
iPhone 11 Pro Max Screen Replacement
Duration: 45 minutes
Steps: 32 Steps
The earpiece speaker and sensor assembly, which is cozying up to the back of your display, was matched to your unique iPhone straight from the factory. Isn’t that neat?
So your iPhone 11 Pro Max screen is acting up, huh? Whether it’s cracked, unresponsive, or just not showing anything, don’t worry! With this guide, you’ll be able to bring your iPhone back to life with a shiny new screen, also known as a display assembly. Oh, and fun fact – that little earpiece speaker + sensor combo on the back of your screen? Yeah, that’s specially made for your iPhone, so be sure to transfer it over when you swap out your display. It’s got this fancy flood illuminator that’s part of the Face ID feature, so handle it with care! If it gets damaged, say goodbye to Face ID (and nobody wants that). And hey, heads up – after a screen swap, the True Tone feature takes a little vacation, even if you’re using an original Apple screen. Oh, and don’t be surprised if your iPhone throws a fit about the display not being ‘genuine’ for a bit. Remember, if you ever need a hand, you can always schedule a repair with the pros!
Step 1


Before you start, make sure to drain your iPhone battery to below 25%. We want to avoid any accidents – a charged lithium-ion battery can be a fire hazard if it’s punctured, so let’s play it safe. If you need help, you can always schedule a repair
Remember, opening your iPhone’s display means saying goodbye to its waterproof superpowers! Make sure you have those replacement seals at the ready before proceeding. Or, if you’re feeling lucky, just be extra cautious about any potential liquid encounters when putting your iPhone back together without the new seals.
– First things first, let’s give your iPhone a little nap by powering it off before we dive into the disassembly party!
– Next up, grab your trusty pentalobe screwdriver and carefully remove those two 6.7 mm-long screws located at the bottom edge of your iPhone. You’ve got this!
Step 2


Be careful not to shove that opening pick in too deep—it’s a delicate dance! By marking your pick, you’ll keep your device safe and sound while you work your magic.
– Take your trusty permanent marker and measure 3 mm from the tip of the opening pick. Give it a little mark to guide your way!
Step 3


Put on those safety glasses to keep your peepers safe from any sneaky glass shards that might pop out during the repair!
If your iPhone’s screen is looking a bit worse for wear with cracks, don’t fret! To keep those shards in check and avoid any ouchies while you tackle the repair, just slap some tape over that glass. You’ve got this!
– Cover the iPhone’s screen with strips of clear packing tape, making sure to overlap them for full protection.
– If the suction cup is giving you trouble in the next steps, no worries! Just fold a sturdy piece of tape, like duct tape, into a handle and use that to lift the screen instead.
Step 4


Get ready for some fun with the Anti-Clamp! This innovative tool will revolutionize your repair process. If you’re not using it, no worries! Just skip ahead three steps for an alternative method.
– Gently tug the blue handle back to free the Anti-Clamp’s arms.
– Slide those arms over either the left or right side of your iPhone—whichever feels right.
– Place the suction cups close to the bottom edge of your iPhone—one on the front and one on the back, just chillin’.
– Give those cups a little squeeze to create a snug hold on the area you want to work on.
Step 5


– Pull the blue handle forward to lock the arms in place. You’ve got this!
– Now, spin that handle clockwise, a whole 360 degrees, or until you see those cups stretching out. It’s like a little dance!
– Make sure those suction cups stay in line with each other. If they start to slide around, give them a little loosen up and get them back in position. Keep those arms aligned, champ!
Step 6


– First, preheat your iOpener in the microwave and gently thread it through the Anti-Clamp’s arms. Next, lay the iOpener along your iPhone’s bottom edge and wait a min to let it work its magic on that tough adhesive! If you’re not seeing a gap, don’t fret – just slide in that opening pick under the screen and bezel with confidence. ‘Cause strong stuff like this usually isn’t for skipping, right? Need a hand? No worries! You can always schedule a repair with us. Just sayin’!
Tools Used

Step 7

Warming up the lower edge of your device is like giving it a cozy hug, loosening up the adhesive holding the screen snugly in place. This makes opening it up a breeze.
– Grab a hairdryer, a heat gun, or your trusty iOpener. Apply it to the lower edge of your iPhone like a warm hug for about a minute. This will make the adhesive underneath as soft and pliable as your favorite pillow. Time to get cozy with your repair!
Tools Used
Step 8


– To get started, grab a single suction handle and give your phone some love by gently attaching it to the bottom edge. Be sure to steer clear of the curvy part of the glass!
Tools Used

Step 9


The adhesive keeping your display snug and secure is super strong, so getting that first gap open might take a bit of elbow grease. If you’re struggling to pop it open, don’t fret! Just add a little more heat and gently wiggle the screen up and down to loosen that adhesive until you’ve got enough space to slide in your tool.
– Give that suction cup a good tug with steady pressure to wiggle open a tiny gap between the front panel and the rear case. You’ve got this!
– Slide an opening pick into that gap you’ve created. It’s like giving your device a gentle little nudge!
Step 10


– Gently glide the trusty opening pick around the lower left corner and up the left edge of your device, effortlessly cutting through the adhesive that’s keeping the display snugly in place.
Step 11

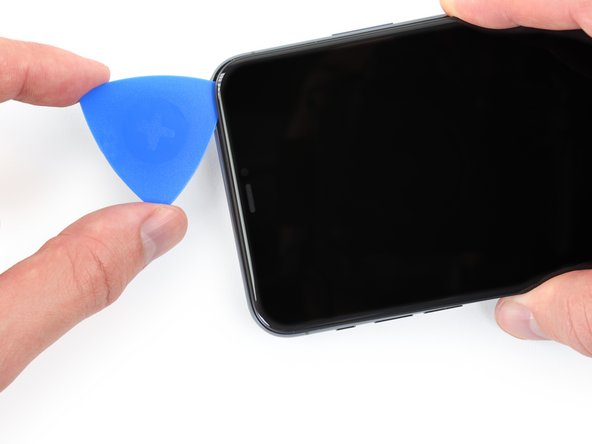
Hey there! Just a heads up, there’s a sensitive cable running along the right edge of your iPhone. So, steer clear of inserting your pick here to avoid any accidental damage to that cable. You’ve got this!
Step 12


– Slide your pick back into the bottom edge of the iPhone and gently glide it up the right side to keep peeling away that stubborn adhesive.
Step 13


Securing the top edge of the display is a piece of cake with a combination of glue and clips. Give it a gentle tug and you’ll have it off in no time. If you need help, you can always schedule a repair.
– Gently nudge the right edge of the display down a bit, heading towards the Lightning port.
– Slide your pick into the top-right corner of the phone with a little finesse.
Step 14

– Gently keep pulling the display down towards the Lightning port until there’s a nice little gap for your pick to slide in.
– Now, slide that pick up to the top left corner and carefully cut through any stubborn adhesive that’s still holding the display in place.
Step 15

– Give that little nub on the suction cup a gentle tug to pop it off the front panel.
Step 16


Hold your horses! Don’t yank the display off just yet; it’s still hanging on to the iPhone’s logic board with some delicate ribbon cables.
– Gently lift the iPhone’s display from the left side, just like flipping open a book. Easy peasy!
– Prop that display up against something sturdy while you work your magic on the phone. You’ve got this!
– When it’s time to put everything back together, carefully position the display, align those clips along the top edge, and give the top edge a gentle press to snap it into place. If it’s being a bit stubborn, take a peek at the clips around the display’s perimeter to ensure they’re not bent out of shape.
Step 17


– Unscrew those two 1.3 mm long Y000 screws holding the battery cover bracket in place. You’ve got this!
– Now’s a perfect time to power up your iPhone and check that everything’s working like a charm before sealing the display back on. Just remember to turn your iPhone off completely before diving back into the repair!
Step 18

– Time to say goodbye to that bracket! Go ahead and remove it.
Step 19


– Grab a spudger or use those fabulous fingernails to gently lift the battery connector out of its cozy socket on the logic board.
– Give the connector a little bend away from the logic board to keep it from unexpectedly high-fiving the socket and sending power surging through your phone mid-repair.
Tools Used

Step 20


– Grab your trusty Y000 driver to tackle those six 1.3 mm screws holding down the logic board cover bracket.
Step 21

– Time to say goodbye to that pesky bracket! Go ahead and remove it.
Step 22


– Time to get started. Use a spudger or your trusty fingernail to carefully disconnect the OLED panel cable connector. If you need help, you can always schedule a repair
Tools Used
Step 23


– Get ready to work your magic by using a spudger or a fingernail to disconnect the front sensor assembly cable connector.
– Next up, with finesse and ease, disconnect the digitizer cable connector using a spudger or a fingernail.
Tools Used
Step 24

– Take out the display assembly – it’s time to get started on this repair
– When you’re putting everything back together, consider pausing here to replace the waterproof adhesive around the edges of the display for extra protection. If you need help, you can always schedule a repair
Step 25


– Unscrew the three screws that are keeping the speaker/sensor assembly snugly attached to the back of the display. You’ve got this!
Step 26


The speaker is still connected by a super delicate ribbon cable. Please handle it with care to avoid any twists or snags.
The earpiece speaker is gently stuck in place.
– Gently use the point of a spudger to give the top edge of the speaker a little nudge.
– Flip the speaker assembly over, guiding it downwards and away from the upper edge of the display.
Tools Used
Step 27

– Grab a hairdryer or a heat gun, or whip up an iOpener if you have one handy! Now, gently warm up the top front of your display for about 1-2 minutes. This will help soften the adhesive that’s holding those sensors in place. You’re doing great!
Tools Used
Step 28


– To get the microphone properly separated, simply use the point of a spudger to lift it gently from its notch in the front panel.
Tools Used
Step 29


The sensor is still connected to the sensor assembly by a super slim flex cable. Just a friendly reminder to handle it with care and avoid putting any unnecessary strain on that little guy!
– Grab your trusty tweezers and give that ambient light sensor a gentle wiggle to free it from its cozy little spot in the display. You’ve got this!
Tools Used

Step 30


– If you’ve successfully removed the entire ambient light sensor, like a pro as shown in the first photo, it’s time to move on to the next exciting step below!
– If the white diffuser strip has decided to play hide and seek and now refuses to come out of the display, just like in the second photo, don’t panic. You’ll need to delicately coax it out from the top edge with a thin blade or a handy pry tool. Applying a little heat beforehand could make this task a cinch.
Step 31


To make your life easier, gently lift and hold the speaker out of the way for better access. Just be sure to avoid tugging on that delicate flex cable while you’re at it!
– Start by working your way from left to right. Slide an opening pick gently beneath the flex cable and then underneath the proximity sensor + flood illuminator module.
– Give it a little wiggle and lift action to effortlessly separate the module from its cozy spot in the front panel.
Step 32


– Alrighty, let’s kick it off with a little earpiece speaker and front sensor assembly removal dance party!
– When putting things back together, pay special attention to the cool black plastic module housing these components:
– Make sure to position the module in a way that leaves these components free and clear of any sticky situations.