How to Replace iPhone 7 Battery: Step-by-Step Guide
Duration: 45 minutes
Steps: 33 Steps
Hey rockstar, once you’ve nailed this guide, don’t forget to calibrate your spanking new battery to keep it rocking at peak performance!
Ready to give your iPhone 7 a new lease on life with a fresh battery? Perfect! If your old battery looks like it’s been hitting the gym too hard (aka it’s swollen), handle it with care. This guide has you removing the display assembly completely to avoid any tragic screen accidents, but hey, if you’re confident you can wiggle the battery out without tugging on those screen cables, feel free to skip the screen disconnect steps. Once you’re done, give that new power pack a proper welcome: charge it to 100%, let it hang out plugged in for a couple more hours, then use your phone till it conks out. Charge it up again to 100% without interruptions and you’re all set!
Step 1
Hey, before you jump in, let’s make sure your iPhone’s battery is under 25%. We wouldn’t want it to turn into a fireworks show if it gets poked accidentally!
Cracking open your iPhone’s display will bust its waterproof seals. Better have some spares on hand before diving deeper, or keep your phone dry if you plan to snap it back together seal-less!
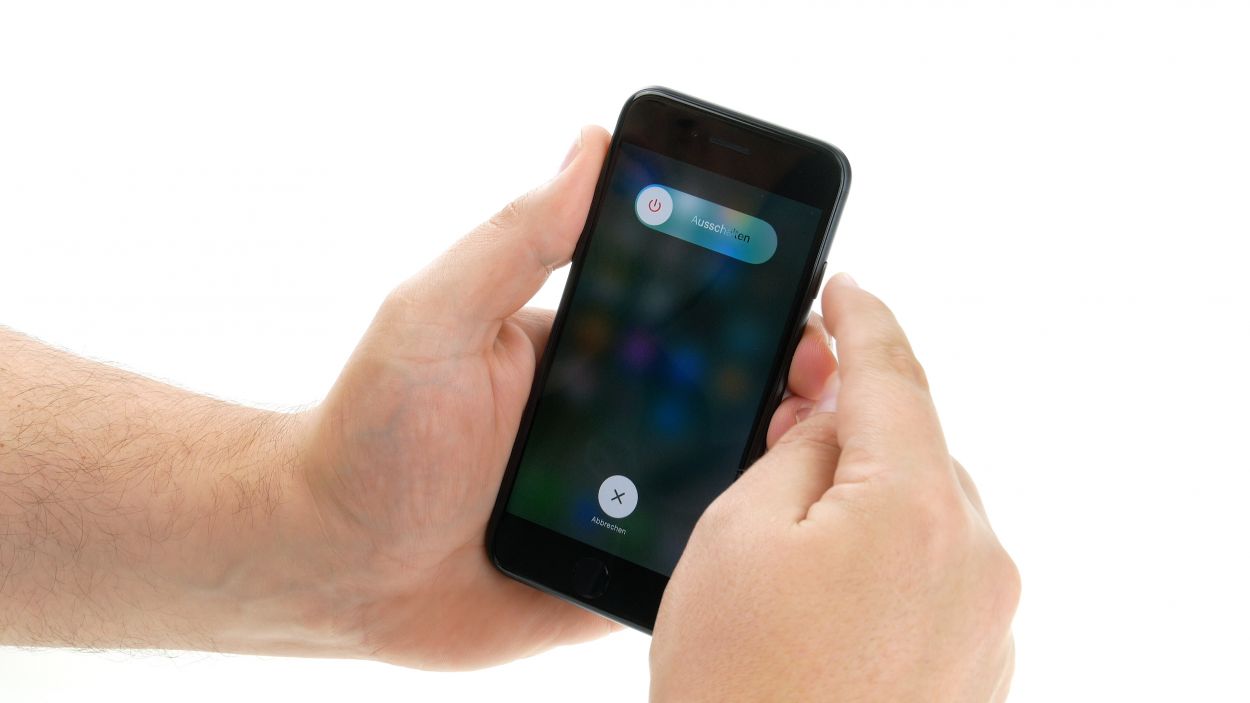
– Make sure your iPhone is powered off before you start the fun of taking it apart!
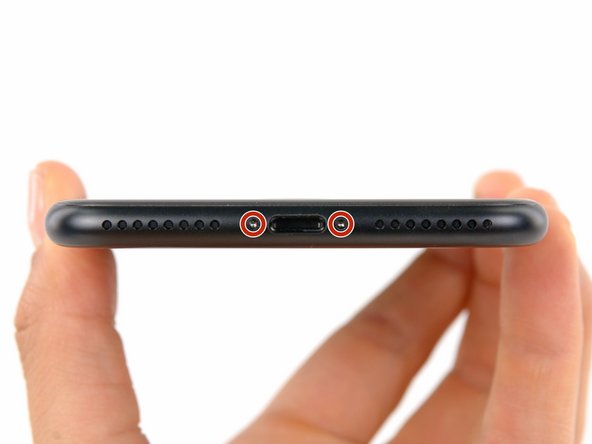
– Take out those two 3.4 mm pentalobe screws sitting at the bottom edge of your iPhone. Let’s get cracking!
Step 2
Be careful not to shove the opening pick too deep, or you might mess things up inside. Just a heads-up: mark your pick to keep your gadget safe and sound. Rock on with the repair!
– Grab a permanent marker and jazz up your opening pick by marking it 3 mm from the tip. It’s like giving your tool a little tattoo to guide the way!
Step 3
The upcoming trio of steps will show off the Anti-Clamp, our nifty gadget built to smooth out the opening act. If you’re not rocking an Anti-Clamp, just hop down three steps for another cool way to get the job done.
– Yank the blue handle back like a pro to free up those nifty Anti-Clamp arms.
– Glide those arms over to the left or right side of your iPhone—dealer’s choice!
– Pop the suction cups near the iPhone’s bottom edge, just above the home button. One cup on the front and one on the back—like a sandwich!
– Give those cups a good squeeze to stick ’em tight to the spot you’re fixing.
Step 4
– Yank the blue handle towards you to snap the arms into place.
– Give the handle a good twist right round (360 degrees should do it) until the cups feel like they’re getting in a good stretch.
– Keep your eyes on those suction cups; they should stay buddies. If they start acting funky and drift apart, just ease them up a bit and line them back up.
Step 5
– Warm up an iOpener and slide it through the Anti-Clamp’s arms.
– Bend the iOpener to rest on the lower edge of the iPhone.
– Pause for a minute to let the adhesive loosen up and create a small opening.
– Place an opening pick into the created gap.
– Omit the following three steps.
Tools Used
Step 6
The upcoming trio of steps will guide you on how to niftily separate the screen with the help of a suction cup.
Step 7
– Pop a suction cup on the lower half of the front panel, right above the home button, and get ready to lift off!
Step 8
– Give that suction cup a hearty tug to create a little space between the screen and frame. It’s like opening a jar of pickles!
– Slip an opening pick into that gap you just made. It’s like playing Operation, but with your gadget!
Step 9
Hold up! Don’t go prying the top edge of the display from the rear case. It’s snugly secured by plastic clips that might just snap if you get too enthusiastic.
– Glide the opening pick along the left edge of your phone, starting from the bottom and shimmying up towards those volume buttons and the sneaky silent switch. You’re just busting through that sticky adhesive that’s clinging onto the display.
– Pause your exciting journey just shy of the top left corner of the display.
Step 10
Hey there! Watch out for those sneaky cables running along the right edge of your iPhone. Let’s not poke around there with the pick—those cables are sensitive!
Step 11
– Pop your tool back in at the lower right corner of your iPhone, then skate it around the corner and glide up the right edge to loosen up that sticky adhesive.
Step 12
– Give a gentle upward tug on the suction cup to pop open the bottom edge of the display like a pro.
– Yank on the tiny nub on the suction cup to unstick it from the front panel like magic.
Step 13
– Wiggle an opening pick under the display at the top left corner and skate it along the top edge to free that stubborn adhesive.
Step 14
– Nudge the display assembly just a tad downwards (away from the phone’s top edge) to free those sneaky clips from the rear case.
Step 16
During this repair adventure, remember to keep track of each screw and make sure to return them to their original homes. This will keep your iPhone happy and healthy!
– Unscrew the four tri-point Y000 screws that hold the lower connector bracket in place. They come in different lengths, so keep an eye on that!
Step 17
– Time to wave goodbye to that lower connector bracket!
Step 18
Just give that connector cable a little upward nudge to keep it from sneaking back and powering up your phone. Nice and easy!
– Grab your spudger and show that battery connector who’s boss! Gently lift it out of its cozy nest on the logic board.
Tools Used
Step 19
Before you jump into the next steps, remember to unplug the battery! We wouldn’t want any unexpected sparks while you’re connecting or disconnecting cables.
– Grab your spudger or use your fingernail to gently pry up the two lower display connectors from their homes on the logic board. Just lift them straight up, easy does it!
– When plugging these bad boys back in, start by pressing one end until you hear a satisfying click, then give the same love to the other end. Remember, middle pressing is a no-go! A misaligned connector can throw a tantrum, and we don’t want any bent connectors on our watch.
– Seeing a blank screen or some funky lines on your display, or is your touch response acting up after putting your phone back together? No panic! Just give those connectors another calm and precise reconnect to ensure they’re sitting perfectly in their sockets.
Tools Used
Step 20
– Whip out your trusty Phillips #000 screwdriver and unscrew the two cheeky 1.3 mm screws that are playing hide-and-seek under the bracket covering the front panel sensor assembly connector.
Step 21
– Unplug the front panel sensor assembly connector from its socket on the logic board like a boss.
– Remember, this press connector prefers a gentle touch—connect one end at a time to avoid any bending drama.
Step 23
– Unscrew the two 1.9 mm Phillips screws holding the barometric vent to the rear case.
Step 24
– Pop off that vent!
Step 25
– Grab your spudger and gently unplug the Taptic Engine connector from its home on the logic board. It’s just a little nudge!
Tools Used
Step 26
– Unscrew the trio of 1.6 mm Phillips screws that are holding the Taptic Engine in place at the rear case. Let’s get those little screws out and move one step closer to victory!
Step 27
– Hey there, it’s time to wave goodbye to the Taptic Engine. Let’s get it out of there!
Step 28
– Grab your trusty tweezers with the non-sharp ends and gently start peeling one of those sticky


