How to Replace iPhone L-Shaped Battery Adhesive Strips Tutorial
Duration: 45 minutes
Steps: 9 Steps
Time to get crafty with that L-shaped tool! You’ve got this!
Get ready to tackle those replacement battery adhesive strips for your “L-shaped” iPhone batteries! This includes the dual-cell champs in the iPhone X and XS Max, as well as the single-cell superstar in the iPhone XS. Check out the list below to see if your phone is in the club. If your new battery doesn’t come with adhesive strips already attached, or if you’re reusing your old battery, you’ll need to swap those strips out. They can be a bit delicate, so having a backup set handy for your first go is a smart move. These adhesive strips are a bit different from what you might have seen in older iPhones because of the wireless charging coil that sits snugly beneath the battery. That coil is held in place by four specially shaped adhesive strips designed to keep it safe. Before diving in, make sure you’ve removed the battery by following one of the handy guides linked below: iPhone X Battery Replacement, iPhone XS Battery Replacement, iPhone XS Max Battery Replacement, iPhone 11 Pro Battery Replacement, iPhone 11 Pro Max Battery Replacement, iPhone 12 Pro Max Battery Replacement, iPhone 13 Pro Battery Replacement, iPhone 13 Pro Max Battery Replacement, iPhone 14 Pro Battery Replacement, iPhone 14 Pro Max Battery Replacement. If you’re looking to replace the battery adhesive strips on a different iPhone model, check out these guides: iPhone 5s, 5c, and SE Battery Adhesives Strips Replacement, iPhone 6, 6 Plus, 6s, 6s Plus, 7, and 7 Plus Battery Adhesive Strips Replacement, iPhone Rectangular Battery Adhesive Strips Replacement. If you need help, you can always schedule a repair!

Step 2


– Once you’re happy with how everything fits, gently remove the battery and lay it down on your workspace with the connector contacts facing up. Nice and easy!
– If your battery already has those shiny new adhesive strips ready to go, feel free to jump straight to Step 7.
– For those with a two-cell battery, just make sure the cells are lined up just like they would be when snugly installed in your iPhone.
Step 3
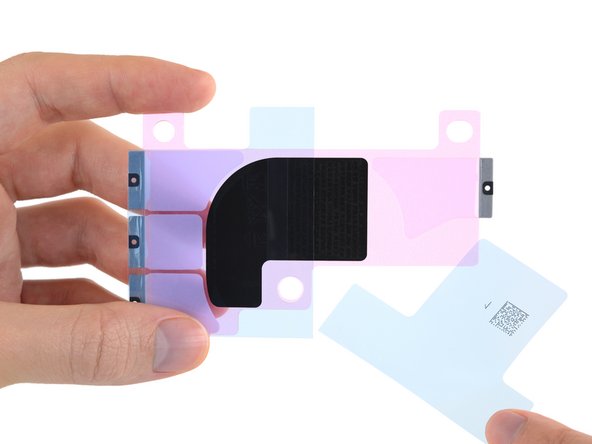


– Gently peel away the blue plastic liner from your fresh set of adhesive strips and toss it aside like yesterday’s news!
Step 4


Once the adhesive grips the battery, it’s not coming off or getting a second chance—if things go sideways, you’ll need to start fresh with new adhesive strips.
– Give those adhesive strips a quick double-check to ensure they’re facing the right way, and remember, your battery should be lying face-down with the connector contacts looking up at you.
– Gently place the adhesive strips over the battery and press them down just like shown. You’ve got this!


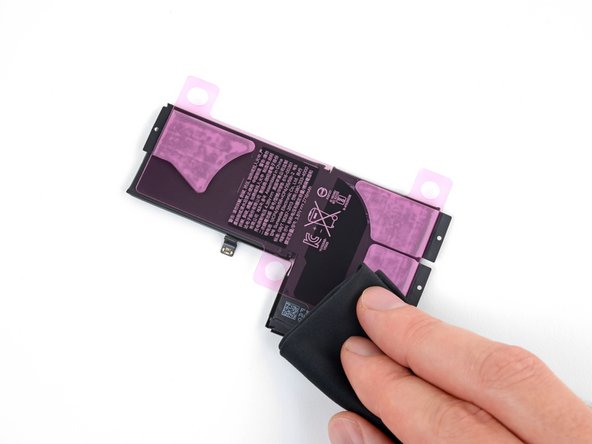
Step 6


– Gently glide your fingertip along the battery’s edges to secure that black pull tab at the end of each adhesive strip. You’ve got this!
Step 7


– Carefully peel away the pink liner and toss it aside, revealing the sticky strips underneath. You’re almost there!
Step 8


Hey there tech whiz! When popping in the battery, just keep an eye out for the Face ID camera and sensor hardware near the top of your iPhone (that quirky ‘notch’ area).
It’s totally cool to sneakily connect the battery for a quick check on alignment, but be sure to unplug it before putting your iPhone back together.
– Gently place the battery in its cozy spot and snug it into the iPhone.
Step 9


– Give that battery a good press onto the adhesive strips to make sure it’s snug as a bug!
– If your battery came with a little plastic liner on top, go ahead and peel that off before sealing up your phone. Don’t forget to toss it in the trash!