Tablet repair shop secrets for fixing your larger screens
What a Tablet Repair Shop Can Fix (And What It Costs in 2026)
A tablet repair shop can get your device back to working condition — often the same day. Here’s a quick look at what to expect:
| Repair Type | Typical Turnaround | Starting Price |
|---|---|---|
| LCD Screen Replacement | Same day | $89.95 |
| Aftermarket OLED Screen | Same day | $129.95 |
| OEM Screen Replacement | Same day | $149.95 |
| Battery Replacement | ~30 minutes | Varies by model |
| Charging Port Repair | ~1 hour | Varies by model |
| Water Damage Diagnostic | Same day | Fee may apply |
Most shops — including local options in Laurel, MS — offer free diagnostics, walk-in service, and at least a 1-year warranty on parts and labor.
Tablets are essential. Whether you use yours for work, school, or staying connected, a cracked screen or dead battery can throw off your entire day. The good news? Most tablet repairs are faster and cheaper than you think. A shattered screen doesn’t mean a ruined device — it usually means a quick trip to a professional.
Over 3.7 million tablet repairs have been completed through professional repair networks, and that number keeps climbing. Why? Because people are realizing that repair beats replacement — every time.
I’m Ralph Harris, a technician with over 20 years of electronics repair experience, more than 500 Apple repair certifications, and a WISE Level 2 Technician certification — and I’ve seen at our tablet repair shop in Laurel, MS how the right repair can add years to a device’s life. In this guide, I’ll walk you through everything you need to know to make a smart, confident repair decision.

Tablet repair shop terminology:
Common Tablet Issues and Professional Fixes

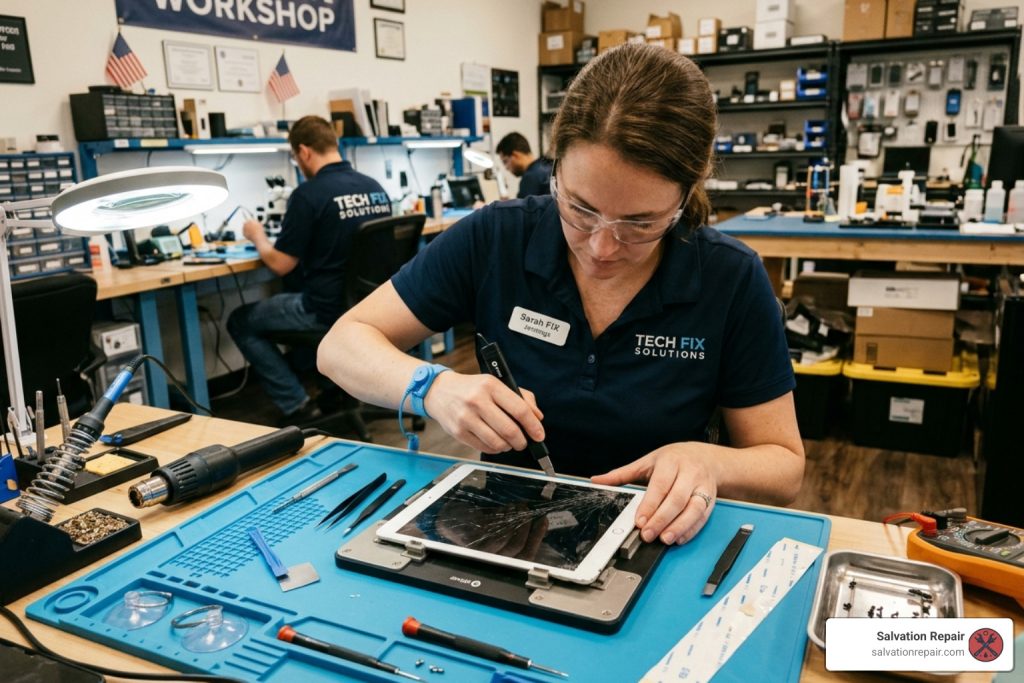
When your tablet decides to quit, it usually falls into one of a few categories. At our tablet repair shop in Laurel, MS, we see everything from “I sat on it” to “it went for a swim.” Understanding these issues helps us provide the most efficient fix.
Cracked Screens: The Spiderweb Effect
Cracked screens are the most common reason people visit a tablet repair shop. Whether it is an iPad, a Samsung Galaxy Tab, a Microsoft Surface, or an Amazon Fire, a shattered display is more than just an eyesore; it can lead to glass splinters and touch-sensitivity issues. We maintain high-precision glass replacement standards right here in Jones County, ensuring your device receives expert care. Check out our Ipad Screen Repair Cost Guide to see how we handle different generations of Apple’s flagship tablets.
Battery and Charging Woes
Does your tablet die at 30%? Or maybe it only charges if you hold the cable at a very specific, “lucky” angle? Battery degradation is a natural part of a tablet’s lifecycle. Most batteries are rated for about 500 to 1,000 full charge cycles. If you’re struggling to stay powered up, you might find our guide on Ipad Not Charging helpful. We replace batteries in about 30 minutes, and charging port repairs usually take about 1 hour, so you are not stuck waiting all day.
Water Damage: The Rice Myth
If you drop your tablet in the pool or spill coffee on it, please do not put it in a bag of rice. Rice does not pull moisture out of the internal components; it just gets dust in your charging port. Professional shops use ultrasonic cleaners and specialized chemicals to displace moisture and stop corrosion. For a breakdown of what this costs, see our Ipad Water Damage Repair Cost page. If you want a general overview of how liquid exposure affects electronics, the Water damage article offers helpful background.
Hardware vs. Software Solutions
Not every problem requires a screwdriver. Sometimes, your tablet is stuck in a “boot loop” where it keeps restarting, or has a corrupted firmware update.
- Boot Loops & Firmware: We can often perform a firmware reinstallation to bring a “bricked” tablet back to life.
- Data Recovery: If the tablet is physically broken but you need those family photos or work documents, we use advanced data recovery techniques to pull information from the storage chips.
- Software Fixes: You can Unlock Your Ipads Potential With Simple Software Repairs/ by identifying app conflicts or OS bugs.
For more complex hardware failures, we recommend The Ultimate Laurel Guide To Fixing Tablet Hardware Woes/.
Choosing the Right Tablet Repair Shop: OEM vs. Aftermarket Parts

When you walk into a tablet repair shop, you’ll likely be given a choice of parts. This is where many customers get confused. Here is the breakdown of what we offer at Salvation Repair in Laurel, MS:
| Feature | LCD Panel | Aftermarket OLED | OEM Genuine Parts |
|---|---|---|---|
| Price | $89.95 | $129.95 | $149.95 |
| Brightness | Standard | High | Maximum (Factory Spec) |
| Color Accuracy | Good | Vibrant | Perfect |
| Touch Response | Standard | Fast | Most Sensitive |
| Best For | Budget repairs | Media consumption | Professionals/Artists |
The main difference is simple: LCD is the most affordable option, aftermarket OLED offers stronger contrast and more vibrant visuals, and OEM genuine parts are the closest match to original factory performance. While various providers offer different tiers, we pride ourselves on transparency. If you need to know Where To Get A Samsung Tablet Screen Fixed In Laurel Ms/, we always explain the difference in brightness, touch feel, and long-term value between these options. For iPad users, our Ipad Air Screen Guide 2025/ provides a deep dive into which screen suits your specific model’s resolution. For broader background on display technology, the OLED article explains how OLED panels differ from LCD screens.
Quality Assurance and Warranties
At Salvation Repair, we do not just fix it and forget it. We believe a tablet repair shop should stand by its work.
- Lifetime Warranty: We offer a lifetime warranty on all our repairs. If the part we installed fails due to a manufacturer defect, we replace it for free.
- Price Matching: Found a lower price in a nearby Mississippi market? We will match it. We want to be the most accessible option in Jones County.
- Rigorous Testing: Every device goes through a multi-point inspection before it leaves our hands. We check the digitizer, brightness, cameras, and speakers.
To help you navigate the local market, we’ve put together a Buyers Guide Best Tablet Repair In Laurel Ms For 2026/ and The Laurel Guide To Not Crying Over A Cracked Tablet Screen/.
Speed and Convenience: Same-Day Service Standards in 2026
In 2026, nobody has time to wait two weeks for a mail-in repair. That is why we have optimized our workflow to be a fast, convenient tablet repair shop option for Laurel, MS and the surrounding Jones County area. We know that your tablet is often your primary tool for work, school, or entertainment in Laurel, Ellisville, Soso, Meridian, and Jackson.
Our Speed Guarantees:
- iPhone Screen Repair: 10-15 minutes, performed right in front of you.
- Tablet/Phone Battery Swaps: 30 minutes.
- Charging Port Repairs: 1 hour.
- Samsung Screen Repairs: Often same-day, depending on part availability.
We strive for same-day service as the gold standard for all our customers in the region. For those closer to home, check out our Ipad Repair Laurel Ms Guide/ for local drop-off instructions. If your device will not take a charge, do not panic – visit Charging Port Woes Where To Fix Your Tablet In Laurel Ms/.
Professional Repair vs. DIY Risks
We love the spirit of DIY. Sites like iFixit provide great guides, but tablets are notoriously difficult to repair at home. Unlike laptops, which use screws, tablets are held together with incredibly strong industrial adhesive.
- The Heat Risk: To open a tablet, you have to heat the edges to soften the glue. Too much heat can damage the LCD; too little can cause the glass to shatter as you pry it.
- Micro-Components: One slip of a plastic pick can tear a ribbon cable for the Touch ID sensor or the front-facing camera.
- E-Waste Reduction: Professional repair is an environmental win. By choosing a tablet repair shop, you’re keeping lithium batteries and heavy metals out of Mississippi landfills.
For more on why professional help is usually the safer bet, see Ipad Repair/, Ipad Repair Near Me Finding The Best Fix In Hattiesburg Ms/, and Cracked Screen Find The Best Repair Ipads Near Me Today/.
Frequently Asked Questions about Your Local Tablet Repair Shop
How much does a tablet repair shop charge for screen replacement?
Pricing depends on the technology inside the screen. For 2026, our base rates for most standard tablets are:
- LCD Screens: Starting at $89.95.
- Aftermarket OLED: Starting at $129.95.
- OEM Quality: Starting at $149.95. Prices can vary based on the specific model (an iPad Pro 12.9″ will cost more than a standard iPad). You can find more details at Ipad Screen Repair Cost/ and Ipadscreen Repair Cost/.
How long does a typical repair take at a tablet repair shop?
Most of our repairs are completed the same day. While a screen swap might take a few hours for a tablet (due to the adhesive drying time), we aim for a 45-minute average for diagnostics. Specific guides for smaller devices like the Ipad Mini Repair/ or larger ones like Ipad Pro Screen Repair/ can give you a better idea of the timeline for your specific device.
Can a tablet repair shop fix water damage or dead screens?
Yes! A “dead” screen doesn’t always mean the tablet is garbage. It could be a disconnected display cable or a blown backlight circuit. We use ultrasonic cleaning for water-damaged boards to remove corrosion. If your screen is completely black, check out Ipad Dead Screen/ for troubleshooting steps. If it’s just a battery that has given up the ghost, we can handle an Ipad Battery Replacement/ in about half an hour.
Conclusion
At Salvation Repair, we believe that your technology should work for you, not the other way around. Whether you are in Laurel, Jackson, Ellisville, or anywhere in Jones County, our tablet repair shop is dedicated to providing fast, reliable, and affordable service. With our lifetime warranty and price match guarantee, you can rest easy knowing your device is in expert hands.
Don’t let a cracked screen or a dead battery slow you down. We repair “any device with a power button,” and we do it with the care and precision your tech deserves.
Ready to get your tablet back in top shape? Schedule your professional screen repair today