How to Replace iPhone 16 Back Glass – DIY Guide
Duration: 45 minutes
Steps: 23 Steps
Ready to give your iPhone 16 a fresh look by swapping out that cracked back glass? You’re in the right place! Just grab some replacement back glass adhesive and follow along. Once you’re done, don’t forget to calibrate your authentic Apple back glass with the handy Repair Assistant. And if you run into any bumps along the way, don’t hesitate to schedule a repair for some extra support!
Step 1


Let your phone’s battery dip below 25%! A fully charged lithium-ion battery can be a bit of a drama queen, so it’s best to keep it at a safe level.
– First things first, let’s disconnect any cables from your phone. Give those cords a break!
– Next, hold down the power button along with either of the volume buttons, then slide to power off your phone. It’s like tucking it in for a cozy nap!
Step 2


Ensure there’s a nice flat spot near the bottom edge that’s large enough for a suction cup to get a good grip.
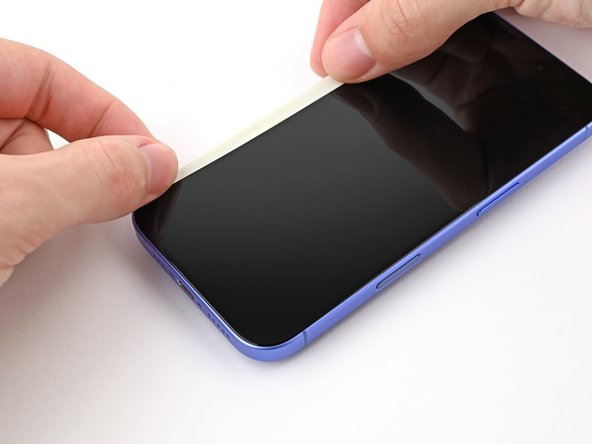
– If your screen or back glass is sporting some serious cracks, don’t sweat it! Just grab some packing tape and lay down overlapping strips over the glass. This will keep you safe and make taking everything apart a breeze.
Tools Used

Step 3


– Grab your trusty P2 pentalobe driver and unscrew those two 7.7 mm-long screws flanking the charging port. You’re on your way to a smooth repair!
Step 4


Uh-oh! If you push your opening pick in too deep, it might not just be your phone that gets a little bruised. Let’s take a moment to mark your pick so you can avoid any mishaps.
Feel free to get creative! You can also mark the other corners of the pick with various measurements.
Or, if you’re feeling crafty, why not tape a coin to a pick about 3 mm from the tip? It’s a nifty little trick!
– Take your trusty ruler and measure 3 mm from the tip, then grab a permanent marker to make a little mark on the opening pick. You’ve got this!
Step 5


In the next four steps, we’ll show you how to use the Anti-Clamp, our nifty tool designed to make opening your device a breeze. If you’re not using the Anti-Clamp, feel free to jump ahead four steps for a different method.
The Anti-Clamp creates suction on both the screen and the back glass. To just open the back glass, make sure to tape down the screen. For a detailed rundown on how to apply that tape, check out our guide.
For the full scoop on using the Anti-Clamp, take a peek at our guide.
Just a heads-up: ensure the tape is only holding the screen and not the back glass!
– Grab two strips of tape and lay them down along the long edges of your phone. Give them a little flip over the screen to keep everything nice and snug!
Step 6


If your iPhone feels a bit too slick for the Anti-Clamp to grip, just slap on some tape to give it a little extra traction!
– Give that blue handle on the Anti-Clamp a little tug backward to unlock those arms.
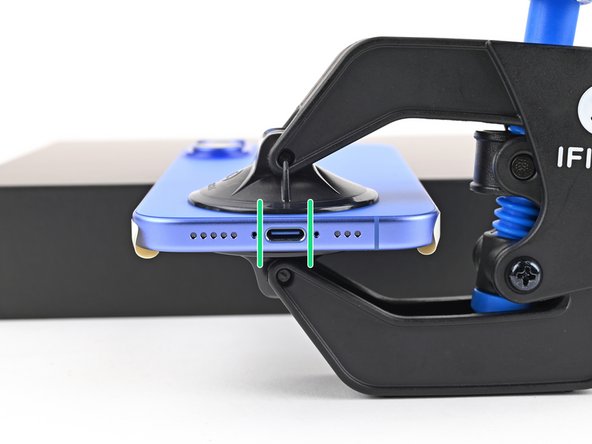
– With the back glass facing up, carefully slide the arms over the right edge of your phone, ensuring one suction cup is on the back glass and the other is on the screen. Aim to center those cups near the bottom edge.
– Support your phone so it stays nice and level between the Anti-Clamp’s arms—a small box does the trick perfectly!
– Squeeze those cups together to create some solid suction.
Step 7


If tape is playing hard to get, try warming up those suction cups a bit to help them stick better.
– Give that blue handle a little tug forward to lock those arms in place.
– Now, twist the handle a full turn (360 degrees) or until the cups start to stretch out.
– As those cups stretch, keep an eye on their vertical alignment. If they start to slip, feel free to take off the Anti-Clamp and use some tape to help those cups stick around.
Step 8


Just a friendly reminder to keep the heat in check! Overheating can be a battery’s worst nightmare, so let’s keep things cool and safe.
If after a minute nothing’s happening, just crank up the heat a bit more and give that handle a little twist—about a quarter turn should do. Let the Anti‑Clamp and a little patience work their magic for you.
– Grab a hair dryer or heat gun and warm up the bottom edge of that back glass until it feels nice and toasty.
– Chill for up to a minute while the adhesive gets cozy and a gap starts to appear between the back glass and the frame.
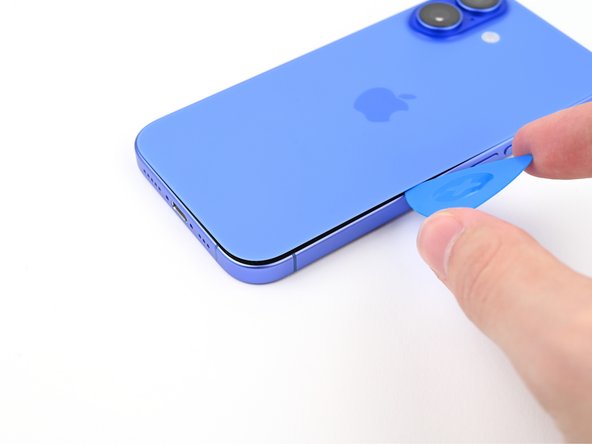
– Slide an opening pick into that gap like a pro.
– Pop off the Anti-Clamp by using those handy pull tabs on the suction cups.
– Feel free to skip the next two steps!
Tools Used


Step 9

Feeling a bit stuck? No worries! You can heat up the back glass using an iOpener. Just follow these handy tips to warm it up and apply the iOpener like a pro.
– Grab your trusty hair dryer or a heat gun and warm up the bottom edge of the back glass until it’s nice and toasty!
Tools Used

Step 10


– Grab a suction handle and stick it right on that bottom edge of the back glass.
– With one hand steadying the frame, give that handle a strong and steady pull—let’s make some space between the back glass and the frame!
– Now, slide the tip of an opening pick into that gap you’ve created.
Tools Used

Step 11

As you carefully cut through the adhesive holding that back glass in place, remember to keep your pick no deeper than 3 mm. We want to avoid any mishaps in those sensitive areas below!
– Be careful with that fragile cable connecting the back glass to the phone, right next to the volume down button. Avoid inserting your pick here; you wouldn’t want to accidentally slice through it!
– Keep an eye out for the multiple spring contacts circling the edge of the phone. They’re sneaky little guys!
Step 12

– Grab your trusty hair dryer or heat gun and give the right edge of that back glass a warm-up until it’s toasty enough to touch. Let’s get that thing ready for some TLC!
Tools Used
Step 13

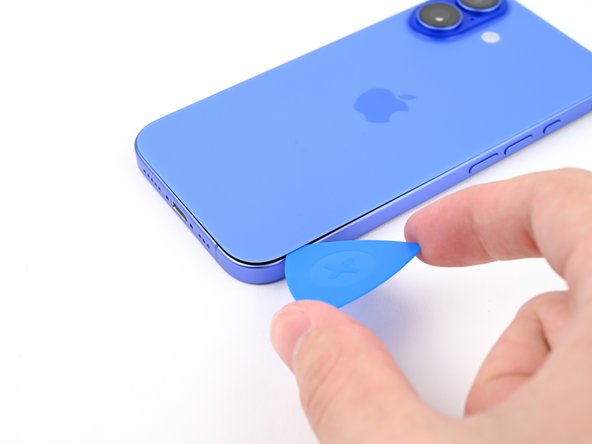
Be careful not to go deeper than 3 mm with your pick; we don’t want to accidentally tickle the spring contacts!
Make sure to steer clear of the volume buttons while you’re at it; we wouldn’t want to mess with the wireless charging cable!
You’ll notice a satisfying click and a little jiggle as that metal clip pops free!
– Gently glide your pick around the bottom right corner and towards the volume down button to break free the adhesive and pop that metal clip loose.
– Keep that pick in place to stop the adhesive from sticking back together. You’re doing great!
Step 14

– Grab a hair dryer or heat gun and warm up the left edge of the back glass until it feels nice and toasty to the touch.
Tools Used
Step 15


Keep your pick under 3 mm deep—nobody wants to accidentally tickle those spring contacts!
As you glide through, you’ll hear and feel those metal clips pop free like they just can’t wait to get out!
– Pop in a second opening pick at the bottom edge. You’ve got this!
– Gently slide that second pick around the bottom left corner and along the left edge of the screen to break free the adhesive and release those pesky metal clips.
– Keep this pick snugly inserted at the top left corner to stop the adhesive from making a comeback!
Step 16

– Grab your trusty hair dryer or heat gun and gently warm up the top edge of that back glass until it’s nice and toasty to the touch. You’ve got this!
Tools Used
Step 17


Keep your pick within a cozy 3 mm depth to steer clear of any spring contact mishaps!
As you glide through, you’ll totally hear and feel those metal clips letting go!
– Gently slide your second opening pick around the top left corner and along the top edge to break the adhesive and free those metal clips.
– Keep sliding that pick around the top right corner until you hit the Action button.
– Leave this pick in place to keep the adhesive from sticking back together.
Step 18


Now that you’re here, the back glass should be ready to pop free from the frame! If it seems like it’s playing hard to get, take a moment to go around the edges with your pick. You might find some sneaky bits of adhesive or clips that are still holding on for dear life.
– Gently swing the back glass to the right, breaking free from any pesky adhesive that’s holding it tight.
– Give the back glass some support with a clean, sturdy object—it’s feeling a little wobbly!
– Before you move on, make sure to remove those opening picks. They’ve done their job!
Step 19


– Grab your trusty tri-point Y000 driver and let’s get those two 1 mm-long screws out of the way that are holding the middle connector cover in place!
Step 20


– Grab your trusty spudger and gently insert its point into one of the cutouts on the middle connector cover.
– Now, give that cover a little nudge towards the left edge of the phone to pop it free from its snug spot on the logic board.
– Time to say goodbye to the cover—remove it with confidence!
– When it’s time to put everything back together, just line up the hook with its home on the logic board. Press down the cover, then slide it over to the right edge of the phone to lock it back in place.
Tools Used

Step 21


– Grab your trusty spudger and gently pry up that battery press connector to disconnect it. You’ve got this!
– When you’re putting it all back together, make sure to line up the connector just right over its socket and give it a soft push with your fingertip—first on one side, then the other—until you hear that satisfying click. No need to muscle it into place; if it’s being tricky, just reposition it and give it another go. You’re doing great!
Tools Used
Step 22


– Grab your trusty spudger and gently use its pointy end to pry up and disconnect that wireless charging coil press connector. You’ve got this!
Tools Used
Step 23

Now’s a great moment to give your repair a test run before sealing everything up. Simply reconnect the battery and back glass temporarily, power on your phone, and check that all is working smoothly. Once you’re satisfied, power it down and let’s get back to reassembling!
– Gently lift the back glass off the frame and set it aside.
– When putting everything back together:
– Follow this guide to reapply adhesive and securely attach your back glass.