How to Replace MacBook Pro 15 Hard Drive Cable Tutorial
Duration: 45 minutes
Steps: 14 Steps
Hey there! Just a friendly reminder: if you run into any hiccups while fixing your device, don’t sweat it! You can always schedule a repair with us at Salvation Repair. We’re here to help you get back on track!
Don’t worry, the hard drive cable is like the superhero of your device, with the power to keep your IR sensor/sleep indicator in tip-top shape!
Step 1

– Time to get your screwdriver ready! Unscrew those ten little screws that are holding the lower case snugly against the upper case. Let’s get this party started!
Step 2


– With a little finesse, use both hands to gently lift the lower case near the vent and pop it off the two clips that are holding it snugly to the upper case.
– Carefully remove the lower case and place it aside, giving it a well-deserved break.
Step 3

Just a tip: Feel free to skip steps 3-6 when taking out the battery to swap the hard drive. However, it’s always a good idea to unplug your devices before getting your fix on! Need a hand? You can always schedule a repair.
– Let’s start off by gently removing those two 5-Point Pentalobe screws from the top edge of the battery.


Step 6

– Give that battery a little tilt back to peek at the cable connector, like you’re checking out a secret.
– Gently pull that sneaky battery cable connector from its cozy socket on the logic board and liberate the battery from the upper case.
Step 7


These screws are snugly held in the hard drive bracket, so they won’t go wandering off on their own.
– Unscrew those two Phillips screws holding the hard drive bracket in place on the upper case. You’ve got this!
– Gently lift that retaining bracket out of the upper case. It’s like a little surprise waiting to be revealed!
Step 8

– Gently lift the hard drive using its handy pull tab and slide it out of the chassis, but keep an eye on the cable connecting it to the computer.
Step 9


– Gently disconnect the hard drive cable by pulling it straight out from the connector. Keep the connector steady to avoid any accidental tugging. If you yank on the connector, you might end up with a torn hard drive cable, and we definitely don’t want that!
Step 10

– Unscrew the following four screws that are keeping the hard drive and IR sensor cable snug against the upper case:
Step 11

– Nudge the hard drive and IR sensor bracket away from the upper case edge like you’re sneaking a cookie from the cookie jar.
Step 12

– Grab the flat end of your spudger and gently lift the hard drive cable connector right off the logic board. Like a boss!
Tools Used
Step 13


– Gently unstick the hard drive and IR sensor cable from the right speaker housing/upper case and liberate them from your device. Woohoo! You’re doing great!
Step 14
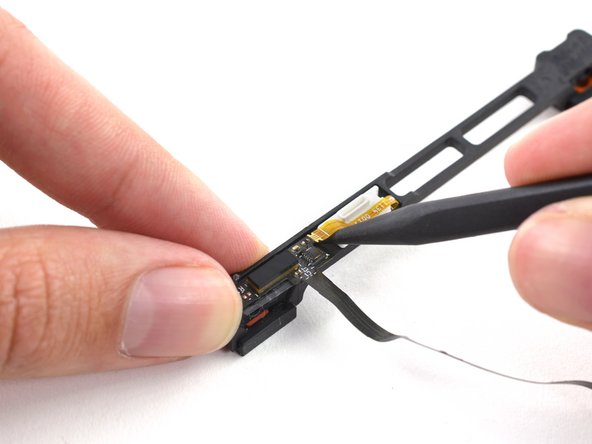

Heads up, party people! Your shiny new replacement part might be flying solo without the front (sensor) bracket. No stress—if it’s missing, just hustle it over from your old cable to the new one. Keep the vibe alive!
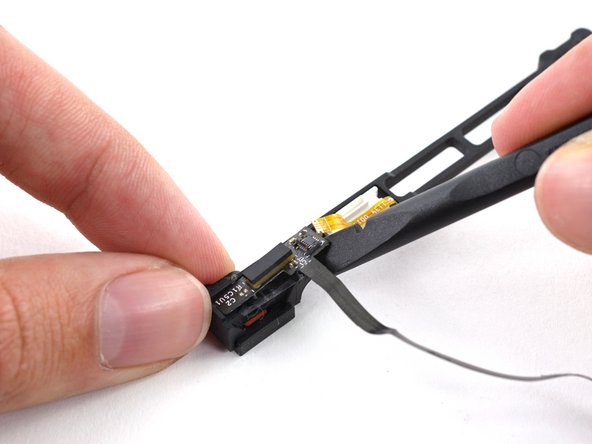
– Pop open the ZIF connector on the hard drive cable using a spudger’s pointy end. Easy does it!
– Carefully slide out the sensor bracket cable from its ZIF connector. No rush!
– Now grab the flat end of a spudger to gently pry the hard drive cable away from the sensor bracket. You got this!
– Peel off the adhesive backing on your snazzy new hard drive cable, stick it onto the sensor bracket, and hook up the sensor bracket cable. Voila!


