DIY Tutorial: MacBook Pro 13 Trackpad Replacement Guide
Duration: 45 minutes
Steps: 11 Steps
Heads up, tech whiz! Make sure to handle your device with care during this fix. If things get tricky, don’t sweat it—help is just a click away at schedule a repair.
Follow this groovy guide to swap out a busted trackpad. Keep your spirits high and tools ready, because you’re about to bring your device back to life!
Step 1

– Alright, it’s time to unscrew some things! You’ll need to remove these 10 screws that are keeping the lower case snug as a bug on your MacBook Pro 13″ Unibody:
Step 2

– Gently lift the lower case a tad and nudge it toward the back of the computer to release those sneaky mounting tabs.

Step 4

– Grab the flat end of your spudger and give the battery connector a gentle pop to free it from its socket on the logic board. Easy does it!
Tools Used

Step 6

– Grab the flat end of your spudger and gently wiggle that trackpad connector free from its cozy home on the logic board.
Tools Used
Step 7

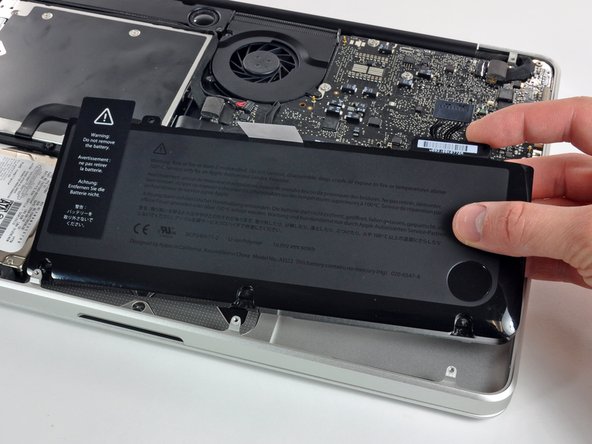
– Pop open your MacBook Pro and plunk it down on the table just like in the picture.
Step 8

– While gripping the edge of the trackpad nearest to the logic board with one hand, go ahead and unscrew the four 1.2 mm Phillips screws marked in red. It’s like a mini adventure inside your device!
Step 9


– If needed, gently nudge the trackpad’s edge nearest to the keyboard out of its cozy spot in the upper case by pushing it away from those clingy brackets.
– Ease the trackpad connector and its buddy, the cable, down through their own special cut-out in the upper case. It’s like threading a needle!
– You might need a spudger to persuade the trackpad connector to sneak past the edge of the logic board. It’s a bit shy!
– After you’ve freed the cable through its slot in the upper case, slide the trackpad away from the outer edge of the upper case and lift it out. Voila, it’s out!
Tools Used
Step 10

Swapping out your trackpad? If your new groove pad didn’t arrive with a flex cable, just snag the cable from your old trackpad and you’re golden!
– When you’re setting up your new trackpad, threading the cable through the upper case and around the logic board can be a bit tricky. A handy tip is to use the point of a spudger to nudge the connector past the logic board. At the same time, gently push the cable through its designated slot in the upper case using your other hand.
Tools Used
Step 11


Crank those screws tight, then just give them a little loosen-up—about 1/4 turn back should do the trick!
– Alright, it’s time to pop back in those four 1.2 mm Phillips screws along the inner edge of the trackpad. Get those screws snug!
– Now, let’s make sure that trackpad is sitting pretty! Align it just right with the keyboard side of the upper case. Once it’s looking centered, go ahead and tighten those four Phillips screws all the way.


