DIY Tutorial: Replace MacBook Pro 15 Airport Extreme Card: Step-by-Step Guide
Duration: 45 minutes
Steps: 12 Steps
Heads up, tech adventurer! Make sure you’re in a well-lit area and have all your tools ready. It’s time to dive into the world of repair, but don’t worry, it’s more fun than a barrel of monkeys!
Time to give your device some wings by installing an Airport Extreme 802.11n card! Let’s get this party started and boost that connectivity!
Step 2
– Unscrew the trio of snazzy 2mm Phillips screws securing the memory door.
– Give the memory door a little lift and a gentle slide towards yourself to free it from the clutches of the casing.
Step 3
– Unscrew the two cheeky 2.8 mm Phillips screws hanging out in the battery compartment near the latch.
Step 4
– Time to get your screwdriver ready! Let’s tackle those 6 screws and get this repair party started!
Step 5
– Unscrew the four 3.2 mm PH00 Phillips screws hanging out on the port side of the computer. They’re just waiting to be freed!
Step 6
– Twist your computer 90 degrees and unscrew those two little 3.2 mm Phillips screws at the back. Easy peasy!
Step 7
– Give your computer a little twist and turn it 90 degrees once more. Now, let’s tackle those four 3.2 mm Phillips screws hanging out on the side. Time to show them who’s boss!
Step 8
Take it easy when removing the upper case. It’s connected to the logic board by a delicate ribbon cable, so let’s treat it with care and avoid any sudden moves!
– Start by lifting the back of the case slightly and wiggle your fingers along the sides to loosen it up. Keep moving around the edges until the sides are free. You might have to give the case a little shimmy to release the front part of the upper case.
– Watch out for those sneaky plastic clips above the DVD slot and near the IR sensor on the left—they’re tough cookies! Prying might be necessary as they don’t like to let go easily, and they’re just as stubborn when you’re trying to snap them back into place during reassembly.
– Reassembly Tip: When reattaching the top case, press down hard directly above each clip until you hear a satisfying snap. That’s when you know they’re securely back in place.
– Reassembly Tip: Those two middle DVD clips can be a real pain and might not snap back properly on their own. To avoid bending the frame, place a plastic spudger into the DVD slot right under the clip’s location for support. Press down firmly until you hear that wonderful snap.
Tools Used
Step 9
Heads up! You can swap out the hard drive without detaching the keyboard from the frame. Just prop it up to keep it out of the way, letting you use both hands to work on popping the drive out.
Watch out for the keyboard-trackpad ribbon cable when you’re freeing the rear of the upper case near the hinge. It’s super easy to accidentally warp the screw receivers flanking the keyboard.
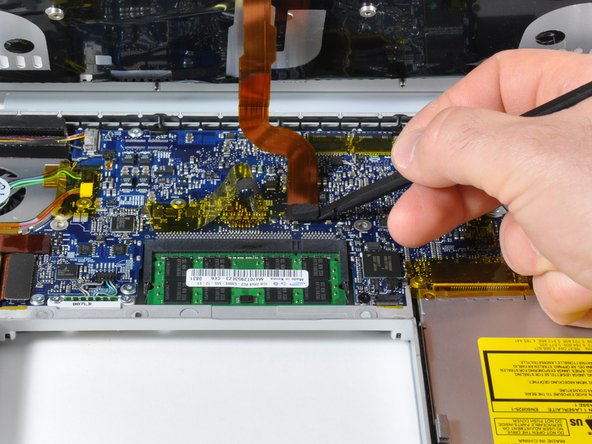
– Unplug the trackpad and keyboard ribbon cable from the logic board, peeling off any tape that’s in your way.
– Whisk away the upper case.
Step 10
Hey there, MacBook Pro Santa Rosa rockstar! Just a heads up, your Airport Extreme card is the life of the party with not just two, but three antenna cables attached. Keep this in mind as you navigate through your repair adventure!
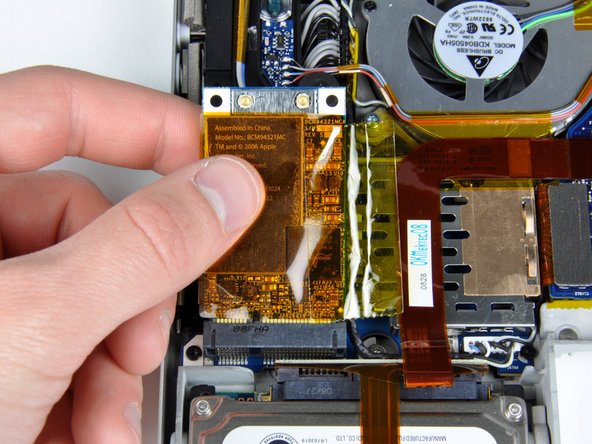
– Unplug the two antenna cables from the Airport Extreme card.
– Lucky for us, Apple marked the spots where each colored antenna cable should go—make sure to peek at that handy label when reconnecting the cables.
Step 11
– Unscrew the lone, sleek black T6 Torx screw chilling just above the Airport Extreme card.
Step 12
– Grab your trusty spudger and give that shiny little metal retaining bracket a gentle lift-off from your computer.
– Now, hoist the Airport Extreme card upwards and glide it out of its cozy home in the connector.


