How to Replace Huawei P9 Front Facing Camera – DIY Guide
Duration: 45 minutes
Steps: 4 Steps
Hey there! Just a friendly reminder to take it easy and double-check your steps. If things get tricky or you feel a bit lost, don’t hesitate to reach out for a helping hand. You can always schedule a repair and let the pros handle it!
Ready to give your Huawei P9 a little makeover? Follow this guide to swap out that front-facing camera with ease! If you need help, you can always schedule a repair.
Step 1


If your screen is looking a bit worse for wear with cracks, grab some tape! It’ll keep those pesky glass shards from flying and give you a better grip to tackle opening your phone. Remember, if you need help, you can always schedule a repair.
– First, power down your phone and pop out that SIM card tray like a pro!
– Next up, grab your trusty screwdriver and unscrew those two Pentalobe P2 screws hanging out at the bottom near the USB C port.
Step 2


– Grab an iSclack or a trusty suction handle to gently pry the phone assembly away from the rear panel. You’ve got this!
Tools Used

Step 3


– Gently pry off the fingerprint sensor using a spudger. You’ve got this!
Tools Used

Step 4
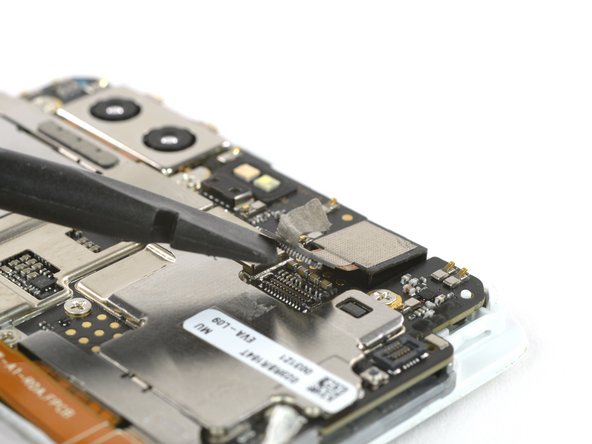


– Gently peel away the conducting fabric like you’re unwrapping a present.
– Carefully unplug the camera connector—think of it as giving your device a little break.
– Now, it’s time to take out the front camera. You’ve got this!