How to Replace Huawei P9 Headphone Jack – DIY Guide
Duration: 45 minutes
Steps: 5 Steps
Hey there, tech hero! Just a heads-up: Before you dive in, make sure to power down your device. Safety first, right? If you get stuck or need a hand, don’t hesitate to schedule a repair. You’ve got this!
Ready to bring back the tunes? Follow this guide to swap out the headphone jack in your Huawei P9 smartphone. It’s easier than you think! And hey, if you run into any bumps along the way, feel free to schedule a repair for a helping hand!
Step 1


If your screen is sporting a crack, grab some tape to shield your eyes from those pesky glass shards and give yourself a better grip for opening up your phone. Safety first, and let’s get this repair party started!
– First, power down your phone and pop out that SIM card tray like a pro!
– Next up, grab your trusty screwdriver and unscrew those two Pentalobe P2 screws hanging out at the bottom near the USB C port.
Step 2


– Grab an iSclack or a trusty suction handle to gently pry the phone assembly away from the rear panel. You’ve got this!
Tools Used

Step 3


– Gently pry off the fingerprint sensor using a spudger. Remember, patience is key!
Tools Used

Step 4


– First up, let’s take off that water indicator sitting pretty on top of the screw.
– Next, grab your trusty Phillips #00 screwdriver and loosen those two screws.
– Now, gently lift off the metal bracket, but watch out for that sneaky adhesive hiding underneath!
Step 5
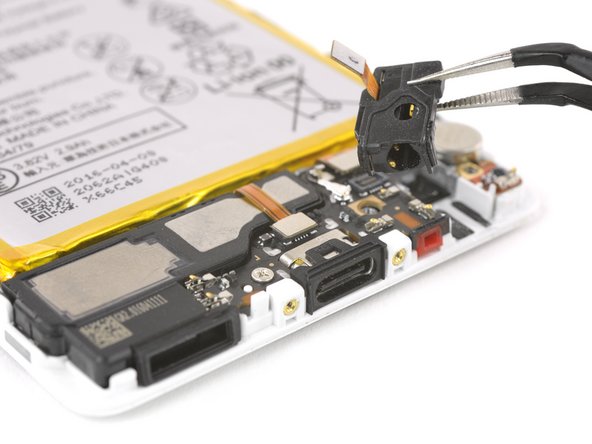

The old headphone jack comes with a handy rubber seal that keeps it snugly in place on your phone. Just pop it off and transfer it to your shiny new headphone jack!
– Unplug the flex cable and take out the headphone jack. You’re doing great!