How to Solder and Desolder Connections – Soldering Skills
Duration: 45 minutes
Steps: 30 Steps
Heads up! It’s time to get your hands a little dirty. If things get tricky and you find yourself in a jam, no worries! You can always schedule a repair with the pros at Salvation Repair. They’ve got your back!
Many repairs can be tackled without soldering, but there are moments when swapping out certain parts, like joysticks, headphone batteries, and rumble motors, calls for a little soldering magic. Plus, diving into soldering opens up a whole new realm of exciting electronics projects! It might seem a bit daunting, but trust us, it’s easier than you think! In this guide, we’ll walk you through the basics of soldering and give you the scoop on: soldering through-hole components, desoldering through-hole components, and soldering surface mount components. If you need help, you can always schedule a repair.
Step 1


Hey there! Just a quick heads up: when you’re soldering or desoldering those lithium-polymer battery wires, it’s super important to stay on your toes! A little slip with the solder or your tools could lead to a short circuit, which might damage the battery and even create a fire hazard. So, let’s keep things safe and follow these handy precautions:
Before you dive into soldering, let’s take a moment to review some important safety tips:
Step 2


Through-hole soldering is all about popping those component leads through holes on your circuit board and locking them in place with some molten solder magic! It’s a go-to technique for DIY enthusiasts and modern electronics alike, perfect for securing those larger components like capacitors and ports.
You’ll commonly find through-hole components such as joystick modules, ports, capacitors, microcontrollers, batteries, and wires. So, let’s get those soldering skills on point!
Step 3


Get ready to dive into the next 10 steps where we’ll guide you through the art of soldering those through-hole components onto your circuit board. Along with your trusty soldering iron, make sure you’ve got these essentials at hand:
Step 4


– Get your tools ready in a bright spot, making sure to keep them far from anything that might catch fire. Safety first!
– Clamp down that circuit board with a vise or a ‘helping hands’ tool. Tilt it just right so you can easily reach those solder pads.
– Position your fume extractor nearby to catch all those pesky solder fumes. It’s like having a little helper!
– Don’t forget your safety goggles! Protect those peepers while you work your magic.
Tools Used

Step 5


Give the orientation a quick double-check, especially if you’re dealing with components that have a directional vibe like diodes, LEDs, and electrolytic capacitors. It’s all about keeping things in their happy place!
– Guide those component leads through the circuit board holes with care! Most of your components should be resting comfortably and flat, nice and close to the board. You’ve got this!
Step 6


– Gently bend the leads outward a bit to keep that component snug as a bug! If you’re feeling crafty, painter’s tape can also lend a hand in securing it just right.
Step 7


– Fire up that soldering iron! If yours has a temperature setting, make sure it’s just right:
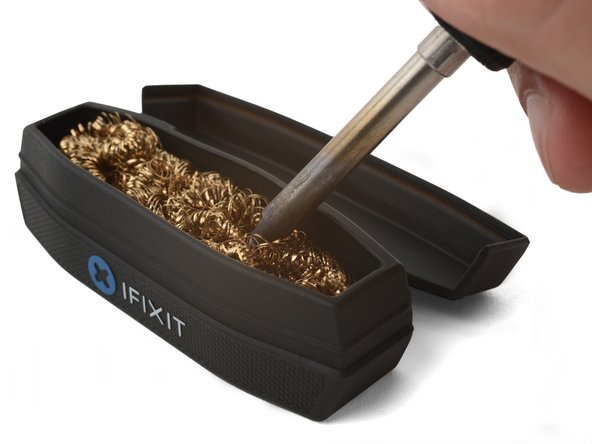
– Give the tip of your soldering iron a little TLC. If you’re using a sponge, dampen it and give the tip a quick wipe. If brass wire is your tool of choice, give the tip a few playful stabs into the wire.
Step 8


If you’re picking up a soldering iron for the first time, give the cleaning and melting process a few tries. It’s a great way to get comfortable with how solder flows and to see just how much the tip can carry. You’ll be a pro in no time!
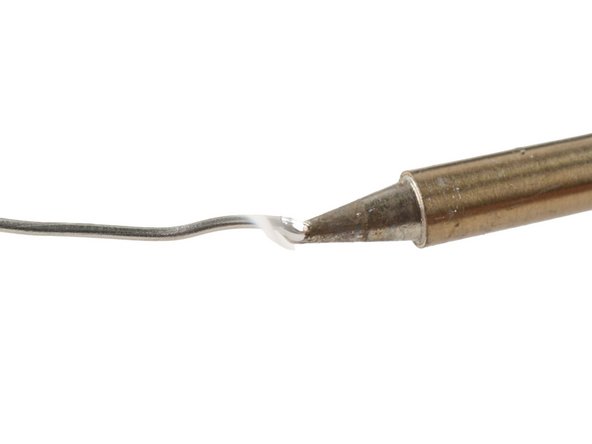
– Grab your soldering iron and let’s make it shine! Melt a little bit of solder right onto the tip; this nifty trick is known as ‘tinning the tip.’ It’s all about helping the heat flow smoothly, making your repairs a breeze!
Step 9


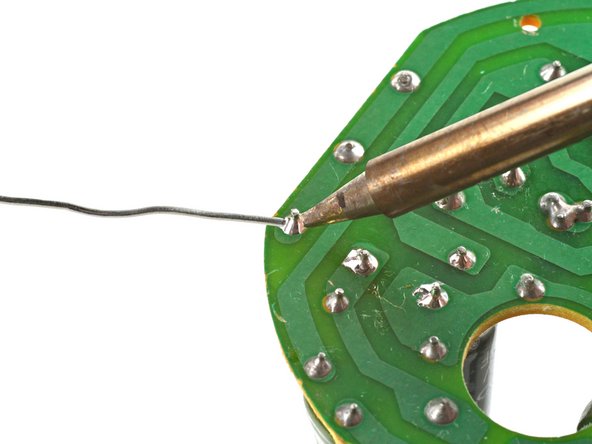
Get ready to crank up the heat! You’re going to warm up that solder pad and the component lead until they’re nice and toasty for about 2 to 3 seconds. With the right heat, they’ll melt that solder wire like butter.
– Gently press the tip of your soldering iron against the circuit board’s solder pad and the component lead for about 1 second. Give them a little warmth and make sure the tip is angled for the best contact with both the pad and lead.
– Now, let the magic happen! Feed the solder wire into that cozy heated spot until you see a lovely concave pool of solder forming around the lead.
– Once you’ve got that pool just right, pull the solder wire away, and then lift the soldering iron from the solder pad. Easy peasy!
Step 10


Just like learning to ride a bike, getting your soldering skills down takes a bit of practice. If your first joint isn’t Instagram-worthy, don’t sweat it! A few tries and you’ll find your groove with the motion and timing.
– Awesome job—you’ve just created a solder joint! Take a moment to check out your handiwork and see if it turned out just right:
Step 11


– After you’ve finished soldering all your leads, grab a flush cutter and trim those leads right above the solder joint. Clean and tidy is the name of the game!
– Before you power down your iron, make sure to leave a little glob of solder on the tip (we call it ‘tinning the tip’). If you’re using rosin-core solder, hang tight until the tip stops smoking. That solder glob acts like a shield, keeping the tip clean and ready for your next project, which means it’ll last longer!
Step 12


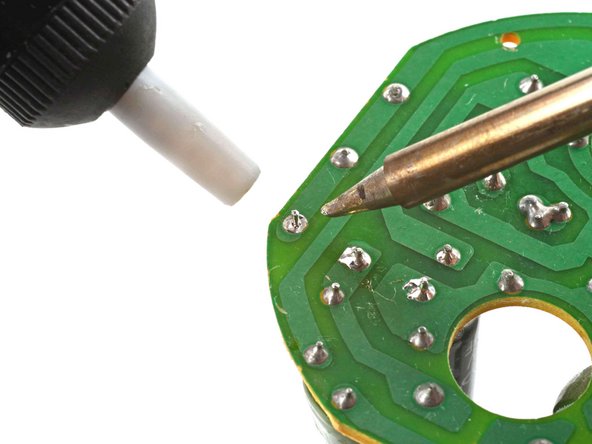
– Grab some isopropyl alcohol and give those solder joints a little love! Use a soft-bristled brush to gently scrub away any pesky flux residue. Your device will thank you!
– Next up, take a lint-free cloth and wipe down the solder joint. This will soak up all that flux and alcohol residue, leaving everything nice and clean!
Step 13


When you’re getting cozy with soldering a component that has multiple through-hole leads (think joystick module, microcontroller, or port), start by tacking down two opposite leads to keep everything in place. Give it a quick check to make sure it’s lined up nicely, and then go ahead and solder the rest of those joints.
If your molten solder is being a bit stubborn and not flowing well, just add a little more flux to the joint. It’ll help things slide into place!
Step 14

Get ready for the next 8 steps where we’ll dive into the fun world of desoldering through-hole components using a solder wick and a desoldering pump. Let’s make some magic happen!
If you’re just starting out with soldering, make sure to check out the soldering steps above first—it’s like learning the basics before hitting the dance floor!
Along with your soldering gear, here’s what else you’ll want to have on hand:
Tools Used

Step 15


– Clamp down that circuit board nice and tight with a vise or a ‘helping hands’ tool. Tilt it just right so those solder pads are easy to reach. And hey, don’t forget those safety goggles – your eyes will thank you!
– If you can, grab a tip that has the biggest surface area that can still slide between the solder joint. It’ll make your job a whole lot easier!
– Fire up your soldering iron! And if yours has a temperature control, make sure it’s set just right:
Tools Used
Step 16


If you’re working your magic with a solder wick, let’s keep the momentum going to the next step!
If you’re using a desoldering pump, feel free to jump ahead to this step!
– First things first, let’s get that soldering iron ready! If you’re rocking a sponge, give it a little splash of water and then swipe the tip across it for a quick clean. If you’ve got brass wire, give that tip a few playful pokes in there.
– Now, let’s melt a tiny blob of solder onto that tip. It’s like a warm hug for better heat transfer!
Tools Used
Step 17


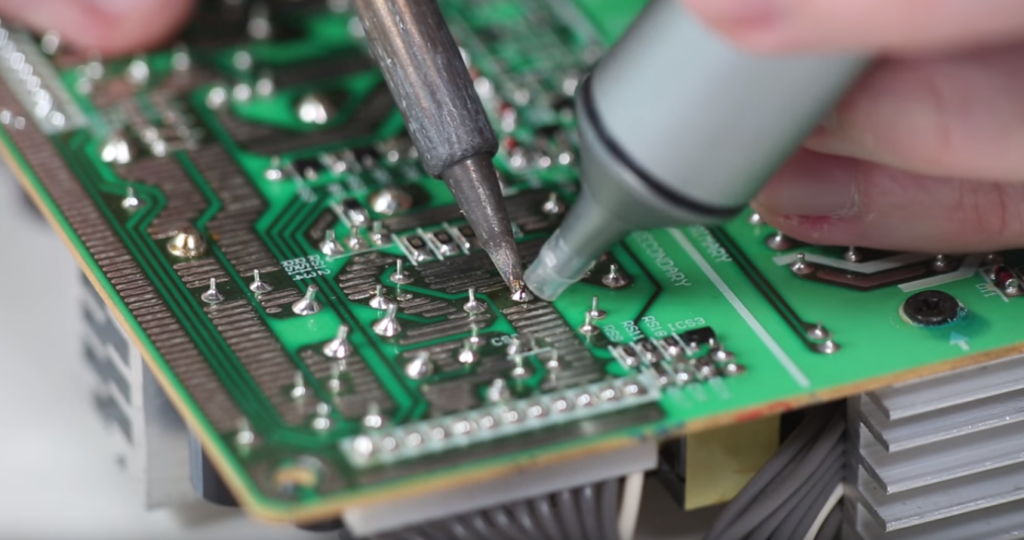
Heat up that solder joint with the wick and watch as it happily sucks up the molten solder like a champ!
– Let’s get started by adding a little bead of flux to that solder joint. It’s like giving it a warm hug!
– Now, grab a clean piece of solder wick and gently place it right on top of the joint. We’re about to work some magic!
– Next up, press the tip of your soldering iron firmly against the wick for 2-3 seconds. You’re heating it up just enough to melt the solder below, so stay focused!
– As the solder seeps into the wick, slide it around to reveal a fresh section touching the joint. You’ll know it’s working its charm when the wick shifts from its copper hue to a shiny silver!
– Once the wick has absorbed most of the solder, carefully lift it and the tip away from the joint together. We’re almost done!
Step 18


Step 19


Ready to tackle that solder joint? Grab your desoldering pump and let’s get to work! Heat up the solder joint and watch the magic happen as you use the pump to vacuum up the melted solder.
If this is your first rodeo with a desoldering pump, don’t worry! Check out this guide for some helpful tips.
– Press down on the desoldering pump plunger until it clicks into place.
Tools Used
Step 20


– Gently place the tip of your soldering iron on the solder joint and let it work its magic.
– As soon as you see that shiny solder melting, get your pump nozzle in there, super close to the gooey goodness—just don’t let it touch the tip!
– Now, give that side button a little press to power up the pump and watch it gobble up all that molten solder.


Step 22

If your desoldering pump isn’t quite getting the job done and you’re struggling to heat that joint, don’t fret! Just add a little more solder and give it another go.
Still having a tough time getting that solder to melt? Try adding some low-temp solder to the mix; it’ll keep things nice and gooey for longer.
Desoldering a ton of pins? Or just doing a lot of desoldering in general? Investing in a dedicated desoldering station or gun could really be a game changer!
Tools Used
Step 23

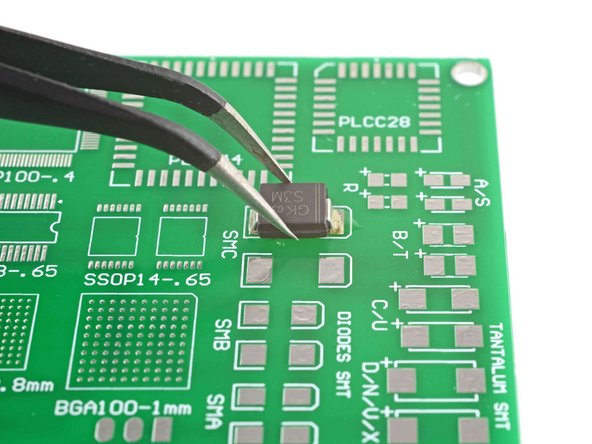
Surface-mount soldering is a nifty little technique where components are attached right on the surface of the circuit board. It’s the go-to method for most electronics manufacturers because it’s super automatable and keeps costs down.
These surface mount components are way smaller than those old-school through-hole ones, which can make hand-soldering a bit of a challenge. But don’t sweat it! With a dash of patience, a sprinkle of practice, and a trusty magnifying glass, you’ll be a surface-mount soldering whiz in no time!
Step 24


– Get ready to dive into the next six steps where we’ll guide you on how to solder those surface-mount components right onto your circuit board. Just make sure you’ve got a fine-tipped soldering iron and a few other essentials at the ready:
Step 25


– Gather your tools in a bright space, making sure it’s clear of anything that could catch fire.
– Position the circuit board on a flat, non-flammable surface that can handle heat, or use helping hands or a PCB vise to keep it steady.
– Keep the fume extractor nearby so it can whisk away those pesky solder fumes.
– Don’t forget to rock those safety goggles!
Tools Used

Step 27

– Fire up your soldering iron and get ready for some action! If your soldering iron has temperature control:
– Give that tip a good scrub! If you’re using a sponge, make it damp and give it a quick wipe. If you’ve got brass wire, poke that tip into the wire a few times to keep it shiny.
– Now, if you’re not rolling with solder paste, melt a little solder right onto the tip. You’ll be transferring this magic metal onto the joint in no time!
Step 28


The soldering iron can get a bit toasty around its contact point, which might make nearby components a little loosey-goosey. So, keep your tools steady and watch out for those surrounding parts!
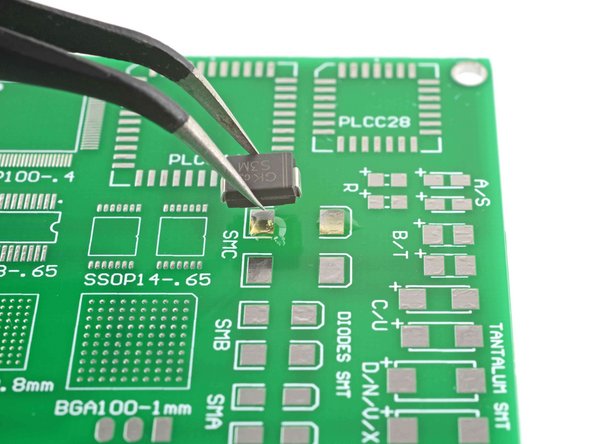
– Gently press the point of a tweezer or the tip of a spudger onto the component to keep it steady.
– Bring the soldering iron tip in contact with both the solder pad and the component. As the pad warms up, it will attract the molten solder like a magnet.
– Lift the tip away from the solder joint.
– Repeat this process for the remaining leads of the component.
Tools Used

Step 29


Handle those tiny components with care—give them a gentle touch, as they can be a bit fragile and might just decide to take a vacation from the board.
– Dab a bit of isopropyl alcohol onto those solder joints and give them a gentle scrub with a soft-bristled brush to kick that pesky flux residue to the curb.
– Follow it up by wiping the solder joint with a lint-free cloth to soak up any lingering flux and alcohol residue. You’re doing great!
Step 30

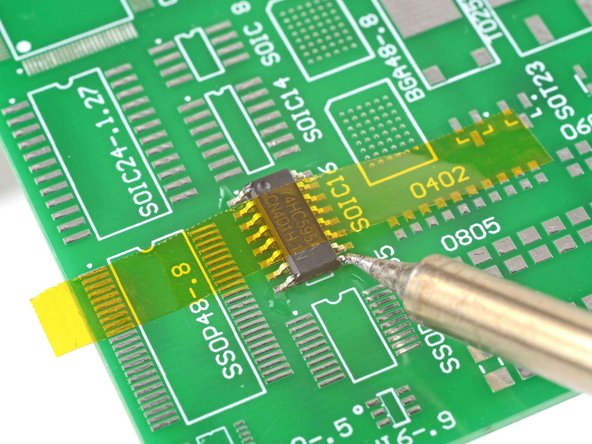
Many surface mount components, like those tricky integrated circuits, come with a bunch of leads that need to be soldered down. Getting them lined up and secured to the board can be a bit of a challenge, but don’t worry, you’ve got this!