Samsung Galaxy S24 Plus Battery Replacement
Duration: 45 minutes
Steps: 30 Steps
This guide focuses solely on battery repairs.
Get ready to breathe new life into your Samsung Galaxy S24+ by swapping out that tired battery! This guide is all about the battery replacement. If you're looking to tackle the screen and battery assembly together, be sure to check out the other guide. Let's dive in and get your device back to its energetic self!
Step 1


Let your phone's battery dip below 25% before you dive in—highly charged lithium-ion batteries can be feisty little fire hazards. And if your battery looks suspiciously puffy, handle with care!
- First things first, let's get your phone ready! Disconnect any cables hanging around it.
- Now, press and hold the side button along with the volume down button, then tap 'Power off' to give your phone a little nap.
Step 2

You can use a hair dryer, heat gun, or hot plate to help with the repair, but remember to keep it cool! Overheating can be a real bummer for your phone's display and internal battery, so let's avoid that heat damage, shall we?
- Warm up an iOpener and gently press it against the right edge of the back cover for about two minutes to loosen things up.
Tools Used


Step 3

Struggling to make a gap? Try adding a bit more heat to loosen up that stubborn adhesive. Just follow the iOpener instructions so things don’t get too toasty.
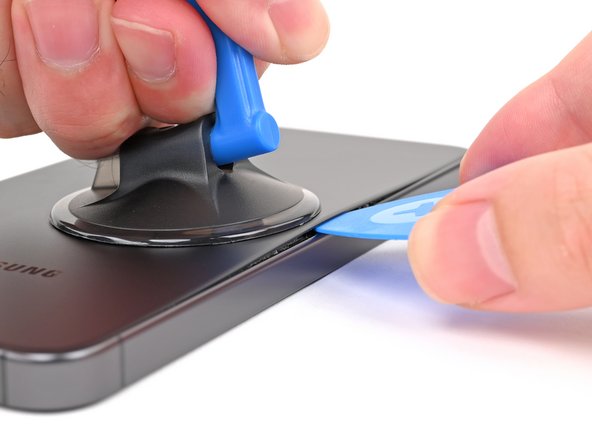
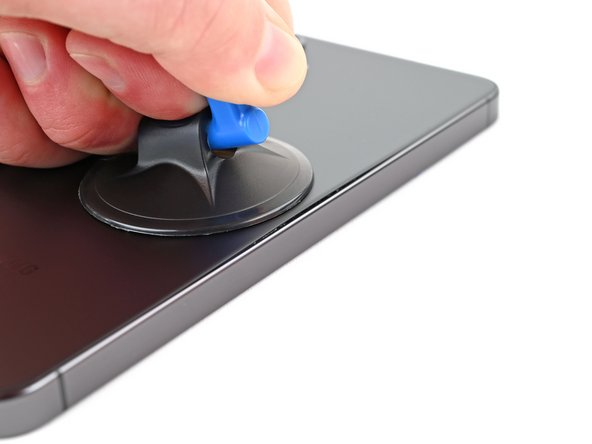
- Stick a suction cup onto the back cover, right near the middle of the right edge for best leverage.
- Pull up steadily on the suction cup to gently pry the cover away from the frame, creating a small gap.
- Slide an opening pick into that gap to keep the separation going smoothly.
Tools Used

Step 4


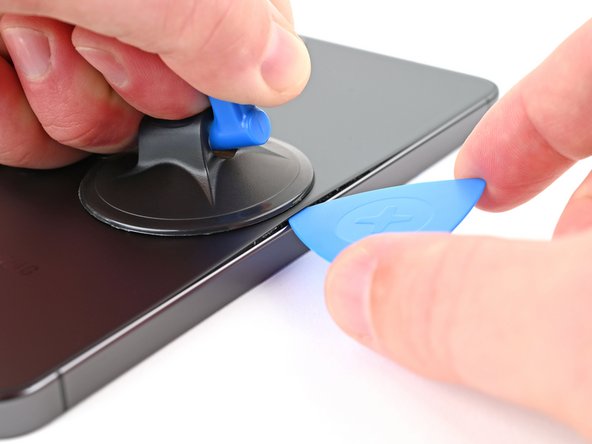
- Gently glide the pick back and forth along the right edge, easing apart the adhesive. Take it slow, but steady—you're doing great!
- Once you've worked the pick in, leave it near the bottom right corner to keep that adhesive from closing back up. You got this!
Step 5

- Warm up the bottom edge of the back cover for a couple minutes with a heated iOpener—think of it as a mini spa treatment for your device.
Tools Used
Step 6


- Gently wiggle the opening pick around the bottom right corner to loosen the adhesive and get things moving.
Step 7

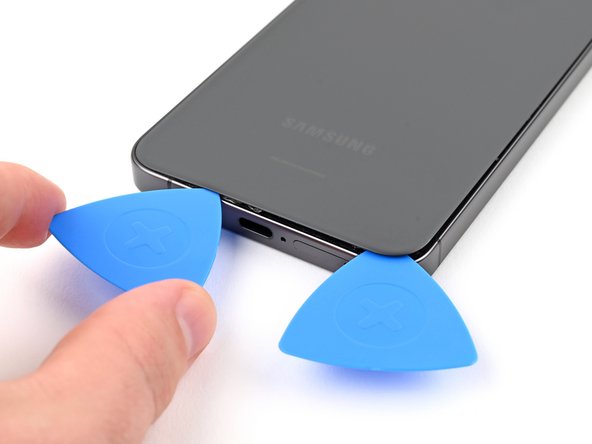
- Time to bring in some backup - insert a second pick at the bottom right corner to help pry things open.
- Now, gently slide the opening pick all the way to the bottom left corner. This will help loosen the adhesive and get you closer to freeing the parts.
- Leave the pick in place at the bottom left corner - this will prevent the adhesive from sneaking back in and sticking everything back together. Nice work so far!
Step 8

- Warm up the left edge of the back cover with a heated iOpener for about two minutes—think of it as giving your device a quick spa treatment before we get hands-on.
Tools Used
Step 9


- Swing that opening pick around the bottom left corner to loosen up the sticky stuff.
Step 10


- Slide a third opening pick into the bottom left corner like you’re getting ready for some serious separation.
- Gently glide that pick towards the top left corner to break free from the adhesive's grip.
- Keep that pick hanging out near the top left corner so the adhesive doesn’t try to stick again.
Step 11

- Warm up a heated iOpener and gently press it against the top edge of the back cover for a cozy two minutes.
Tools Used
Step 12


- Swing the opening pick around the top left corner to loosen up that sticky adhesive.
Step 13


- Pop a fourth pick into the top left corner—like you're adding sprinkles to a sundae.
- Glide that pick over to the top right corner to break up the sticky adhesive. Smooth moves!
- Let the pick chill near the top right corner so the adhesive doesn’t make a surprise comeback.
Step 14


Check out that adhesive square chilling above the flash—it's holding down the rear microphone.
- Line up your opening pick with the flash, like you're about to give it a high five.
- Gently slide the pick under the top edge of the back cover—when you feel that adhesive grip, you’re in the right spot.
- Keep moving the pick toward the bottom of the phone, lifting the cover as you go, until the sticky stuff lets go and the cover comes free.
Step 15


If the back cover isn’t budging, grab an opening pick and gently work it around the edges to break up any stubborn adhesive.
Now’s a perfect time to fire up your phone and make sure everything’s working as it should before you seal it up. Don’t forget to shut it down completely before you keep going.
Water resistance depends on how well you stick that back cover down, but keep in mind your device will lose its official IP rating after this repair.
- Start by carefully removing the back cover. During reassembly, use tweezers or your fingers to peel away all adhesive from the back cover and the device itself. If stubborn residue sticks around, apply some heat or dab on isopropyl alcohol (90% or higher) using a coffee filter or a lint-free cloth to loosen it up. For custom-cut adhesives, just follow this guide to get it right. If you need help, you can always schedule a repair.
Tools Used


Step 16

Near each press connector on the board, you'll spot an arrow pointing to the best prying spot. Follow the arrow, and you'll be in the right zone to get started. If you need a hand along the way, you can always schedule a repair.
- Grab your spudger and gently coax the wireless charging coil connector off the motherboard—think of it as popping a fancy Lego brick apart.
- When it’s time to snap the connector back in, line it up like you’re parking a tiny spaceship, press lightly with your finger on one edge, then the other until you feel (and maybe hear) the click. No brute-force heroics—if it’s grouchy, lift, realign, and try again.
Tools Used

Step 17


- Grab your trusty Phillips screwdriver and get ready to remove thirteen 3.5 mm-long screws that hold the wireless charging coil and loudspeaker in place:
- First, tackle the six screws that keep the wireless charging coil secure
- Next, take out the seven screws that keep the loudspeaker from rocking out
Step 18


- Slip the point of a spudger into the notch at the top left corner of the loudspeaker—see the arrow for guidance. Give it a gentle pry to loosen it from the frame. If you need a hand, you can always schedule a repair.
Tools Used
Step 19


- Gently use your fingers to pop the loudspeaker out of the frame—like you're picking the last cookie from the jar.
- Lift out both the wireless charging coil and the loudspeaker from the frame. They should come out together, no wrestling required.
- When putting things back, press around the edges of the loudspeaker to snap it securely into the frame, then reintroduce the screws to their old hangouts.
Step 20

- Grab a spudger and gently pry up to disconnect the battery press connector. Keep it careful and steady—no sudden moves! If you need a hand, you can always schedule a repair.
Tools Used
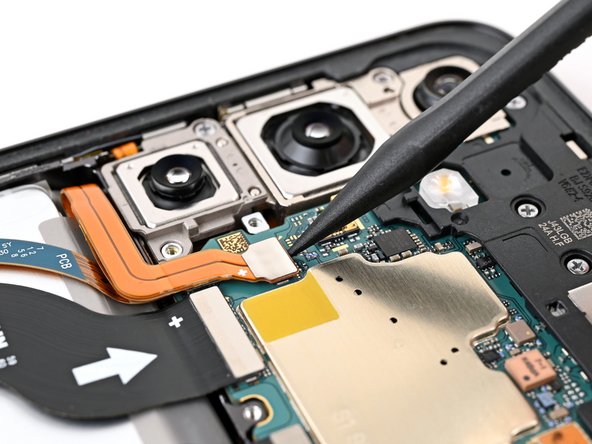
Step 21


- Slide the flat end of your spudger under both interconnect cables and gently pop them free from the daughterboard—no yanking, just a chill lift.
Tools Used
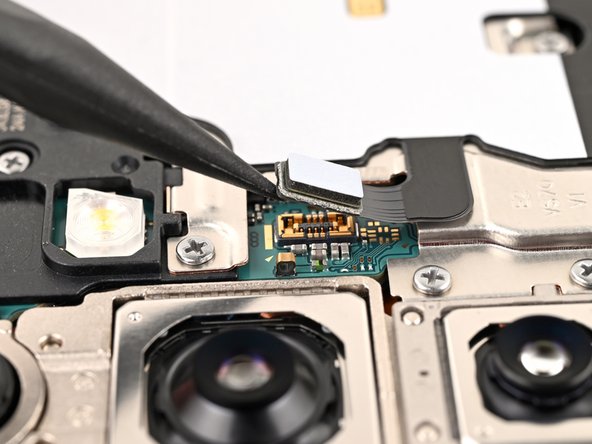
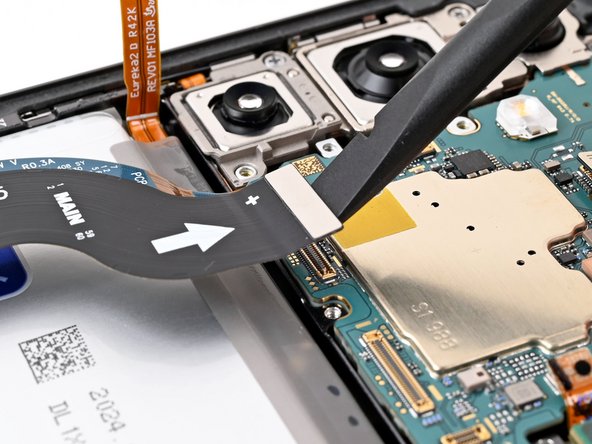
Step 22


- Let's get started! Use a trusty spudger to carefully pry up and disconnect those interconnect cable press connectors from the motherboard. Take your time and make sure they're completely released.
Tools Used
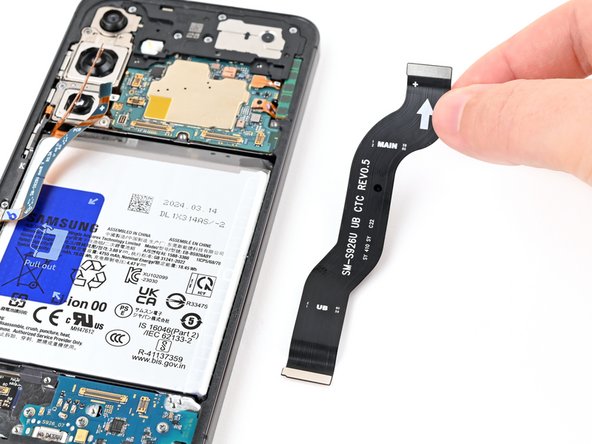
Step 23


- Gently disconnect and remove the interconnect cables from the phone.
Step 24


- Grab your trusty spudger and gently pop up both the display cable and the lower antenna cable connectors from the motherboard—think of it like opening stubborn jars, but with a bit more style.
Tools Used
Step 25

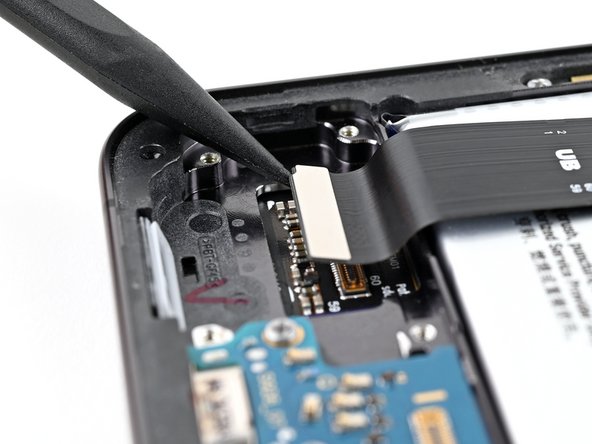
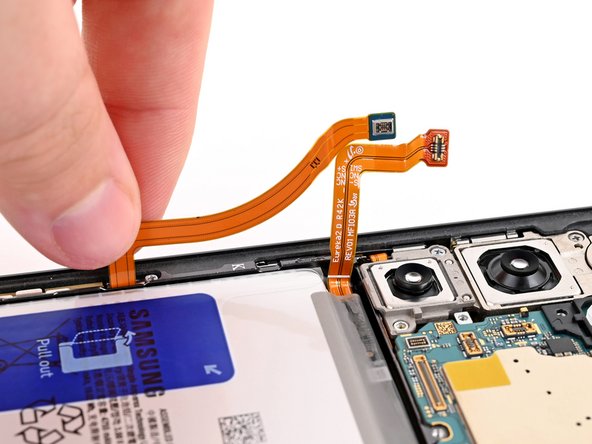
- Grab your trusty spudger and carefully pop up the display cable connector hanging out near the phone’s bottom edge.
- Lift out the display cable—easy does it!
Tools Used
Step 26

- Gently push aside the battery and antenna cables so they’re out of the way of the battery. Keep it smooth and careful—no sudden moves.
Step 27

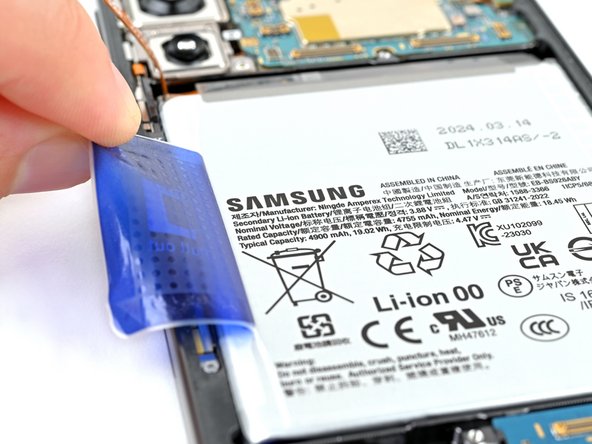
- Gently pull the battery pull tab away from the battery, guiding it towards the left edge of the phone. Take your time and be careful not to pull too hard, you got this!
Handle the battery gently—no bending, creasing, or puncturing allowed! A damaged battery can leak nasty chemicals or even catch fire. Take your time and stay safe during these steps. If you need help, you can always schedule a repair.
If that pull tab is giving you a hard time, grab an opening pick or any slim plastic tool and slide it under a corner at a shallow angle. Seriously, steer clear of metal tools—no poking or pressing into the battery. Your battery will thank you for the gentle touch!
Step 28

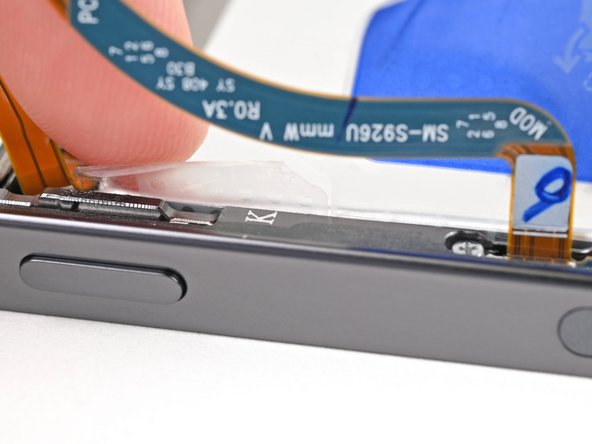
Make sure to separate these tabs, or the battery won’t budge in the next step. Want to keep things tidy? Tape the tabs to the side of your phone or screen so they’re not in your way.
- Gently peel apart the tiny, clear tabs located above and below the blue section of the pull tab from the rest of the tab. It's like giving them a little wiggle to set them free!
- Now, give those small tabs a little bend away from the battery. This will keep them out of the way and ensure they don’t accidentally get too cozy with the battery.
Step 29
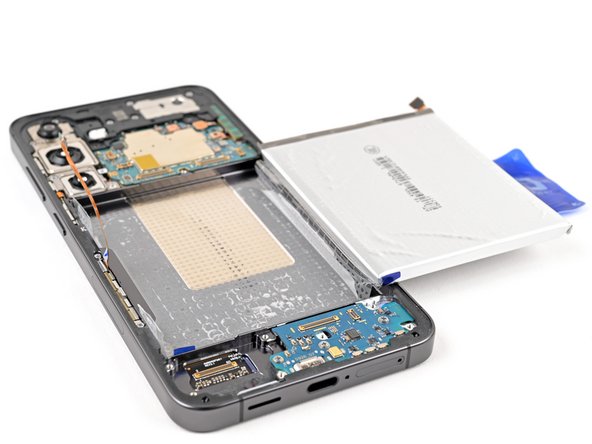

Watch out for bending the battery along the right edge of the phone frame—it prefers to keep its shape! To make things easier, you might need to gently peel up a bit of the lower adhesive film by lifting the battery before moving it over the edge.
The battery is stuck on with a sneaky double-sided adhesive film that loops under it. When you tug on the pull tab, you'll notice the left side of the battery pops up, but the right side stays put. You'll tackle the stubborn film and fully free the battery in the next step.
If the battery isn't budging, try adding a couple drops of high-concentration (90%+) isopropyl alcohol to the left edge. Prop up the left side of the phone so the alcohol can sneak underneath, then give it a minute to work its magic on the adhesive.
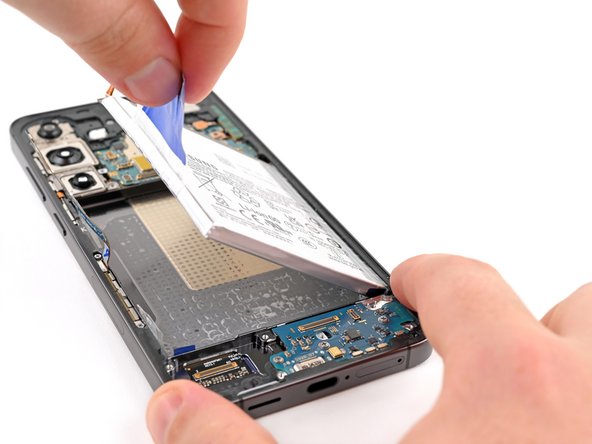
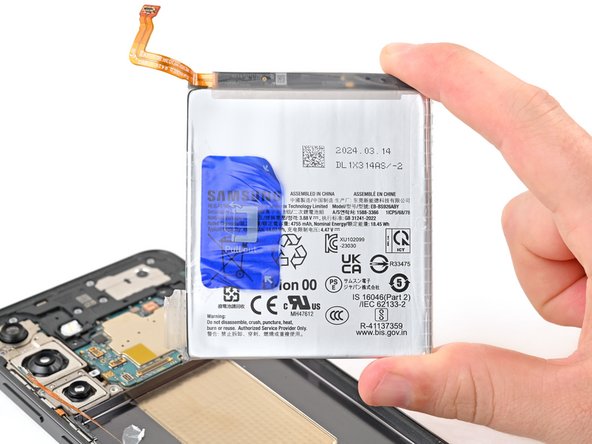
- Hold the phone's frame steady with one hand, and with a bit of determination, pull the blue tab straight up. You'll feel the battery pop away from the adhesive—just like magic!
- Now, gently place the battery over to the right edge of your phone, like it's finding its cozy spot.
Step 30


- Now, just follow these steps in reverse to put everything back together.
- To make sure your device runs like a dream, don’t forget to calibrate your battery after reassembly.
- If things aren’t going as planned, no worries—try some basic troubleshooting or check out our helpful Answers community for support.
- Got e-waste? Take it to a certified recycler like R2 or e-Stewards.
- Need a hand? If you're stuck, feel free to schedule a repair.