Samsung Galaxy S24 Plus Front Camera Replacement
Duration: 45 minutes
Steps: 27 Steps
Ready to swap out the front camera on your Samsung Galaxy S24+? Follow along for a clear, step-by-step guide that'll have you snapping selfies again in no time.
Step 1


Before you start, make sure your phone's battery is below 25% charged. A charged lithium-ion battery can be a safety hazard, so it's better to be safe than sorry. If your battery is swollen, take the necessary precautions to avoid any accidents. Let's get started with your repair! If you need help, you can always schedule a repair
- Unplug all cables from your phone—no strings attached.
- Press the side key and volume-down together, tap “Power off,” and give your phone a well-earned nap.
Step 2

A hair dryer, heat gun, or hot plate can be handy, but handle with care—excessive heat can damage your phone’s display and internal battery. Keep the temperature moderate to avoid any mishaps, and if things get tricky, remember you can always schedule a repair.
- Warm up your iOpener and park it on the right edge of the back cover for a solid two minutes. Let that heat work its magic!
Tools Used


Step 3

If that gap just won’t budge, hit it with a little more heat to loosen things up. Keep an eye on those iOpener instructions so you don’t end up with a scorched device!
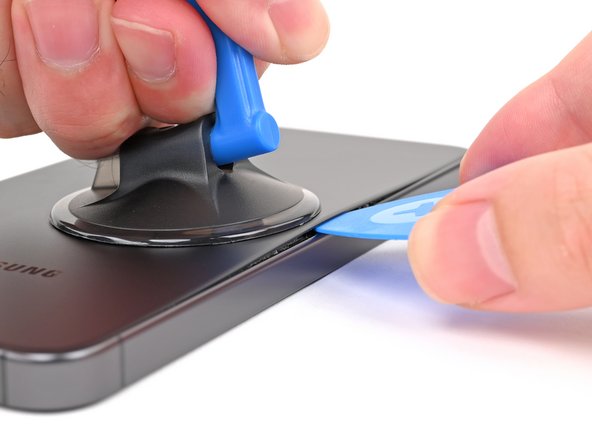
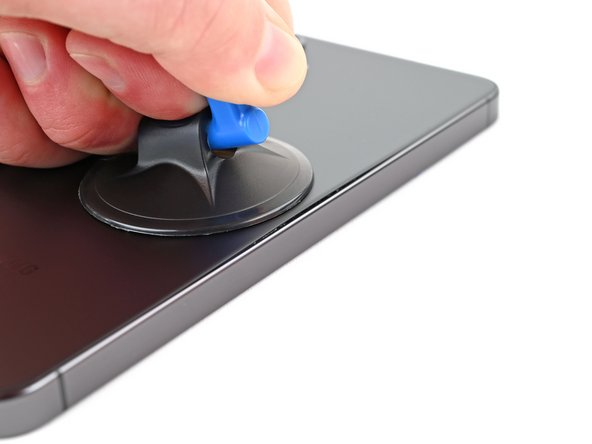
- Stick a suction cup onto the back cover, aiming as close to the middle of the right edge as you can. Think of it as giving your device a gentle hug to start the opening process.
- Pull up firmly on the suction cup to gently pry a small gap between the cover and the frame. Keep the pull steady—no sudden yanks!—and watch that gap appear.
- Slide an opening pick into the gap you just made. It’s like slipping a tiny, friendly wedge to help lift the cover away smoothly.
Tools Used

Step 4


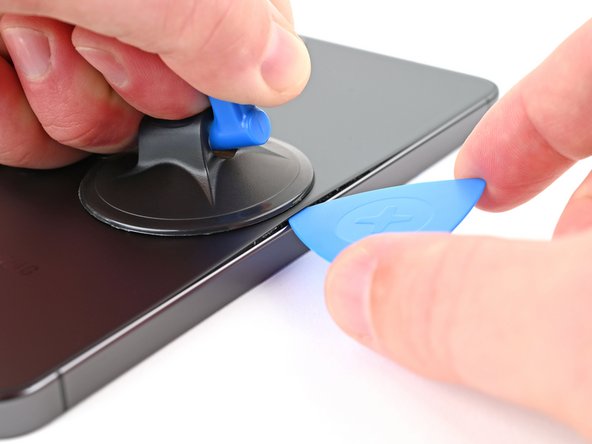
- Gently slide the pick along the right edge, back and forth, to separate the sticky stuff holding everything together.
- Keep the pick snugly in place near the bottom right corner to stop the adhesive from sealing itself back up.
Step 5

- Place a heated iOpener along the bottom edge of the back cover and let it work its magic for about two minutes.
Tools Used
Step 6


- Give the opening pick a little spin around that bottom right corner to break free the adhesive. Let's get this party started!
Step 7

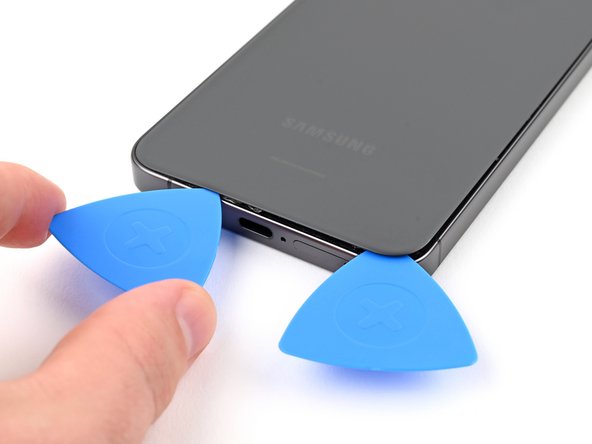
- Pop a second pick into the bottom right corner—like you're starting a secret handshake.
- Slide that pick all the way to the bottom left corner to loosen up the sticky stuff.
- Leave the pick chillin' in the bottom left corner so the adhesive doesn’t sneak back together.
Step 8

- Warm up the left edge of the back cover with an iOpener for two minutes. This will make things a lot easier when it's time to open it up!
Tools Used
Step 9


- Swing that opening pick around the lower left corner to loosen up the sticky stuff and keep things moving.
Step 10


- Time to get this repair started! Insert a third opening pick at the bottom left corner, and get ready to separate that adhesive.
- Now, gently slide the pick toward the top left corner to loosen the adhesive's grip. You're making great progress!
- Leave the pick near the top left corner to keep the adhesive from resealing. You're doing fantastic, keep it up! If you need help, you can always schedule a repair
Step 11

- Warm up the top edge of the back cover with a heated iOpener for about two minutes—think of it as giving your device a spa moment before the repair fun begins.
Tools Used
Step 12


- Gently wiggle the opening pick around the top left corner to loosen the adhesive. Keep it steady and don’t rush—patience is key here. If you need help, you can always schedule a repair.
Step 13


- Insert a fourth opening pick at the top left corner to get things started.
- Gently slide the pick toward the top right corner to loosen the adhesive holding things together.
- Keep the pick near the top right corner to prevent the adhesive from sealing back up prematurely.
Step 14


Check out that little square of sticky stuff wrapped around the rear microphone—right above the flash.
- Get started by aligning the opening pick with the flash - it's time to get this repair underway!
- Gently slide the pick under the top of the back cover until you feel it catch on the adhesive. Don't worry, it's supposed to!
- Keep sliding the pick downwards, lifting the cover as you go, until it's free from the adhesive. You're making great progress!
Step 15


If the back cover is putting up a fight, grab an opening pick and gently work around to loosen any stubborn adhesive that’s making life harder.
Now’s the perfect time to fire up your phone and test everything out before sealing it back up. Just don’t forget to turn it off completely before continuing.
Your device might lose its IP rating, but how well you reapply the back cover adhesive will play a big part in maintaining water resistance. Keep that in mind!
- Start by gently removing the back cover.
- During reassembly:
- Use tweezers or your fingers to carefully peel off any leftover adhesive from both the back cover and the phone. If it's stubborn, a little heat or some isopropyl alcohol (90% or higher) along with a coffee filter or lint-free cloth can work wonders.
- Got custom-cut adhesives? Just follow this guide to get it right.
Tools Used


Step 16

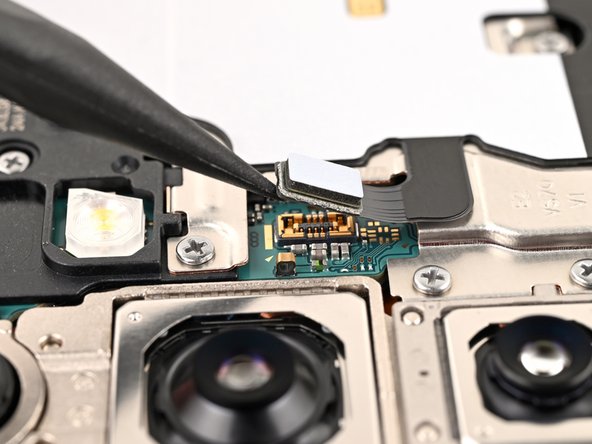
Each press connector on the board has a handy arrow showing you exactly where to pry—no guesswork, just follow the arrow and pop it loose like a pro.
- Grab your trusty spudger and gently lift up the wireless charging coil connector from the motherboard. Easy does it—no need for a wrestling match here.
- When it's time to reconnect, line up the connector nice and straight over its socket, then press down with your finger—one side, then the other—until you hear that satisfying click. If things aren’t clicking, don’t force it. Lift, reposition, and give it another go.
Tools Used

Step 17


- Time to get started! Use a trusty Phillips screwdriver to remove the thirteen 3.5 mm-long screws that hold! the wireless charging coil and the loudspeaker in place:
- First, tackle the six screws that keep the wireless charging coil secure
- Next, remove the seven screws that hold the loudspeaker firmly in its spot
Step 18


- Grab your trusty spudger and gently slide the tip into the notch at the top left corner of the loudspeaker, where you'll see a little arrow pointing the way.
- Now, give it a gentle pry to pop the loudspeaker free from the frame. You've got this!
Tools Used
Step 19


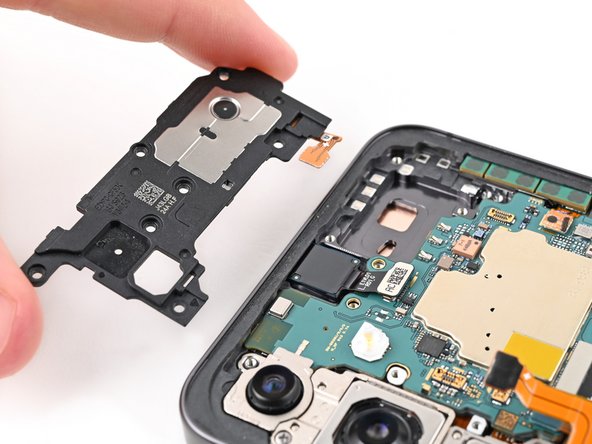
- Gently lift the loudspeaker out of the frame using your fingers—no superhero strength required.
- Take out both the wireless charging coil and the loudspeaker from the frame. It's a two-for-one special!
- When putting everything back together, give a firm press along the edges of the loudspeaker to snap it in place before you grab those screws.
Step 20

- Grab your trusty spudger and gently lift up to detach that pesky battery press connector. You're doing great!
Tools Used
Step 21


- Let's get started! Use a trusty spudger to carefully pry up and disconnect the earpiece speaker press connector. Remember to take your time and be gentle, we're making great progress!
Tools Used
Step 22


- Grab your Phillips screwdriver and take out the five 3.5 mm screws holding the earpiece speaker in place.
Step 23

- Slide the flat end of a spudger gently between the bottom edge of the earpiece speaker and the metal plate on the motherboard. Twist the spudger carefully to unclip the earpiece speaker from the frame, then lift it out. When reassembling, slide the top edge of the earpiece speaker into the frame first, then press down to clip it back in place. Need a hand? You can always schedule a repair.
Tools Used
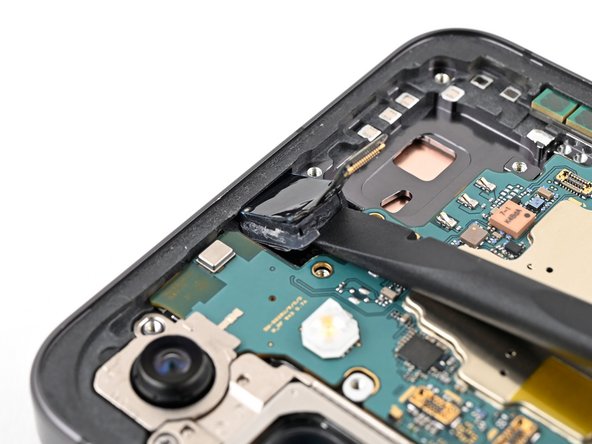
Step 24


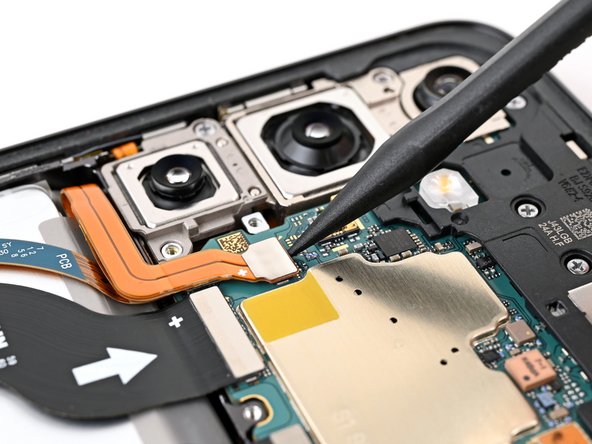
- Grab your trusty spudger and gently pry up to disconnect the front camera press connector. You've got this!
Tools Used
Step 25

- Warm up the front camera area with a hair dryer or heat gun until it feels toasty—but not scorching.
Tools Used
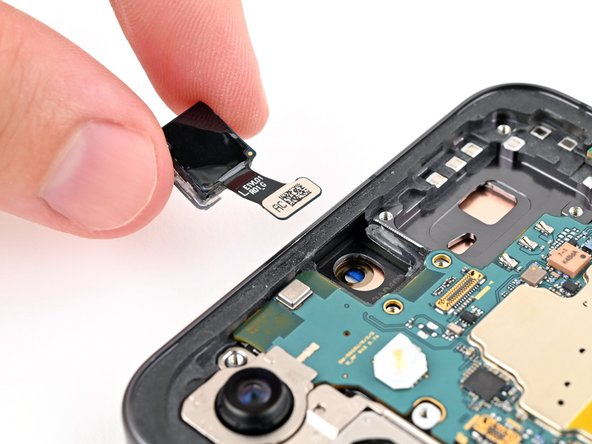
Step 26


The adhesive holding the camera is pretty tough, so take your time and add some heat if it feels like it's stuck. Be careful not to separate the sensor from the lens—keep them together to avoid any extra hassle.
If the camera isn't budging, grab a SIM card eject tool and gently scrape away the adhesive that's holding it in place. You've got this!
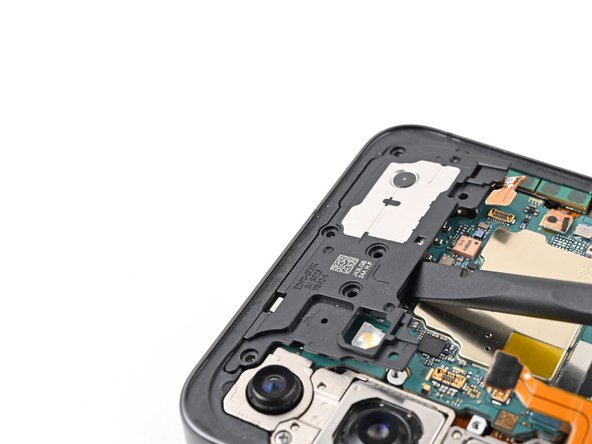
- Gently use the flat end of a spudger to pop the front camera out of its cozy little spot in the frame. You've got this!
Tools Used

Step 27

- To wrap things up, just reverse these steps and you'll be golden!
- Hit a snag? Don't worry, some basic troubleshooting or a chat with our community at Salvation Repair can get you back on track.
- Remember to responsibly recycle your e-waste with an R2 or e-Stewards certified recycler.
- If you need help or have any questions, you can always schedule a repair with us.