Samsung Galaxy S24 Plus Screen and Battery Assembly Replacement
Duration: 45 minutes
Steps: 43 Steps
Heads up: this guide is tailored for replacing both the screen and battery together. If that’s what you need, you’re in the right place!
Ready to refresh your Samsung Galaxy S24+? This guide walks you through swapping out the screen and battery assembly—yep, that's the whole package: screen, battery, and frame all together. Double-check you've got the right part before diving in! If you only need a new battery, there’s a separate guide for that. Same goes for just the screen—find the step-by-step for each one. Let’s get your phone looking and working like new!
Step 1


Let your phone's battery drain below 25% — keeping a full lithium-ion battery can be a safety hazard. If you notice your battery swelling up, take the proper precautions and handle with care.
- Unplug any cables from your phone—let’s give it some space to breathe.
- Press and hold the side button plus the volume down button, then tap 'Power off' to shut it down like a boss.
Step 2

You can use a hair dryer, heat gun, or hot plate to warm things up, but don’t go wild with the heat—your phone’s screen and battery are not fans of sauna sessions.
- Warm up your iOpener and set it on the right edge of the back cover for a cozy two minutes.
Tools Used


Step 3

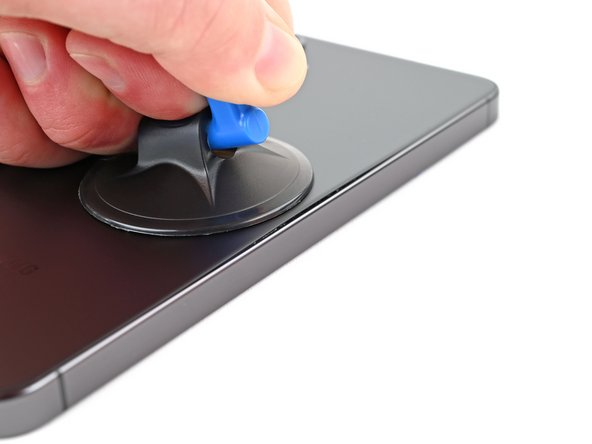
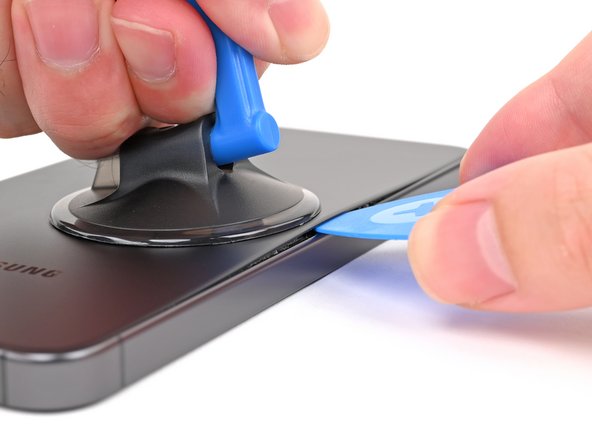
- Stick a suction cup right near the middle of the right edge—center stage for maximum drama.
- Pull the handle like you're lifting a tiny treasure chest—steady, strong, and just enough to pop the back cover loose.
- Slide an opening pick into the crack like you're slipping a VIP pass into the party.
Having trouble creating that initial gap? No worries—just give the heat a little extra love to loosen up the adhesive. Just make sure to follow the iOpener instructions carefully so you don’t accidentally turn up the heat too high. If you need a hand with this step, remember you can always schedule a repair.
Tools Used

Step 4


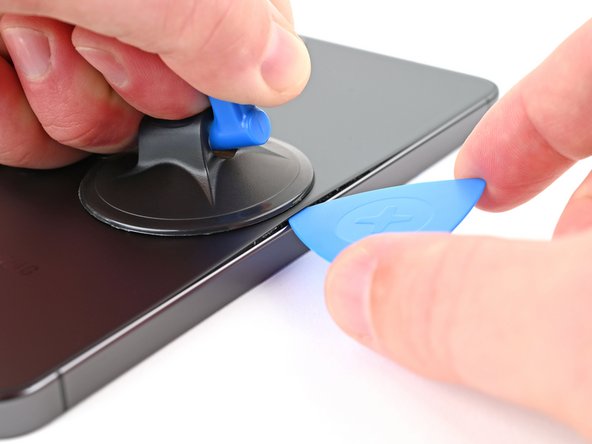
- Wiggle that pick along the right edge to loosen up the sticky stuff holding things together.
- Let the pick chill near the bottom right corner so the adhesive doesn't decide to make a comeback.
Step 5

- Let's get this repair started! Apply a heated iOpener to the bottom edge of the back cover for about two minutes. This will help loosen things up and make the next steps a breeze.
Tools Used
Step 6


- Swing the opening pick around the lower right corner to loosen that sticky adhesive—almost there!
Step 7

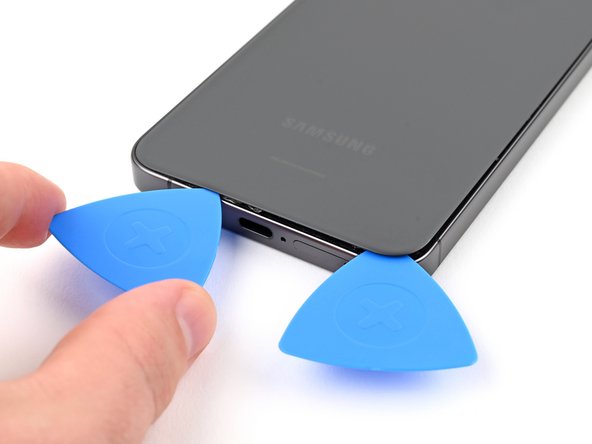
- Time to get this repair started! Insert a second pick at the bottom right corner to help loosen things up.
- Now, gently slide the opening pick to the bottom left corner - this will help separate the adhesive and make the rest of the process a breeze.
- Great job so far! Leave the pick in the bottom left corner to prevent the adhesive from resealing, and get ready for the next step.
Step 8

- Warm up the left edge of the back cover with a heated iOpener for about two minutes. Keep the heat steady and gentle to loosen things up for the next step.
Tools Used
Step 9


- Swing that opening pick around the bottom left corner to break up the sticky stuff holding things together.
Step 10


- Pop a third opening pick into the bottom left corner—don’t be shy, it’s tougher than it looks.
- Cruise that pick up toward the top left corner to loosen up the sticky stuff.
- Leave the pick hanging out near the top left corner so the adhesive doesn’t get any ideas about sticking back together.
Step 11

- Warm up the top edge of the back cover by gently pressing a heated iOpener against it for about two minutes. This helps loosen the adhesive so the cover can come off more easily.
Tools Used
Step 12


- Twist that opening pick around the top left corner to break free the adhesive. Keep it smooth and steady!
Step 13


- Insert a fourth opening pick at the top left corner to get things started.
- Gently slide the pick toward the top right corner to loosen the adhesive holding things together.
- Keep the pick near the top right corner to stop the adhesive from sealing back up as you work.
Step 14


Check out the sticky square of adhesive chilling around the rear microphone, just above the flash.
- Align the tip of your trusty opening pick with the flash.
- Gently slide the pick beneath the top edge of the back cover until you feel it catch on the adhesive.
- Continue sliding the pick down towards the bottom of the phone while carefully lifting the cover until it's free from the sticky stuff.
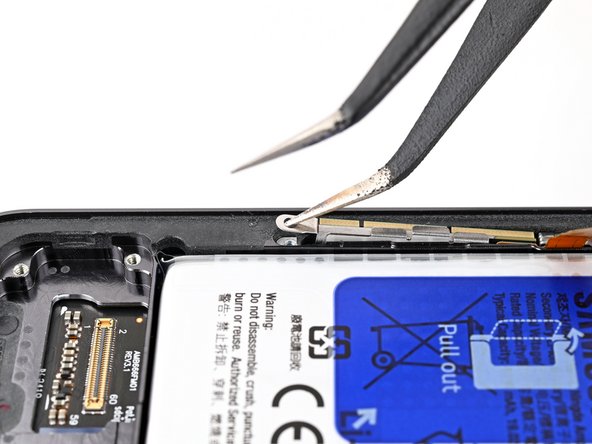
Step 15


If the back cover acts like it’s glued to an ex, slide an opening pick along the edge to break any clingy adhesive bonds.
This is the perfect moment to hit the power button, give your phone a quick spin, and make sure everything’s alive and kicking. Once it passes the pop quiz, shut it down completely before you dive back in.
After you re-stick the back cover, water resistance is basically a trust fall—your phone won’t keep its official IP badge, but a neat seal job still buys you some splashy peace of mind.
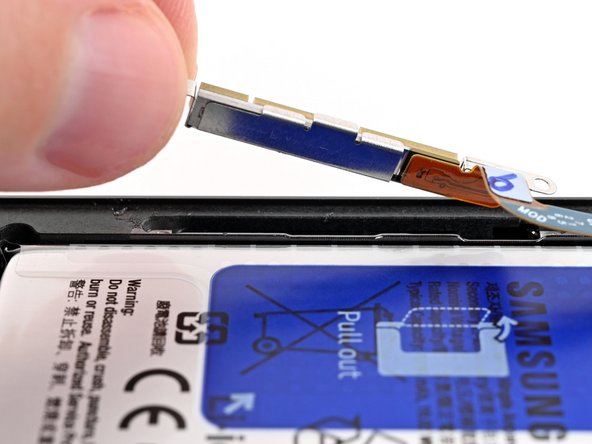
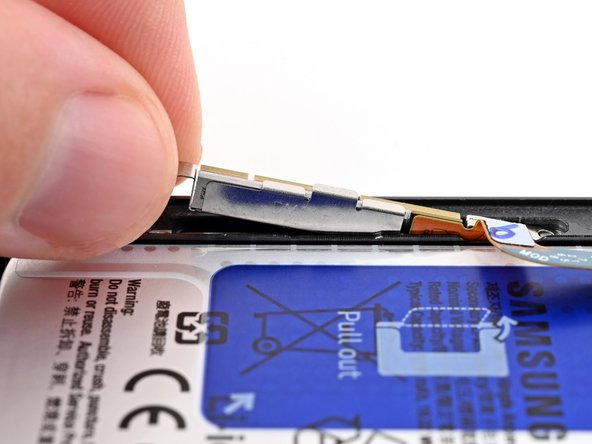
- Pop off that back cover—go ahead, give it a gentle lift.
- When you're putting things back together:
- Grab some tweezers or use your fingers to peel away every bit of sticky adhesive from both the back cover and the phone. If that stuff is stubborn, try a little heat or a splash of isopropyl alcohol (90% or higher) with a coffee filter or a lint-free cloth.
- Using custom-cut adhesives? Just follow the steps in this guide.
Tools Used


Step 16

Check out the arrow printed next to each press connector—it's like a helpful little hint for where you should pry.
- Grab your trusty spudger and gently lift up the wireless charging coil connector from the motherboard. Easy does it—no need to wrestle with it.
- When popping the connector back in, line it up nice and straight, and press down with your fingertip—one side, then the other—until you hear that satisfying click. If it’s being stubborn, just reposition and try again. No forcing needed.
Tools Used

Step 17


- Grab your Phillips screwdriver and unscrew the thirteen 3.5 mm screws holding down the wireless charging coil and loudspeaker. First, remove the six screws securing the wireless charging coil, then take out the seven screws fastening the loudspeaker. Need a hand? You can always schedule a repair if things get tricky.
Step 18


- Take your spudger and slide its tip into the notch at the top left of the loudspeaker—look for the little arrow pointing the way.
- Gently lift up to pop the loudspeaker free from the frame. Easy does it!
Tools Used
Step 19


- Pop that loudspeaker out of the frame with a gentle flick of your fingers—like you're flicking away last week’s bad vibes.
- Lift the wireless charging coil and loudspeaker together, as if you’re rescuing two buddies from a tiny jail cell.
- When you’re putting everything back, press around the loudspeaker’s edges until you hear it snap into place, then snug those screws back in—no wiggle room allowed.
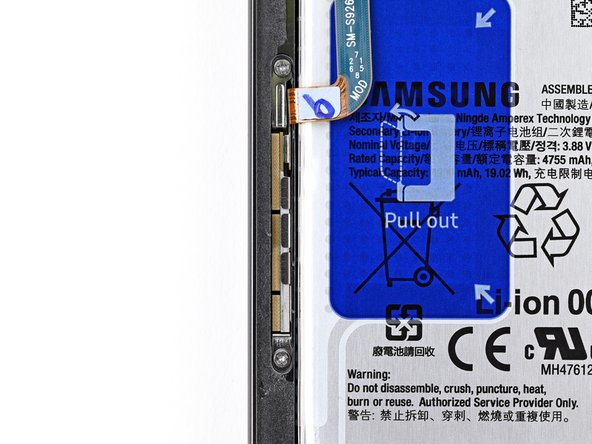
Step 20

- Grab a spudger and gently pry up to disconnect that battery press connector. Easy does it—no force needed.
Tools Used
Step 21


- Grab your trusty spudger and gently pop up both interconnect cable connectors from the daughterboard. Easy does it—no need to rush!
Tools Used
Step 22


- Grab your trusty spudger and gently pry up those interconnect cable press connectors from the motherboard. Disconnect them with care, and you'll be one step closer to your repair victory!
Tools Used
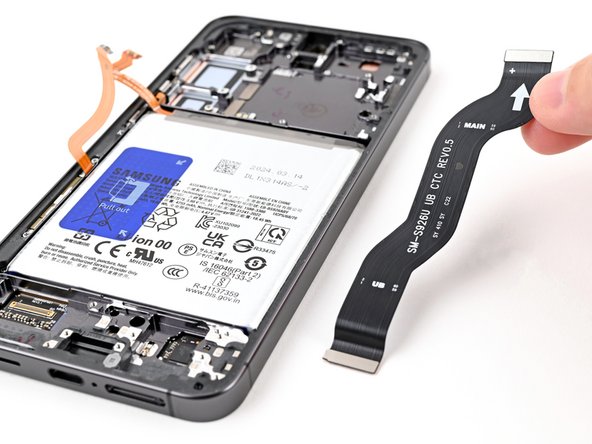
Step 23


- Gently pull those interconnect cables free—think of it like unplugging your favorite game controller, but way easier.
Step 24


- Gently lift and disconnect the earpiece speaker connector with a spudger—like giving your phone a tiny high-five.
Tools Used
Step 25


- Grab your Phillips screwdriver and show those five 3.5 mm-long screws who's boss—they're holding the earpiece speaker in place, but not for long!
Step 26

- Gently wedge the flat end of a spudger between the bottom edge of the earpiece speaker and the metal plate on the motherboard—think of it as giving the speaker a little lift. Twist the spudger carefully to unclip the earpiece from its frame, then lift it out. When putting everything back together, slide the top edge of the earpiece into the frame first, then press down and clip it back in place. Need a hand? You can always schedule a repair with Salvation Repair if things get tricky.
Tools Used
Step 27

Be careful with the spudger! Only use it in the areas suggested to avoid damaging delicate components. We don’t want any accidental scratches or mishaps!
- Slip the tip of your spudger under the upper antenna connector at the top left corner—like you're scooping up the last chip in the bowl.
- Gently pry up to pop the upper antenna connector off the motherboard. Easy does it!
Tools Used
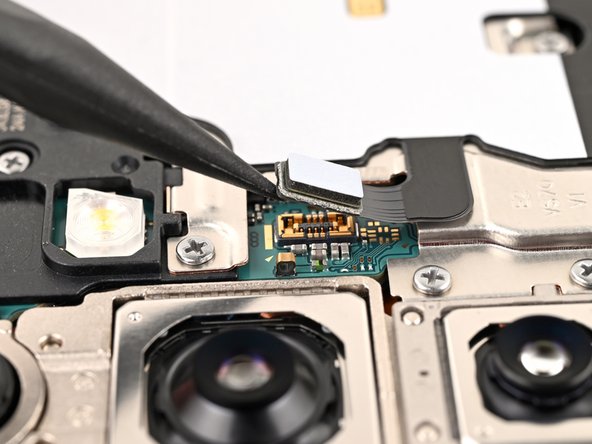
Step 28

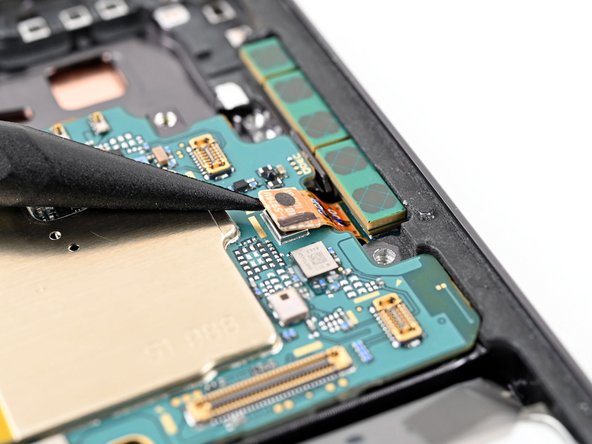
Be careful not to insert the spudger in any other spot, or you might damage those fancy surface-mounted components!
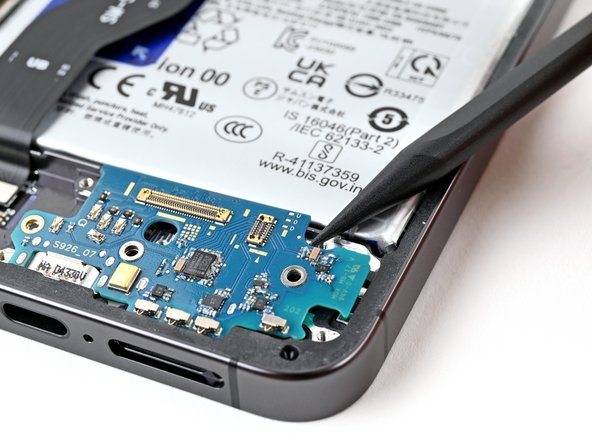
- Slip the tip of your spudger under the lower right corner of the front camera press connector—nice and easy.
- Pop the front camera press connector up and away from the motherboard. No wild moves necessary!
Tools Used
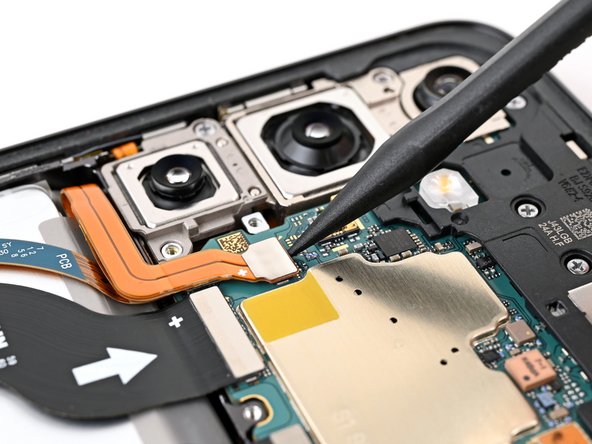
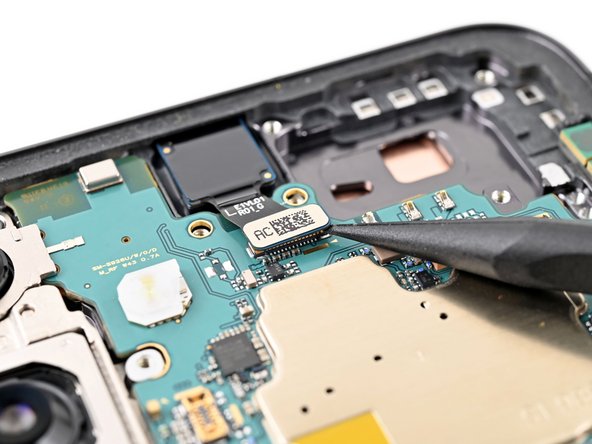
Step 29


- Grab your trusty spudger and gently wiggle it to lift and disconnect those display and lower antenna cable press connectors from the motherboard. You've got this!
Tools Used
Step 30

- Grab your Phillips screwdriver and twist out those two 3.5 mm-long screws holding the motherboard in place. Easy does it!
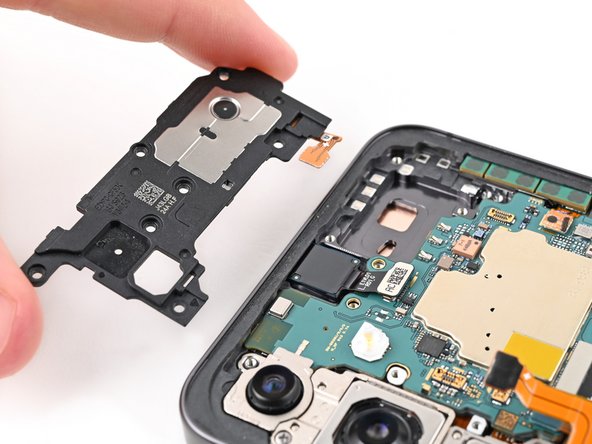
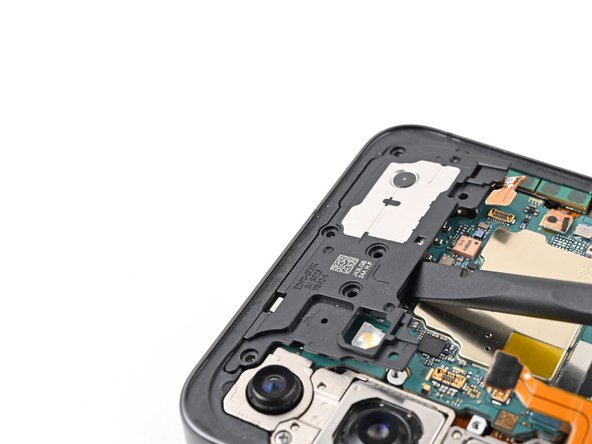
Step 31
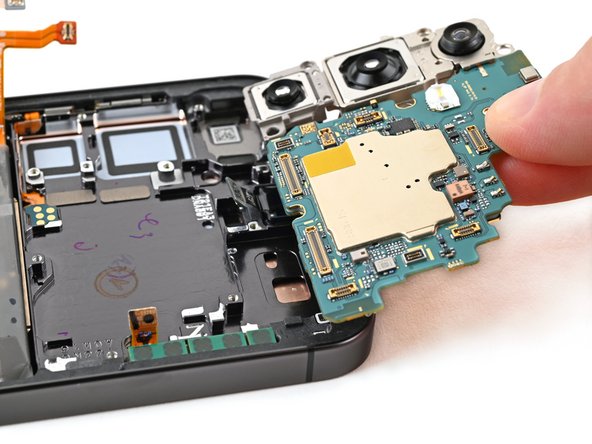

- Slide the flat edge of your trusty spudger into the gap between the motherboard's top edge and the phone frame, right in that earpiece speaker cutout.
- Gently pry against the frame to pop the motherboard out of its cozy spot and set it free.
- When it's time to put everything back together, just make sure all those cables are out of the way before you nestle the motherboard back into its frame.
Tools Used
Step 32
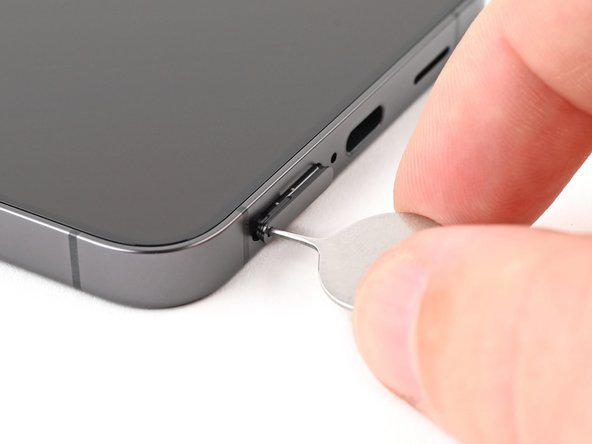

Accidentally poked the microphone hole with the SIM eject tool? No worries — you probably didn't cause any damage to the mic. It's a common mishap, and the microphone can handle a little nudge. If you're unsure or want to be safe, you can always schedule a repair for a quick check-up.
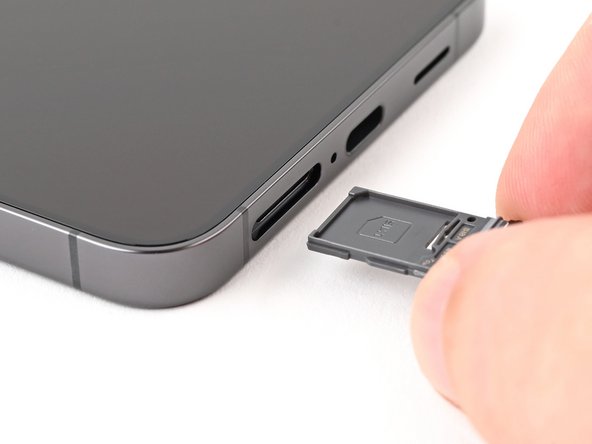
- Grab a SIM eject tool, a paperclip, or a straightened paperclip—whatever gets the job done—and gently insert it into the tiny hole on the bottom edge of your device where the SIM tray hides. Think of it as giving your phone a little nudge to open up.
- Once the tool is in, give it a gentle press—that's the signal for the SIM tray to pop out and say hello. Keep steady, and don’t rush this part.
- Carefully pull out the SIM tray, and you’re all set for the next step. If you need a hand, you can always schedule a repair with Salvation Repair.
Step 33


- Grab your trusty Phillips screwdriver and unscrew the three 3.5mm screws holding the daughterboard in place. Nice and easy—just the right amount of torque!
Step 34


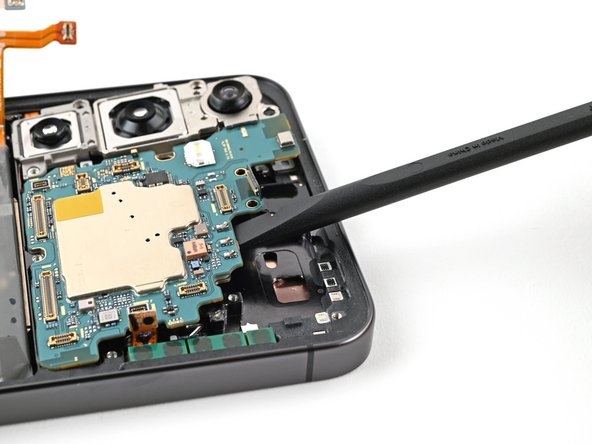
Avoid prying directly on the battery! Instead, tilt your spudger and gently nudge against the frame. You've got this!
- Grab your spudger and pop up the top right corner of the daughterboard—like you’re opening a stubborn bag of chips.
- Lift the daughterboard out, nice and easy.
- When you’re putting things back together, slide the USB-C port into place at a bit of an angle, then press the daughterboard flat onto the frame. It’s like fitting the last puzzle piece—satisfying!
Tools Used
Step 35

- Time to get this front camera loose! Use a hair dryer or a heat gun to warm it up until it's hot to the touch. This will help it come off more easily.
Tools Used
Step 36
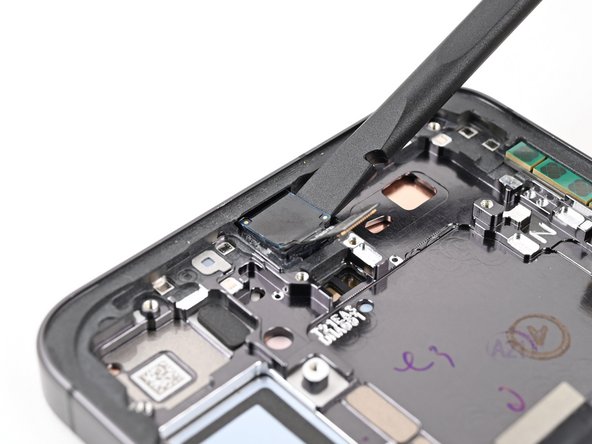

Be careful when removing the camera, as the adhesive can be super stubborn. Take your time, and don't be afraid to add a little more heat if it's feeling stuck. Just remember to keep the sensor and lens together - we don't want any separated parts!
If the camera refuses to budge, grab a SIM card eject tool and gently scrape away the tough epoxy around it. Sometimes those little parts just want to hang on a bit longer!
- Slide the flat end of your spudger under the front camera and pop it out of its cozy spot in the frame.
Tools Used

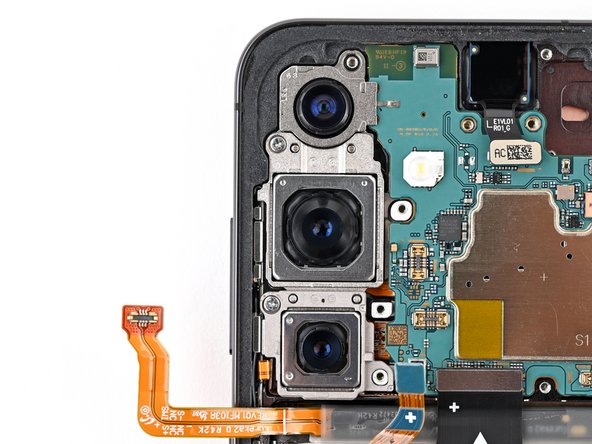
Step 37
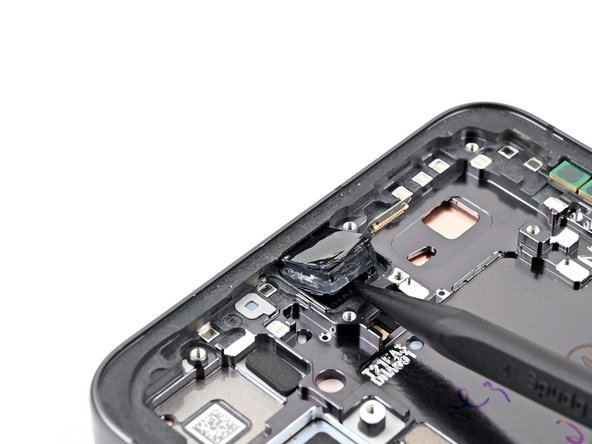

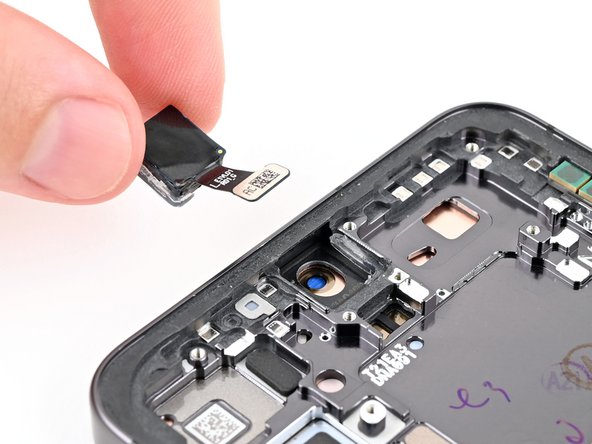
- Time to get a grip on that front camera! Use a spudger to carefully pry it out of its recess until you can get a good hold on it with your fingers.
- Now that you've got a good grip, go ahead and remove the front camera. Easy peasy!
Tools Used
Step 38

- Slip the pointed end of a spudger into the gap between the bottom of the top antenna and the frame—think of it as gently prying open a stubborn lid.
- Carefully lift the antenna away, breaking the adhesive hold without any drama.
- Grab it with your fingers and gently pull the antenna out of the frame—smooth and steady wins the race.
- When reassembling, don’t forget to transfer that conductive tape from the old antenna to the new one—keeping everything connected and happy.
Tools Used
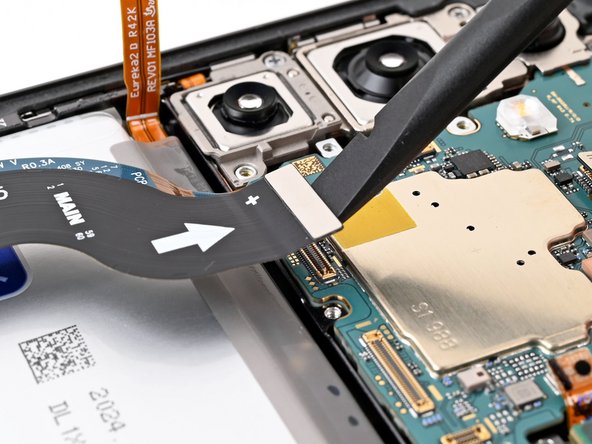
Step 39


- Take the flat end of your spudger and gently pop up the display cable connector sitting near the bottom edge of the phone. It’s a little like flipping a tiny pancake—just easier.
- Carefully lift out that display cable and set it aside. You’re making great progress!
Tools Used
Step 40

- Grab a Phillips screwdriver and gently unscrew those two 2.5 mm screws holding down the bottom antenna. Easy does it—you're well on your way! If you need help, you can always schedule a repair.
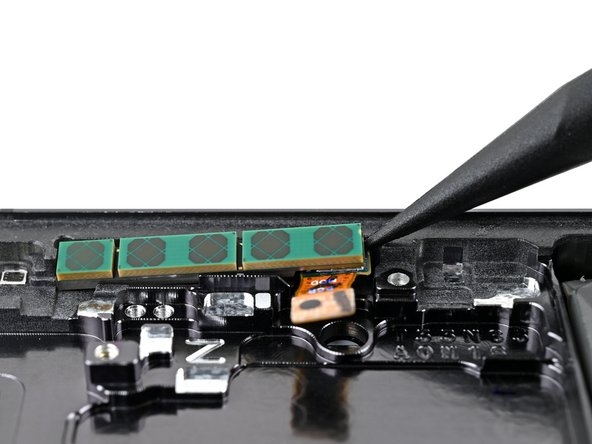
Step 41

- Slide one arm of your angled tweezers or a trusty SIM eject tool into the bottom screw hole on the lower antenna bracket. It’s like poking a friend to get their attention—just gentler.
- Carefully pry up the antenna bracket and lift it out of its cozy spot until you can get a solid grip with your fingers. Just a little wiggle, and it’s free—no wrestling required!
Tools Used

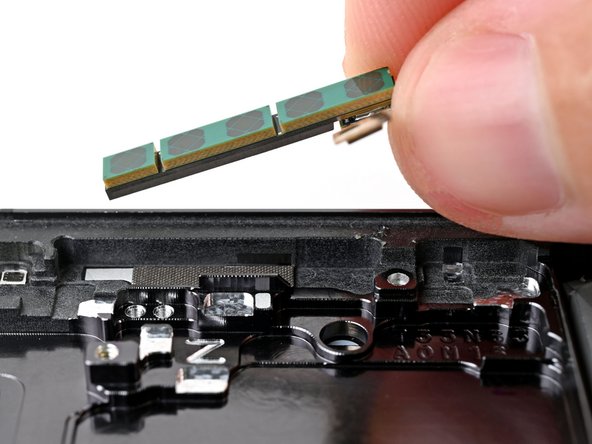
Step 42
- Gently lift the bottom antenna out of its cozy spot and set it aside.
Step 43

- Ready to put things back together? Just work your way backwards through the steps.
- If your repair didn't go as planned, don't sweat it—double-check your work or reach out for some troubleshooting.
- Got leftover parts or a device you can't revive? Drop them off at an R2 or e-Stewards certified recycling spot.
- If you’re still stuck, you can always schedule a repair with Salvation Repair.