Samsung Galaxy S24 Plus USB-C Port and Daughterboard Replacement
Duration: 45 minutes
Steps: 26 Steps
Time to give your Samsung Galaxy S24+ a fresh start with a new USB-C port and daughterboard! Since the USB-C port is attached directly to the daughterboard, swapping one means swapping both. Follow these steps to get your device back in action.
Step 1


Let your phone's battery level drop below 25% before you get started—trust me, a fully charged lithium-ion battery is not your friend right now. If your battery looks swollen, handle it with extra care.
- Unplug your phone from any cables—let it be free!
- Press and hold both the side key and the volume down button, then tap 'Power off' to shut down your phone. Easy does it!
Step 2

You can use a hair dryer, heat gun, or hot plate to loosen things up, but go easy—your phone’s screen and battery aren’t fans of high heat. Handle with care to avoid any accidental damage.
- Warm up an iOpener and gently press it onto the right edge of the back cover for about two minutes. This will help soften the adhesive, making the cover easier to pry off later.
Tools Used


Step 3

If you're struggling to get a gap started, try adding a bit more heat to loosen up that stubborn adhesive. Just make sure to follow the iOpener instructions—no need to roast your device!
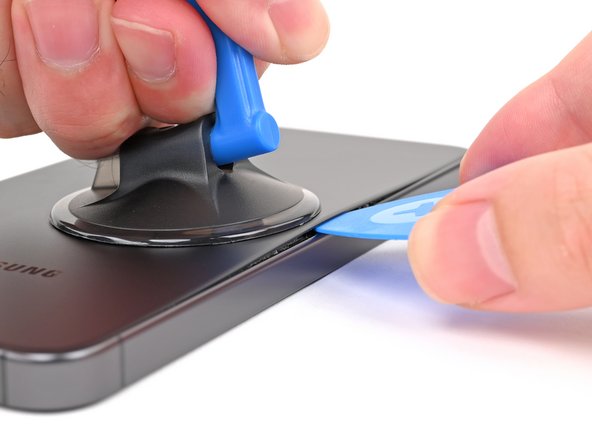
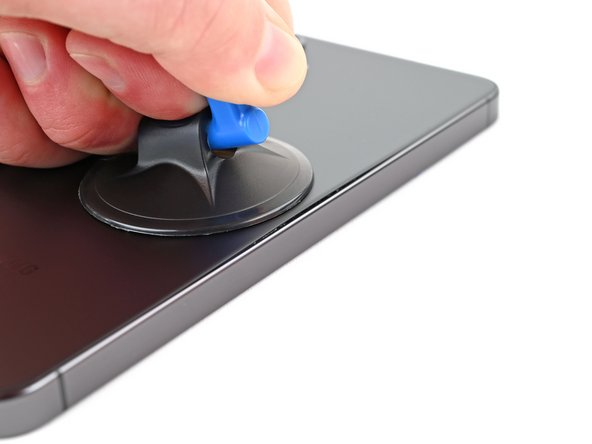
- Stick the suction handle right near the center of the device’s right edge.
- Give the handle a good, steady pull to pop open a gap between the back cover and the frame.
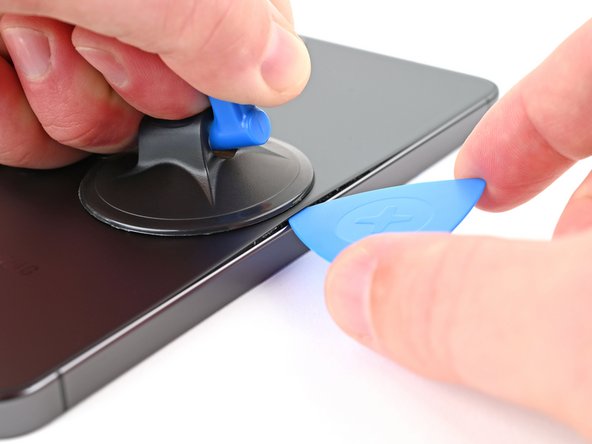
- Slide an opening pick into that newly made gap—nice and easy.
Tools Used

Step 4


- Gently rock the pick back and forth along the right edge to loosen the adhesive - it's like persuading a stubborn sticker to let go!
- Leave the pick in place near the bottom right corner to keep the adhesive from sneaking back in and resealing.
Step 5

- Lay a heated iOpener on the bottom edge of the back cover and hold it there for about two minutes. This will help soften the adhesive and make the cover easier to lift.
Tools Used
Step 6


- Gently twist the opening pick around the bottom right corner to loosen the adhesive. Keep it steady and friendly—you're just giving it a little nudge to get things started. If you need a hand along the way, you can always schedule a repair.
Step 7

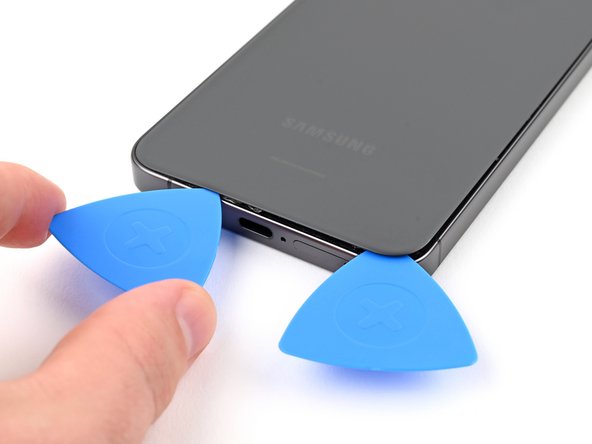
- Pop in another pick down at the bottom right—double trouble for that glue.
- Slide the new pick along the bottom edge to the left, giving the adhesive the ol’ slip-n-slide.
- Let the pick chill in the bottom left corner like a tiny bouncer, keeping that sticky stuff from sneaking back together.
Step 8

- Warm up that iOpener and give it a cozy hug on the left edge of the back cover for a solid two minutes. You'll be amazed at how it helps loosen things up!
Tools Used
Step 9


- Gently wiggle the opening pick around the bottom left corner to loosen the adhesive. Keep it steady and work your way around to free things up.
Step 10


- Time to get this repair started! Insert a third opening pick at the bottom left corner to begin loosening the adhesive.
- Now, gently slide the pick toward the top left corner to separate the adhesive and make progress on your repair.
- Leave the pick near the top left corner to prevent the adhesive from resealing - you're making great progress so far!
Step 11

- Let's get this repair started! Apply some heat to the top edge of the back cover using a heated iOpener for about two minutes.
Tools Used
Step 12


- Let's get this repair started! Rotate the opening pick around the top left corner to loosen the adhesive and gently pry it open.
Step 13


- Grab a fourth opening pick and gently slide it in at the top left corner to get things started.
- Carefully wiggle the pick toward the top right corner to loosen up the adhesive and keep the gap open.
- Keep that pick near the top right corner to stop the adhesive from sealing back up as you work.
Step 14


Above the flash, you’ll find a little patch of adhesive surrounding the rear microphone. It's like a cozy blanket for your mic!
- Get your opening pick ready and aim it right at the flash—like you're lining up a perfect shot.
- Slide the pick under the top edge of the back cover. You'll know you're hitting the adhesive when things get a little sticky.
- Keep that pick moving toward the bottom, gently lifting the cover as you go, until the cover pops free from the adhesive. Smooth moves!
Step 15


If the back cover is being stubborn, slide an opening pick around the edges—sometimes that adhesive likes to make a comeback.
Now’s the perfect moment to power up your phone and check that everything’s working before sealing things up. Just make sure to turn it off again before you jump back into the repair.
Water resistance depends on how well you stick the back cover adhesive, but keep in mind your device won’t have its official IP rating anymore.
- First things first, let's pop off that back cover like a pro!
- As you get ready to put everything back together:
- Use tweezers or your trusty fingers to carefully peel off any sticky remnants from the back cover and your phone. If the adhesive is being stubborn, a little heat or some isopropyl alcohol (90% or higher) along with a coffee filter or lint-free cloth will work wonders!
- And if you’re rocking some custom-cut adhesives, be sure to check out this guide.
Tools Used


Step 16

Take a peek at the board near each press connector - you'll spot an arrow showing you the best spot to pry it open.
- Grab your trusty spudger and carefully pry up the wireless charging coil press connector from the motherboard. No rush, just a gentle lift!
- When it's time to reconnect those press connectors, line it up with the socket like you're setting a puzzle piece. Gently press down, starting on one side and then the other, until you hear that satisfying click. If it’s being a bit stubborn, don’t stress—just reposition and give it another try. For any tricky spots, feel free to schedule a repair.
Tools Used

Step 17


- Grab your trusty Phillips screwdriver and send those thirteen 3.5 mm screws packing—six guard the wireless charging coil and seven are hanging out with the loudspeaker.
Step 18


- Slide a spudger into the notch at the top left corner of the loudspeaker, where the arrow points. Then, gently pry up to unclip the loudspeaker from the frame. Need a hand? You can always schedule a repair if things get tricky.
Tools Used
Step 19


- Gently pop the loudspeaker up and away from the frame using your fingers—like lifting the lid on a secret snack stash.
- Take out both the wireless charging coil and the loudspeaker from the frame. Double score!
- When you’re putting it all back together, press around the edges of the loudspeaker until it snaps back in place. Then, send those screws home.
Step 20

- Grab your trusty spudger and gently lift the battery press connector to disconnect it. Take it slow, we got this!
Tools Used
Step 21


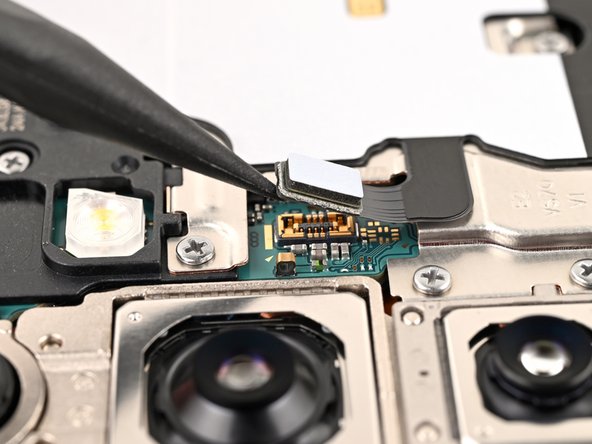
- Grab your trusty spudger and gently pop up both interconnect cable press connectors from the daughterboard. Easy does it!
Tools Used
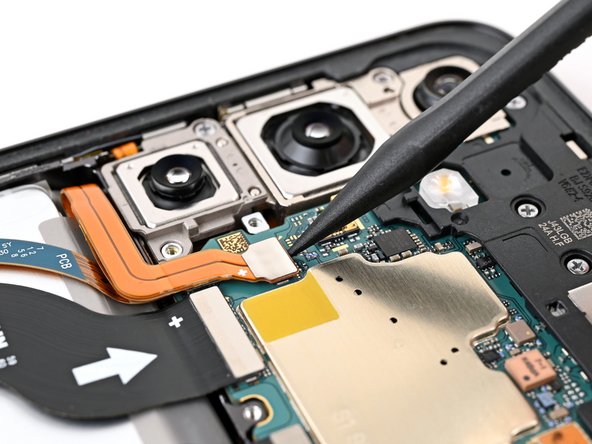
Step 22


- Grab a spudger and gently pry up to disconnect both interconnect cable press connectors from the motherboard. Easy does it—just keep it gentle and steady. If you need a hand, you can always schedule a repair.
Tools Used
Step 23


- Unplug and lift out those interconnect cables from your phone—they’re ready for a break.
Step 24
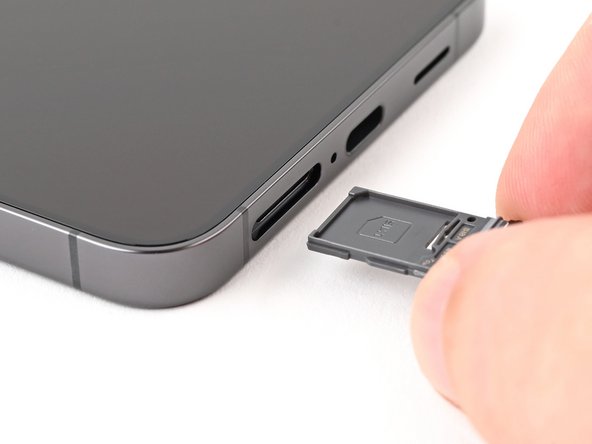
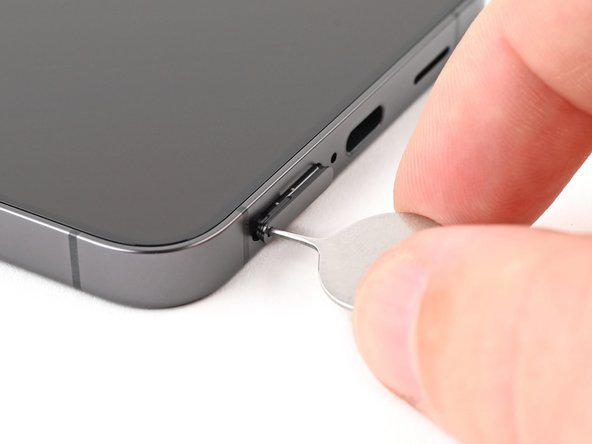

Oops! If the SIM eject tool slipped into a microphone hole, no stress—your mic is probably just fine.
- Grab your trusty SIM eject tool, a bit, or even a straightened paper clip—whatever's handy—and gently insert it into the SIM card tray hole located on the bottom edge of your phone.
- Give that SIM eject tool a little push to pop out the SIM card tray like a champ.
- Now, carefully pull out the SIM card tray and set it aside.
Step 25


- Grab your trusty Phillips screwdriver and remove the three 3.5mm screws holding the daughterboard in place. Easy peasy, right?
Step 26


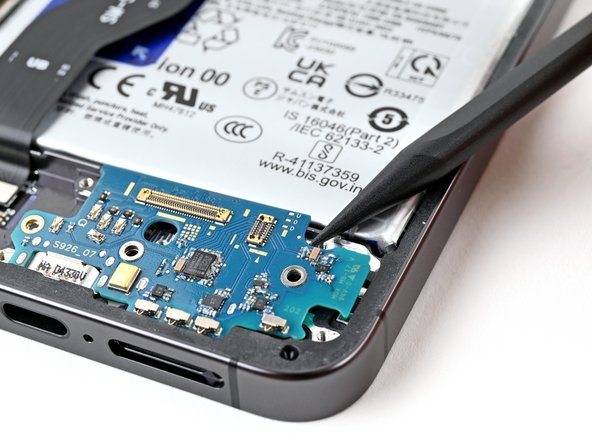
Keep your spudger angled toward the frame, not the battery—nobody wants a surprise!
- Slide the tip of your spudger under the top-right corner of the daughterboard and give it a gentle nudge—think of it as the board’s cue to exit the stage.
- Lift the daughterboard out and set it aside; it’s done its part for now.
- When you’re putting everything back together, sneak the USB-C port back into its little nook at a slight angle, then press the daughterboard flat—like tucking it in for a nap.