Samsung Galaxy S23 Plus Battery Replacement
Duration: 45 minutes
Steps: 31 Steps
This guide focuses on the battery itself. Let's get ready to power up!
Get ready to give your Samsung Galaxy S23+ a fresh start by swapping out that tired old battery! This guide will help you tackle the battery replacement on its own. If you’re also thinking about replacing the screen and battery assembly together, you’ll want a different guide for that. Remember, your phone’s lithium-ion battery doesn’t last forever. If your device is running out of juice faster than you can charge it, it might be time for a new battery. And if you notice any swelling, be sure to handle it with care! Just a heads-up: your phone's water resistance may take a hit after the repair, depending on how well you reapply that back cover adhesive. So let’s dive in and breathe new life into your device!
Step 1


Let your phone's battery drop below 25% before starting—fully charged lithium-ion batteries can be a bit feisty! If it looks swollen, treat it with extra care.
- First things first, let’s disconnect any cables from your phone. Give those cords a break!
- Now, press and hold the side key along with the volume down button until you see the option to 'Power off.' Go ahead and select that to turn off your phone. You're doing great!
Step 2

A hair dryer, heat gun, or hot plate can do the trick here—just go easy with the heat! Too much can mess with the display or battery, and nobody wants that kind of meltdown.
- Warm up your iOpener and let it chill on the right edge of the back cover for about two minutes. This helps loosen up the sticky stuff underneath.
Tools Used


Step 3


If you're having a tough time making a gap, don't sweat it! Just add a little more heat to help loosen that adhesive up. Remember to check out the iOpener instructions to keep things from getting too toasty.
- Place the suction handle near the center of the right edge of the back cover. Make sure it’s positioned right, like you're about to pull a secret door open.
- Now, gently but firmly pull on the suction handle, creating a nice gap between the cover and the frame. You got this!
- Slip an opening pick into the gap, like you’re about to crack open a treasure chest.
Tools Used

Step 4


- Gently slide the pick back and forth along the right edge to start loosening that sticky adhesive.
- Keep the pick in place near the bottom right corner to stop the adhesive from sealing back up. You got this!
Step 5

- Warm up the adhesive at the bottom edge by letting a heated iOpener chill there for two minutes—just enough time to loosen things up without breaking a sweat.
Tools Used
Step 6
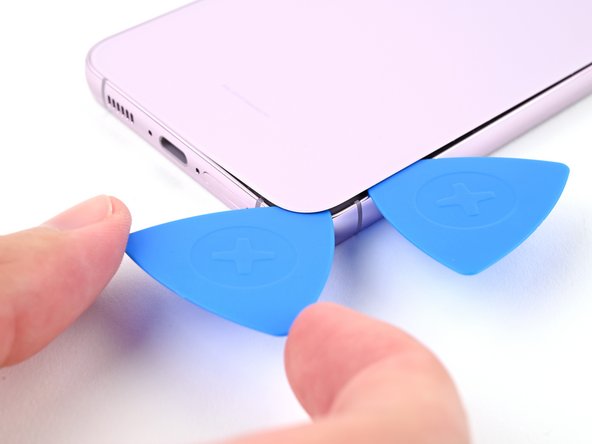

- Slide pick numero-dos into the bottom-right corner like you're sneaking it into a party.
- Give that pick a smooth spin around the corner—think lazy Susan—to pop the glue loose.
Step 7


- Glide the opening pick down to the bottom left corner to break up that stubborn adhesive.
- Keep the pick parked in the bottom left corner—this stops the adhesive from sticking itself back together.
Step 8

- Grab your iOpener, give it a warm-up, and hug the left edge of the back cover for a cozy two-minute spa treatment.
Tools Used
Step 9


- Swing that opening pick around the bottom left corner and send that adhesive packing.
Step 10


- Start by inserting a third pick at the bottom left corner of the device.
- Gently slide your pick upward toward the top left corner to loosen the adhesive hold.
- Keep the pick in the top left corner to prevent the adhesive from resealing as you work.
Step 11

- Warm up an iOpener and gently press it against the top edge of the back cover for about two minutes. This helps loosen the adhesive so you can lift the cover more easily.
Tools Used
Step 12


- Slide a fourth opening pick into the top left corner to get things started.
- Twist it gently around that corner to loosen the adhesive and make separation easier.
Step 13


- Gently slide your opening pick into the top right corner to break that adhesive seal like a pro.
- Keep the pick in that corner to stop the adhesive from getting all clingy again.
Step 14


Be careful not to bump the rear cameras with your pick. A little nudge could leave those lenses in a not-so-happy state.
There's a stubborn patch of adhesive hanging out right under the flash.
If you peek through the flash cutout, you'll spot the opening pick doing its thing.
- Line up the tip of your opening pick with the flash cutout—think of it as aiming for the sweet spot.
- Gently slide the pick underneath the top edge of the back cover until you feel it catch on the adhesive—that's your cue to keep going.
- Keep working your way down toward the bottom of the phone, gradually separating the adhesive from the back cover. Stay patient and steady!
Step 15


If your cover is still sticking to the frame, grab an opening pick and gently slide it around the edge until the cover pops off completely. Take your time—patience pays off here.
- Pop off the back cover like you're opening a treasure chest.
- When you're putting everything back together:
- Now’s a great time to fire up your phone and make sure all the bells and whistles are working before sealing things up. Don’t forget to shut it down again before you keep going.
- Sticky leftovers? Tackle those with tweezers or your fingers. If they’re being stubborn, a bit of heat and some isopropyl alcohol (90% or stronger) will do the trick.
- If you’ve got custom-cut adhesives, check out this guide.
- Going with double-sided tape? This guide has you covered.
Tools Used


Step 16


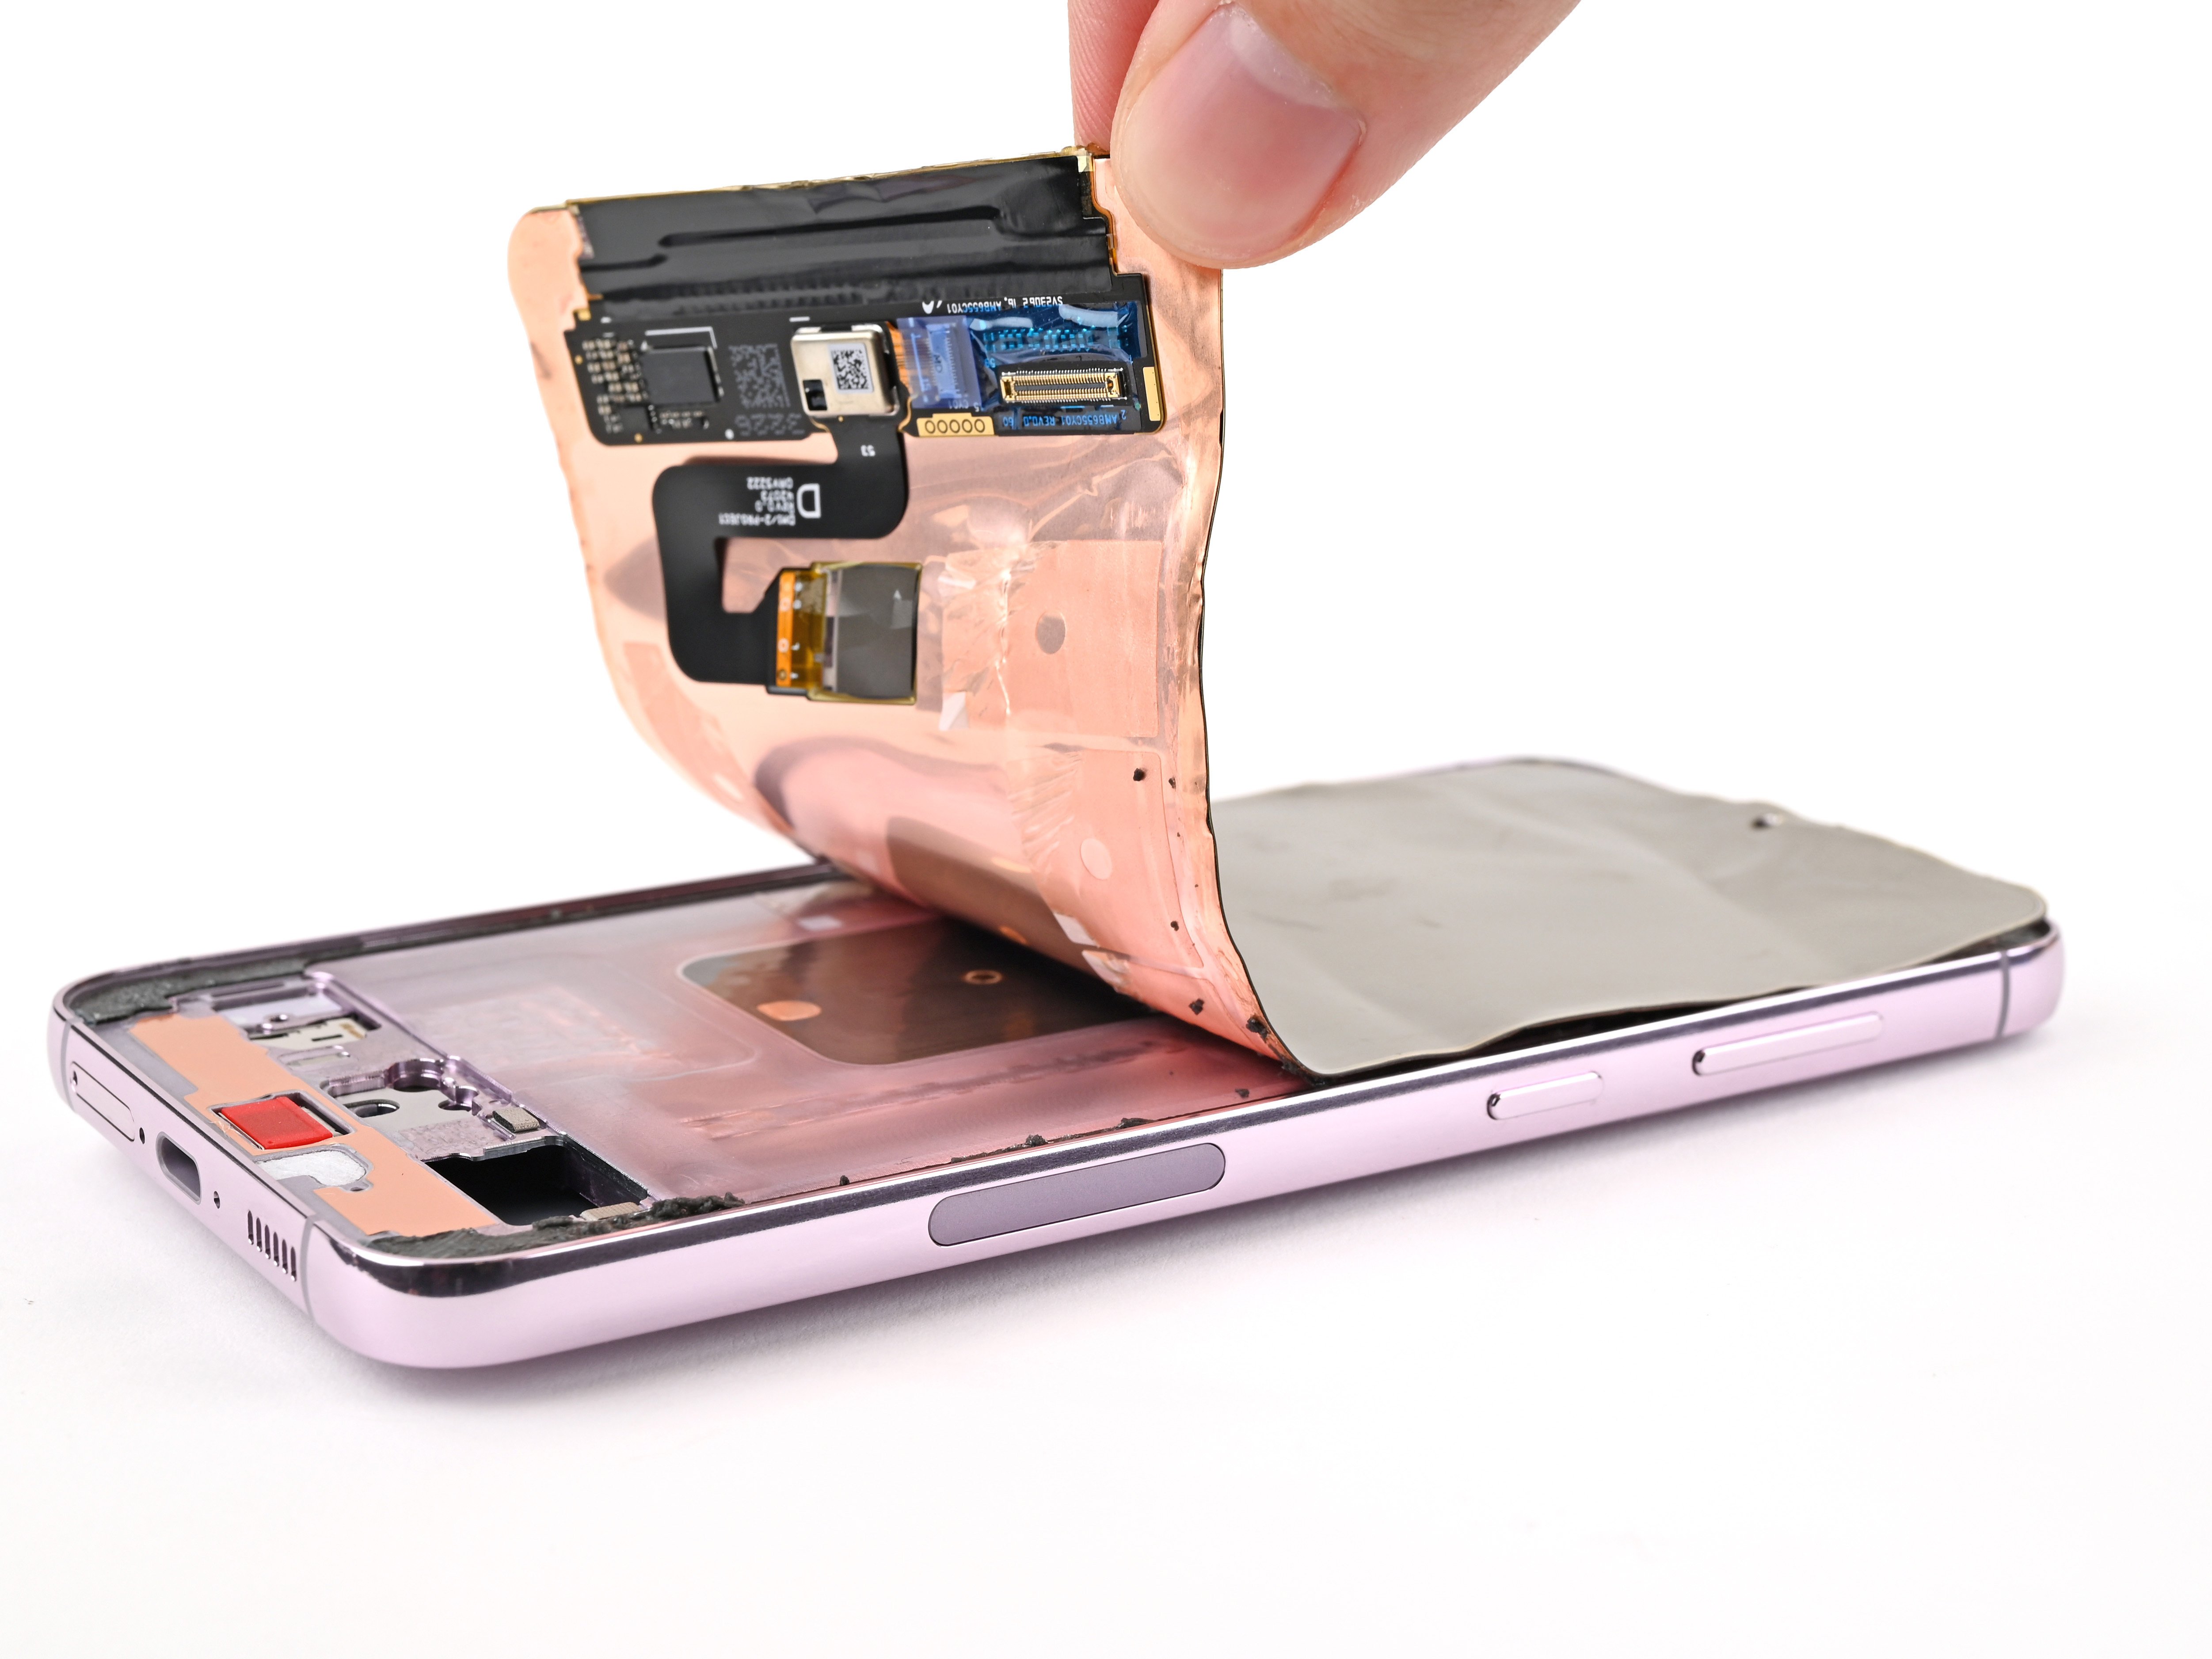
- Grab your trusty spudger and gently pop up the wireless charging coil connector from the motherboard, kind of like flipping a tiny pancake.
- When it's time to reconnect, line up the press connector and give each side a gentle press until you hear a click—no need to squish the middle like a sandwich. A misaligned connector could bend pins and really mess things up, so take your time.
Tools Used

Step 17


- Grab a spudger and gently pry up the NFC antenna press connector to disconnect it. Keep it light but firm—you're doing great! If you need a hand, you can always schedule a repair.
Tools Used
Step 18


- Grab your Phillips screwdriver and take out the thirteen 3.5 mm-long screws holding down the wireless charging coil and the loudspeaker.
- You’ll find six screws keeping the wireless charging coil in place.
- And seven screws are holding the loudspeaker. Time to set those free!
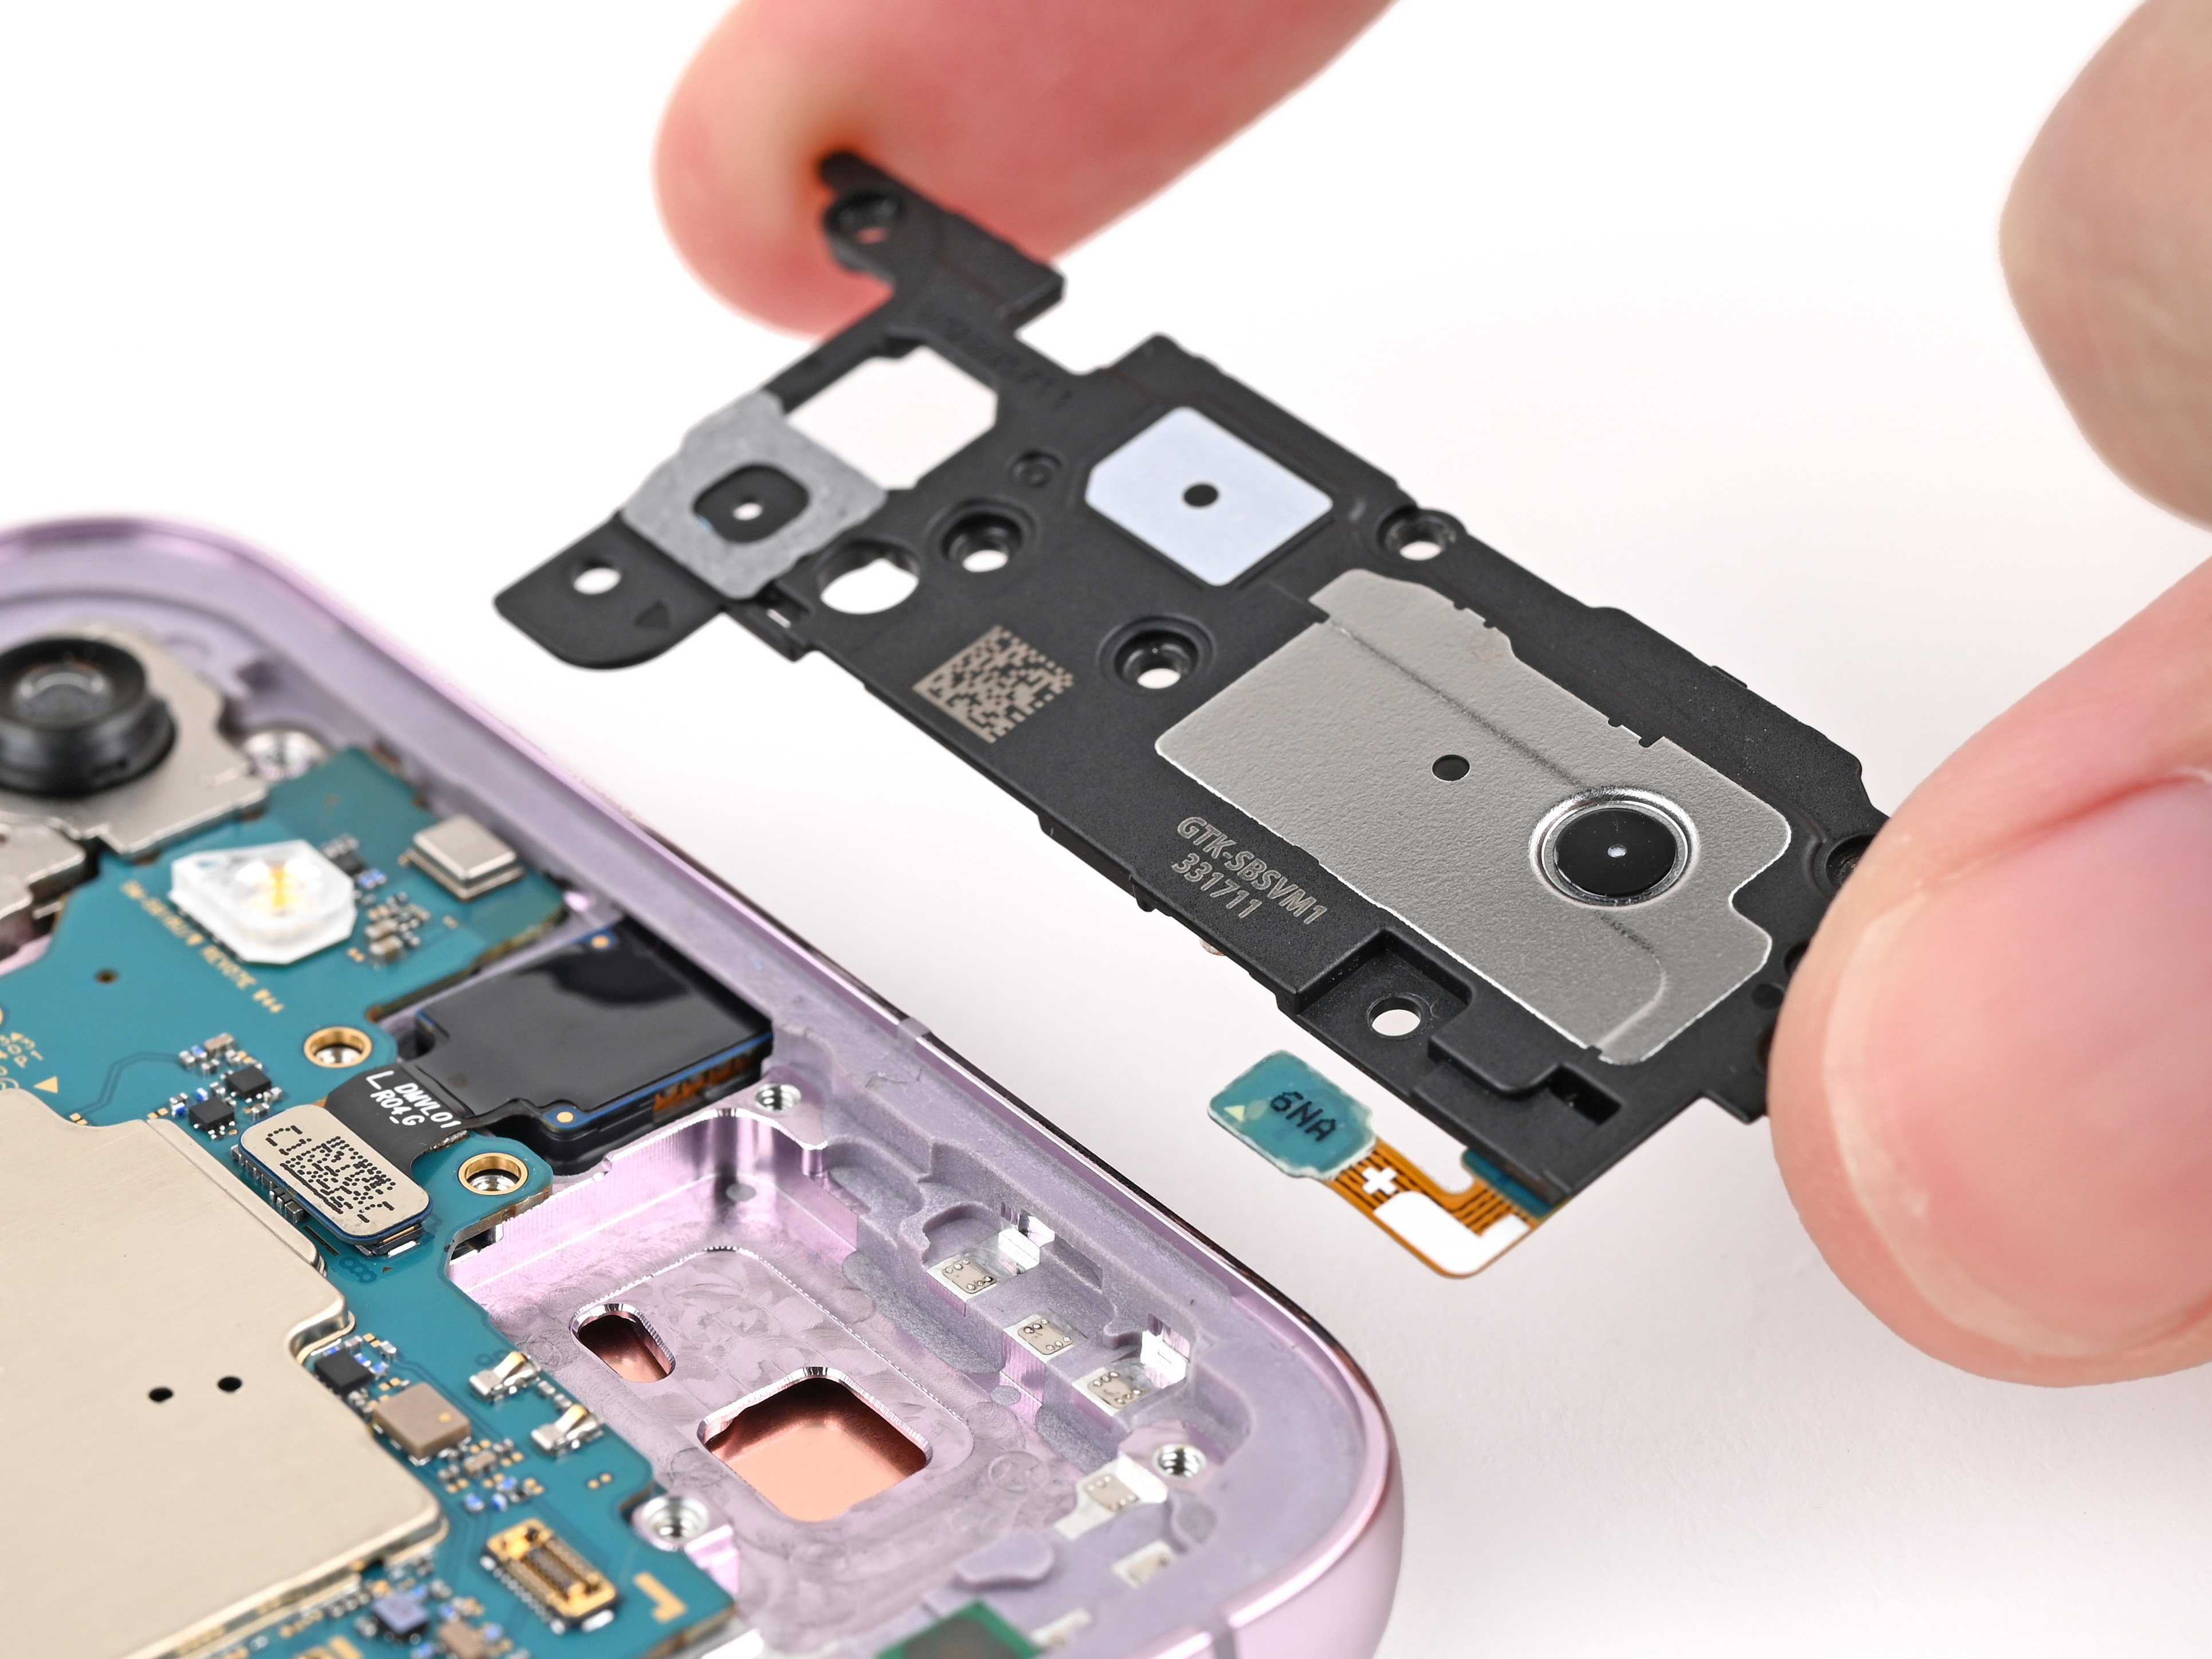
Step 19


- Time to get this loudspeaker out! Insert the point of your trusty spudger into the notch at the top left corner of the loudspeaker.
- Gently pry up to unclip the loudspeaker from the frame. Easy does it!
Tools Used
Step 20
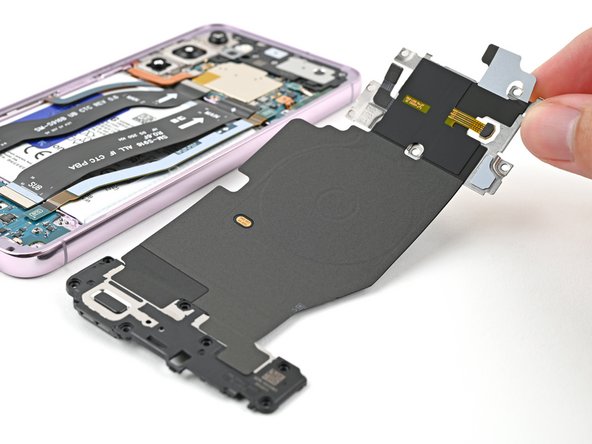

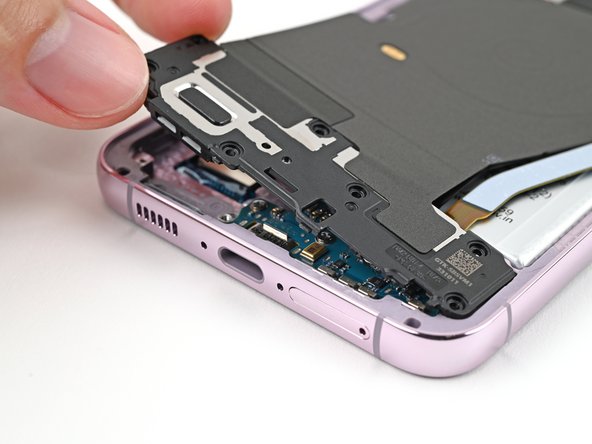
- Gently lift the loudspeaker away from the frame using your fingers until it's fully free.
- Take out the wireless charging coil along with the loudspeaker from the frame.
- When putting everything back together, press gently around the edges of the loudspeaker to snap it back into place on the frame.
Step 21


- Grab your spudger and gently wedge the tip under the battery press connector. Pry up and disconnect it to free the battery from its hold. If you need a hand, remember you can always schedule a repair.
Tools Used
Step 22


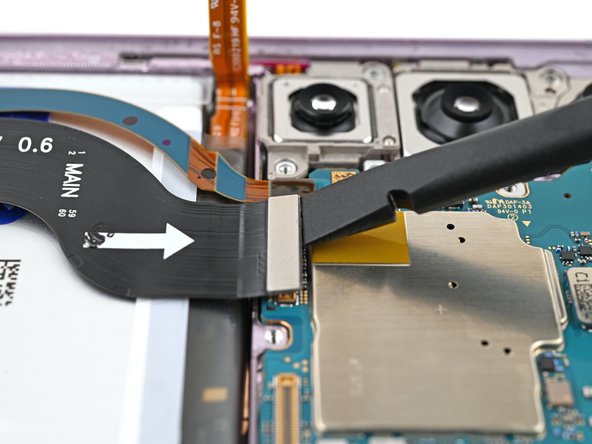
- Grab your trusty spudger and gently pop up those primary and secondary interconnect cable connectors from the daughterboard. Take it slow and keep it smooth!
Tools Used
Step 23

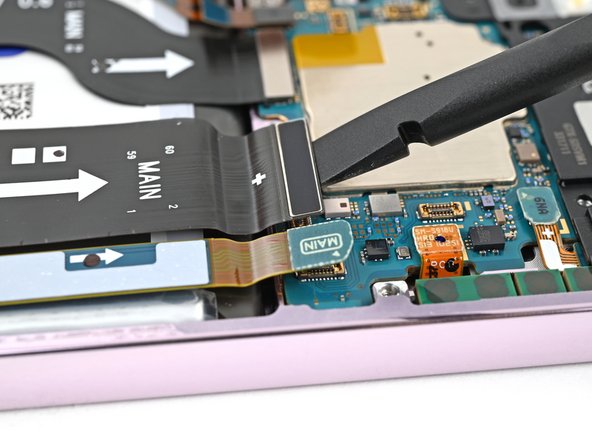
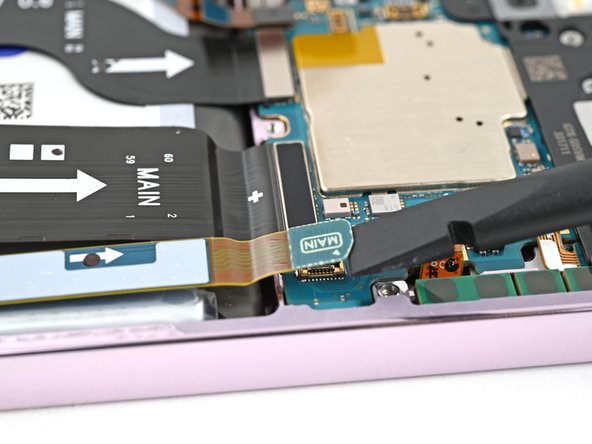
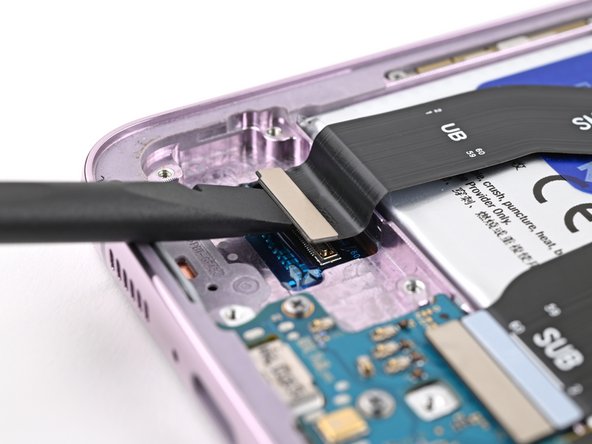
- Do the same unplugging magic for both the primary and secondary interconnect cable connectors on the motherboard.
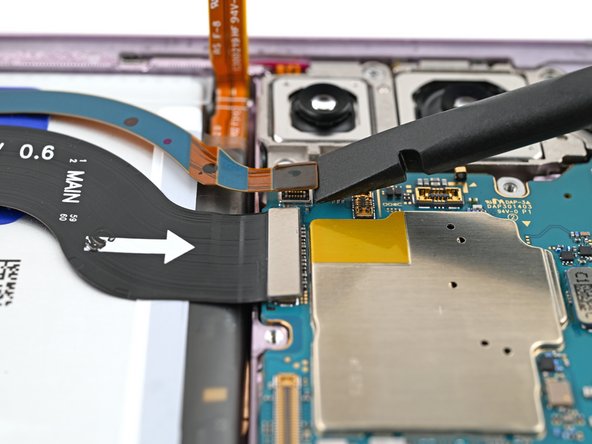
Step 24


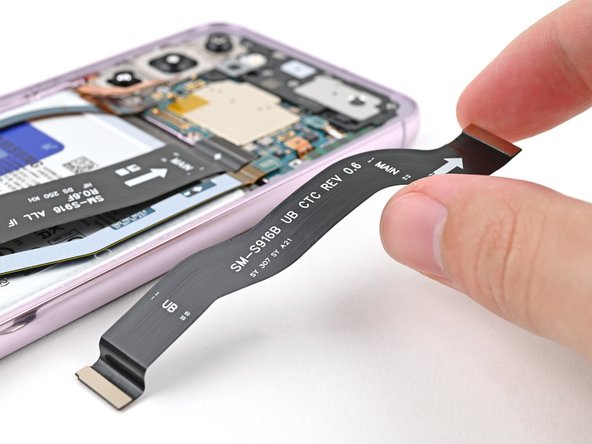
- Unplug those interconnect cables and set them aside—you're making progress!
Step 25

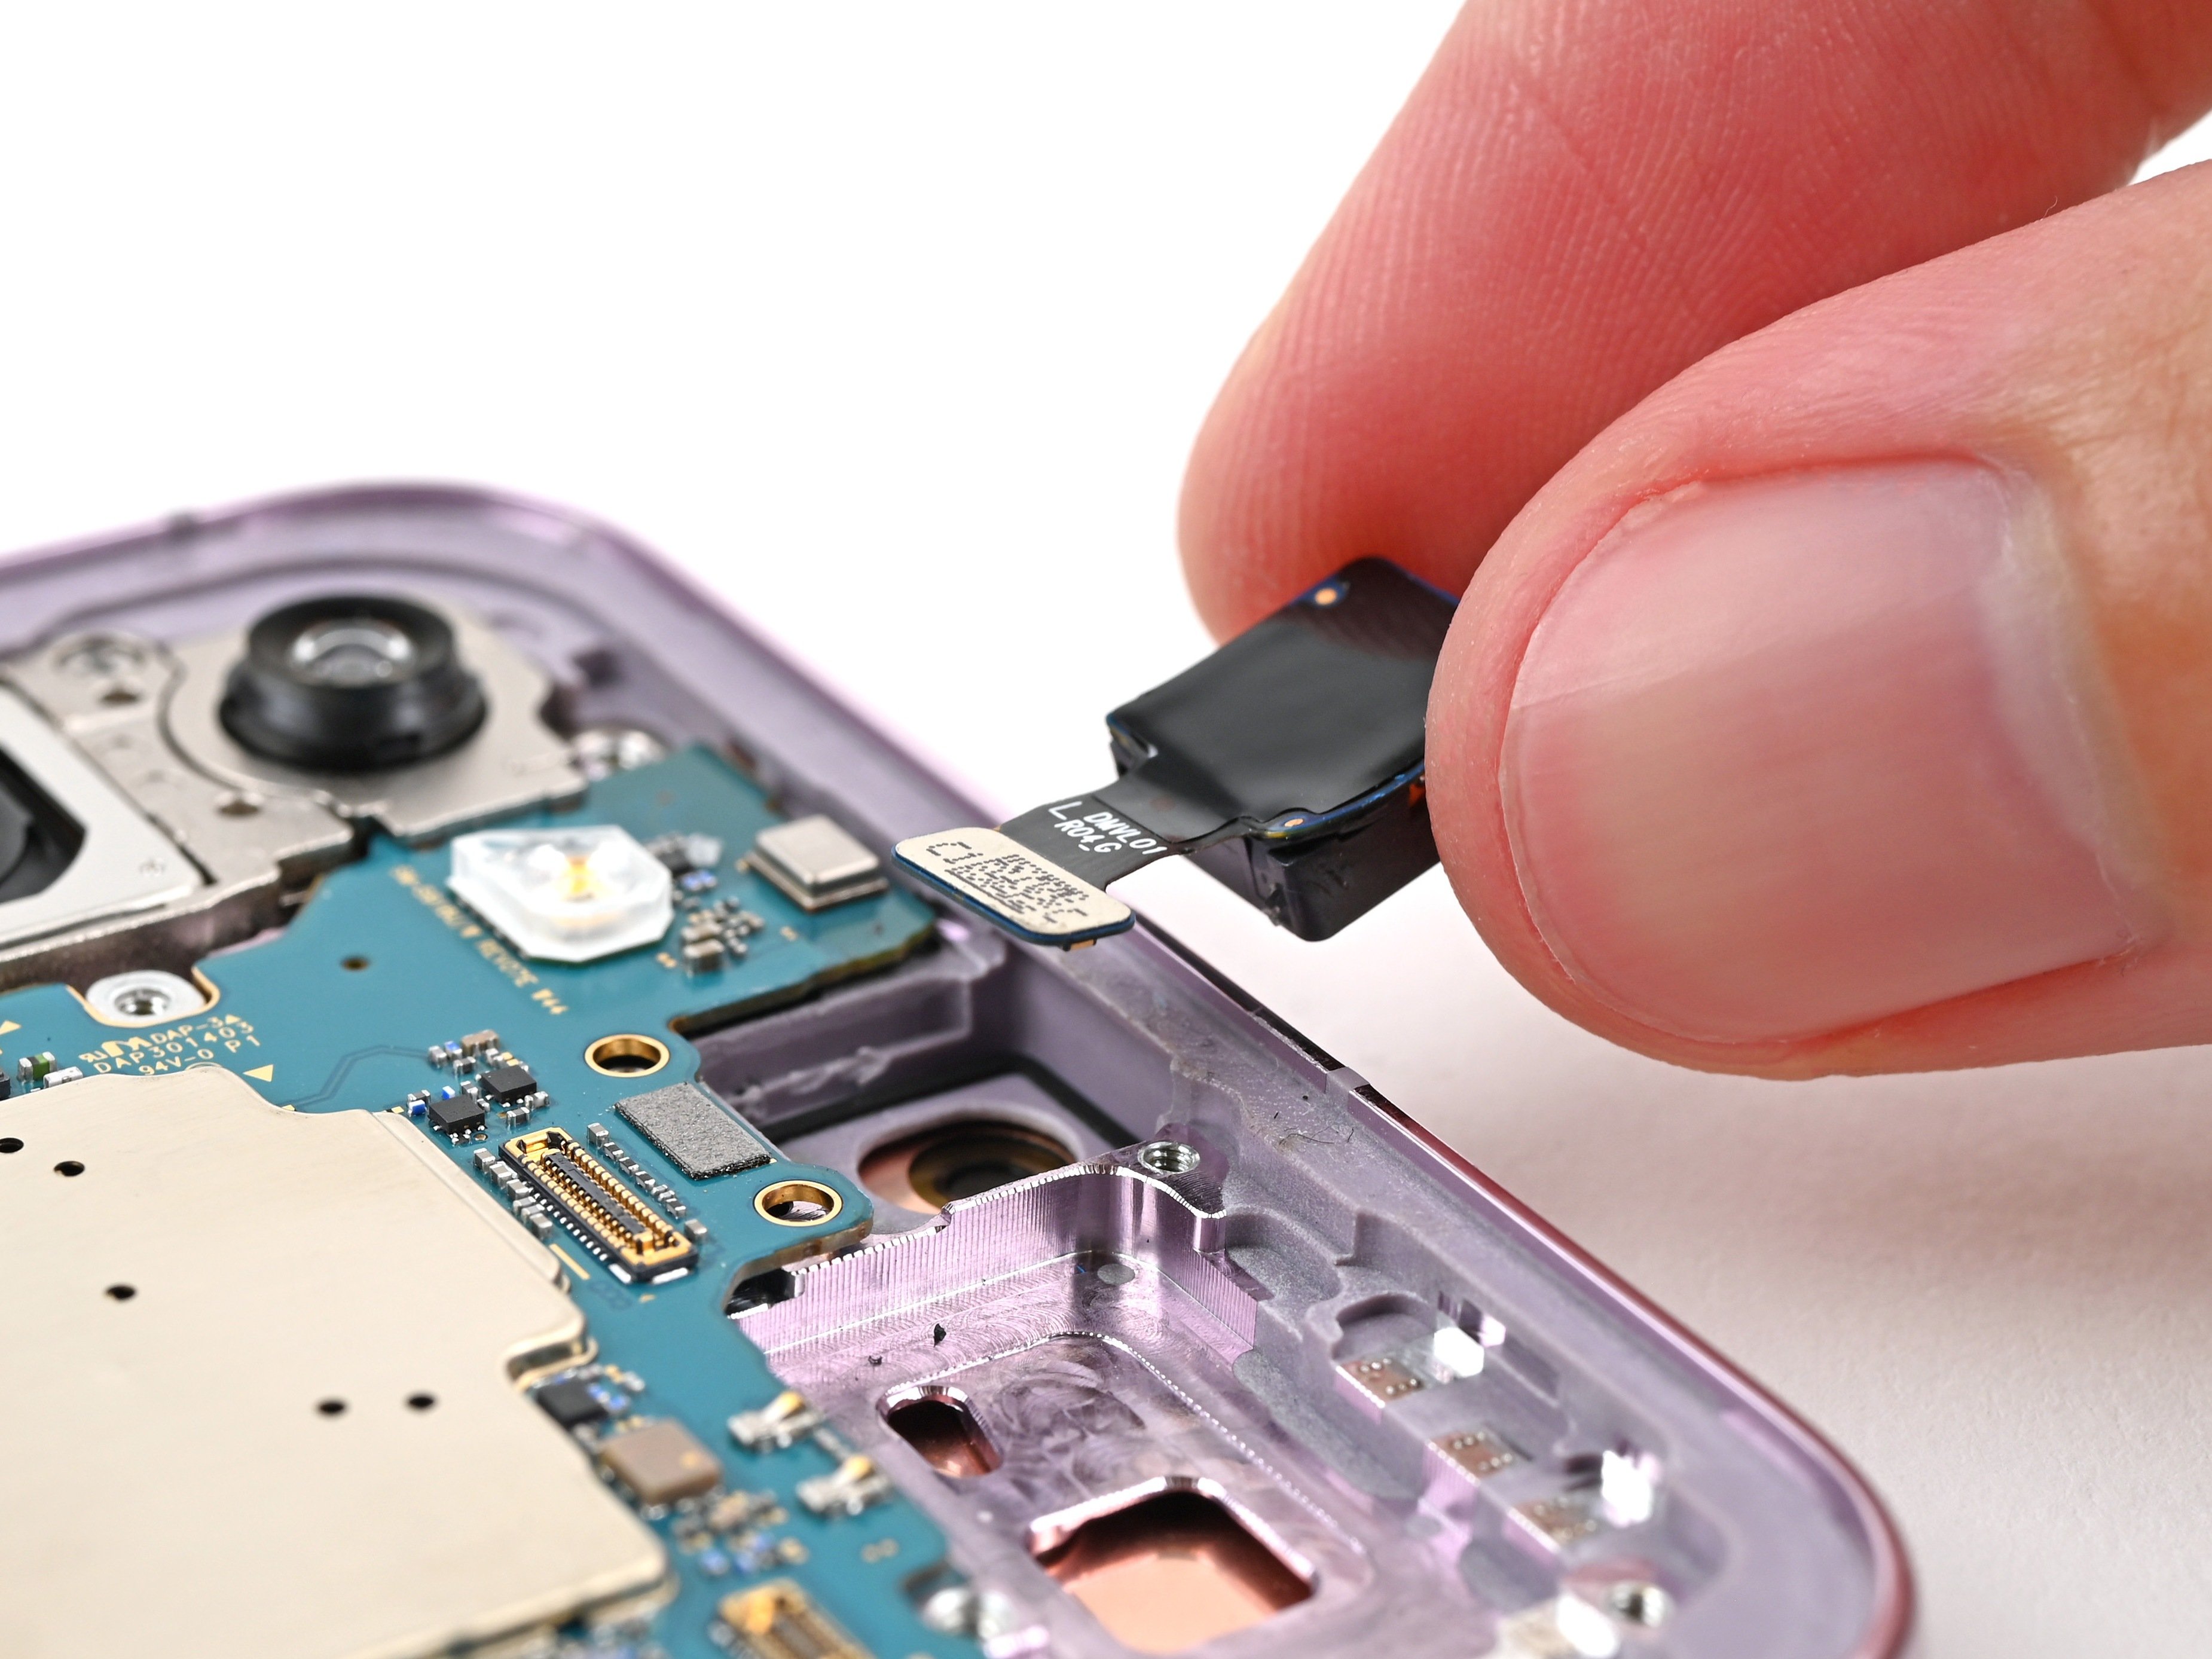
- Time to play connector-Tetris! Slide your spudger under the display and 5G mmWave ribbon cable connectors and pop them off the motherboard—gently does it.
Tools Used
Step 26

- Grab your trusty spudger and gently nudge the display cable press connector up from the bottom edge of your phone. It’s like giving it a little high-five to say, 'Hey, time to disconnect!'
- Once you’ve got that cable free, go ahead and remove it. You’re doing great!
Tools Used
Step 27

- Slide your finger in like a polite bouncer and gently scoot the battery and antenna cables out of the battery’s personal space.
Step 28
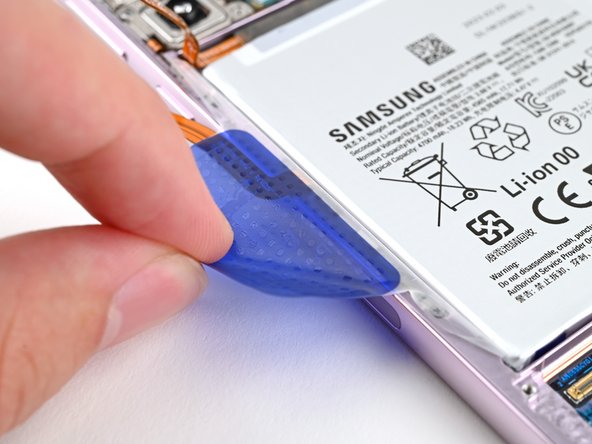

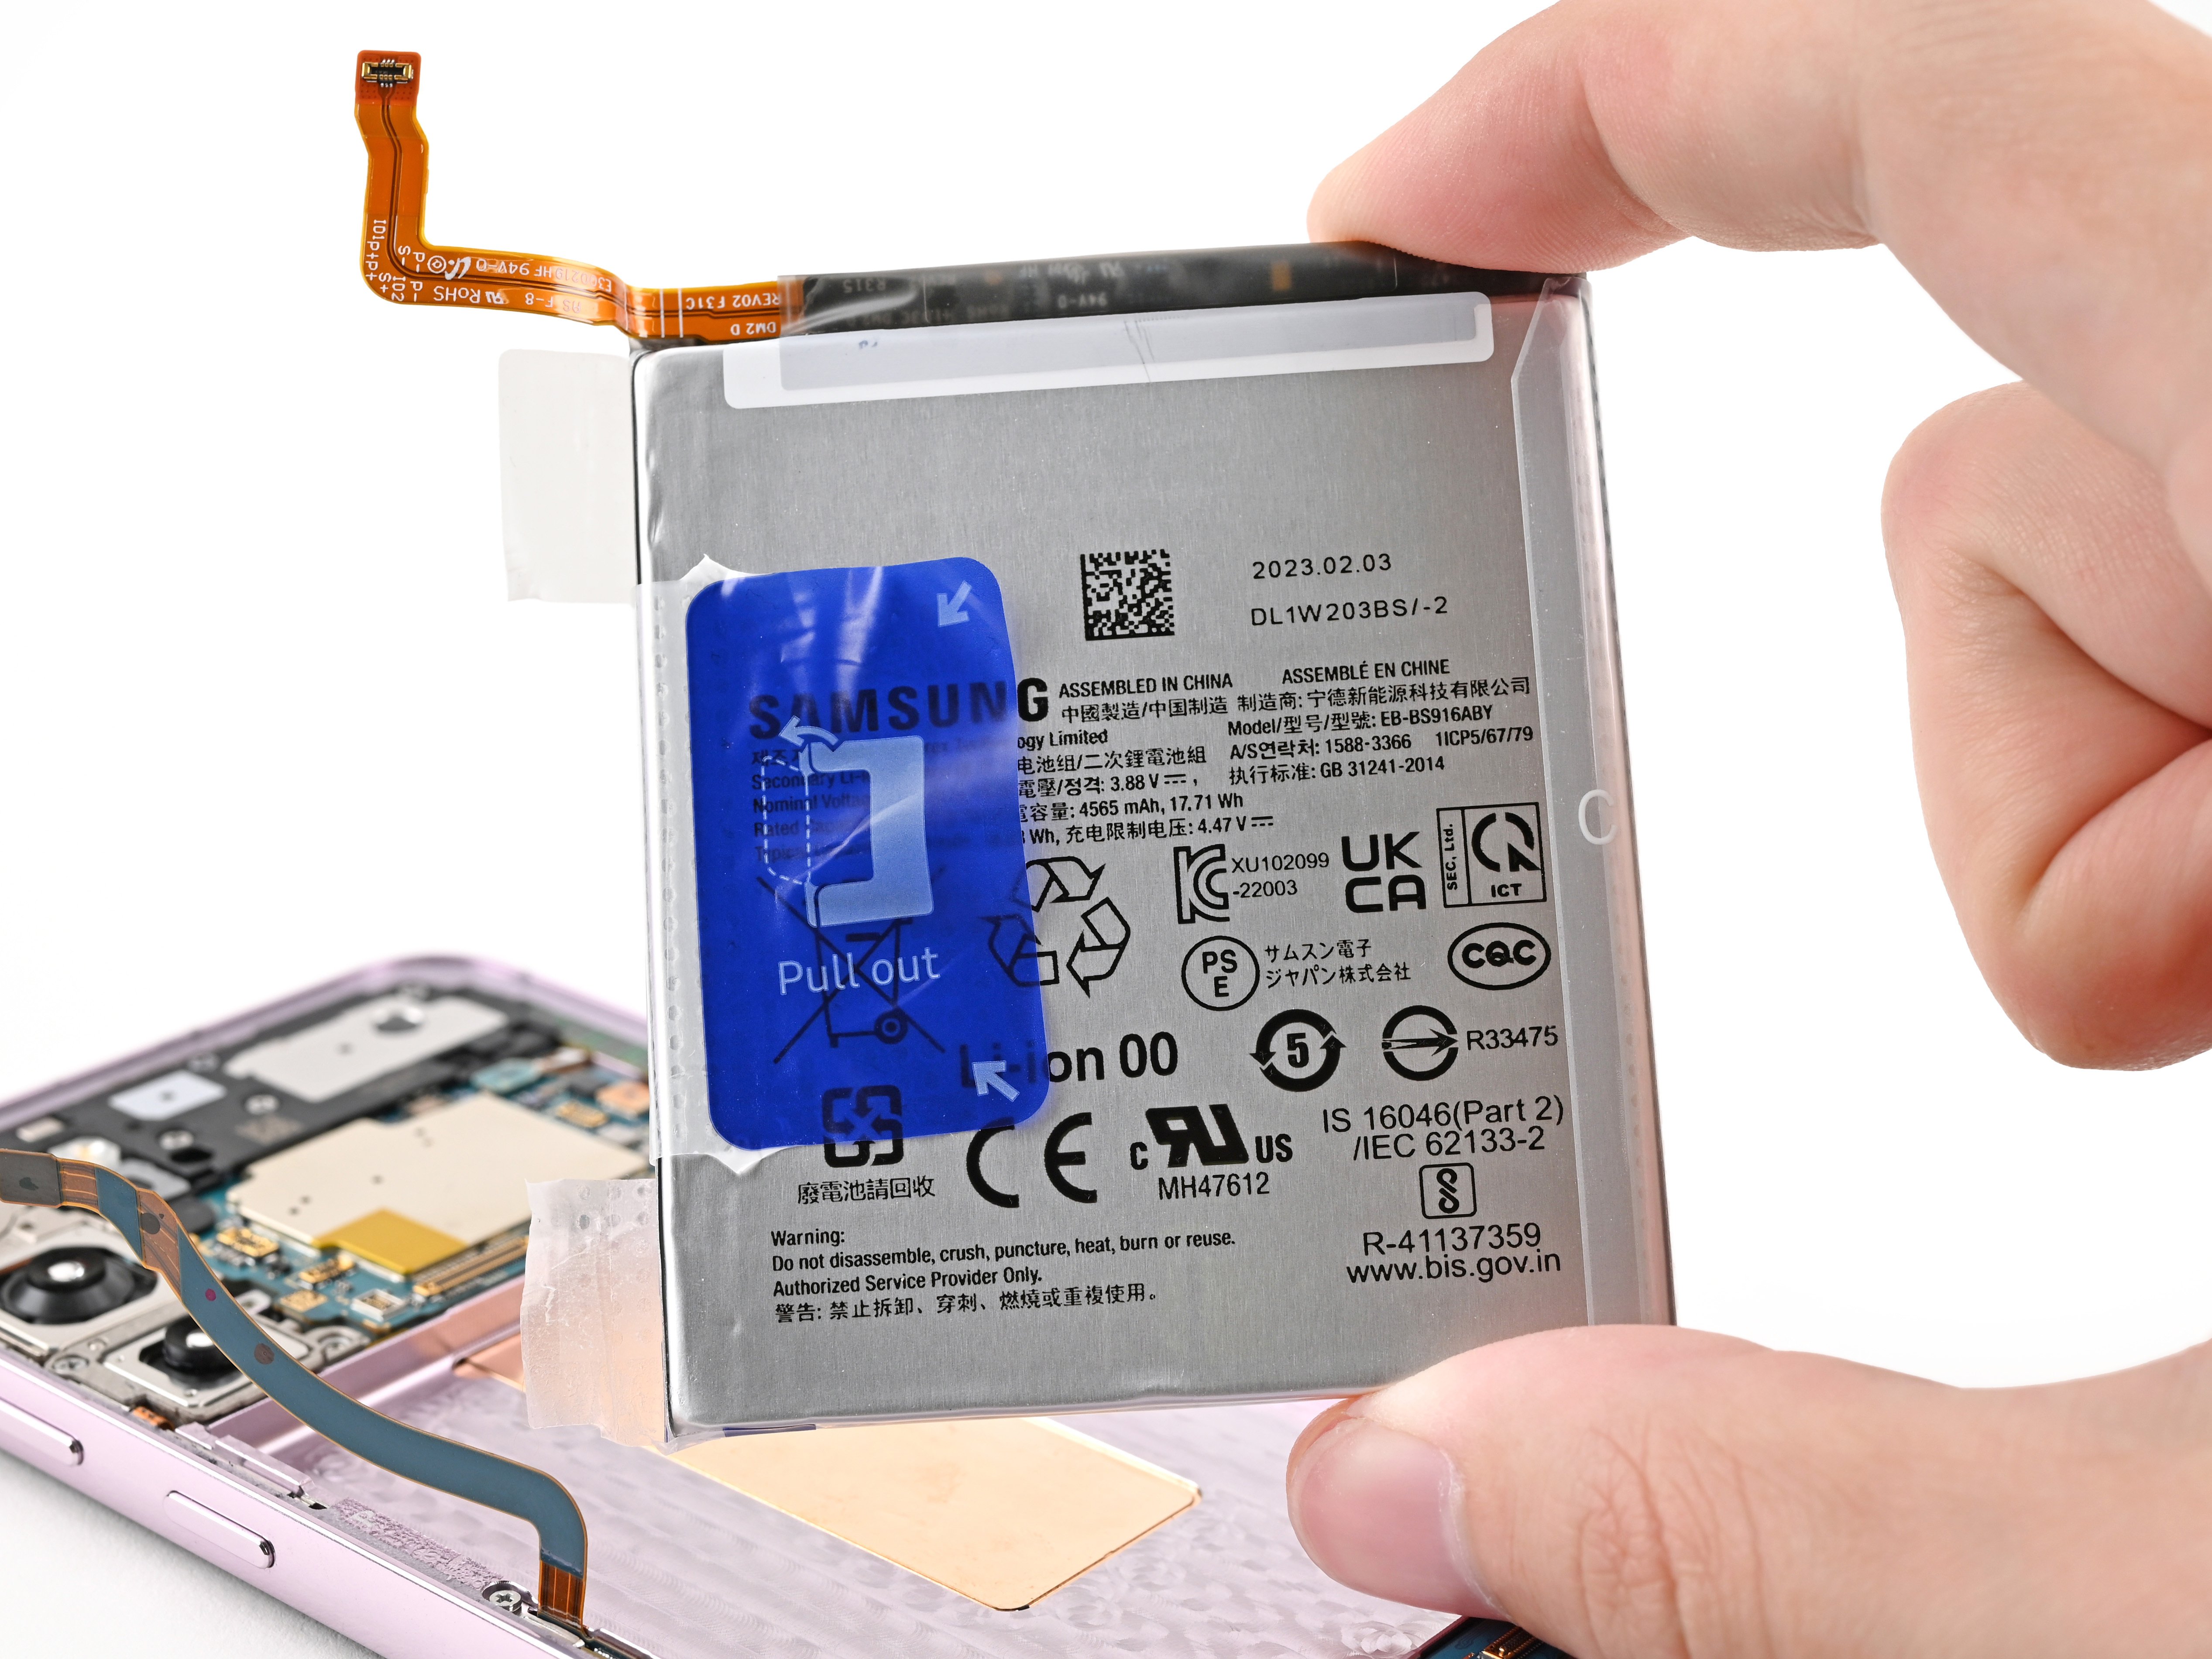
Handle the battery gently—avoid bending, creasing, or poking holes in it. Damaged batteries can leak nasty chemicals or even catch fire, so take care during these steps. If you need help, you can always schedule a repair.
- Grab the battery pull tab on the left side of the battery and gently peel it away. If you need a hand along the way, you can always schedule a repair.
Step 29
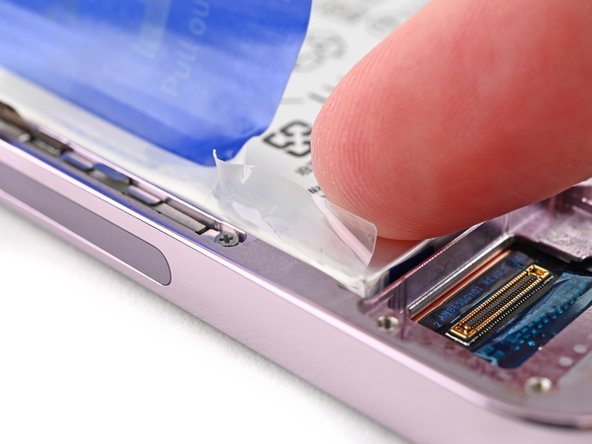
Make sure these tabs are totally separated, or your battery's going to stay put like it's glued to the spot in the next move.
- Gently lift those two little tabs hanging out at the top and bottom corners on the left side of the battery. Easy does it!
Step 30

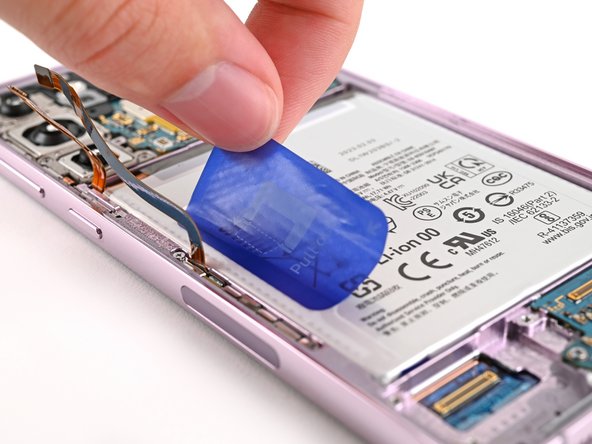
If the tabs are giving you attitude, just tuck them underneath the phone and tape them to the screen for a clean workspace.
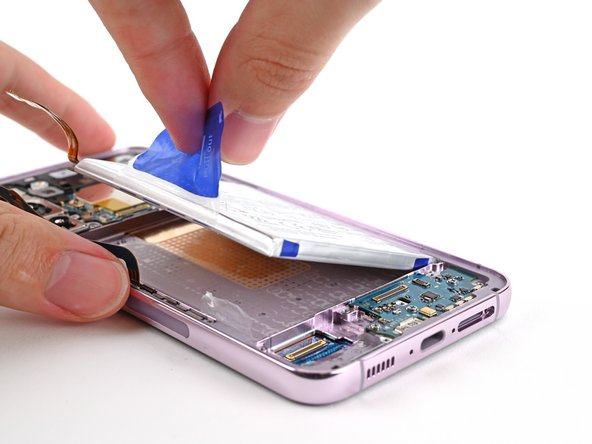
That sticky adhesive might try to hold on for dear life. Keep a steady pull—patience will win, and the battery will finally let go of the frame.
Stuck battery? Hit the left edge with a couple drops of strong isopropyl alcohol (90%+). Prop up that side, chill for a minute, and let the alcohol loosen things up.
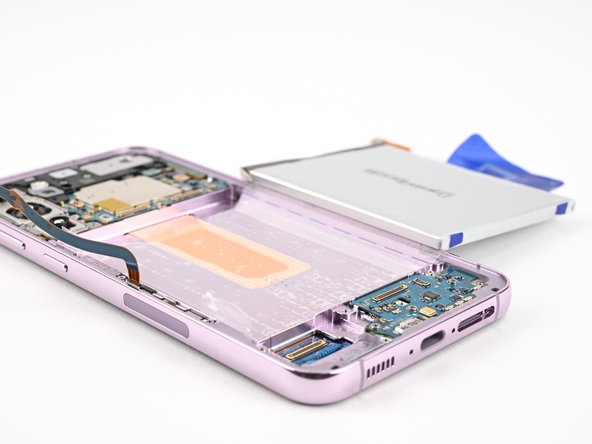
- Use one hand to flip back the top and bottom tabs out of the way of the battery, then give the frame a firm press to keep it steady. With your other hand, grab the blue pull tab and pull straight up with steady, confident force to break the battery's adhesive grip. Finally, gently lay the battery over the right edge of your phone. If you need a hand, you can always schedule a repair.
Step 31

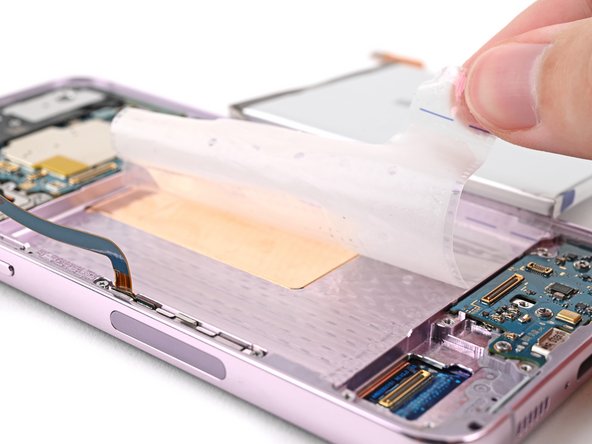

- Gently peel off the battery’s plastic film from the frame—think of it like unwrapping a tiny present.
- Lift out the battery along with its film. You got this!
- If you used isopropyl alcohol, give it about ten minutes to fully vanish before popping in the new battery. Patience pays off!