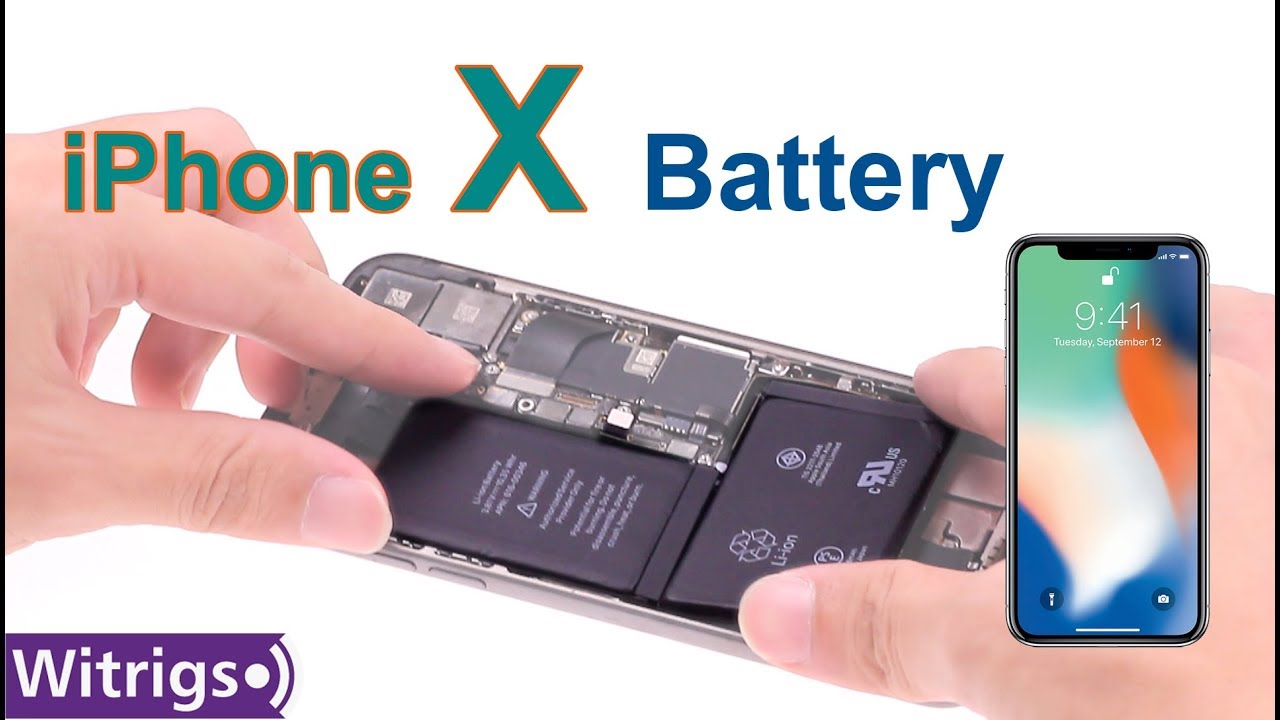
How To Replace iPhone X Battery Guide
Duration: 45 minutes
Steps: 48 Steps
Hey there! Just a heads up: make sure you’re working in a clean space and keep all your tools handy. We want your repair journey to be smooth sailing! If things get tricky, don’t hesitate to schedule a repair with the pros!
Hey there! So, here’s the scoop: iPhone batteries tend to lose their spark over time—basically, they just can’t hold a charge like they used to. Apple says their batteries are good for about 80% capacity after around 500 charge cycles, which usually means they’ll last about 18-24 months for most folks. When your battery starts to fade, it might even slow down your iPhone a bit. But don’t worry! This guide will help you swap out that tired battery and get your iPhone back to its speedy self. If you notice your battery is swollen, make sure to take the right precautions. We’ll walk you through completely detaching the display and removing the lower speaker and Taptic Engine to get to those pesky adhesive strips. And for the cherry on top, once you’ve installed your new battery, give it a little love: charge it to 100% and keep it plugged in for at least two more hours. Then, use your iPhone until it decides to take a nap due to low battery. Finally, charge it up uninterrupted to 100%. If you need help, you can always schedule a repair!
Step 1

Hey there! Time to kick off this repair adventure with a bang – make sure your iPhone battery is feeling the love by giving it a charge below 25%. We want to avoid any fiery surprises, so let’s play it safe and keep that battery cool as a cucumber.
Opening up your iPhone’s display might let some water in, so be sure to have those replacement seals on standby before you dive into this step. If you decide to put it back together without swapping out the seals, just be extra careful to keep it away from any liquids!
– First things first, let’s give your iPhone a little break—power it down before we dive into the disassembly fun!
– Next up, grab your trusty pentalobe screwdriver and remove those two 6.9 mm-long screws hanging out at the bottom edge of your iPhone.
Step 2


Be careful not to push your opening pick in too deep, or you might end up giving your device a little love tap it doesn’t need! Just follow this step to mark your pick and keep everything safe and sound.
– Get ready to measure 3 mm from the tip and give that opening pick a stylish mark with a trusty permanent marker!
Step 3


Don’t forget to put on your cool safety glasses before getting started to prevent any glass surprises during the repair.
Got a cracked screen on your iPhone? No worries! Just grab some tape and cover that glass to keep it from shattering further and to protect yourself while you tackle the repair. You’ve got this!
– Grab some clear packing tape and lay down overlapping strips over the iPhone’s screen until it’s completely covered. It’s like giving your phone a cozy blanket!
– If the suction cup isn’t playing nice in the next few steps, no worries! Just fold a sturdy piece of tape (like duct tape) into a handle and use that to lift the screen instead. You’ve got this!
Step 4


In the next three steps, we’ll show you how to use the Anti-Clamp, our nifty little tool designed to make opening your device a breeze. If you’re not rocking the Anti-Clamp, no worries! Just skip ahead three steps for a different approach.
– Give that blue handle a gentle pull back to free up the Anti-Clamp’s arms.
– Slide those arms right over the edge of your iPhone—left side or right, your choice!
– Get those suction cups cozy near the bottom edge of the iPhone—one on the front, and one on the back.
– Squeeze the cups together to create a nice suction on your target area.
Step 5


– Give that blue handle a gentle tug forward to lock those arms in place.
– Twist the handle a full 360 degrees or until you see those suction cups start to stretch out.
– Keep an eye on those suction cups to make sure they’re staying in sync. If they start to drift apart, just loosen them a bit and realign those arms.
Step 6


– Warm up that iOpener and slide it through the arms of the Anti-Clamp like a pro.
– Bend the iOpener so it rests comfortably on the bottom edge of your iPhone.
– Take a breather for a minute to let the adhesive loosen up and create a little gap for you.
– Gently slide an opening pick under the screen and the plastic bezel, but steer clear of the screen itself.
– Feel free to skip the next three steps.
Tools Used


Step 8


– Grab your trusty suction handle and stick it to the bottom edge of your phone, steering clear of that curved glass area. You’ve got this!
Tools Used

Step 9


The adhesive keeping your screen snug and secure is pretty tough; prying it open takes a bit of muscle. If you’re struggling to make that first gap, just add some heat and gently wiggle the screen up and down to loosen the adhesive. Soon enough, you’ll have just enough space to slip in your tool and get the job done!
– Gently tug on the suction cup with steady pressure to create a tiny gap between the screen and the frame. You’ve got this!
– Slide an opening pick into the gap beneath the screen’s plastic bezel—just avoid poking the screen itself. Easy peasy!
Step 10


– Gently slide the opening pick around the lower left corner and up the left edge of your iPhone, cutting through the adhesive that’s keeping the display snug. You’re doing great!
Step 11

Hey there! Just a heads up, there are some delicate cables on the right side of your iPhone. Avoid using your pick in this area to prevent any damage to these cables.
Step 12


– Slide your tool gently along the edge of the device, making your way to the top side with a smile on your face. Keep up the good work as you separate the adhesive to free your device.
Step 13


The upper edge of your screen is held in place by a combination of adhesive and clips.
– Gently take the opening pick for a stroll around the top corner of the display, making sure to give the display a little wiggle in the direction of the Lightning port as you go.
– Now, guide the pick to the opposite corner and gracefully trim away any lingering adhesive that is keeping the display in place.
Step 14

– Give that small nub on the suction cup a gentle tug to pop it off the front panel.
Step 15


Hold your horses! Don’t go full throttle separating the display just yet; there are some delicate ribbon cables still linking it to the iPhone’s logic board.
– Start by gently lifting the iPhone’s display from the left side, just like opening a book. Easy peasy!
– Prop that display up against something sturdy so you can work on your phone without it flopping around.
– When it’s time to put everything back together, carefully position the display, making sure the clips at the top edge are aligned. Give that top edge a gentle press to snap it into place. If it’s being stubborn and doesn’t click right away, take a peek at those clips around the display’s edge to ensure they’re not bent. You’ve got this!
Step 16

Hey there! As you embark on this repair journey, remember to treat each screw like a VIP guest. Ensure they return to their homes snug and cozy to keep your iPhone happy and intact.
– Unscrew those five Y000 screws holding down the logic board connector bracket like a pro! Here’s a tip: they come in various lengths, so pay attention to which ones you’re removing.
Step 17

– First things first, let’s get that bracket off! You’re doing great.
– Now, as you put everything back together, here’s a pro tip: power up your iPhone and give it a quick test run to make sure all functions are running smoothly before sealing the display. Just remember, it’s super important to power down your iPhone completely before diving back into the repairs!
Step 18


– Gently use the tip of a spudger or a clean fingernail to lift the battery connector out of its cozy home on the logic board.
– Give the connector a little bend away from the logic board to keep it from accidentally reconnecting and powering up your device while you’re working your magic.
Tools Used


Step 22


The front panel sensor assembly flex cable is gently stuck in place, so give it a little love as you work on it!
– Gently raise the cable until the adhesive gives way.

Step 24


Remember to keep your cool and steer clear of the three rows of grounding pads near the bottom of the iPhone!
– Let’s get things moving! Start by unscrewing the seven screws that are holding the bracket snugly beneath the Taptic Engine and speaker. You’ve got this!
Step 25


– Gently lift the bracket starting from the side closest to the battery. No need to yank it out completely, as it’s still attached with a little flex cable.
Step 26


– While keeping the bracket out of the way, gently use the tip of a spudger to lift and disconnect the flex cable hiding underneath. You’ve got this!
Tools Used
Step 27

– Time to say goodbye to that bracket! Go ahead and remove it with care.
Step 28


– Get ready to bid farewell to the tiny 2.1 mm Y000 screw holding down the speaker connector cover. It’s time to set it free and let the sound waves flow!
Step 29

– Get ready to party with some speaker connector cover removal action!


Step 31


When gently prying up the speaker, be sure to give some love to the flex cable you just disconnected. If you need to, nudge it to the side so the speaker can glide out with ease.
– Slide a spudger under the top edge of the speaker, right by the iPhone’s case. You’ve got this!
– Gently nudge and lift the top edge of the speaker. Easy does it!
– When you’re putting the speaker back in, double-check that the flex cable is in the right spot and not getting squished underneath. We want everything to fit just right!
Tools Used
Step 32


– Gently grasp the speaker by its sides and give it a little wiggle from side to side to loosen up that sticky adhesive holding it to the bottom of the iPhone.
– Now, carefully pull the speaker away from the bottom of the iPhone until that adhesive gasket lets go and you’re free to move on!
Step 33


– Let’s get started by gently taking out the speaker.
Step 34


– The speaker gasket is a one-time wonder—it’s not going to be used again! So, when you’re putting things back together, make sure to follow this step to swap in a fresh gasket.
– Grab some tweezers and gently peel off all the old gasket from the frame and speaker. It’s like taking off an old sticker—just a little careful finesse!
– Next up, grab a microfiber cloth and some isopropyl alcohol to give the frame and speaker a good clean. We want to get rid of any sticky remnants from the old gasket.
– Now, before you dive into installing the new speaker gasket, take a moment to check its orientation on the bottom of the speaker. The big cutout on the gasket should line up nicely around the speaker grille mesh.
– Carefully pull off the larger, clear liner from the gasket, and using those trusty tweezers, place the gasket right on the bottom of the speaker.
– With your fingers or a spudger, give that gasket a firm press to ensure it’s snug in place and sticking well.
– Finally, peel off the remaining liner and position the speaker, making sure the connector doesn’t get trapped underneath. We want everything to fit just right!

Step 35


– Unscrew the 2.3 mm Phillips screw that’s holding the Taptic Engine in place. Let’s get that little guy out!
Step 36


– Grab your trusty spudger and gently pry the Taptic Engine flex cable straight up from its socket. You’ve got this!
Tools Used
Step 37

– Time to say goodbye to the Taptic Engine! Gently remove it and keep moving forward with your repair journey.
Step 38

The battery of the iPhone X is held in place by four pieces of stretchy adhesive magic—one at the top cell and three at the bottom. If you find yourself in a bind, remember, you can always schedule a repair!
– Each piece of adhesive comes with a handy black pull-tab at the end, which is gently stuck to the side edge of the battery. Just give it a little tug, and you’re on your way!
Step 39


Hey there! Let’s keep things light and breezy – no sharp tools around the battery, okay? We definitely don’t want any unexpected chemistry experiments or fiery surprises happening!
Each tab features a handy little loop right in the middle; if you’re having a tough time getting a grip on the tab, just slide a tool through that loop for some extra help!
– Peel off the adhesive tab gently from the lower edge of the battery.
Step 40


Be careful not to mess up the speaker cable connector right under the center adhesive tab. It’s a delicate little guy, so show it some love!
– Give it another go and peel off the last two adhesive tabs from the bottom edge of the battery. You’re doing great!
Step 41


If those strips happen to break, no need to stress! Things don’t always go as planned. Keep on reading for some bonus steps on how to deal with those pesky broken strips.
– To boost your chances of getting it right:
– If a strip decides to break off and plays hide-and-seek under the battery, don’t sweat it! Just move on to the other strips and keep rolling with the extra steps below.
Step 42


If any of those pesky adhesive strips decide to break loose under the battery and play hide and seek, go ahead and remove the remaining ones. Then, just follow the steps below to keep things moving smoothly!
The strip is going to stretch way beyond its original size! Keep pulling, and if you need to, grab the strip closer to the battery for a better grip.
Step 43


– Give it another go by repeating the previous step to take off the strip on the opposite side, making sure to save the center strip for that grand finale.
Step 44


– Gently lift the center strip away, making sure to avoid getting it tangled up with the speaker flex cable.
Step 45


Be super careful with that last pull tab – it’s hanging out right next to the Face ID hardware! If it gets damaged, only Apple can work their magic to fix it. So, take it easy and handle with care!
– Gently peel back and detach the pull tab on the last adhesive strip located at the top edge of the upper battery cell. You’ve got this!
Step 46


If the adhesive gets a little too attached to the battery and refuses to let go, show it who’s boss by gently introducing some high concentration (over 90%) isopropyl alcohol underneath the battery edge near the stubborn adhesive strip(s).
If you’re feeling adventurous and want to explore different ways to unstick the battery, let’s move on to the next step just below.
– Carefully peel off that last adhesive strip – you’re almost there!
– If you’ve successfully tackled all four adhesive strips, feel free to skip ahead to the next step.
Step 47


When using pry tools to gently lift the battery out of your iPhone, remember to tread lightly! A little care goes a long way—too much enthusiasm might lead to accidentally damaging those delicate ribbon cables or the wireless charging coil hanging out right under the battery. You’ve got this!
– If any of those pesky adhesive strips decided to break off and the battery is still clinging to the rear case, it’s time to warm things up! Grab your trusty iOpener or a hair dryer and gently heat the back of the phone right behind the battery.
– Once that’s done, flip your iPhone back over and take a strong piece of string—think dental floss or a thin guitar string—and carefully slide it underneath the battery.
– Now, here comes the fun part! Use that string in a sawing motion from side to side along the battery to break free from the adhesive. It might take a little while since that adhesive likes to play hard to get, but with a bit of patience, you’ll get it loose. Just remember to be gentle and avoid bending or damaging the battery.
Tools Used
Step 48

– Grab the battery by its bottom edge and gently pull it out of your iPhone.
– If there’s any leftover alcohol solution inside your phone, give it a little wipe or let it air dry before you pop in your new battery.
– Before you bring the new battery into the mix, reinstall the Taptic Engine and speaker. This keeps everything aligned just right during the install.
– Before sticking the replacement battery down, give the battery connector a quick reconnect to the logic board socket. This will help ensure the battery sits snugly in its spot.
– If your new battery doesn’t come with adhesive already attached, check out this guide for tips on swapping out those adhesive strips.
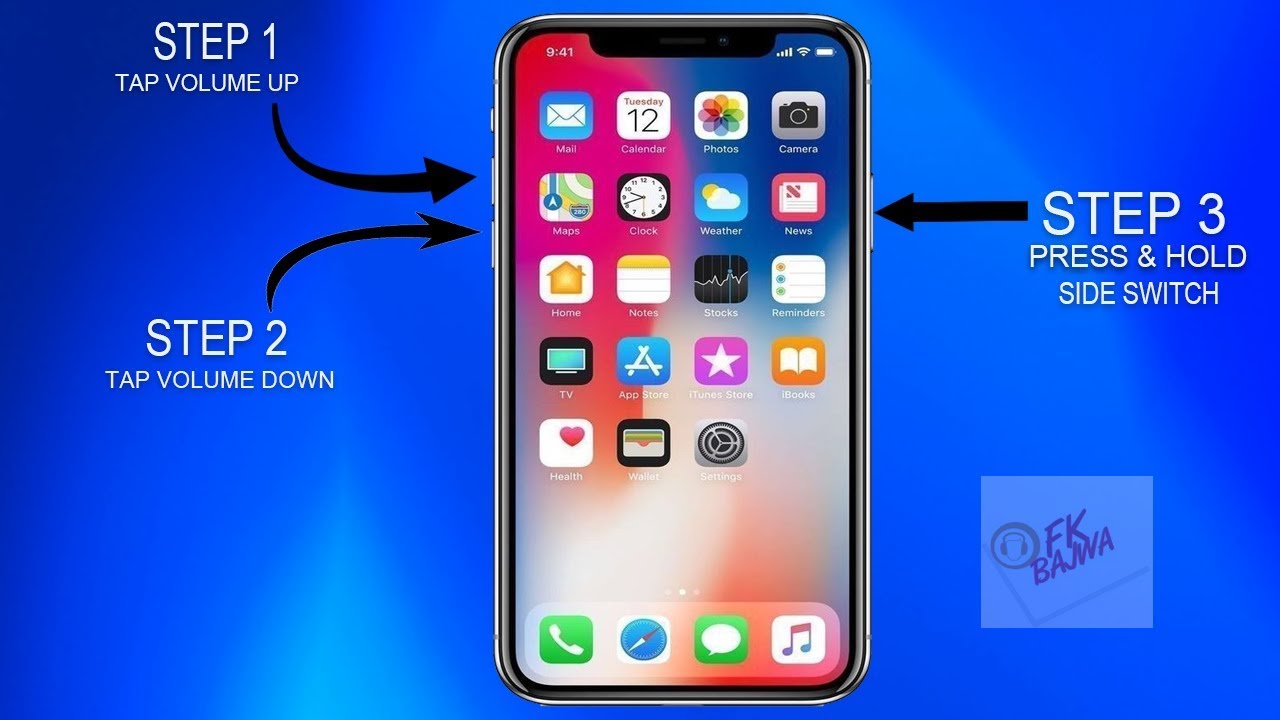
– Once you’ve put everything back together, go ahead and perform a force restart. This can help avoid pesky issues and make troubleshooting a breeze.