
How to Replace SSD in Eluktronics N850HK – DIY Guide
Duration: 45 minutes
Steps: 7 Steps
Hey there! Just a quick heads up: be super careful while you’re working on your device! We want you to keep those fingers safe and sound. If things get tricky or you need a hand, don’t hesitate to schedule a repair. You’ve got this!
Meet the Eluktronics N850HK, a sleek laptop that features an M.2 PCIe SSD—your trusty storage sidekick! Whether you’re checking for wear and tear or ready to upgrade to a bigger and faster SSD, you’re in for a treat. Swapping out the SSD is a breeze, needing just a screwdriver and a dash of care. This guide will walk you through the steps to replace the SSD in your N850HK. Before diving in, make sure to power down your laptop and unplug it from the wall. For an extra layer of safety, disconnect or remove the battery before you start your adventure!


Step 2


– Grab your trusty Phillips #00 screwdriver and get ready to tackle those twelve 4 mm screws holding the bottom panel of your laptop in place. Let’s make it happen!
Tools Used

Step 3


– Grab your trusty Phillips #00 screwdriver and let’s get to work! Start by removing those four 3 mm screws hanging out under where the battery usually chills. You’ve got this!
Tools Used
Step 4


While the odds of a mishap are pretty slim, it’s a smart move to keep an eye out for static electricity when you’re tinkering with a computer motherboard. Make sure to ground yourself or rock an anti-static wrist strap for good measure!
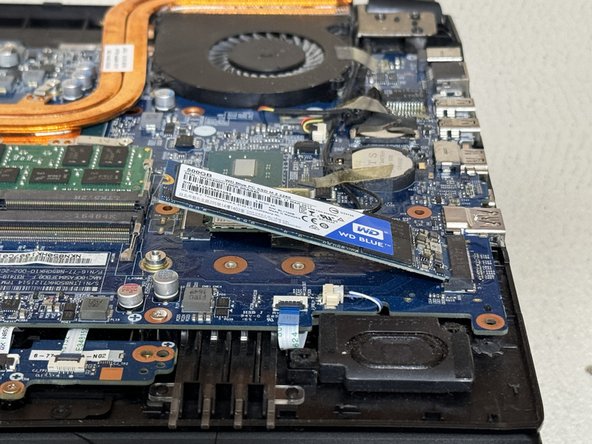
– Gently pop off the back case and take a peek at the SSD hanging out in the lower right corner.
Tools Used

Step 5

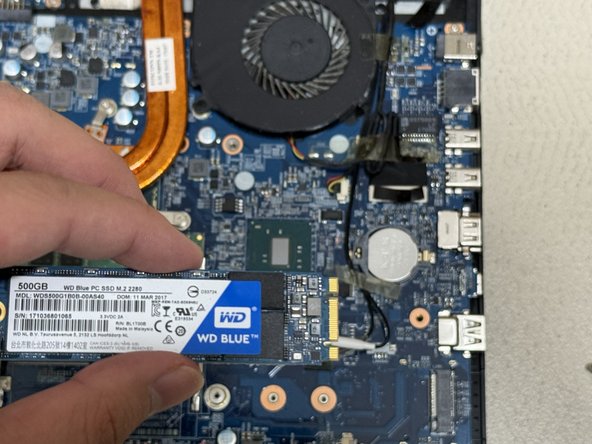
– Grab your trusty Phillips #00 screwdriver and take out that pesky 3 mm screw holding the SSD in place.
– Now, gently slide the SSD out of the M.2 slot like you’re unveiling a hidden treasure.
Tools Used
Step 6


– Align the SSD like a pro by using the nifty ridges on the right side.
– Gently slide that shiny new SSD into the cozy M.2 mounting slot.
– Grab your Phillips #00 screwdriver and snugly fasten the 3 mm screw to keep the SSD secure.
Tools Used
Step 7


– Put everything back together by retracing your steps in the opposite order. You’ve got this!