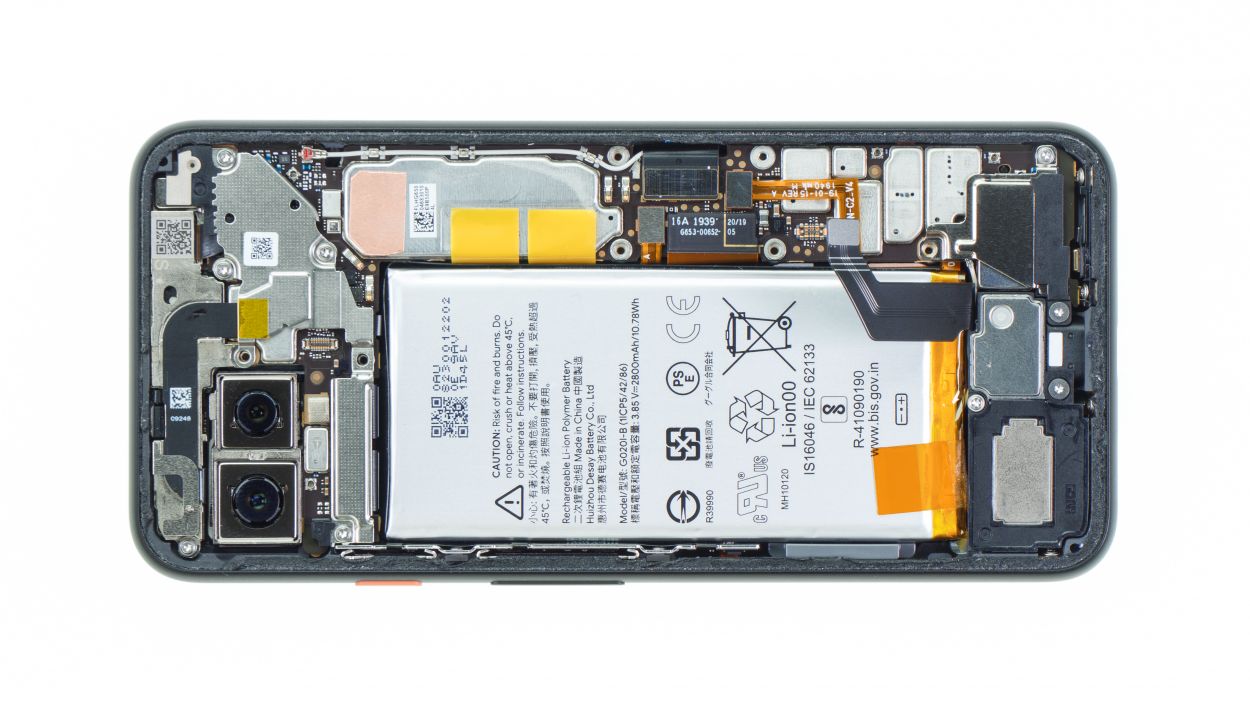
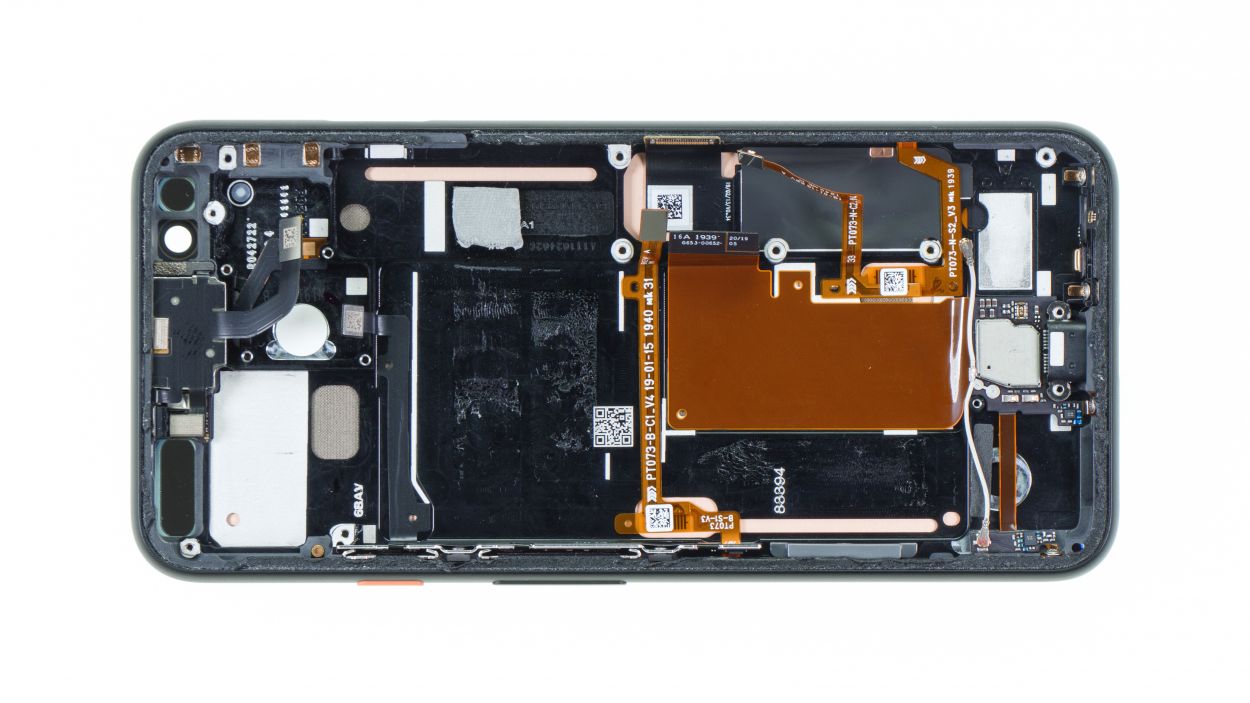
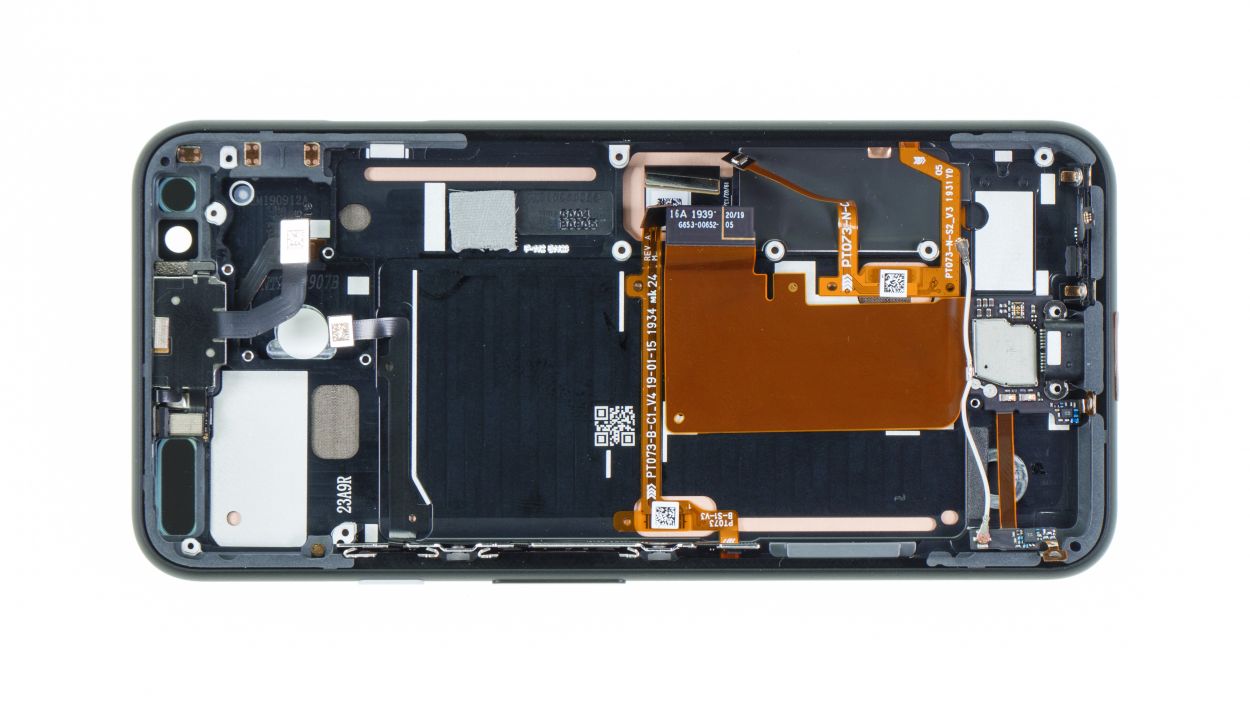
How to Replace Google Pixel 4 Screen: Step-by-Step Guide
Duration: 120 min.
Steps: 30 Steps
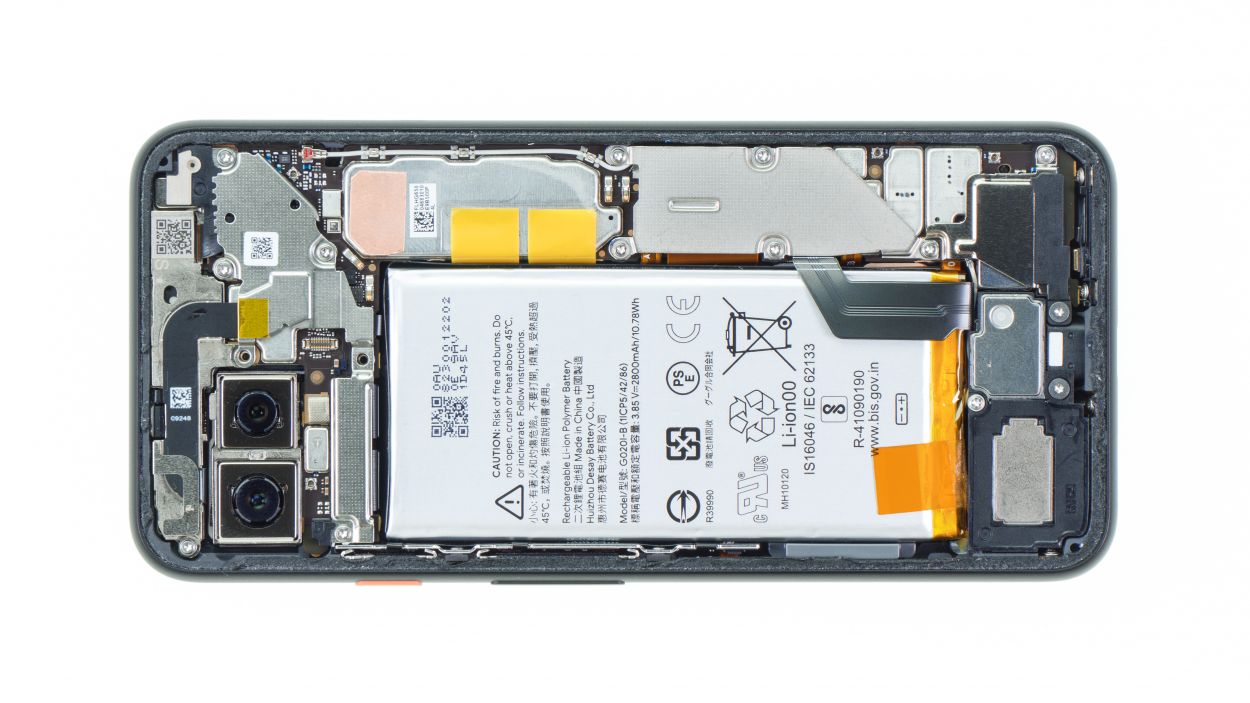
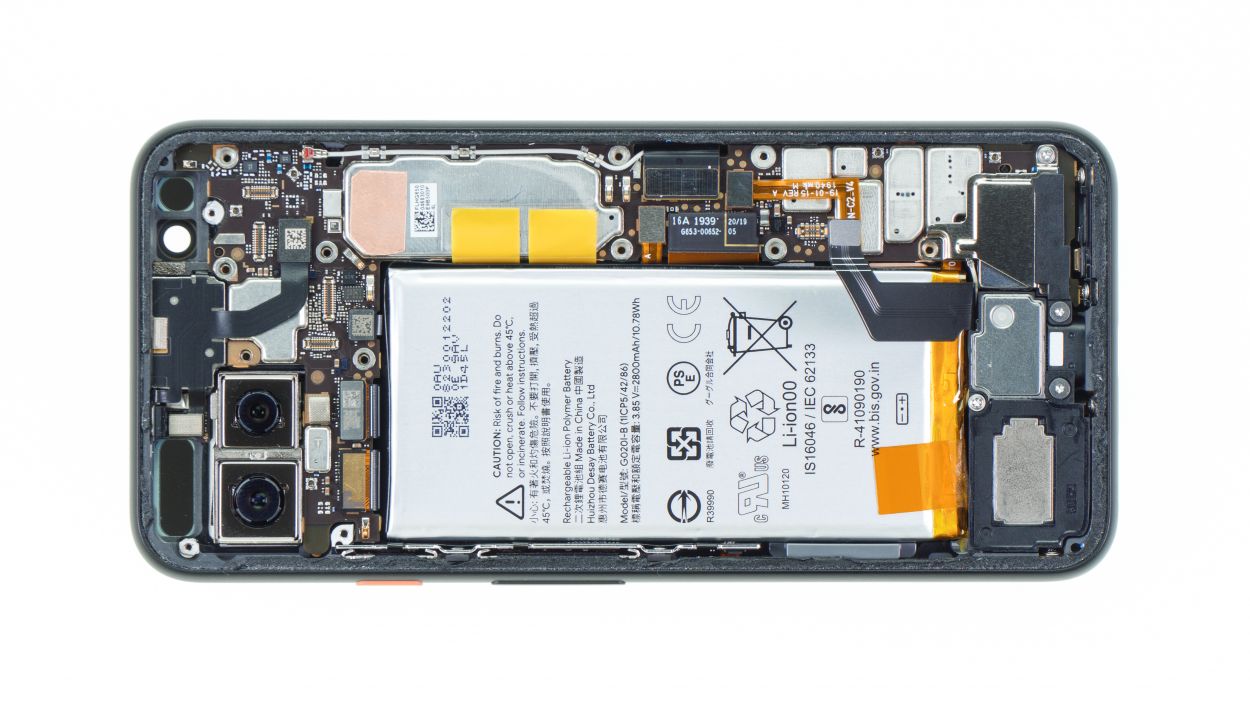
The OLED screen of your Google Pixel 4 is a hot ticket, with bragging rights over LCDs: Amazing blacks and righteous color depth make for a groovier viewing party. But OLEDs are also drama queens. A little tumble, and bam! Glass may look chill, but the OLED panel beneath is throwing a tantrum. Whether your glass is toast, the panel’s cracked, or some other screen shenanigans are going down – this totally rad repair guide will walk you through swapping out that display like a pro. We’re talking the whole shebang – new glass, new OLED, new frame. It’s not just about slapping on a fresh pane! The glass back of the Pixel 4 is like, glued to the max, so go easy when you’re prying it off. And heads up, screen replacements mean yanking and re-planting every component, so give yourself some extra time to rock this fix. Got questions or wanna dish on the guide? Hit us up at the bottom and drop a sick review!
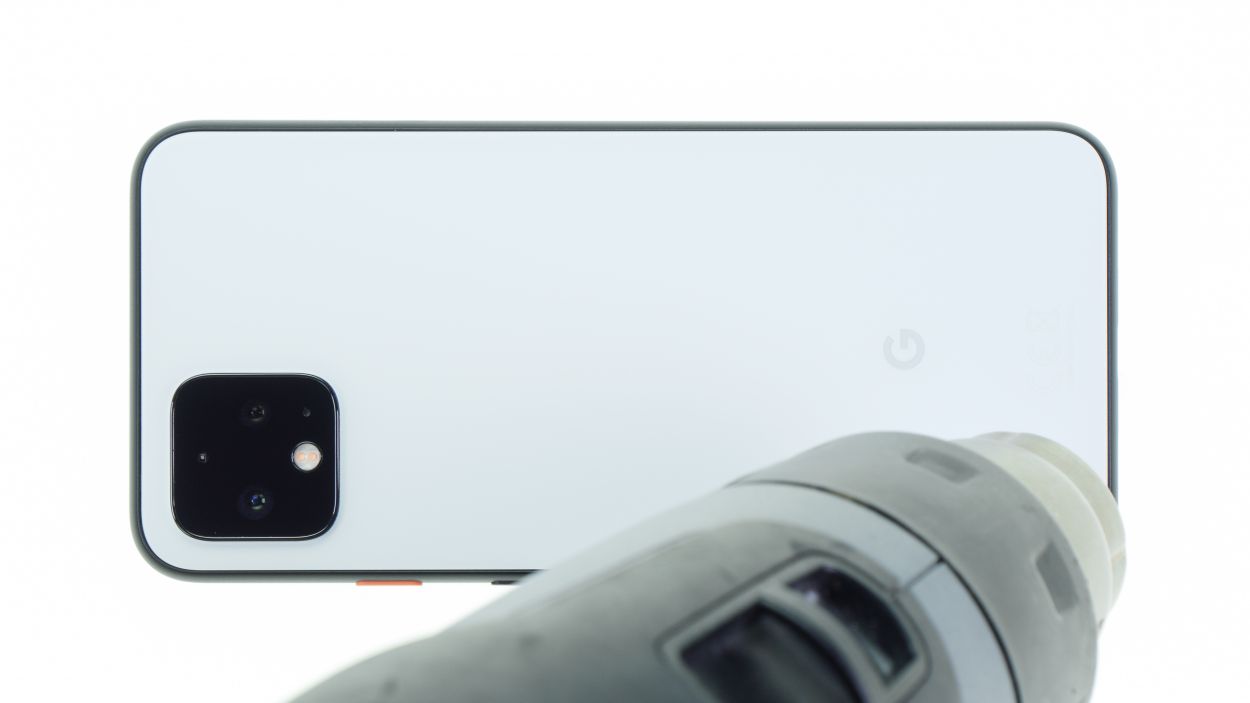
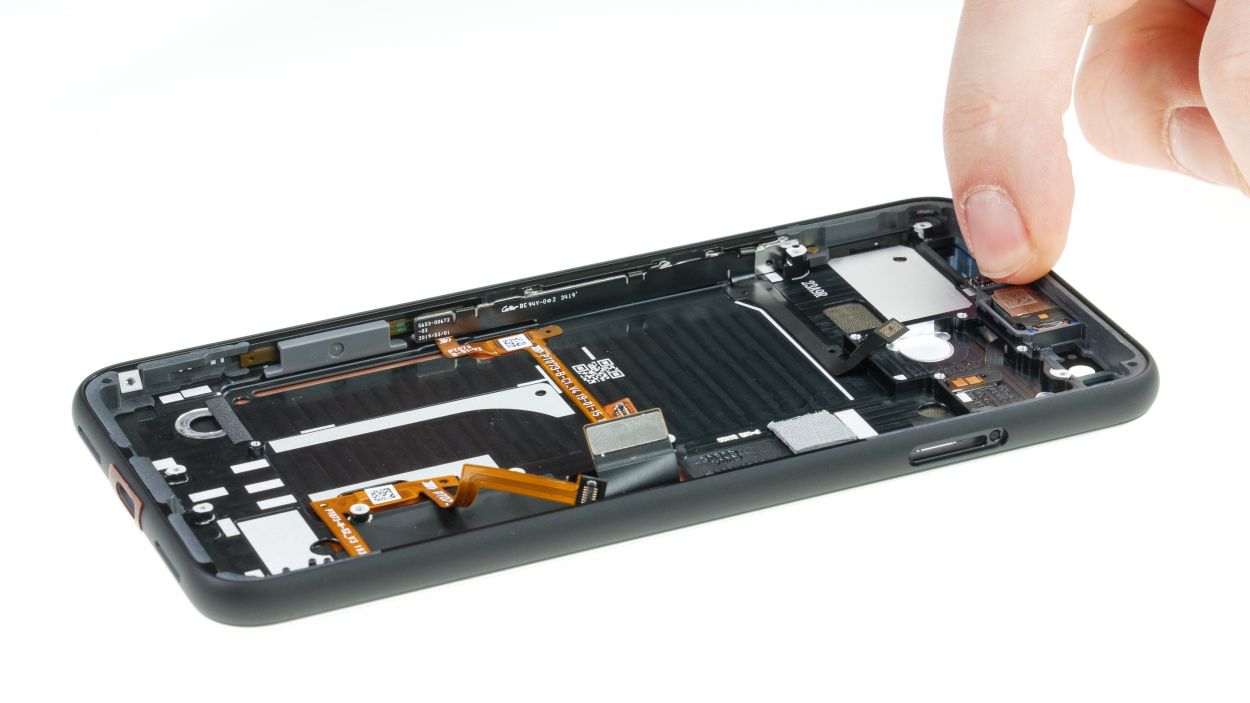
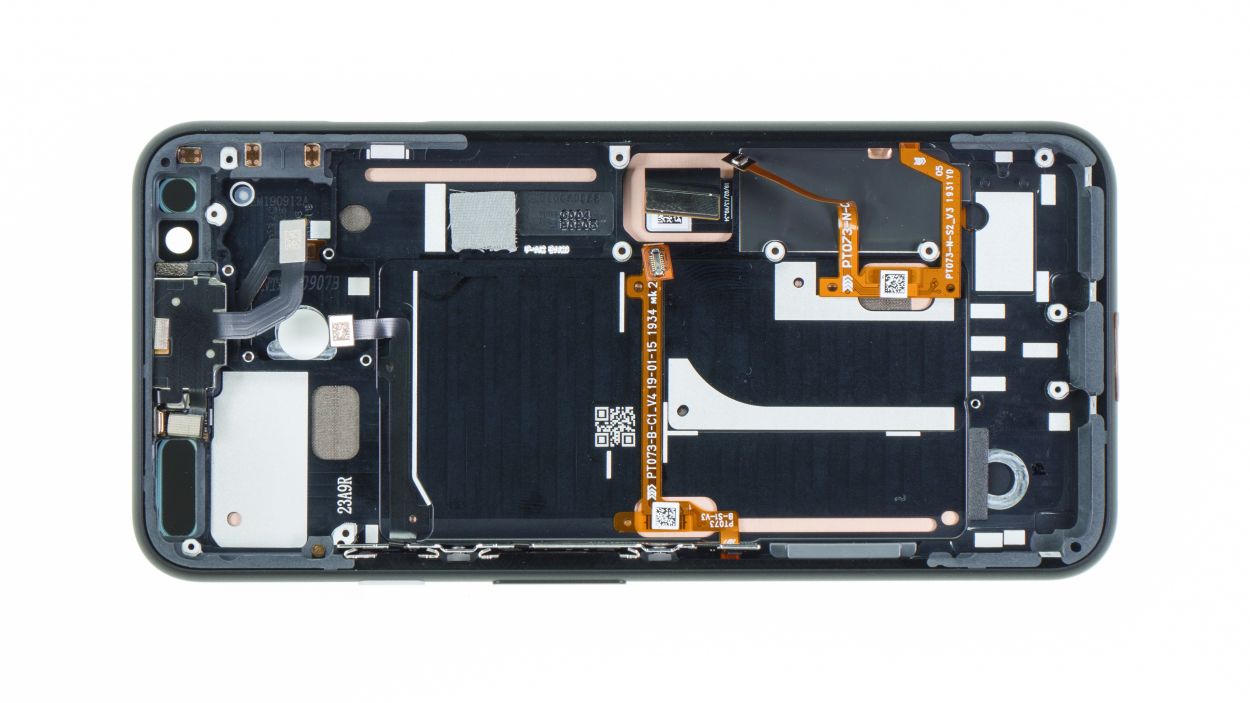
Step 1

– Press and hold the standby button on the right side for a few moments, then tap to confirm the shutdown when it pops up on your screen.
Step 2
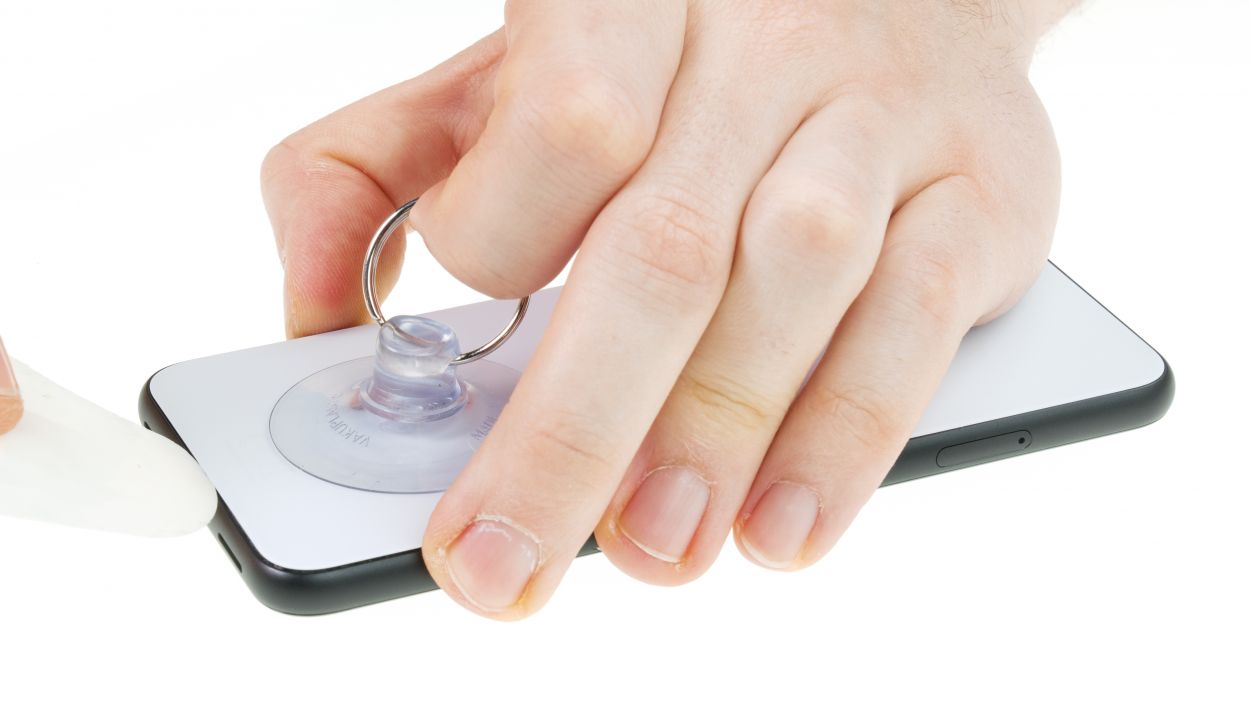
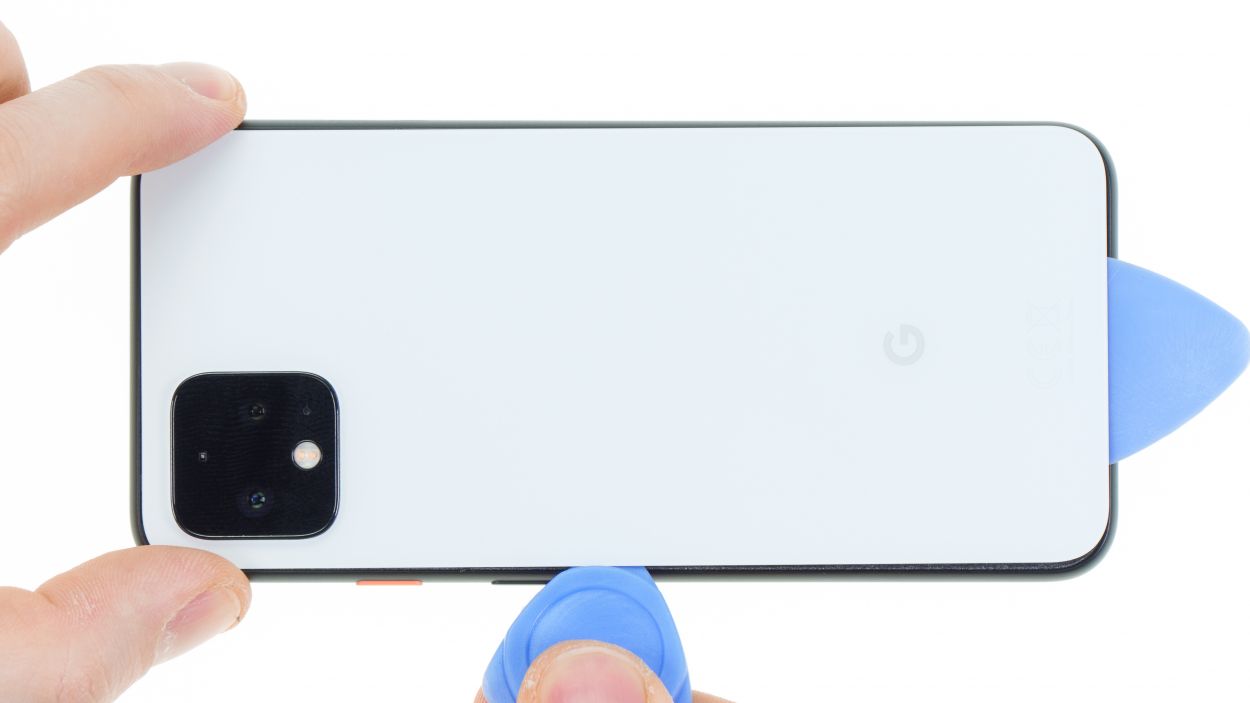
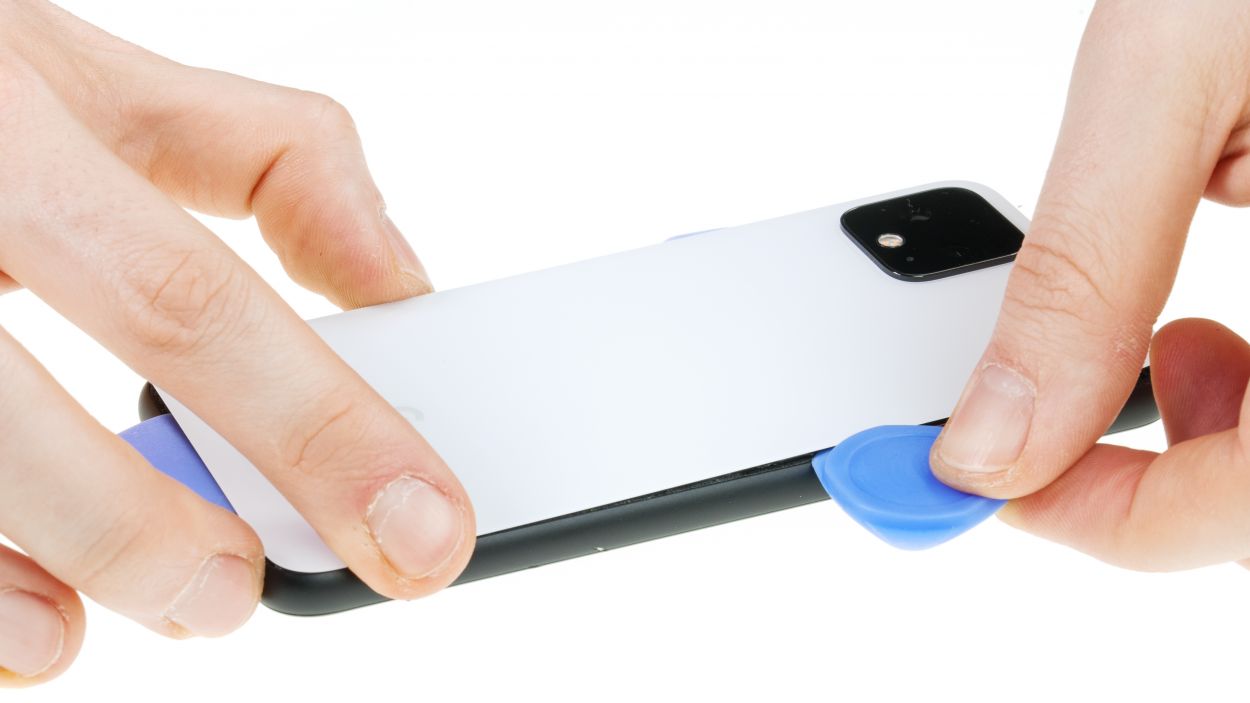
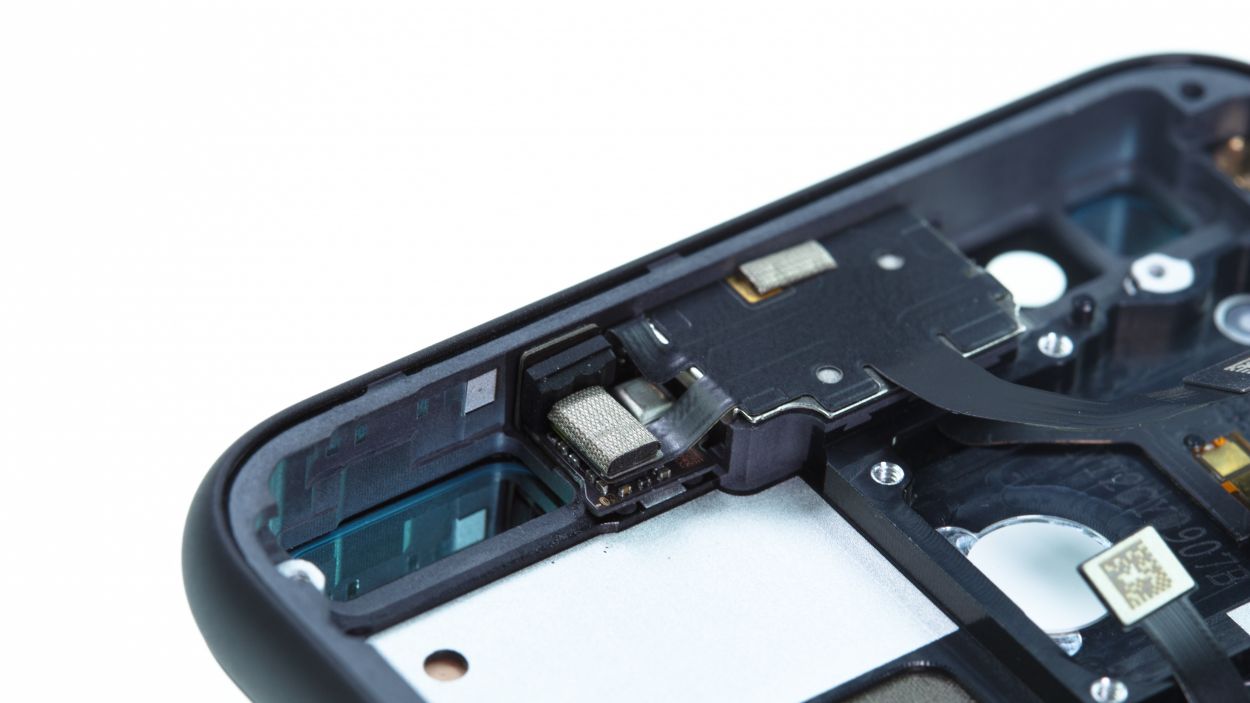
Be gentle with your tool and don’t go too deep into the device—let’s keep those internal components safe and sound!
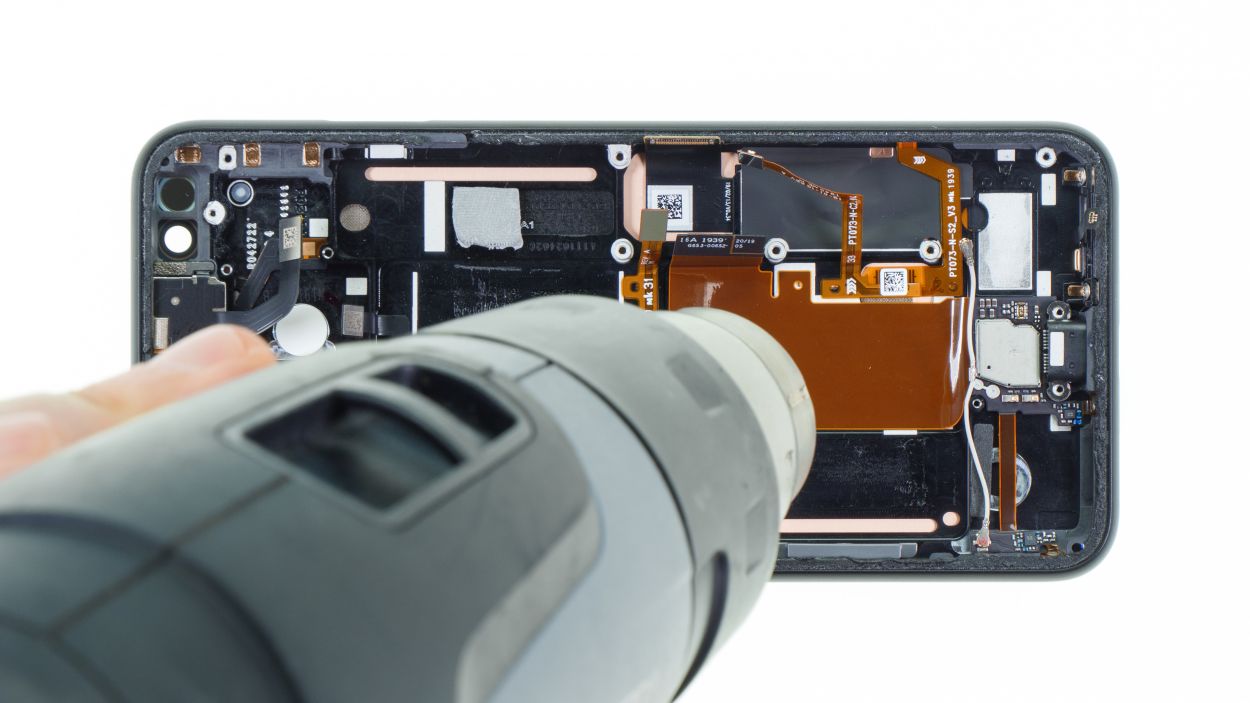
– Use a heat gun or hair dryer to heat the edge of the device evenly for several minutes. This makes it easier to remove the adhesive from the back cover. Just heat up until you can touch the device with your fingers without burning yourself. Heat mostly the edge and not the middle of the device, where the battery is located.
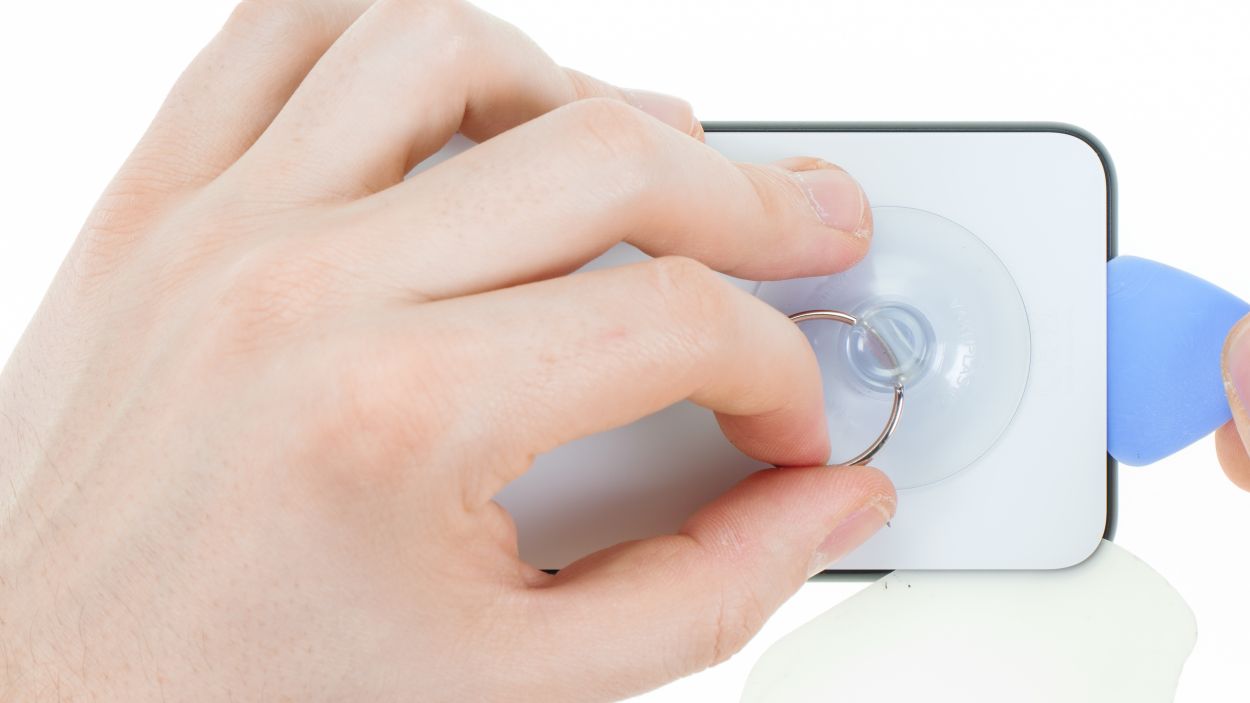
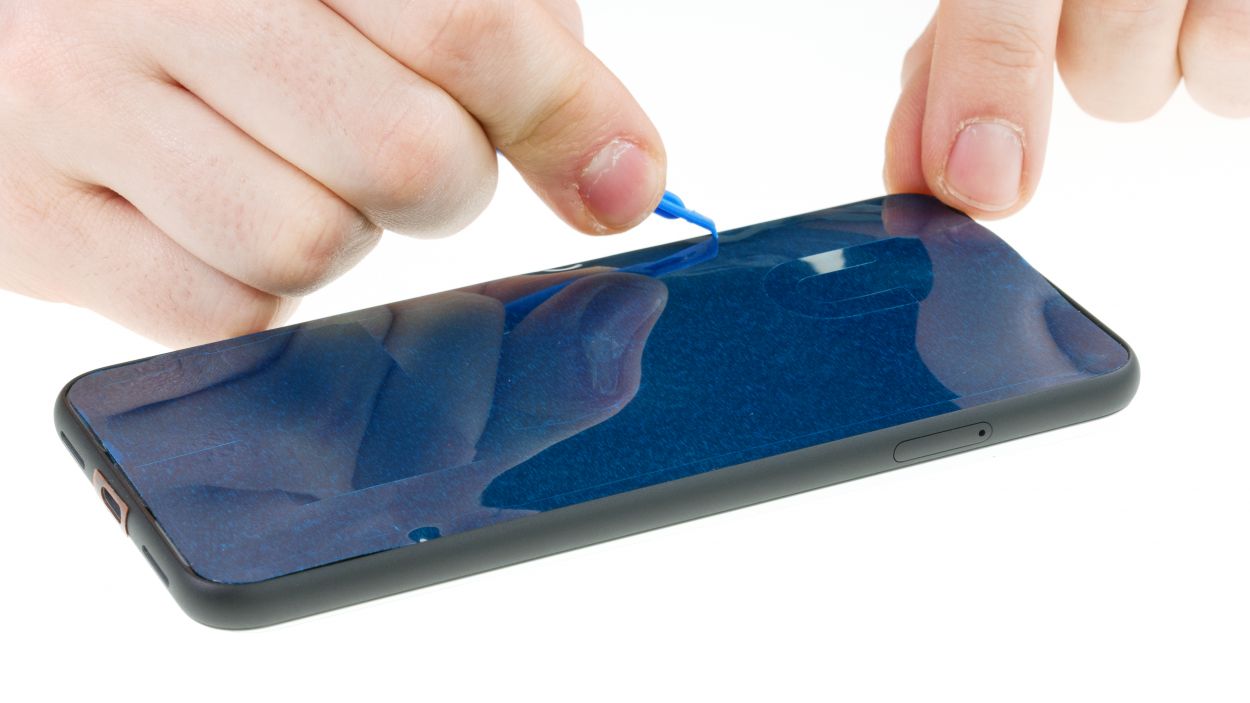
– Then place the suction cup on the bottom of the back cover and pull while pressing the device down.
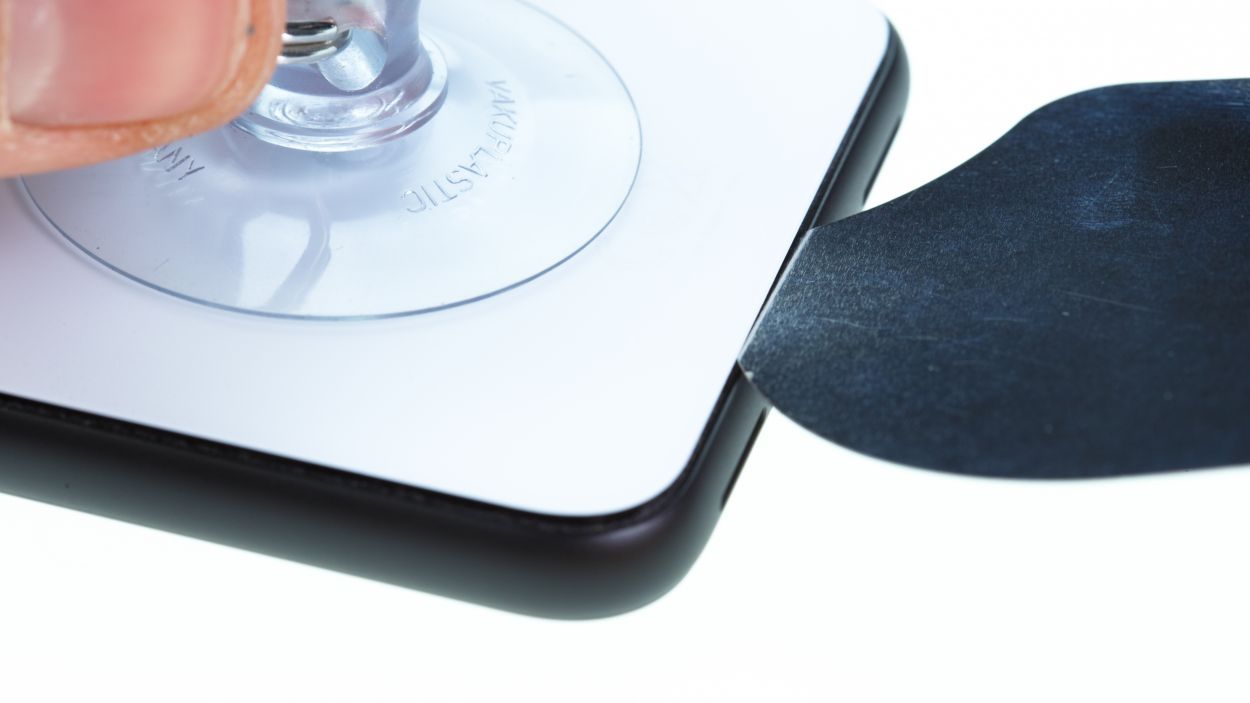
– Push a tool into the gap that is now created between the back cover and the frame. If you can’t get a plectrum in between, you can use a tool specially designed for this purpose, such as the iFlex. Be careful not to scratch the frame or back cover with the blade of the iFlex.
– Then heat up every part of the edge of the back cover and move the plectrum or iFlex along the edge of the back cover to gradually loosen the glue.
– You can use several picks to prevent the glue from rebonding in areas that have already been loosened.
Tools Used
- heat gun to heat parts that are glued on so they’re easier to remove.
In most cases, you can also use a hairdryer.” rel=”noopener”>Heat gun - screen and the frame. The practical iFlex is made of stainless steel and sits comfortably in the hand. This makes it the perfect assistant for every smartphone repair.” rel=”noopener”>iFlex Opening Tool
- VAKUPLASTIC Suction Cup


2 × 4,0 mm Torx T3
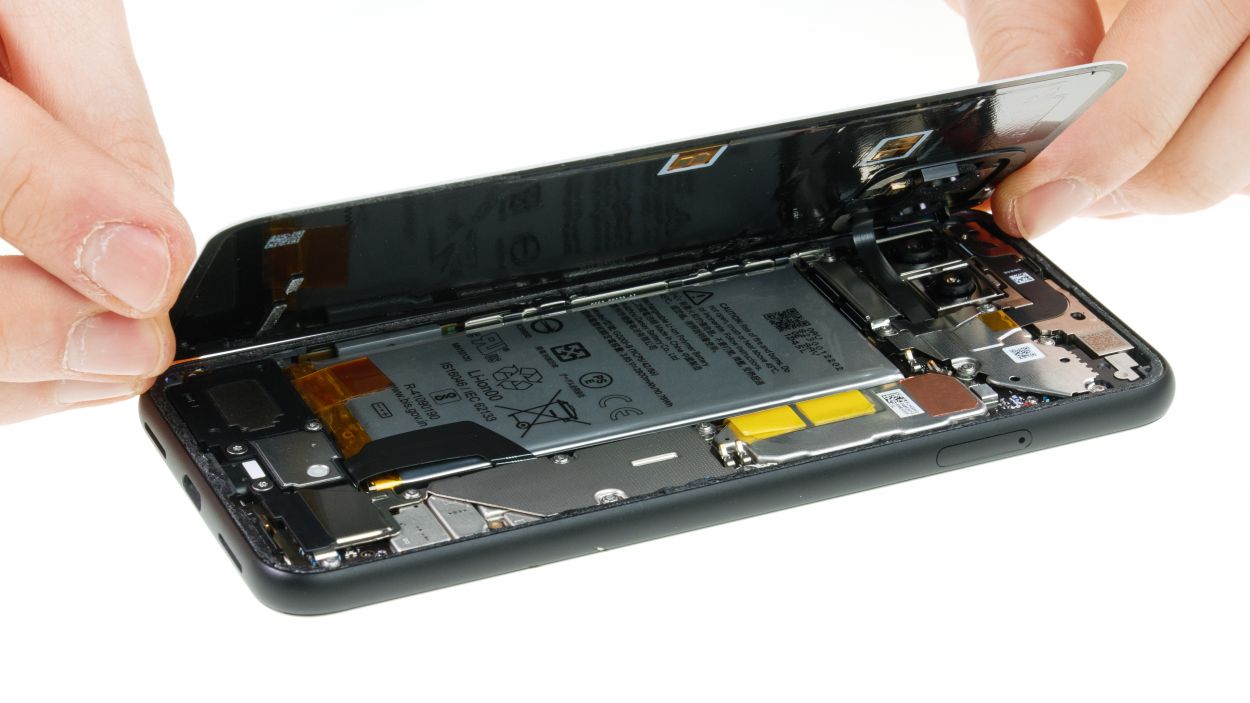
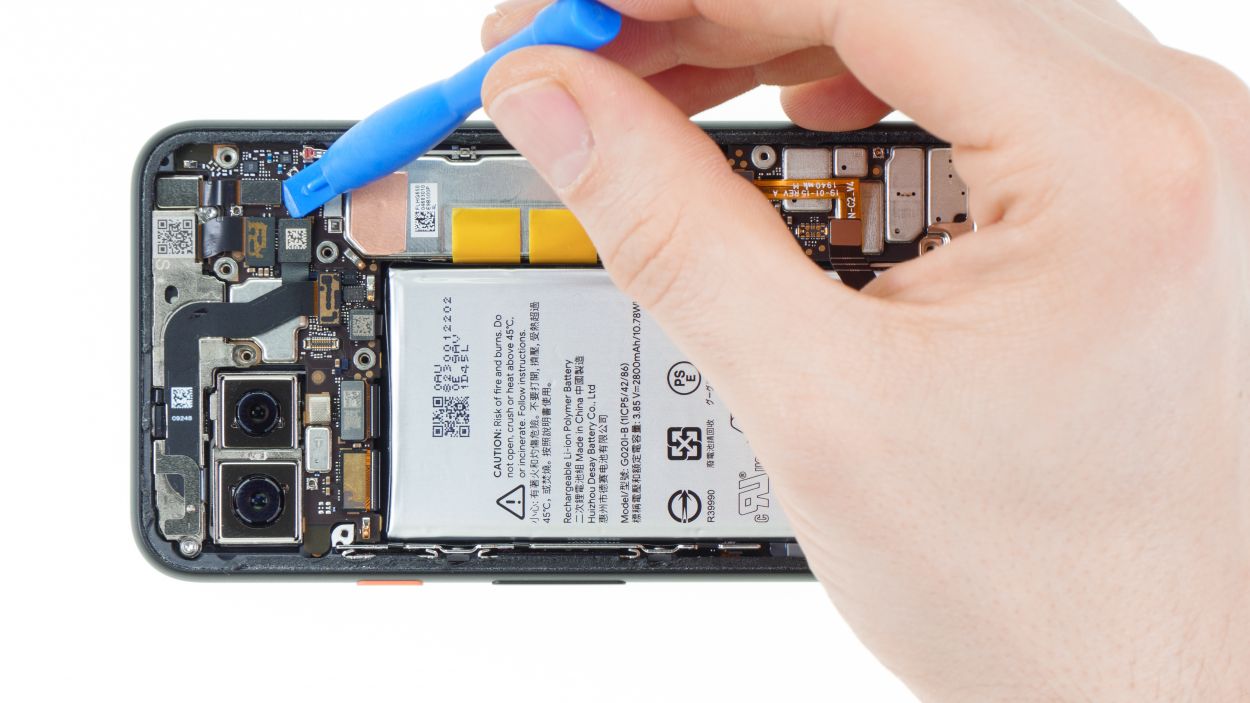
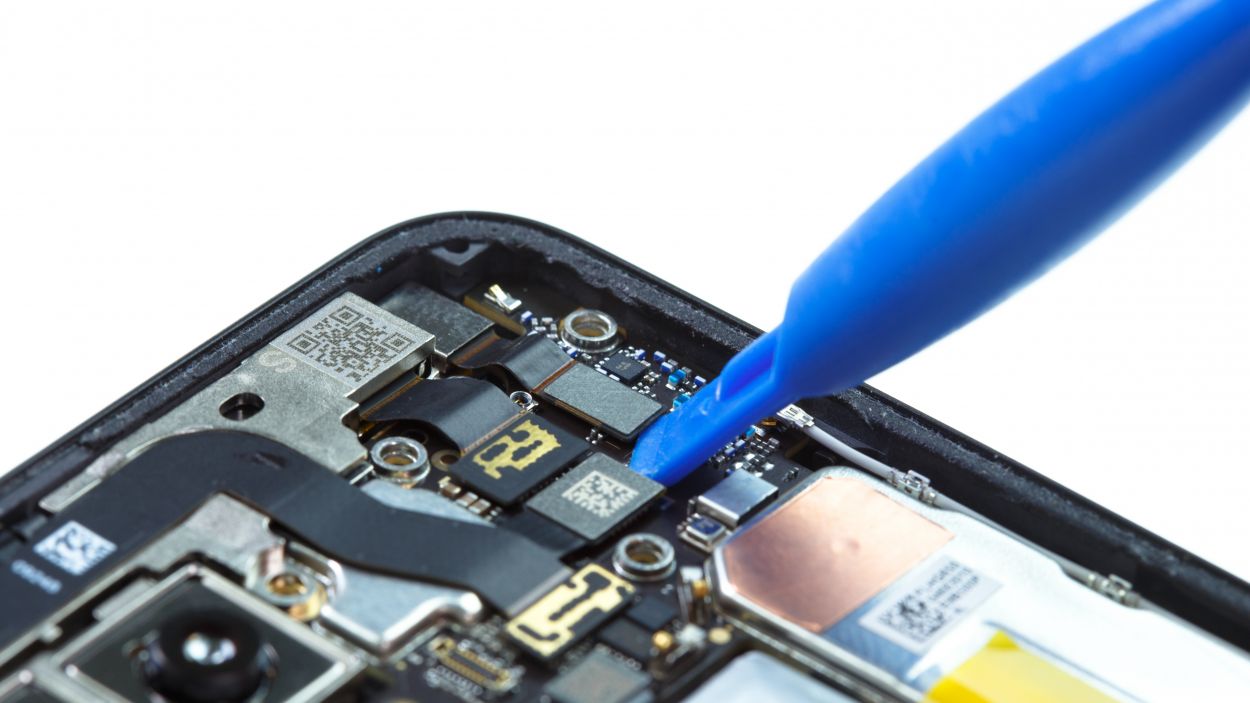
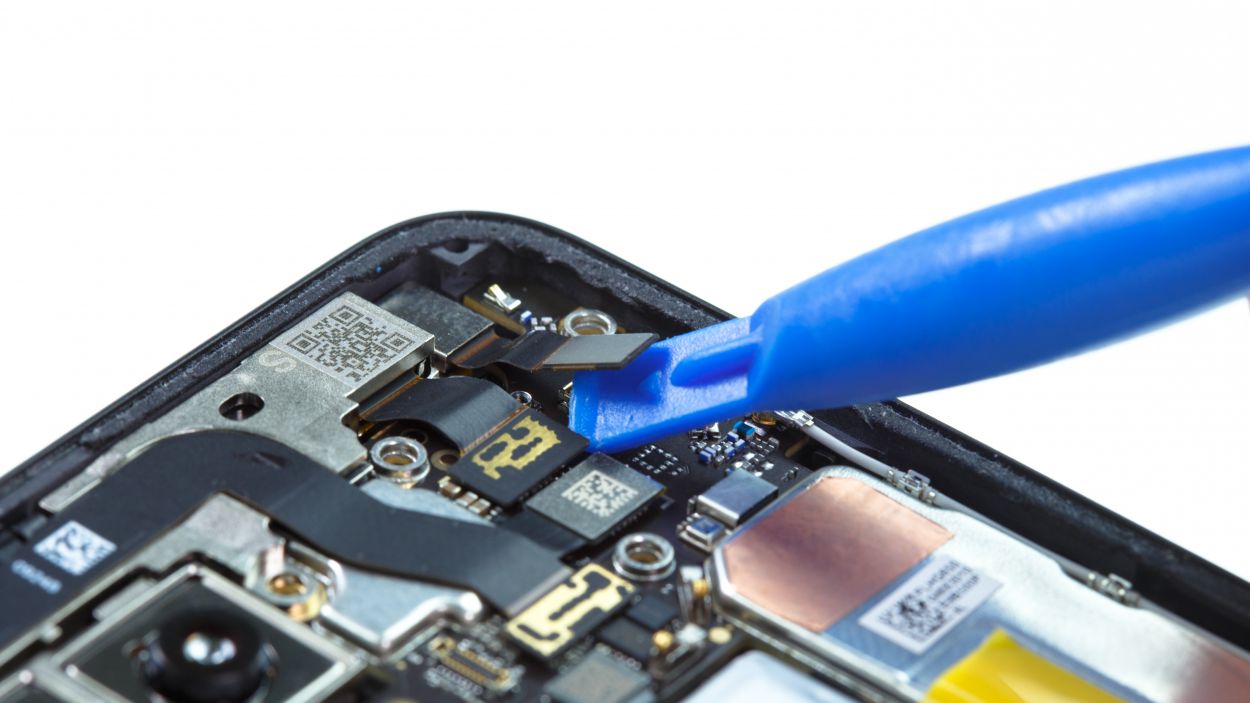
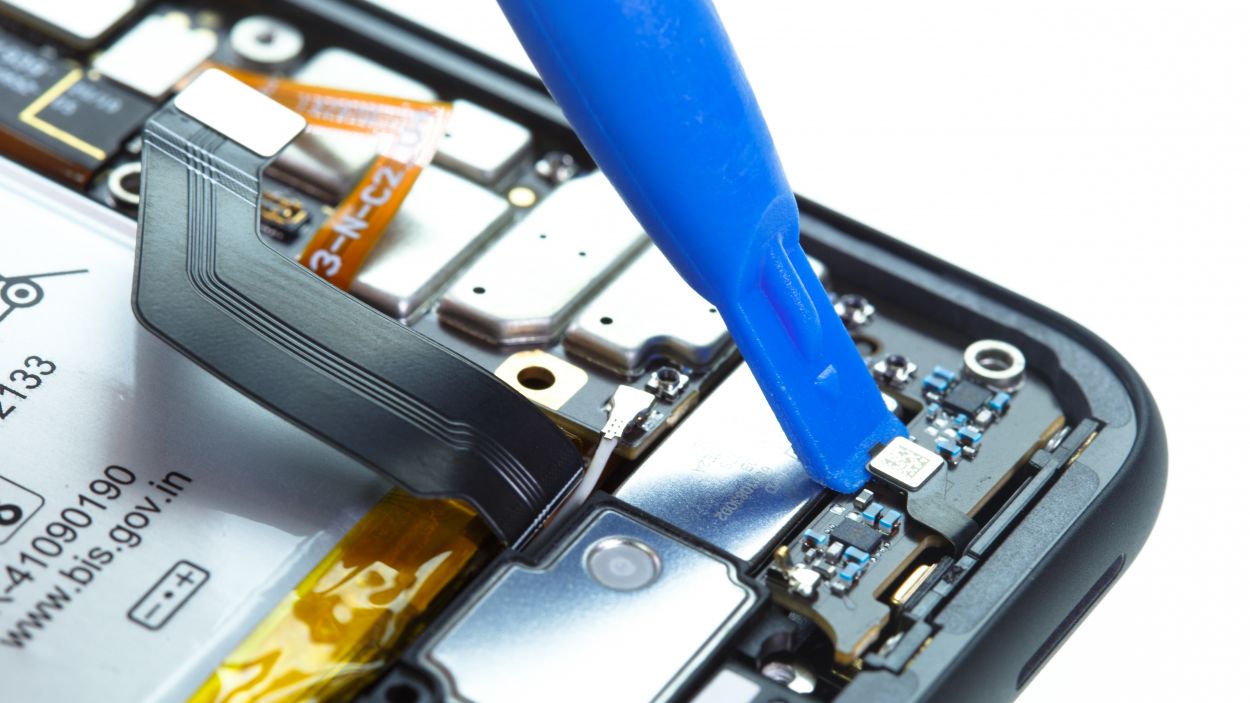
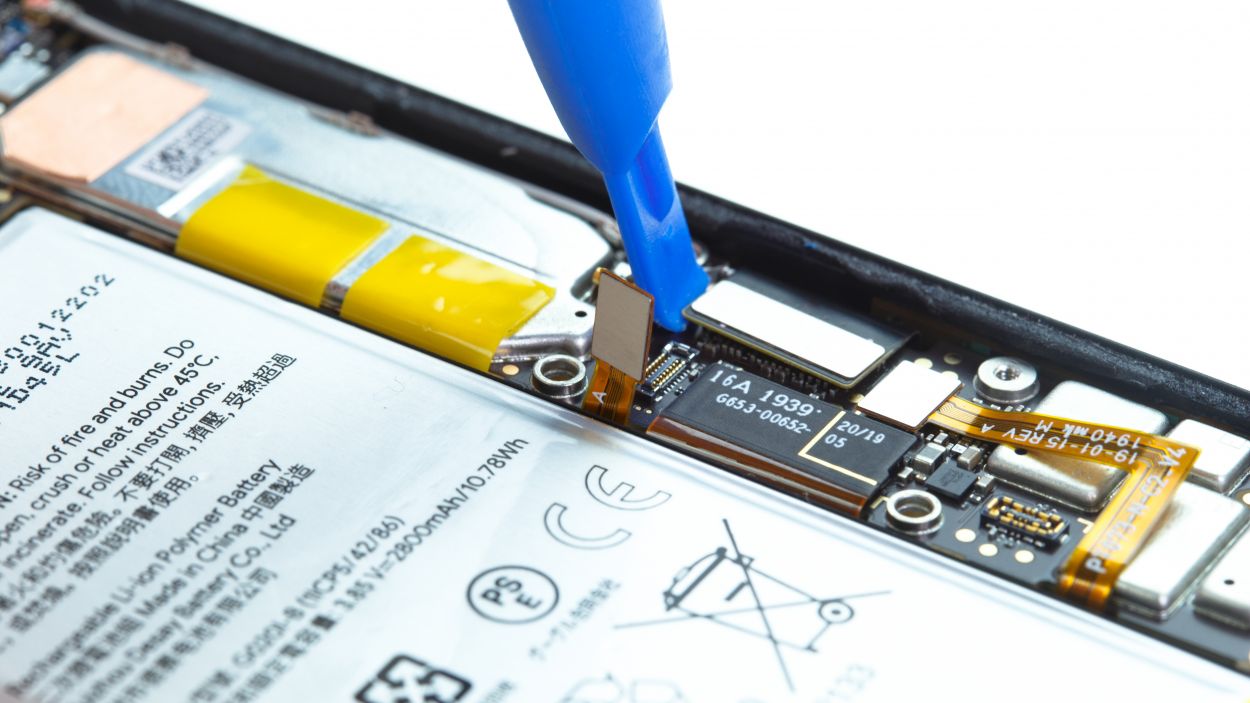
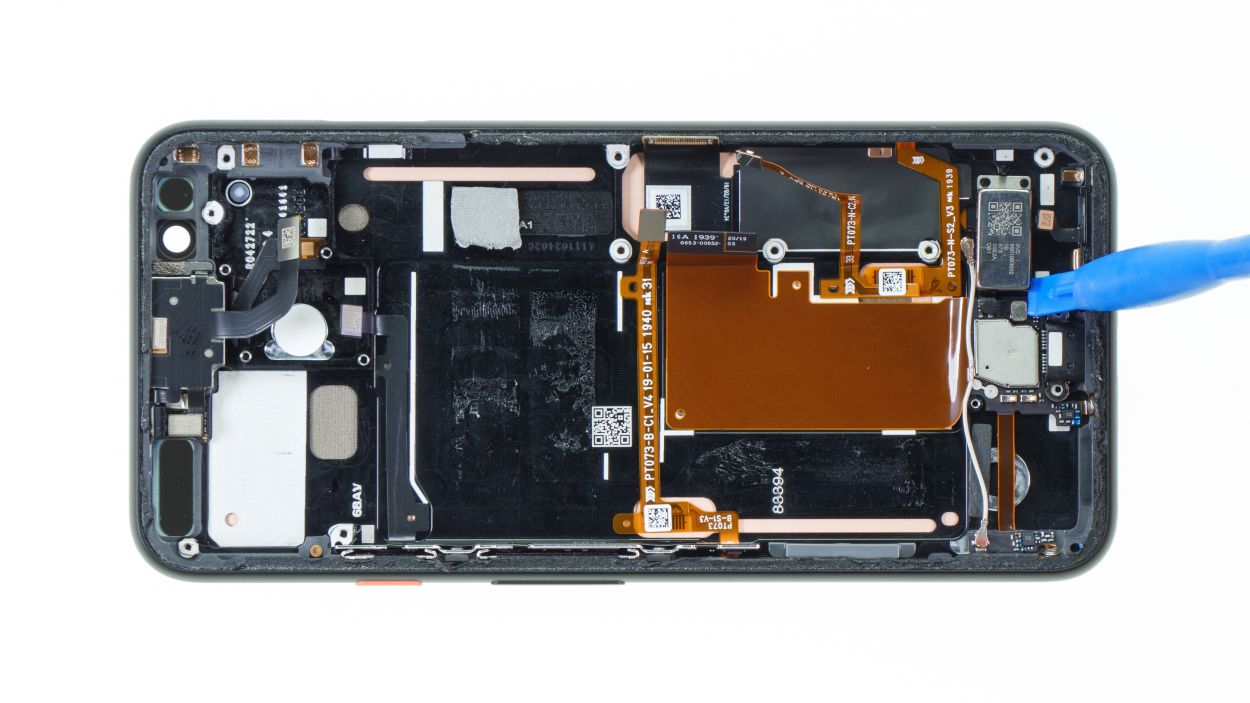
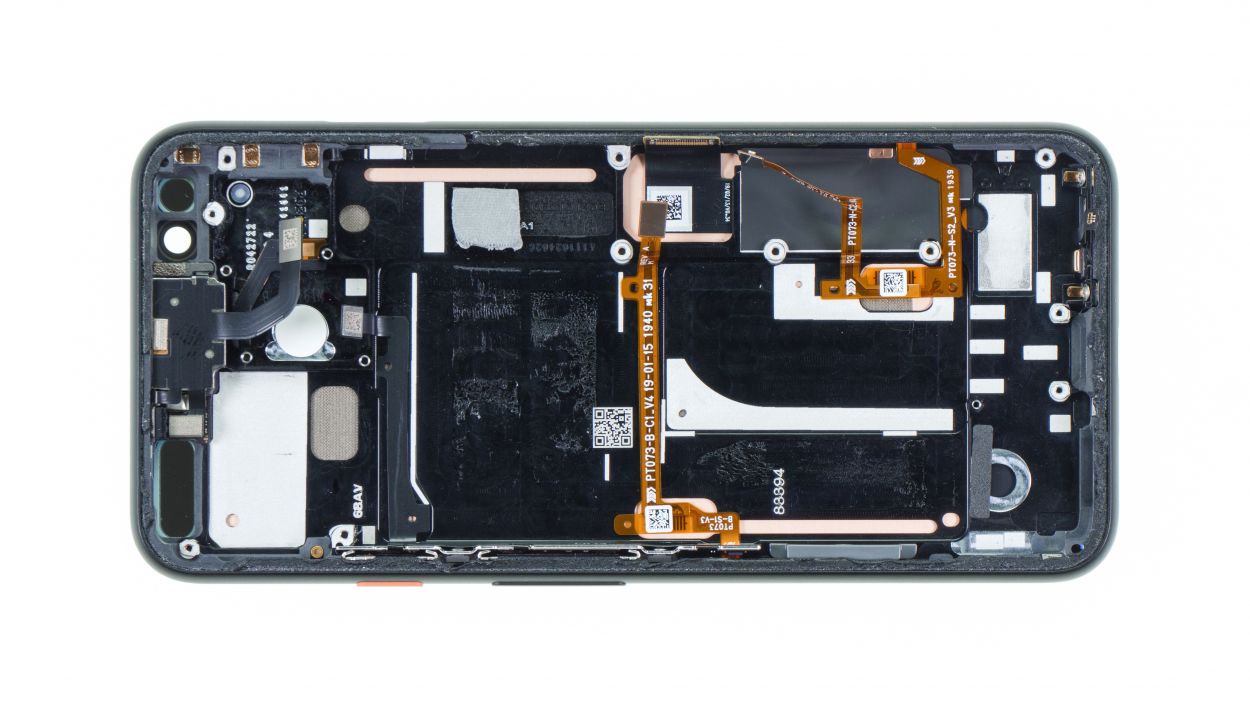
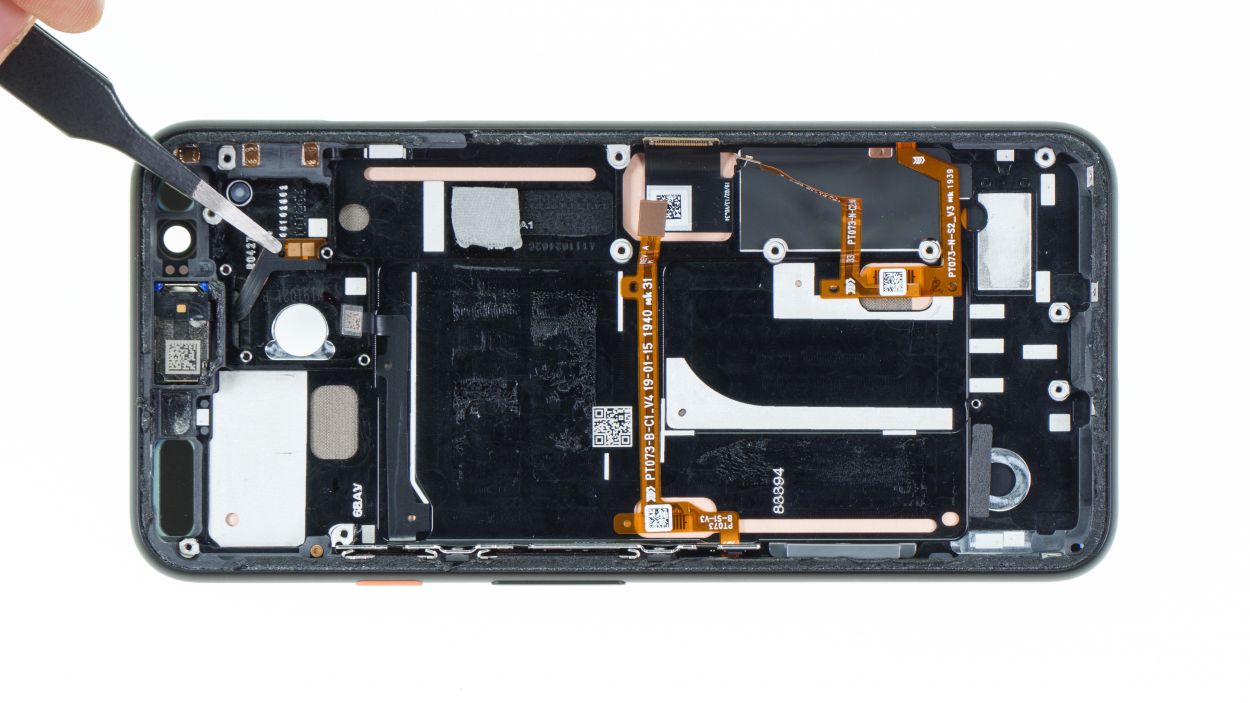
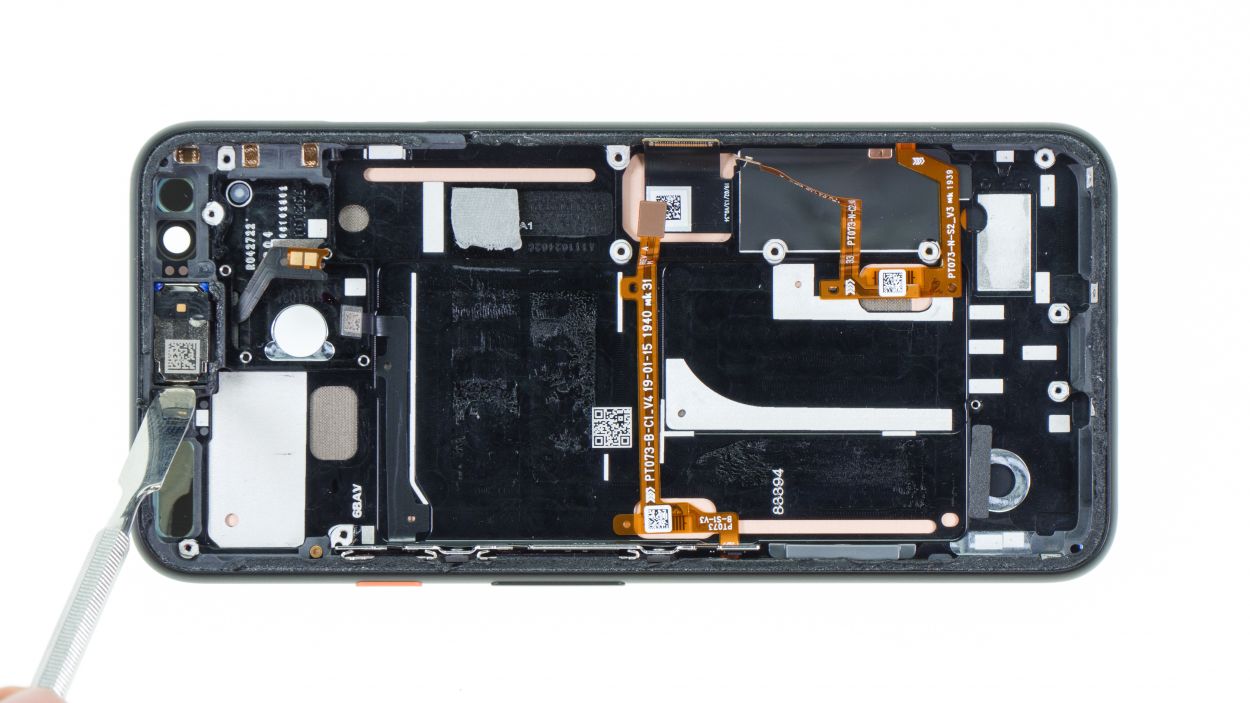
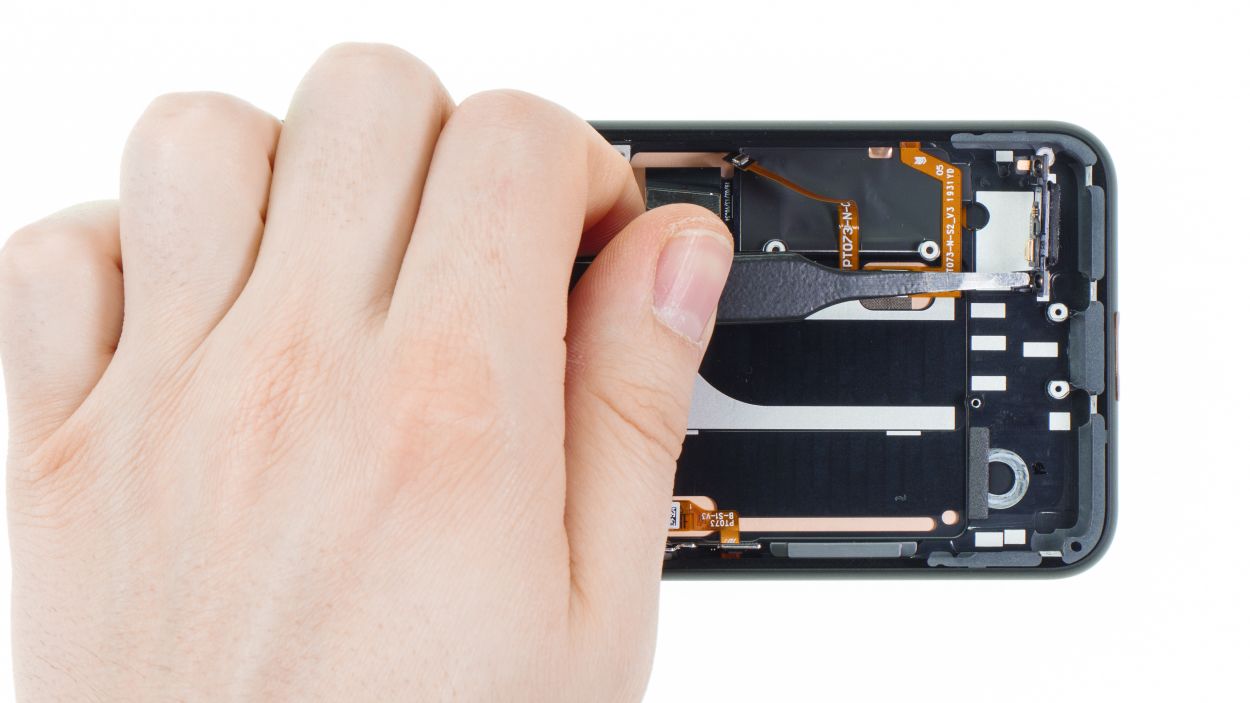
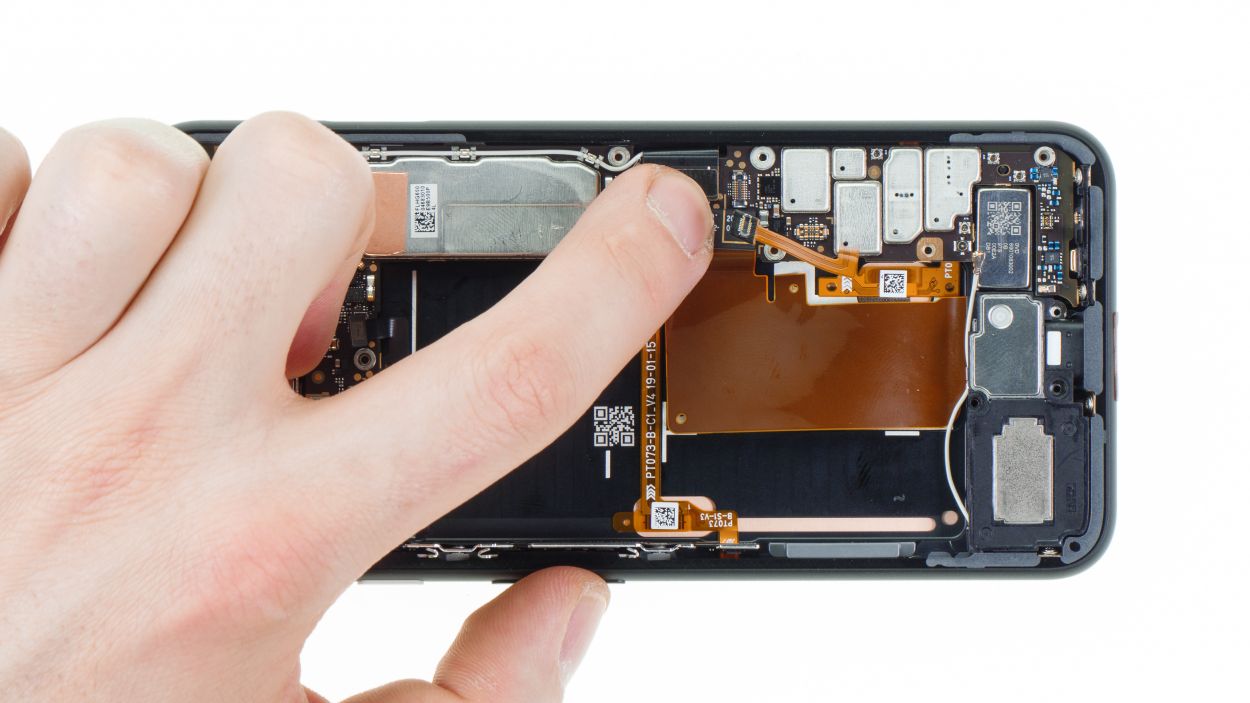
Hey there, before you start disconnecting those connectors from the motherboard, take a moment to check out the area around them. You might spot some tiny components hanging out right next to the connectors. If you can, use your spudger to pry at a spot where there are no components nearby. This way, you’ll keep everything safe and sound. Remember, if you need help, you can always schedule a repair!
4 × 4,0 mm Torx T3
1 × 2,0 mm Torx T3
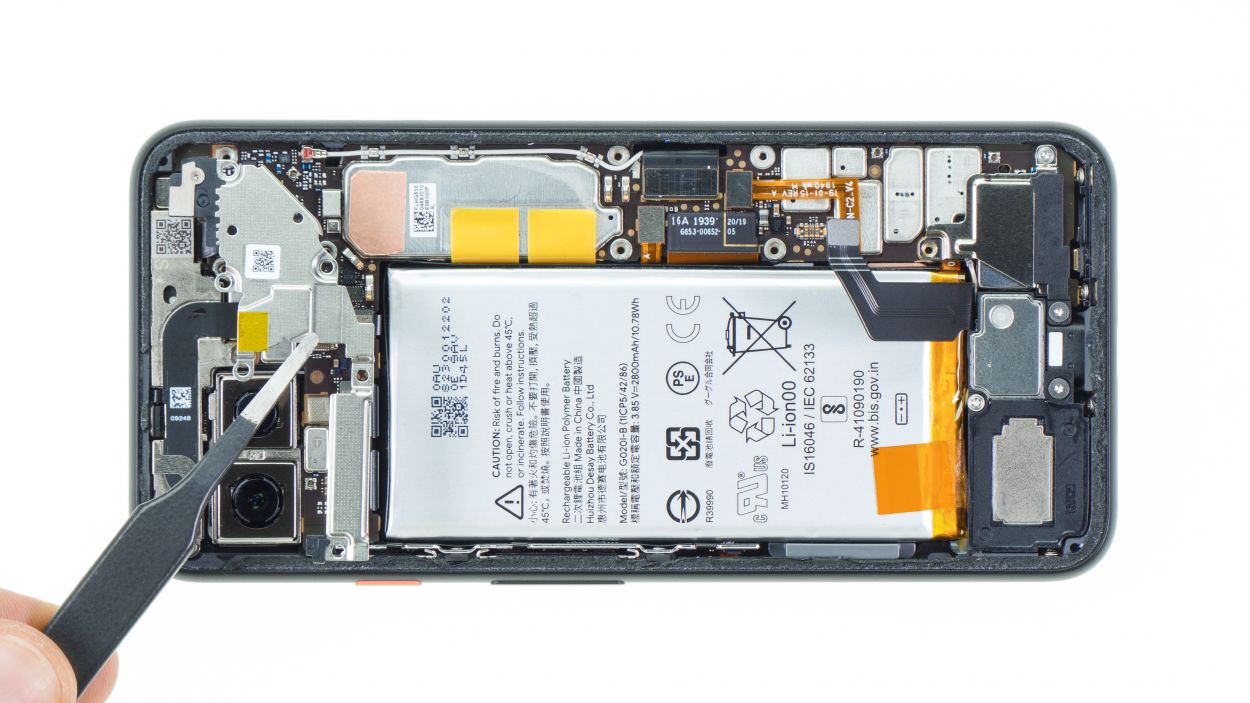
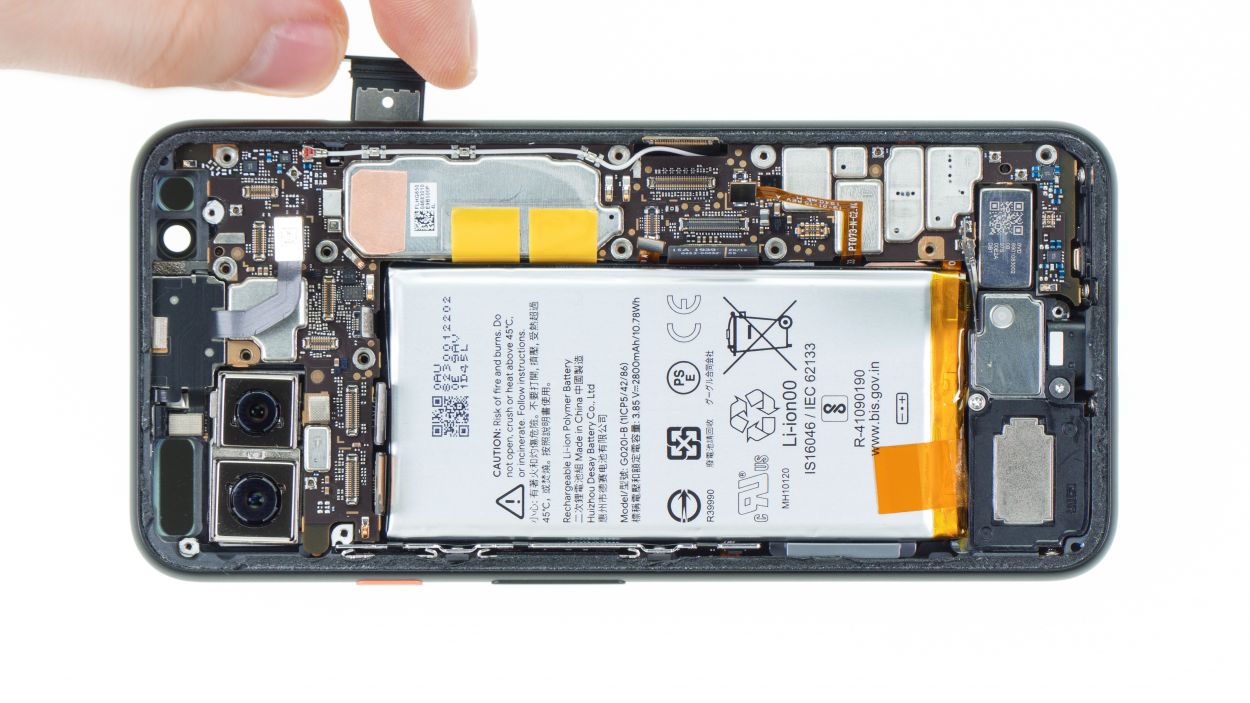
Battery connector
The screws come in various lengths—think of them as a little family! Keep them in their own lanes to avoid confusion, especially when they start mingling with other screws from your device. A fantastic tip? Use a magnetic mat! Just lay out the screws and the cover plate exactly where they were in the device. Thanks to the magic of magnetism, your screws will stay right where you put them, making it way harder for them to wander off. If you need help, you can always schedule a repair.
Tools Used
Step 5


4 × 4,0 mm Torx T3
2 × 2,3 mm Torx
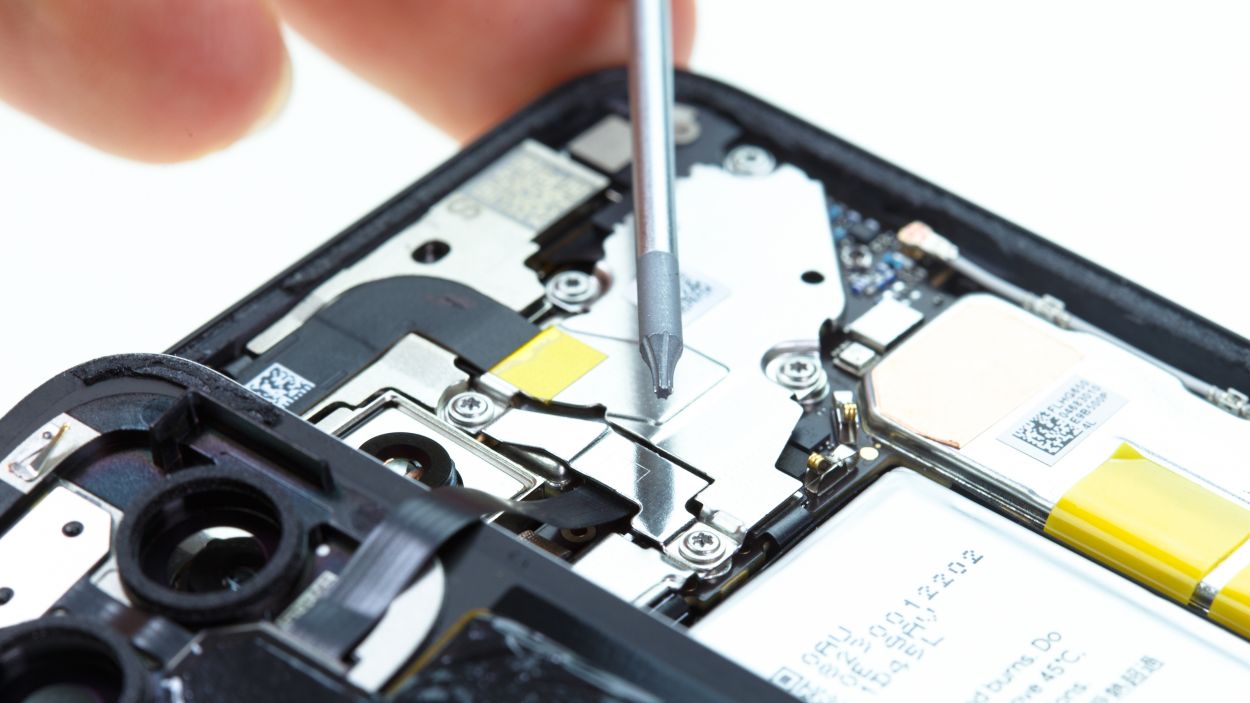
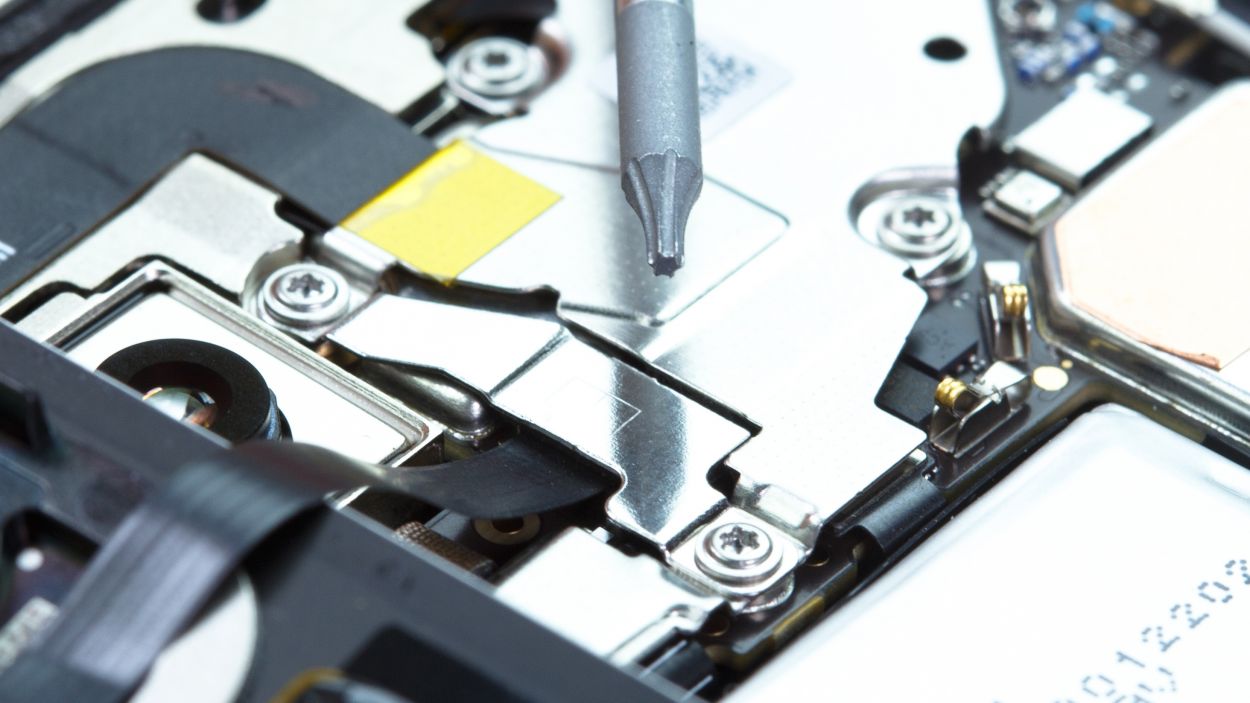
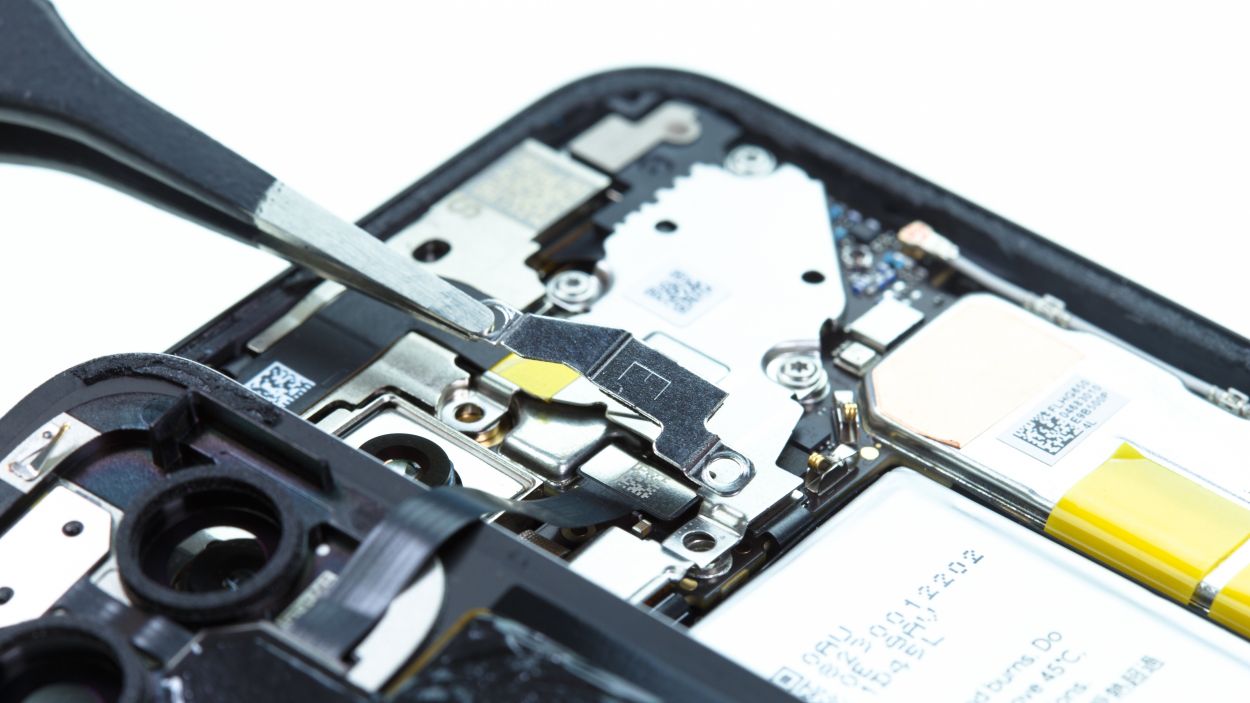
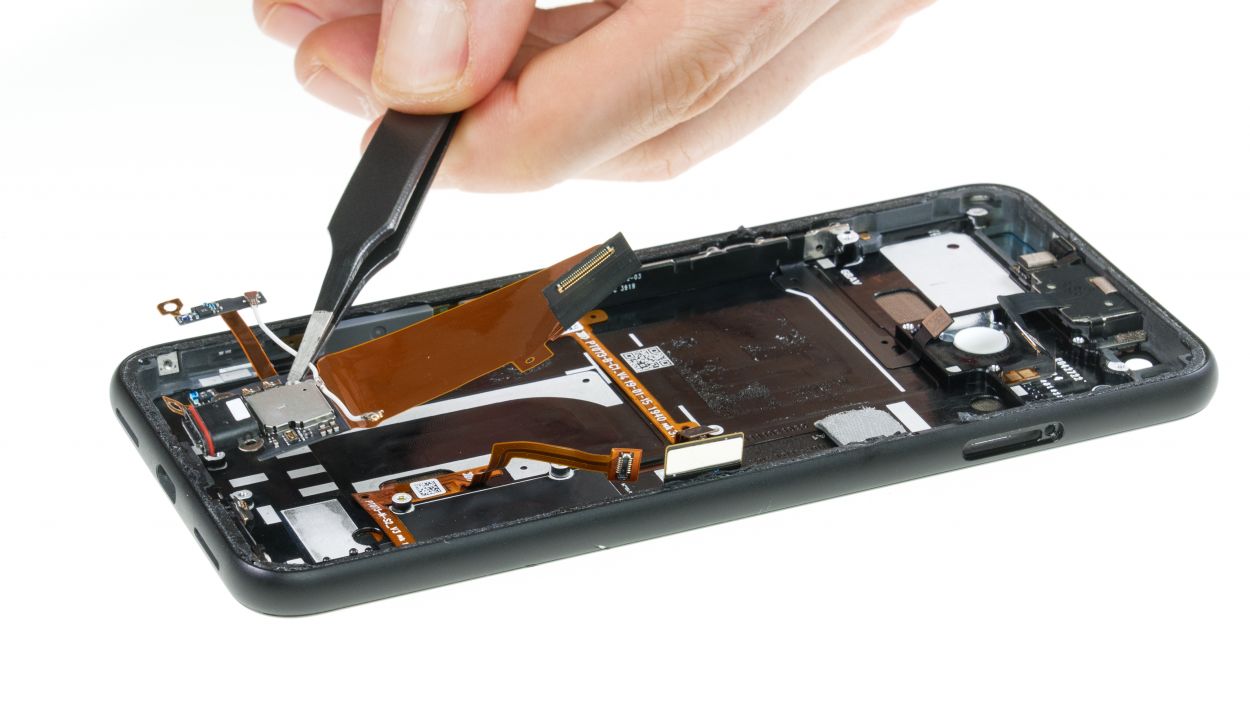
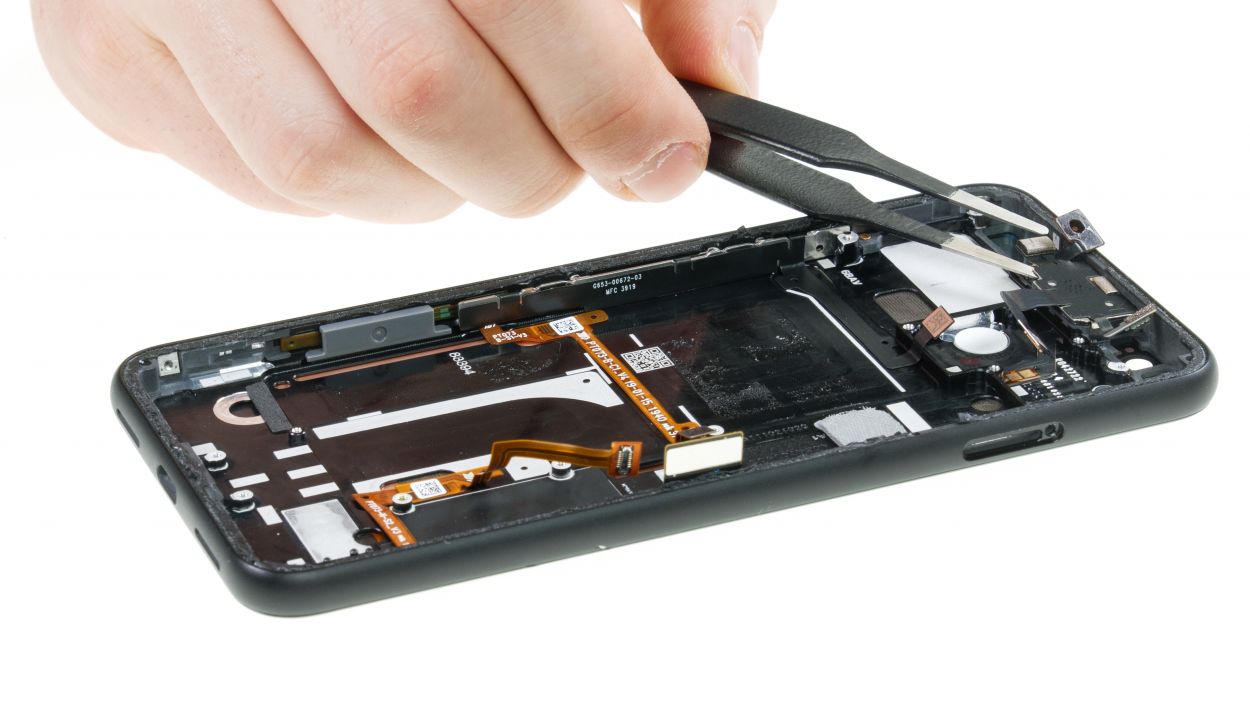
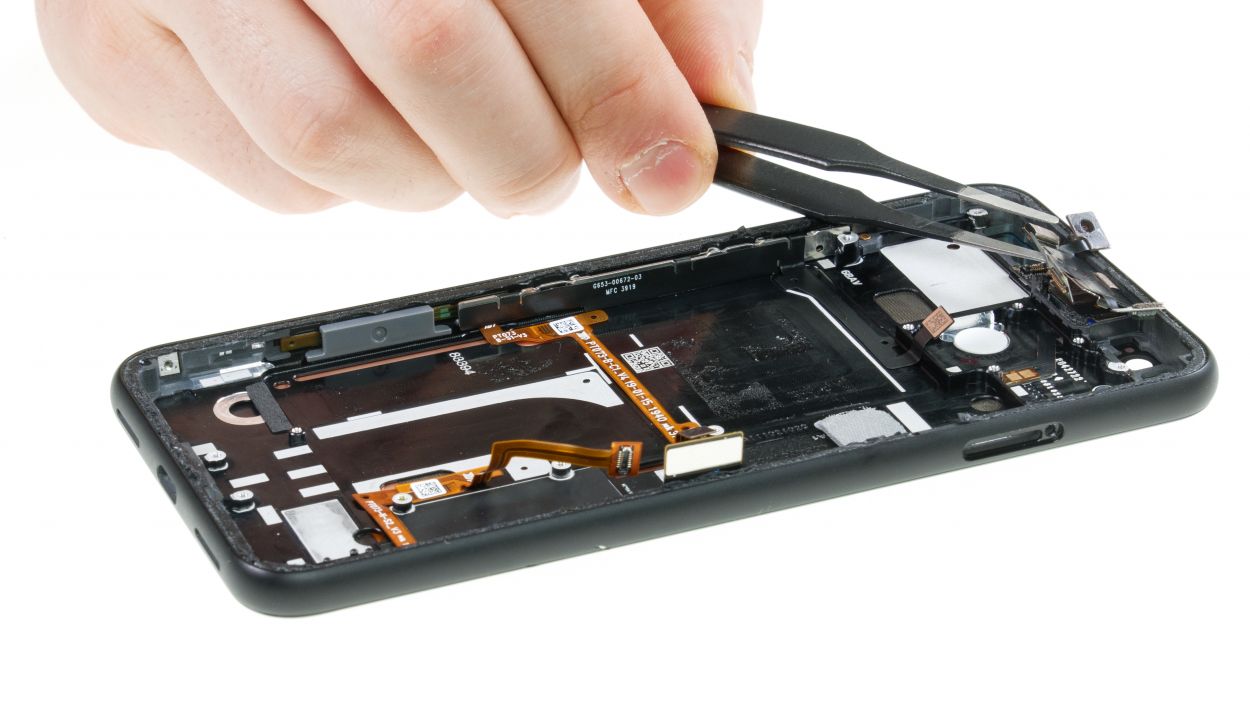
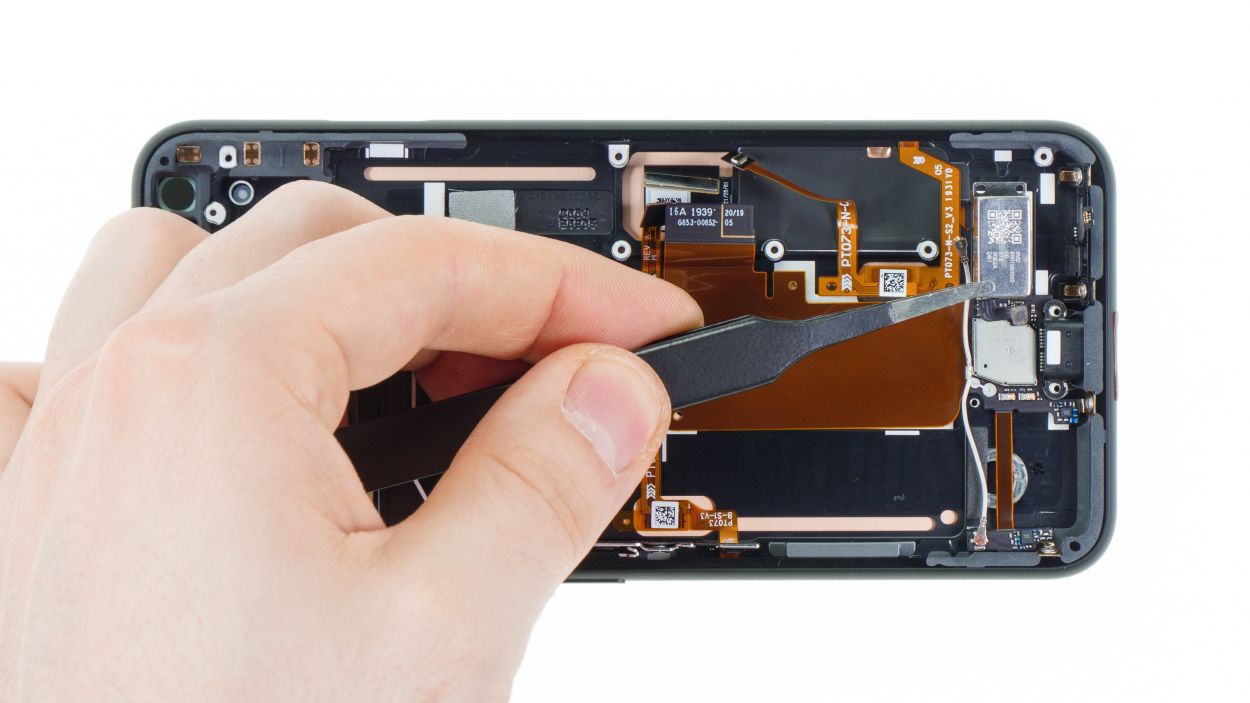
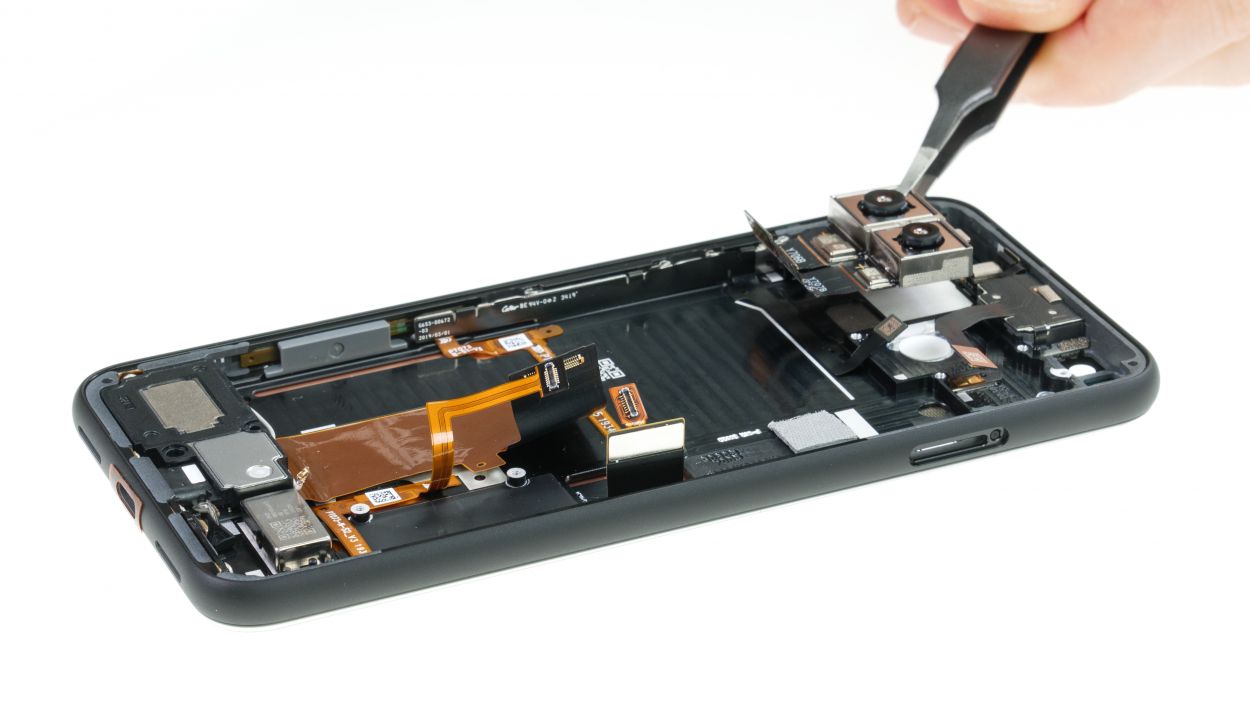
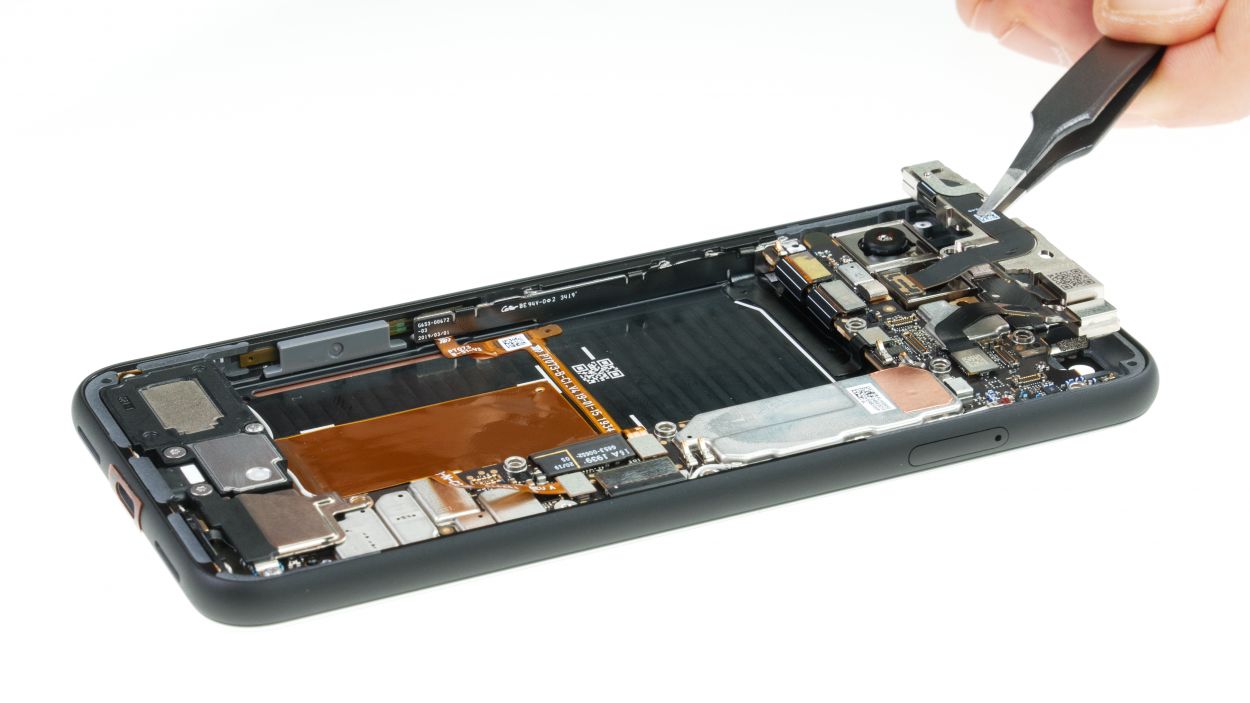
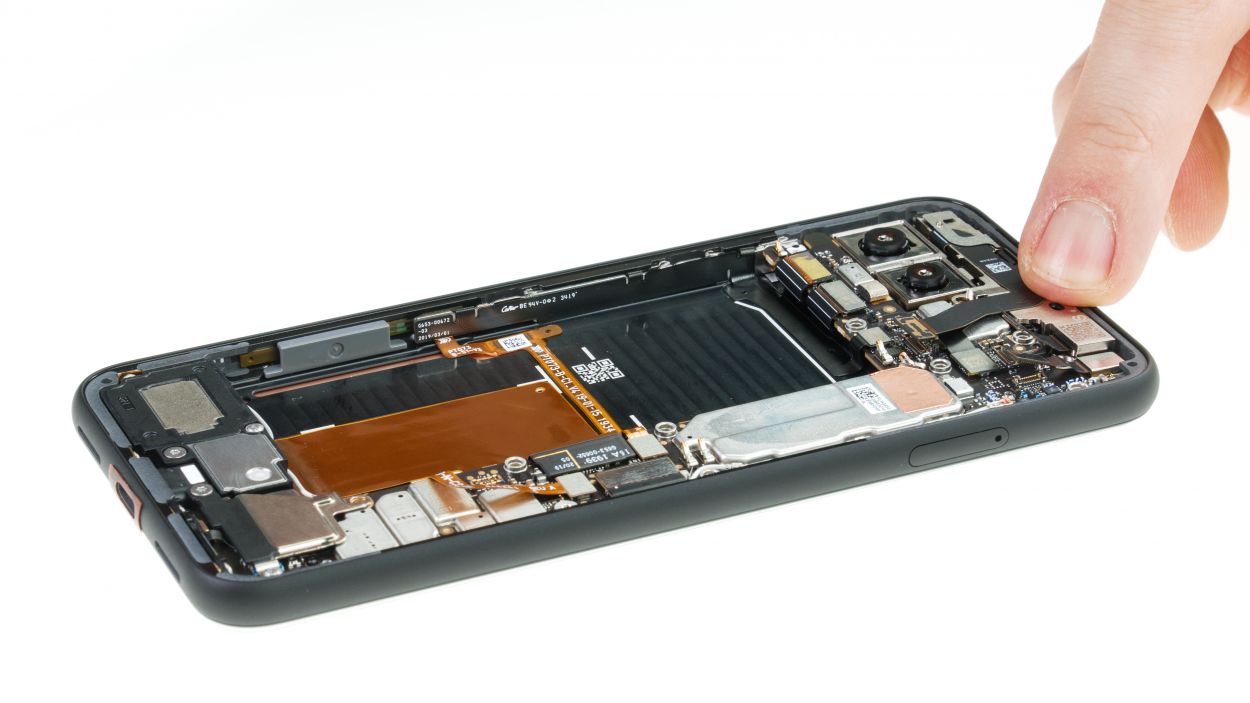
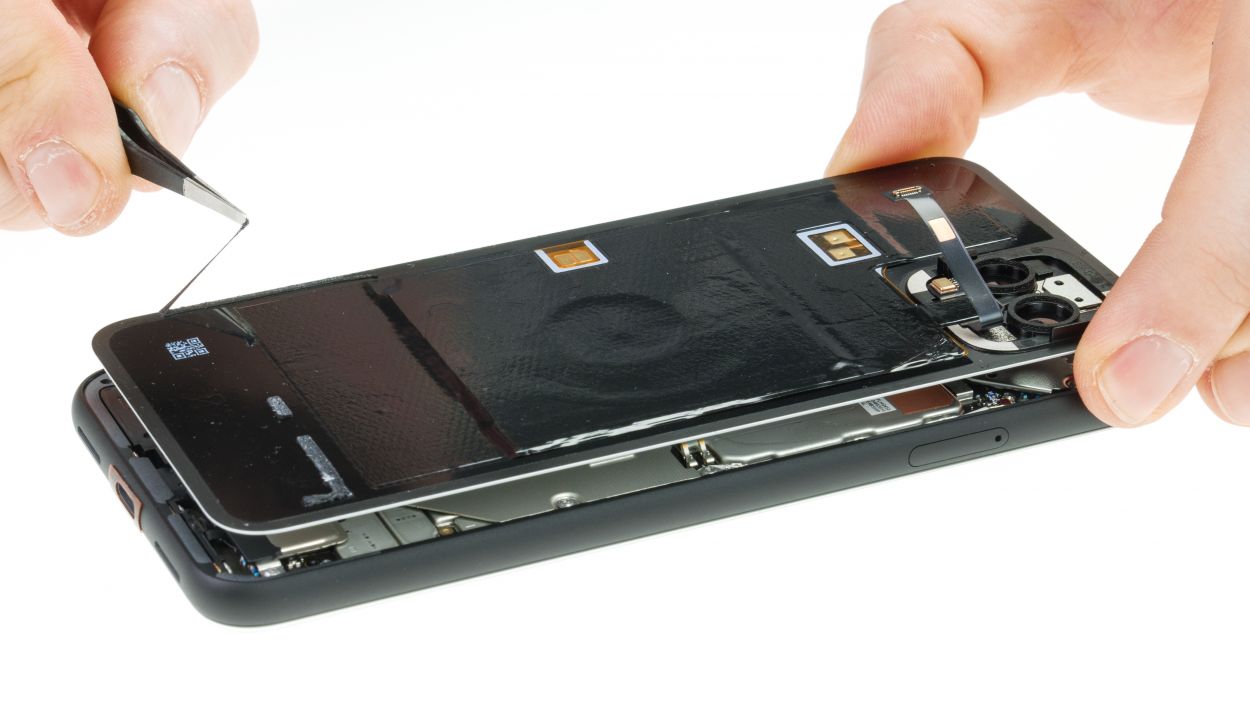
– Loosen the four screws of the cover plate above the contacts of the front camera and sensor module and remove the plate.
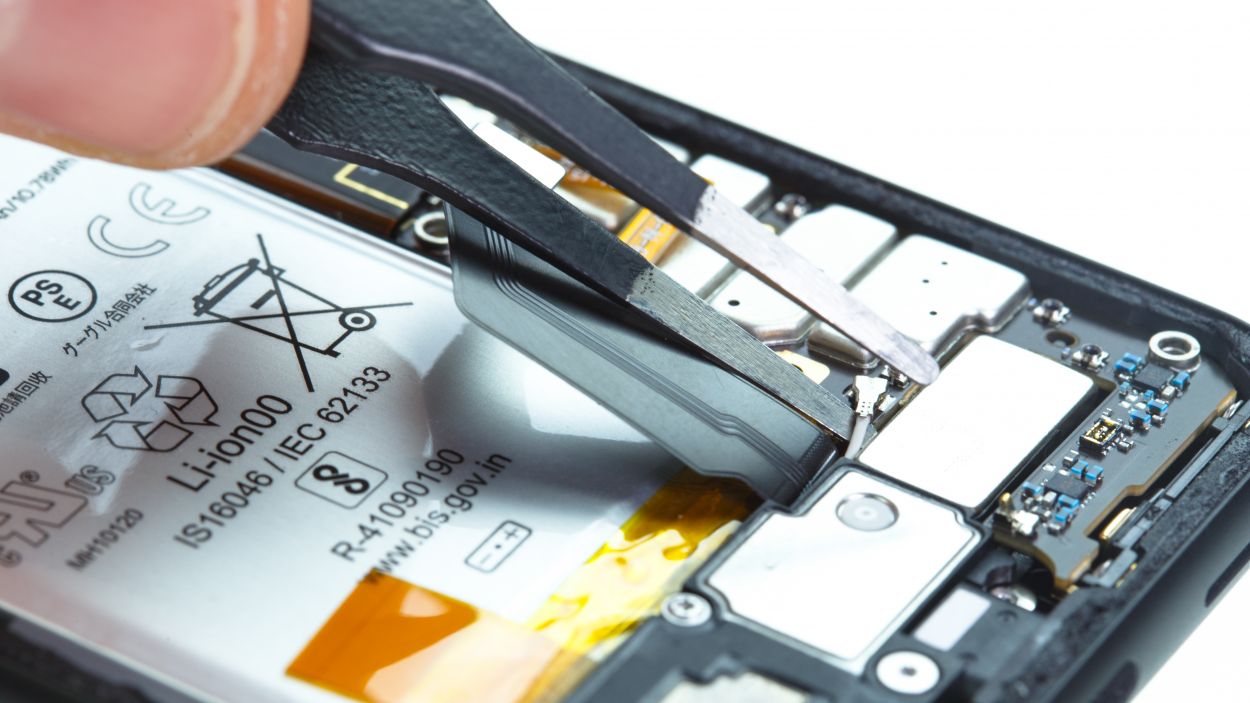
– Carefully separate the three connectors from the main board with a spudger.
– Unscrew the two other screws that secure the entire module.
– Gently lever in several places until you can remove the module.
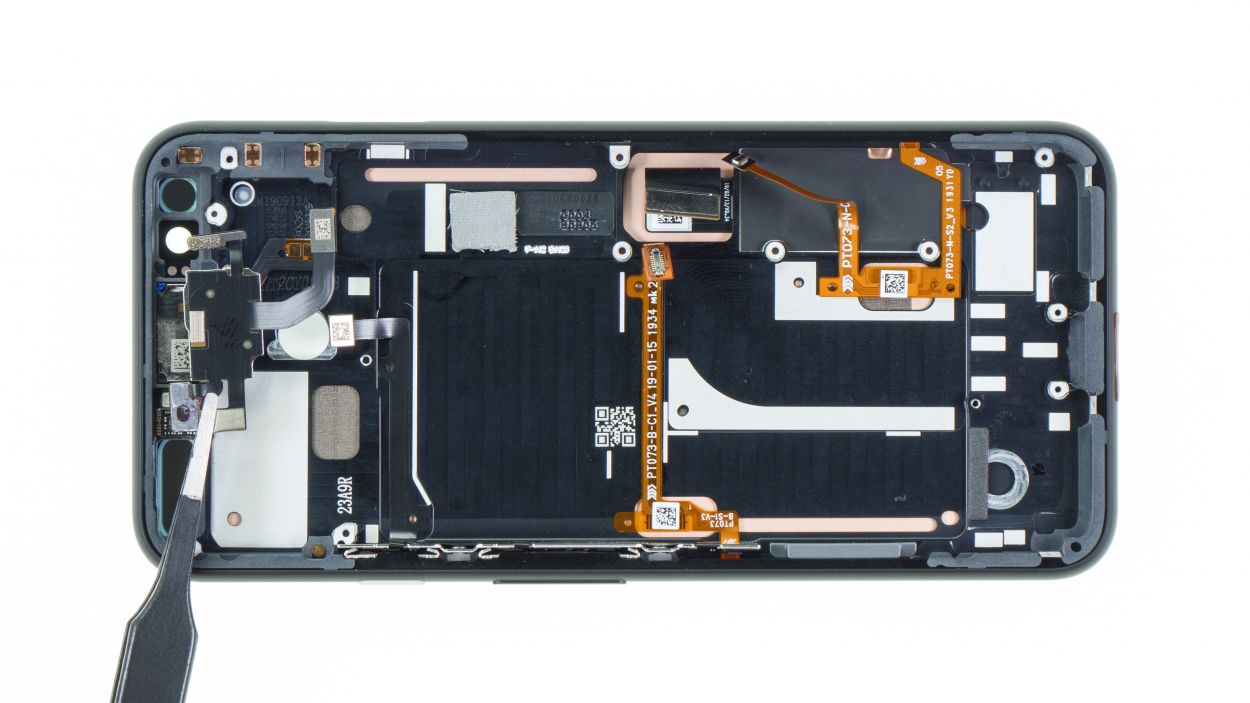
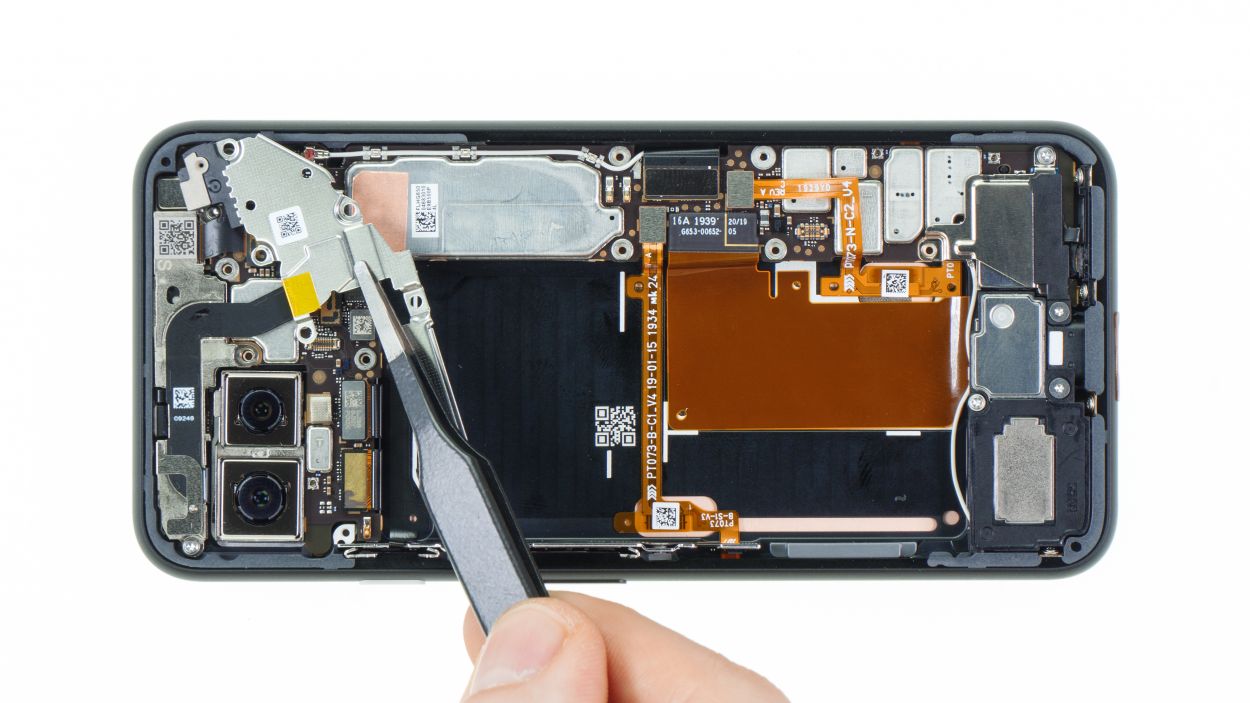
Step 6


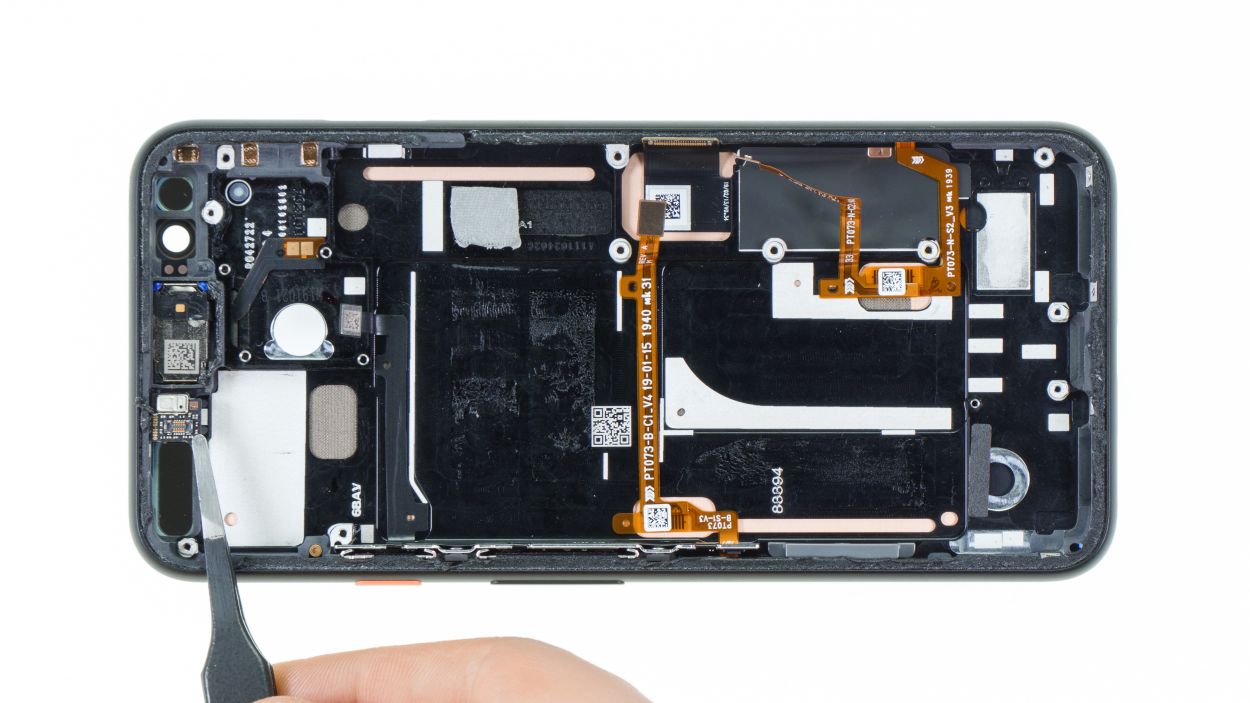
– Loosen the two Torx T3 screws of the lower cover plate and take it out.
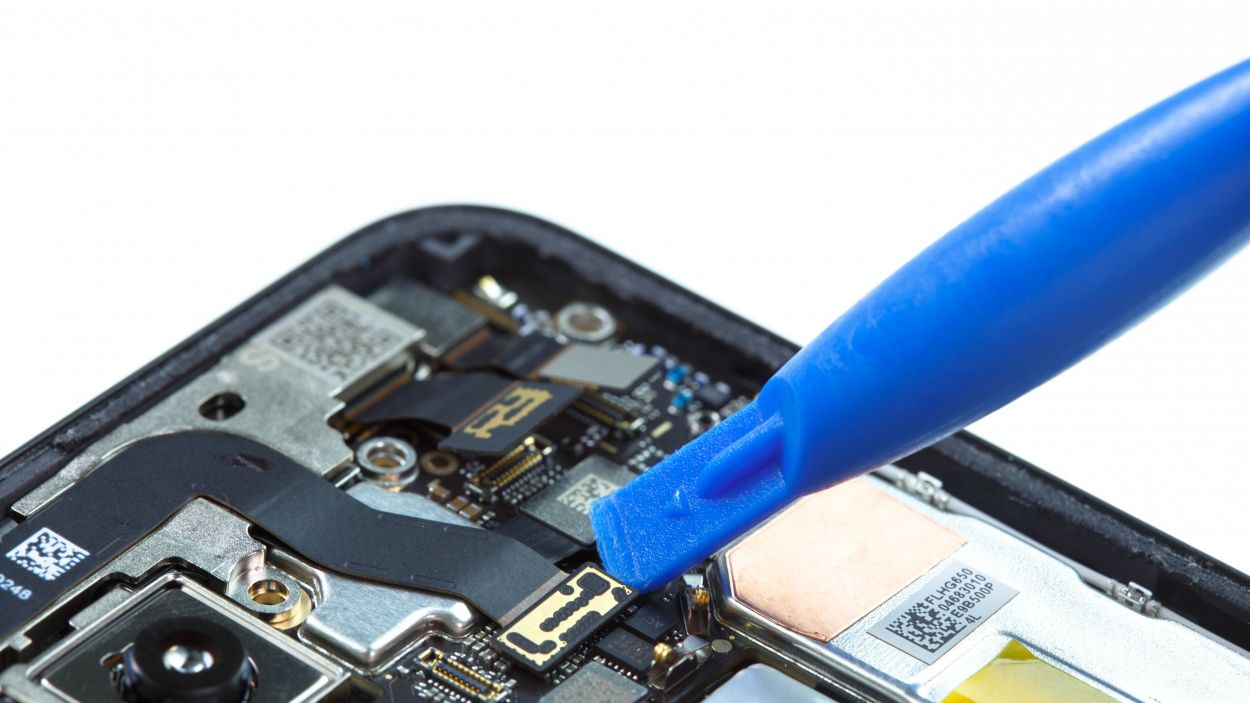
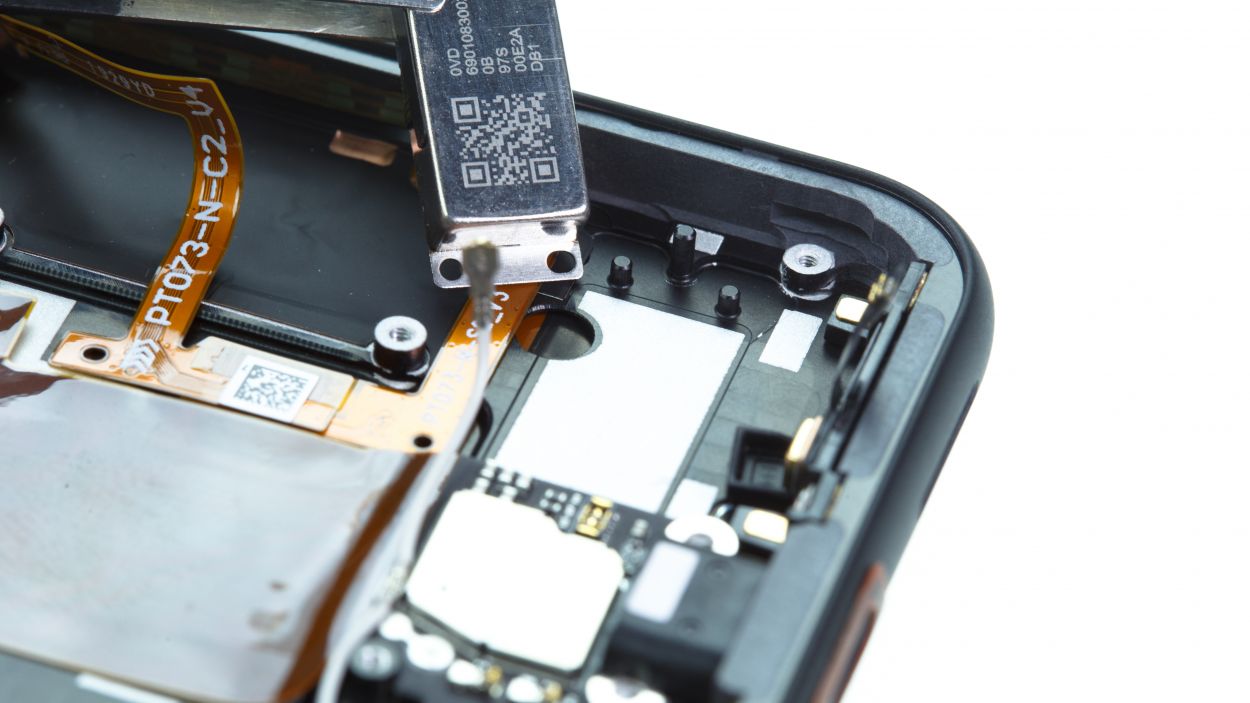
– Disconnect all connectors and the antenna cable from the main board.
1 × 4,0 mm Torx T3
1 × 4,4 mm Torx T3
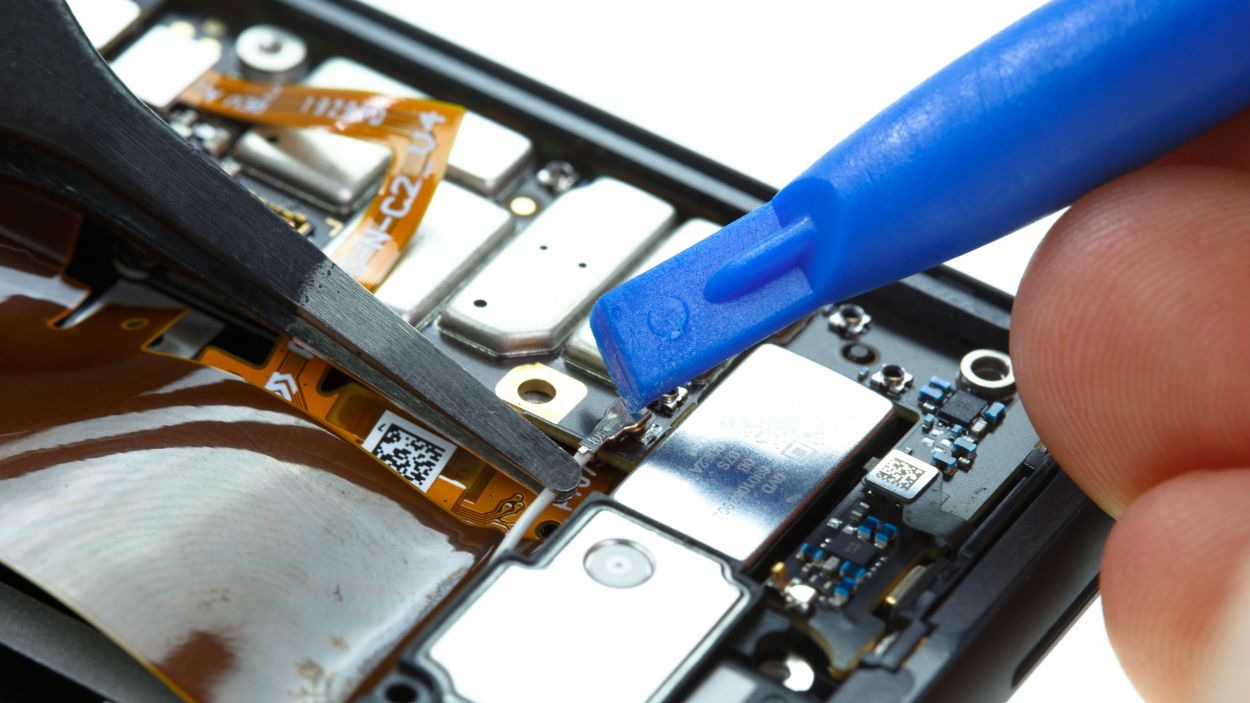
At Salvation Repair, we’ve got you covered! When it comes to disassembling your device, always be gentle and cautious. Think of it like unwrapping a present – you never know what’s inside! When working with connectors, use a trusty spudger to pry them off, and be kind to the tiny parts on the motherboard.
But be super careful when plugging those pesky connectors back in, or you might disturb the party (and damage your device!). If you need help, you can always schedule a repair
At Salvation Repair, we’re here to guide you through it, step by step. Take your time, have fun, and remember – you’ve got this!
Tools Used
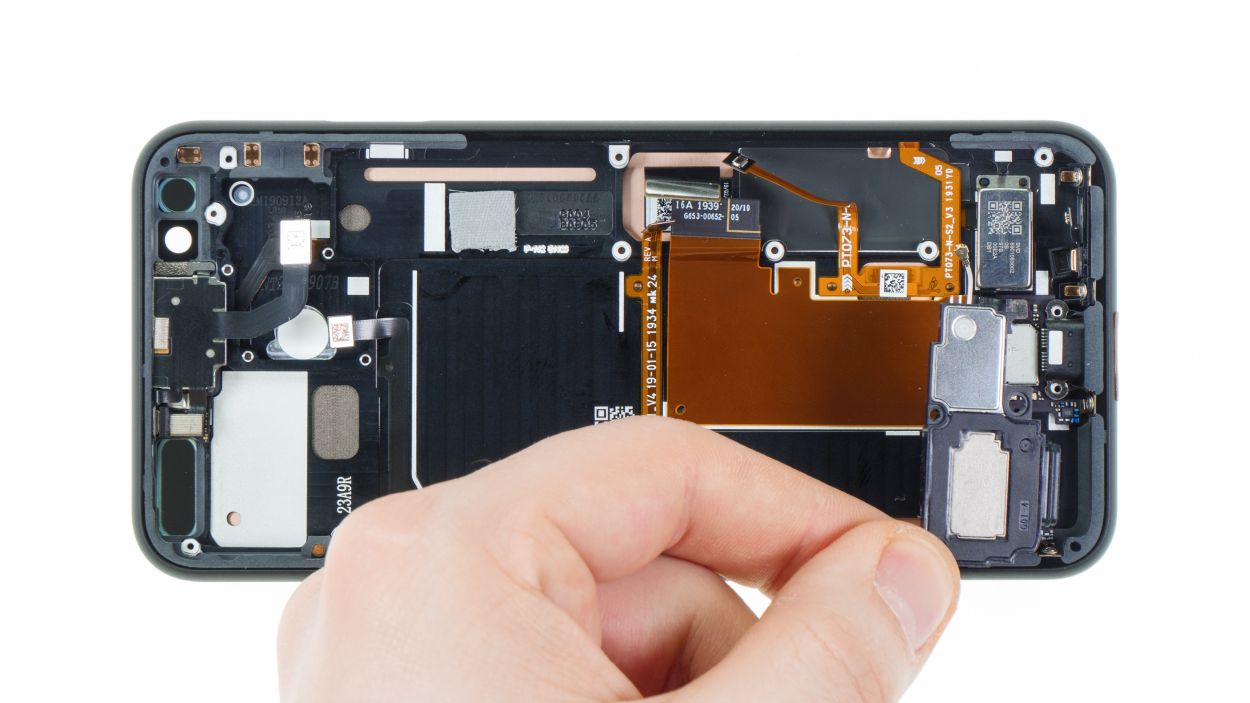
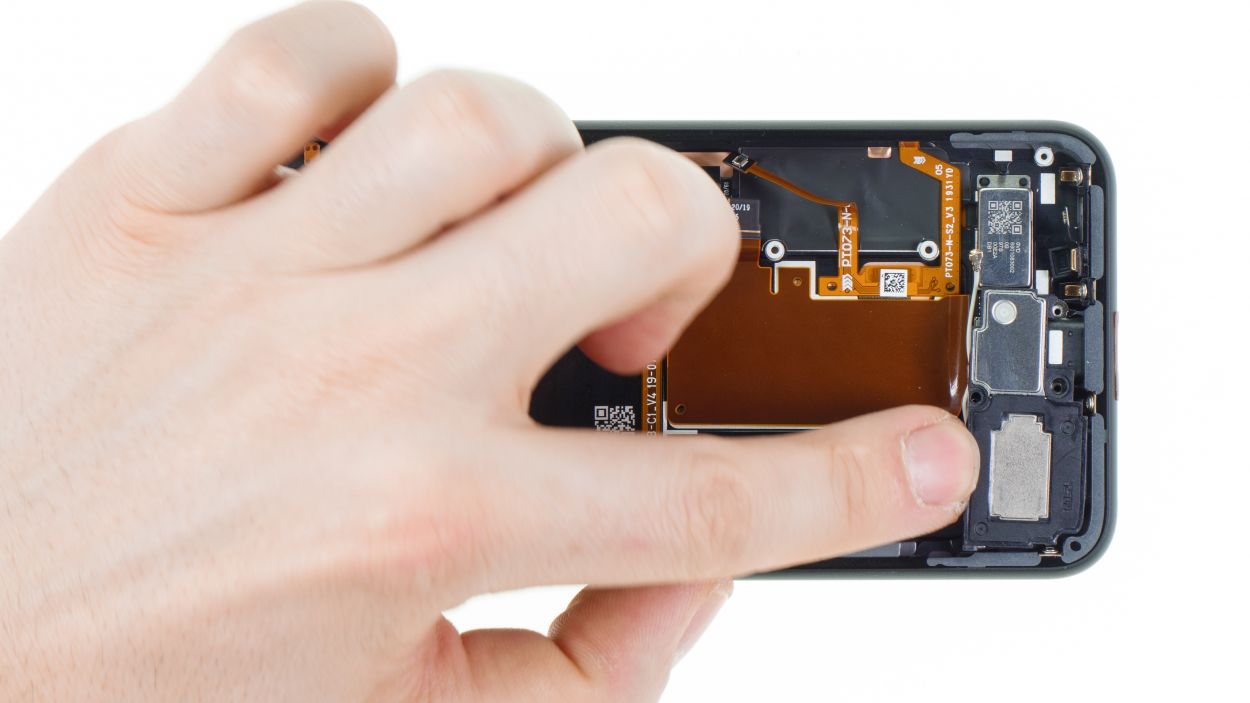
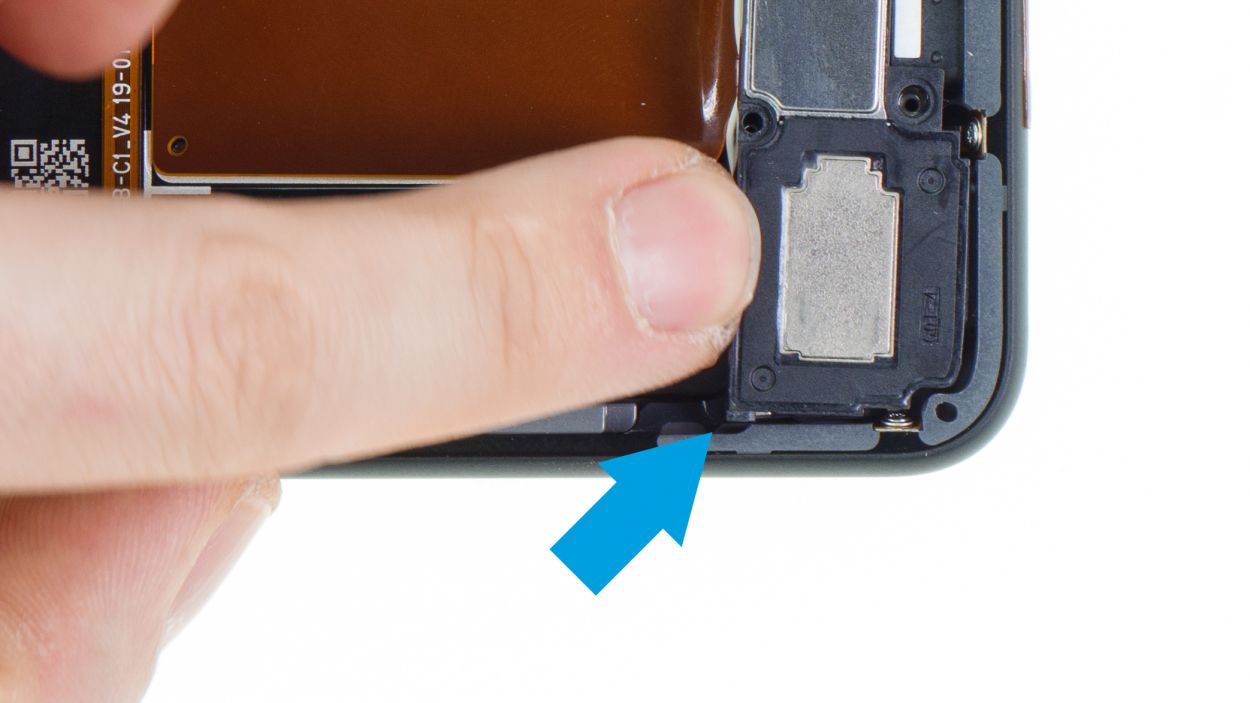
Step 7
1 × 4,0 mm Torx T3
1 × 4,4 mm Torx T3
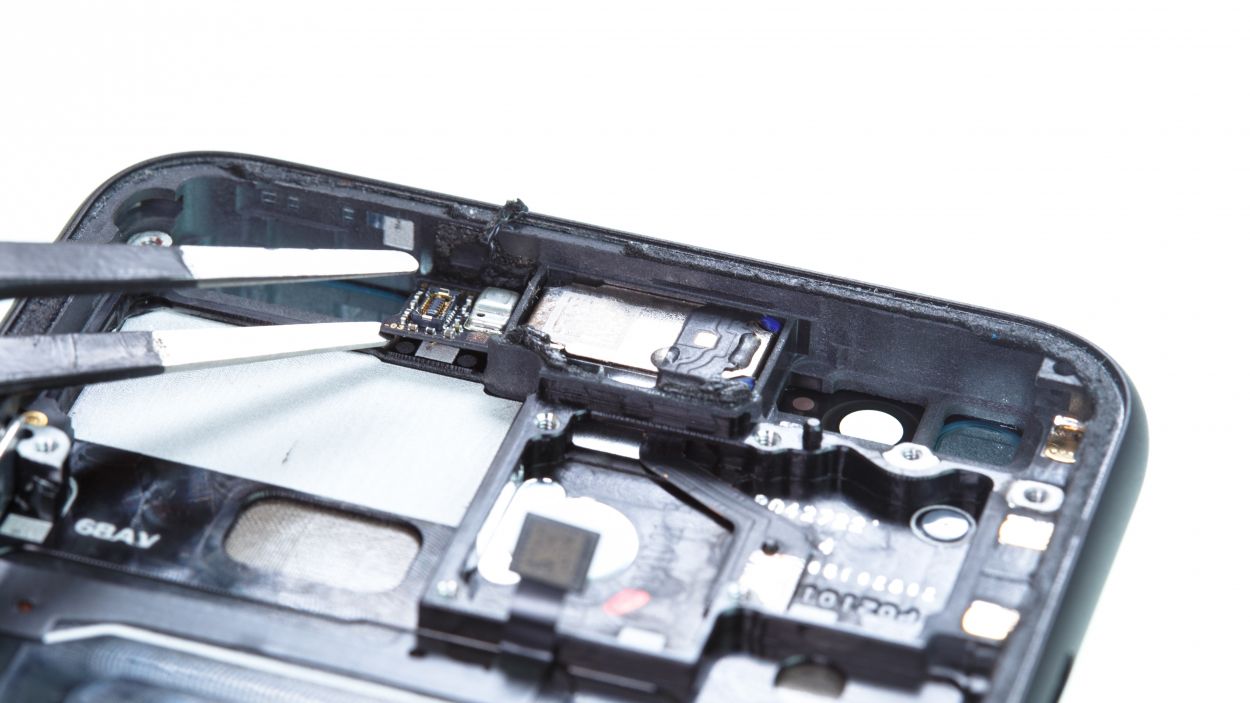
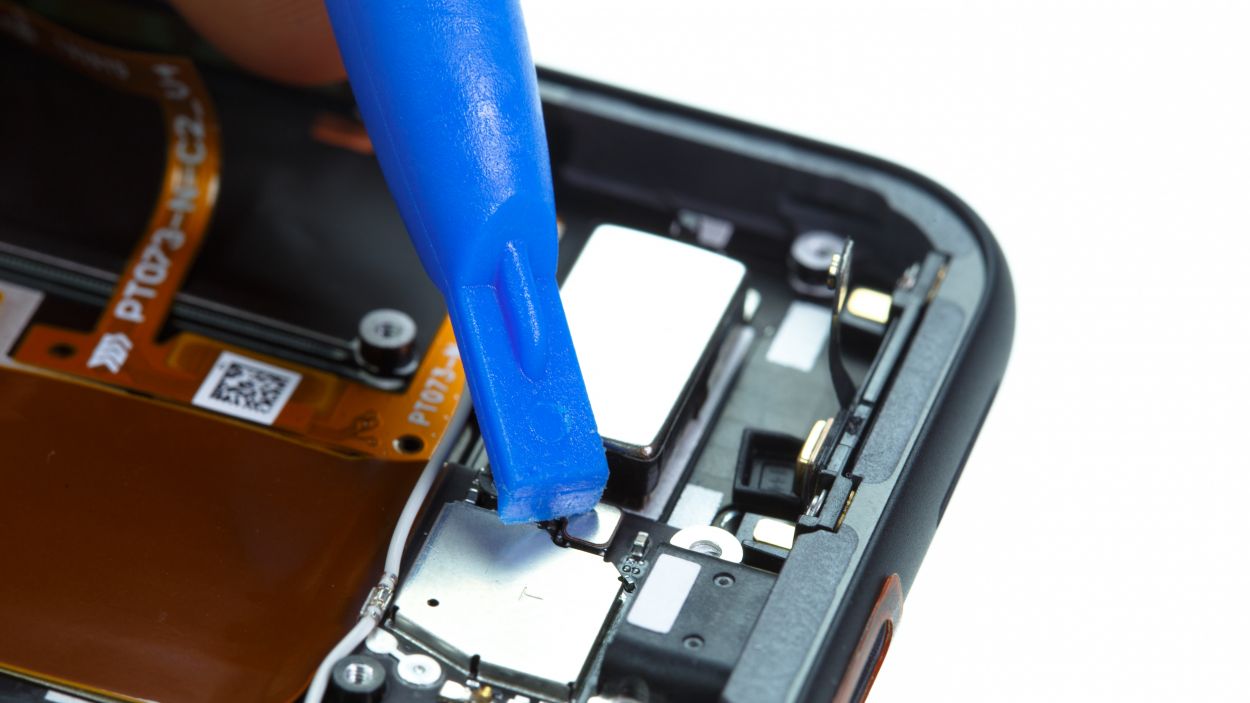
– Unscrew those two little speaker screws.
– The speaker’s opening is tucked away at the bottom of your device, snugly positioned deep into the frame and hooked on the left side.
– Gently slide the speaker upward and pry it loose from the side.
– Now, go ahead and lift that speaker out of the device!
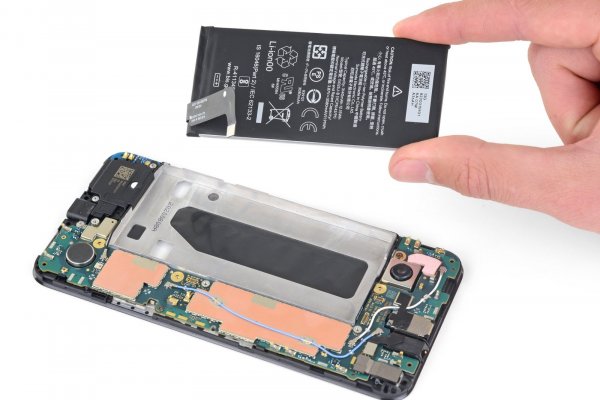
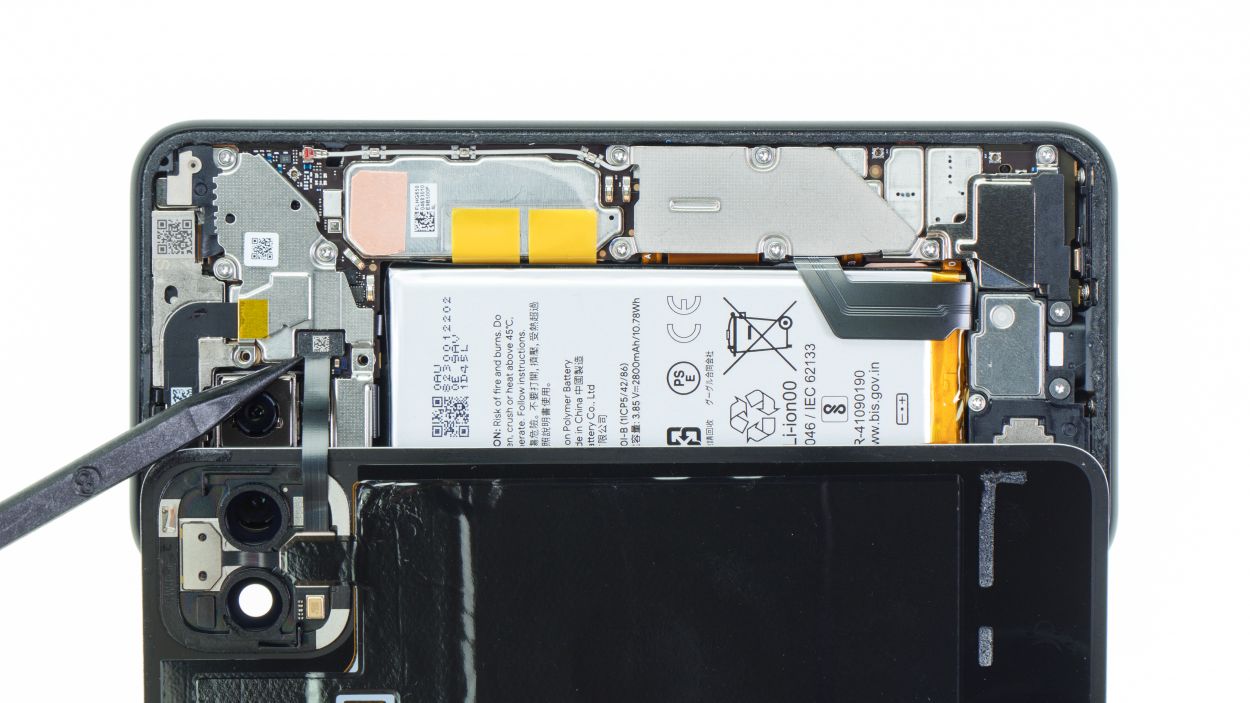
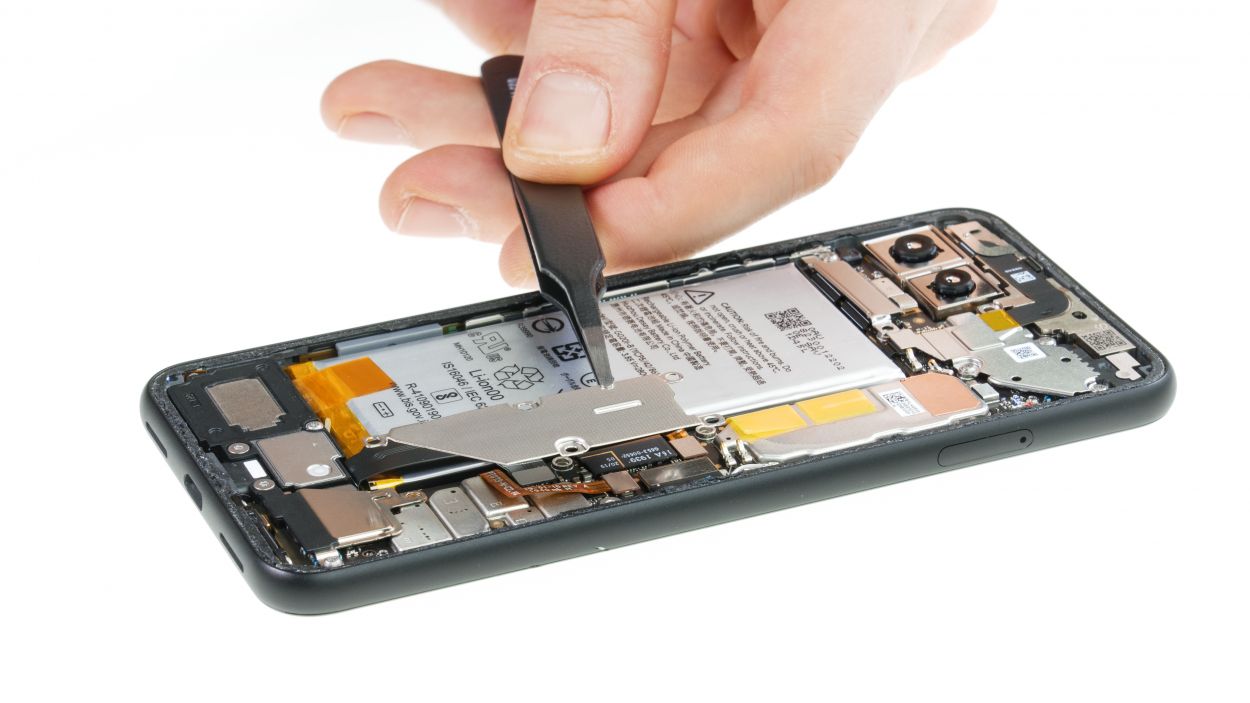
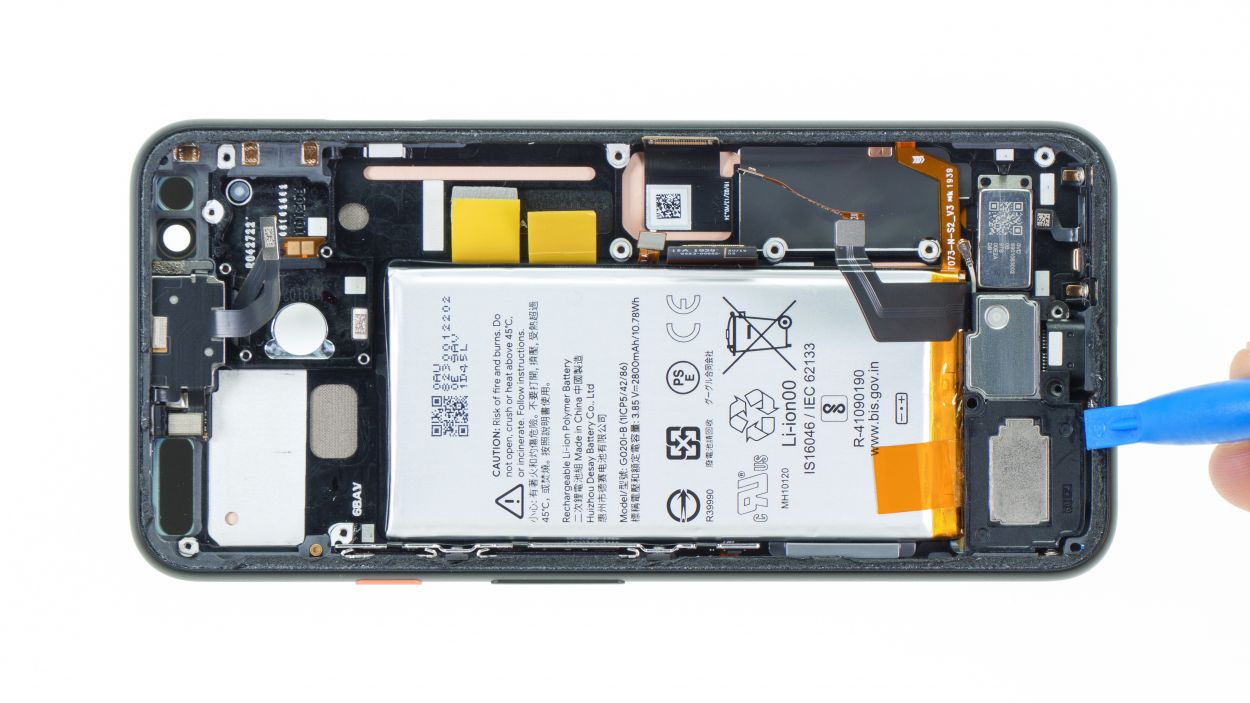
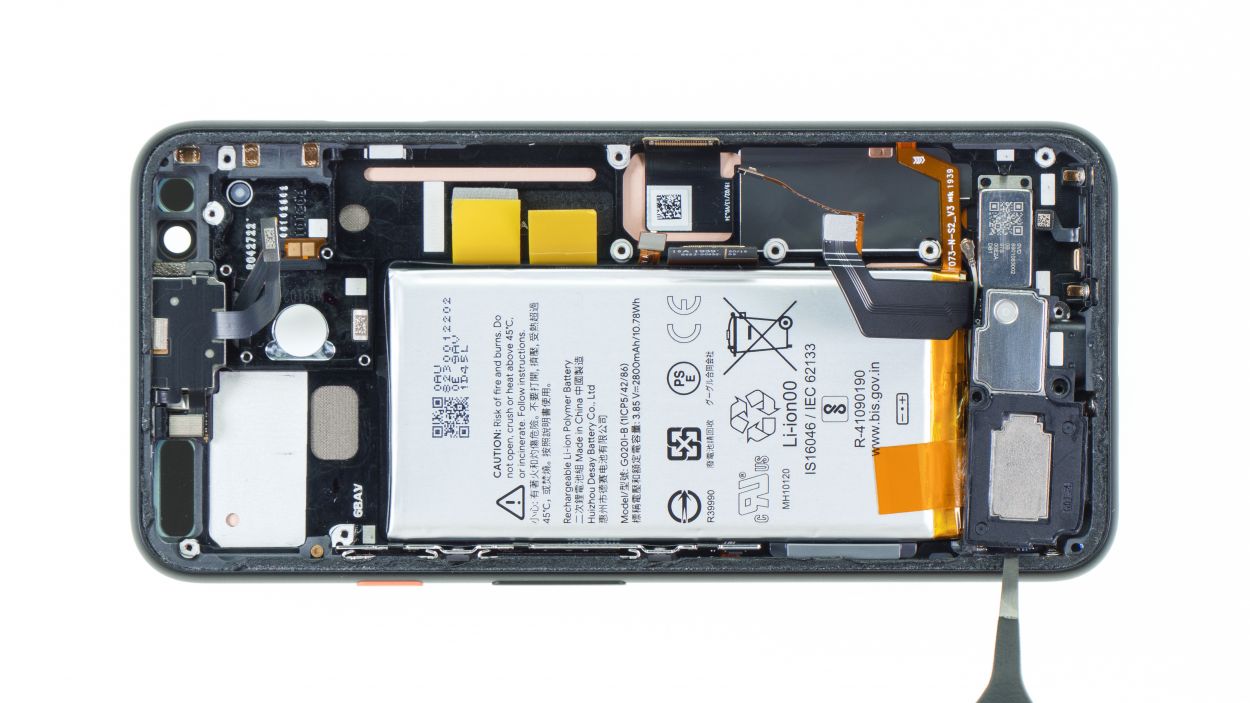
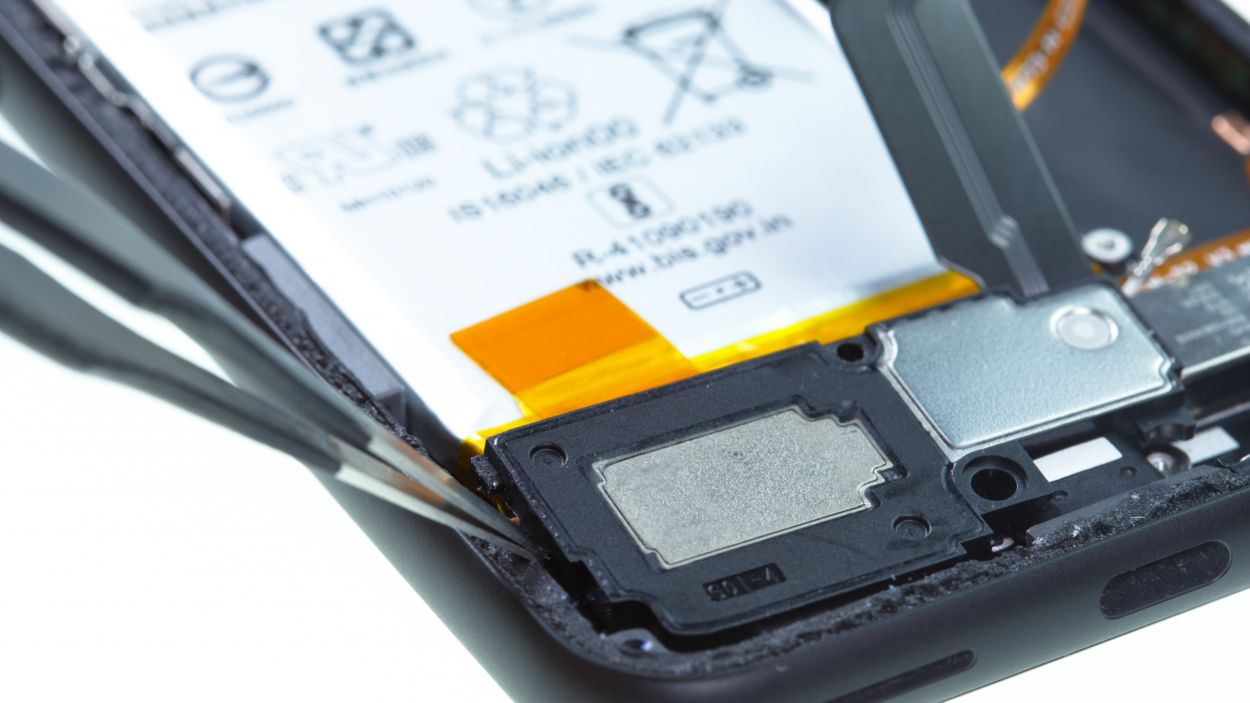
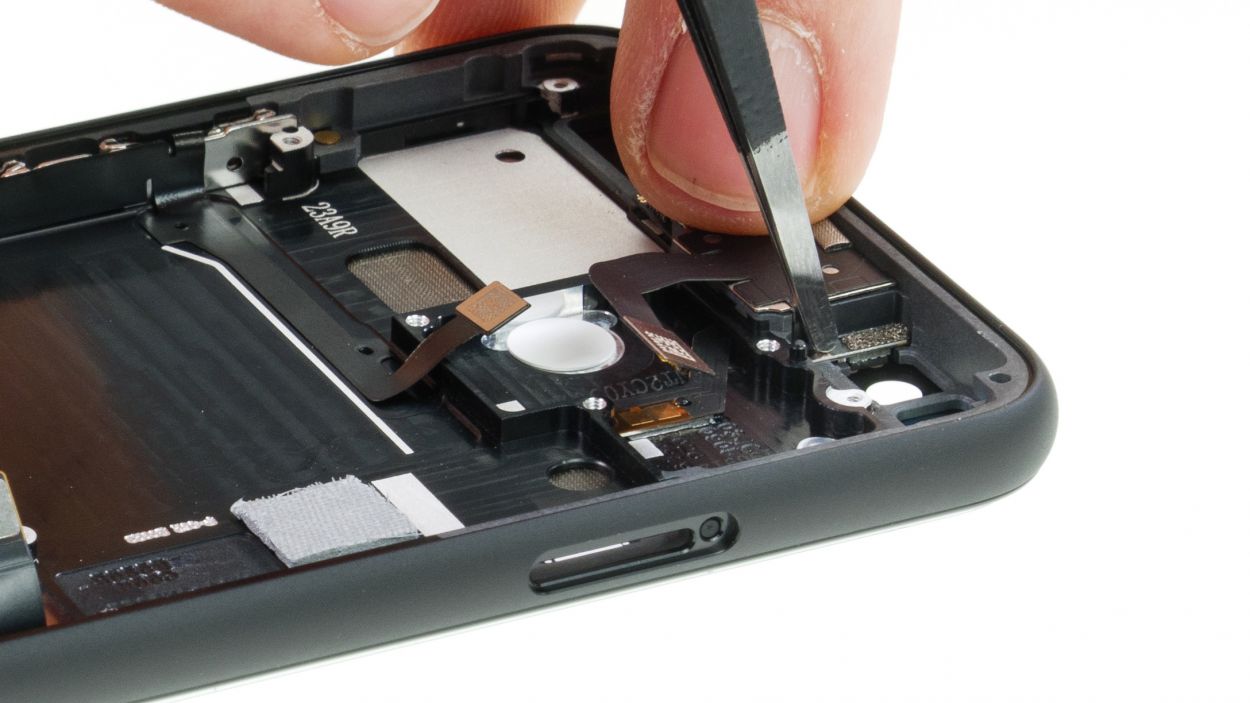
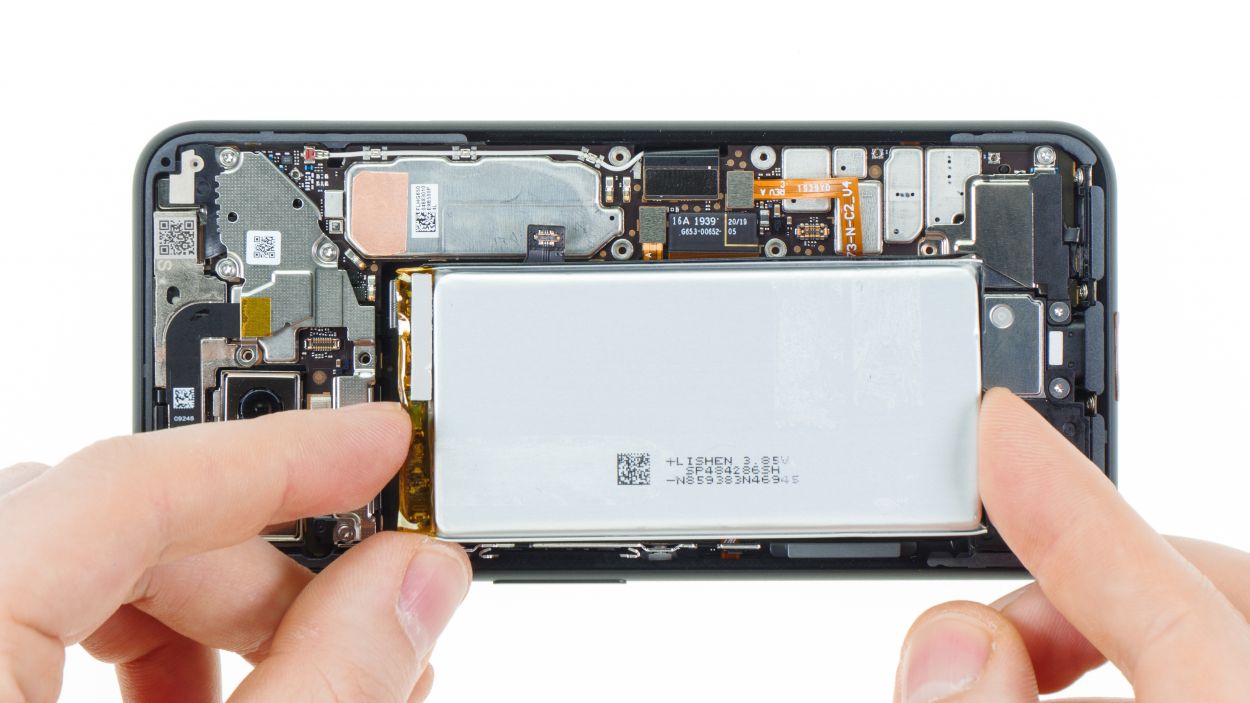
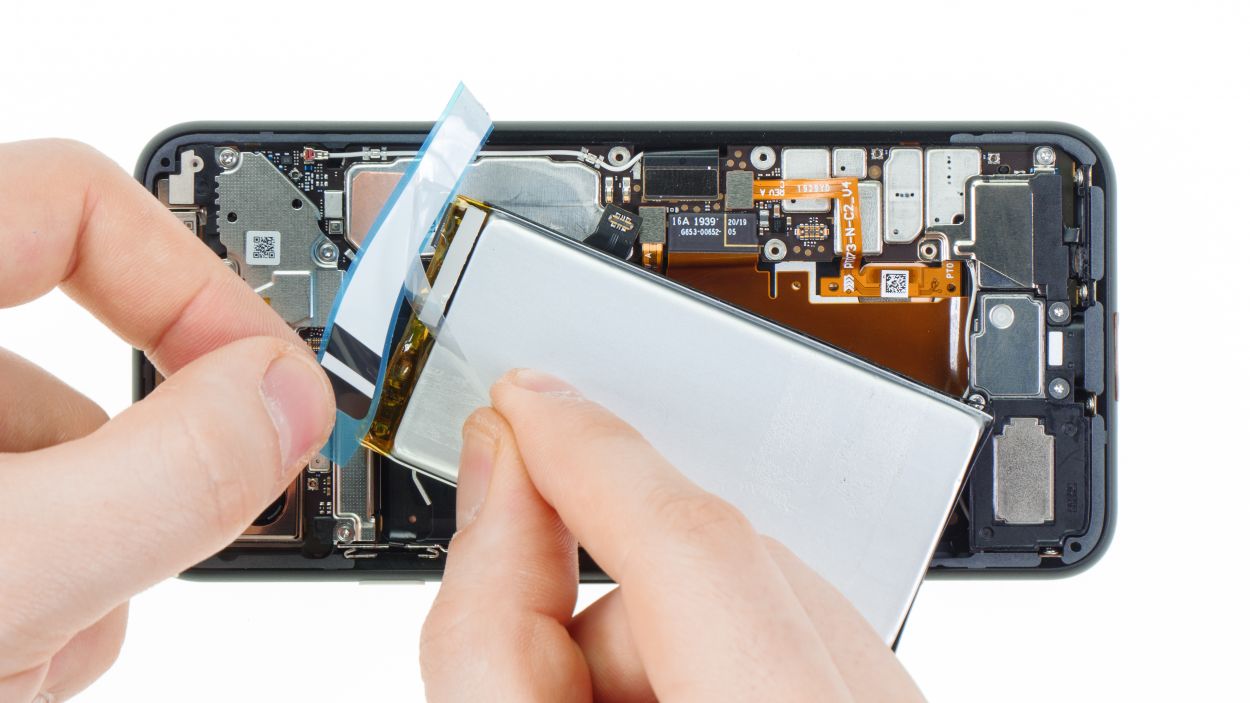
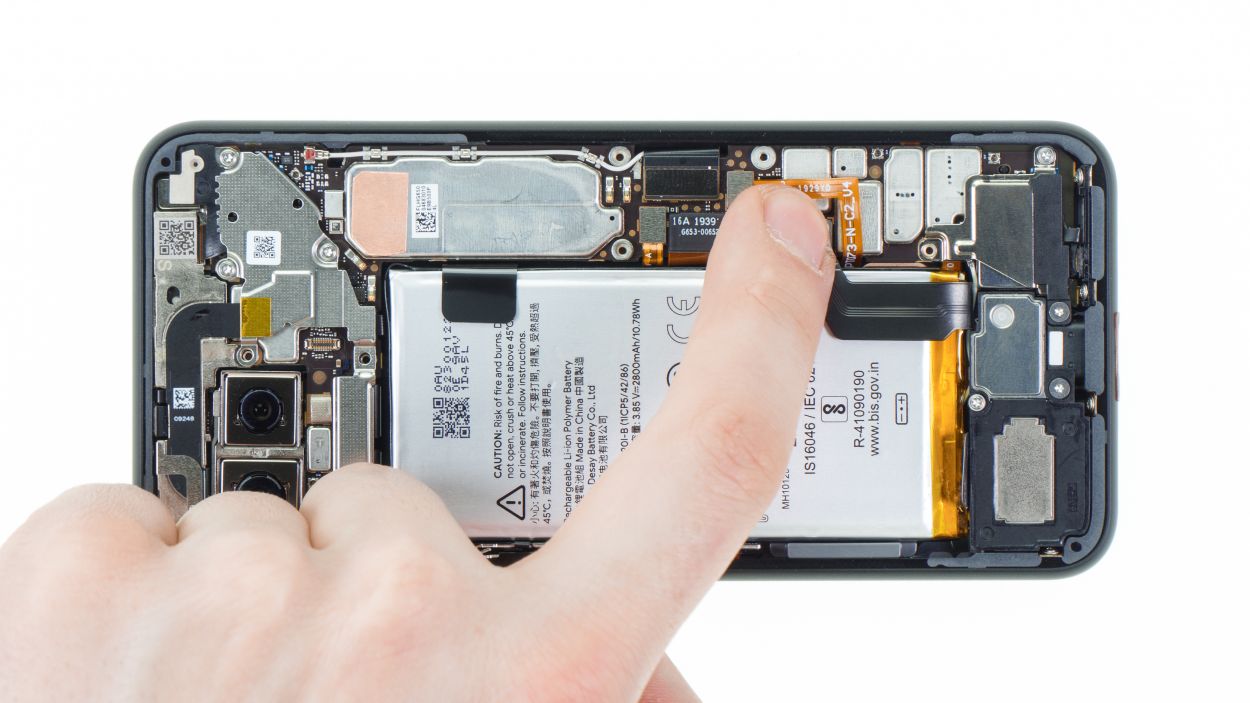
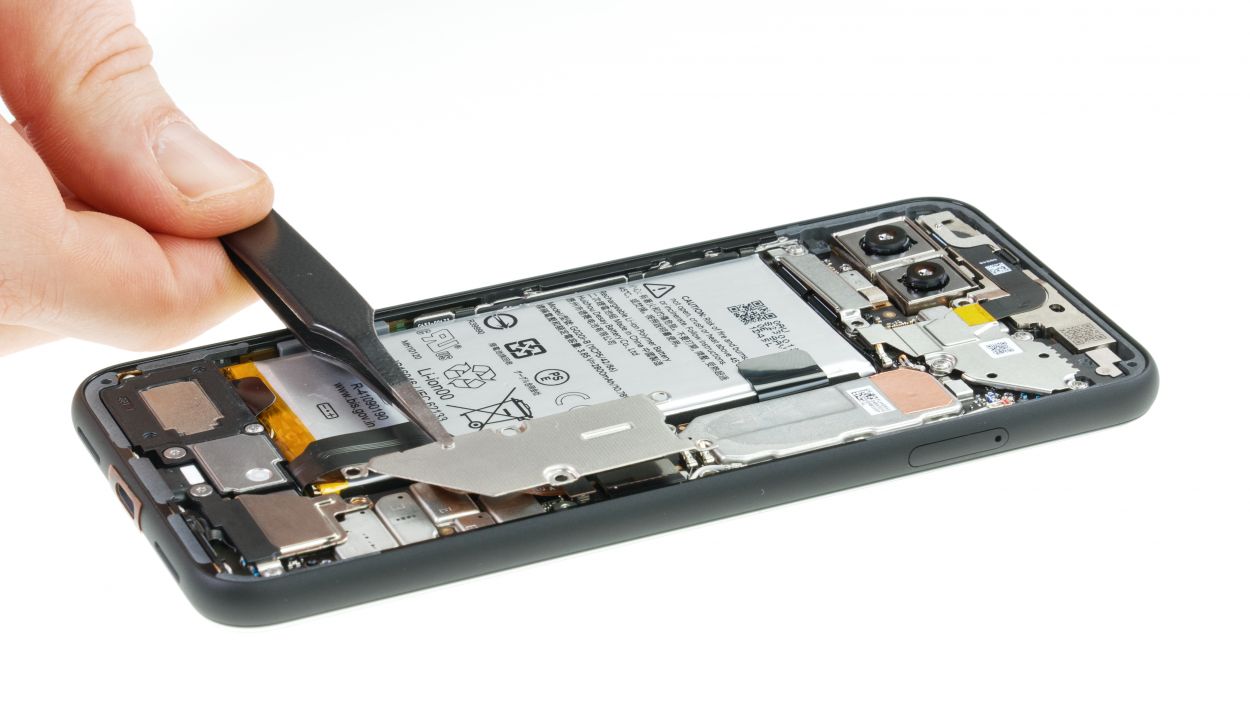
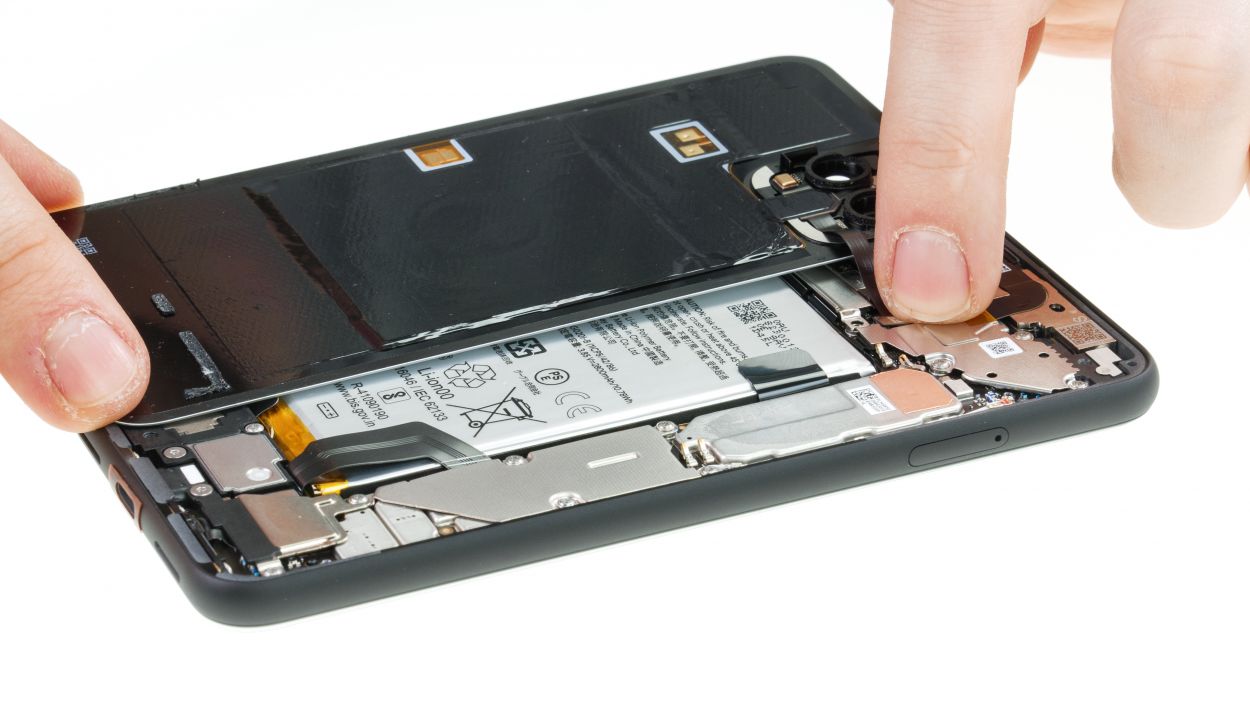
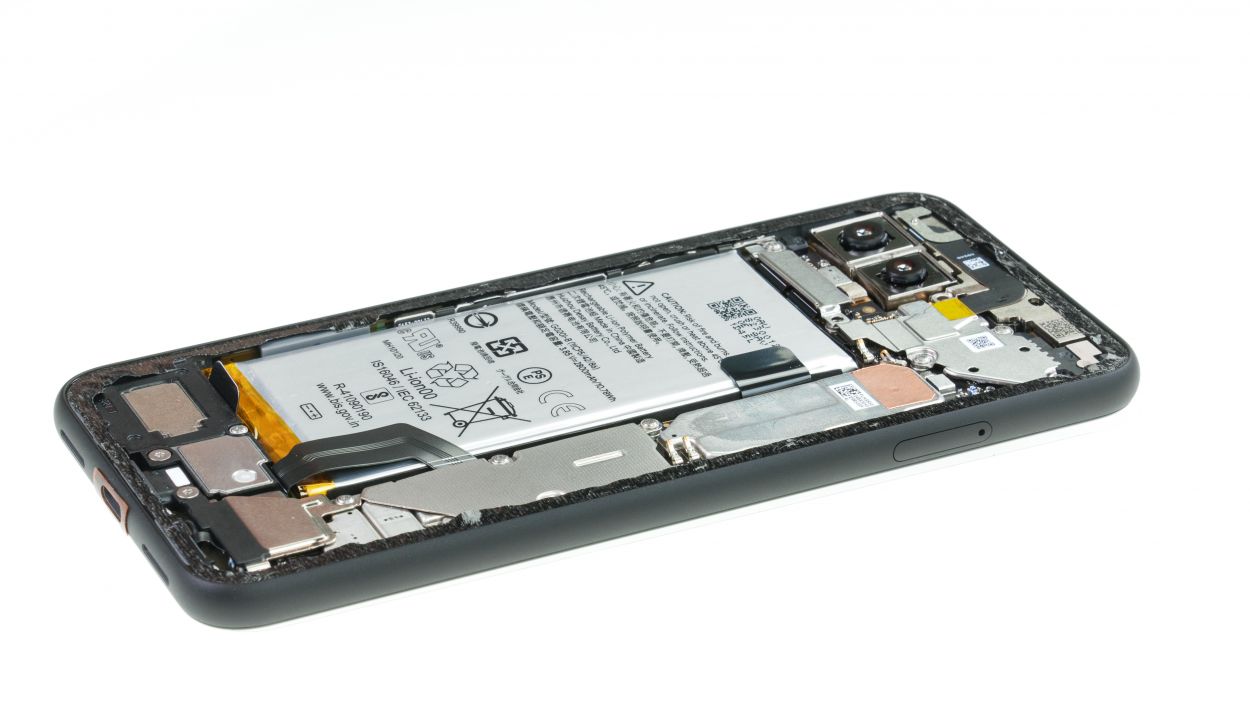
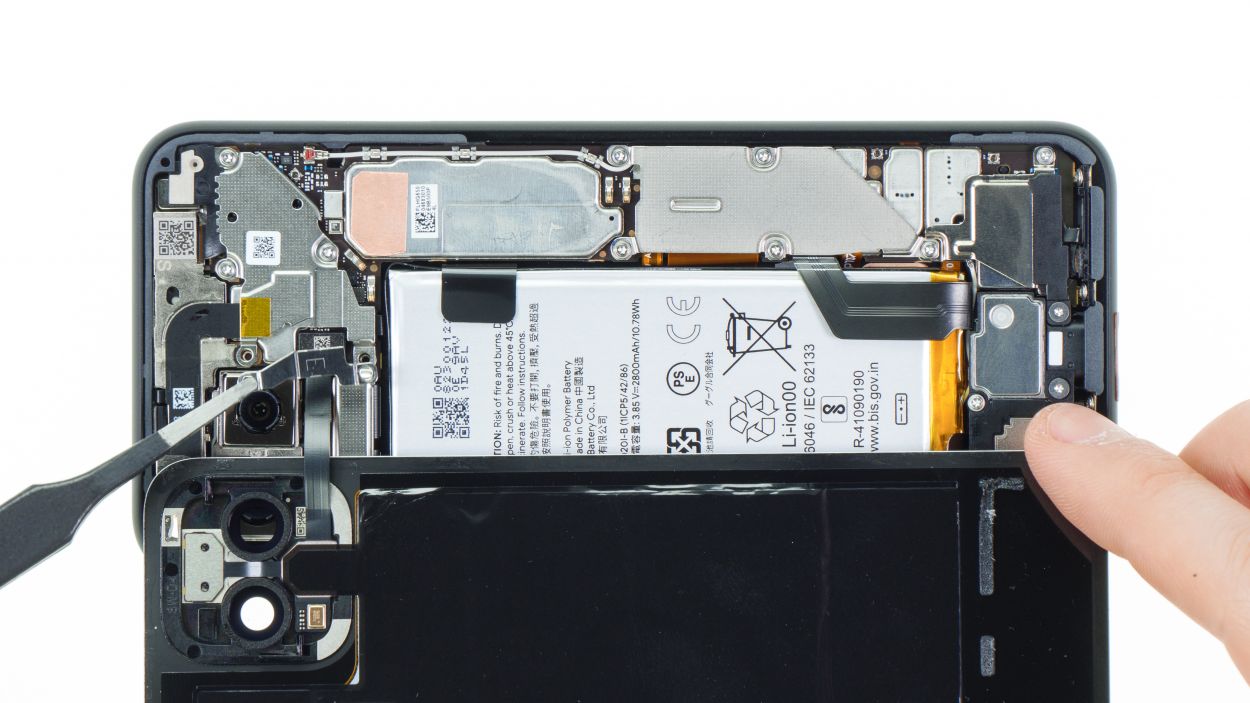
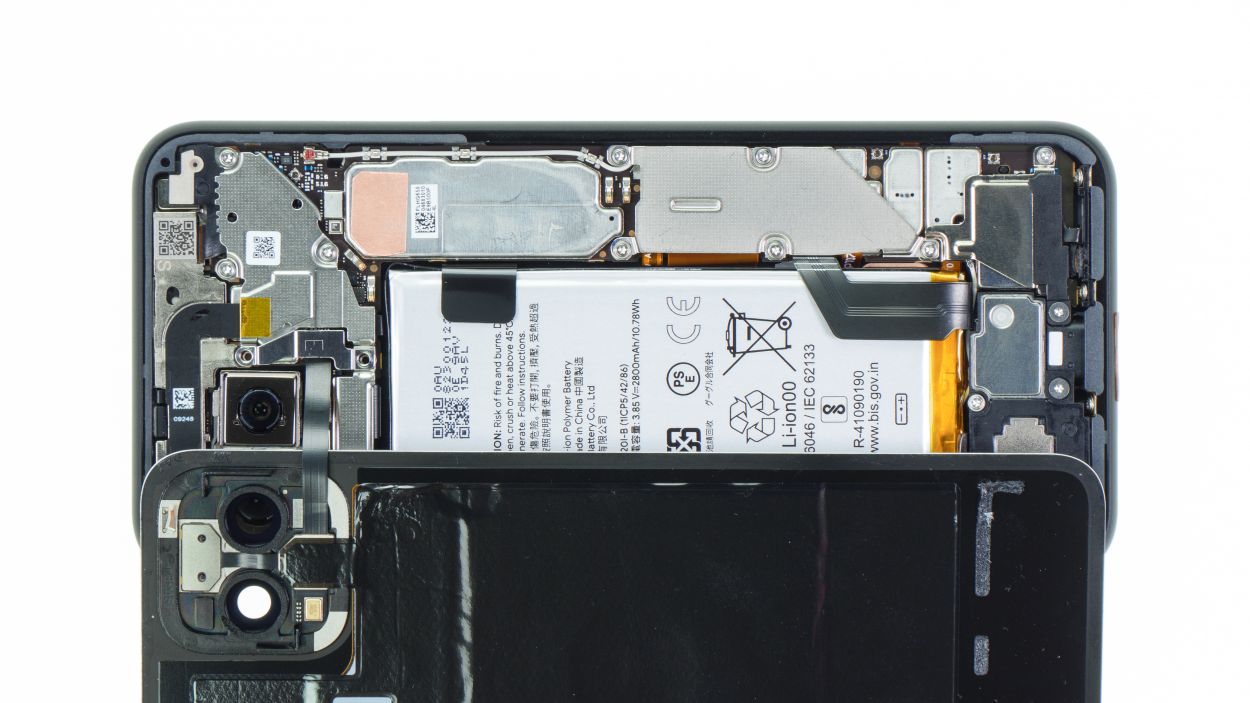
Step 8
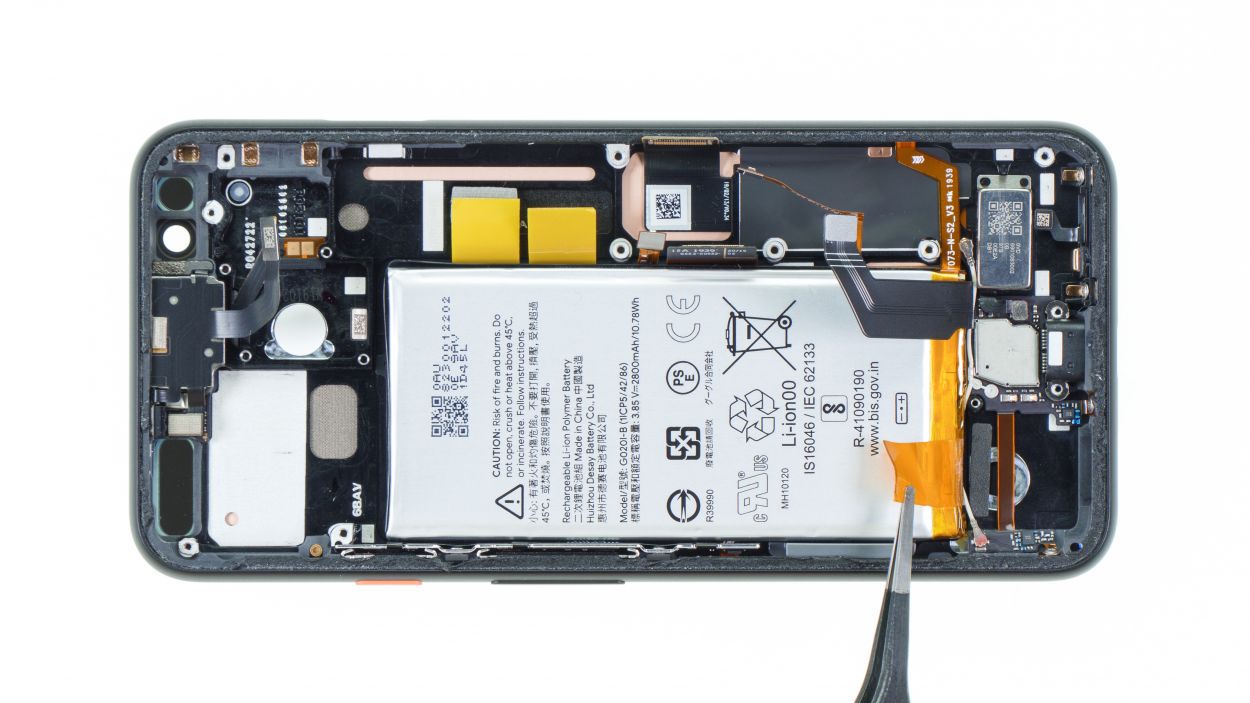
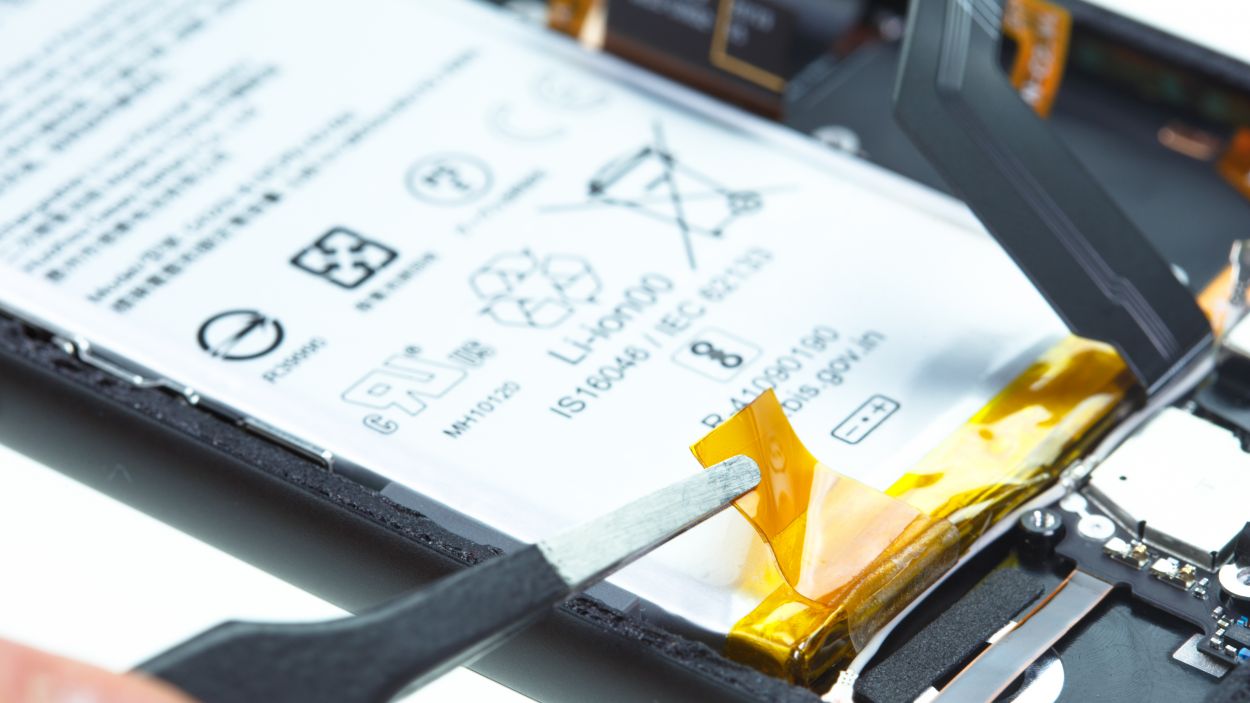
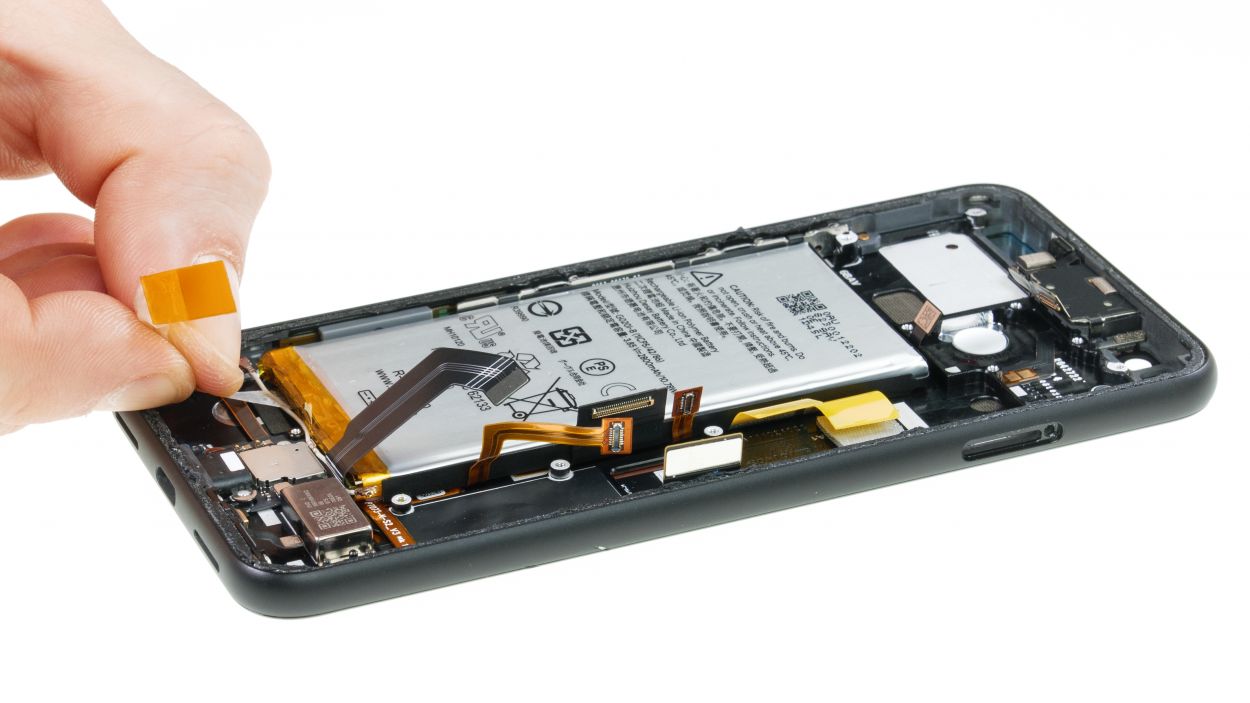
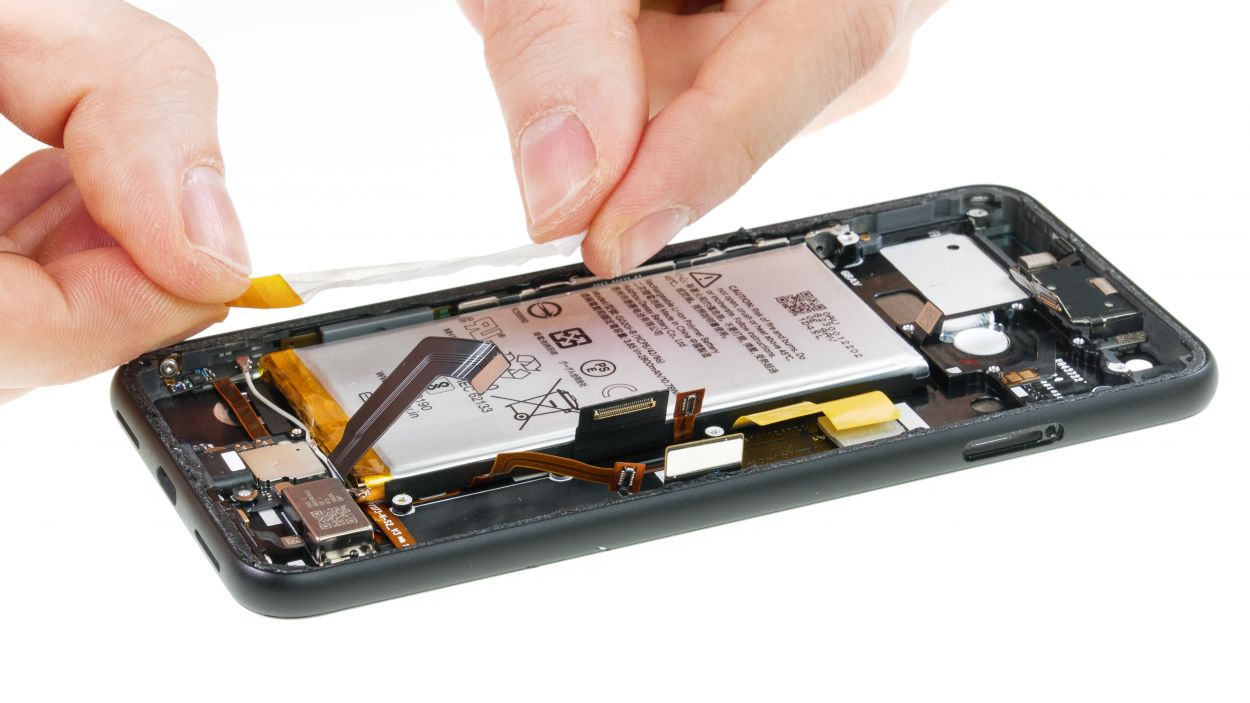
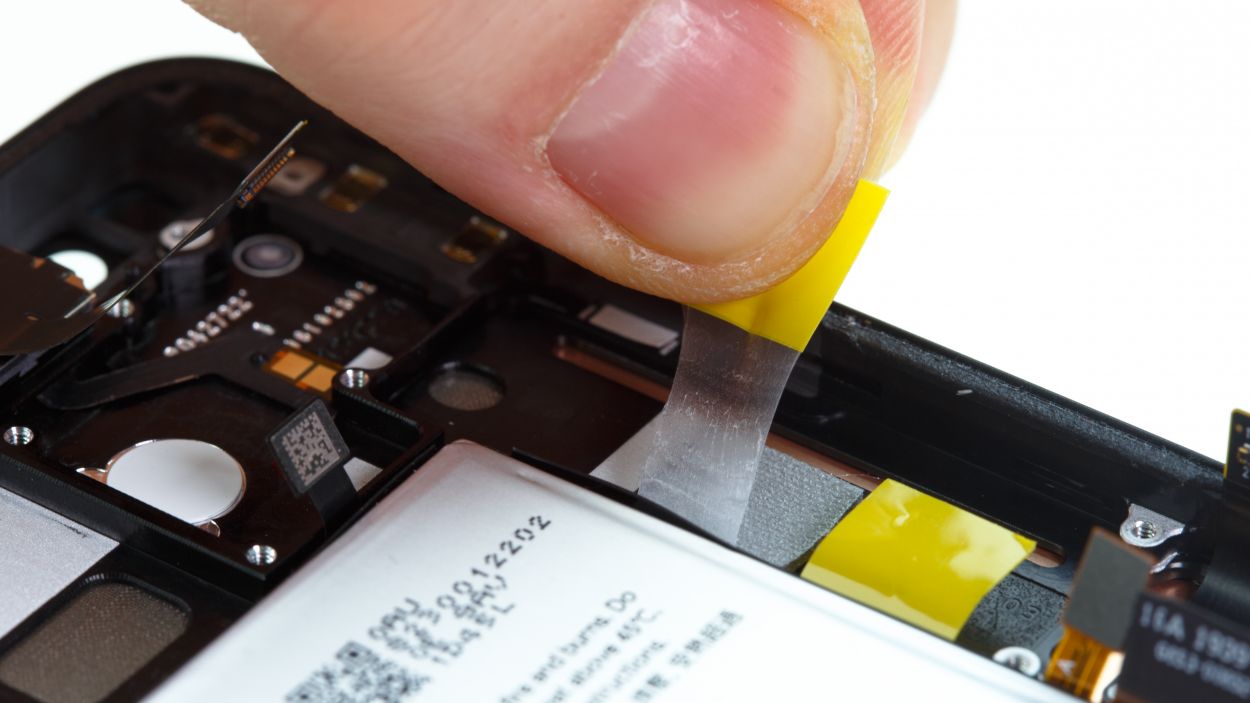
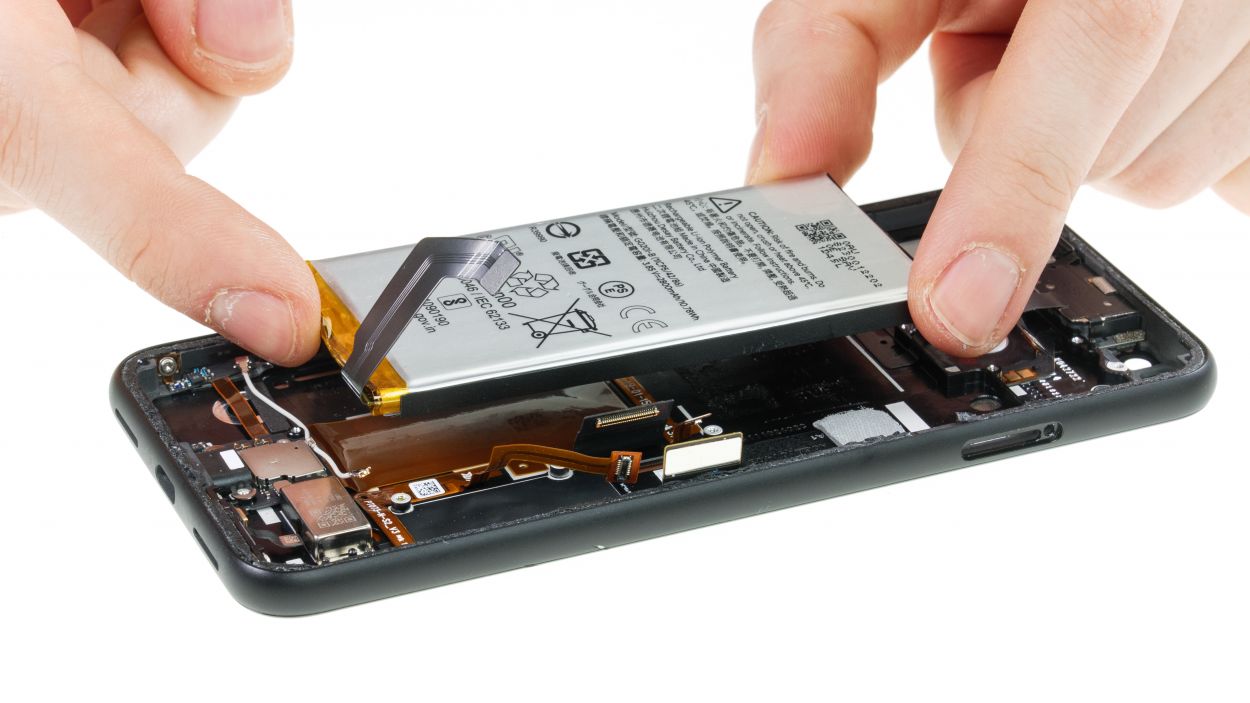
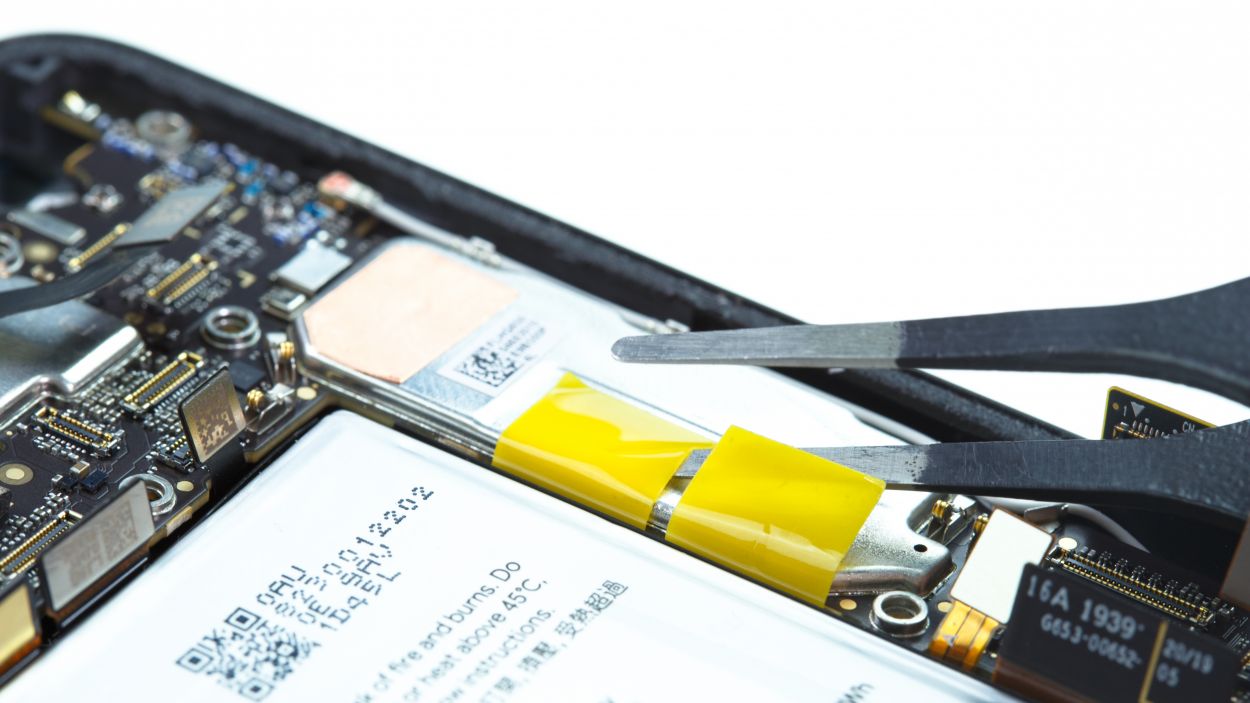
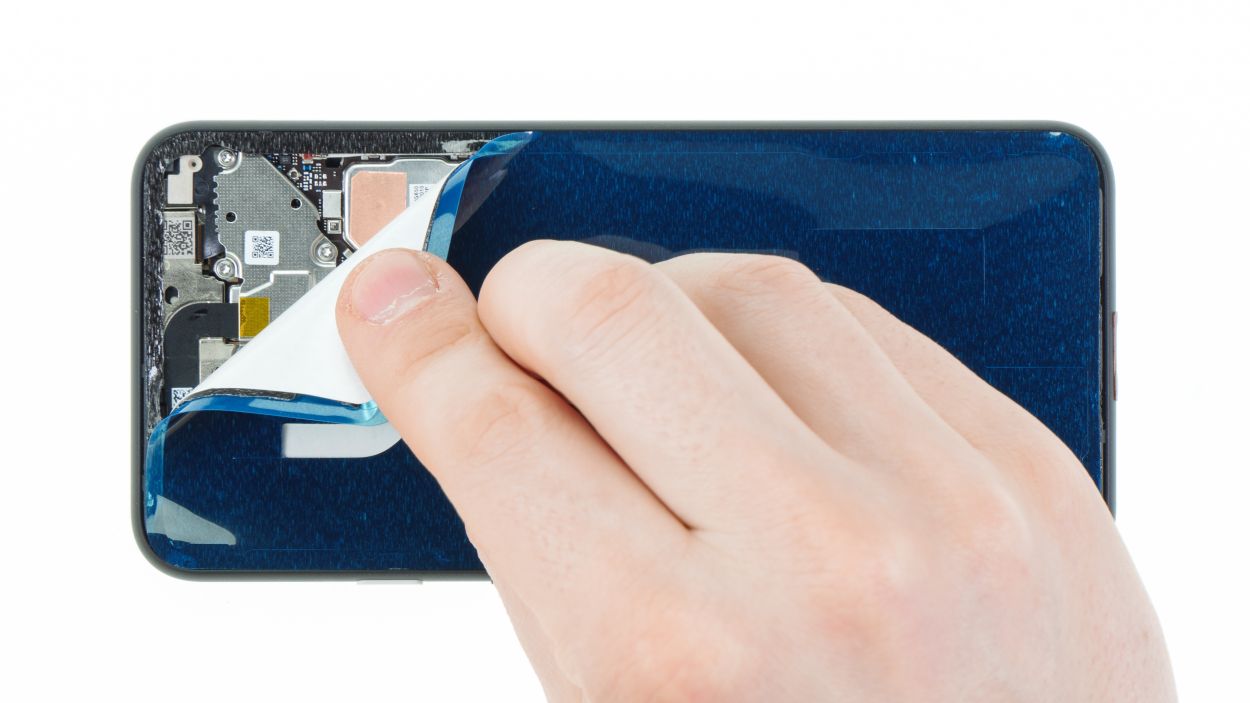
– Gently nudge that lower tab from the upper side of the battery and slide it out to the side like the cool cat you are. Remember to peel those adhesive+strips+Pixel+4&crid=1TJIMMAJSUJUZ&sprefix=repair+tools%2Caps%2C165&linkCode=ll2&tag=salvationrepa-20&linkId=c486487cf454ce8edd6f5beefab4110f&language=en_US&ref_=as_li_ss_tl’>adhesive strips out as flat as possible—no one likes a broken strip!
– If one of those sneaky strips decides to tear, try to rescue the other two first. Got some tweezers? Use ’em to grab that torn strip and pull it out a bit more. If that doesn’t work, it’s time to carefully lever the battery out of your device.
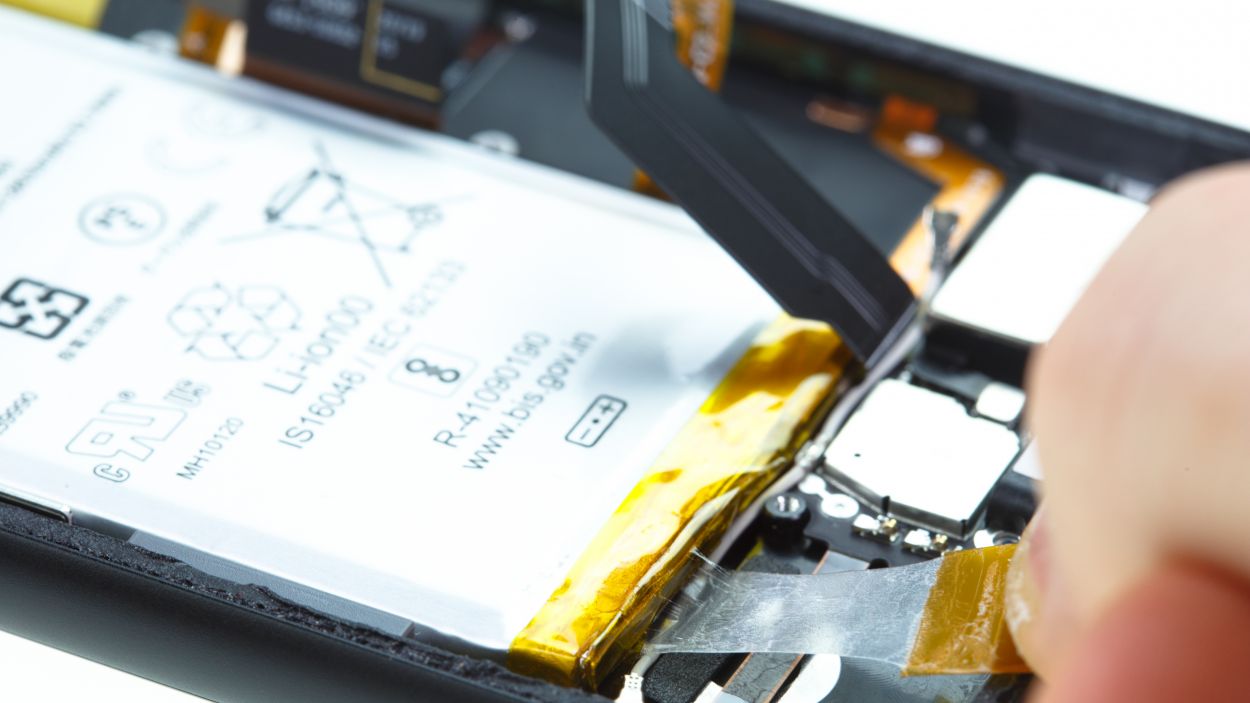
– Grab a heat source and warm up the glue—just be smart and don’t heat the battery itself. Instead, warm up the device on the display side. Safety first, right?
– Now it’s time for the fun part! Use a wide tool like a battery spudger or an iSesamo and carefully lift that battery from all sides until it pops out. Just keep an eye out for any flex cables hiding underneath—don’t want to hurt those little guys!
Tools Used
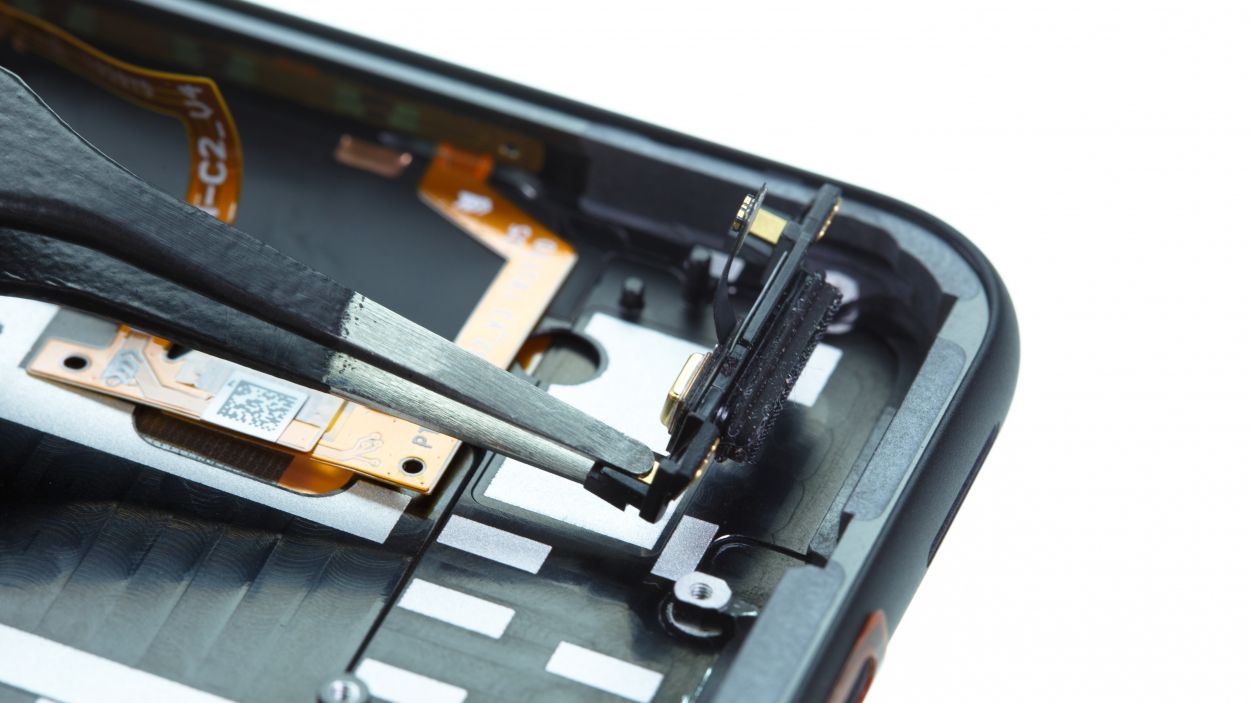
Step 9
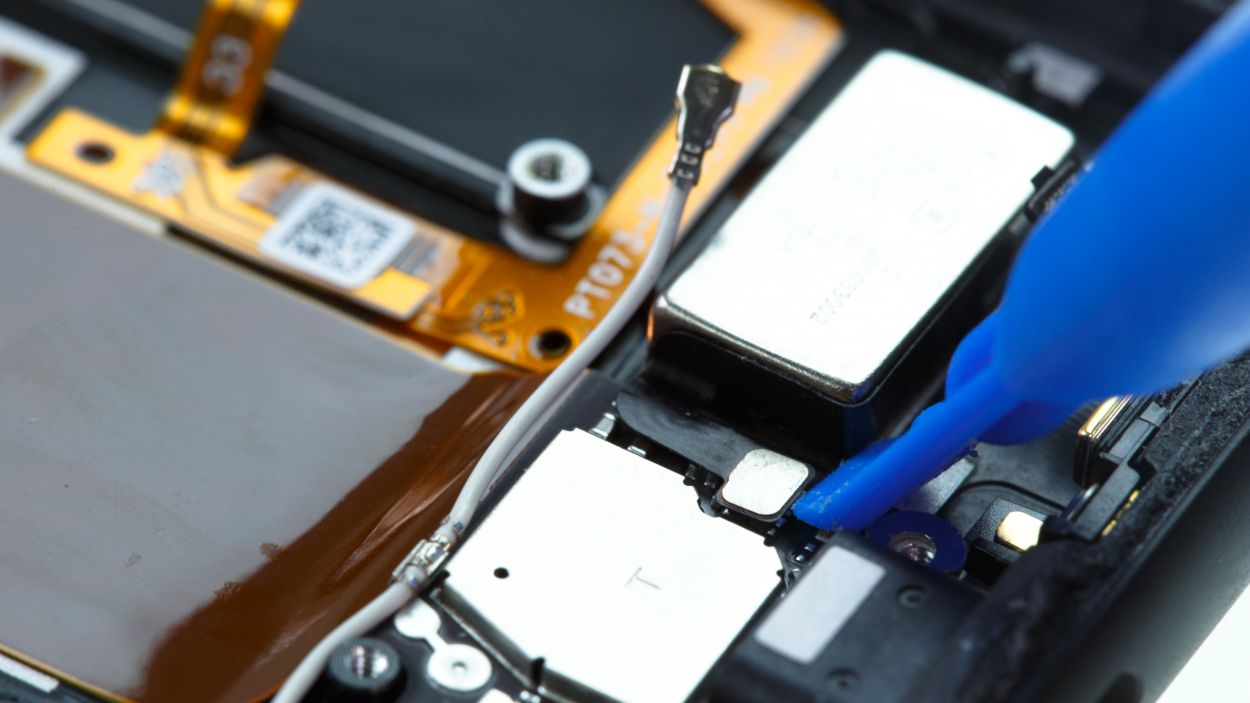

– That pesky vibration motor’s glued to the USB board – no worries!
– Gently nudge the connector loose with a spudger.
– Time for some heat! Warm things up and carefully slide a thin tool (tweezers or a spatula work great) under the motor to free it. If you’re feeling stuck, you can always schedule a repair.
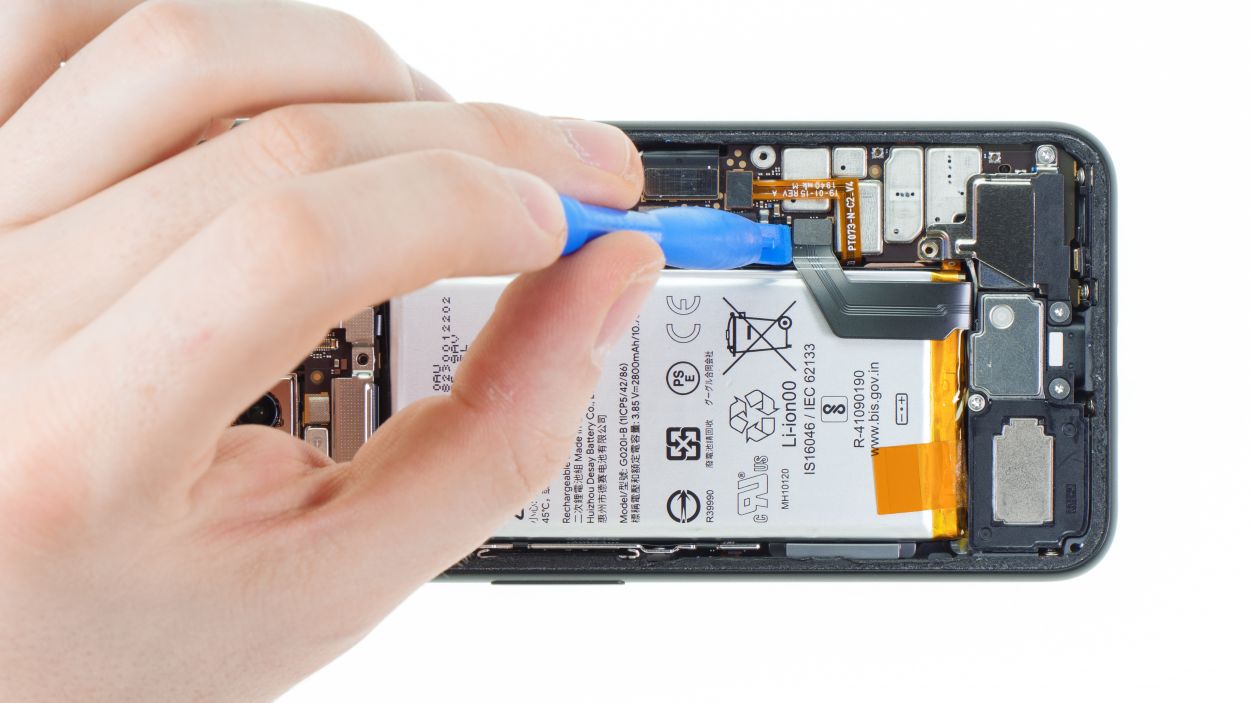
Step 10

2 × 2,0 mm Torx T3
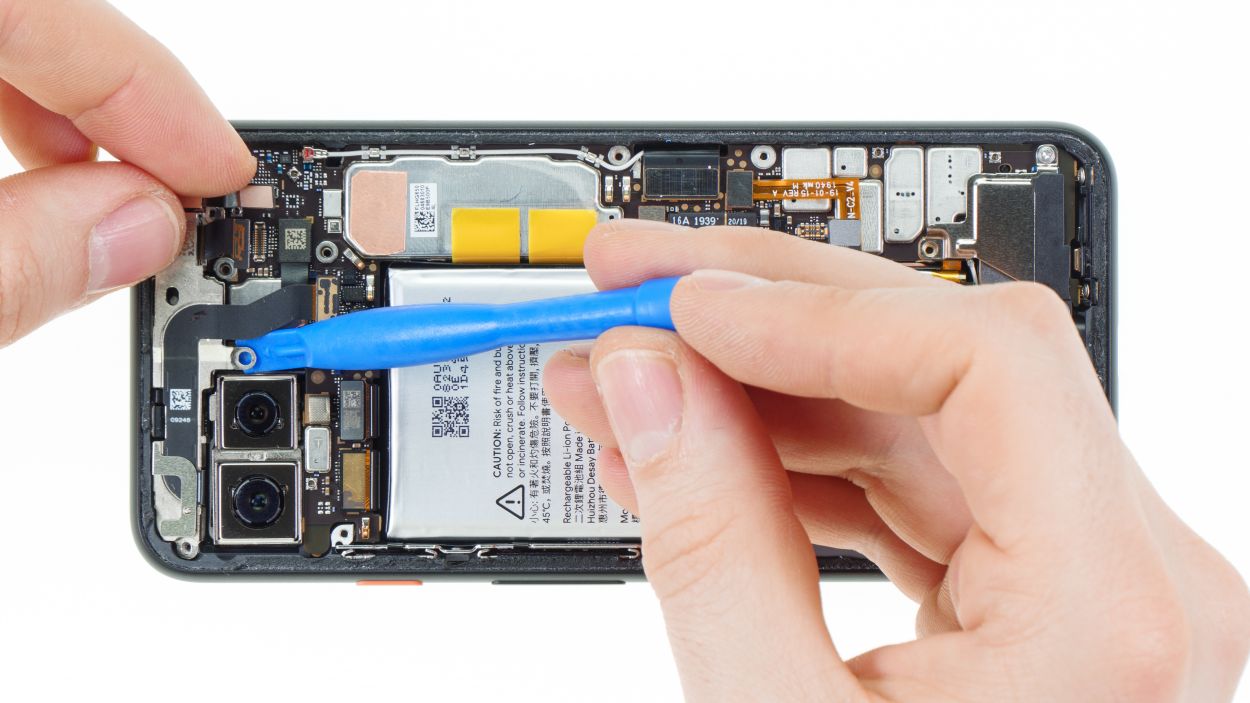
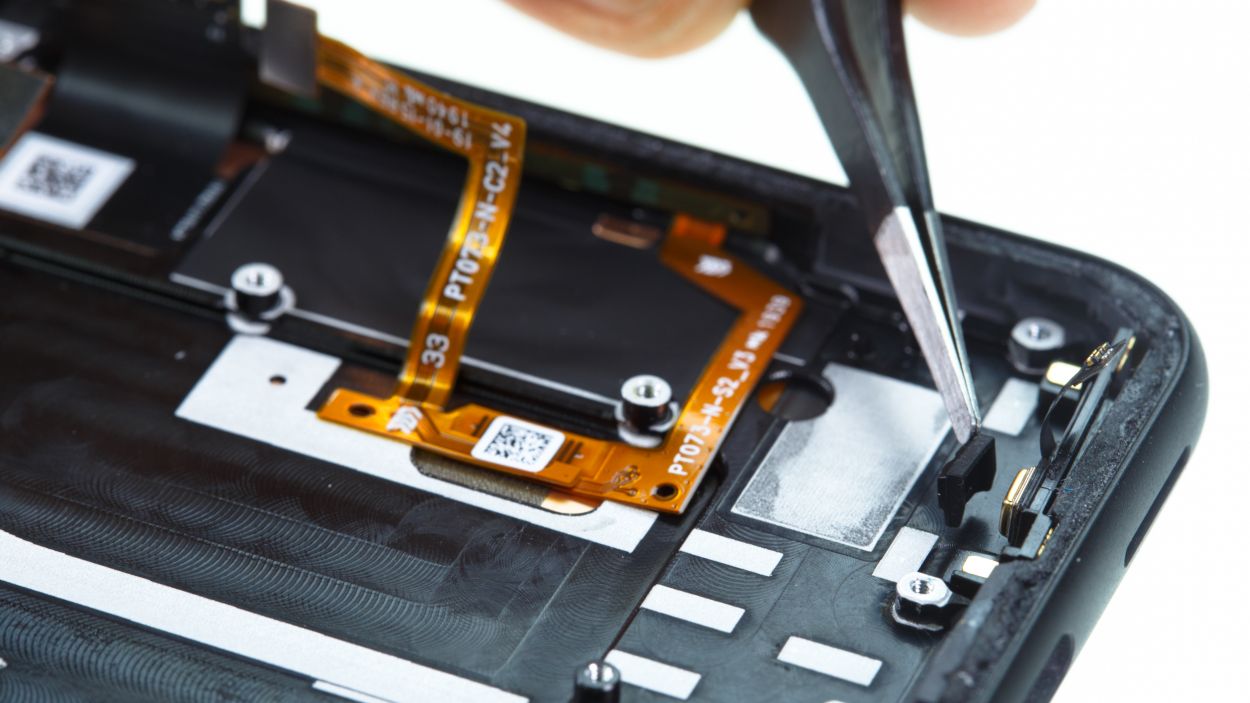
– Start by loosening those two screws snugly holding the frame together. You’ve got this!
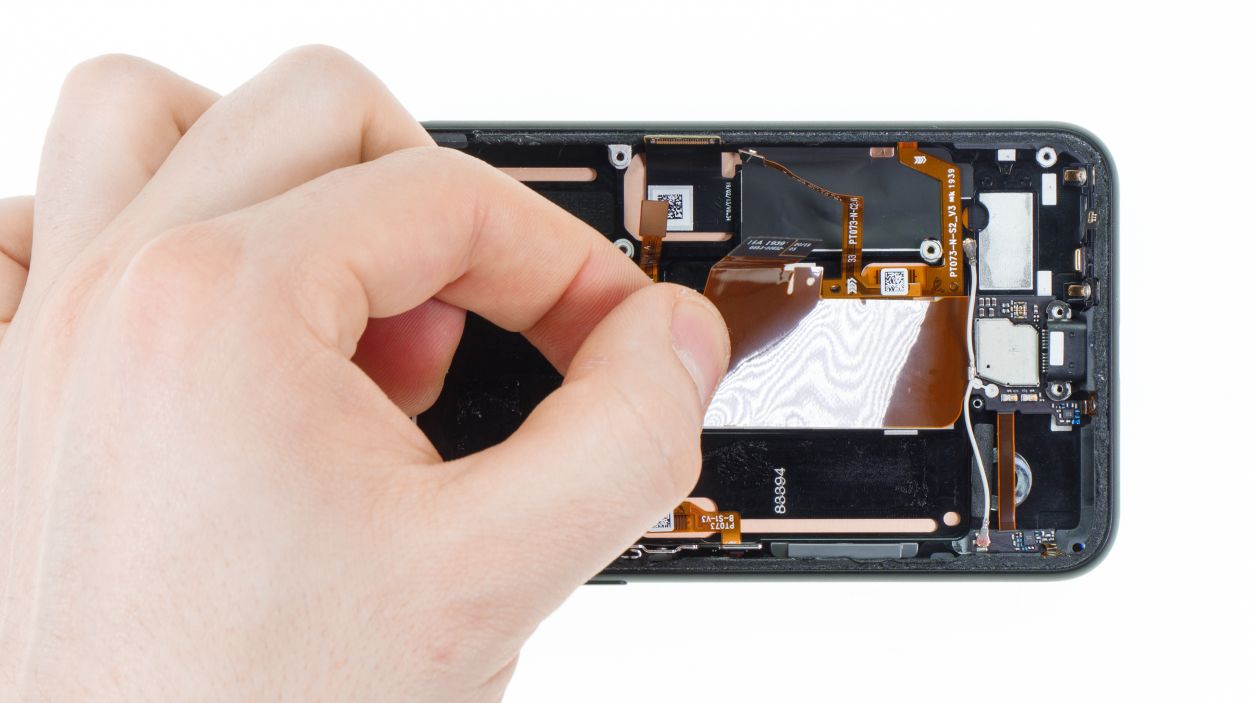
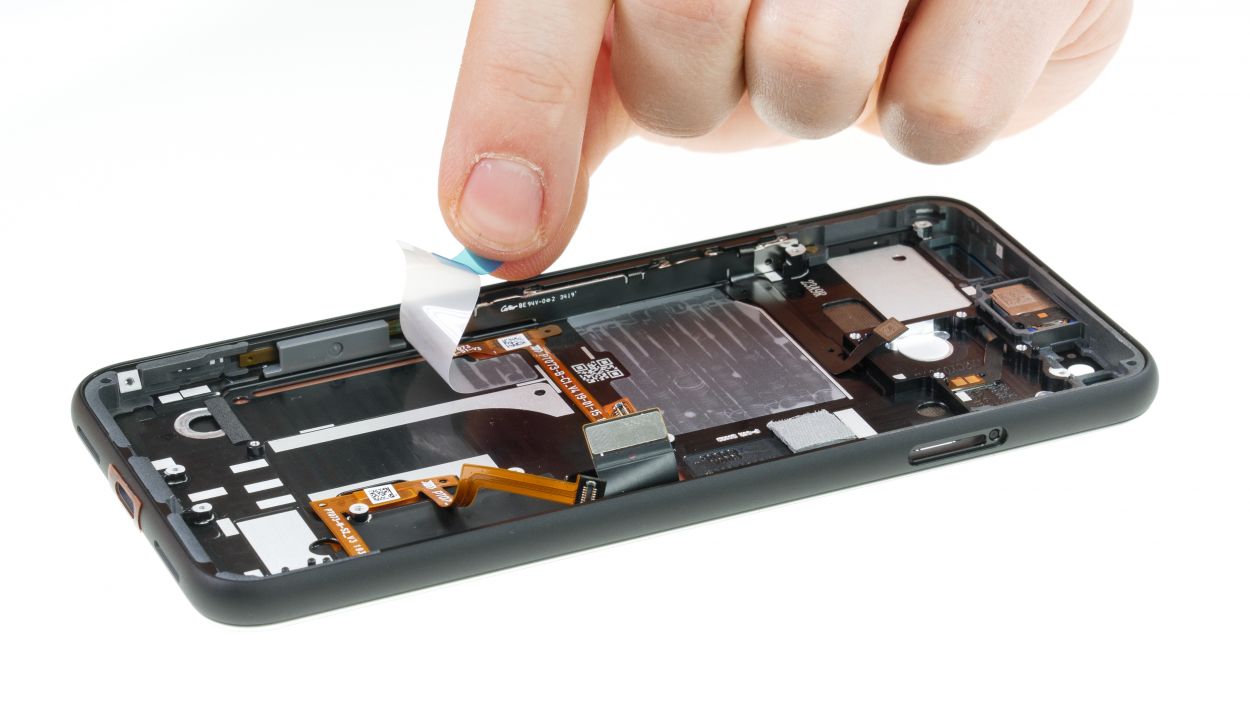
– Next up, warm up that glued wide flex cable and gently peel it away from the back of the display. Don’t forget to loosen the cable on the left side too!
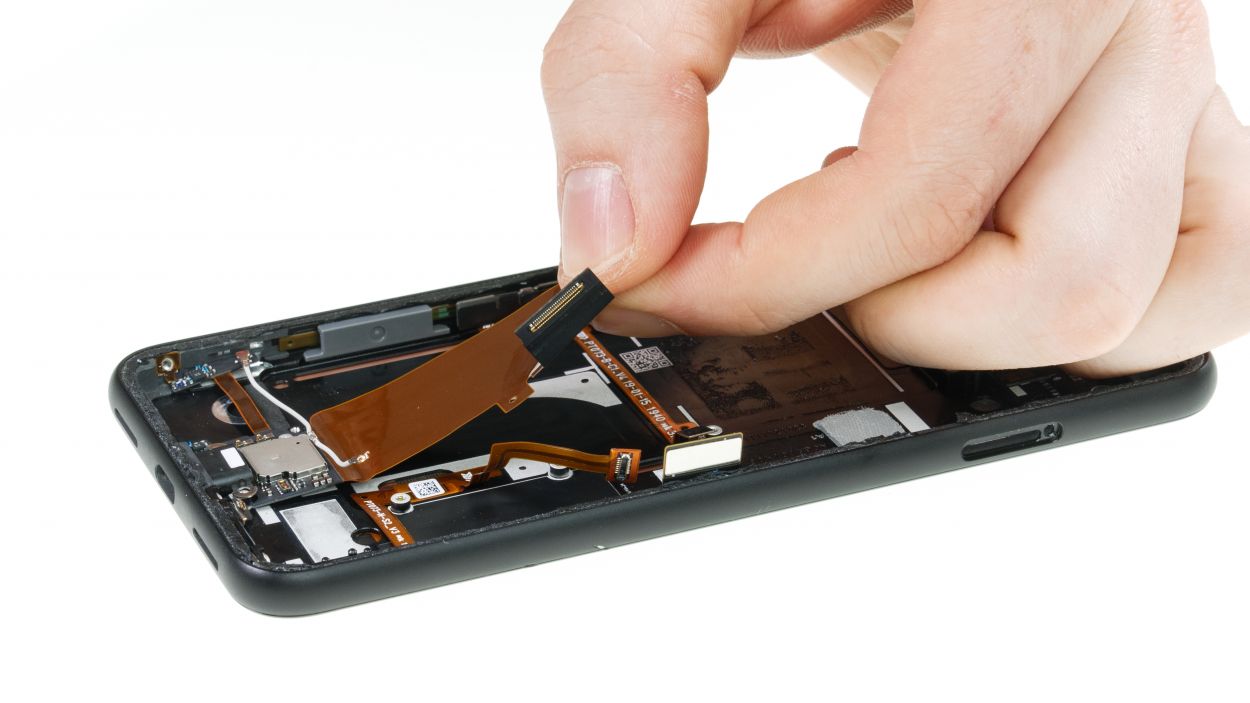
– Now, give the USB connector a little nudge to pop it out of the frame, and then carefully lift the whole component out of the device. Easy peasy!
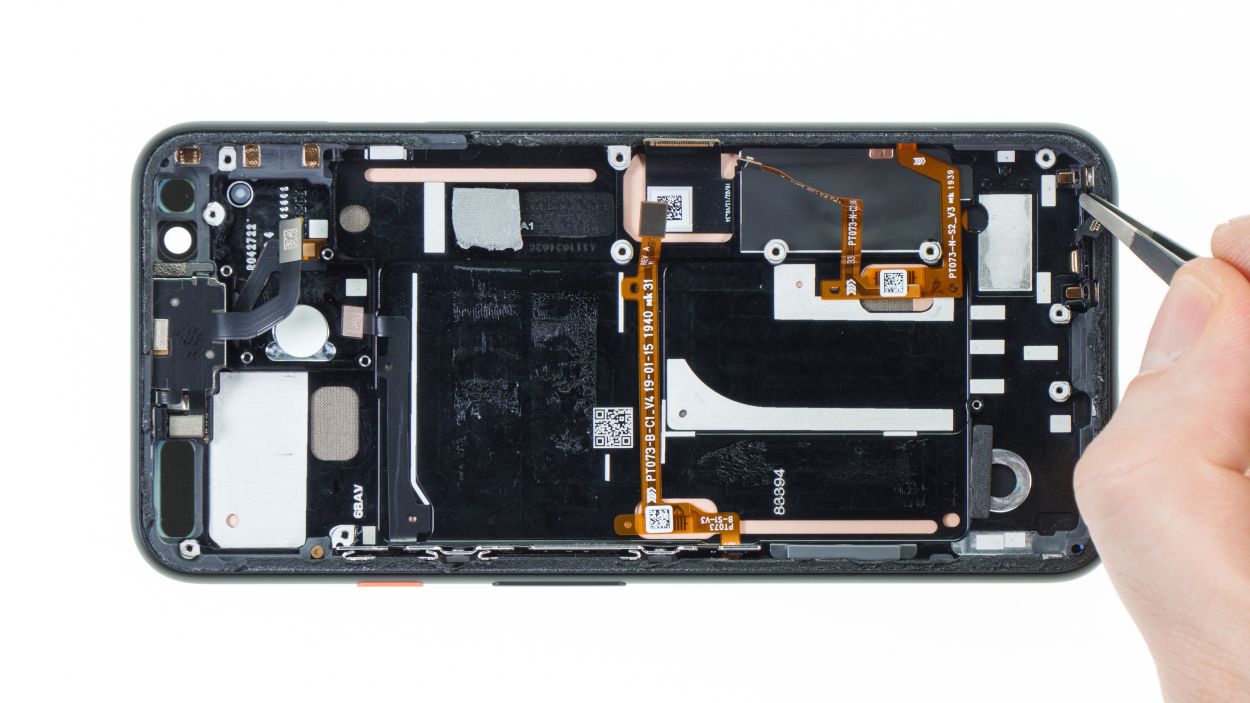
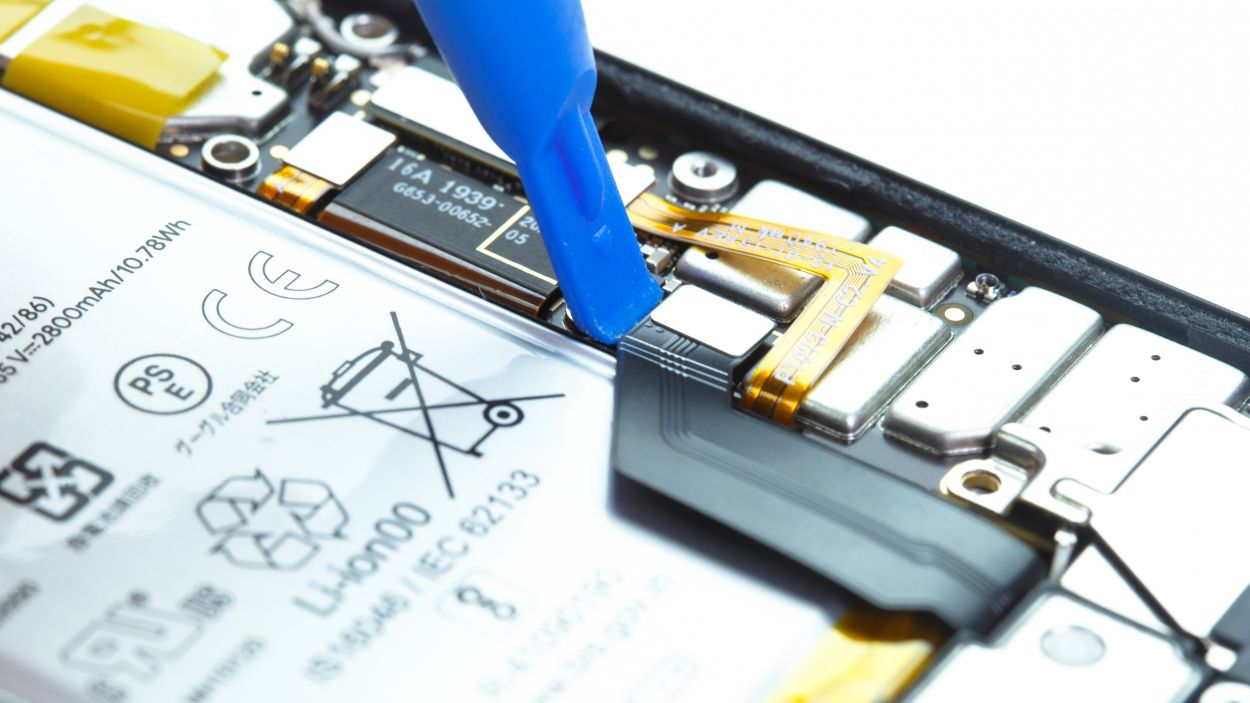
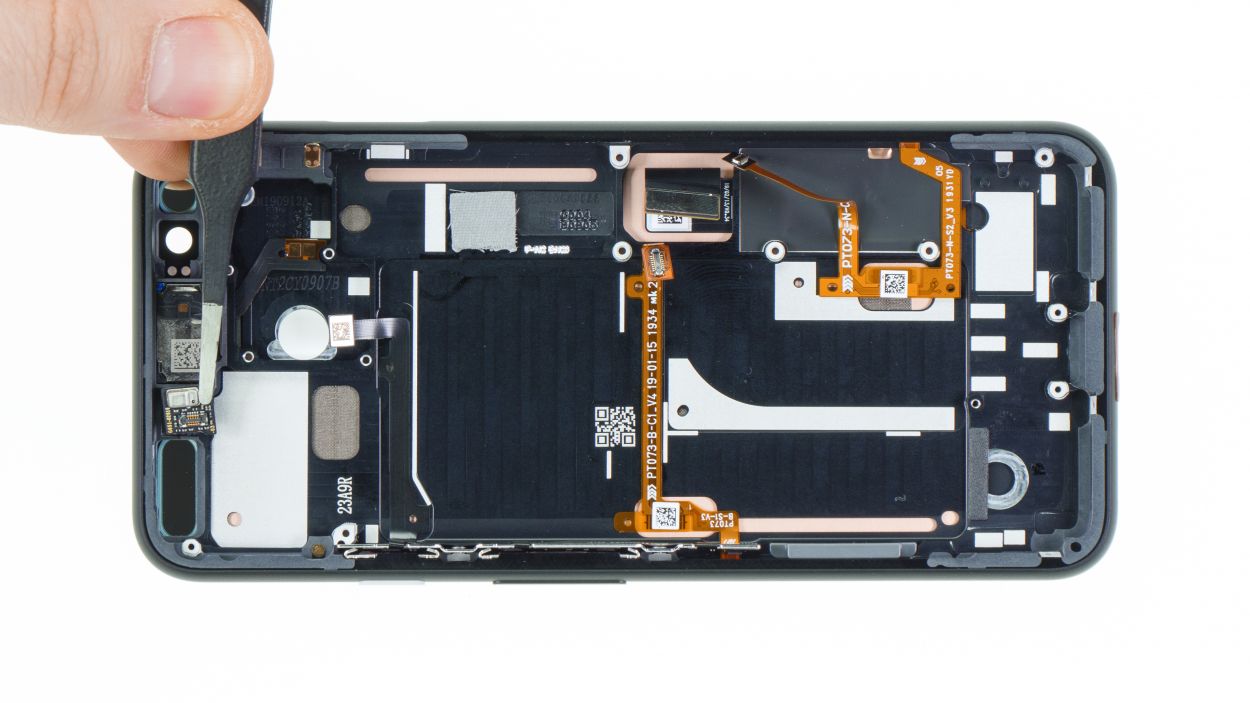
Step 12


Warm up the entire area to help loosen that pesky glue. It’ll make removal a breeze!
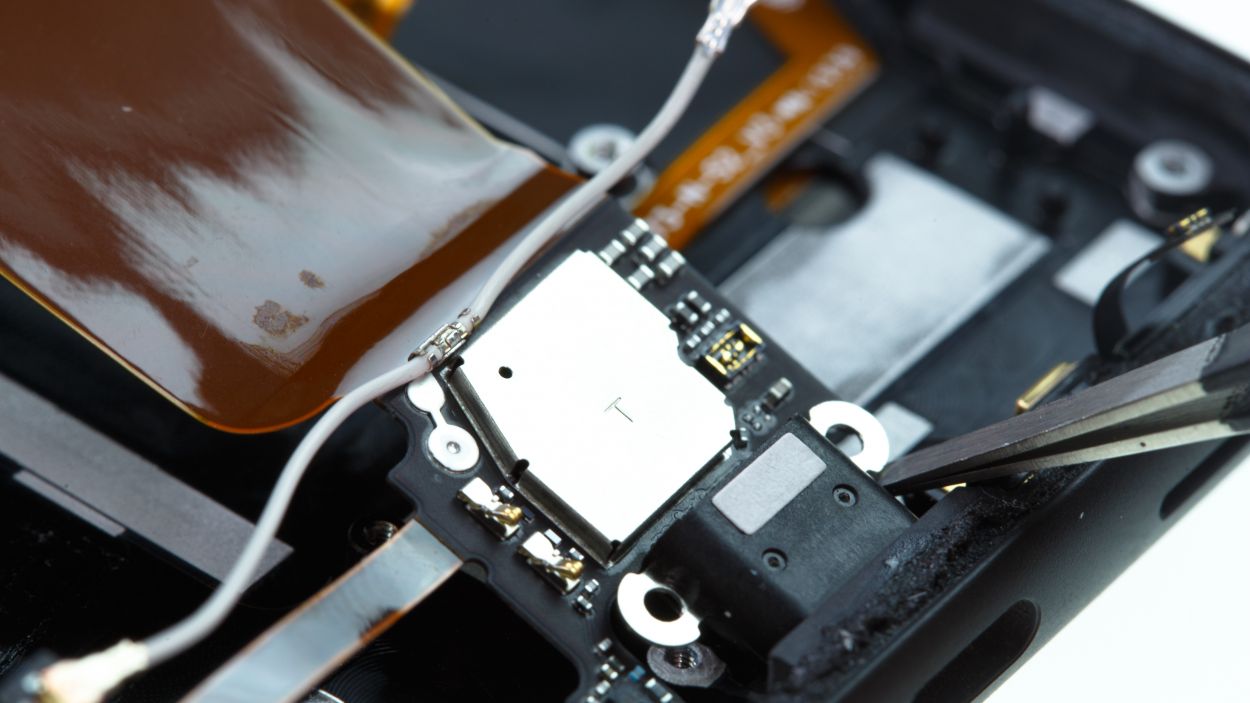
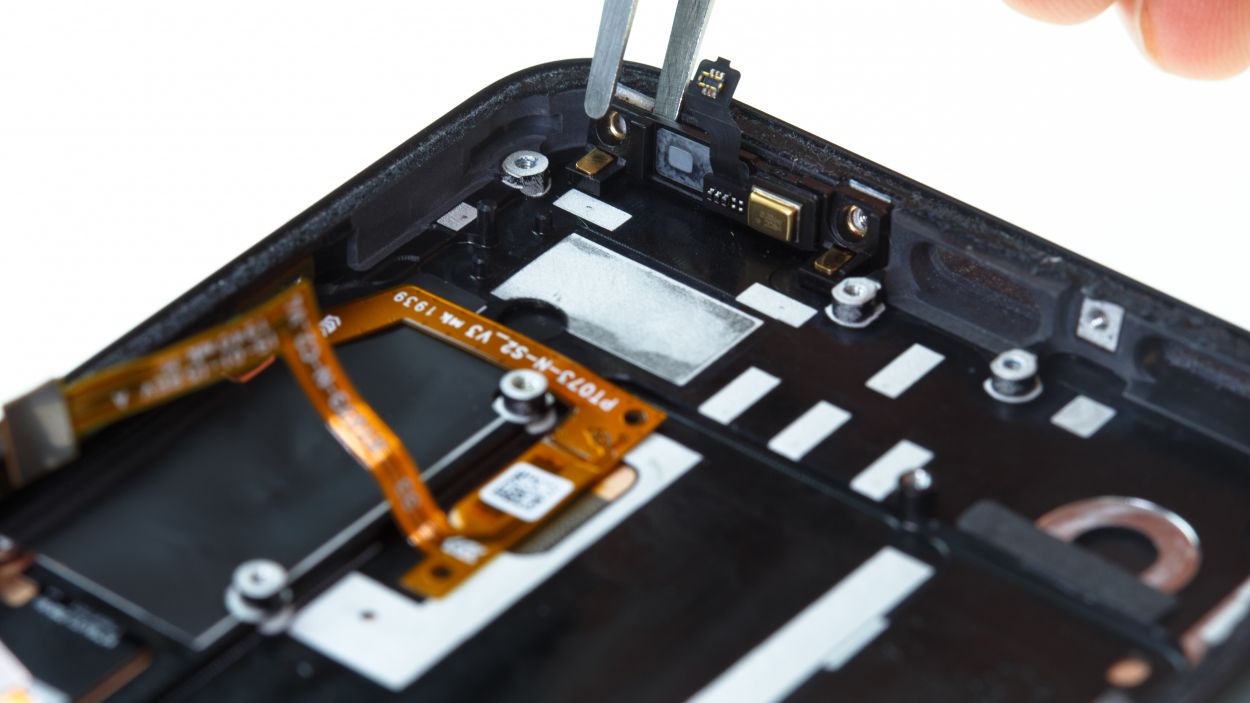
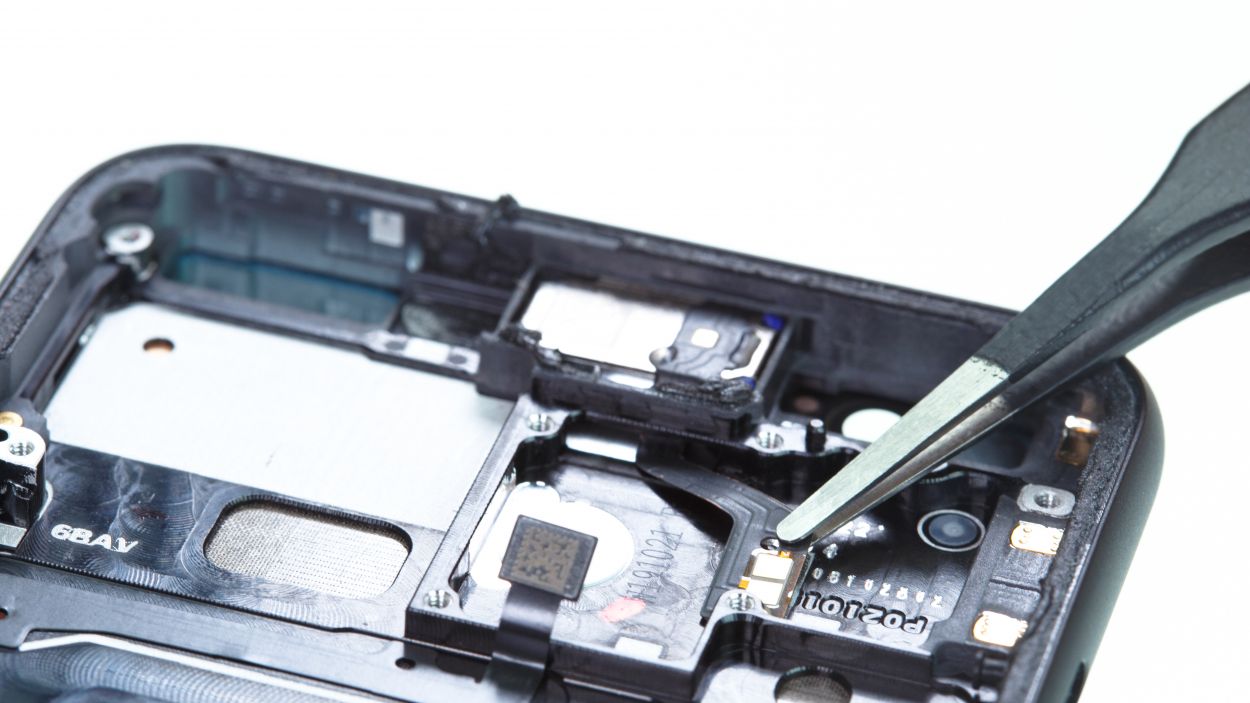
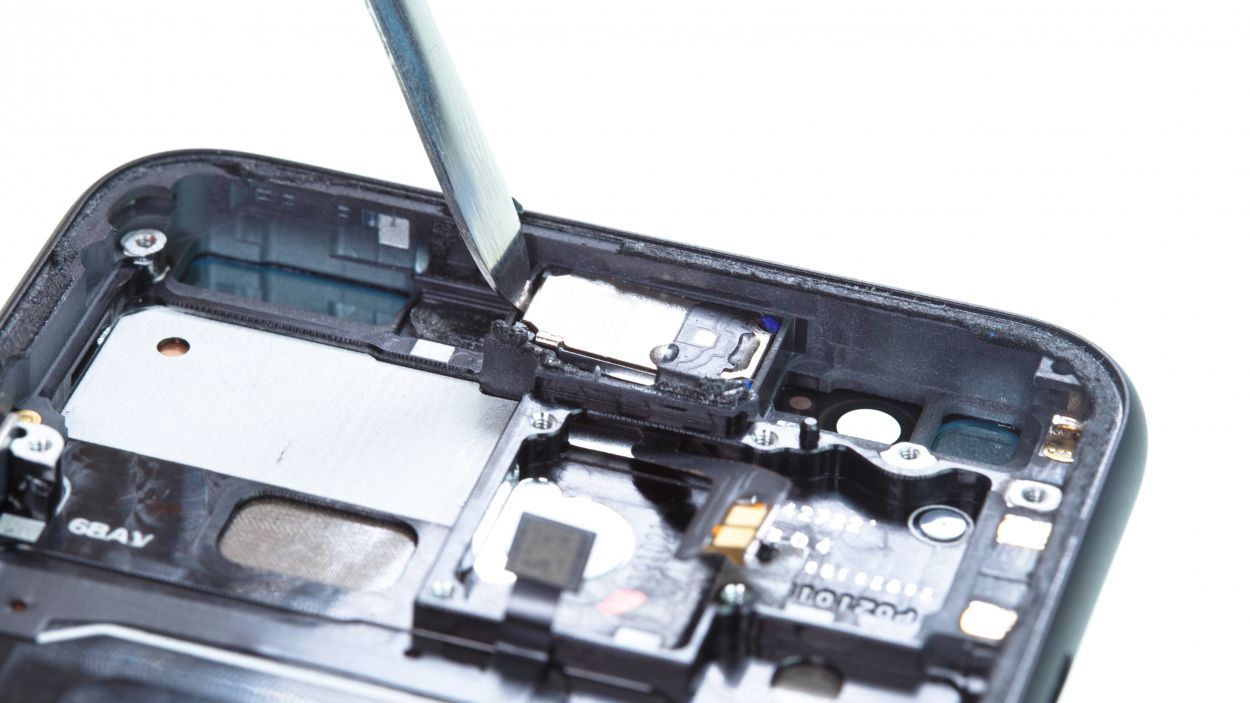
– Hey there! You’ll find another microphone and a sensor tucked away on a cable set that’s glued to the earpiece at the very top of your device. Sneaky, right?
– To kick things off, start by disconnecting the connector on the side. Easy peasy!
– Next up, gently peel off that black rubber cover that’s keeping your microphone cozy.
– Now it’s time to get a little hands-on! Use a lever to pop between the microphone and the frame to free it up, and don’t forget to release the sensor on the other side of the earpiece as well. You got this!
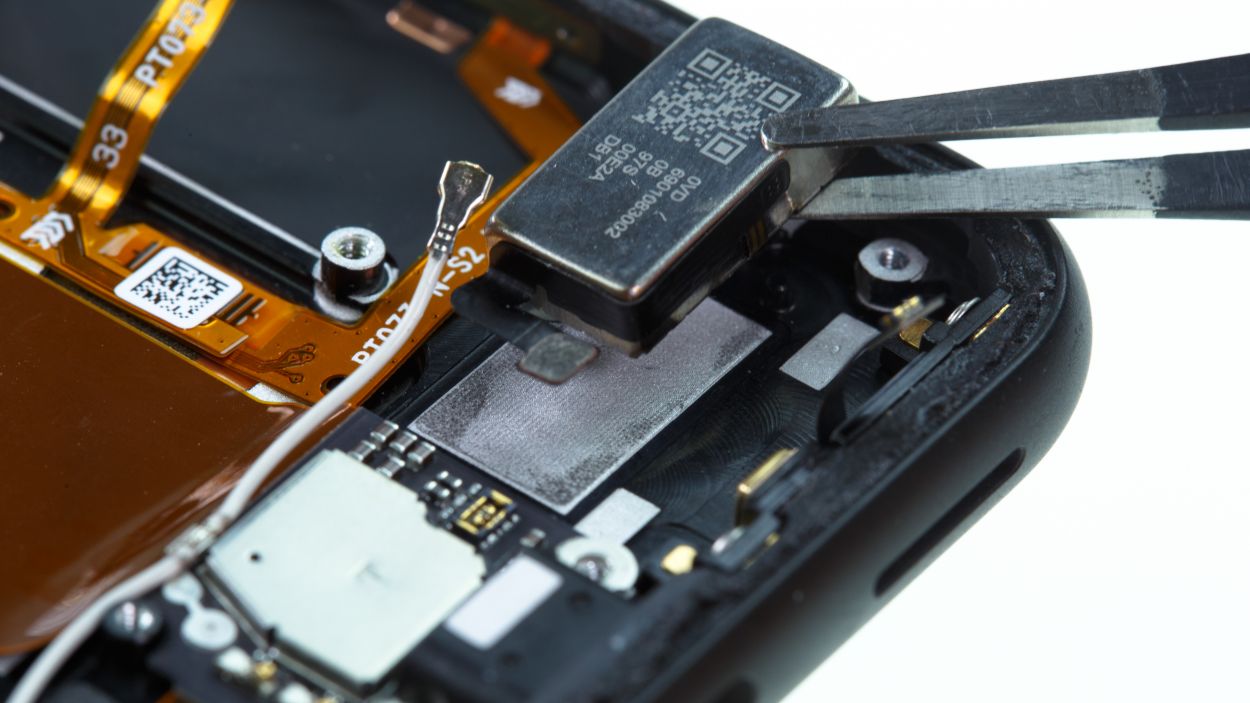
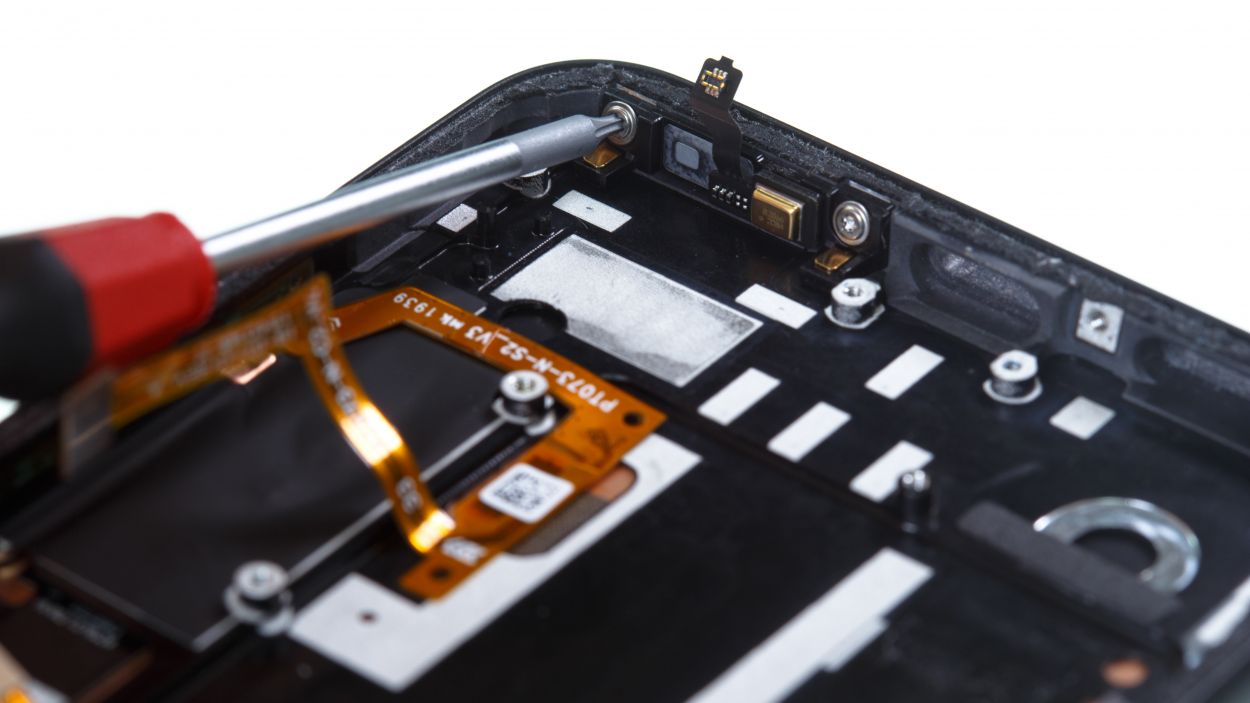
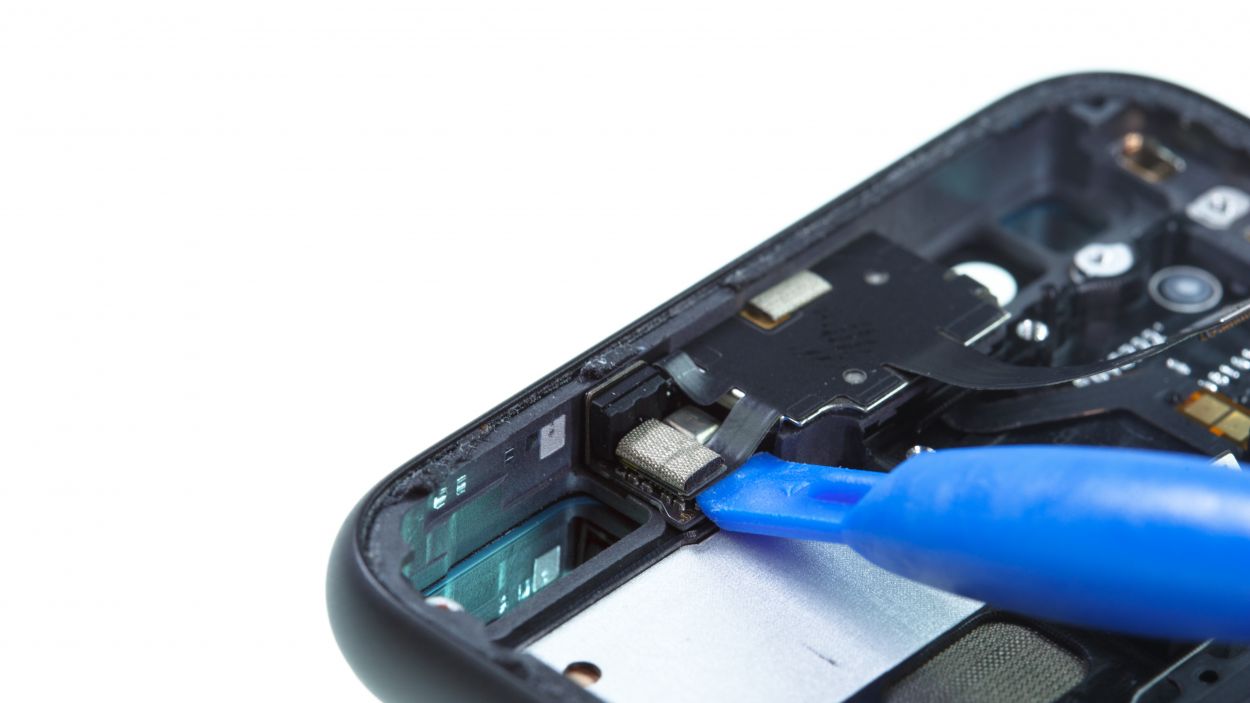
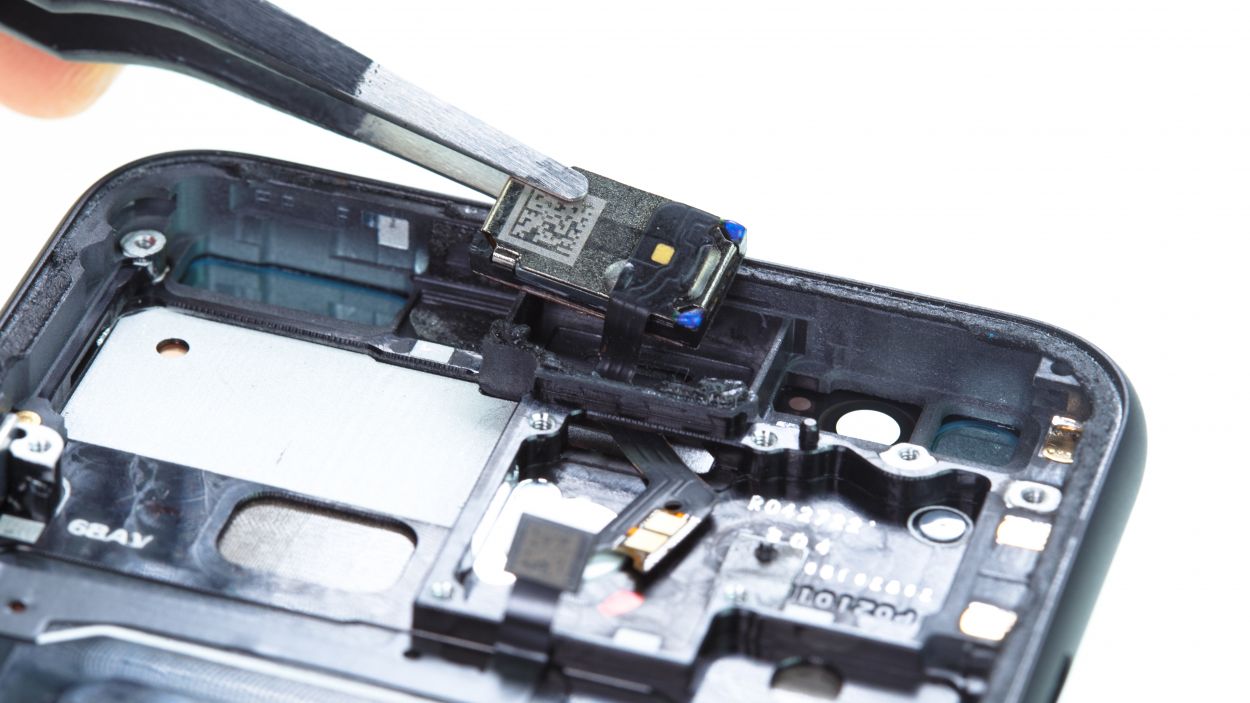
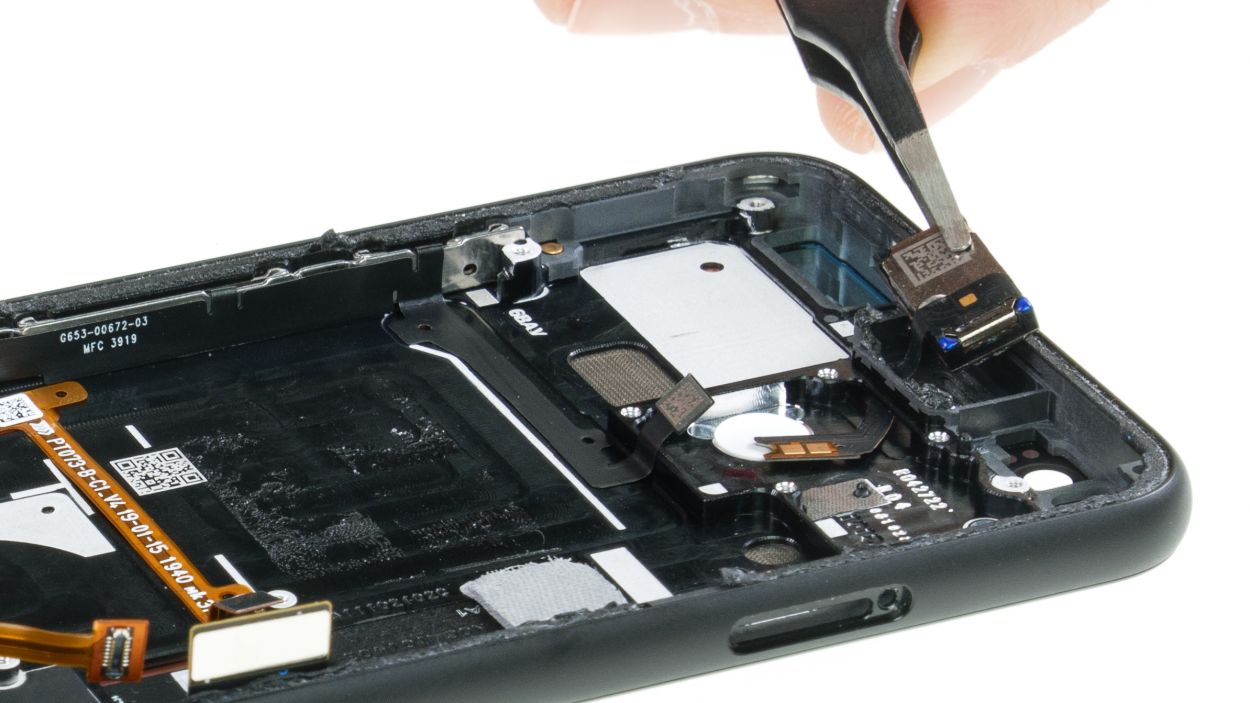
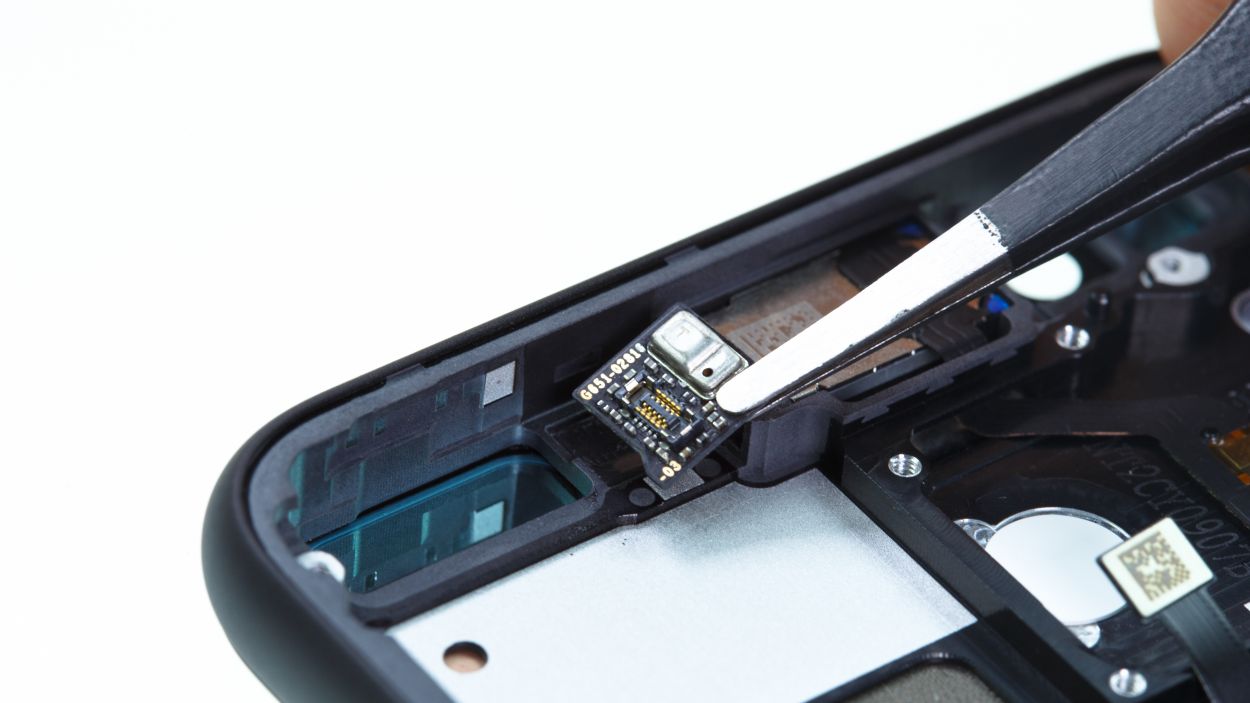
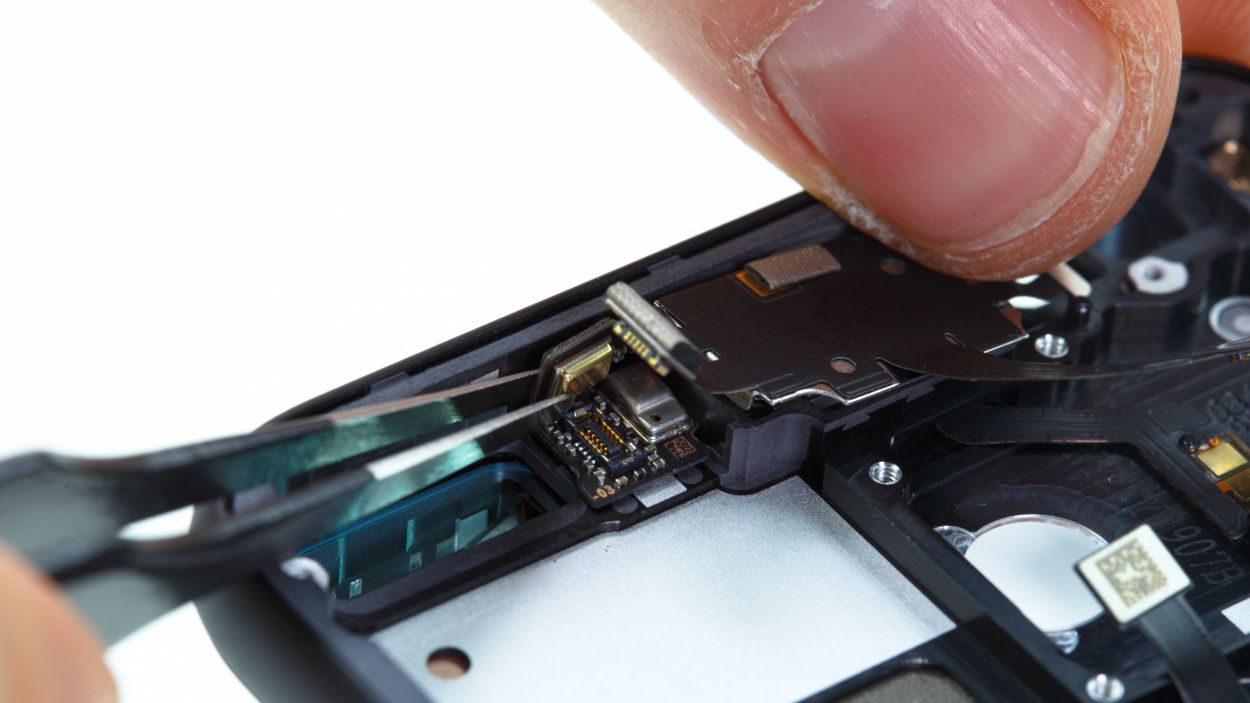
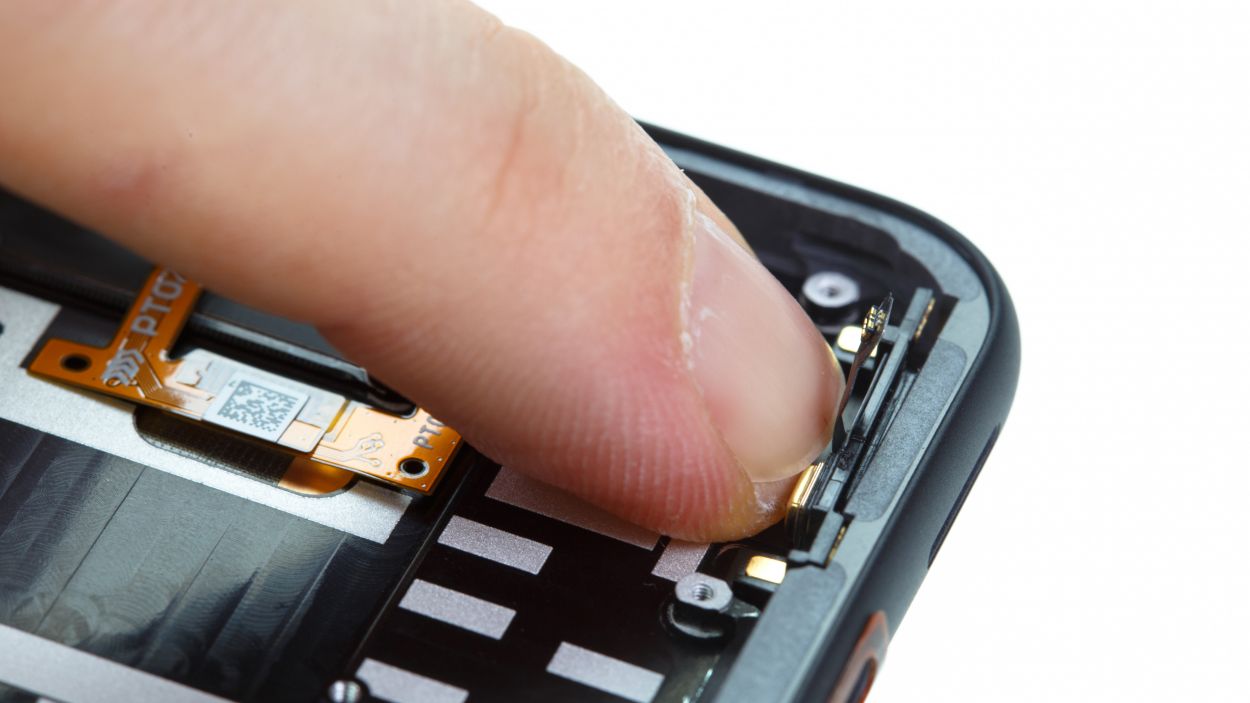
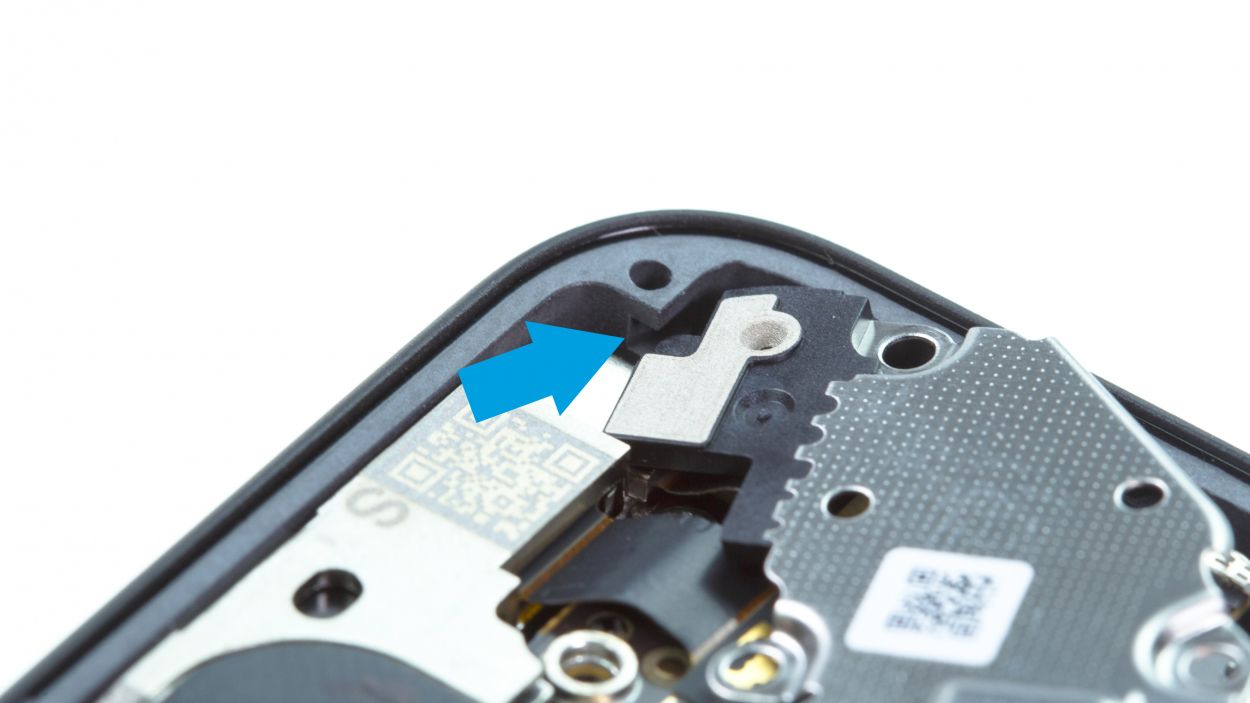
Step 13

– On the left side of the earpiece, you’ll find another little sensor that’s stuck on there. Time to warm it up!
– Gently heat the sensor, then use your trusty tweezers to carefully pry it away from the side.
– Once it’s loosened, go ahead and lift that sensor right out!
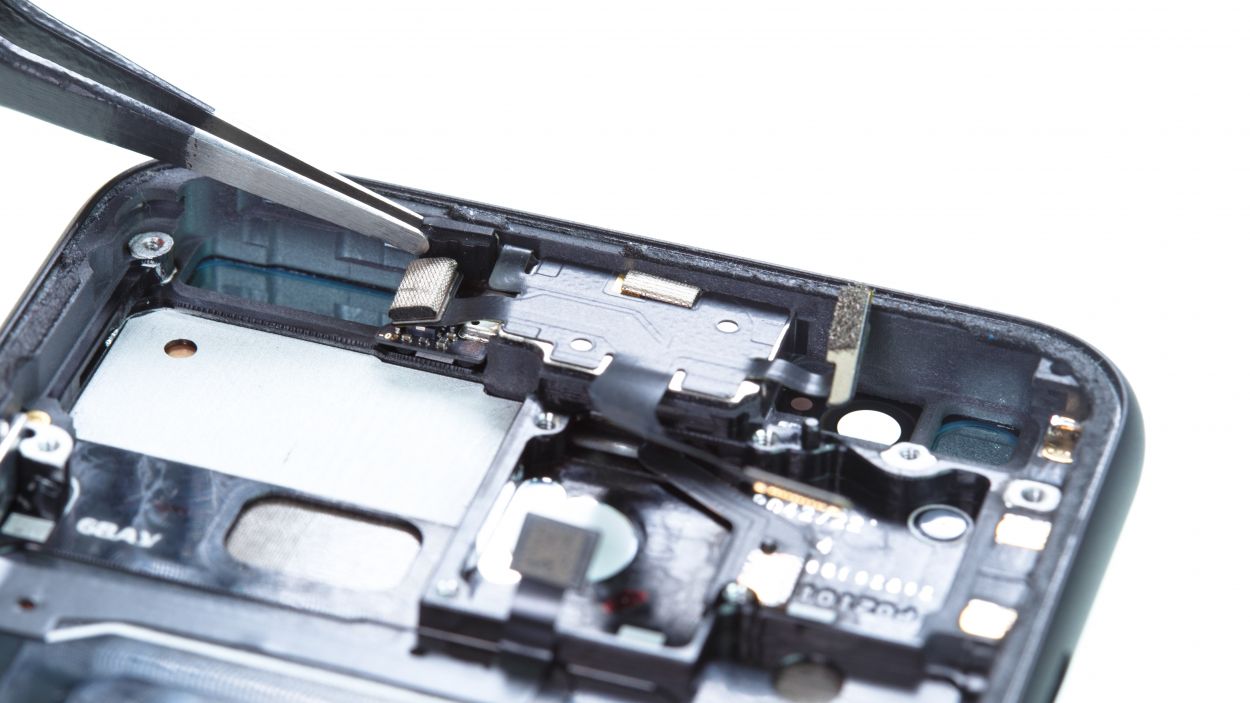
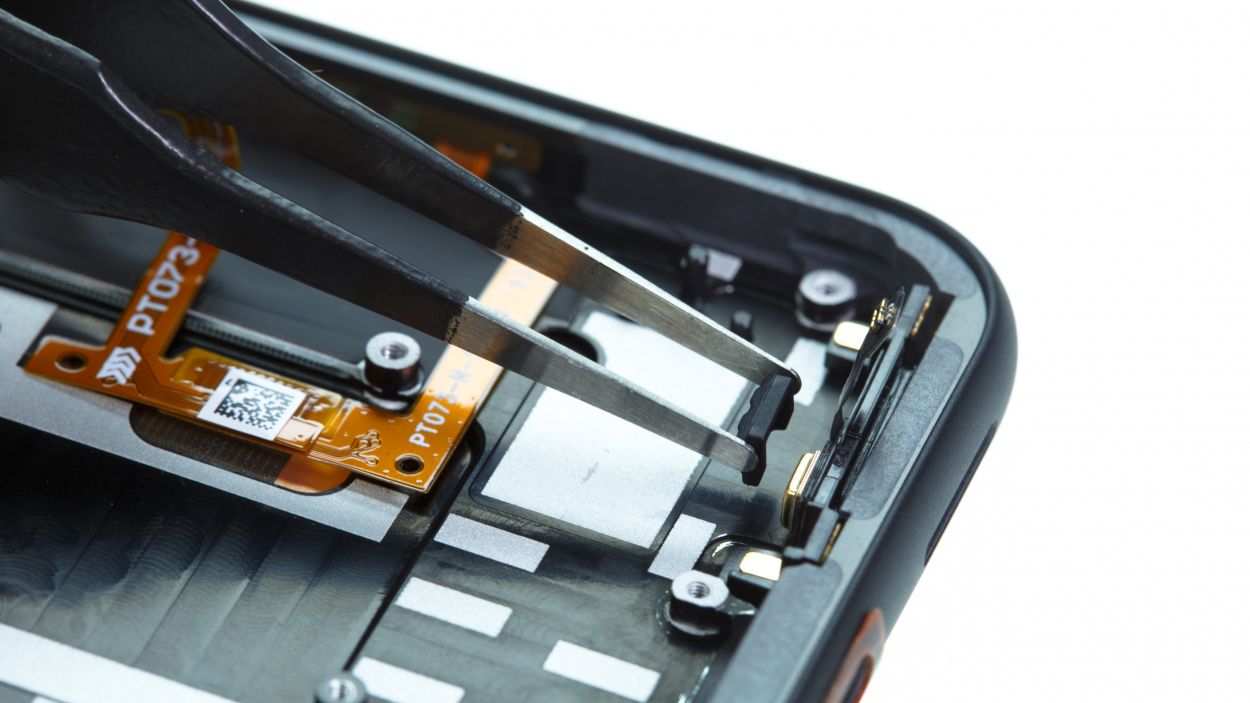
Step 14

Take a peek at your spare display and check if it’s already rocking an earpiece. If it is, go ahead and skip this step—you’re all set to keep moving!
– Gently warm up the flexible earpiece cable for a cozy felt difference! Then, loosen it using a funky steel spatula or quirky tweezers.
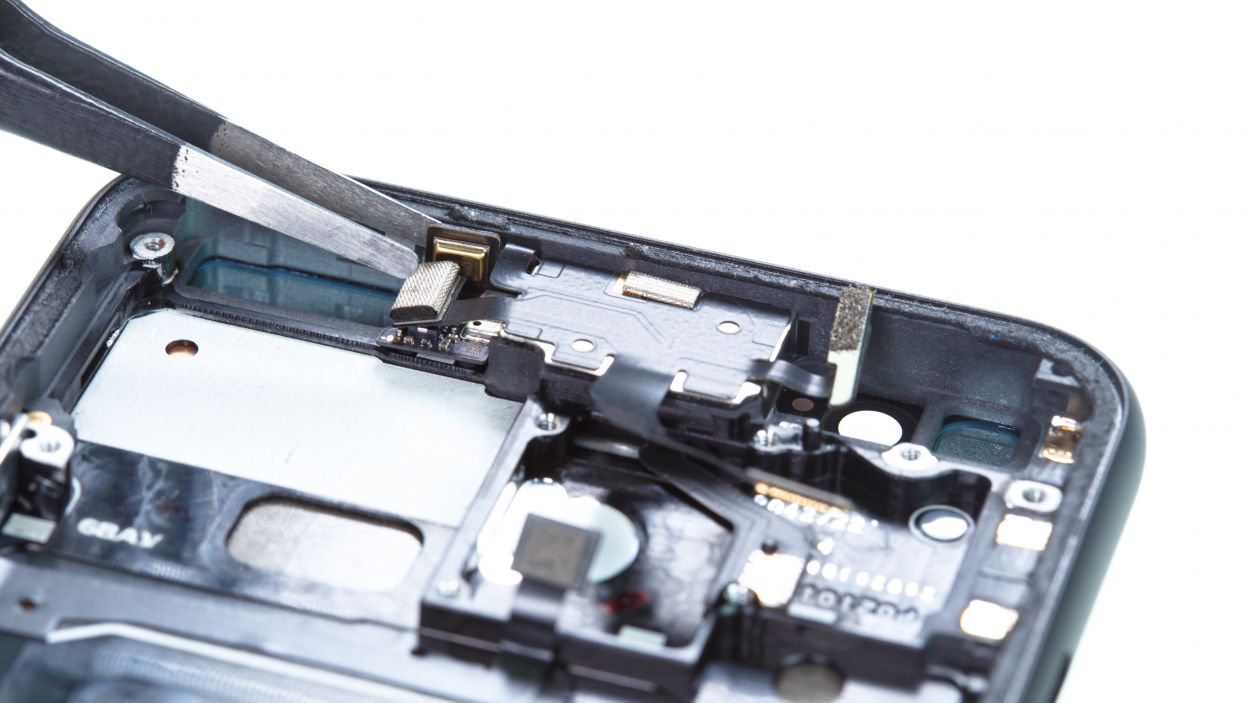
– Ready for some lateral action? Give one side of the earpiece a good ol’ lever push, and watch it pop up like magic!
– Pass the cooled-off flex cable through the opening, then give the earpiece a friendly farewell!
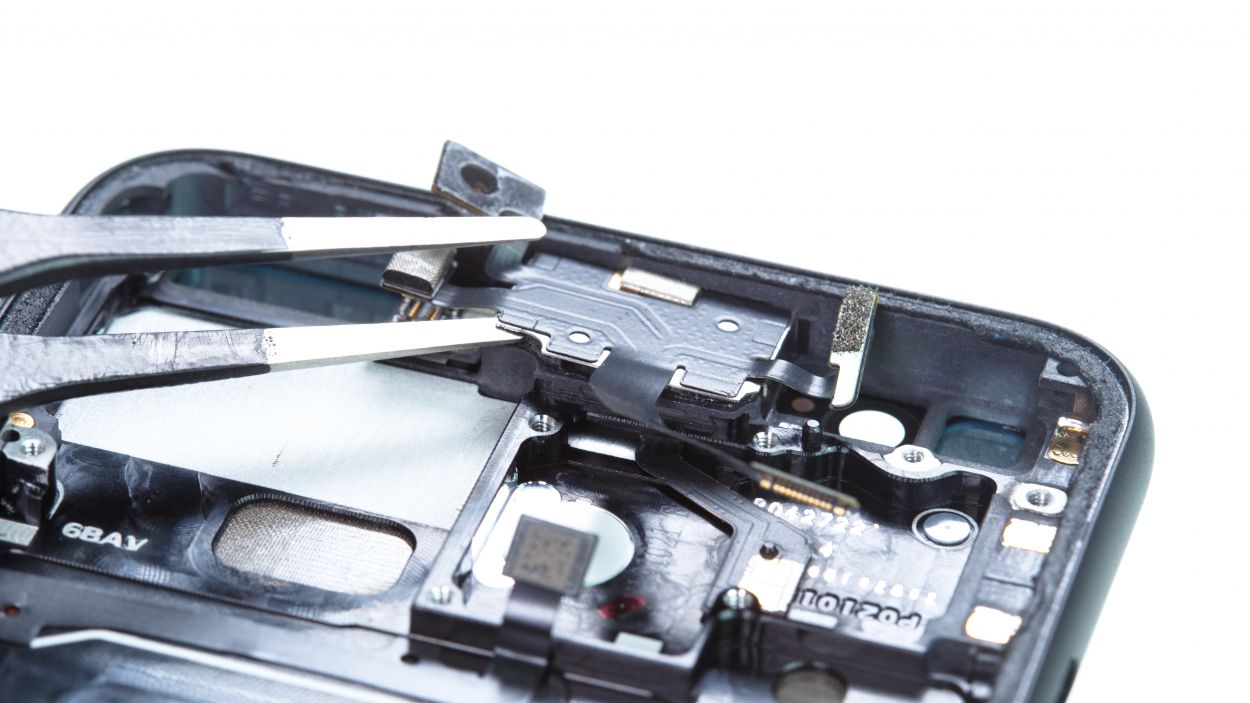
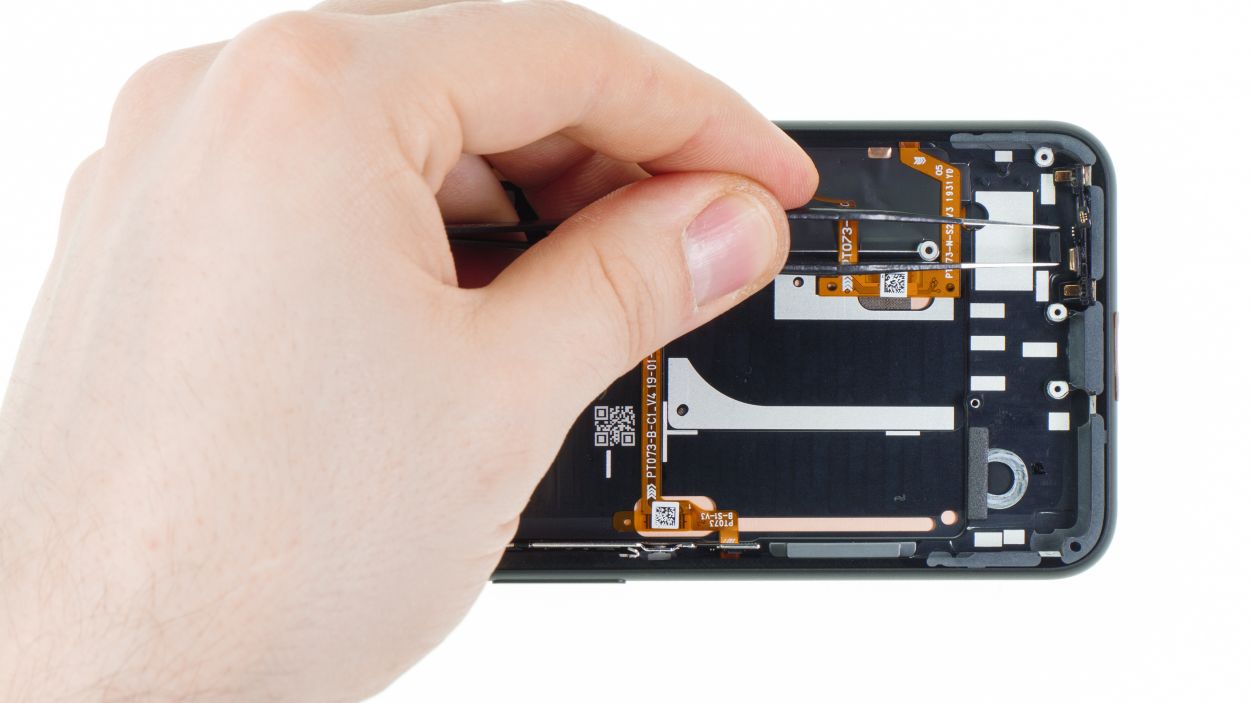
Step 15
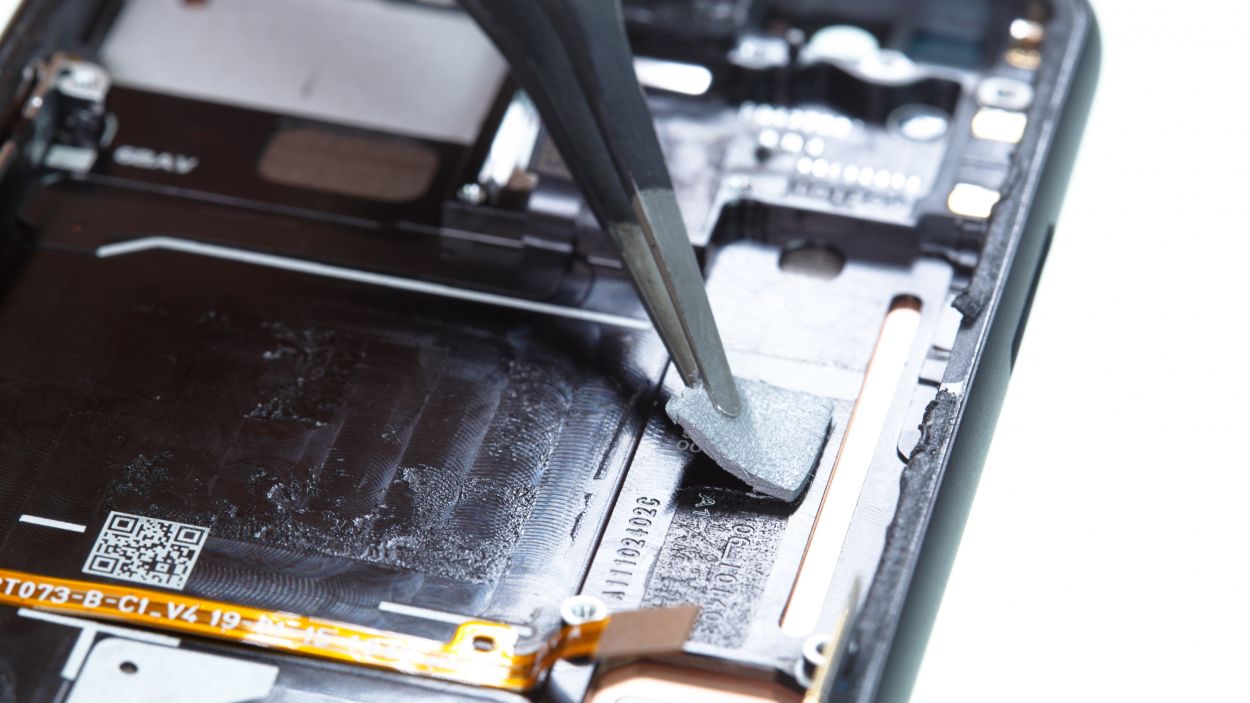
– If necessary, take over all components missing in the spare part like the flex cables of the “Active Edge” function or seals and spacers.
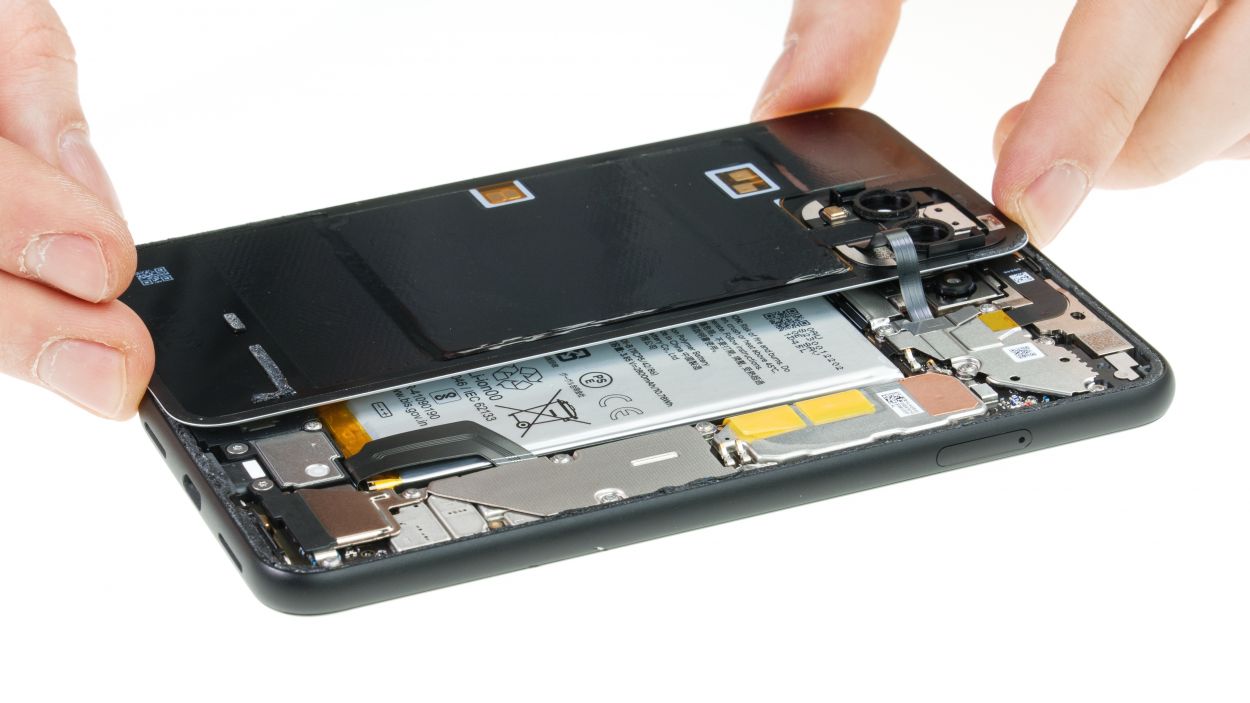
– The grey rectangle under the board is used for heat distribution in the device and should also be transferred to the new display.
– Finally, also remove all films that protect the openings of the sensors and other surfaces.
Step 16

– Guide that flex cable through the opening and gently place the earpiece where it belongs. You’ve got this!
– Nestle the flex cable into its home; that nifty little round opening will help you align the contacts perfectly. Keep it up!
Step 17
– Pop that sensor back into its spot to the left of the earpiece. Make sure it’s lined up just right.
– Give the sensor a gentle press until it’s snug and secure.
Step 18
– Pop that microphone and sensor module onto the earpiece.
– Make sure it fits like a glove and position that golden microphone on the side of the frame.
– On the flip side, fold the flex cable down and give it a good press.
– Hook up the connector.
– Lastly, slap that black rubber cover onto the microphone.
Step 19
2 × 2,3 mm Torx T3
– Gently slide that lower microphone unit right into the cozy opening in the frame.
– Once it’s snug and happy in its spot, grab those two Torx T3 screws and secure them in place.
– And hey, don’t forget to pop that black rubber cover back over the microphone to keep it safe and sound!
Step 20
2 × 2,0 mm Torx T3
– Gently slide the USB board with the wide flex cable into your device. Hold off on sticking down that flex cable just yet!
– Now, carefully tuck the USB connector into the opening at the bottom of the frame until it sits snugly.
– Don’t forget to position the thin cable that runs along the side of the frame too!
– Time to put those screws back in their cozy little spots.
– Lastly, make sure to align that wide flex cable nicely and give it a gentle press to secure it in place.
Step 21

Vibration connector
– Time to give that vibration motor a new home! Pop it into its spot in your device.
– See those two little openings? They’re looking for a snug fit on those two little nubs in your gadget.
– Give that motor a gentle press – let the adhesive do its magic!
– And finally, connect the vibration motor. You’re almost there!
Step 22

1 × 4,0 mm Torx T3
1 × 4,4 mm Torx T3
– Hey, that speaker’s got a little black nose on the wide end – kinda cute, huh? It’s designed to hook under the frame.
– Give that speaker a little wiggle and slide it into its spot at the bottom of the frame. Aim for a nice, flat fit!
– Once it’s snug and not sticking out, fasten it with those two Torx T3 screws (they’re different lengths, so pay attention!). If you need help, you can always schedule a repair
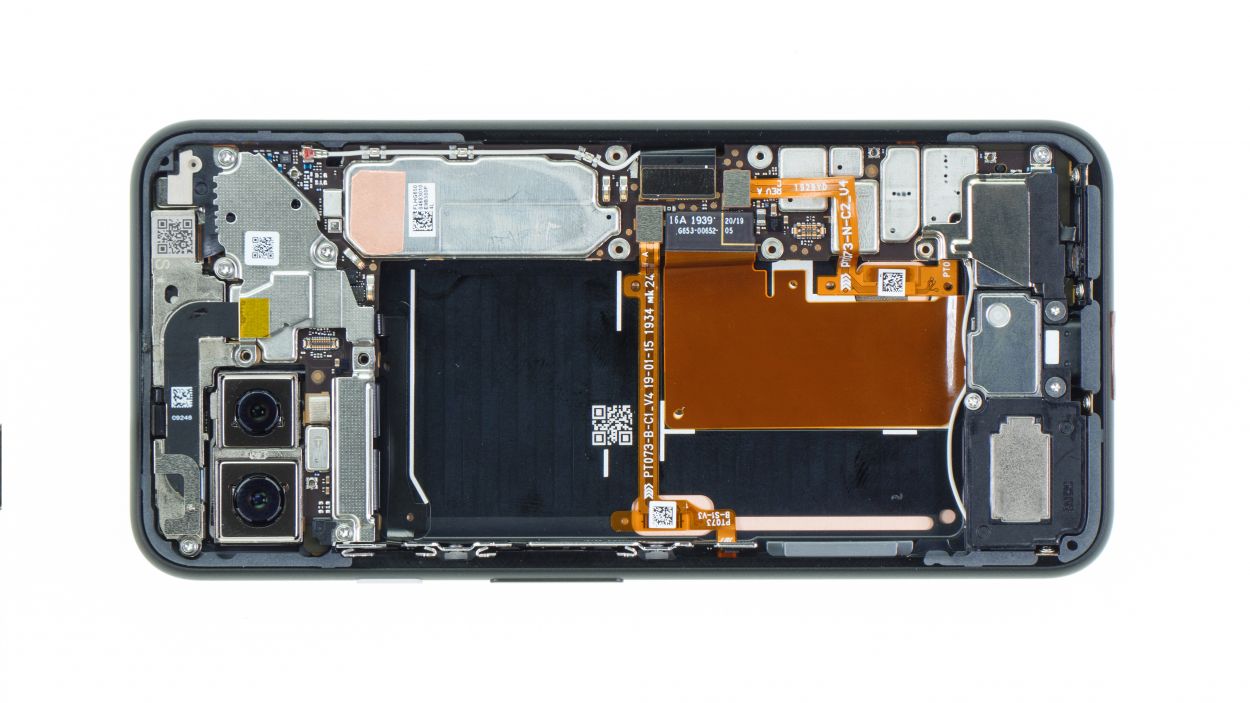
Step 23

Connectors
1 × 4,0 mm Torx T3
1 × 4,4 mm Torx T3
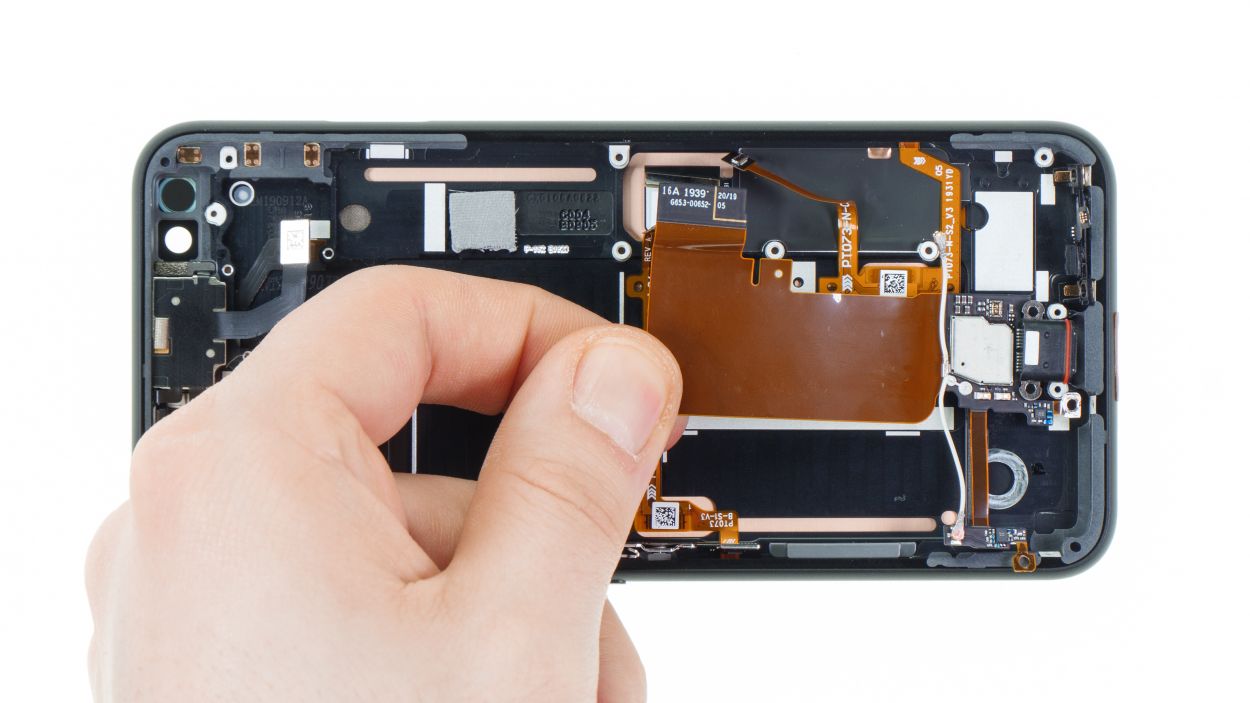
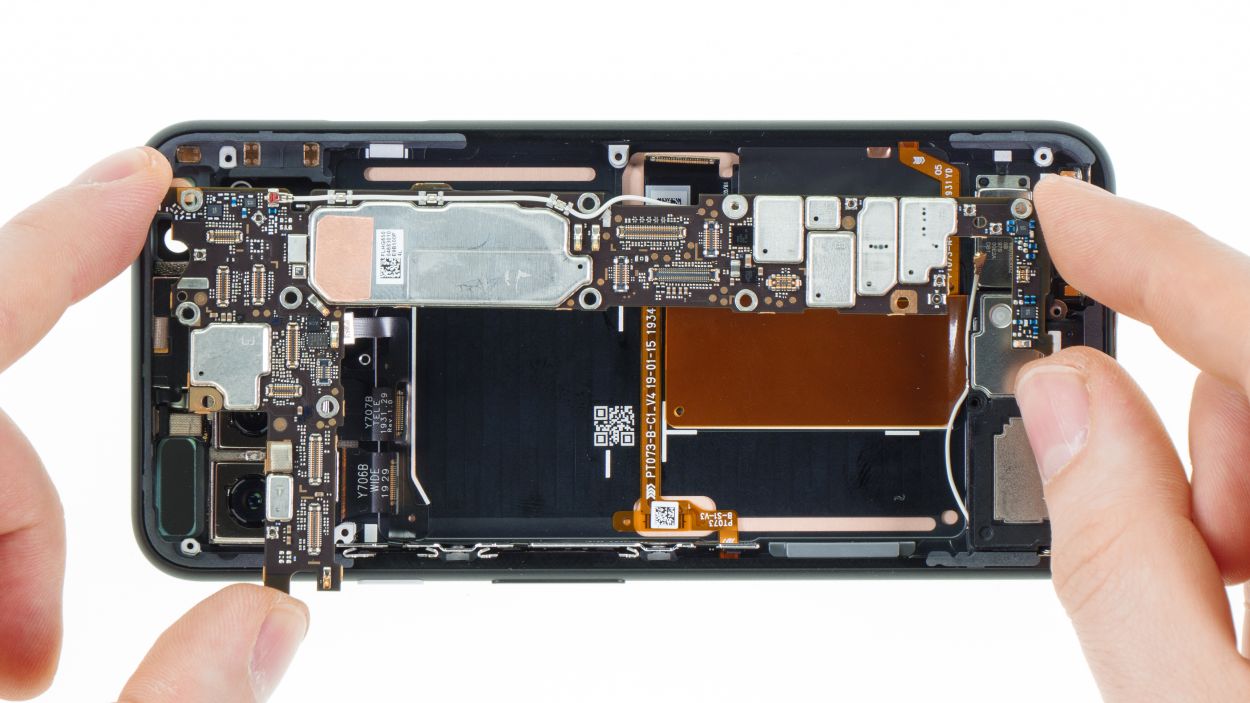
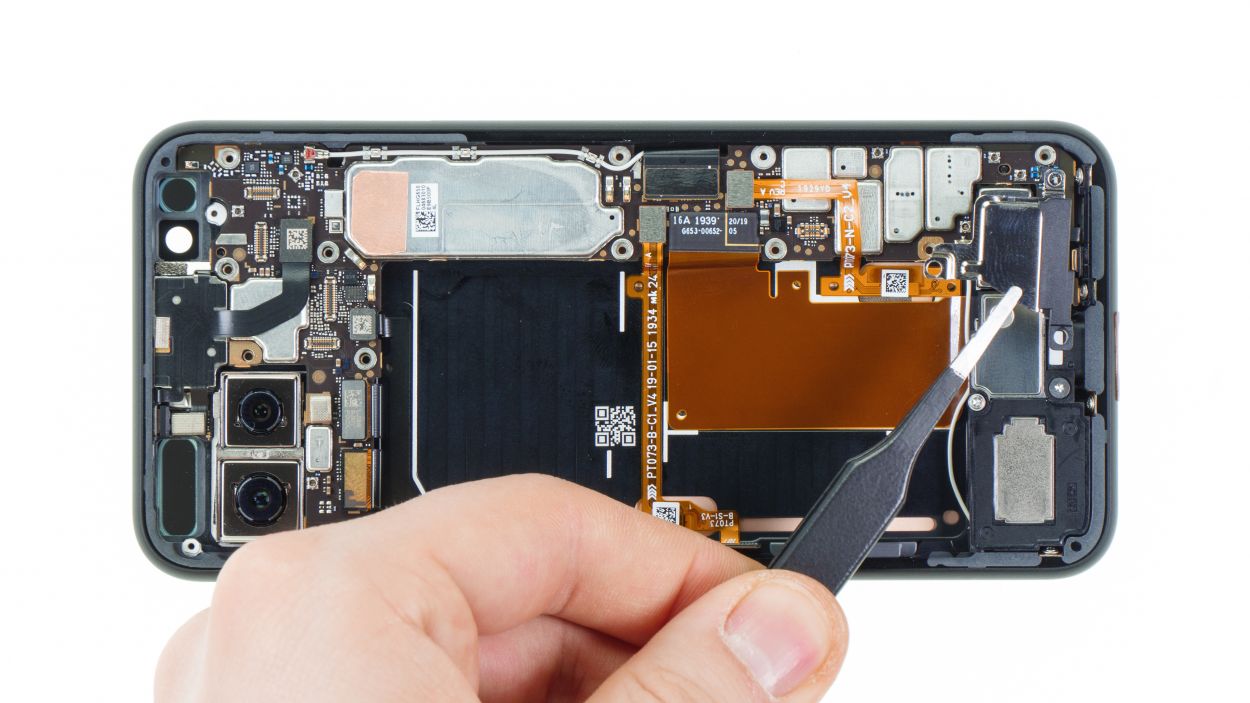
Before you get those connectors all snug and secure, double-check that the PCB is sitting pretty in its rightful spot!
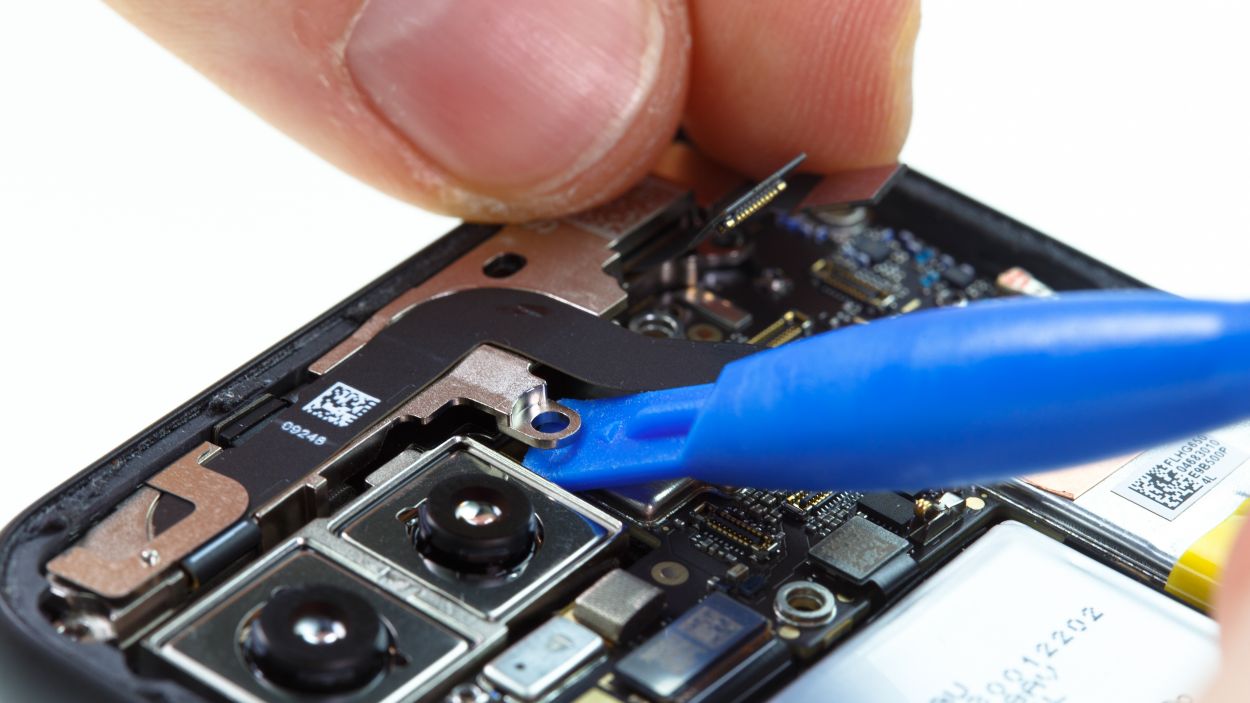
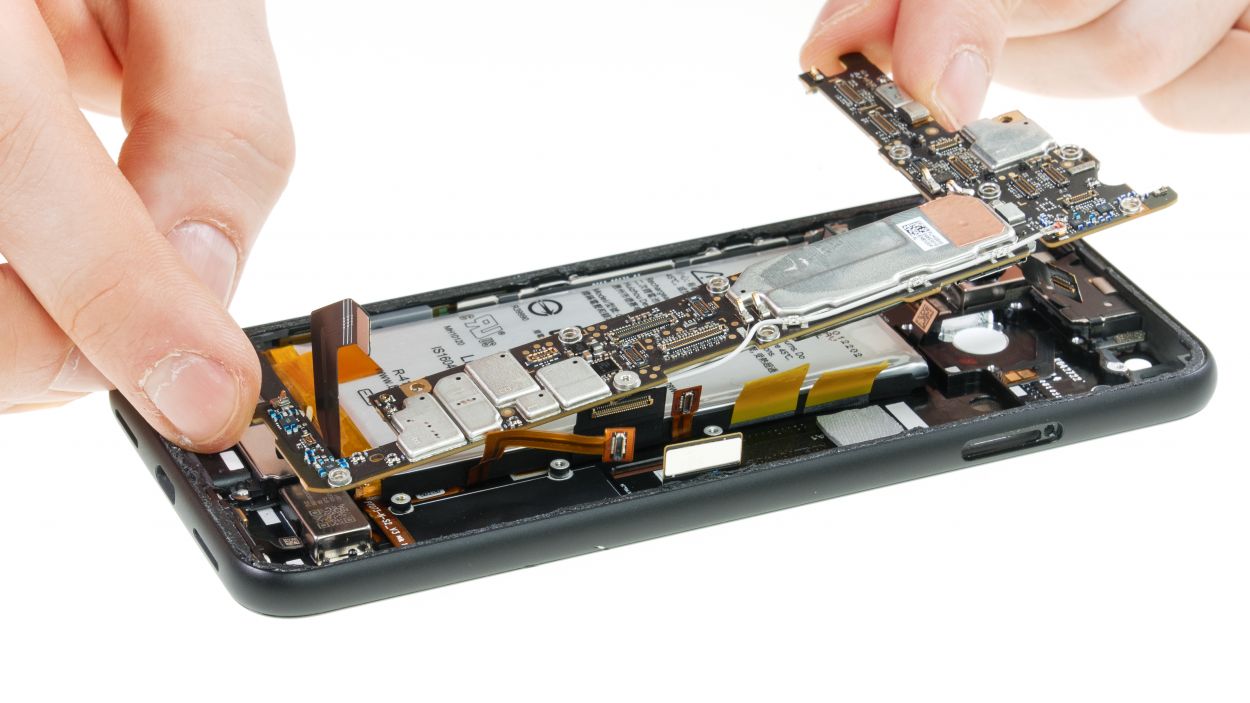
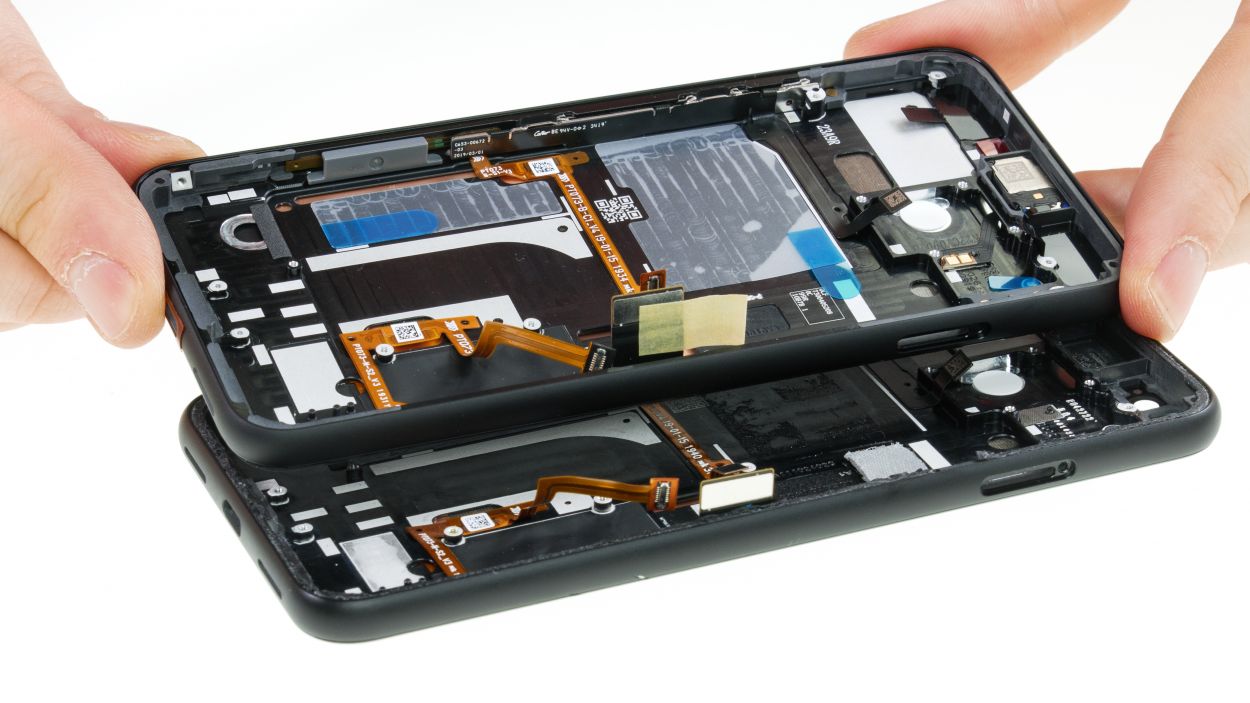
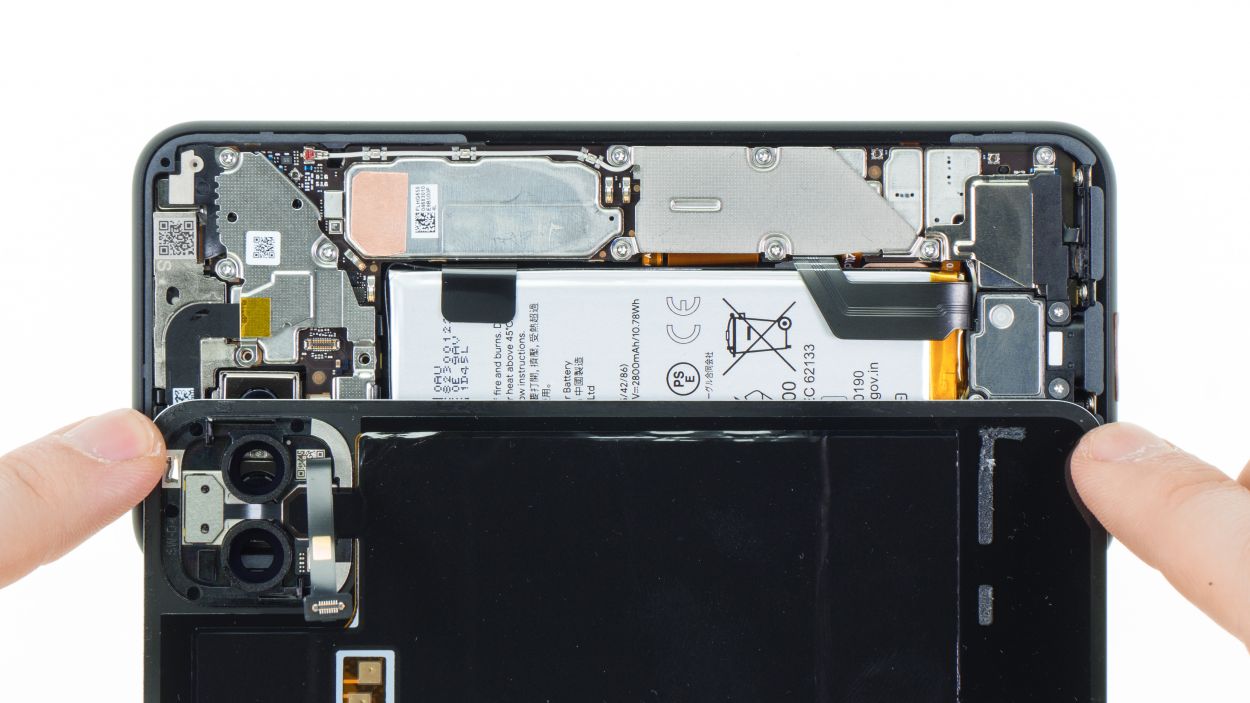
– Start by gently placing the dual camera on the clean white surface inside your device.
– Next, carefully bend all the flex cables to the side to avoid pinching them under the main board when you slide it in.
– Now, take your time and slowly insert the main board into the unit, making sure to navigate around all those cables.
– Begin at the bottom and then snugly push it into the frame at the side.
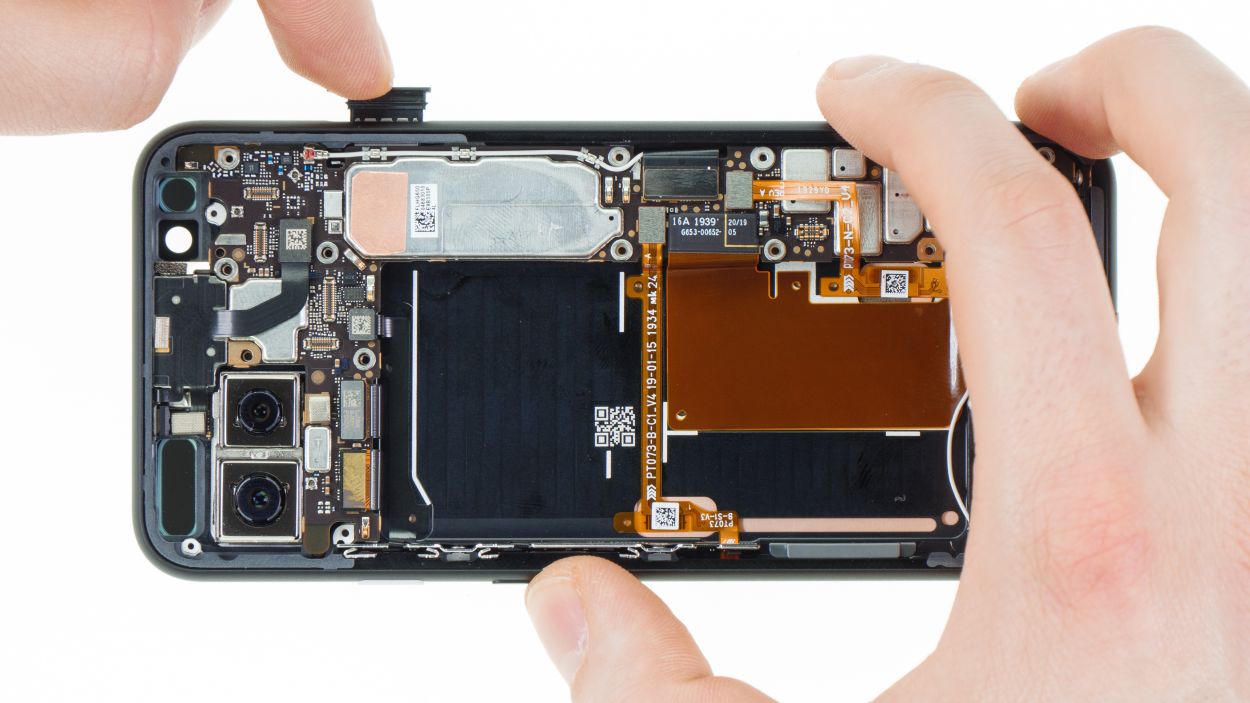
Step 24
4 × 4,0 mm Torx T3
Keep that front camera and sensor unit dust-free, both on the outside and inside of your device. A clean lens means clearer selfies and smoother operation! If you need help, you can always schedule a repair.
– Let’s pop that front camera/sensor module right into the device! Get it snug in there.
– Give it a little press until it’s seated just right.
– Now, don’t forget to connect all three little connectors back. They miss you!
– Finally, place the cover plate back on and screw it down. Almost there!
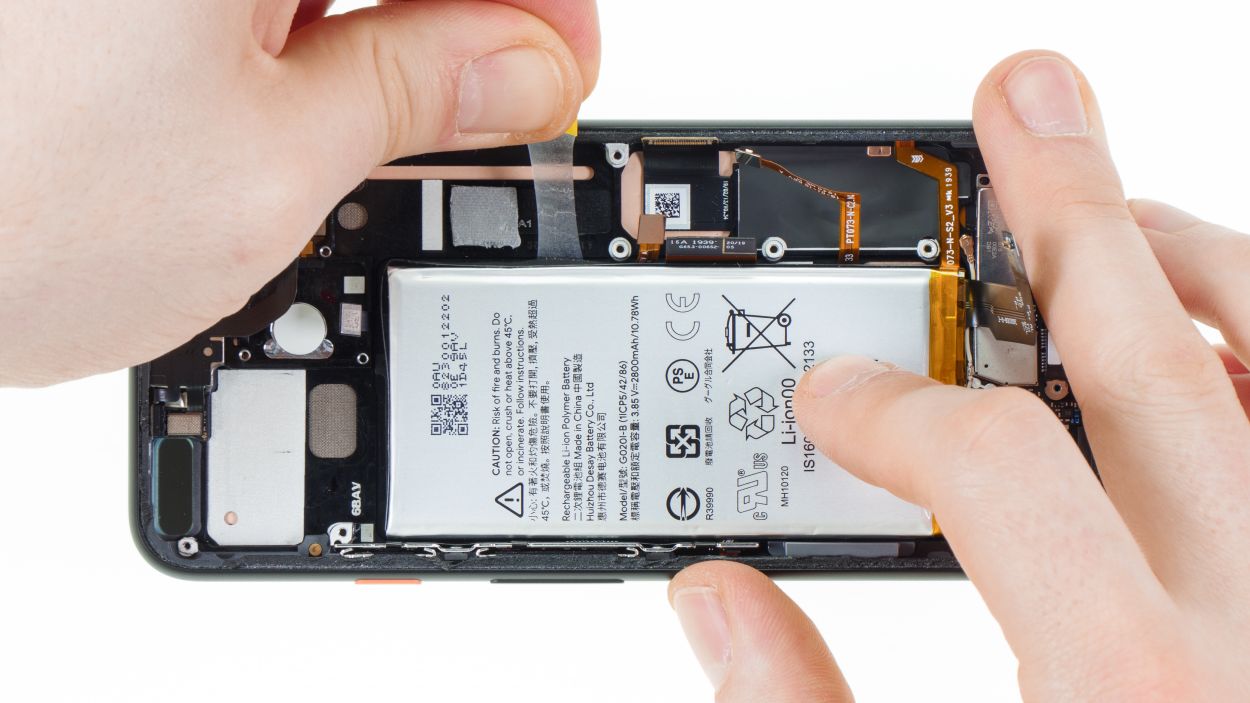
Step 25
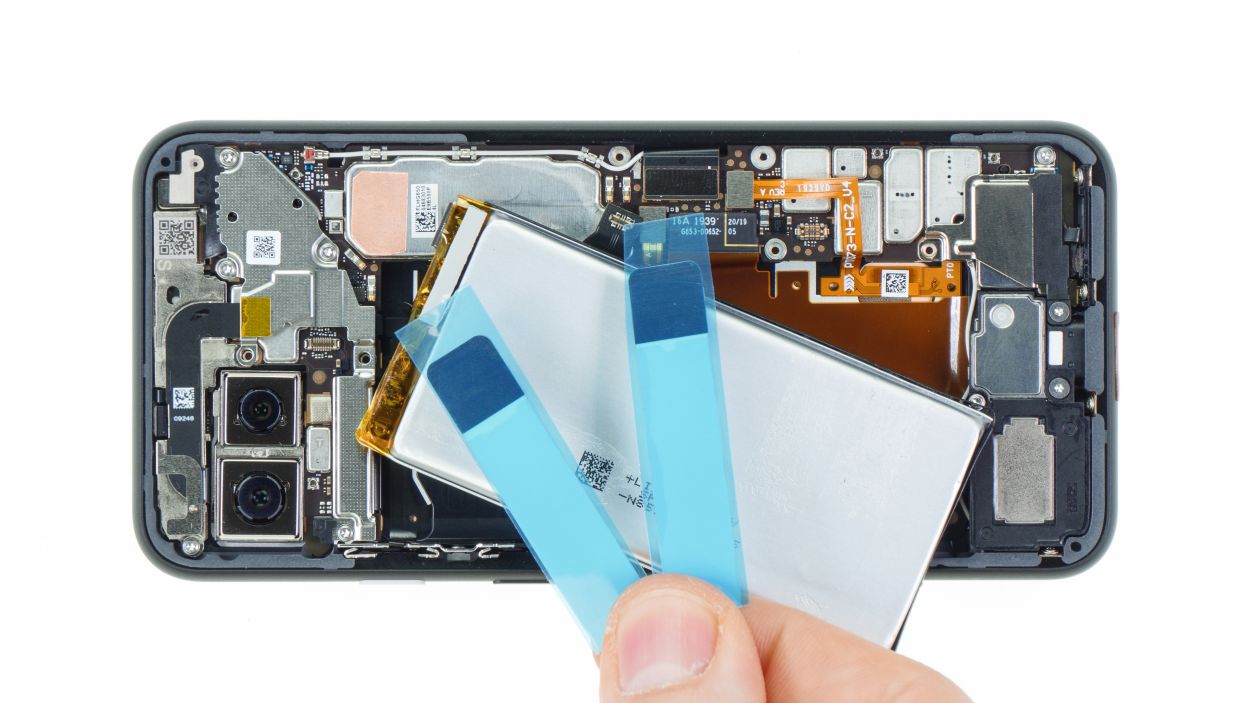
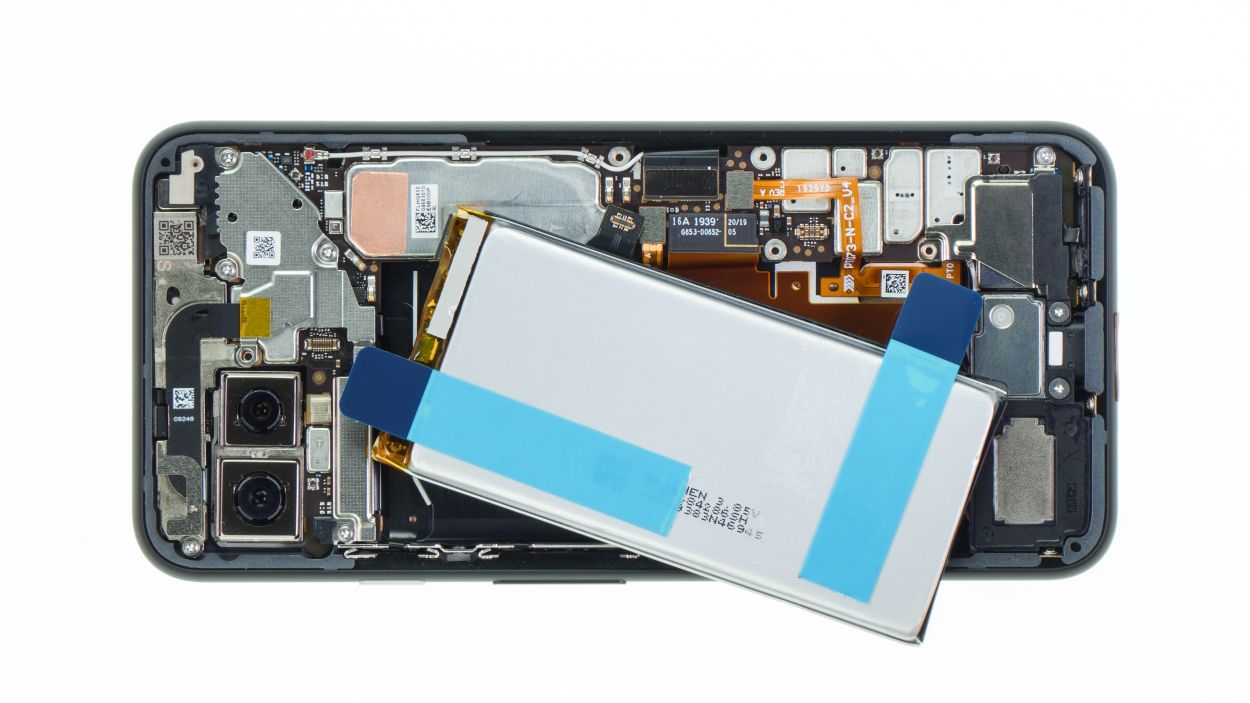
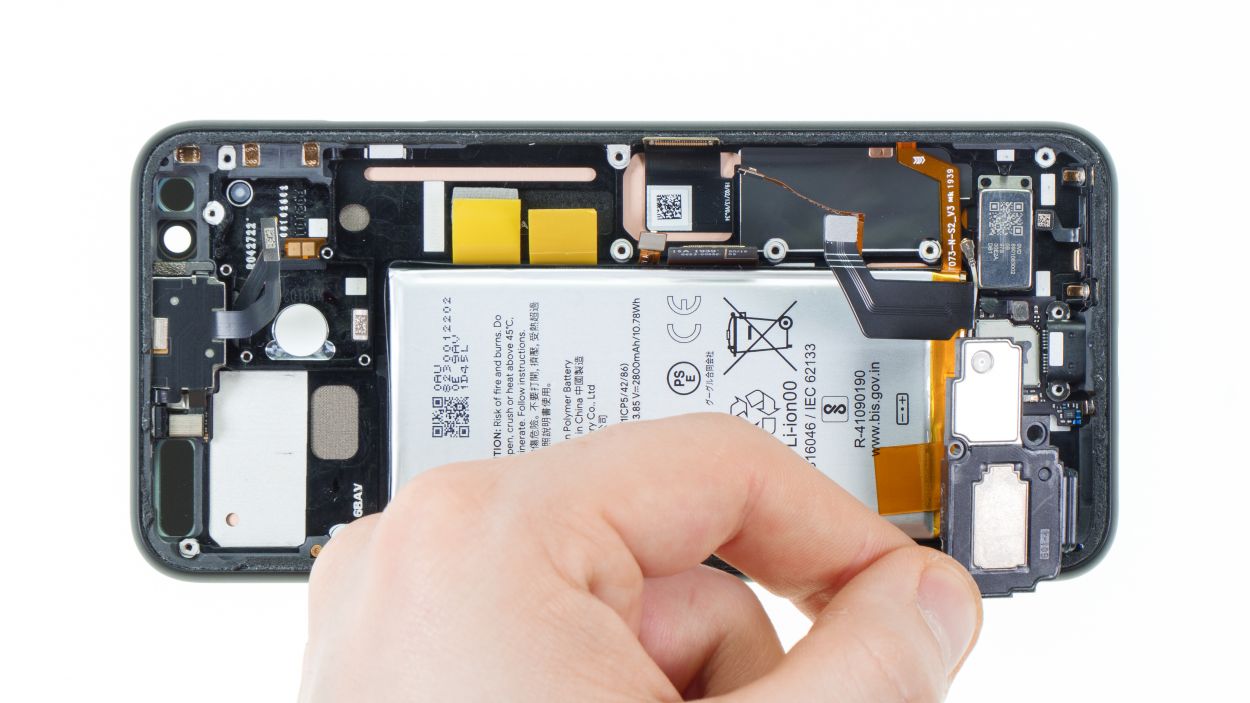
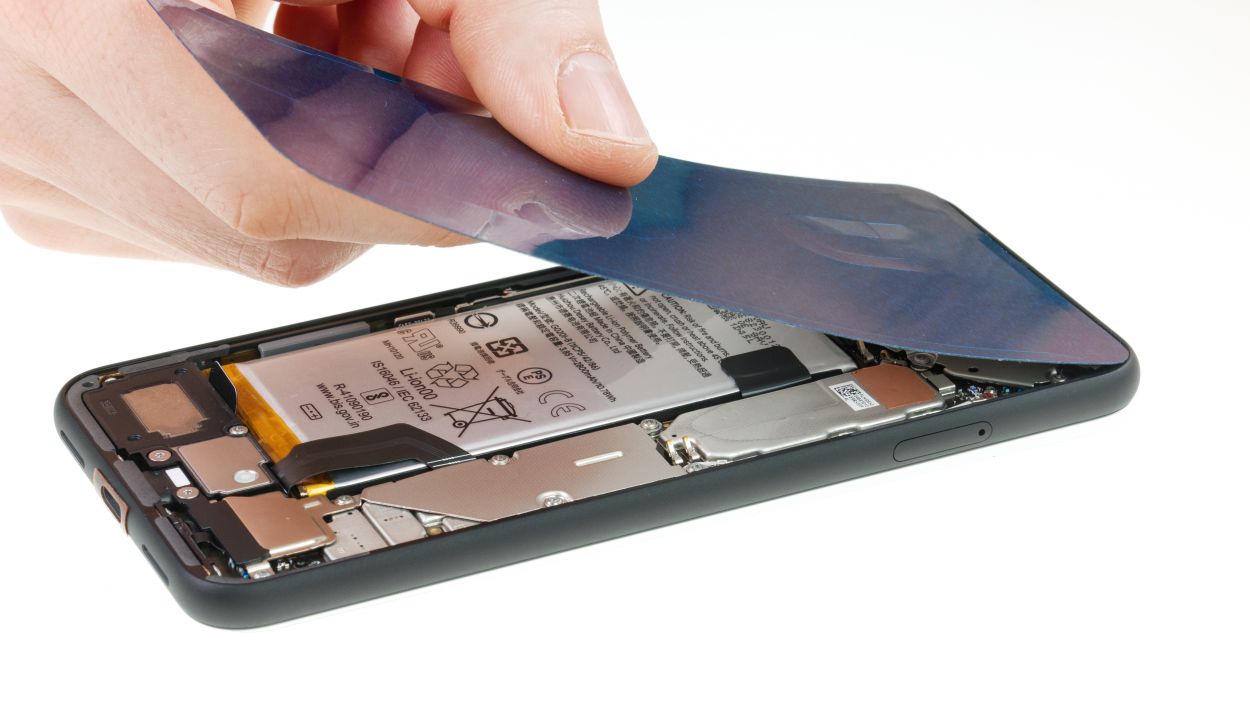
Snip those adhesive+strips+Pixel+4&crid=1TJIMMAJSUJUZ&sprefix=repair+tools%2Caps%2C165&linkCode=ll2&tag=salvationrepa-20&linkId=c486487cf454ce8edd6f5beefab4110f&language=en_US&ref_=as_li_ss_tl’>adhesive strips and lay them down just like the originals! Remember, keep them clear of the flexible cables inside your smartphone’s housing. If you need help, you can always schedule a repair!
– First things first, let’s make sure there’s no sticky adhesive residue hanging out on the back of the battery or inside your device. We want a clean start!
– Next up, peel off that transparent protective foil from the adhesive+strips+Pixel+4&crid=1TJIMMAJSUJUZ&sprefix=repair+tools%2Caps%2C165&linkCode=ll2&tag=salvationrepa-20&linkId=c486487cf454ce8edd6f5beefab4110f&language=en_US&ref_=as_li_ss_tl’>adhesive strips and stick those strips onto the battery. Just a heads up, the black tabs should be sticking out like little flags!
– Now, fold those black tabs down and secure them to the top of the battery. We want everything nice and snug.
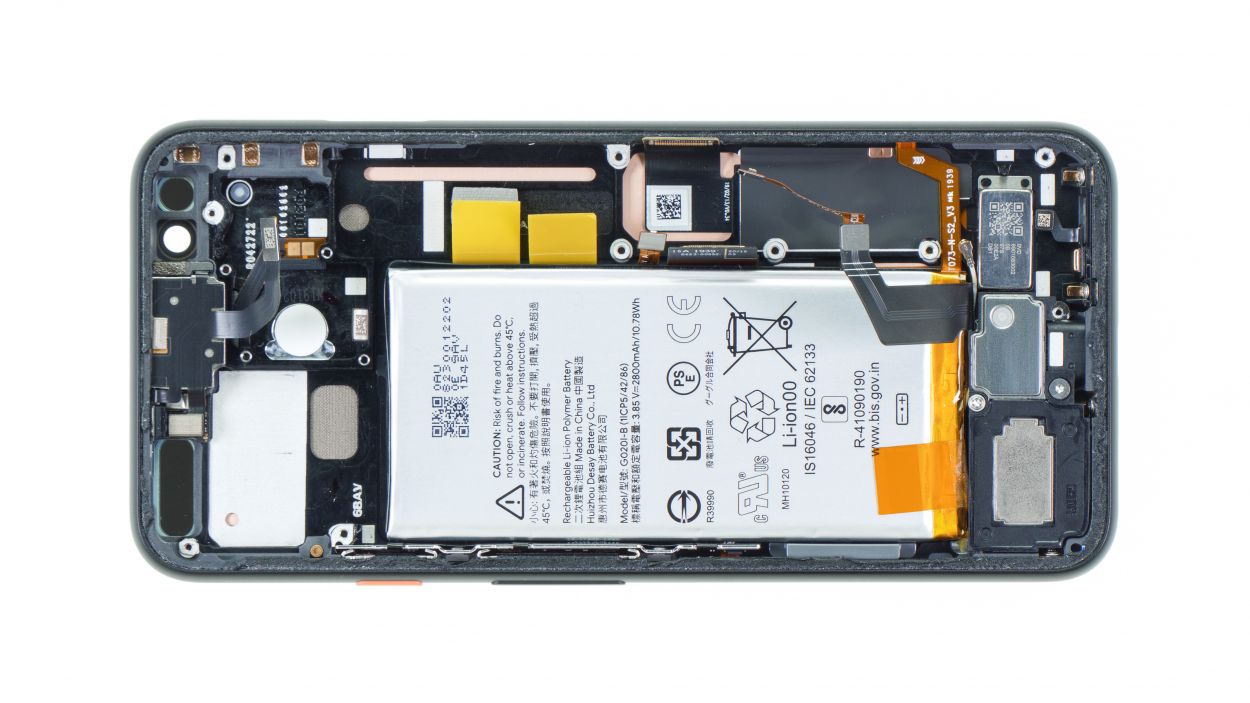
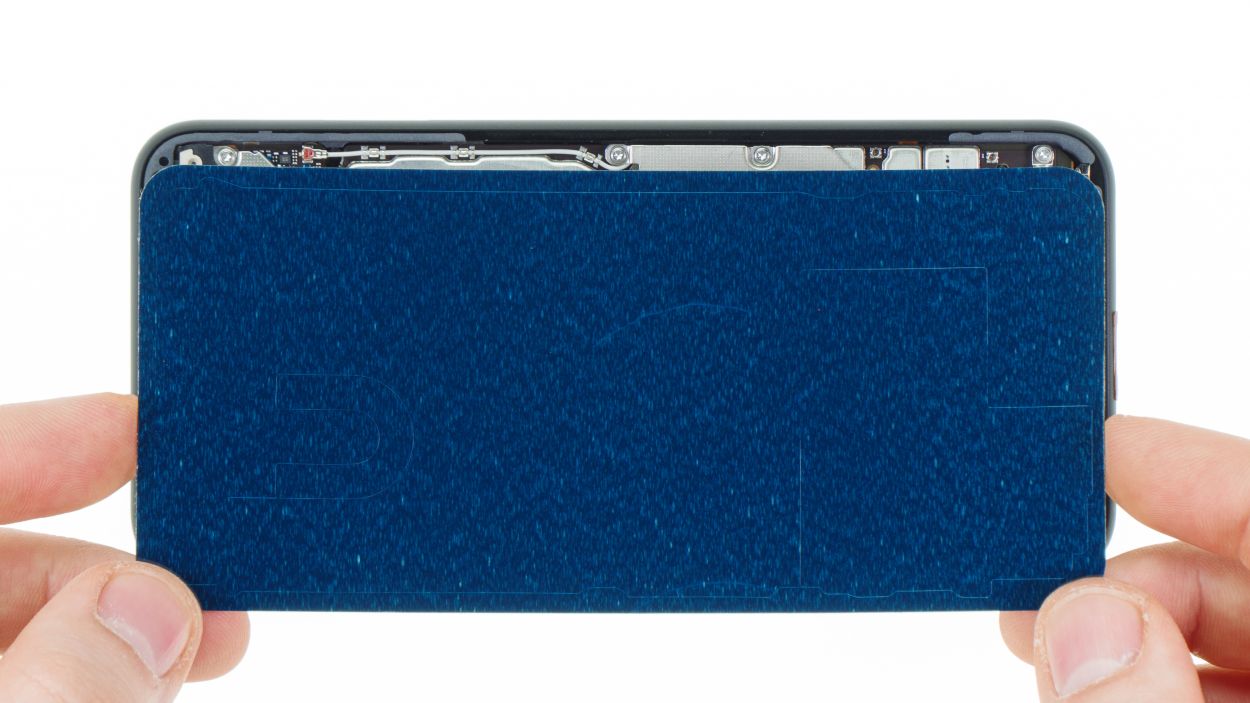
– Time to remove the blue protective film and gently place the battery back into your device. It’s like tucking it in for a cozy nap!
– Just double-check that there’s plenty of space all around and that the battery isn’t getting squished. The battery contact should be sitting right above its connector on the main board, ready to connect!
Step 26
4 × 4,0 mm Torx T3
1 × 2,0 mm Torx T3
One of the screws is a bit shorter than the others. Just a friendly reminder to keep them separate so you don’t mix them up!
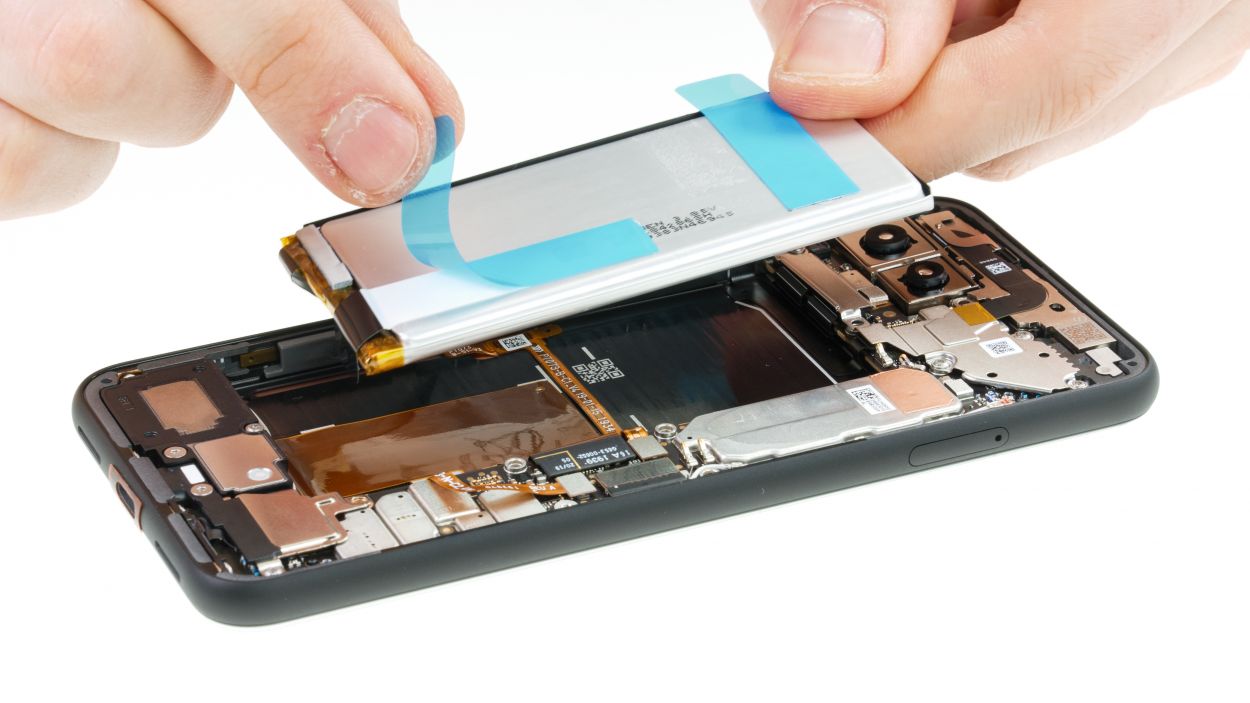
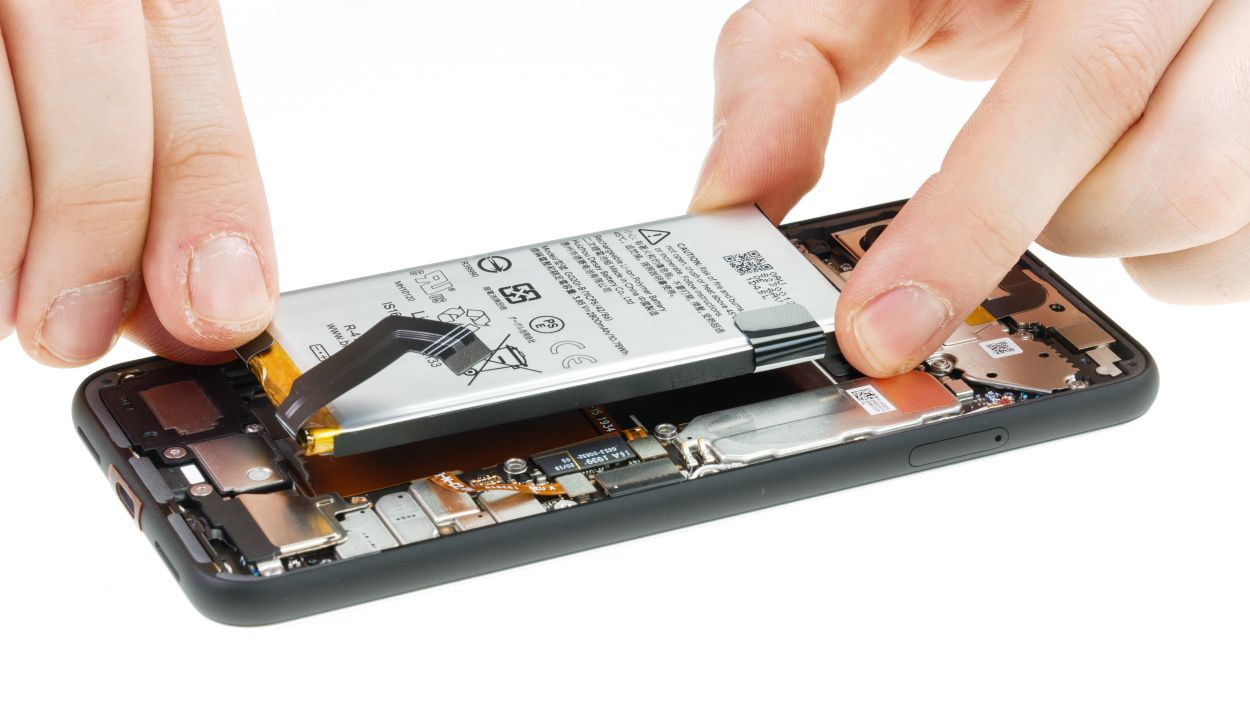
– Connect the battery contact. Make sure that it is properly seated before you press it firmly. Do not slide the connector over the socket on the circuit board.
– Put the cover plate on and screw it in place.
Step 27

– Place the back cover on the device and connect the connector of the flexible cable.
– Close the back cover and switch on the device.
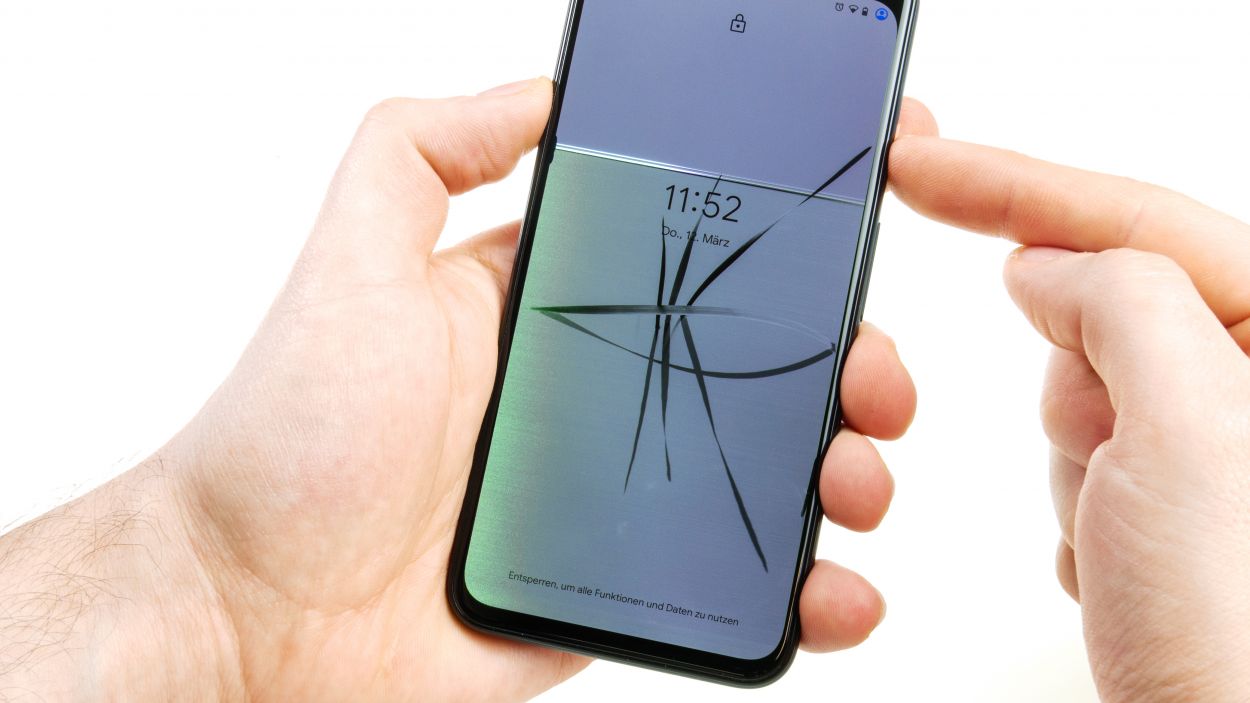
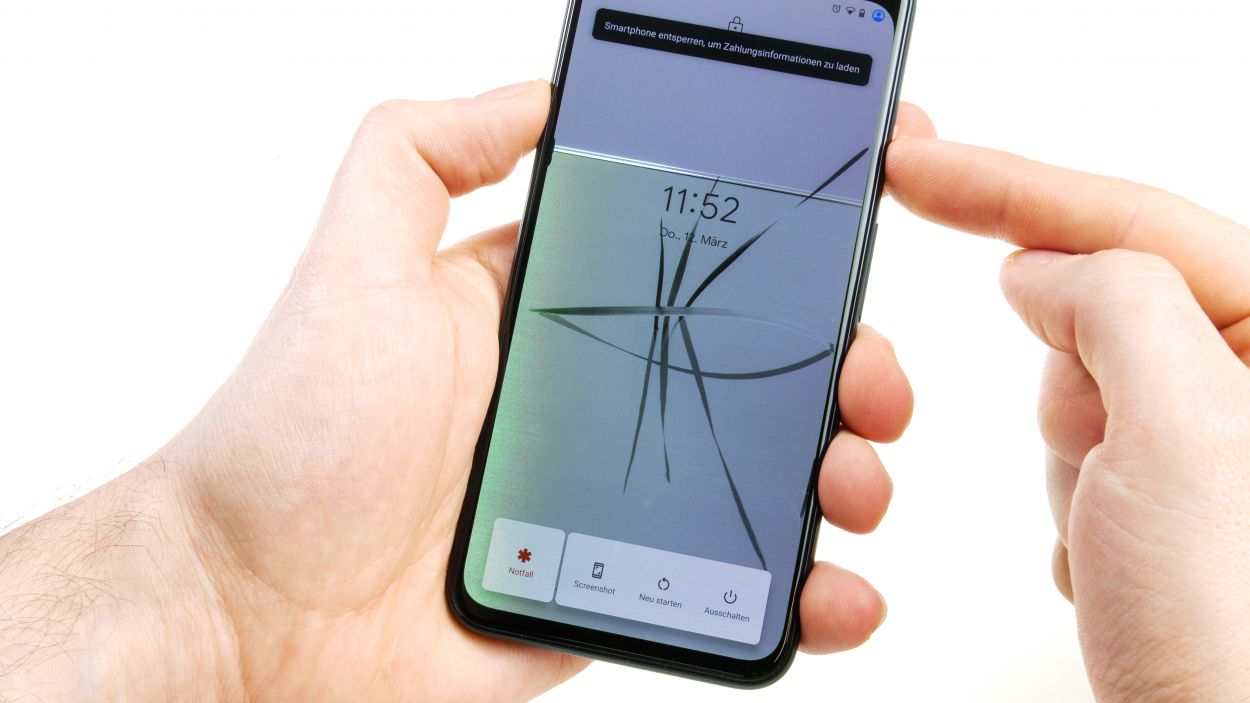
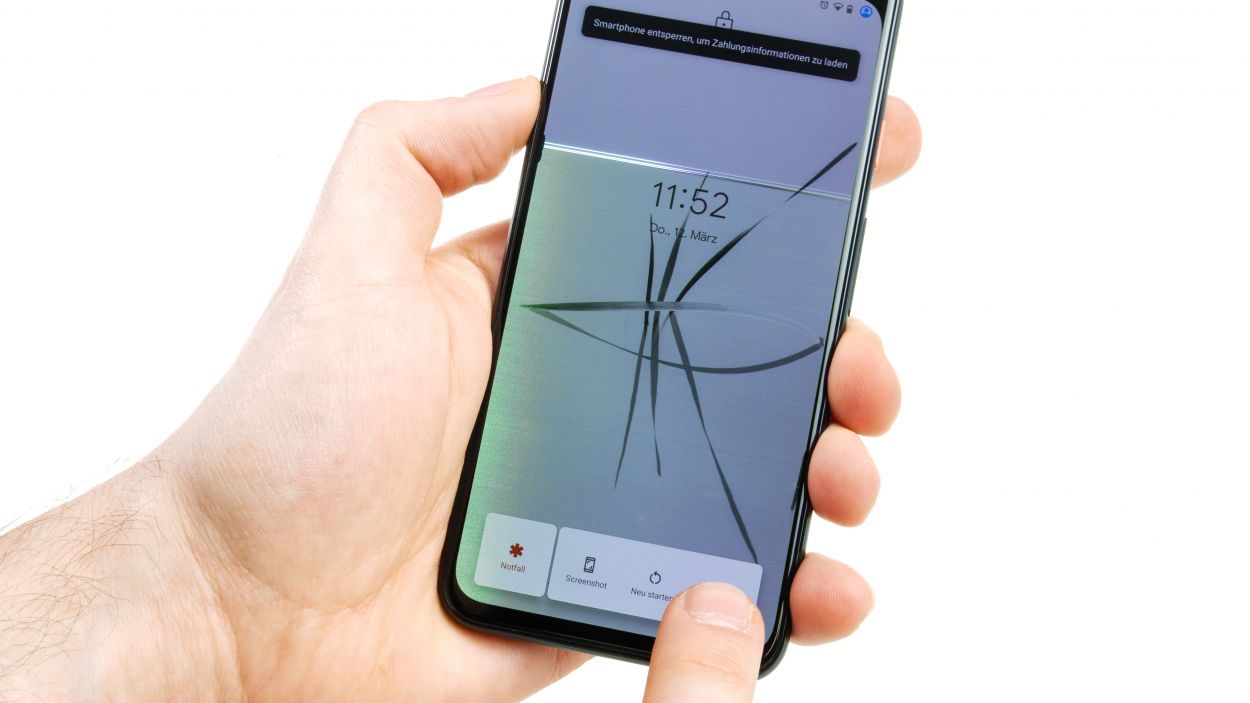
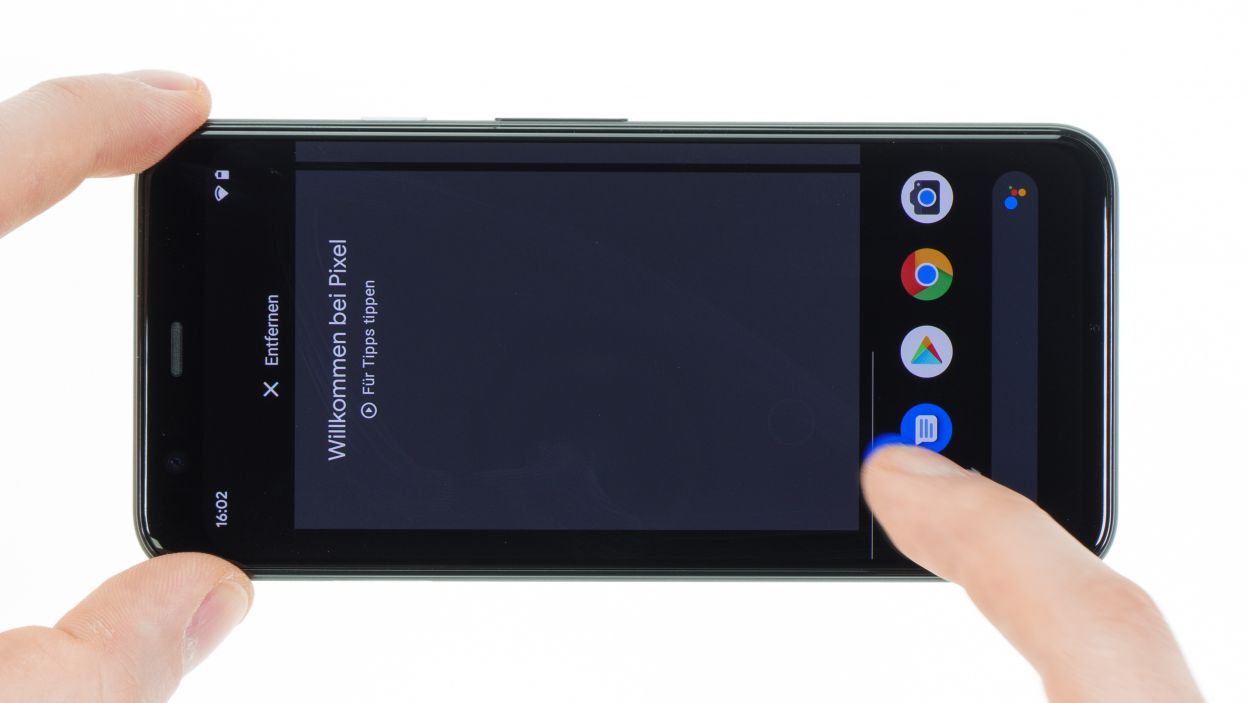
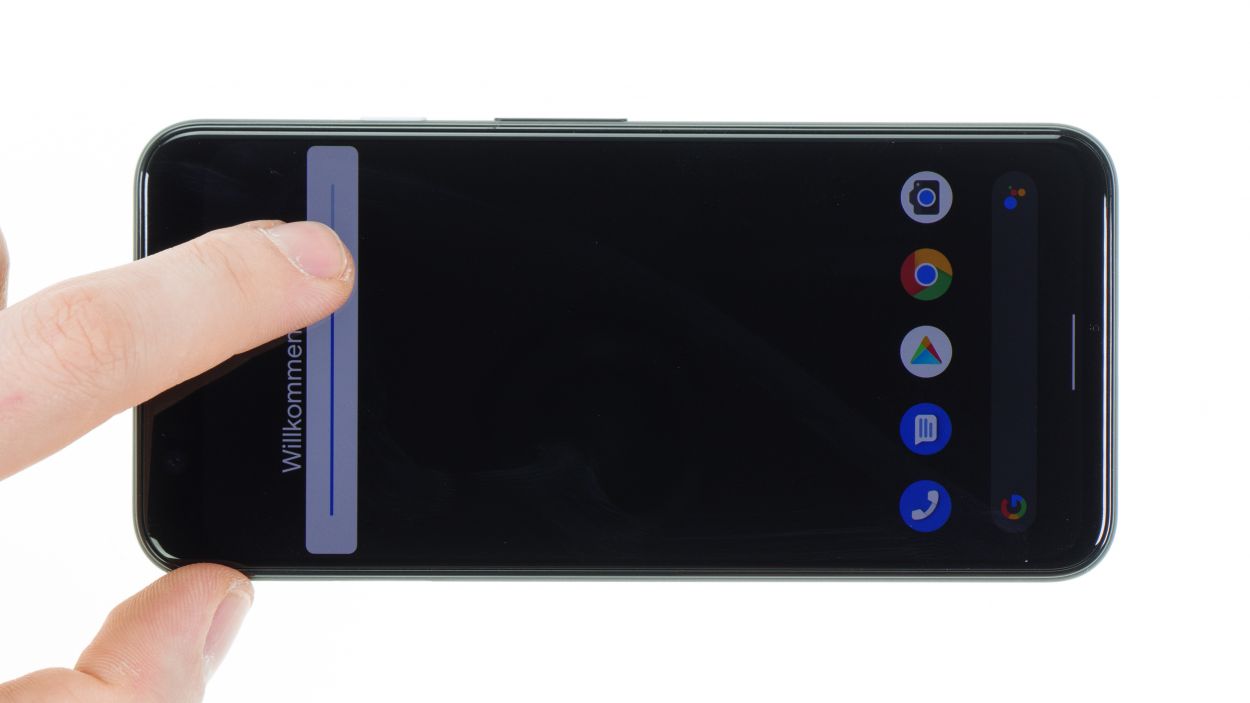
– You can test the touchscreen by sliding an app along the entire edge and zigzagging across the screen. If it always follows your finger, the touchscreen should not have any glitches.
– Check the brightness, contrast and sharpness of the screen.
Step 28

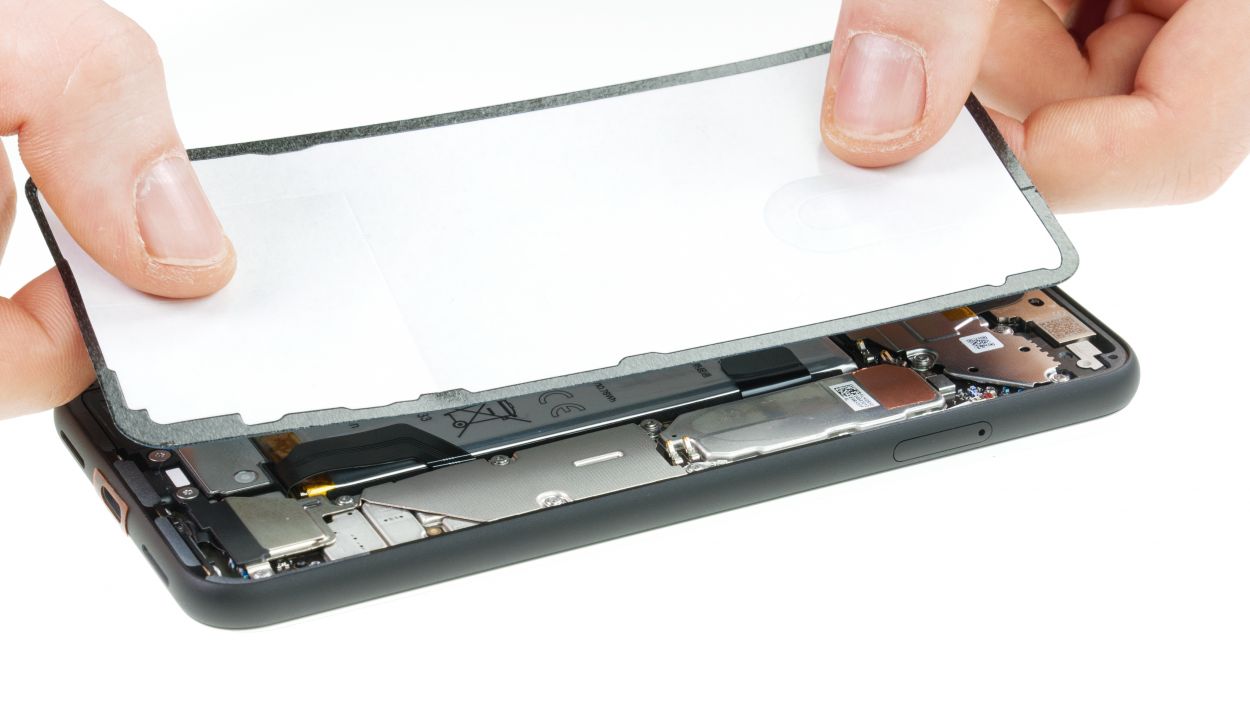
– First things first, let’s get rid of all that old glue gunk on the back cover and the frame. A clean start is key!
– Next up, find the perfect spot for your adhesive frame by giving it a test fit in the unit. Check out those camera openings and the edges to make sure everything lines up just right.
– Now, peel off that white protective film from the edges and carefully place the adhesive frame on one side of the frame.
– Gently slide the adhesive frame onto the entire frame, keeping an eye out to ensure it’s sitting pretty and not sticking out anywhere.
– Once it’s in place, give that adhesive a good press along the edge of the frame. A spudger can be your best buddy here—run it along the edge to make sure it’s secure.
– Time to remove the rest of the protective film and the middle carrier layer. Almost there!
– Finally, take a moment to double-check that the glue is sitting just right. It shouldn’t be sticking out or wrinkling at all. If you spot any trouble spots, feel free to adjust the adhesive as needed.
Step 29


2 × 4,0 mm Torx T3
– Gently lay the back cover on your device and connect that flexible cable like a pro.
– Pop the cover on and tighten those screws to seal the deal!
Step 30
– Gently fold that back cover over and align it perfectly on your device’s frame.
– Make sure it doesn’t touch the frame or the glue until it’s just right in the center.
– Once it’s all lined up, press down along the edges to help that adhesive stick like it’s meant to.
– Finally, give your device a little warmth and weigh it down with some books or secure it with clamps for about half an hour. That’s the secret to a solid bond!