DIY Guide to Replace Camera on Google Pixel 4
Duration: 60 min.
Steps: 15 Steps
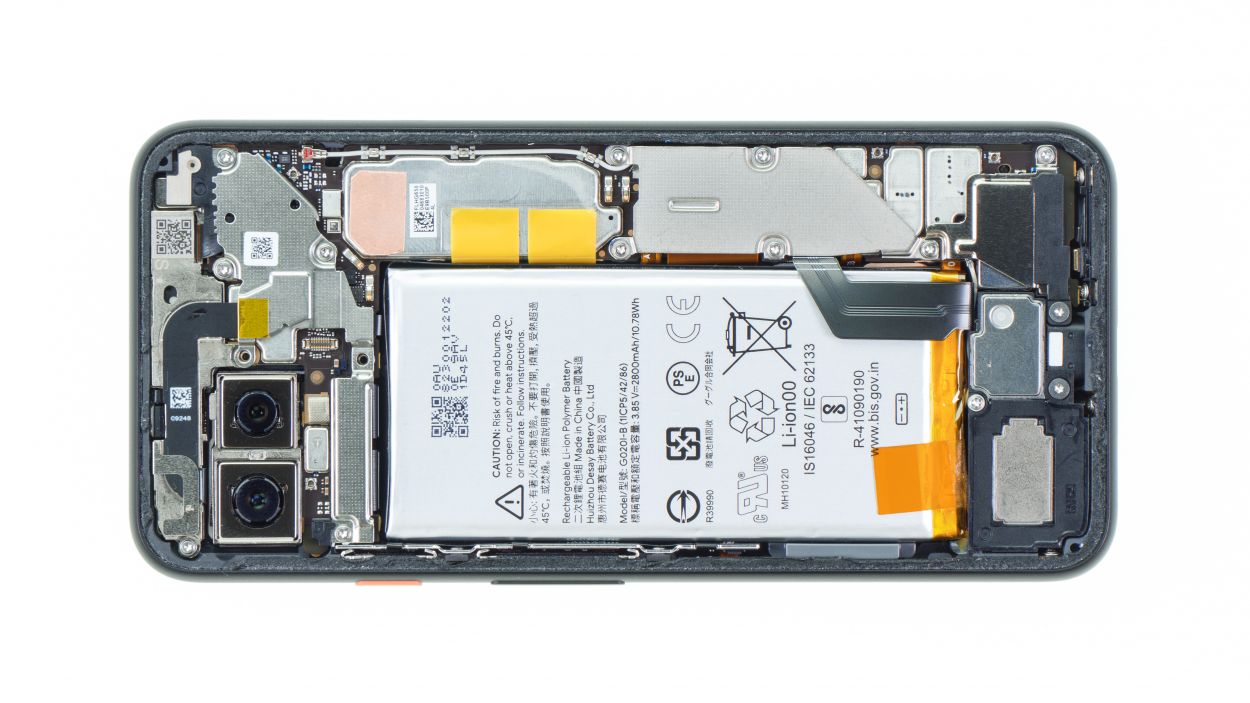
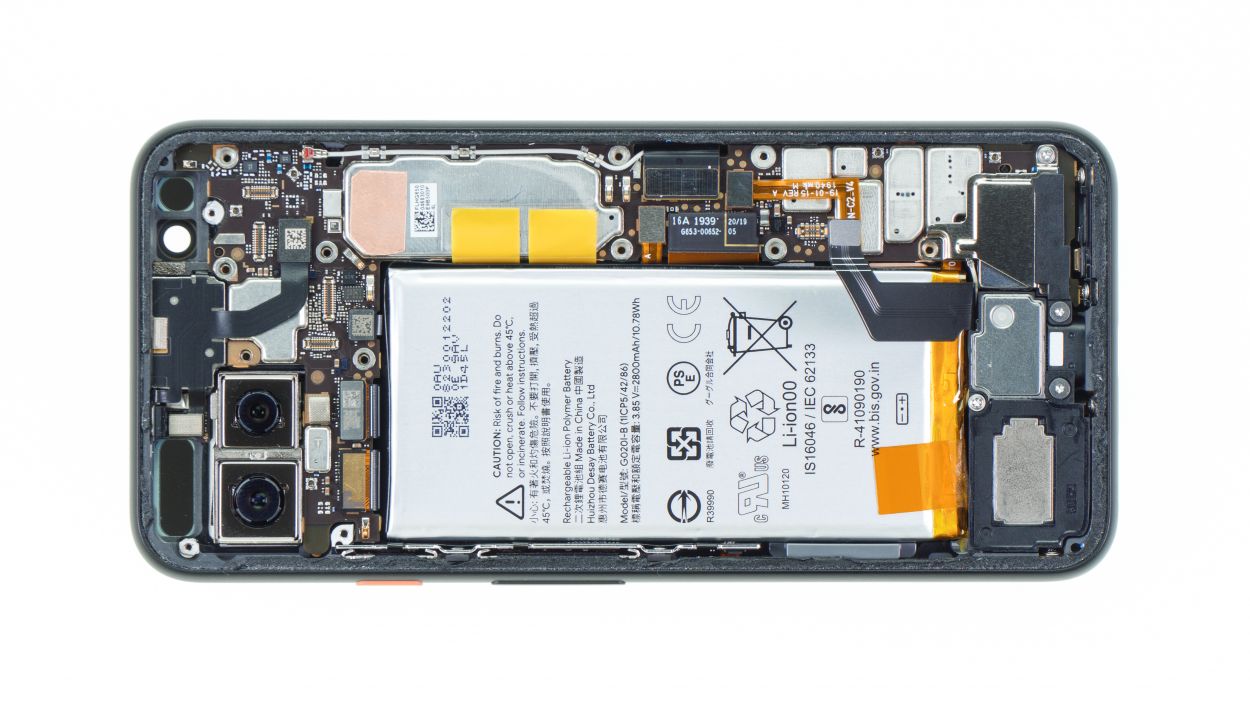
Snapping awesome pics and catching life’s great moments with your Google Pixel 4 should be a breeze! But, if perfect focus eludes you leaving your shots blurry, or smudges on your lens have you seeing spots, it might be time for a DIY camera tune-up. Jump into our step-by-step guide packed with crisp visuals to guide you in removing the mainboard to get to the camera. The back is glass and glued down, making this a bit of a challenge, but hey, you’ve got this! Ditch the costly repair shops and long waits, and take control with your own two hands. Stuck or got questions mid-repair? Our tech squad and the community love to chat in the comments. Plus, your thoughts on our guide are always welcome!
Step 1

– Press and hold the standby button on the right side for a couple of seconds, then go ahead and confirm the shutdown on your screen.
Step 2
Hey, careful there! Don’t plunge your tool too deep—gotta protect those inner techy bits!
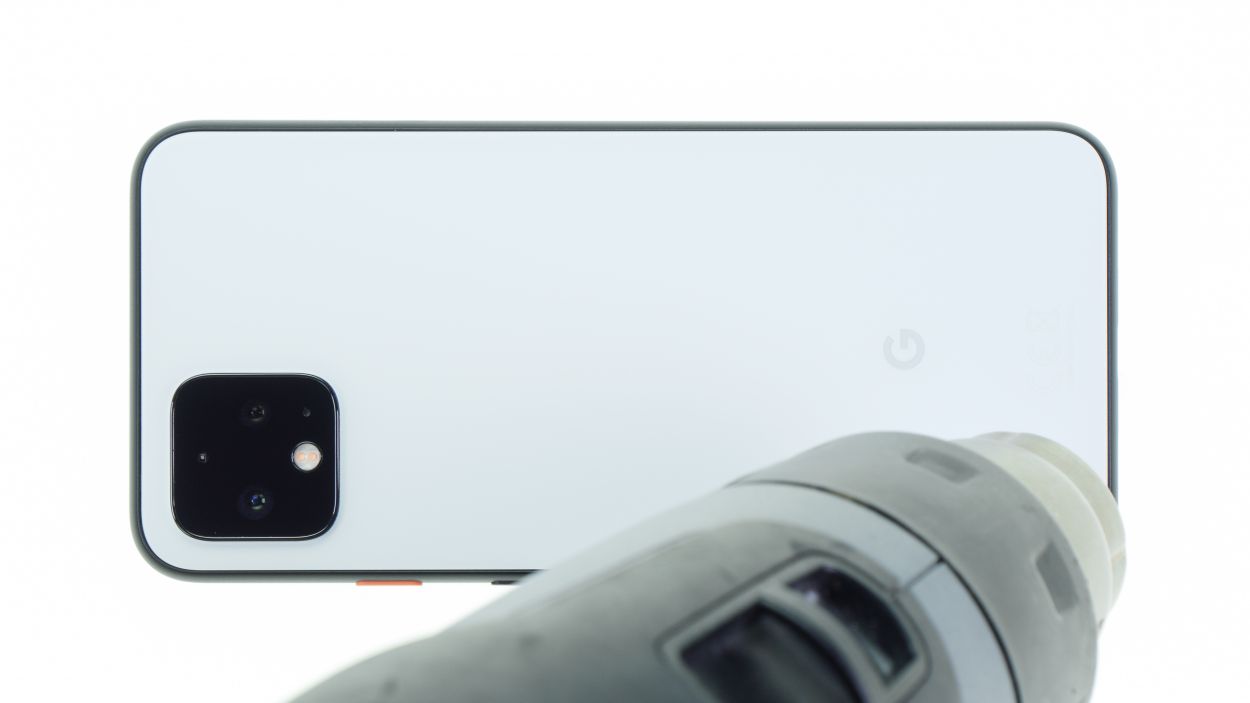
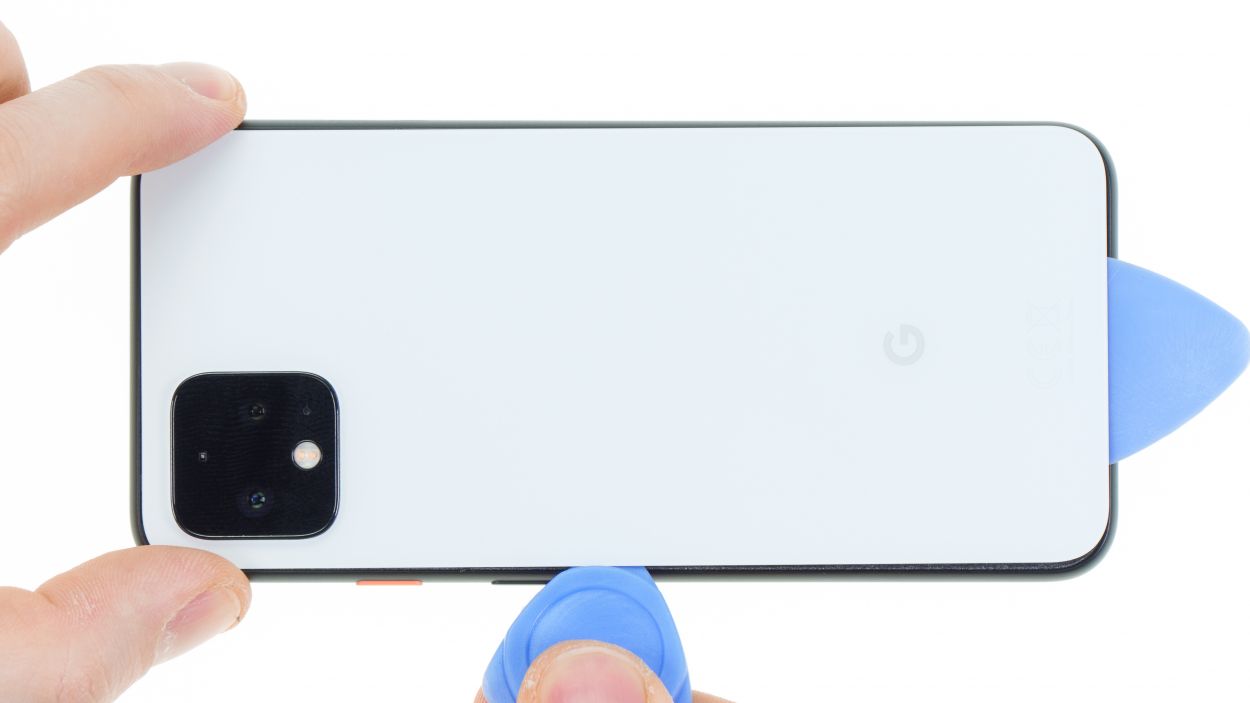
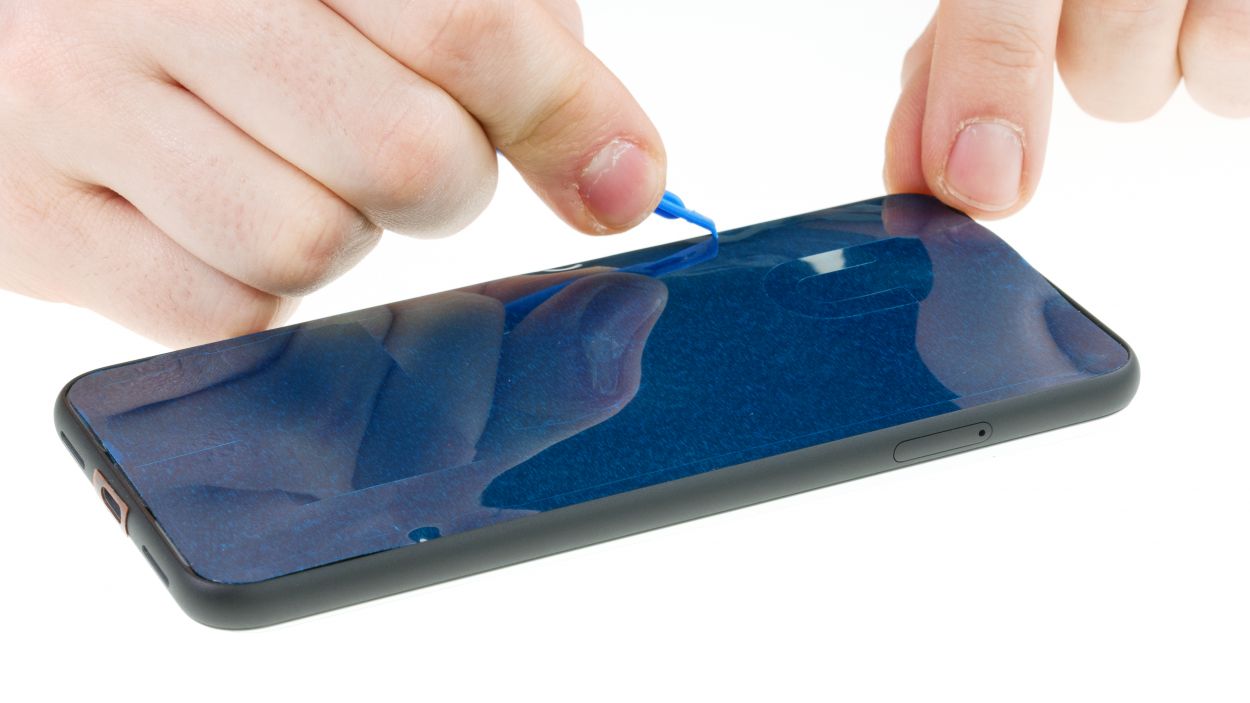
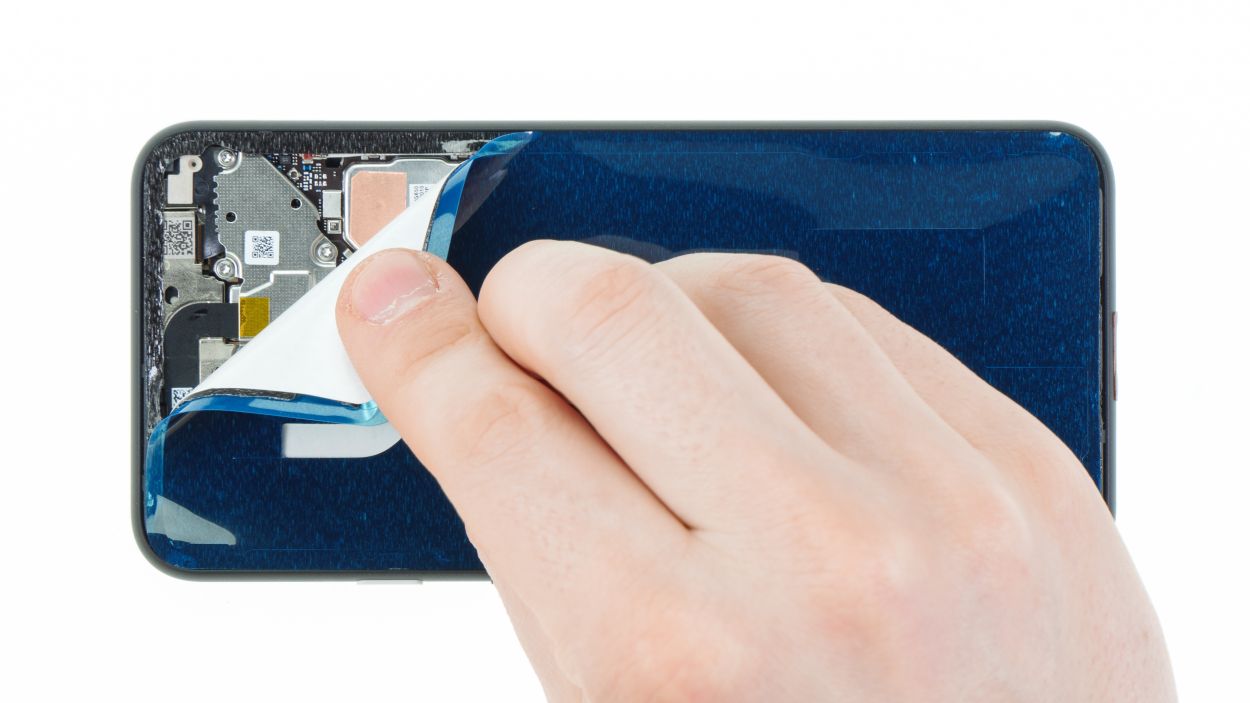
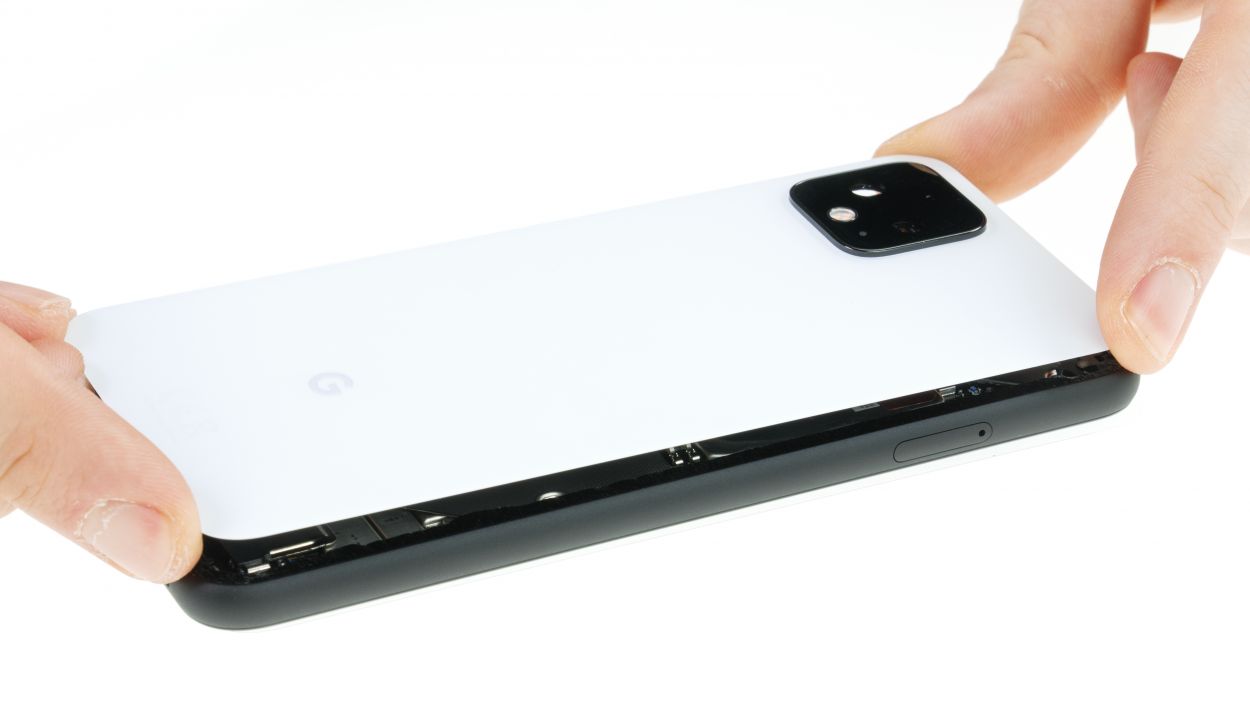
– Crank up some tunes and grab your heat gun or hair dryer! Let’s get the edges of your device nice and toasty for a few minutes—like warming up leftovers, only it’ll help soften the stubborn adhesive under the back cover. Remember, just heat it enough so it’s touchable without singing your fingertips. Focus on the edges and steer clear of the middle to keep the battery safe.
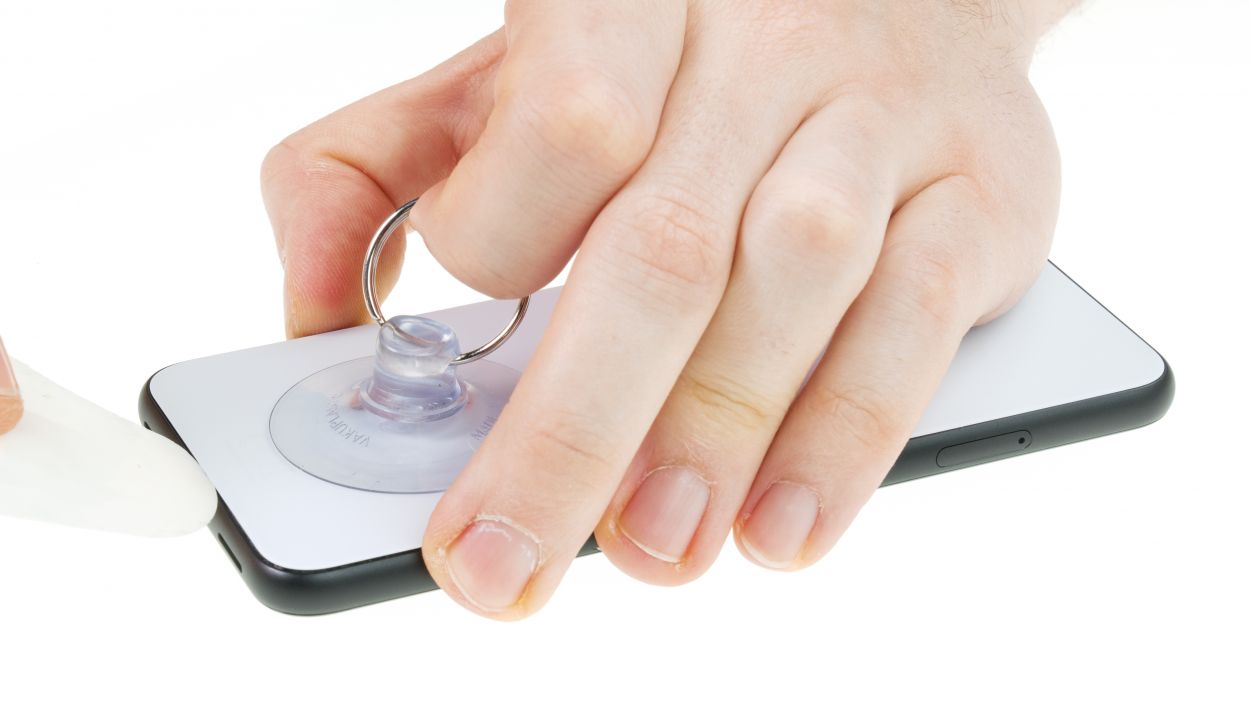
– Next, slap on a suction cup at the bottom of the back cover. Give it a firm pull while holding down the rest of the device. It’s like opening a jar that just doesn’t want to budge!
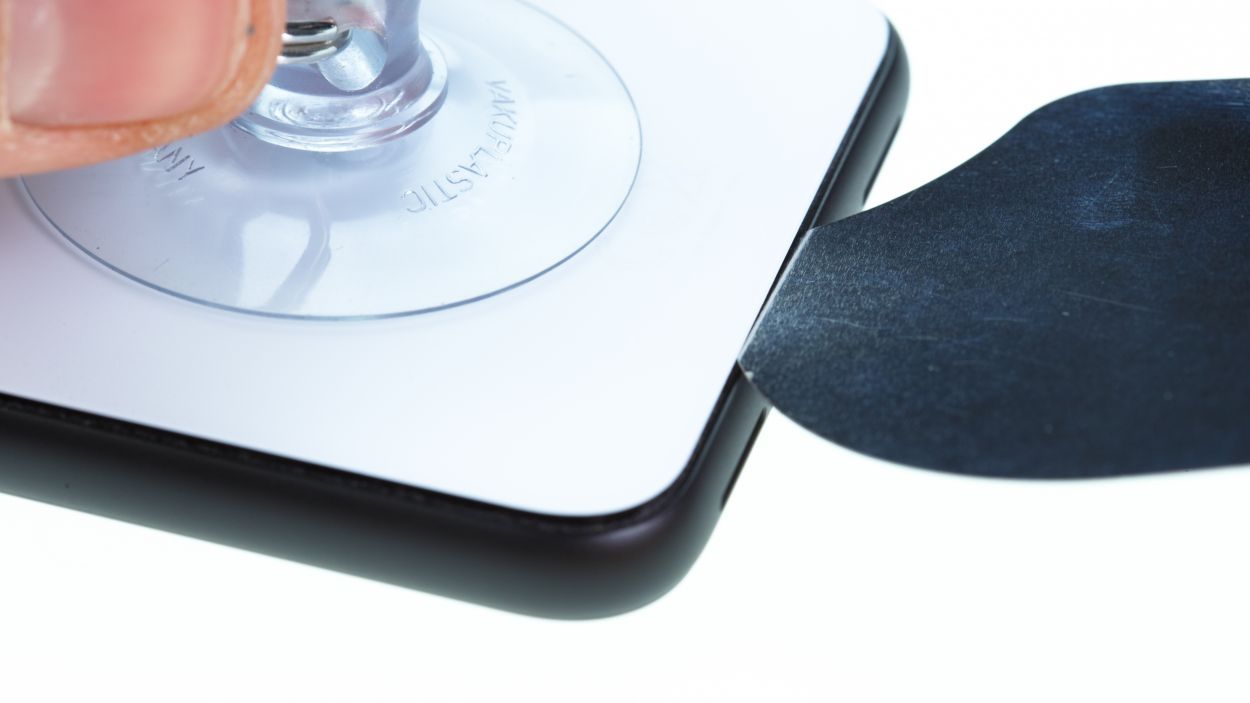
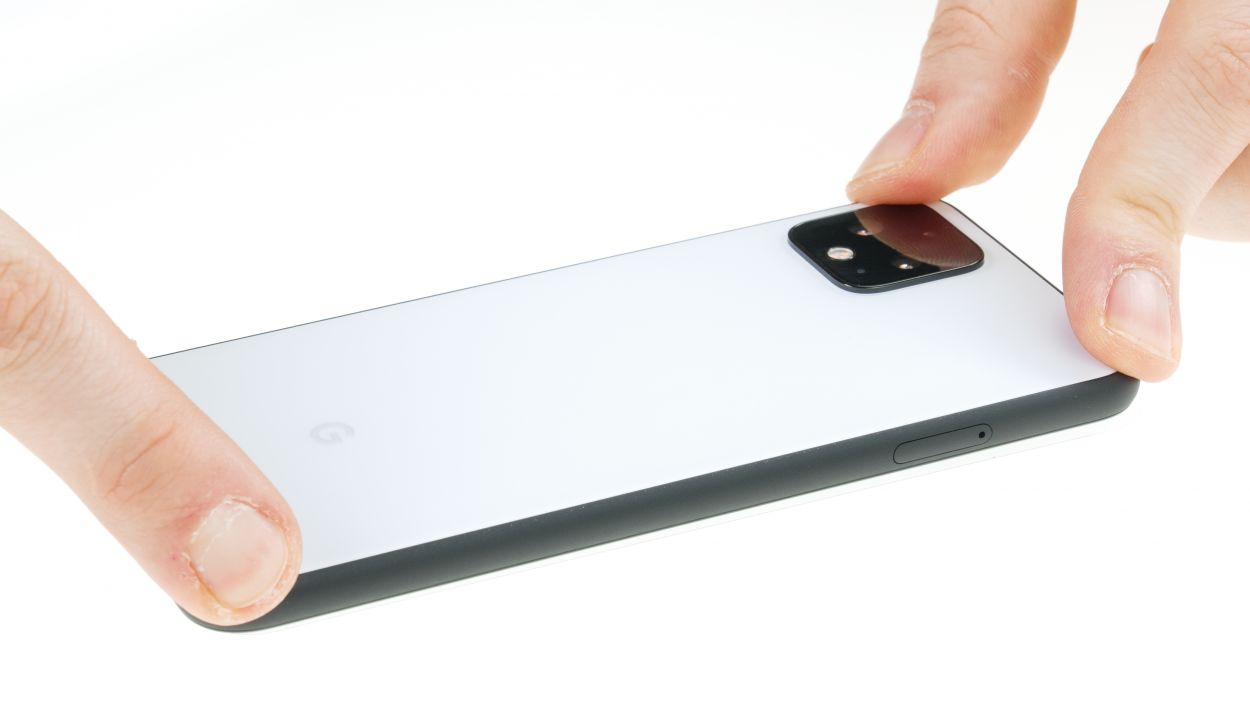
– Now, wiggle a tool into the small opening you’ve created between the back cover and the frame. Can’t fit a plectrum? No sweat, use a special tool like the iFlex—but watch out, don’t nick the frame or the cover.
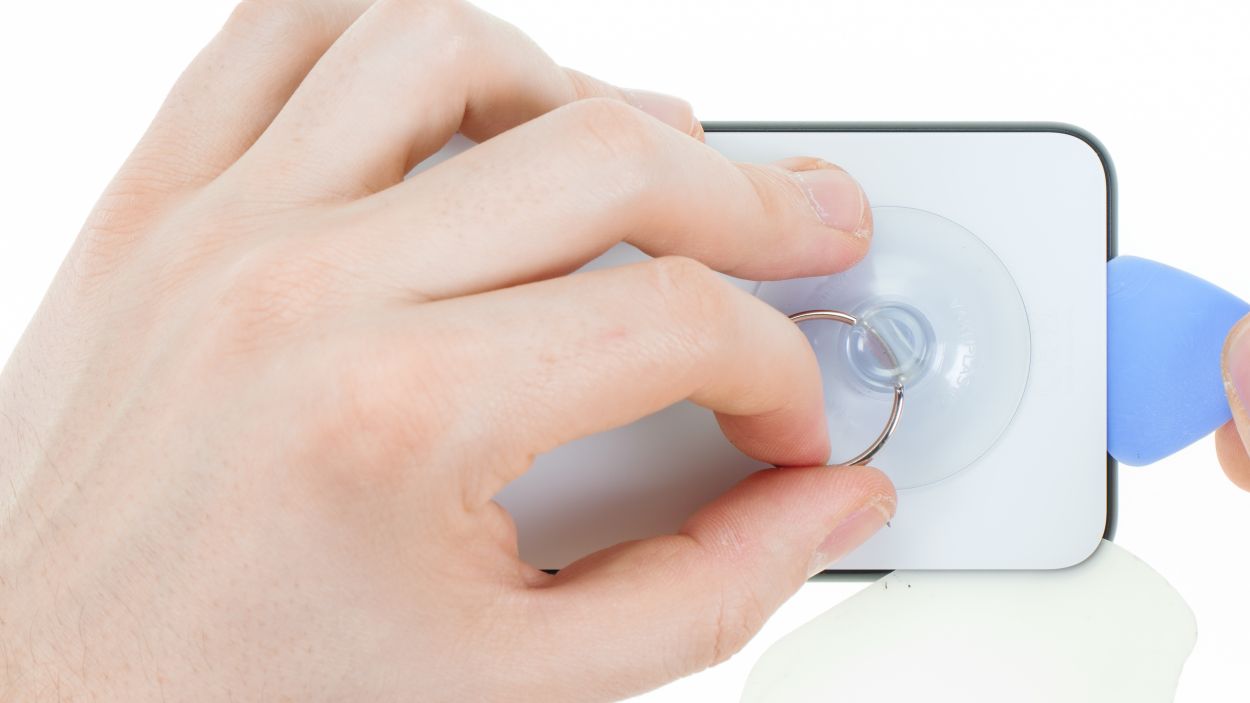
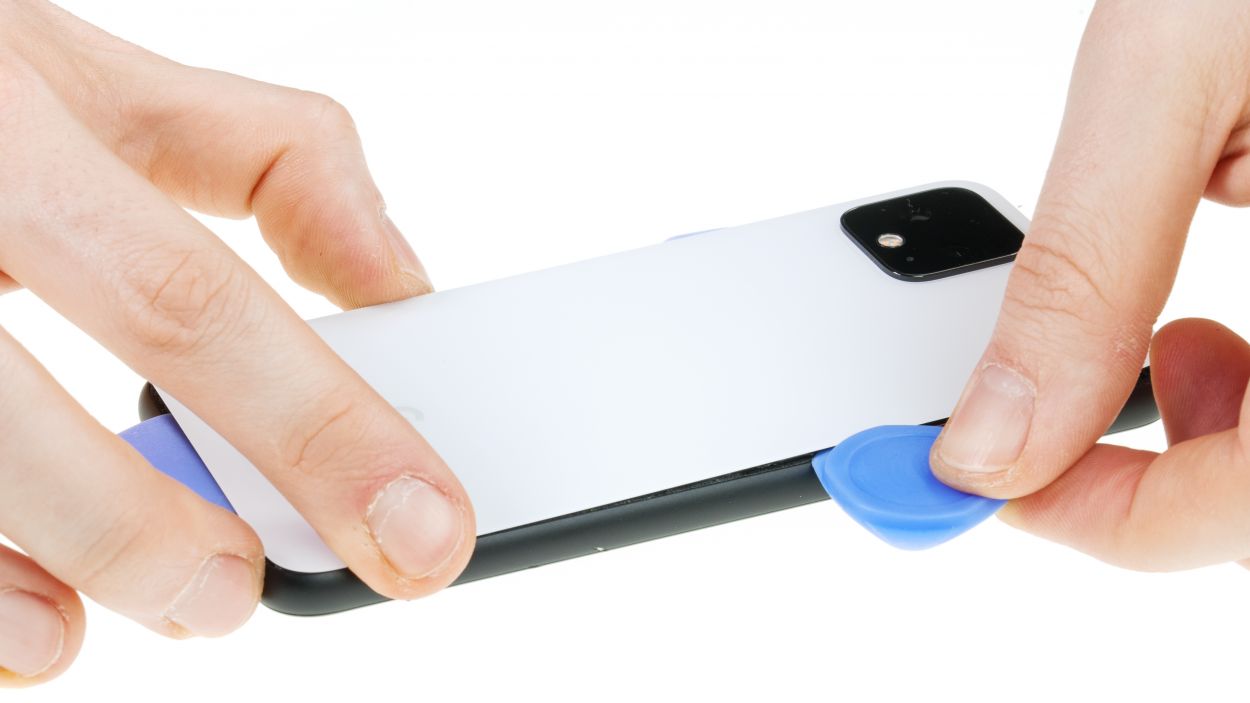
– Time for round two with the heat gun! Sweep it along the edges and dance the plectrum or iFlex around the back cover’s edge to get that glue loosening up gradually.
– Keep those picks handy and pop them in sections you’ve already freed up to stop the adhesive from getting clingy again.
Tools Used
- heat gun to heat parts that are glued on so they’re easier to remove.
In most cases, you can also use a hairdryer.” rel=”noopener”>Heat gun - screen and the frame. The practical iFlex is made of stainless steel and sits comfortably in the hand. This makes it the perfect assistant for every smartphone repair.” rel=”noopener”>iFlex Opening Tool
- VAKUPLASTIC Suction Cup
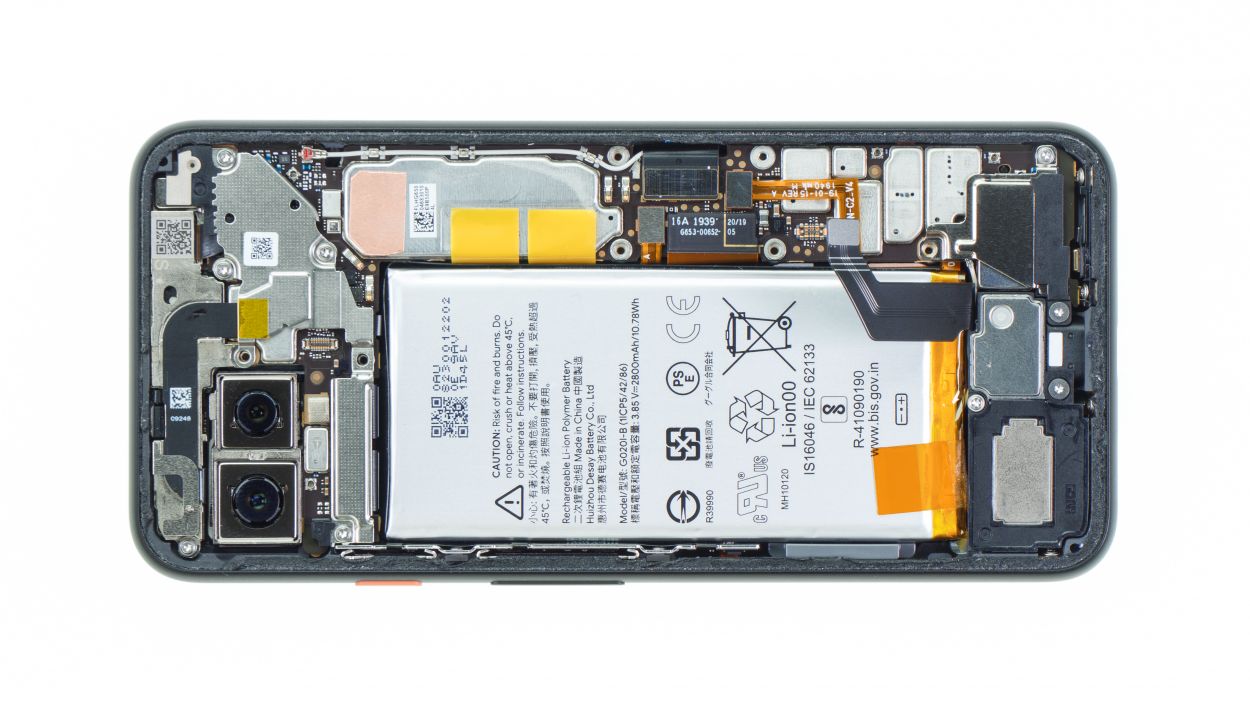
Step 3

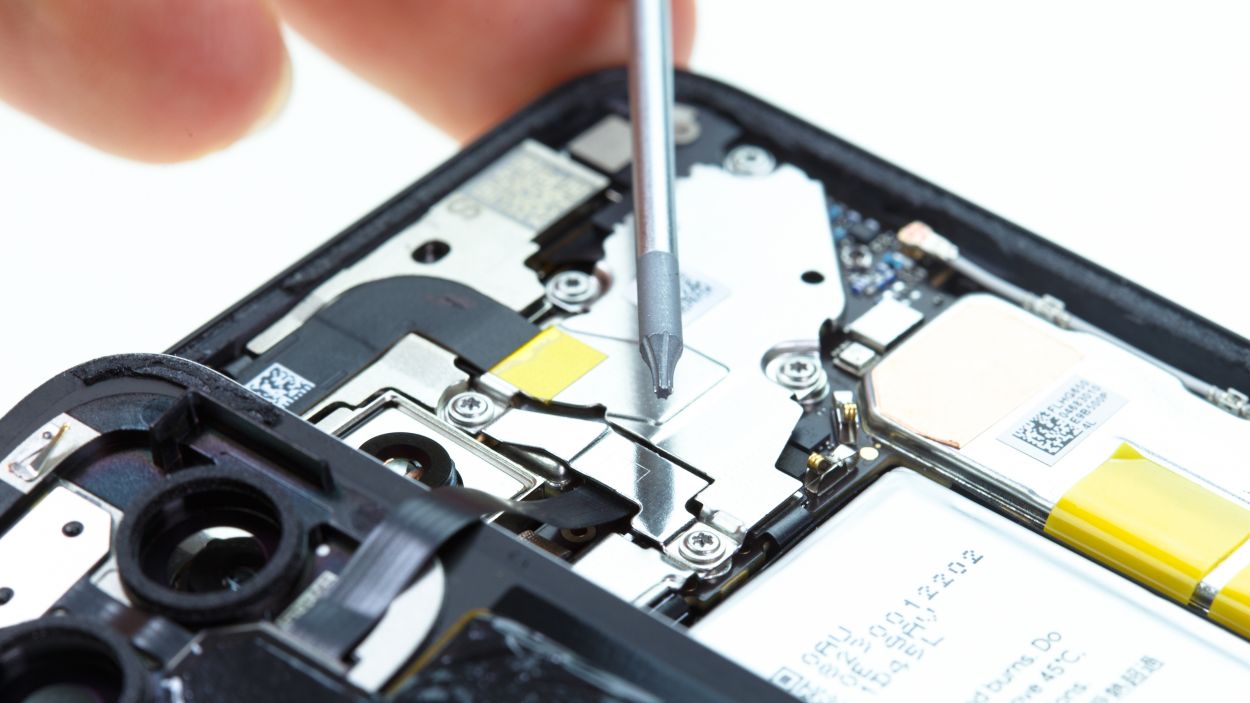
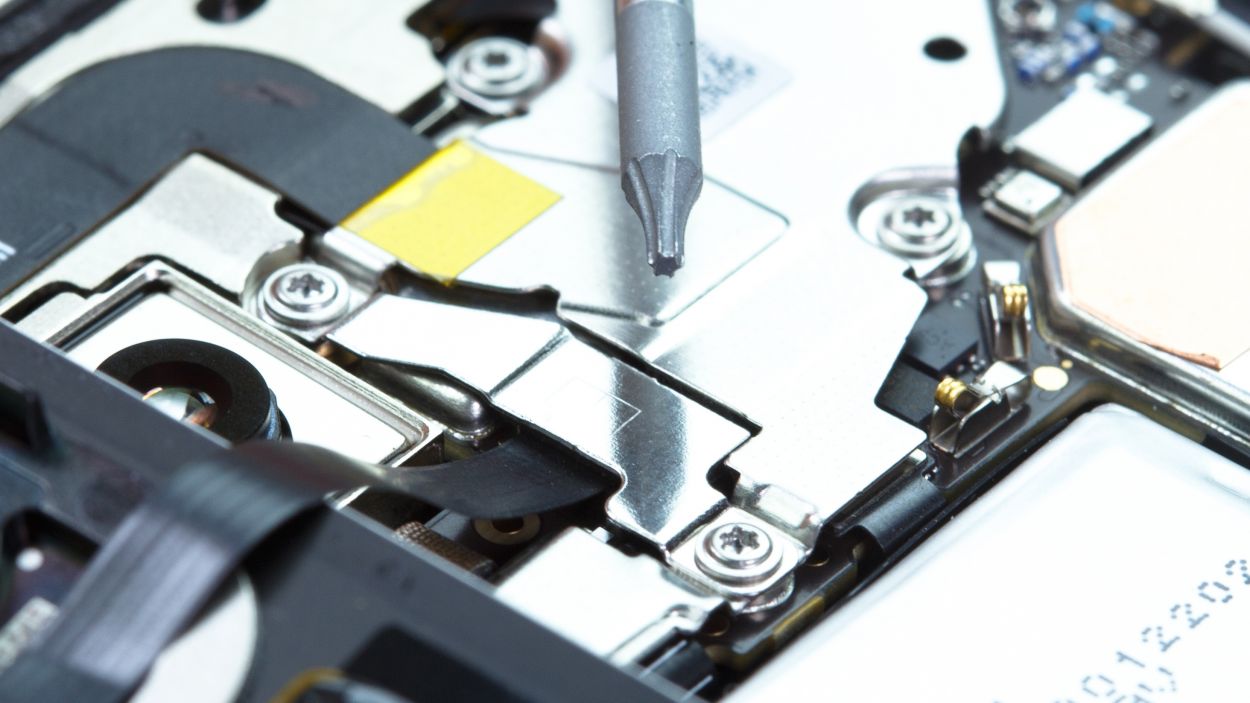

2 × 4,0 mm Torx T3
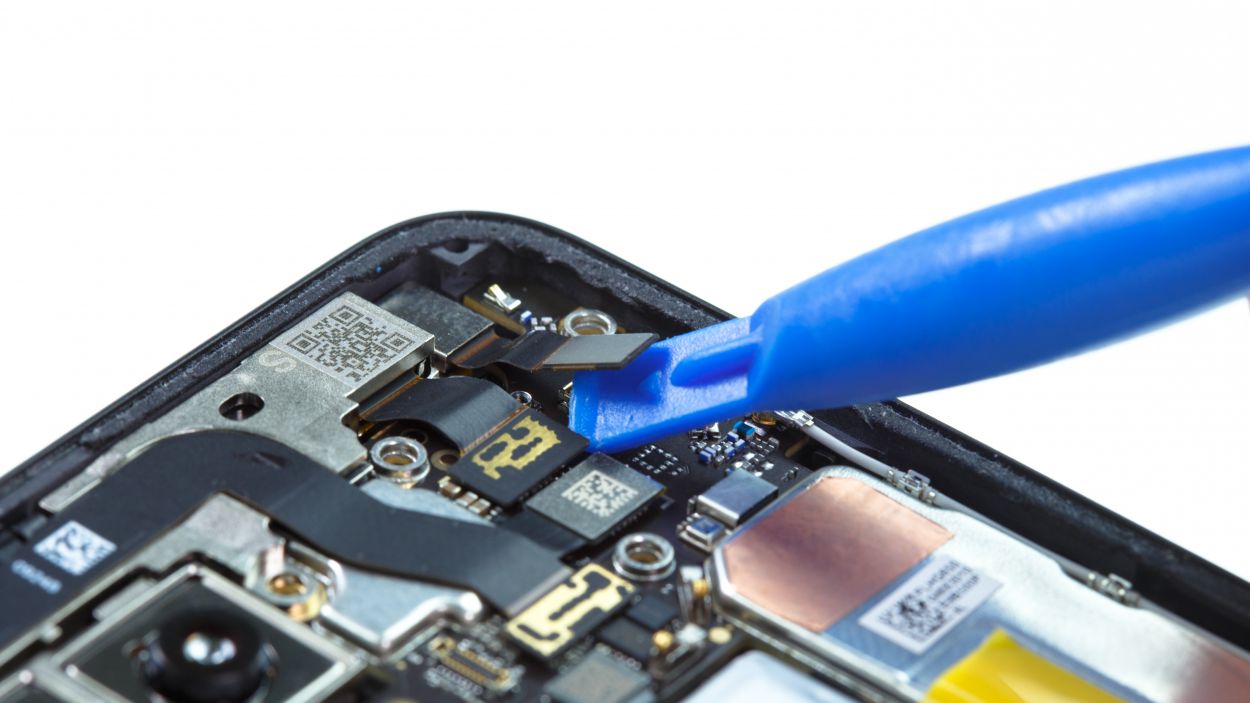
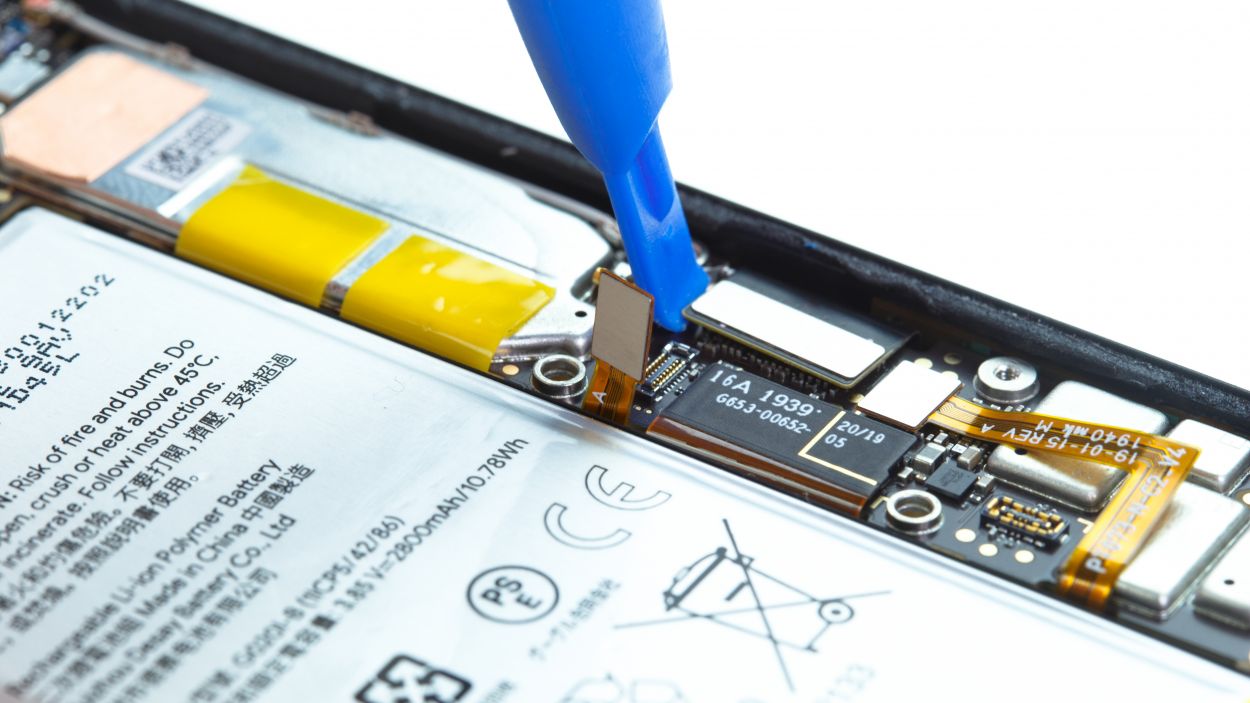
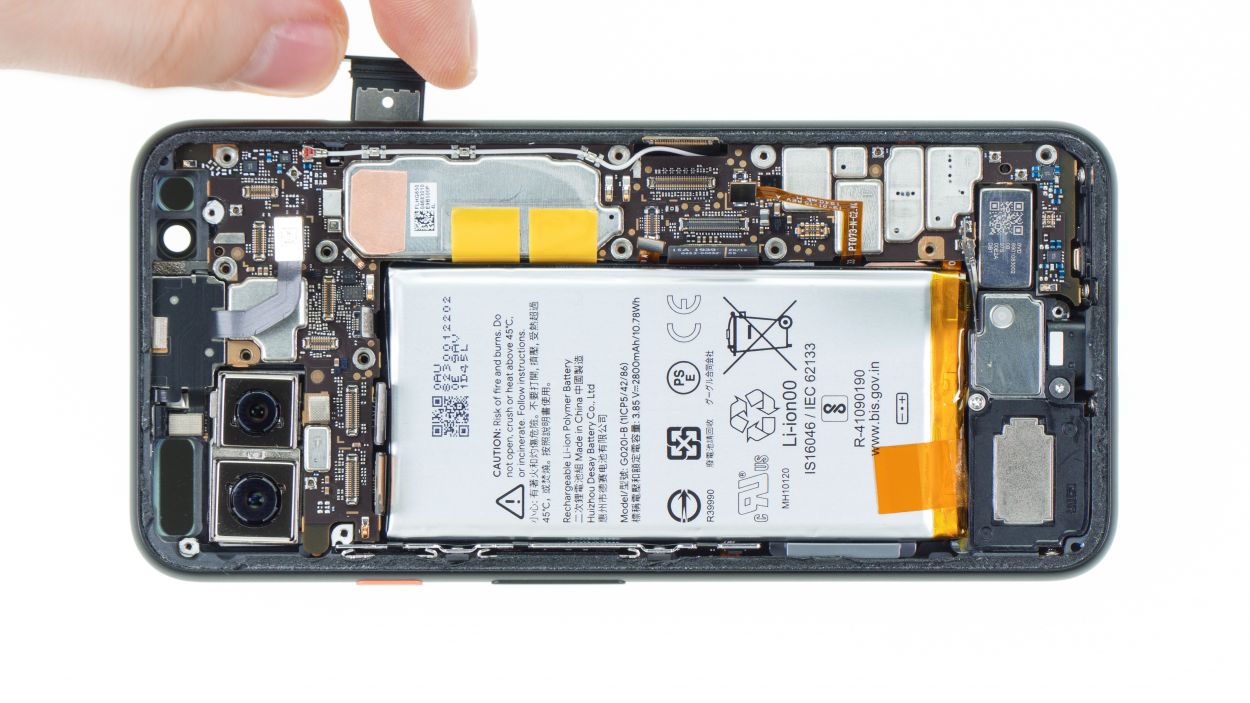
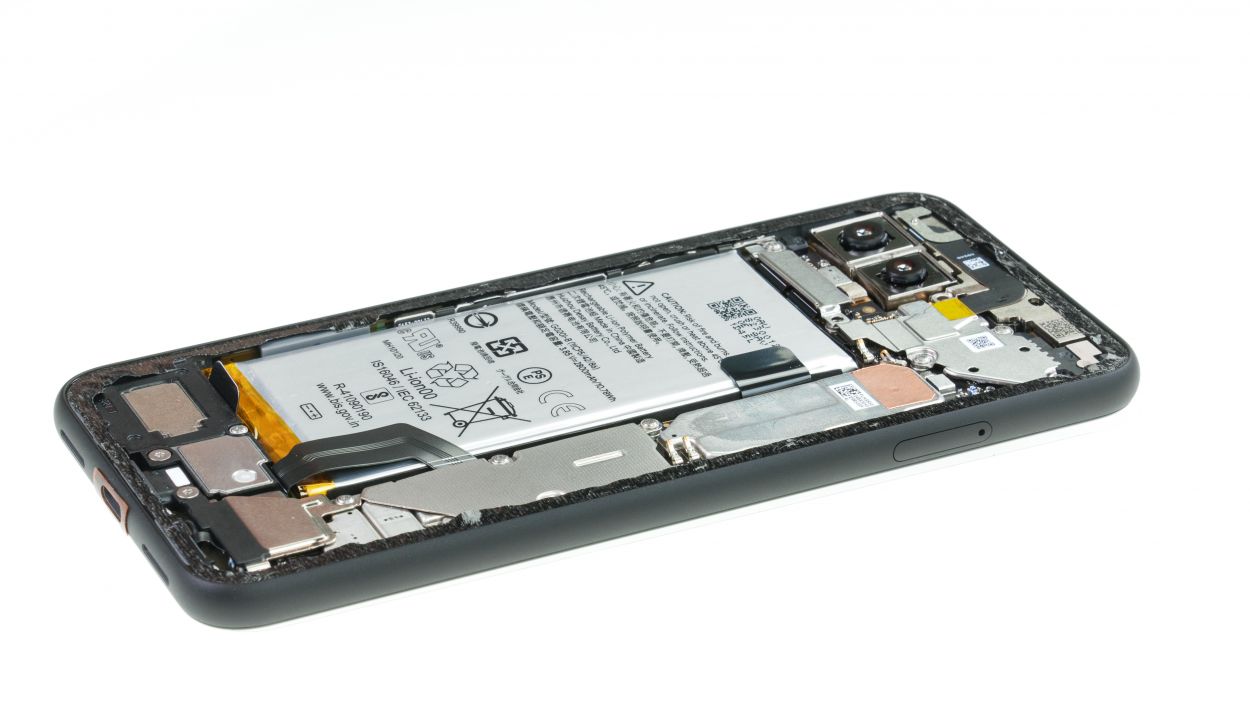
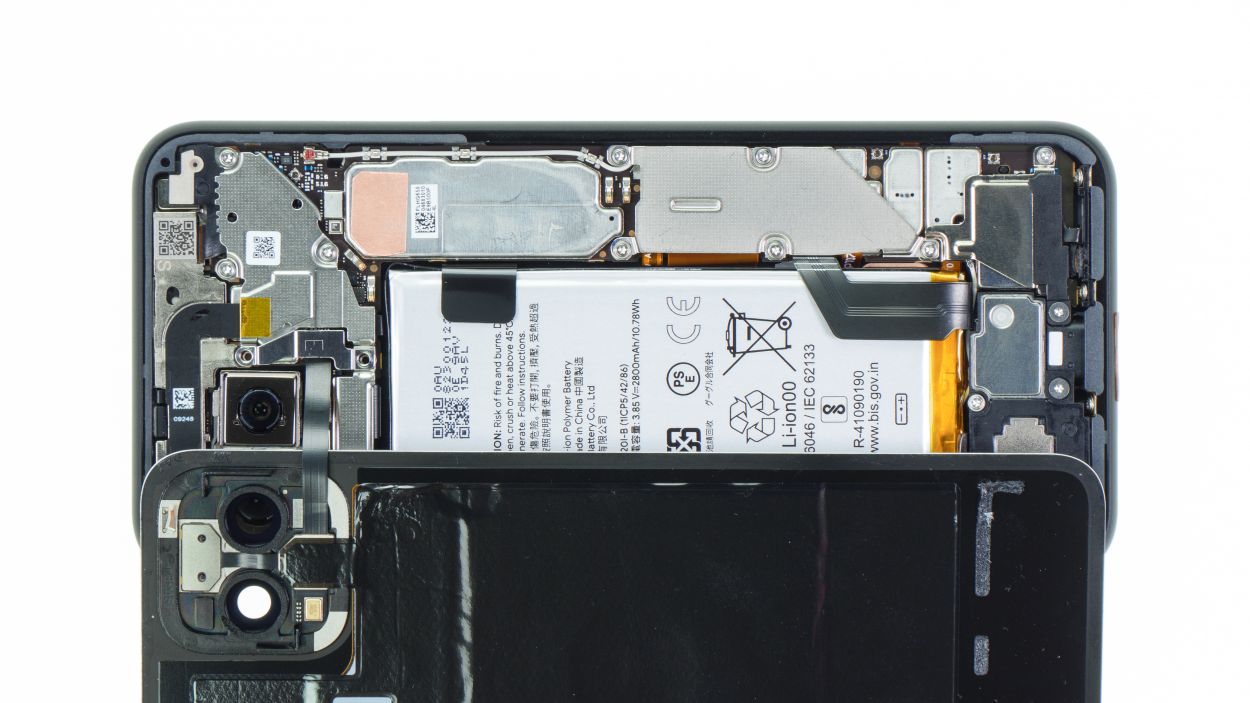
Hey there, eagle-eyed fixer! Before you start popping off those connectors from the motherboard, zoom in for a sec—those tiny buddies love to hang out right beside the connectors. Make sure to use your spudger where it’s component-free to avoid any oopsies. Stay keen, minimize the damage!
– Gently unscrew those two screws and take off the cover plate.
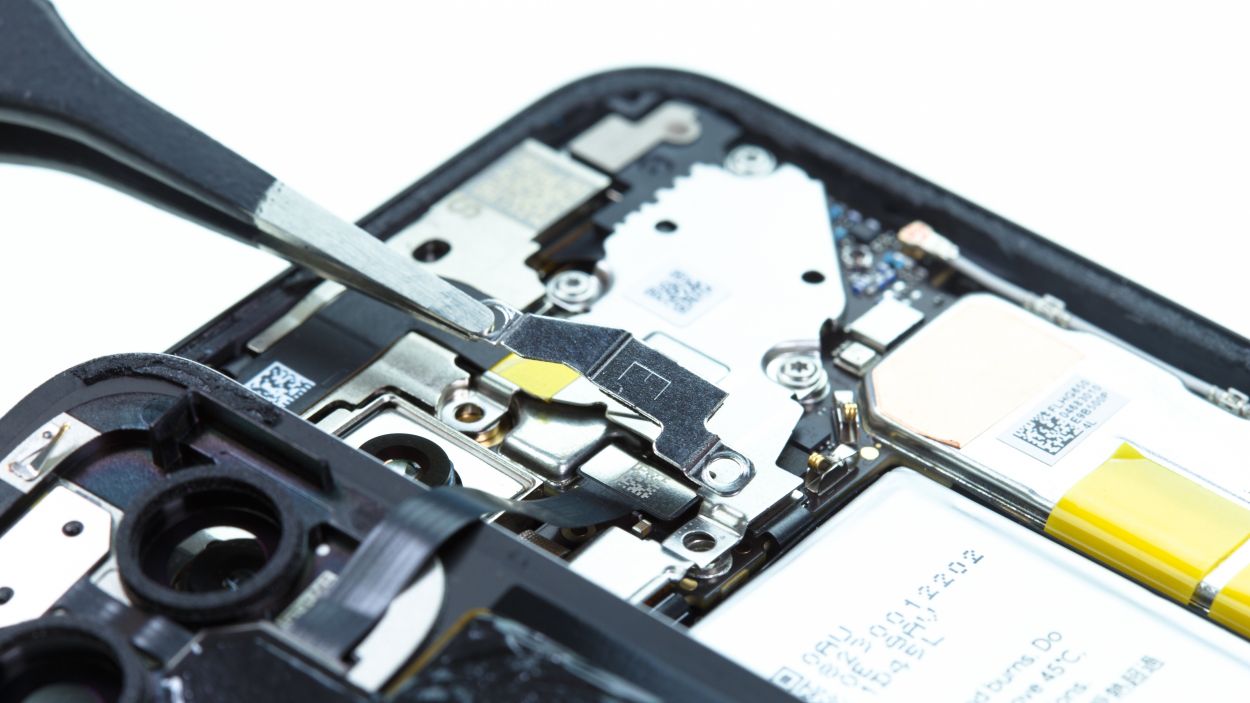
– Carefully pry apart the connector using a spudger.
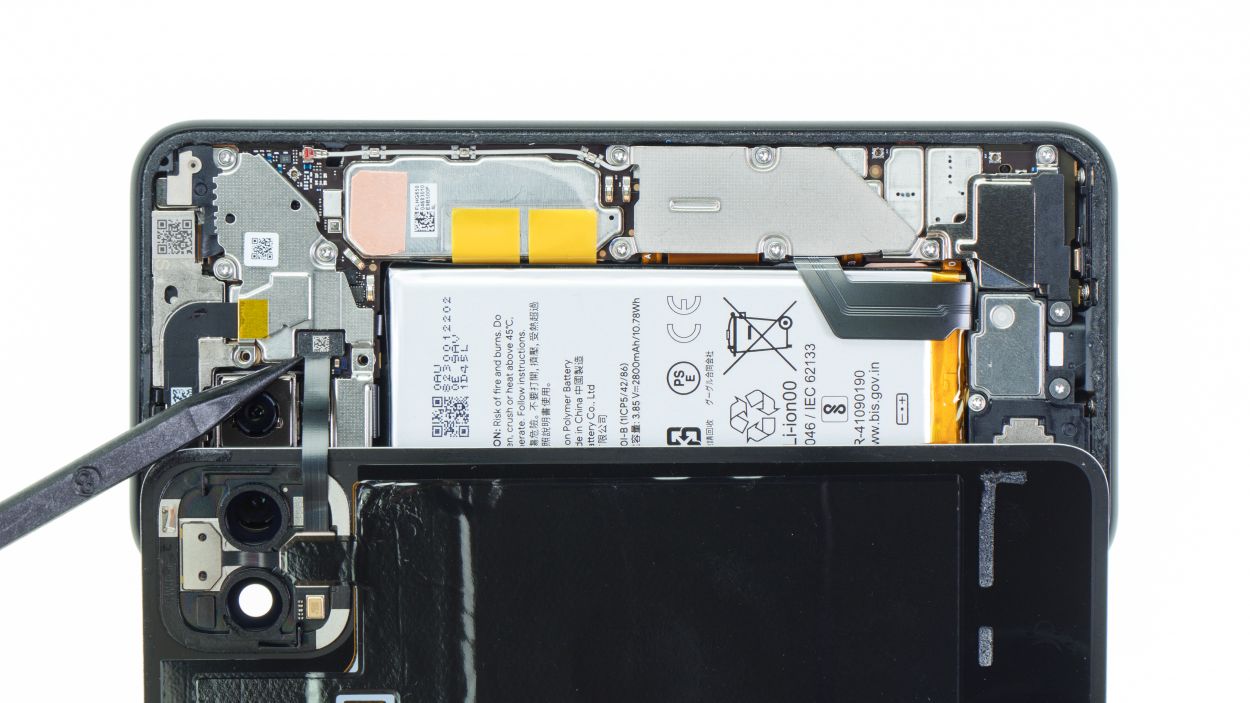
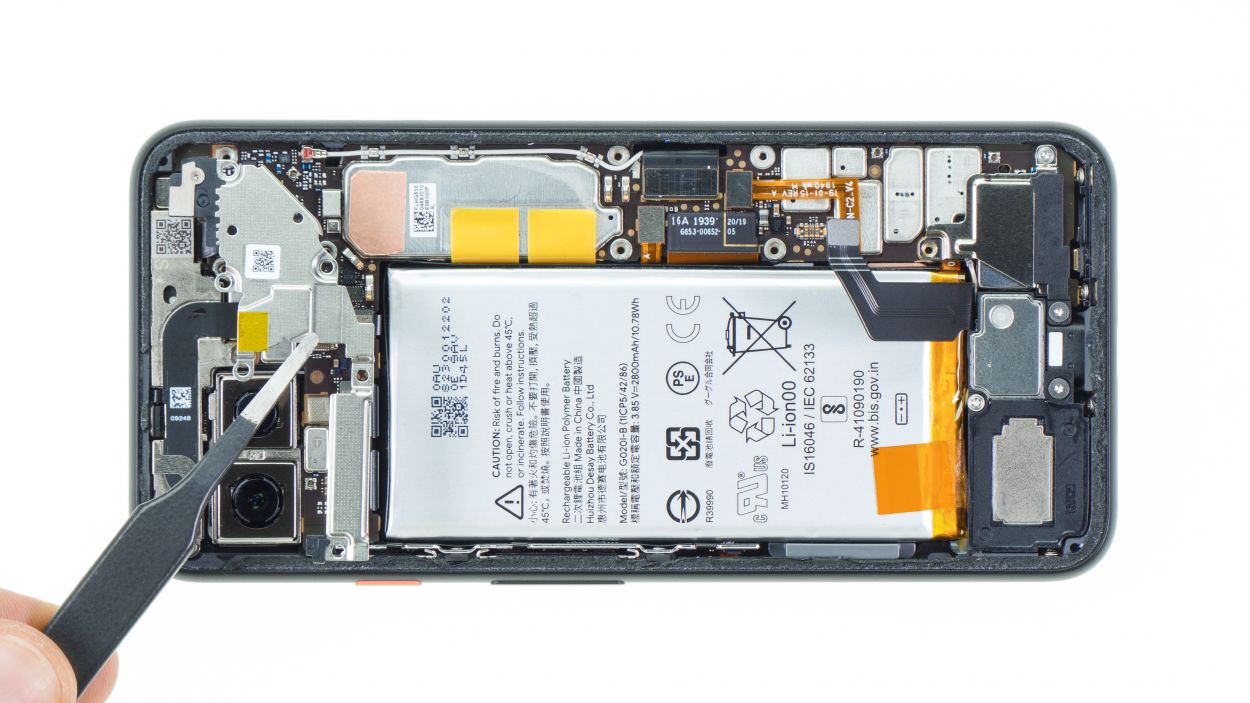
Step 4
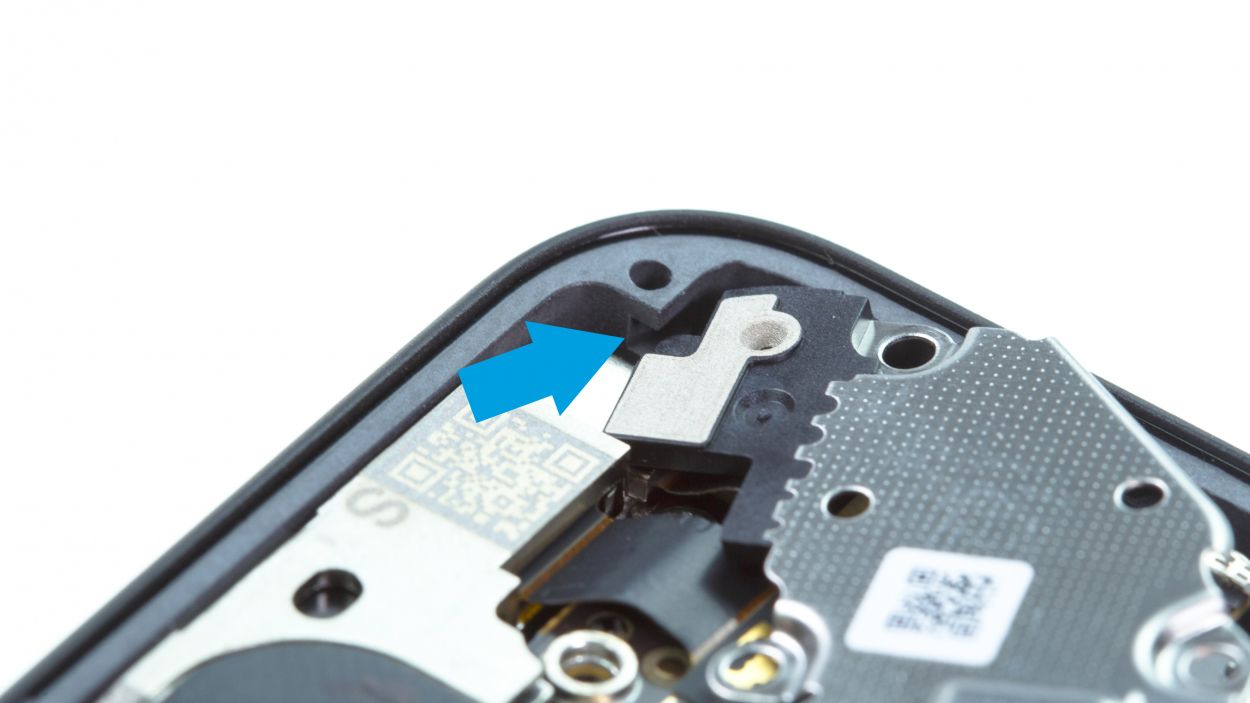
– Unscrew the cover plate that’s guarding the battery connector. Let’s get this party started!
4 × 4,0 mm Torx T3
1 × 2,0 mm Torx T3
Battery connector
Those screws are sneaky little guys – all different sizes! Don’t let them play hide-and-seek. A magnetic parts tray (like the kind we use at Salvation Repair) is your best friend here. Pop those screws and the cover plate onto the mat just as you took them off, and they’ll stay put thanks to magnetic magic. No more lost screws! If you need help with this step, you can always schedule a repair.
Tools Used
Step 5
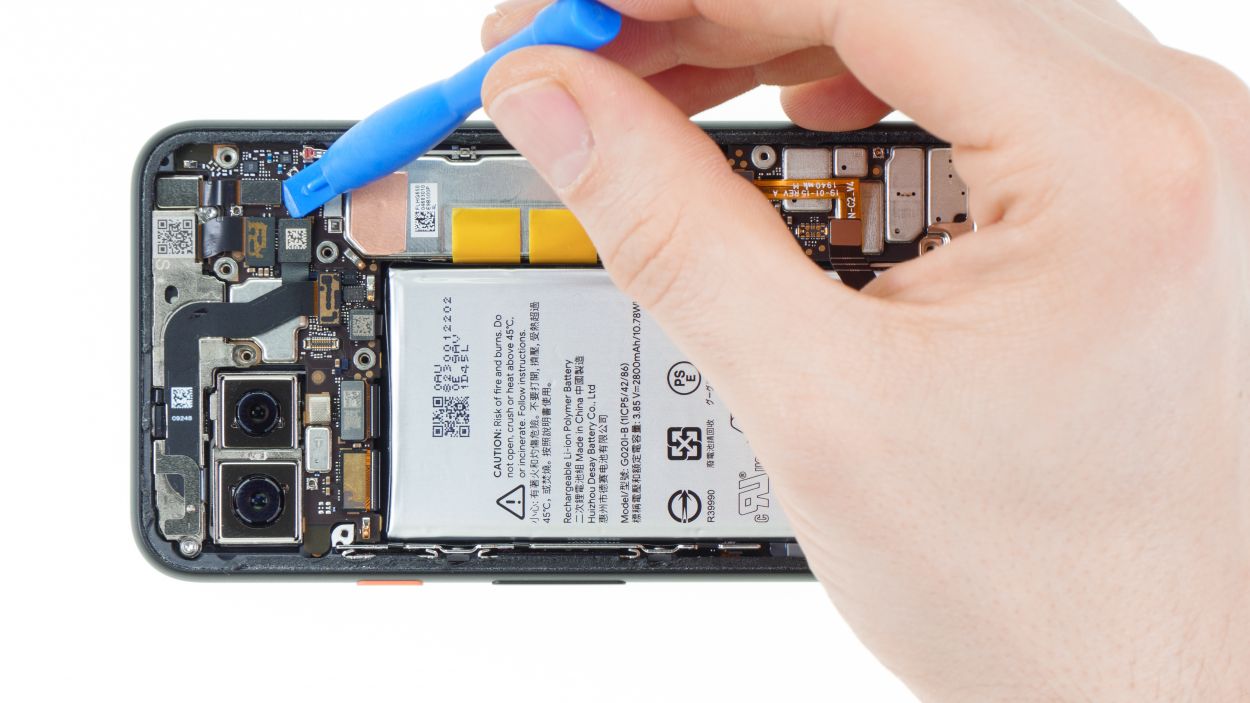


4 × 4,0 mm Torx T3
2 × 2,3 mm Torx
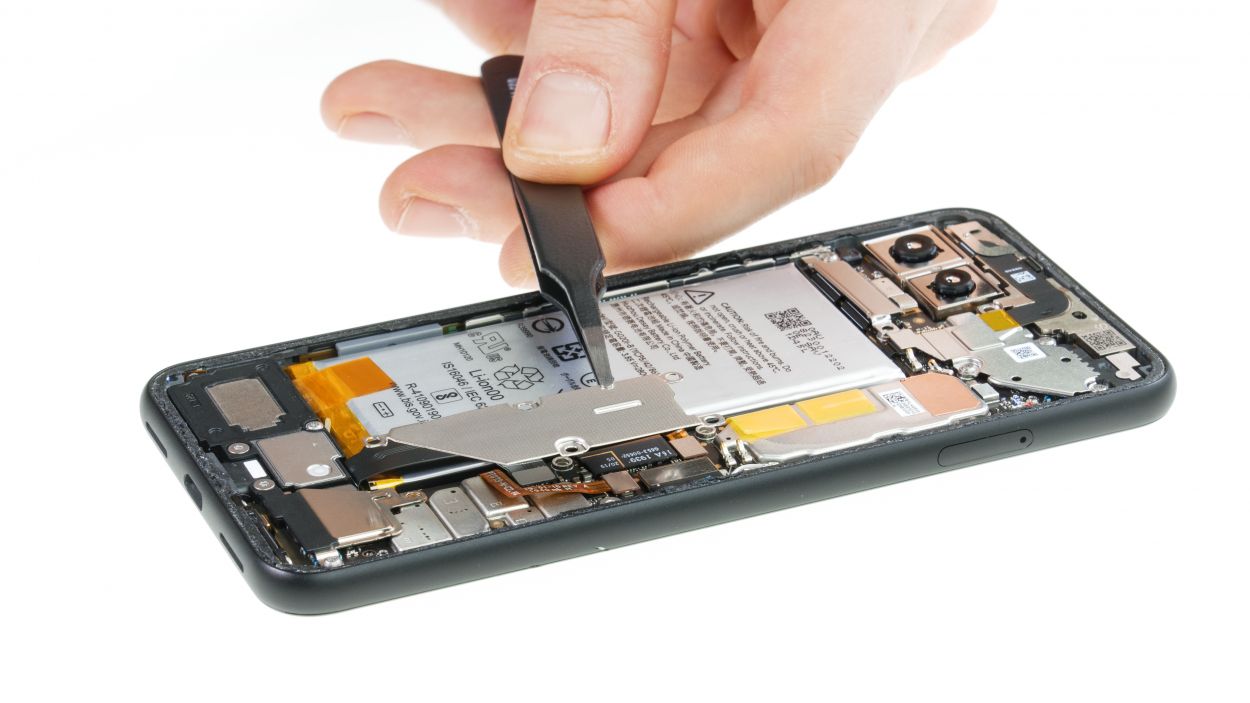
– Time to get those cover plate screws loose! Unscrew the four screws above the front camera and sensor module cover, then lift off the plate like a pro.
– Now, gently use a spudger to disconnect the three connectors from the main board. Easy does it!
– Next up, unscrew the last two screws holding the whole module in place. You’ve got this!
– Finally, give it a little wiggle in a few spots until you can lift out the module. Smooth moves!
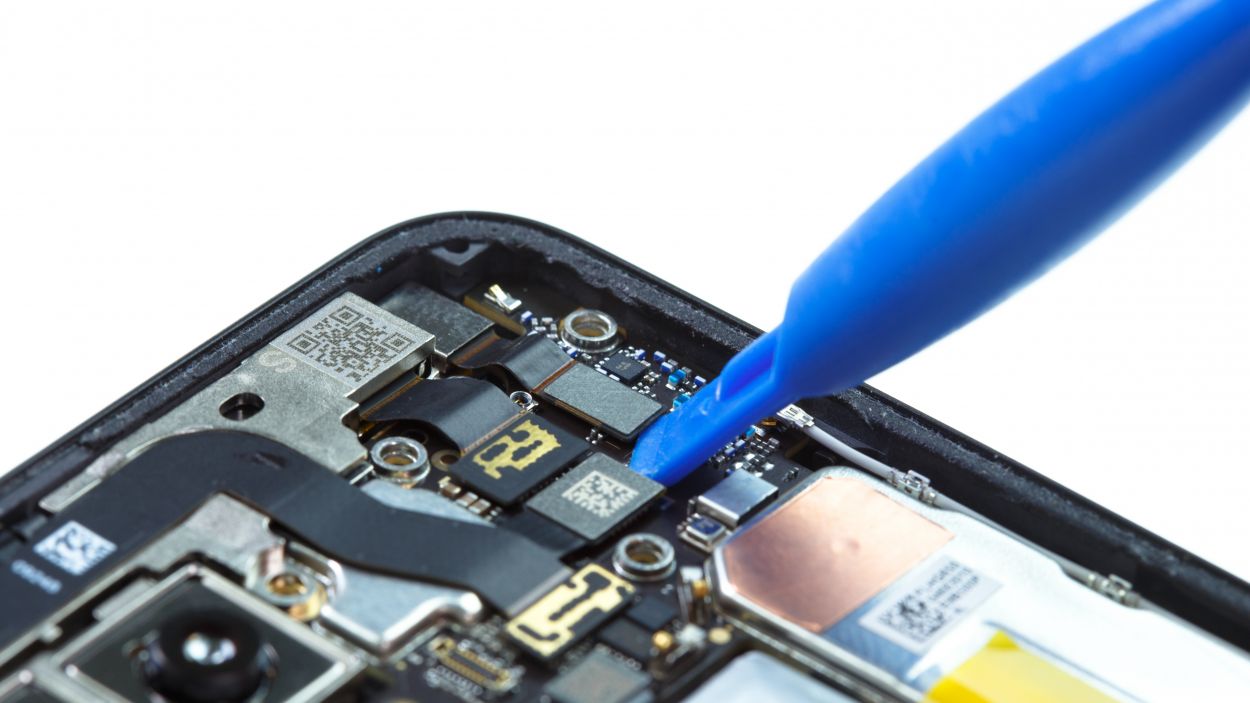
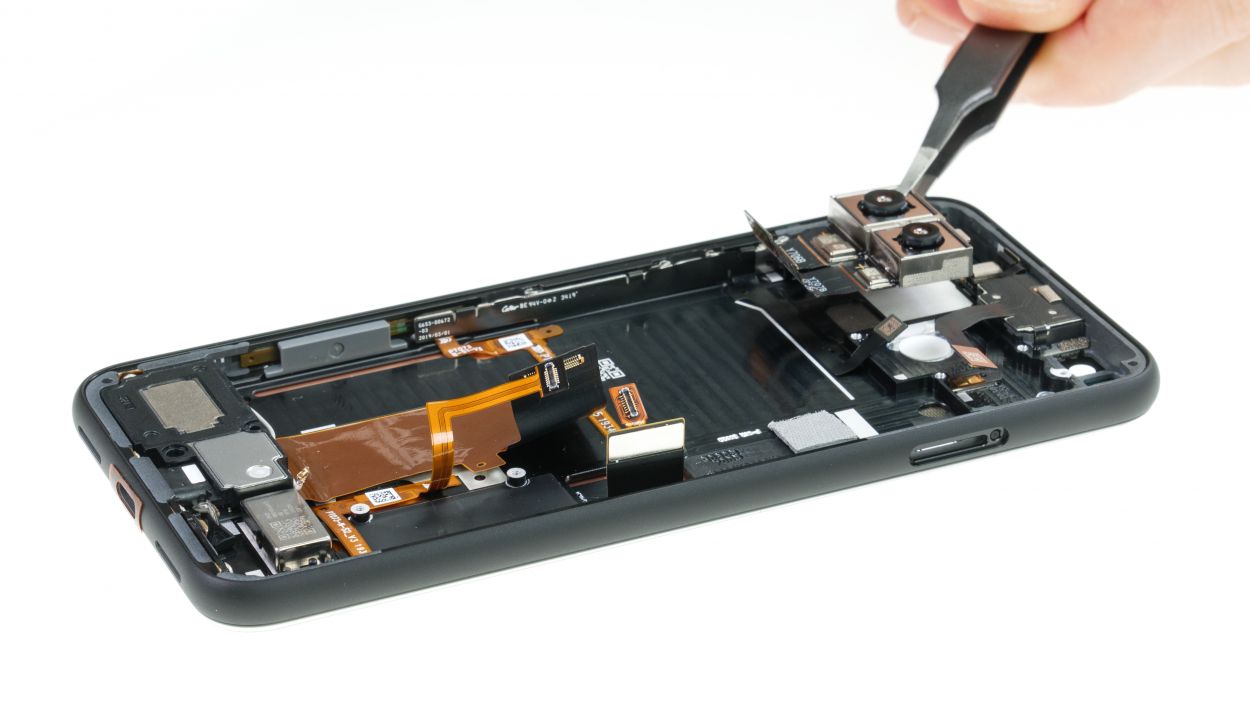
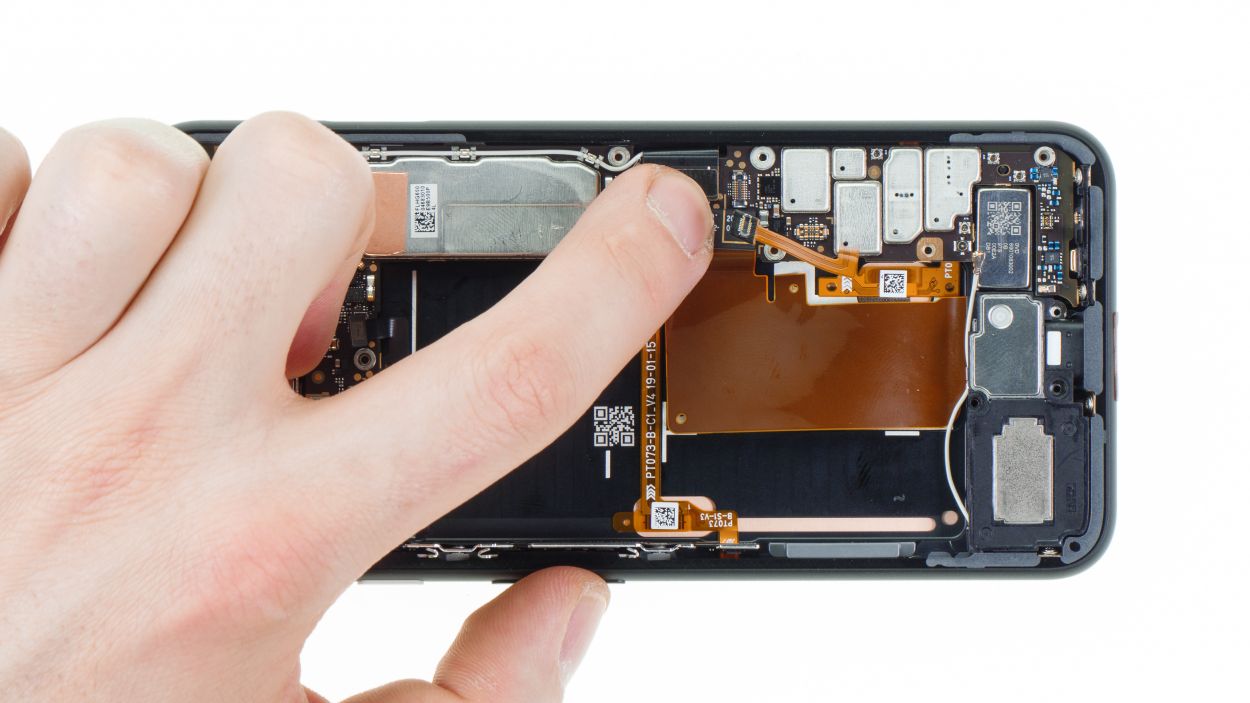
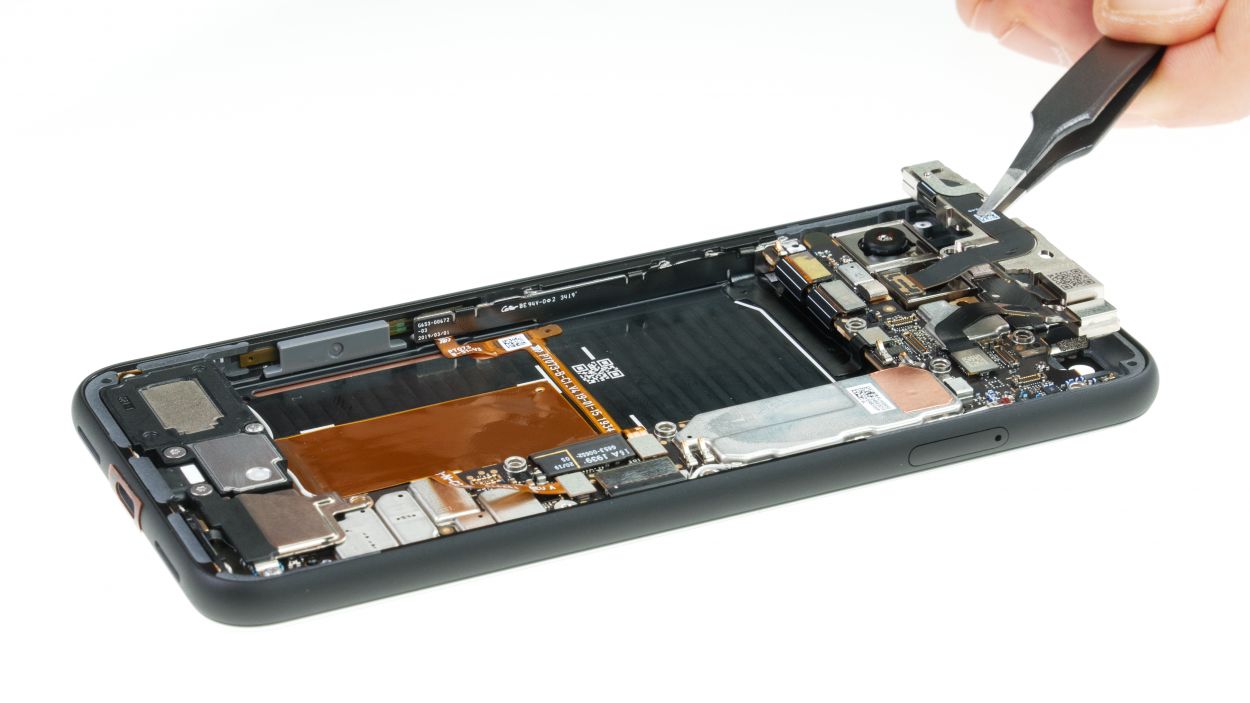
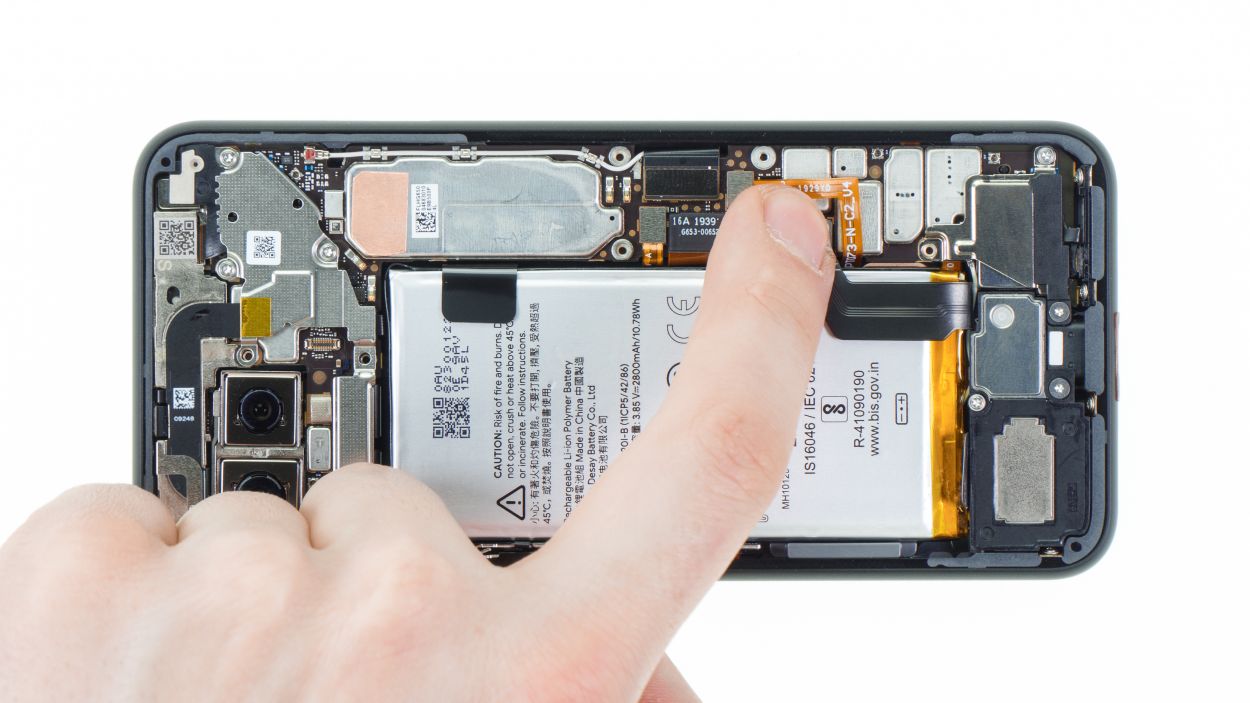
Step 6


1 × 4,0 mm Torx T3
1 × 4,4 mm Torx T3
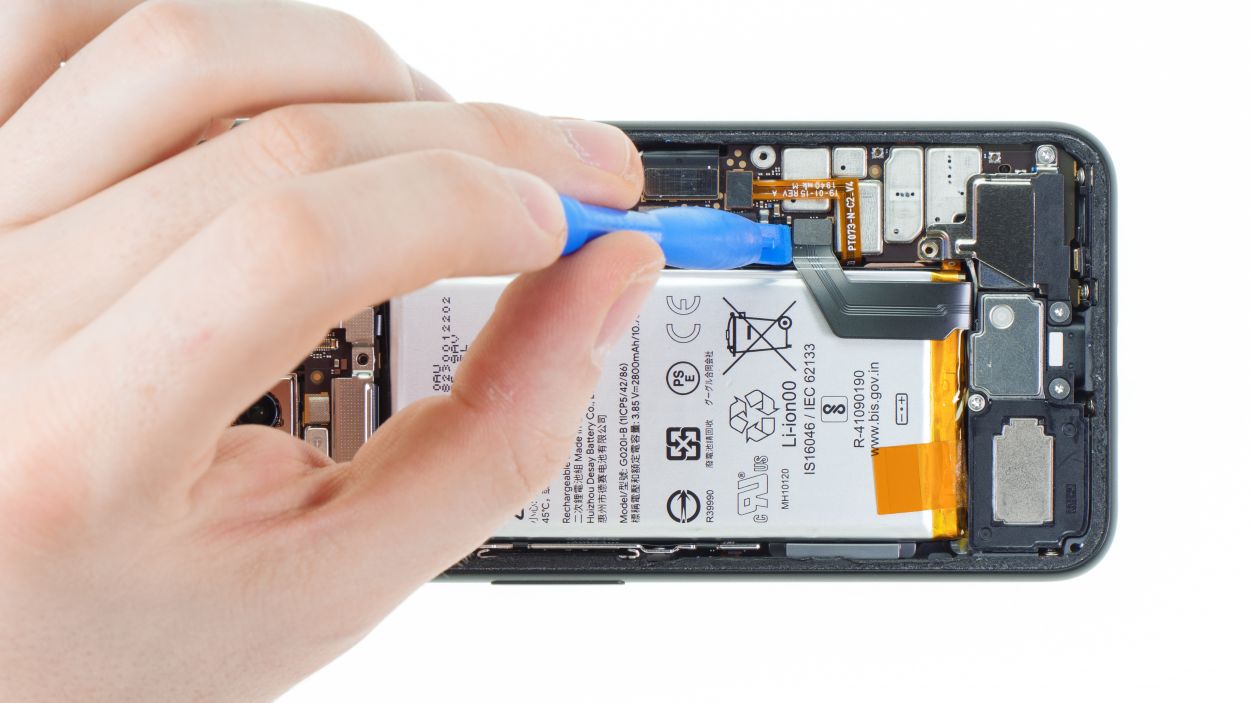
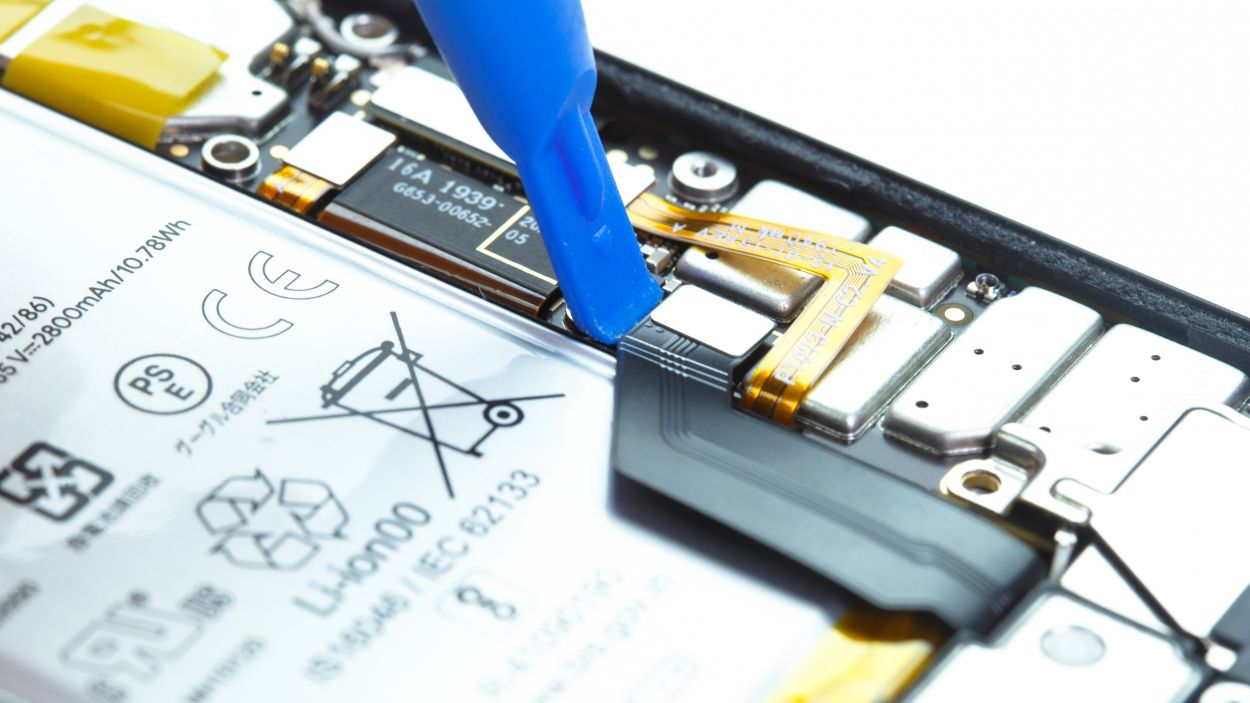
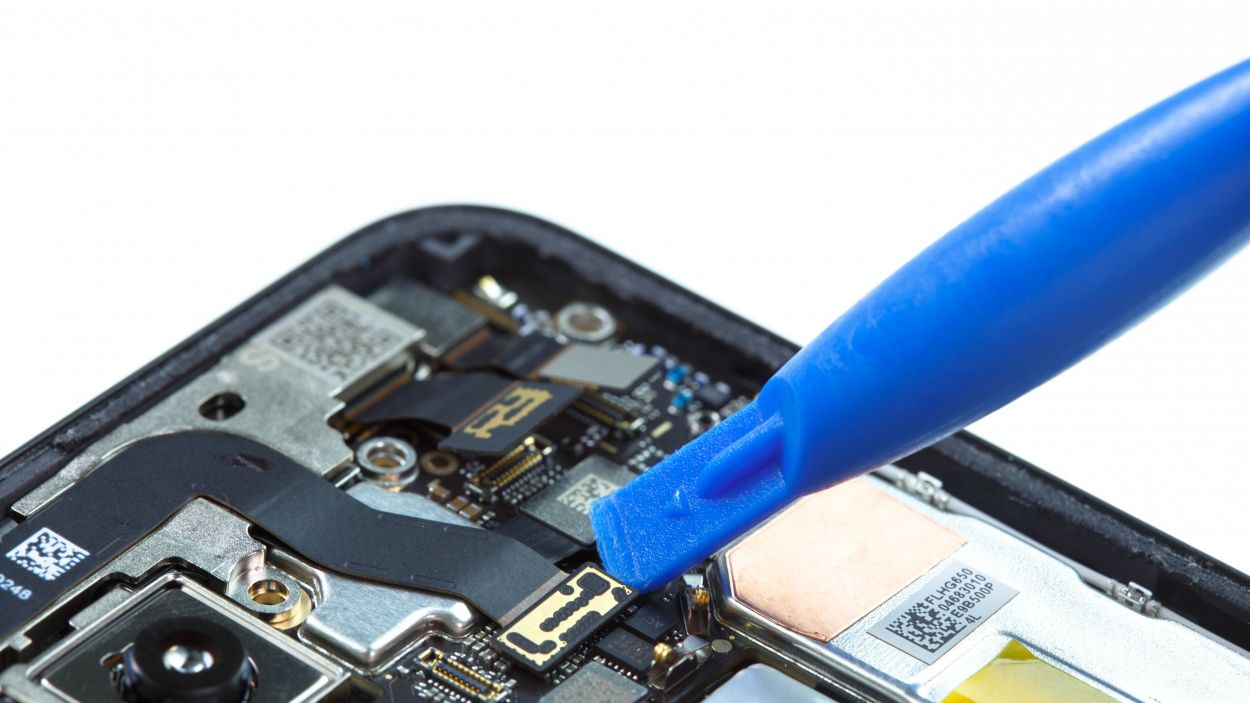
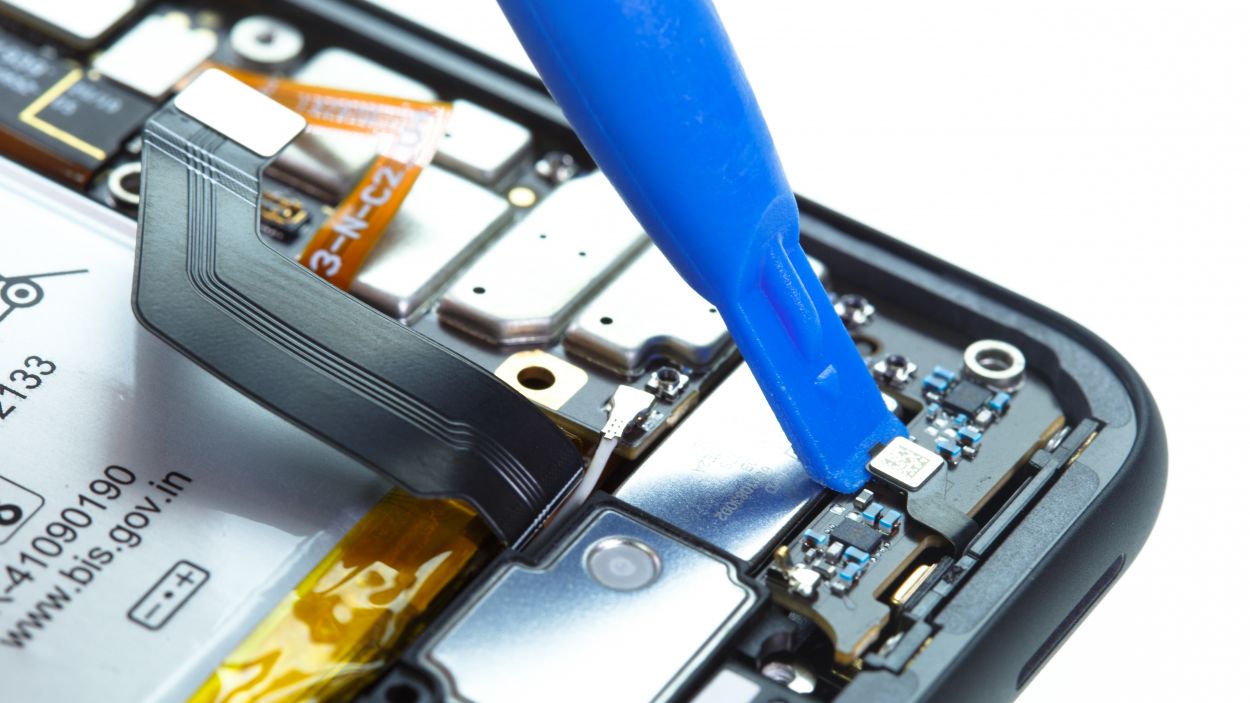
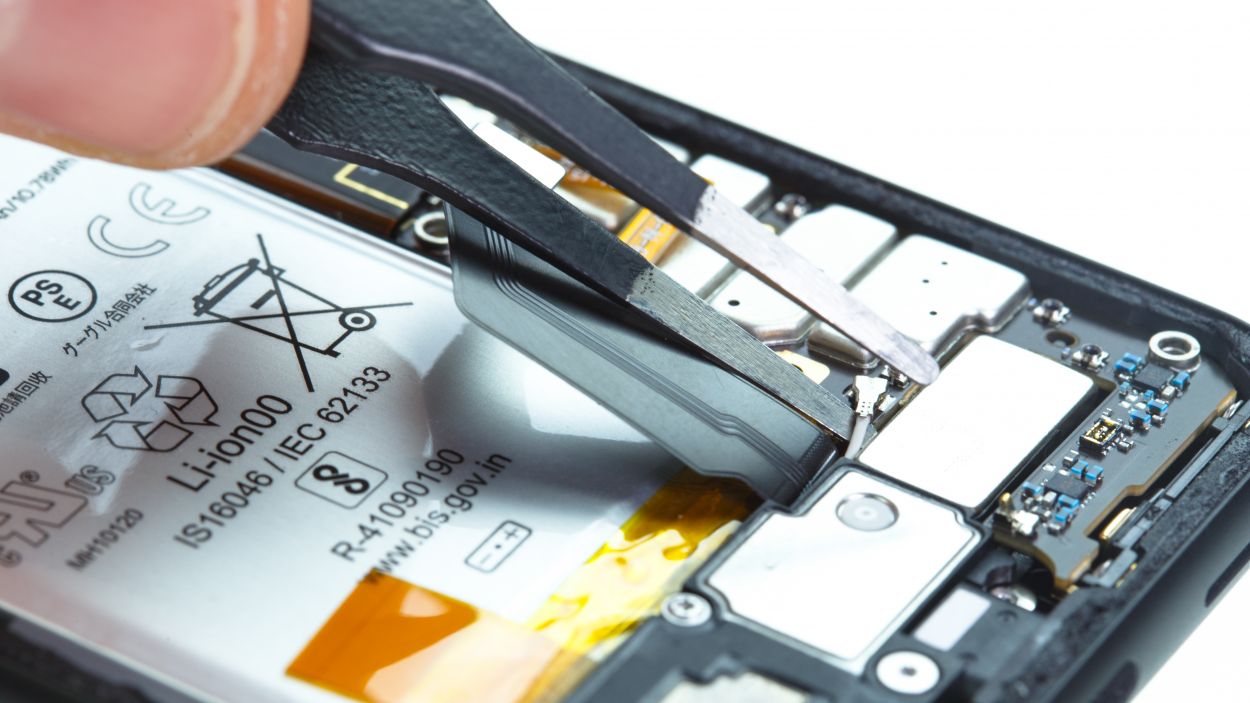
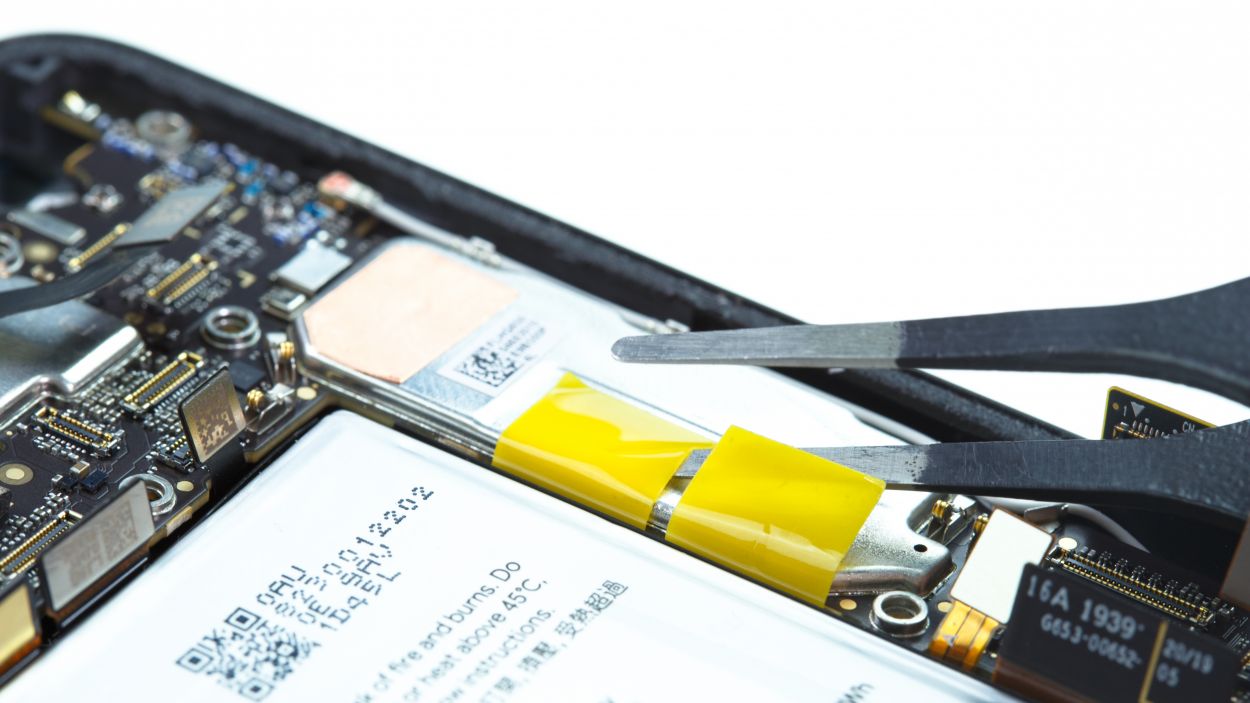
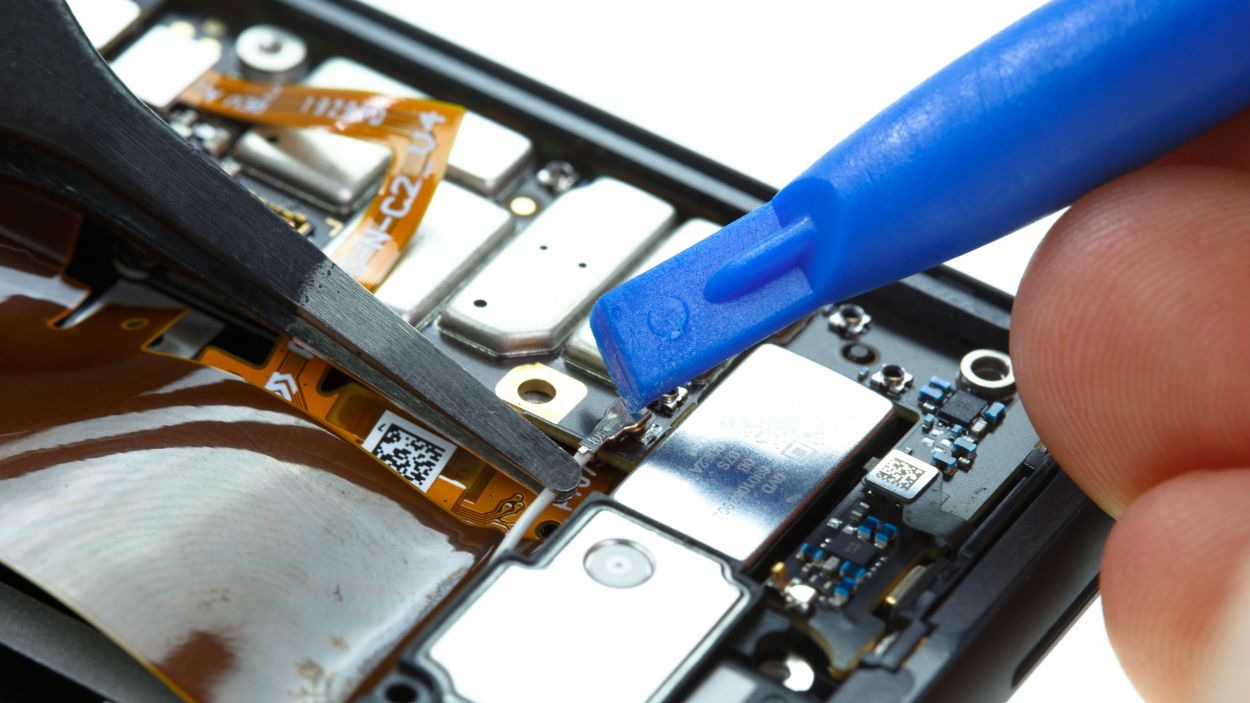
Always take care when loosening the connectors. Lever with the spudger where there are no small components on the board. Be very careful when unplugging the connectors to avoid damaging anything on the main board.
– Gently loosen those two Torx T3 screws on the lower cover plate and pop it off like a pro.
– Carefully disconnect all the connectors and the antenna cable from the main board—you’re almost there!
Tools Used
Step 7
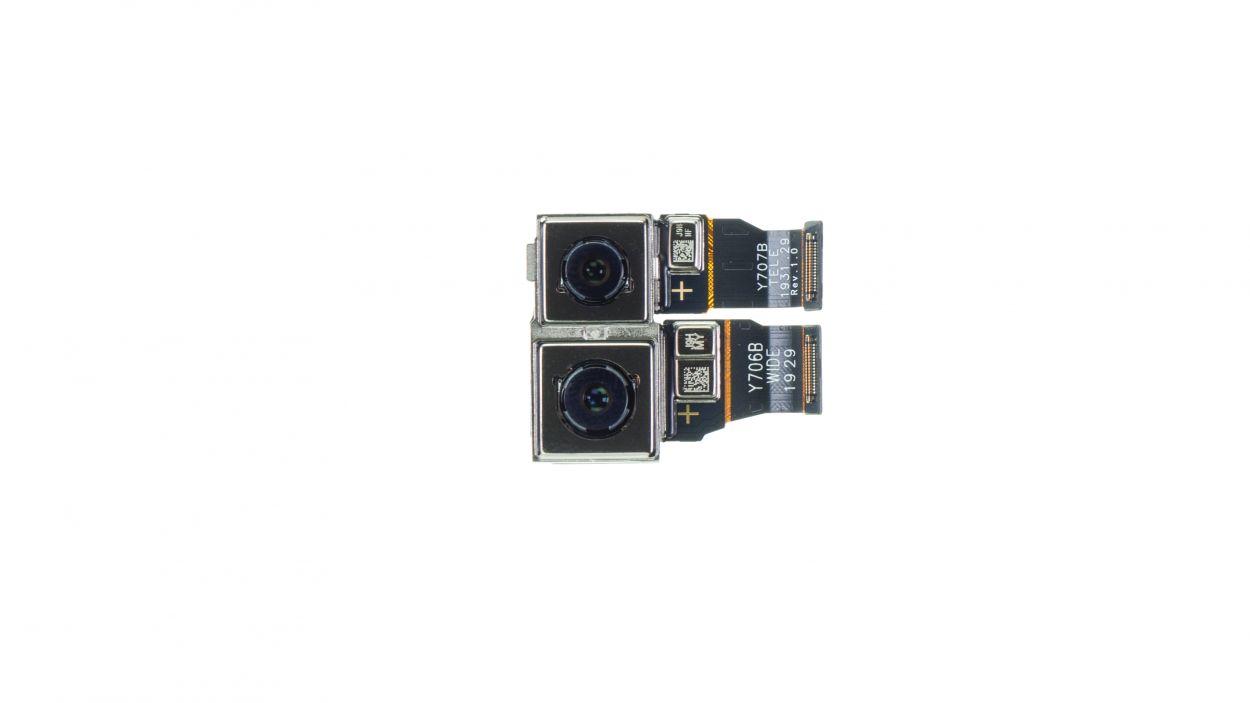
– Hey there! First, peel off any pesky protective film from your snazzy new camera lens. It’s gotta breathe!
– Give your new camera a once-over. Make sure it’s in tip-top shape before we get started!
– Let’s keep those lenses fingerprint-free – we want them sparkling! Be careful during the repair.
– Before snapping the back cover shut, do a quick dust check on the cameras and inside the cover. No dust bunnies allowed!
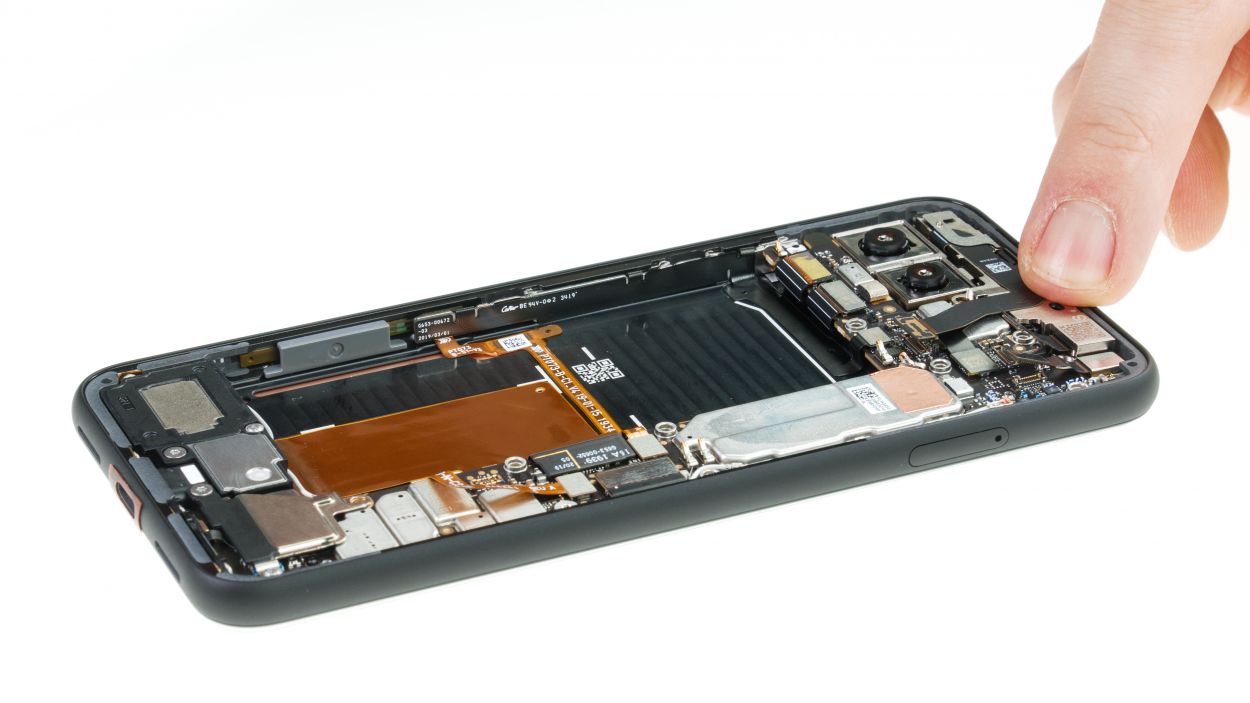
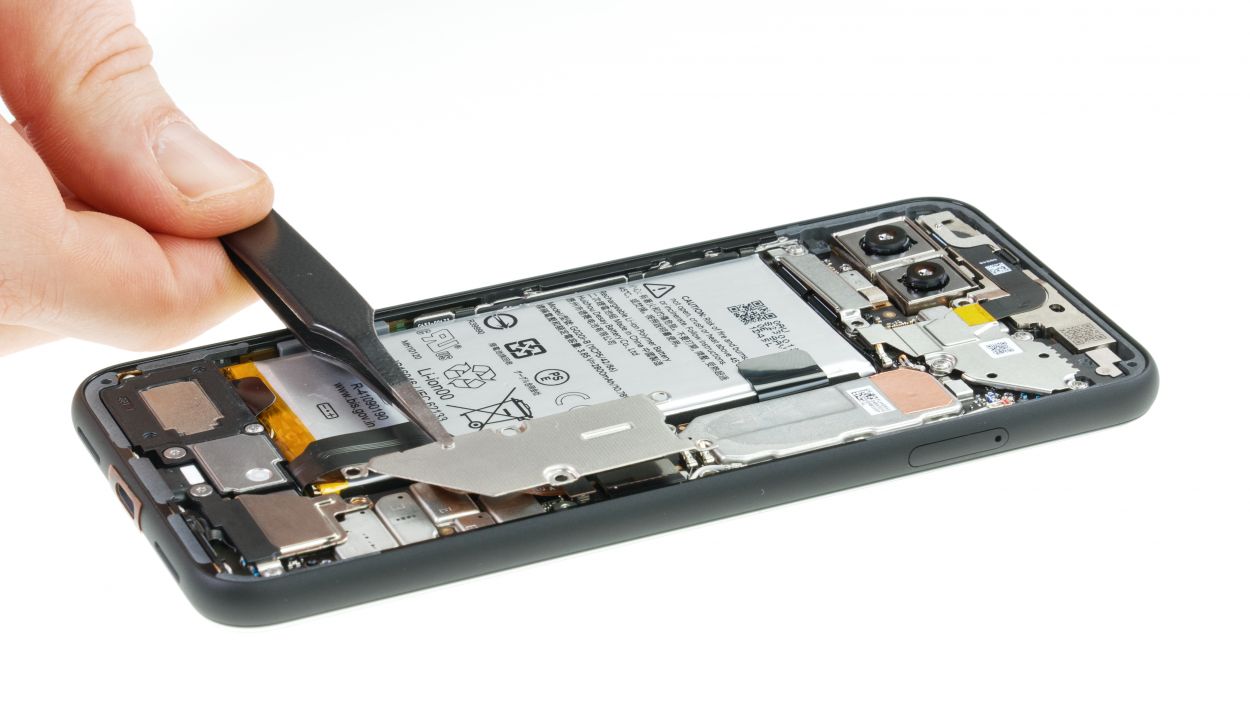
Step 8

Connectors
1 × 4,0 mm Torx T3
1 × 4,4 mm Torx T3
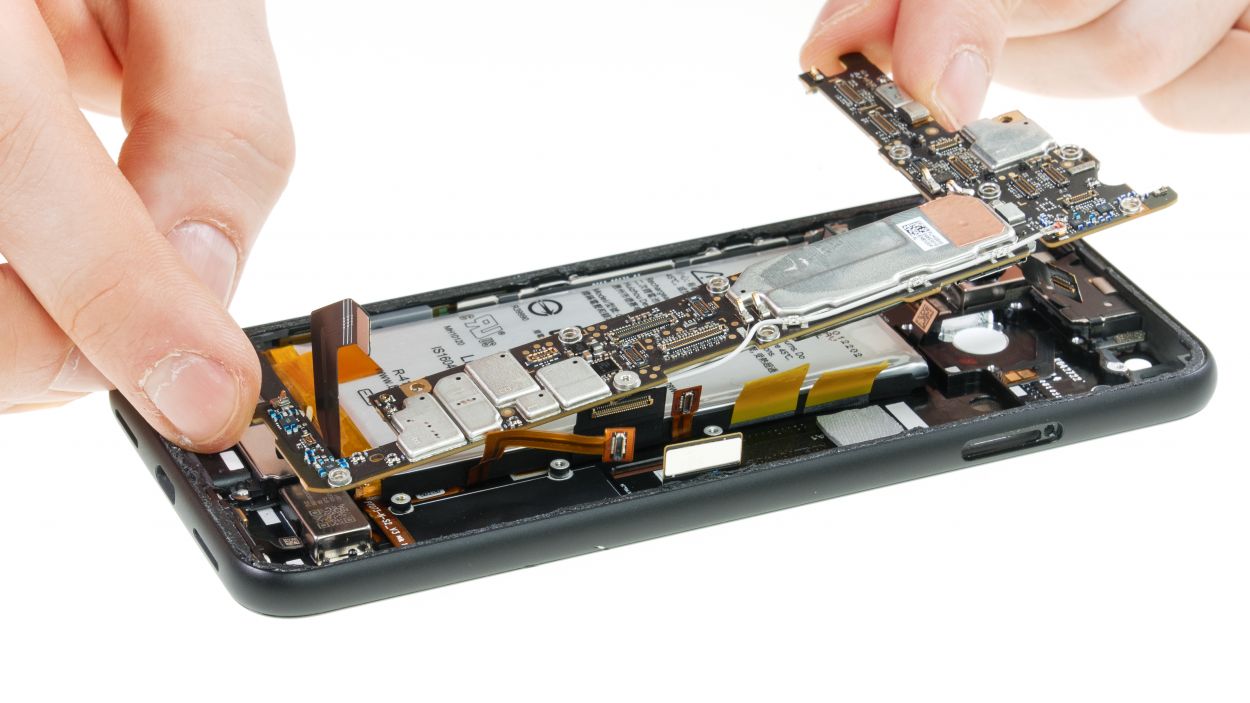
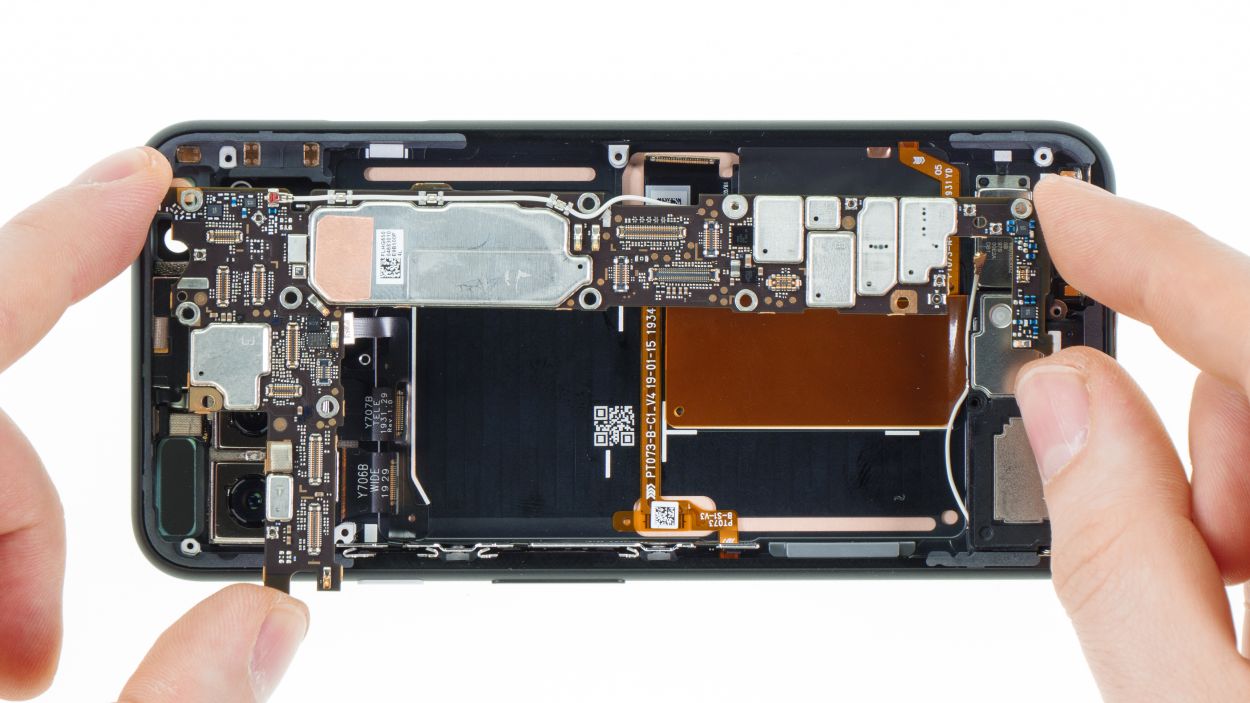
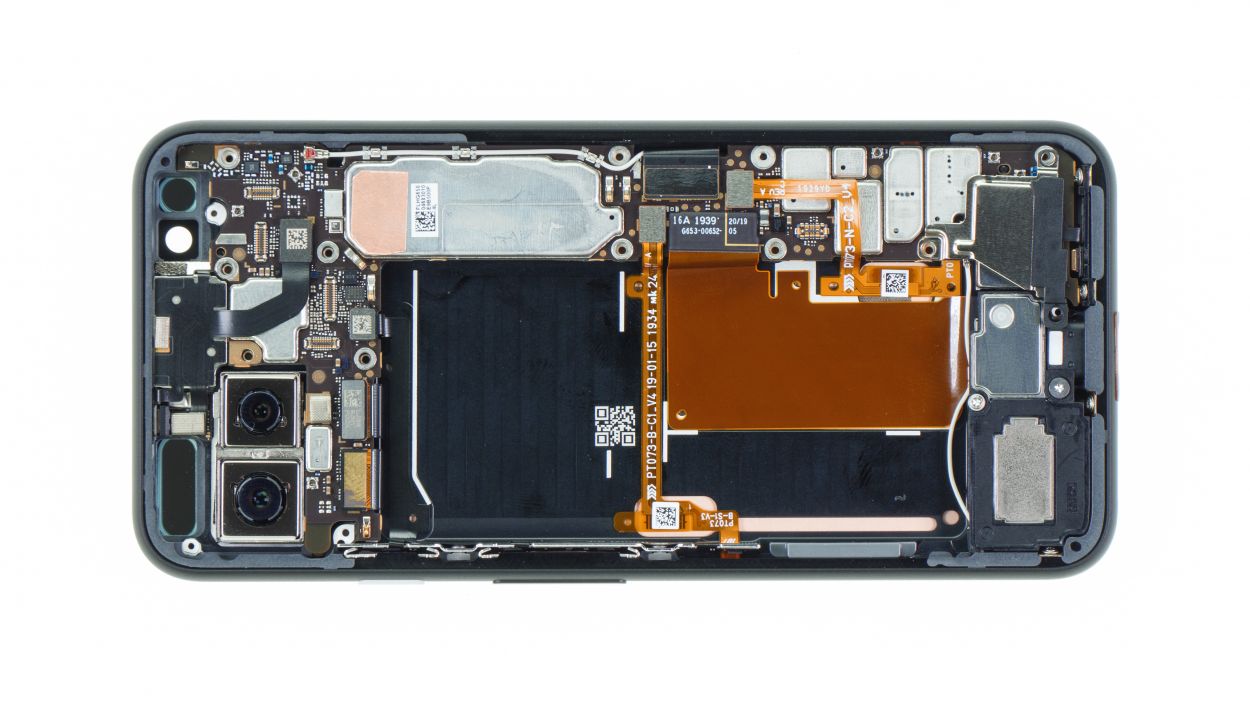
Alright, champ! Before you plug everything in, give that PCB a nice, snug fit. Make sure it’s sitting pretty and ready to rock! If you’re feeling a little lost, you can always schedule a repair
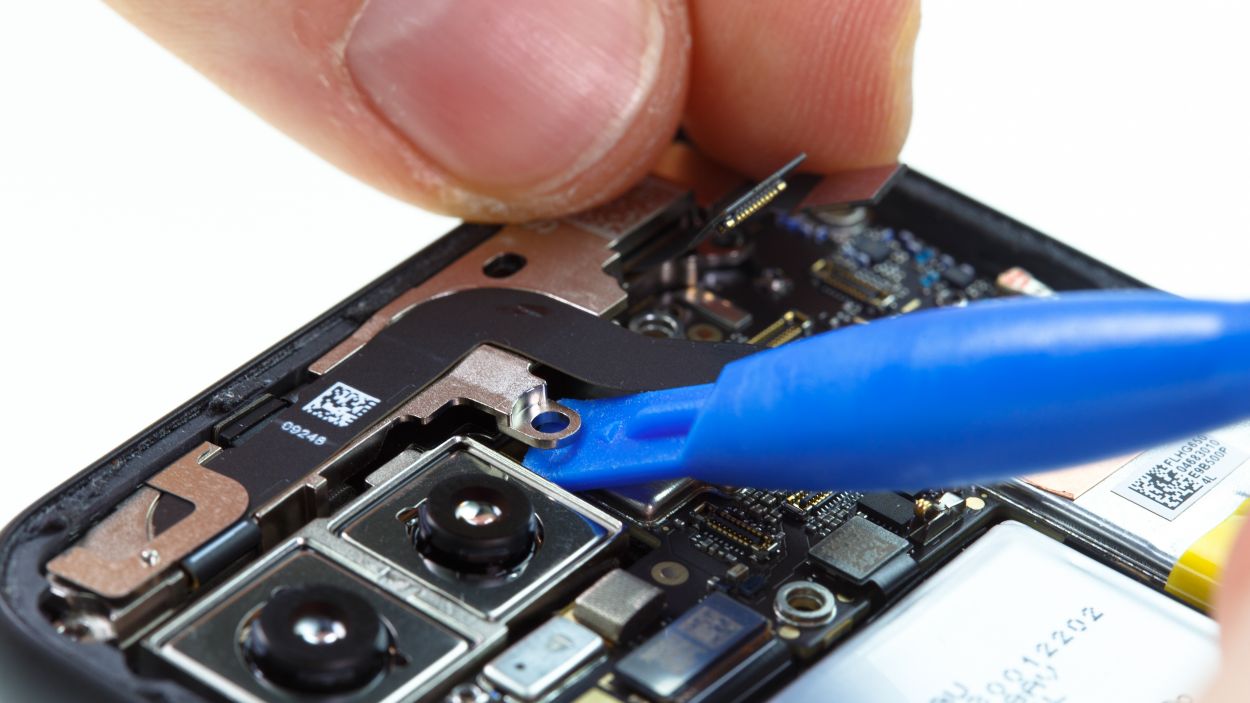
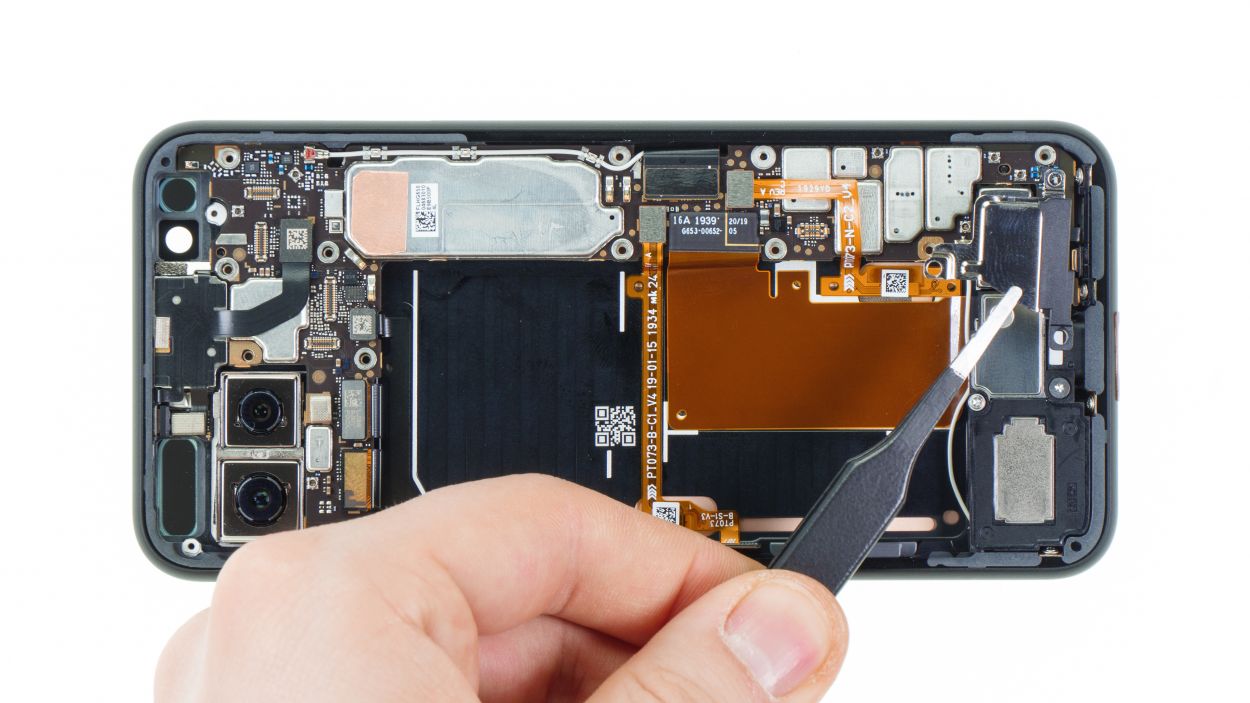
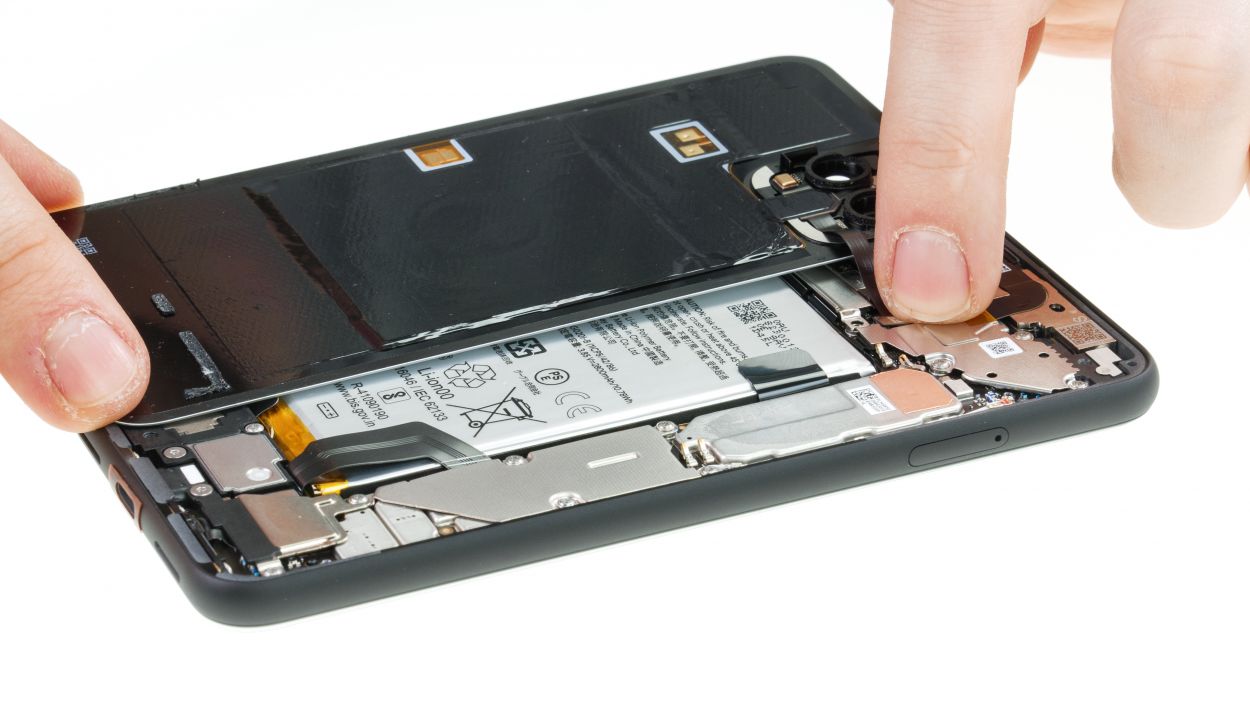
– Start by gently placing the dual camera on the clean white surface inside your device.
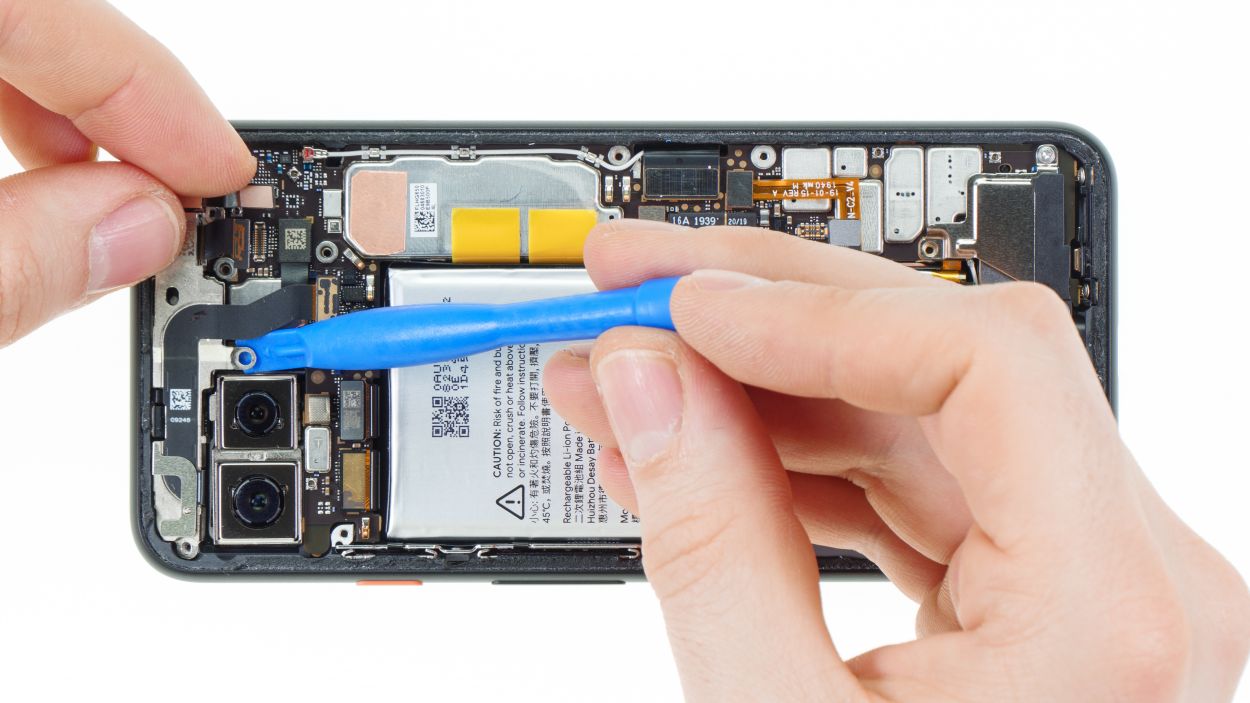
– Next, carefully bend all the flex cables to the side to avoid pinching any of them under the main board when you slide it in.
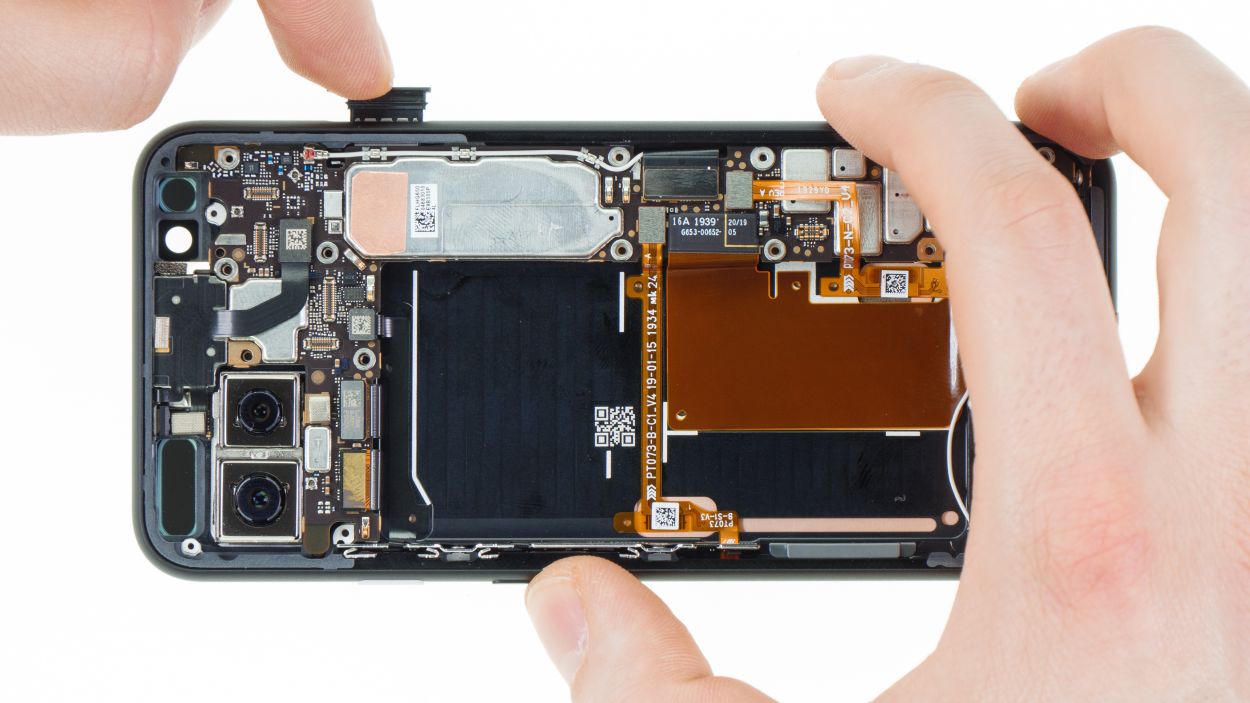
– Now, take your time and slowly insert the main board into the unit, making sure to navigate around all the cables.
– Begin at the bottom and then gently push it into the frame at the side.
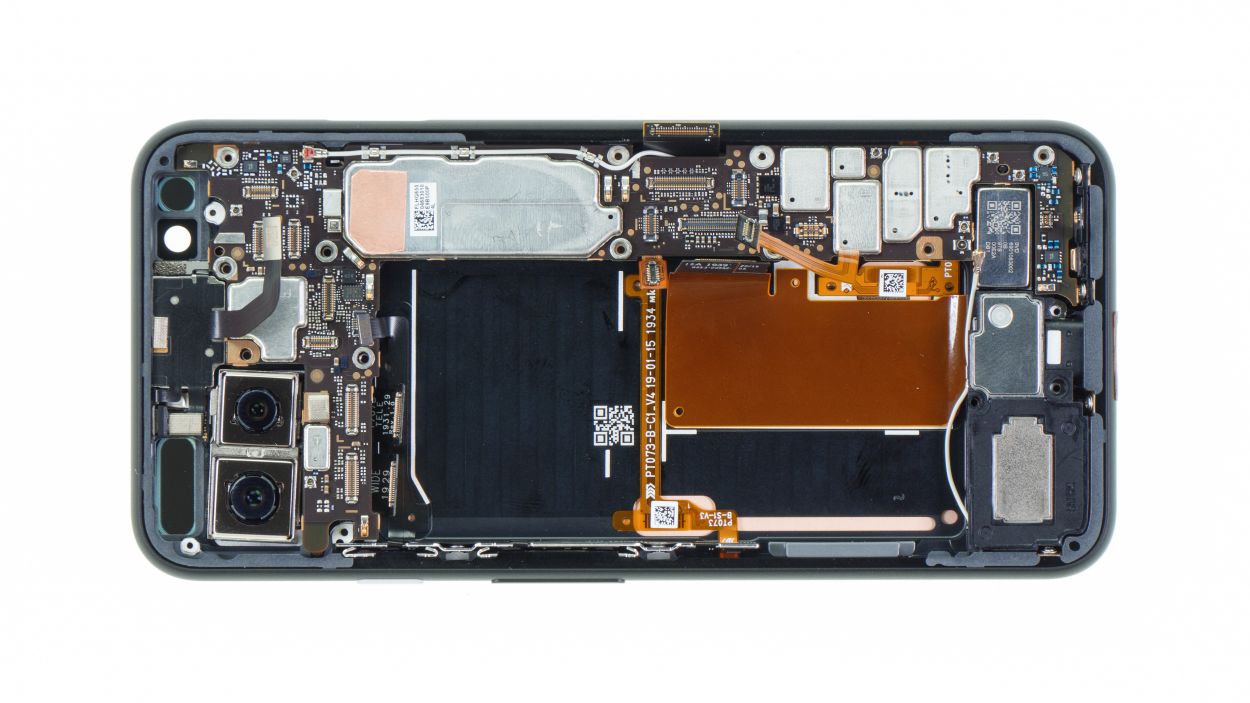
Step 9
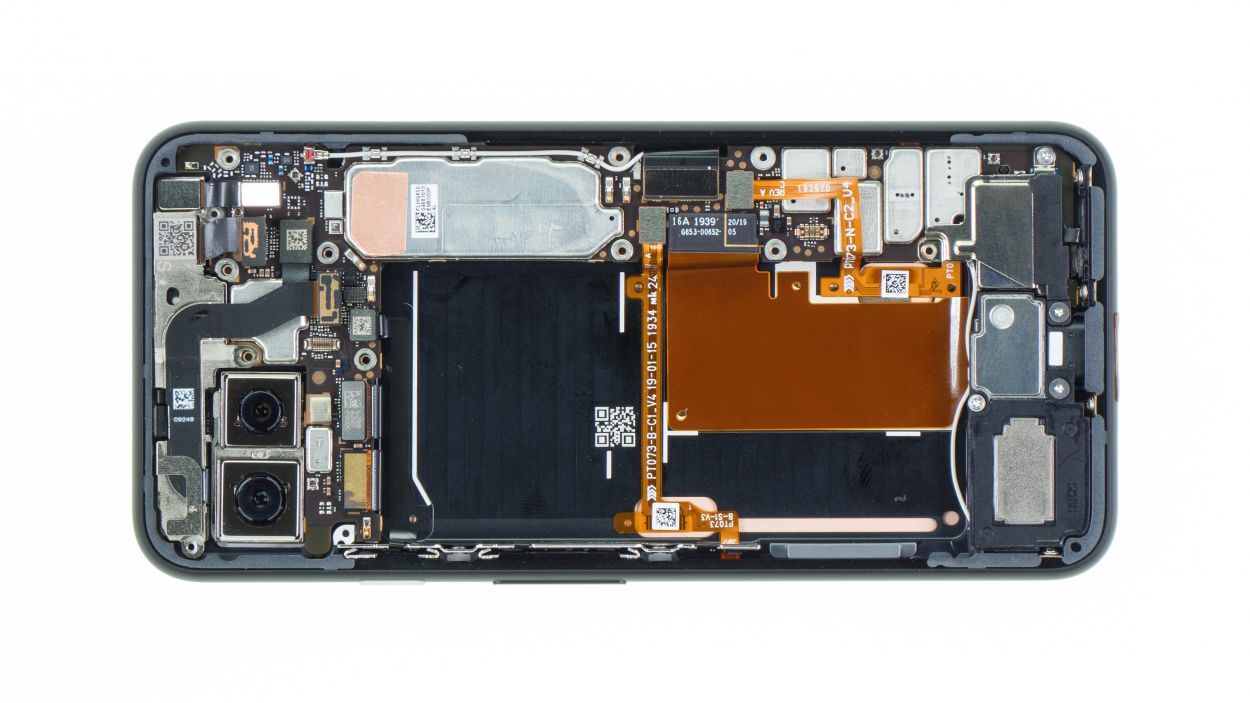
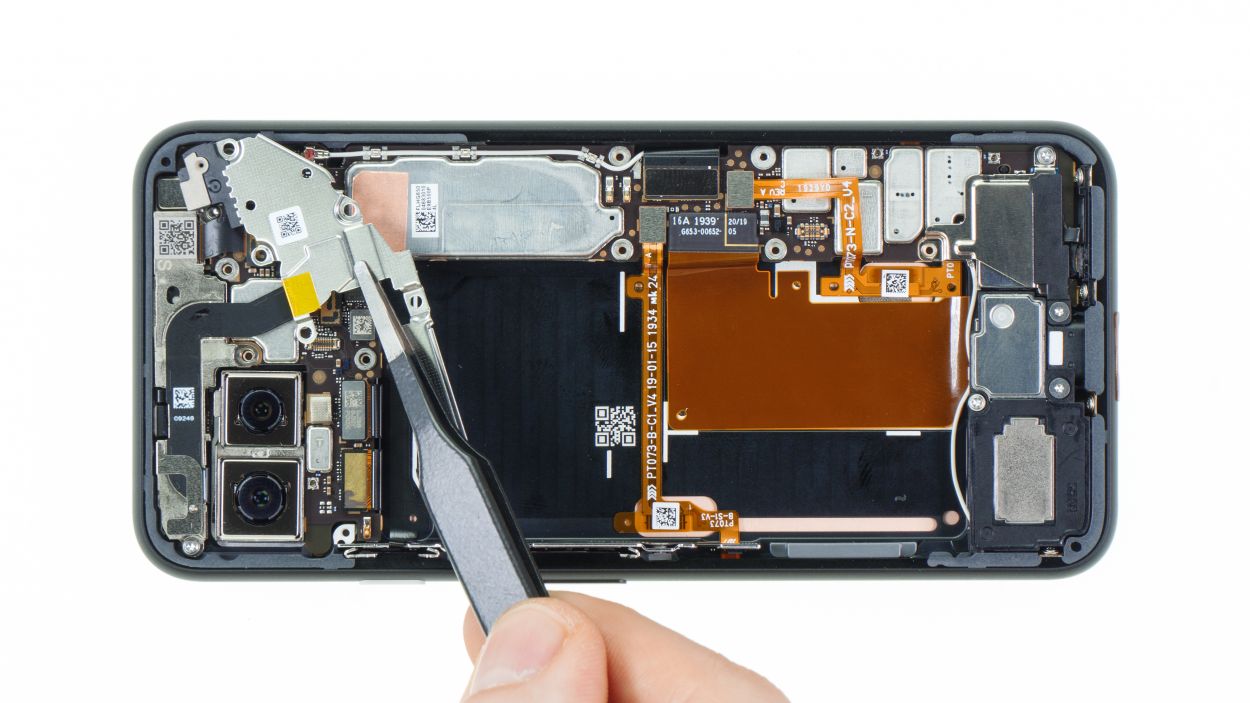
4 × 4,0 mm Torx T3
Keep that front camera sparkling clean! No dust bunnies allowed on the camera lens or inside your device. Let’s get this thing shining!
– Gently slide the front camera/sensor module into its cozy spot inside the device.
– Give it a little press until it clicks into place like it belongs there.
– Now it’s time to reconnect all three connectors – they’ll appreciate the company!
– Cap it all off by placing the cover plate on top and securing it with screws.
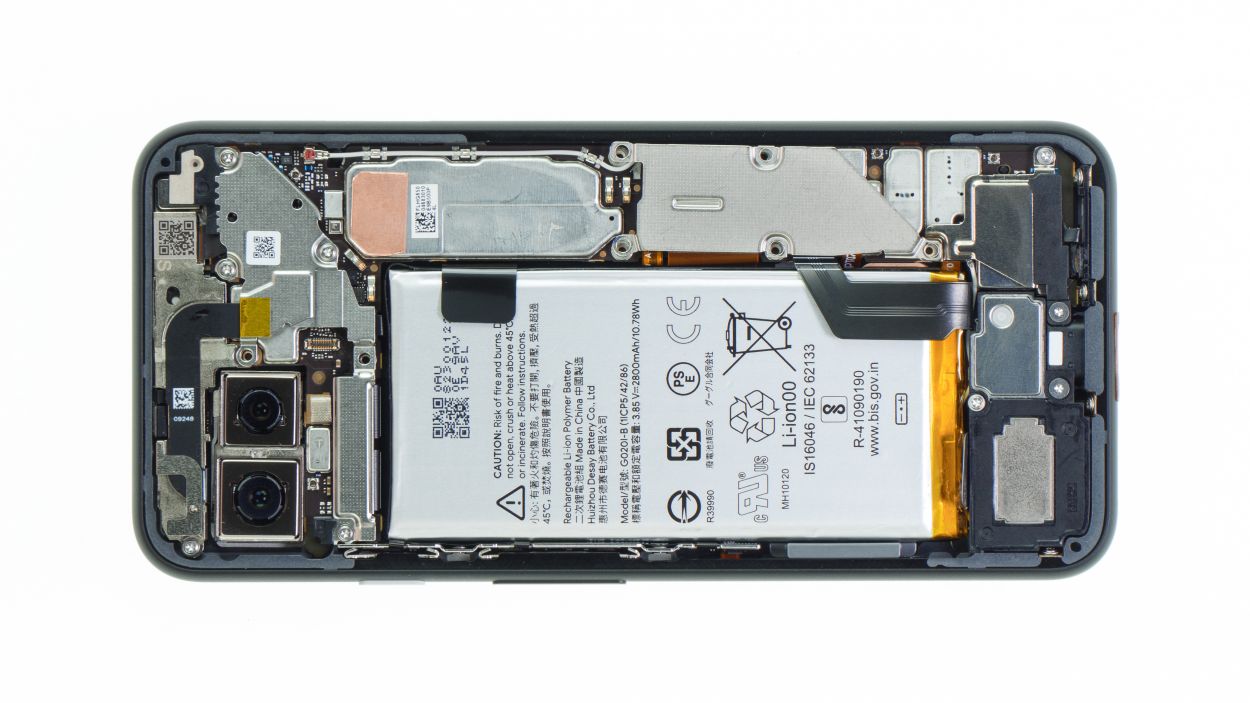
Step 10
Time to get those adhesive+strips+Pixel+4&crid=1TJIMMAJSUJUZ&sprefix=repair+tools%2Caps%2C165&linkCode=ll2&tag=salvationrepa-20&linkId=c486487cf454ce8edd6f5beefab4110f&language=en_US&ref_=as_li_ss_tl’>adhesive strips in place! Cut them down to size so they line up perfectly with the original spots. Just a friendly reminder: keep those strips clear of any flexible cables nestled in your smartphone’s housing. You’ve got this!
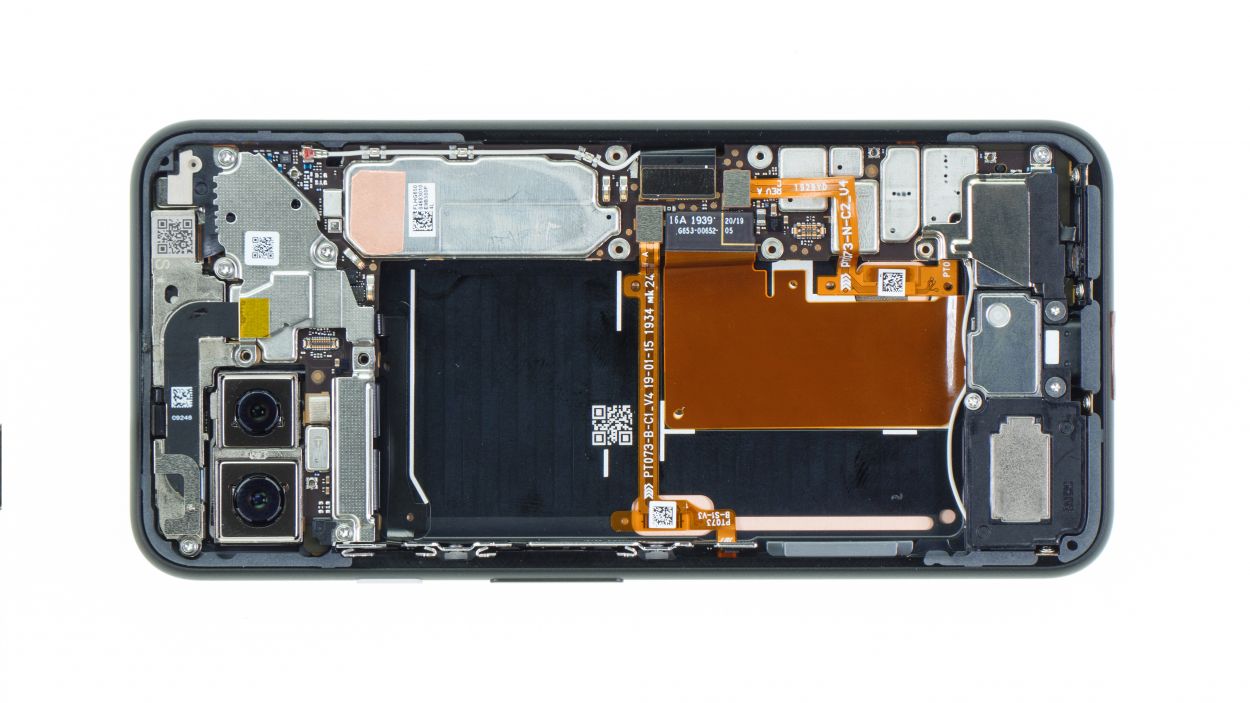
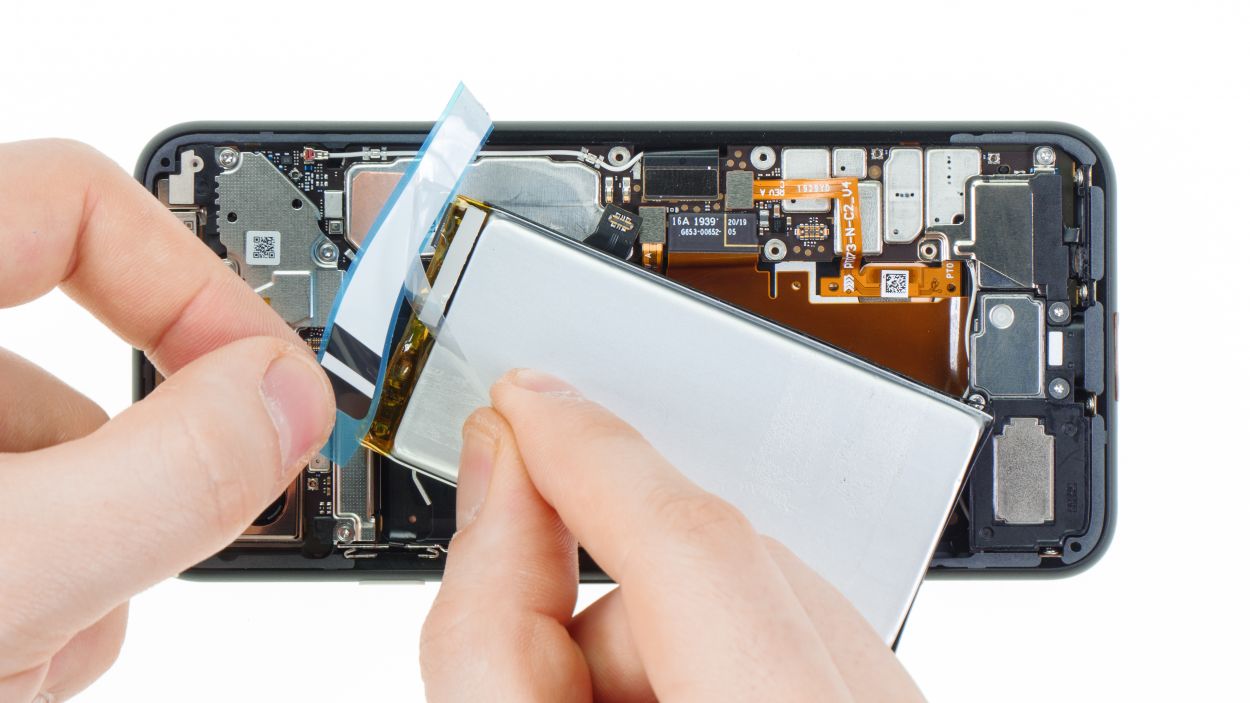
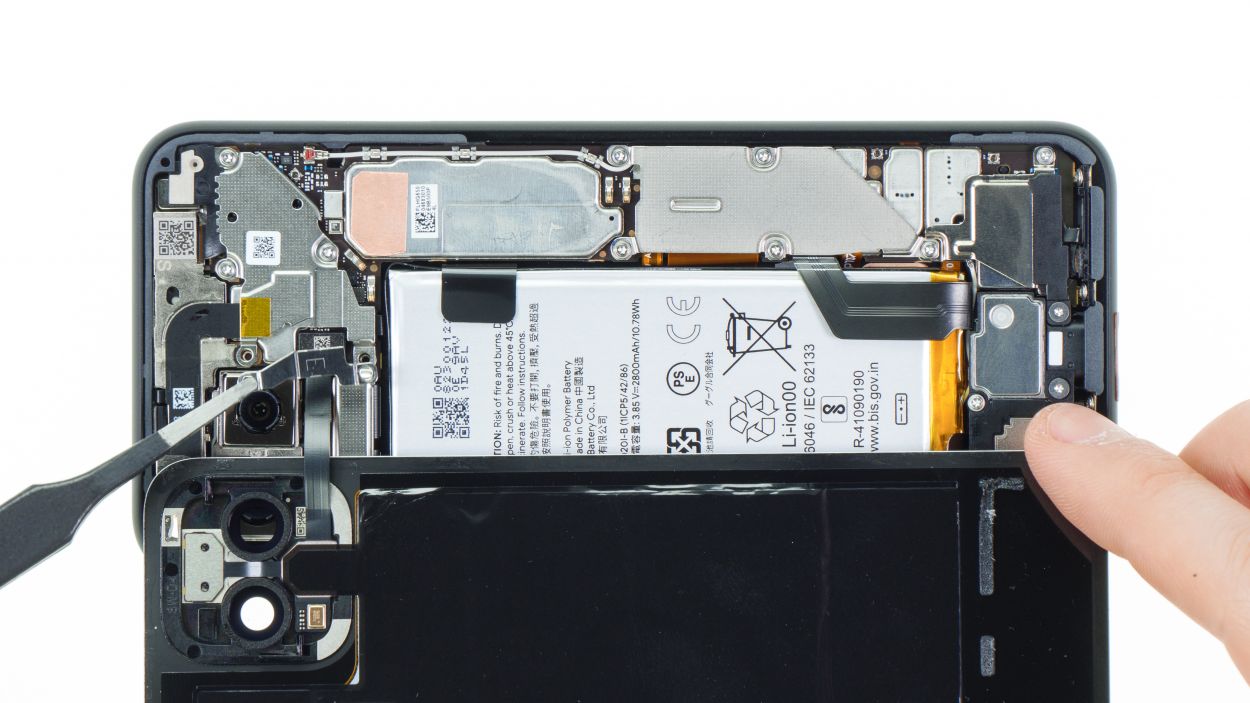
– First things first, let’s make sure there’s no sticky adhesive residue hanging out on the back of the battery or inside your device. We want a clean start!
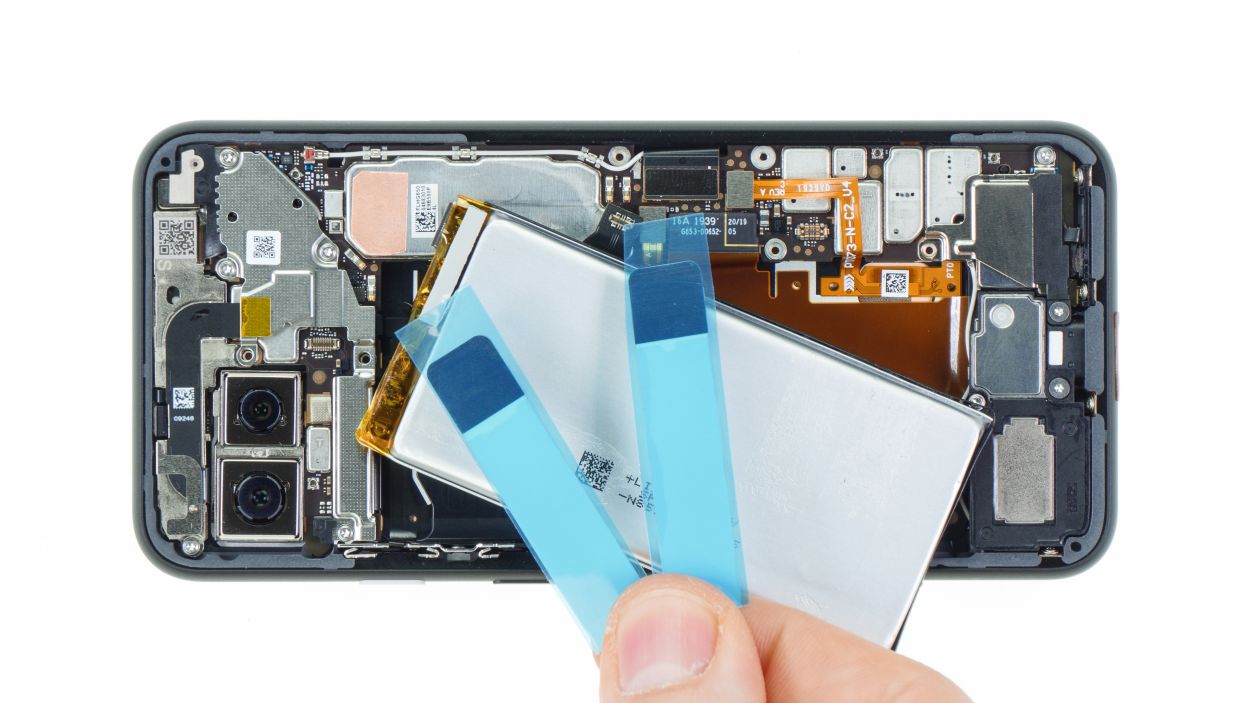
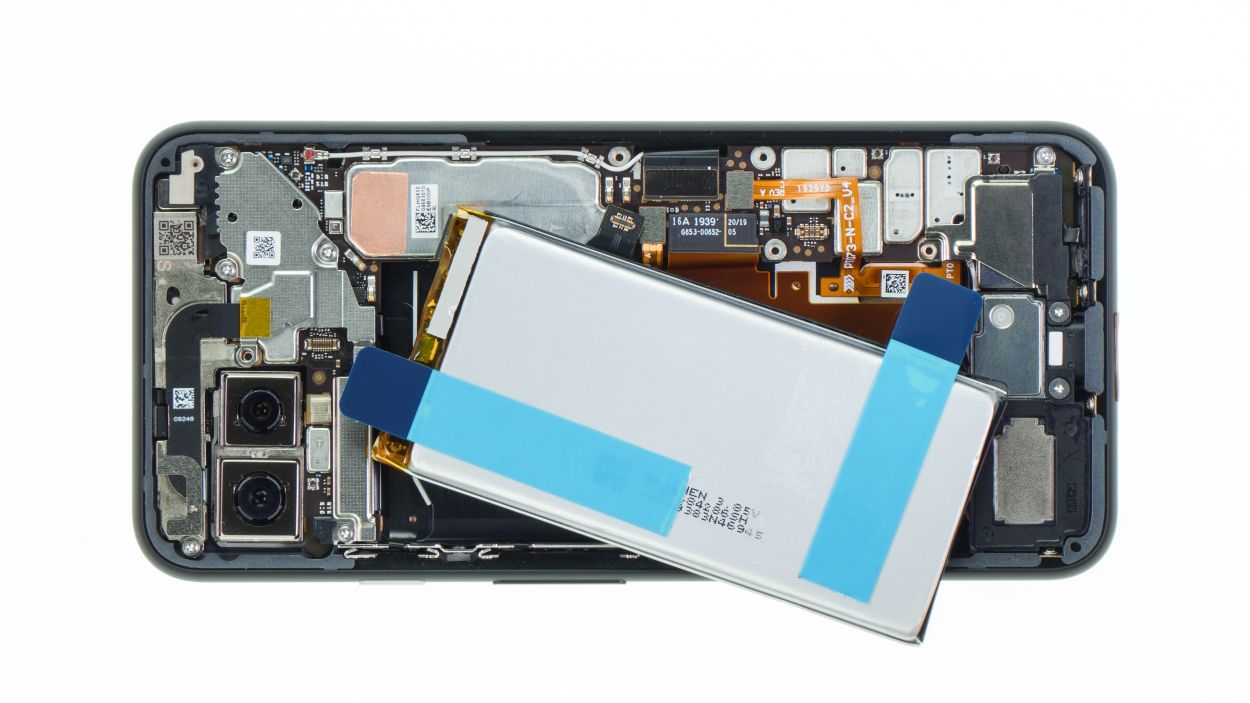
– Next up, peel off that transparent protective foil from the adhesive+strips+Pixel+4&crid=1TJIMMAJSUJUZ&sprefix=repair+tools%2Caps%2C165&linkCode=ll2&tag=salvationrepa-20&linkId=c486487cf454ce8edd6f5beefab4110f&language=en_US&ref_=as_li_ss_tl’>adhesive strips and stick those strips onto the battery. Just a heads up, the black tabs should be sticking out like little flags!
– Now, fold those black tabs down and secure them to the top of the battery. We want everything nice and snug.
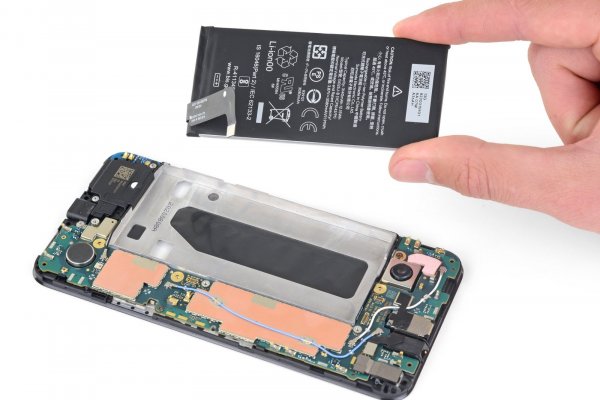
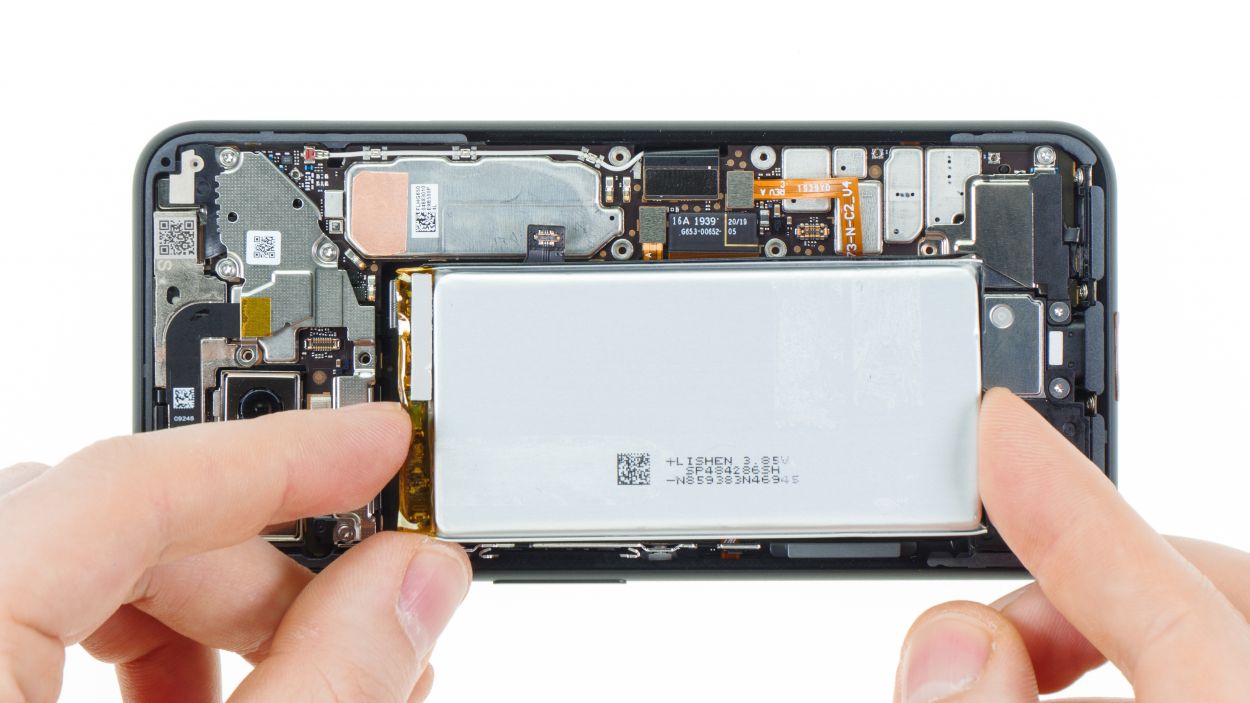
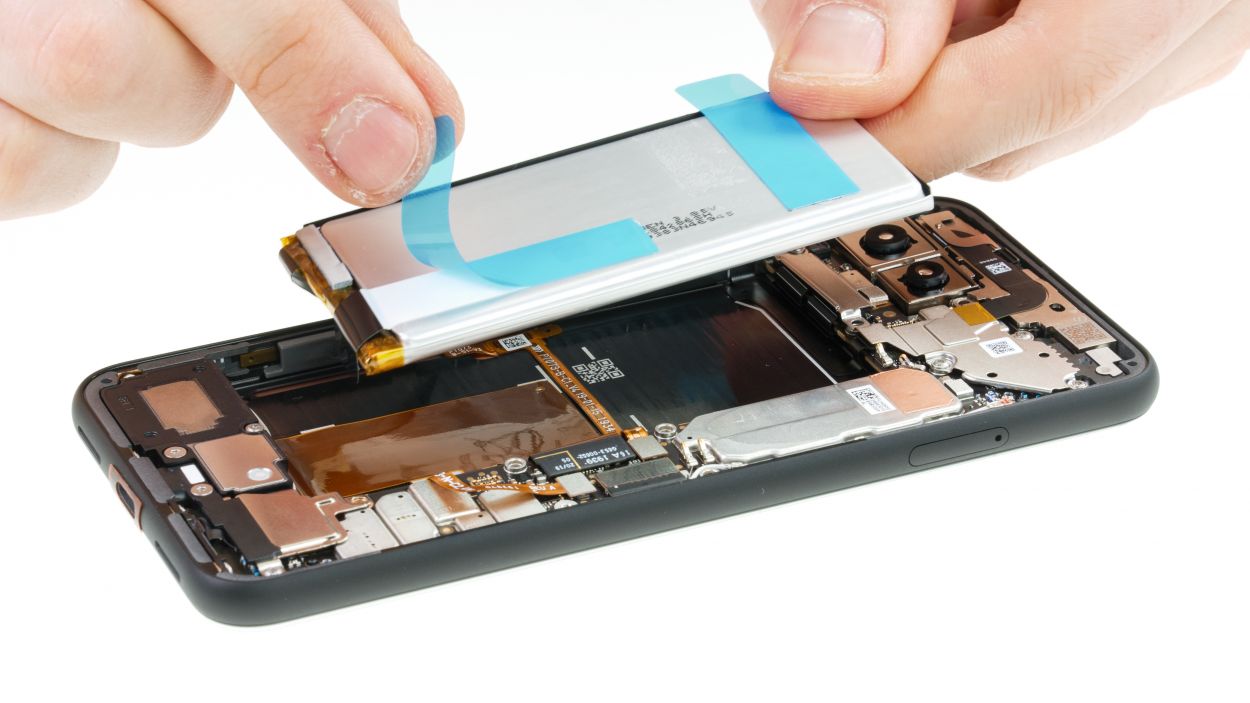
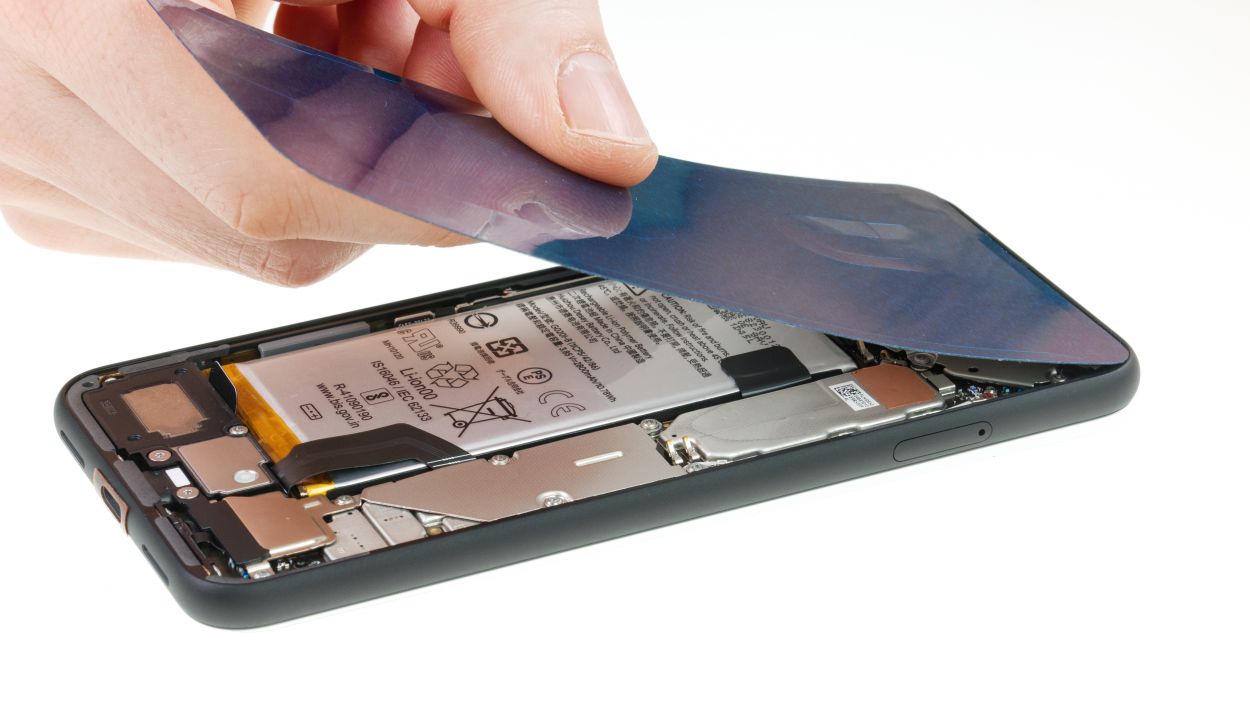
– Time to remove the blue protective film and gently place the battery back into your device. It’s like tucking it in for a cozy nap!
– Just double-check that there’s plenty of space all around and that nothing is getting squished. The battery contact should be sitting pretty right above its connector on the main board.
Step 11
4 × 4,0 mm Torx T3
1 × 2,0 mm Torx T3
One of the screws is a bit shorter than the others. Just a friendly reminder to keep them separate so you don’t mix them up!
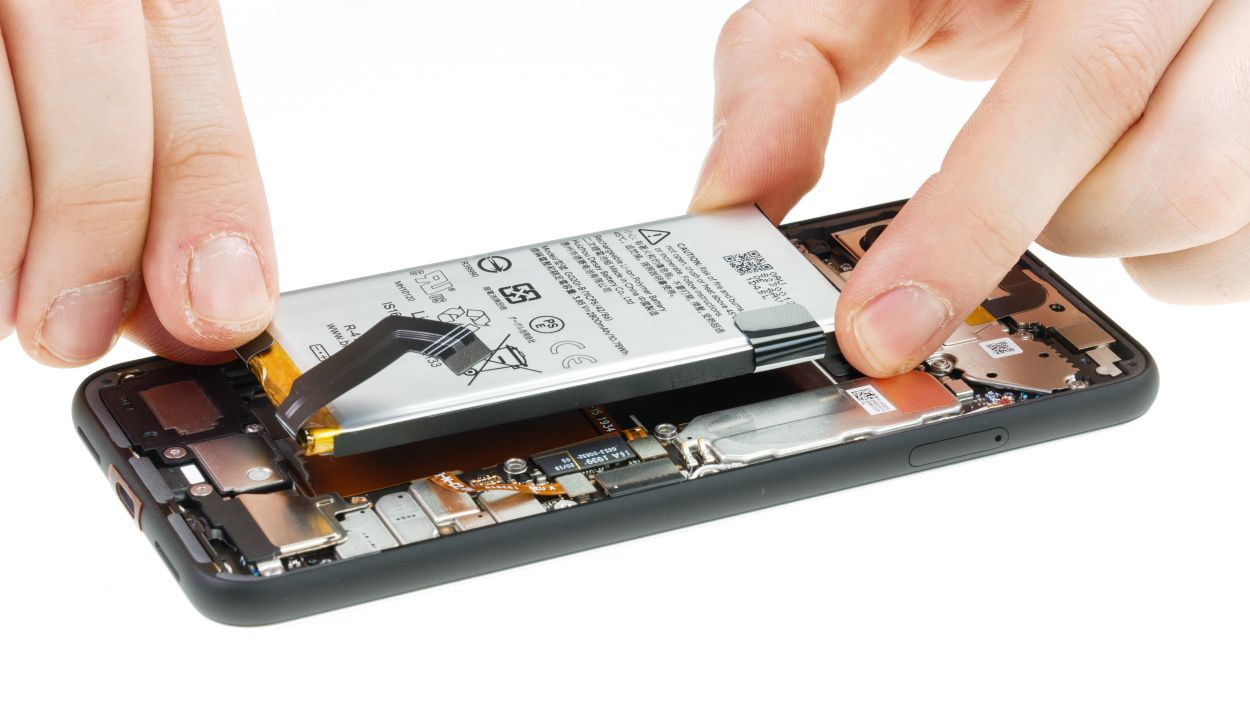
– First up, connect that battery contact! Give it a good press to ensure it’s snug and happy—just avoid sliding it around on the circuit board, okay?
– Now, let’s get that cover plate back on. Position it nicely and secure it with some screws. You’re almost there!
Step 12
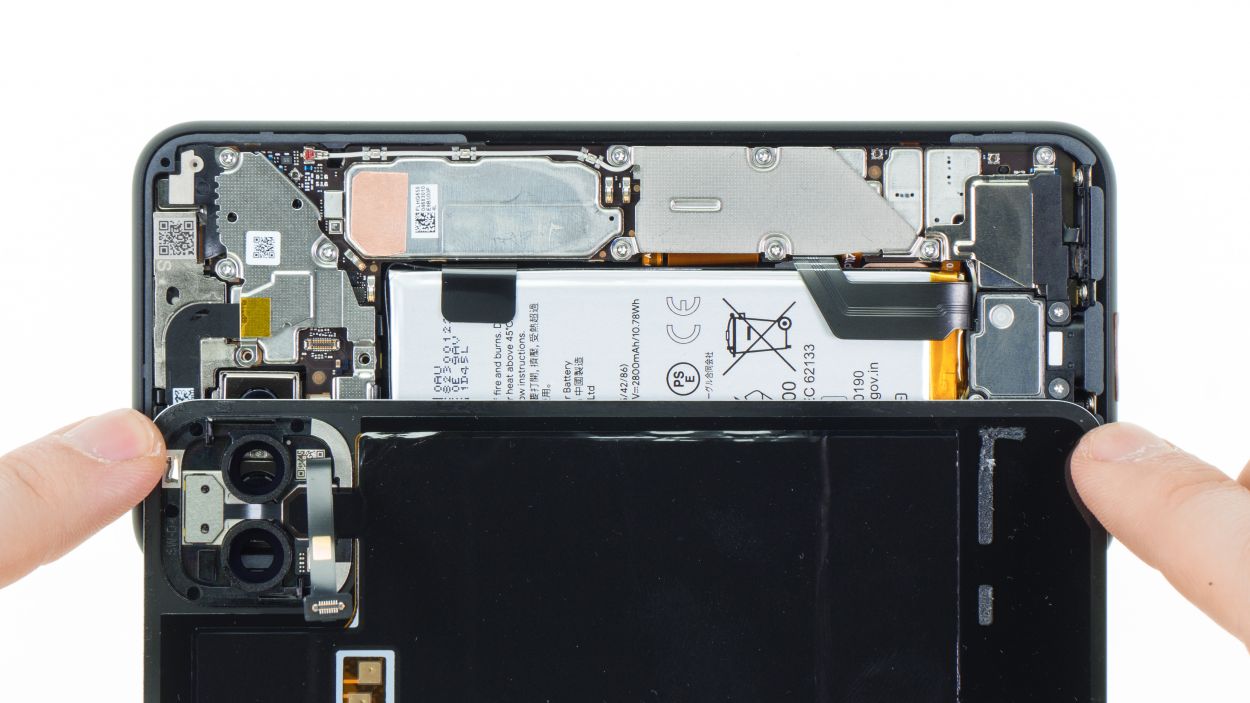

– Pop the back cover onto your device and connect that flexible cable like a pro.
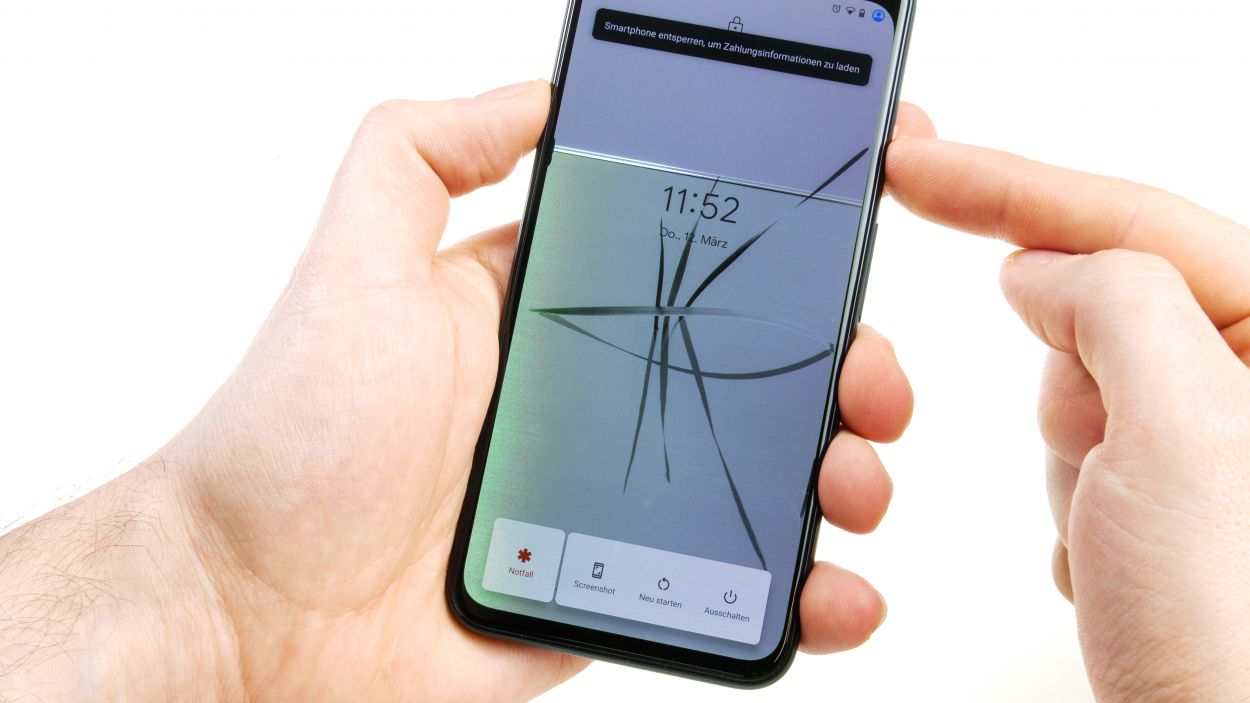
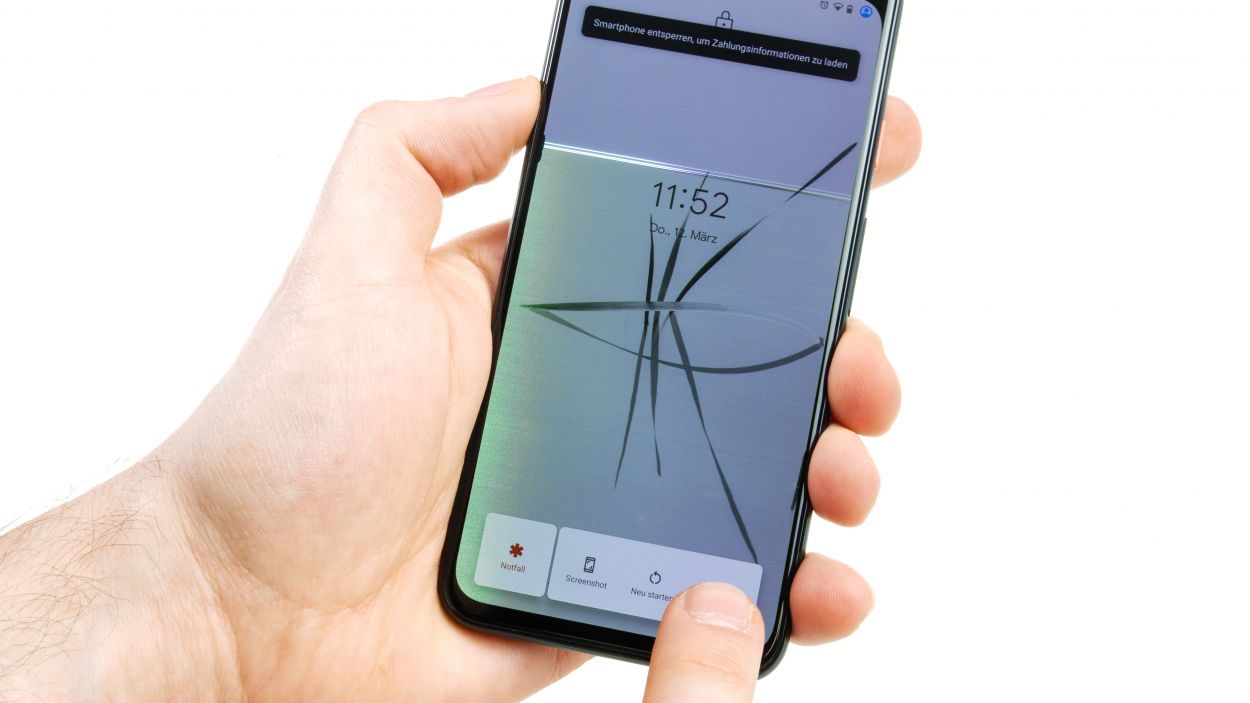
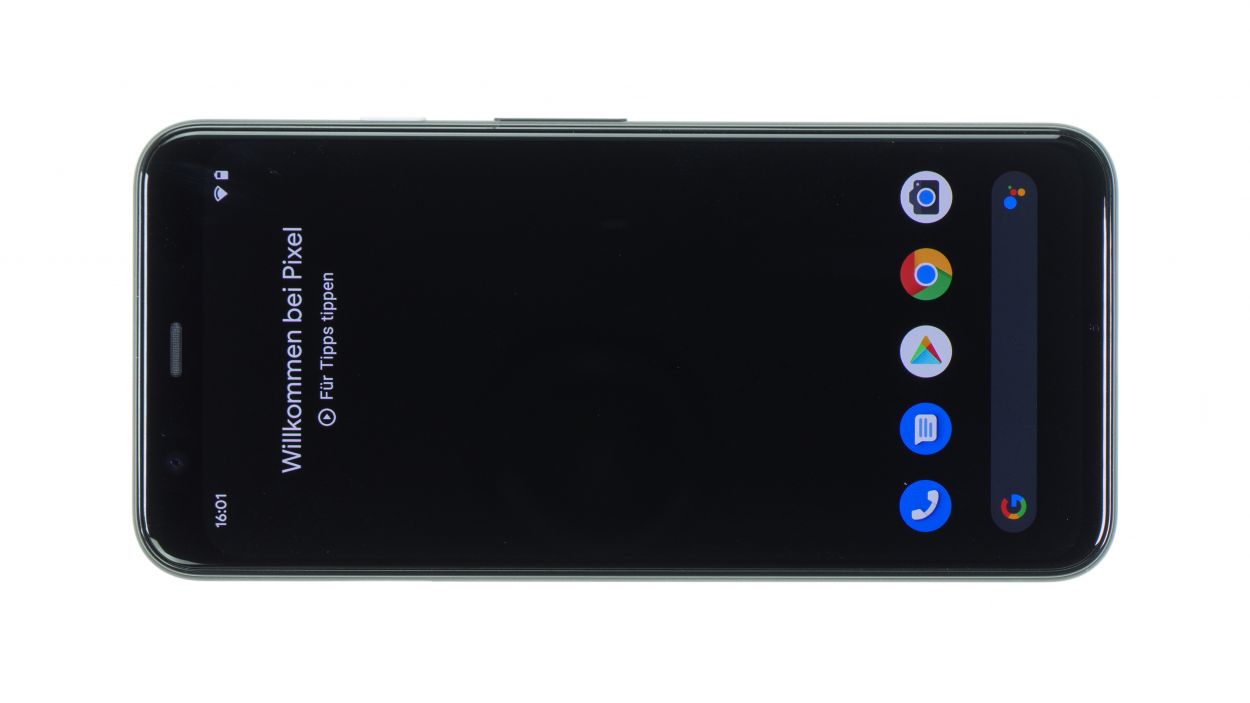
– Give it a snug close and power up your device!
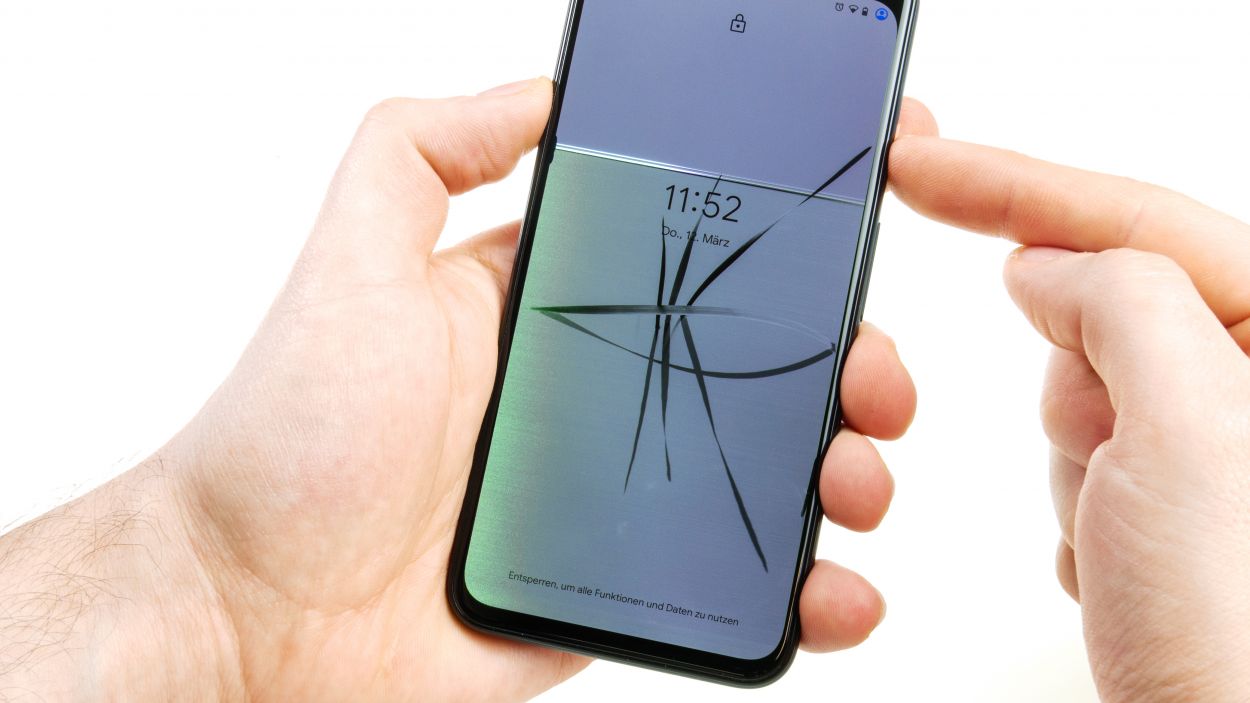
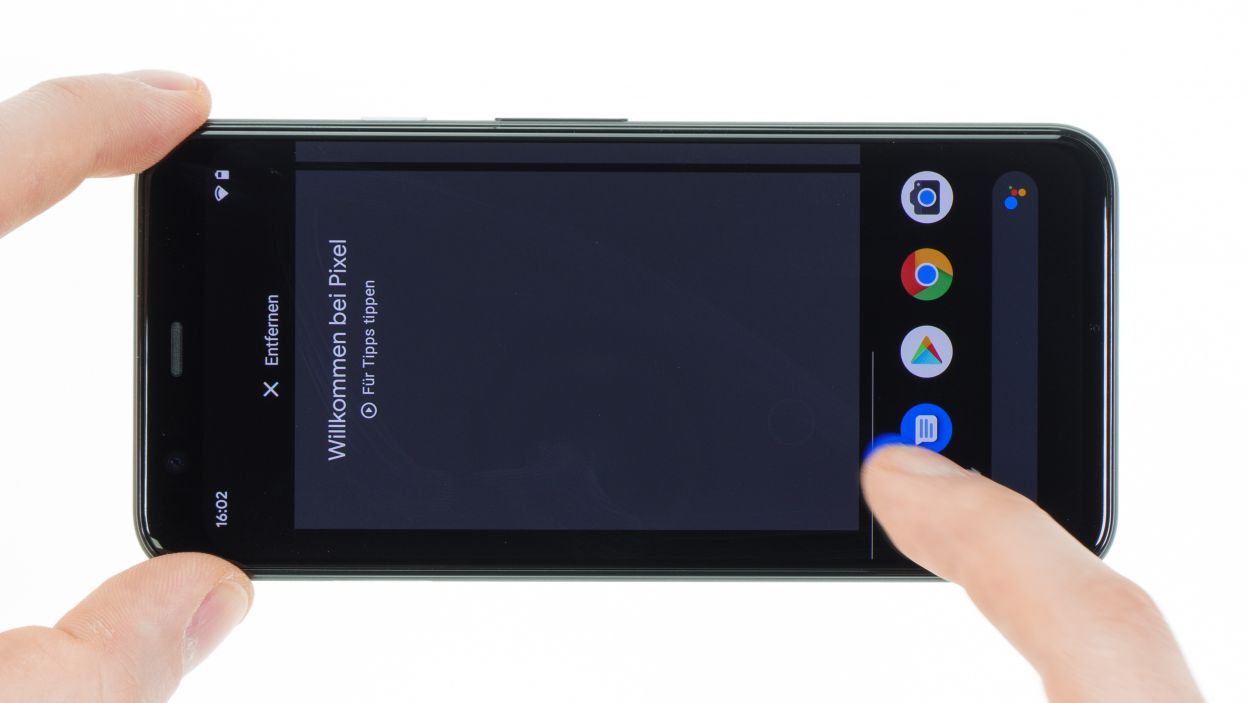
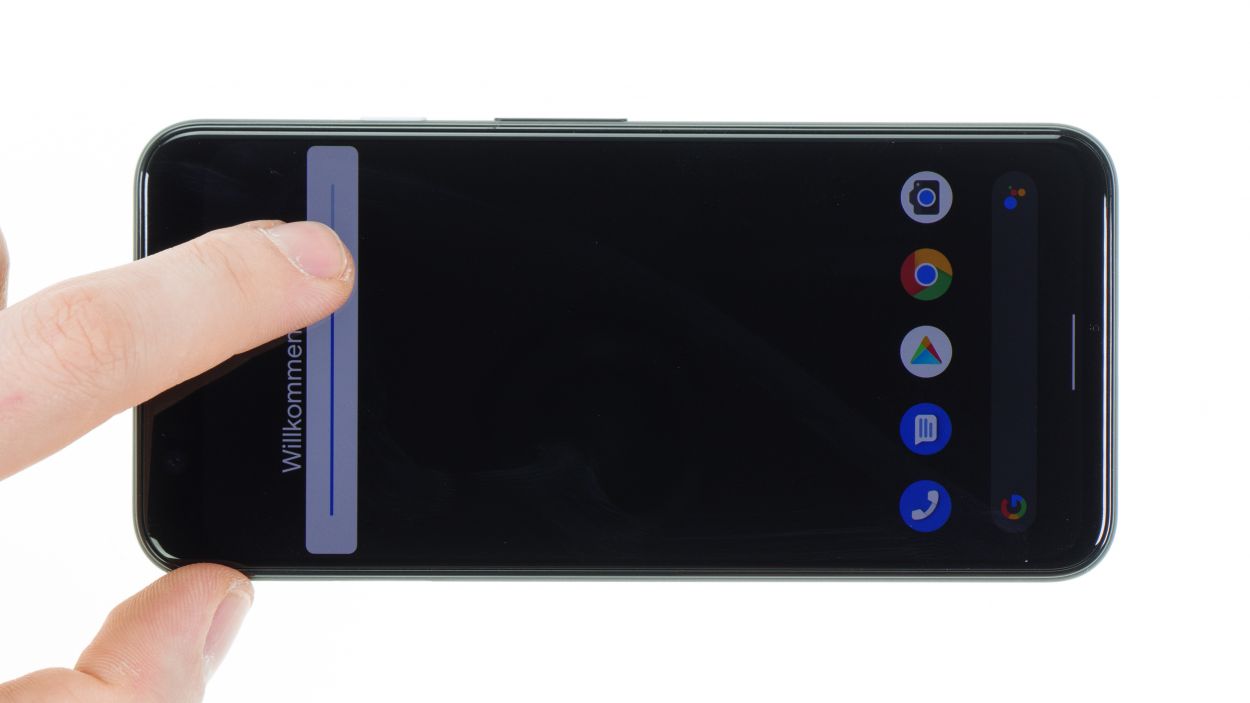
– To make sure your touchscreen is in tip-top shape, slide an app all the way around the edges and zigzag it across the screen. If it keeps up with your finger the whole way, you’re good to go!
– Time to check out the screen! Take a moment to look at the brightness, contrast, and sharpness and make sure everything’s looking sharp.
Step 13

Hey there! We’re using Pixel 3 adhesive frame pics here because, when we made this guide, Pixel 4 frames weren’t around. But don’t worry, the steps are totally the same! It’s a piece of cake. If you get stuck, you can always schedule a repair.
– First, let’s ditch that old glue! Gently remove any residue from the back cover and frame.
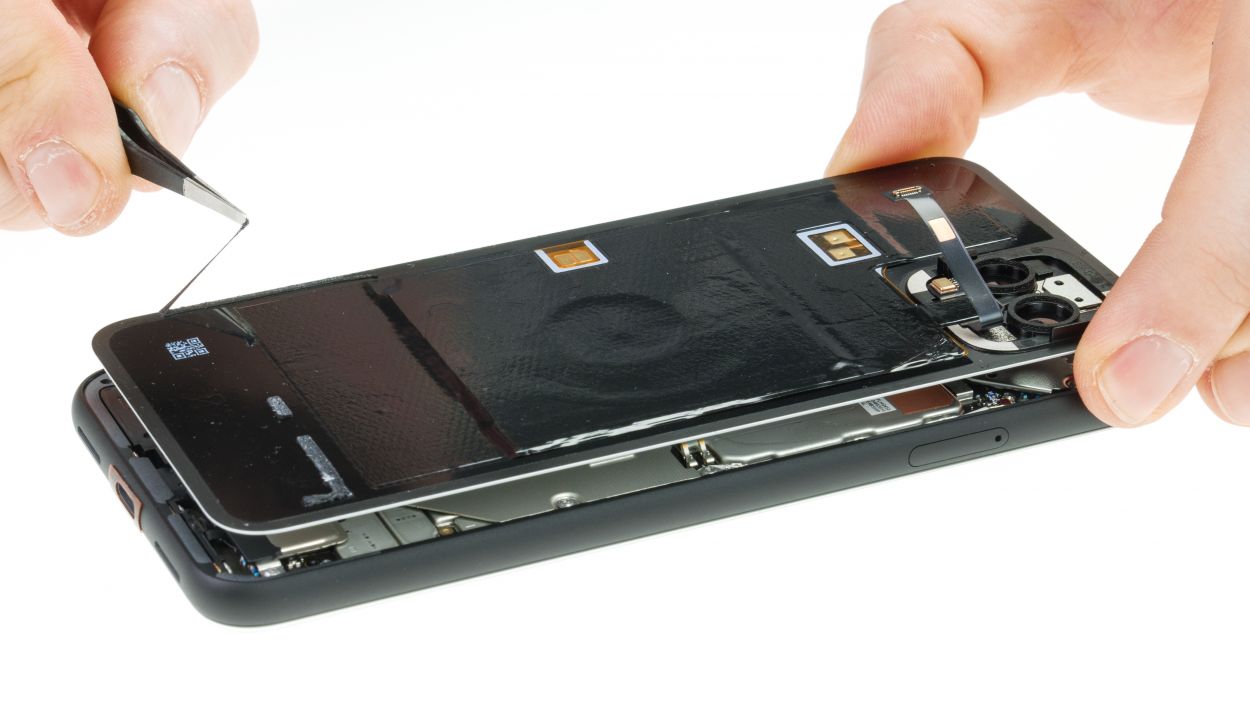
– Time to find the adhesive frame’s sweet spot! Do a test fit to see where it goes – the camera openings and edges are your best guides.
– Peel off the white film from the edges and carefully place the adhesive frame on one side.
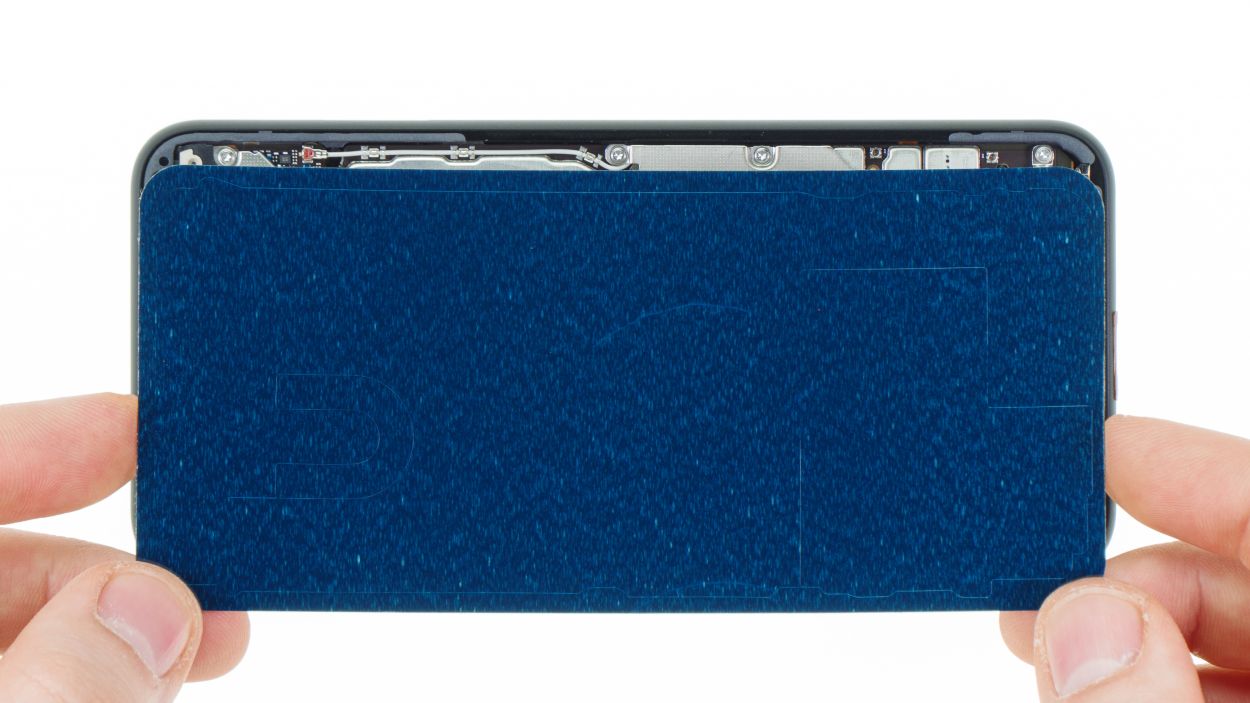
– Slowly slide the adhesive frame into place, making sure it’s smooth and doesn’t stick out anywhere. Take your time!
– Now, press the adhesive firmly onto the frame’s edge. A spudger can help you get a nice, even press along the whole edge.
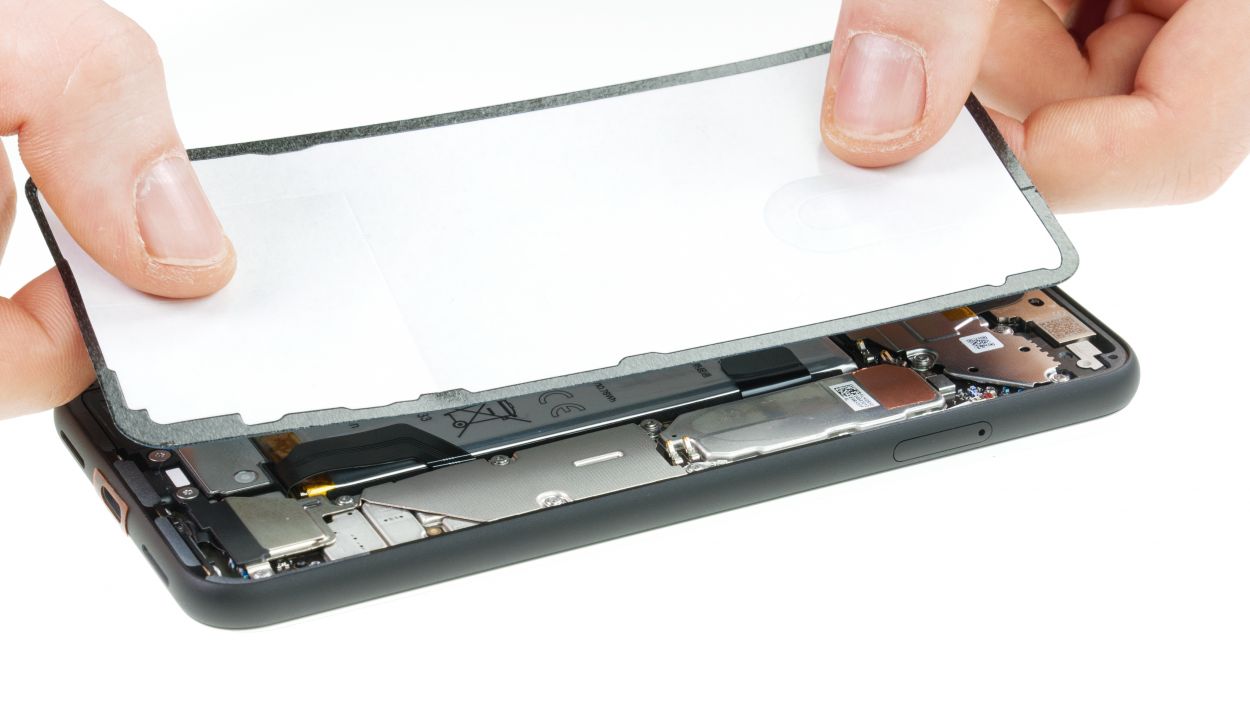
– Peel off the rest of the protective film and the middle carrier layer – almost there!
– Final check! Make sure the glue is perfectly placed, no wrinkles or bumps. If you need a little tweak, go for it! If you need a hand with this step, you can always schedule a repair.
Step 14


2 × 4,0 mm Torx T3
– Gently place the back cover onto your device and connect that flexible cable like a pro.
– Secure the cover in place and tighten those screws to keep everything snug.
Step 15
– Gently fold the back cover over and align it perfectly with the device’s frame.
– Make sure it doesn’t touch the frame or the glue until it’s just right in the center.
– Next, press down on the back cover all around the edge of the frame to ensure the adhesive sticks like it should.
– To wrap things up, give the device a little warmth and then place a few books on top or use clamps for about half an hour. This way, the glue will bond like a champ!