DIY Guide: Replace HUAWEI Honor 10 Screen Step-by-Step
Duration: 60 min.
Steps: 21 Steps
Is your Honor 10 screen looking like a spider web or is the touchscreen just not feeling it anymore? No worries! With our step-by-step guide, you can tackle the repair yourself! We’re swapping out the whole display unit along with the frame, so say goodbye to just the cracked screen. Just a heads up, this repair is a bit trickier since we need to get into the phone through the glass back cover. So, make sure to back up your data, find a clean workspace, and take your time! If you hit a snag, don’t hesitate to reach out via our live chat or drop a comment on the step you’re stuck on. Happy repairing!
Step 1


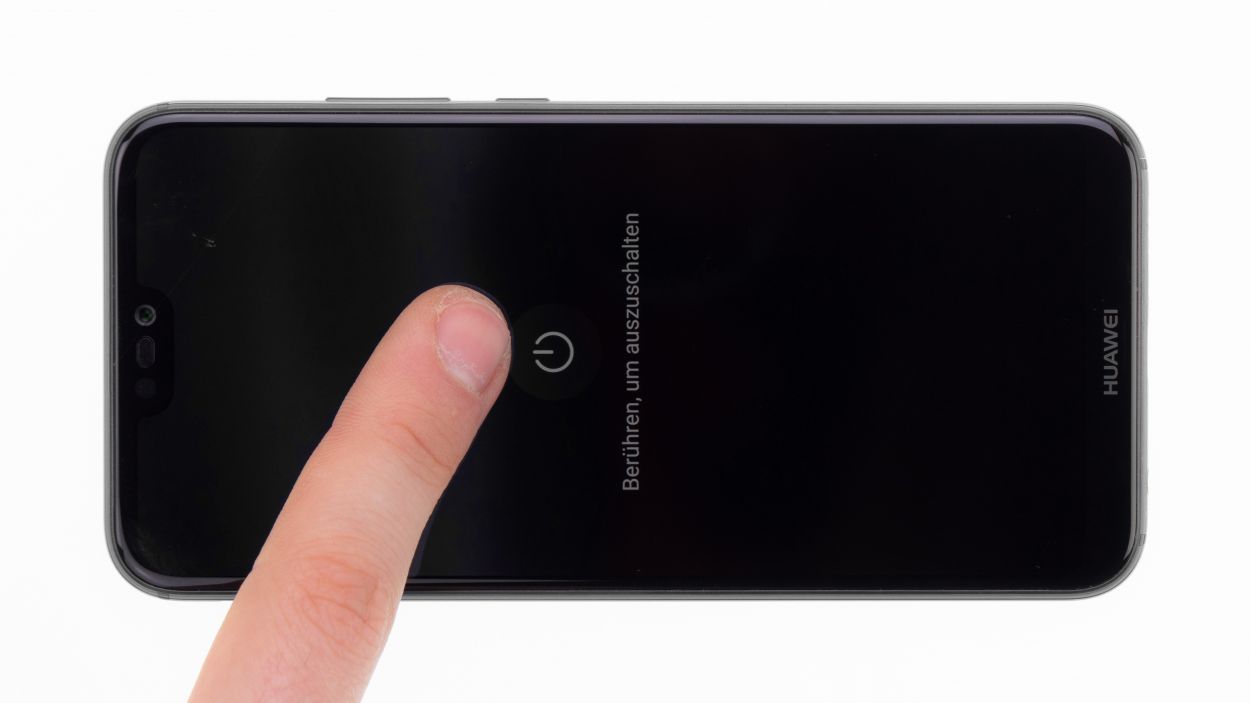
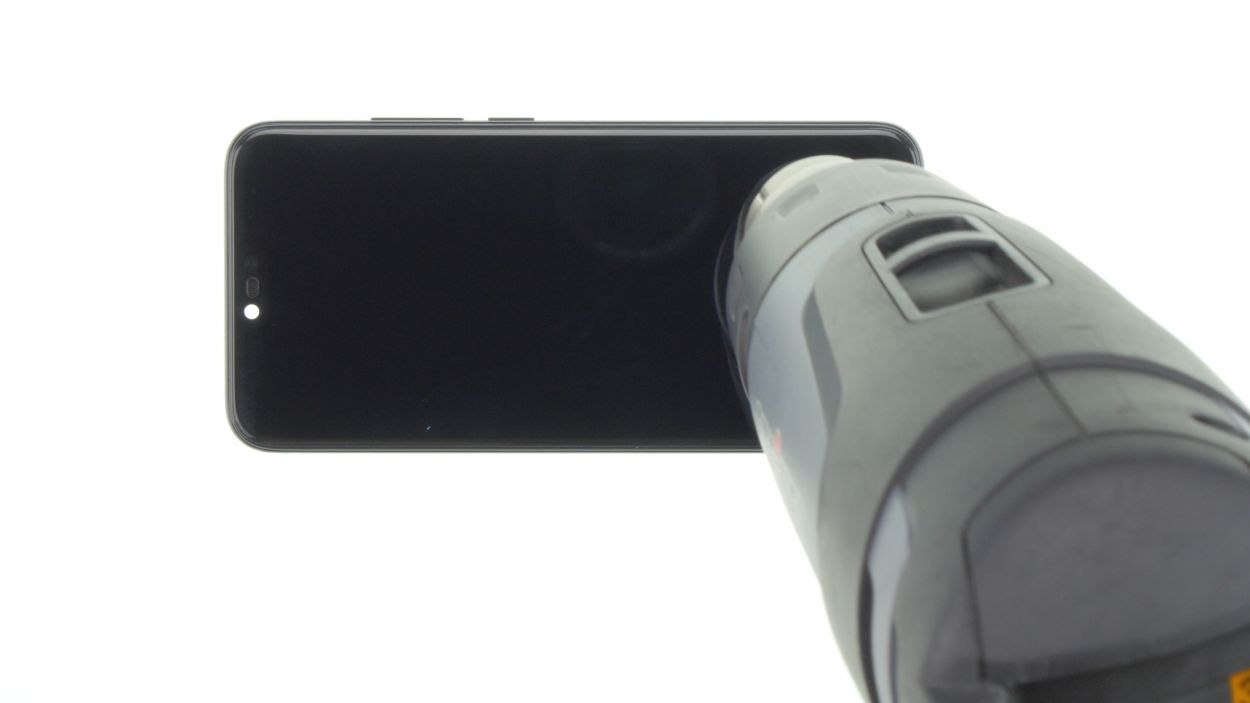
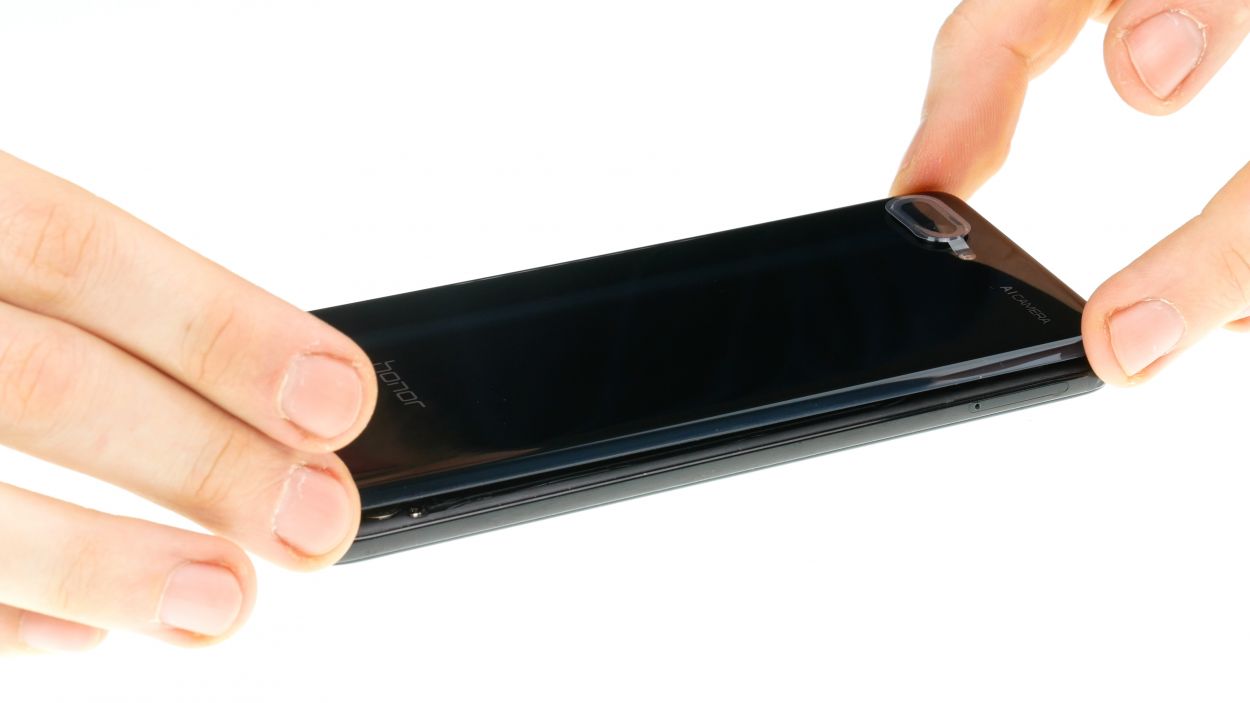
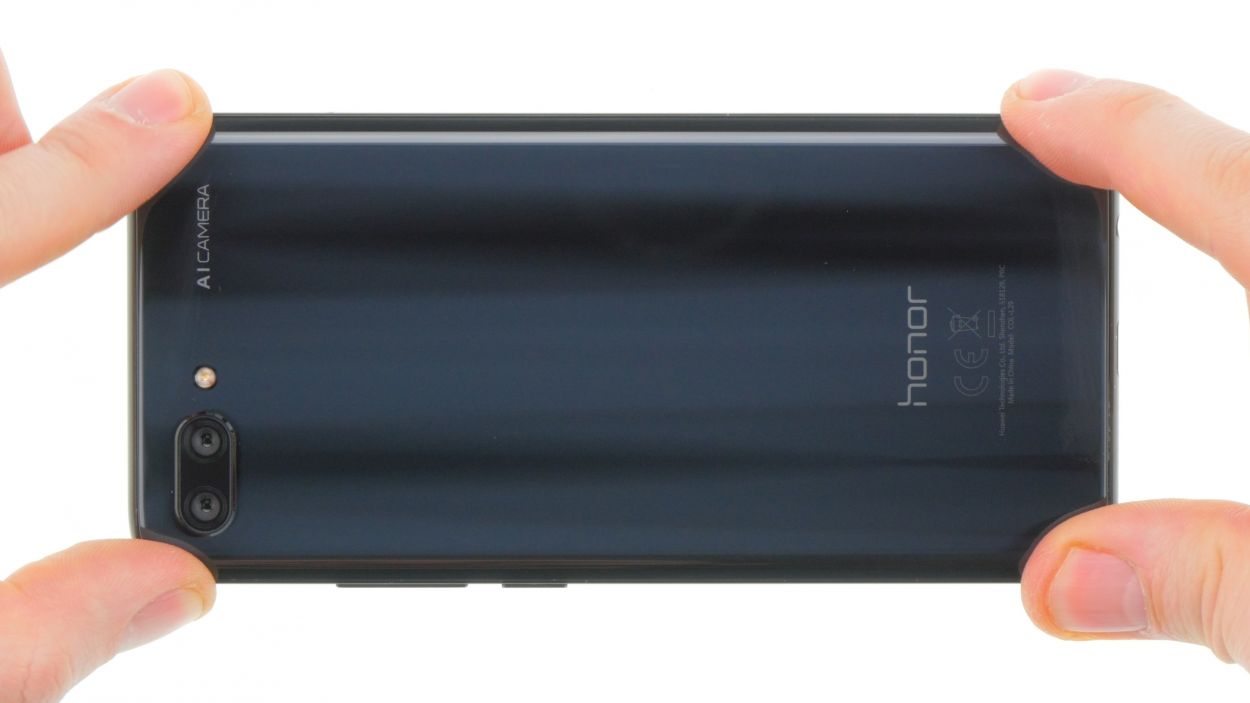
Take a look at the image showcasing a different device because our Honor 10 display decided to take a little vacation. Don’t worry, though! With some handy steps, we’ll have it back in action in no time. If you need help, you can always schedule a repair.
– First things first, let’s power down your device! Hold on to that power button until you see the ‘Power off’ option pop up on the screen.
– When that option shows up, give it a tap with your finger to confirm that you want your Honor 10 to take a little nap. Now, just sit back and relax while you wait for the screen to fade to black.
Step 2
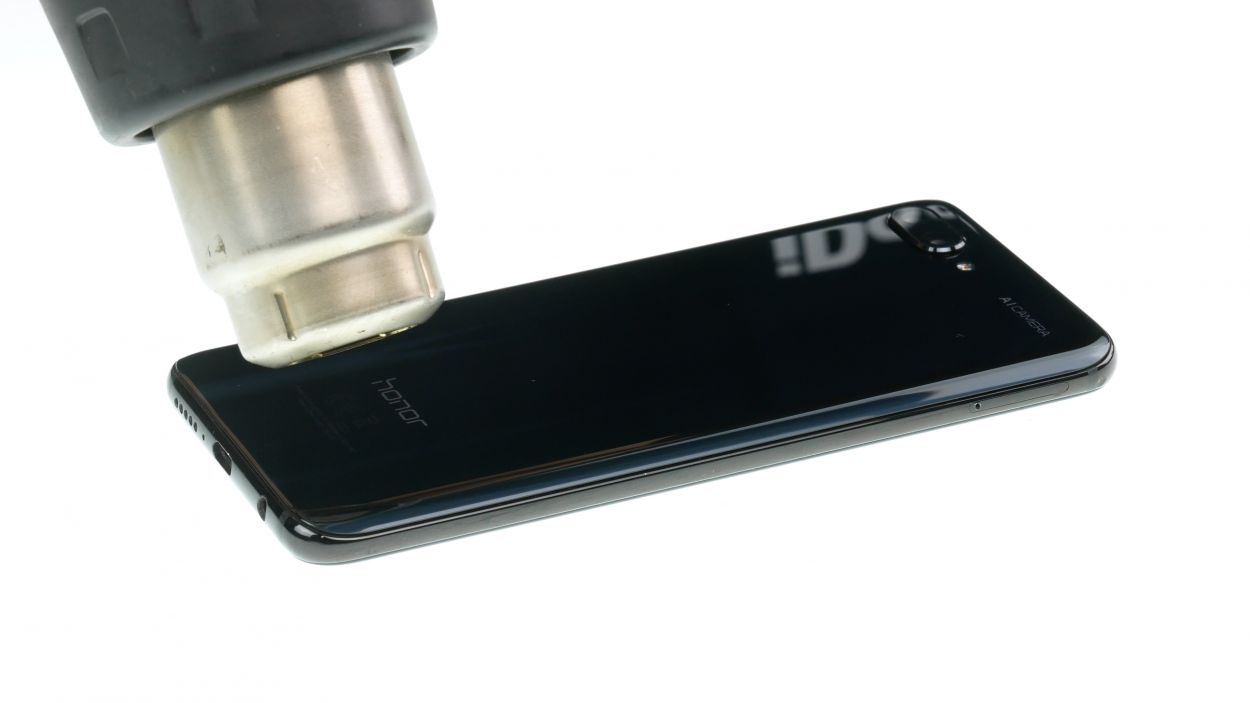
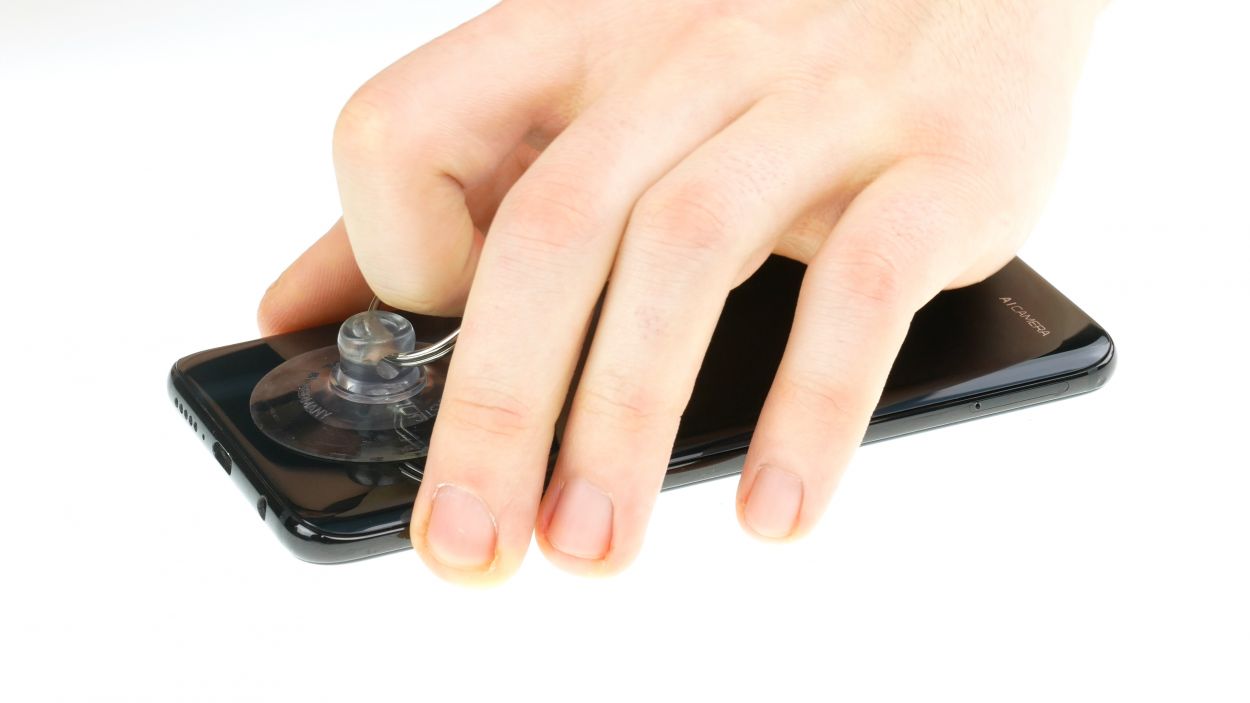
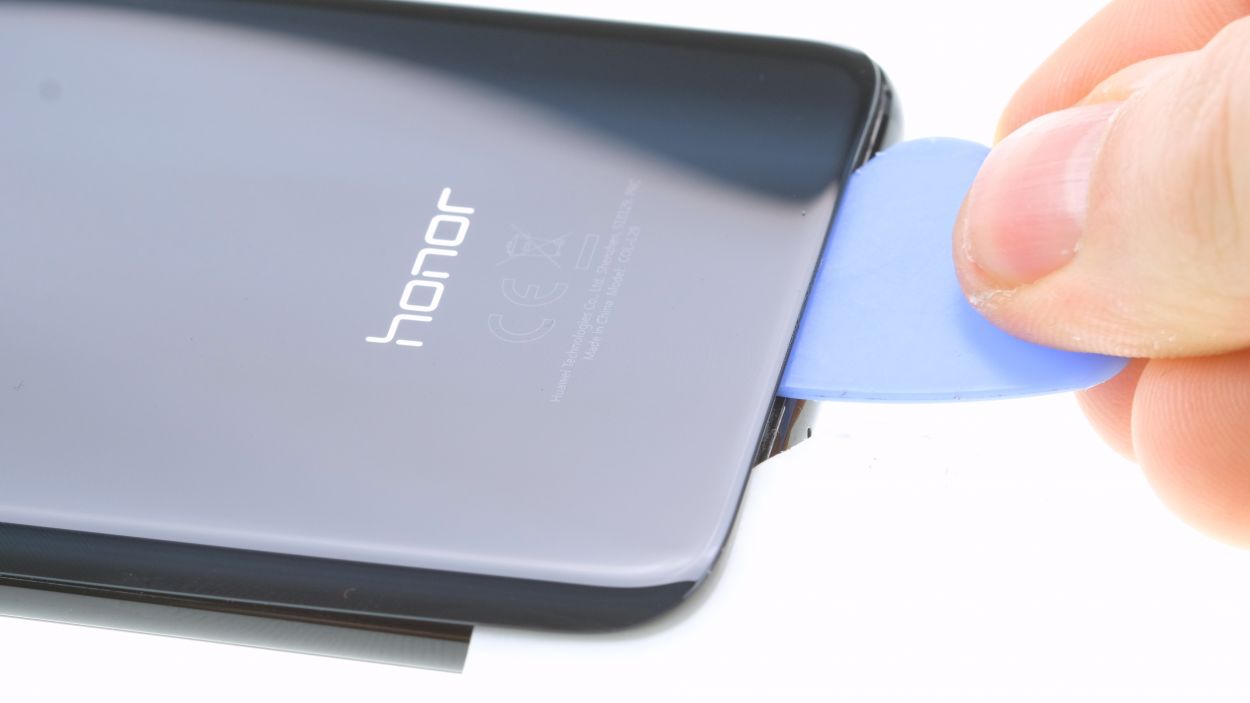
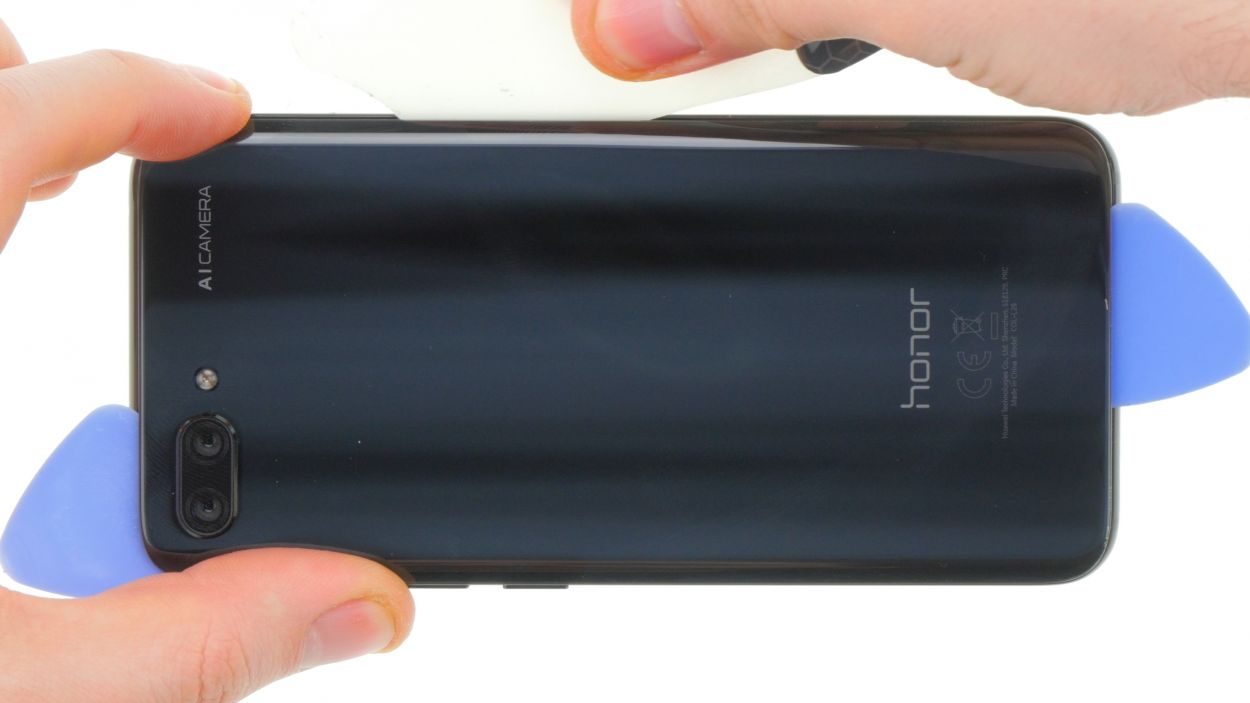
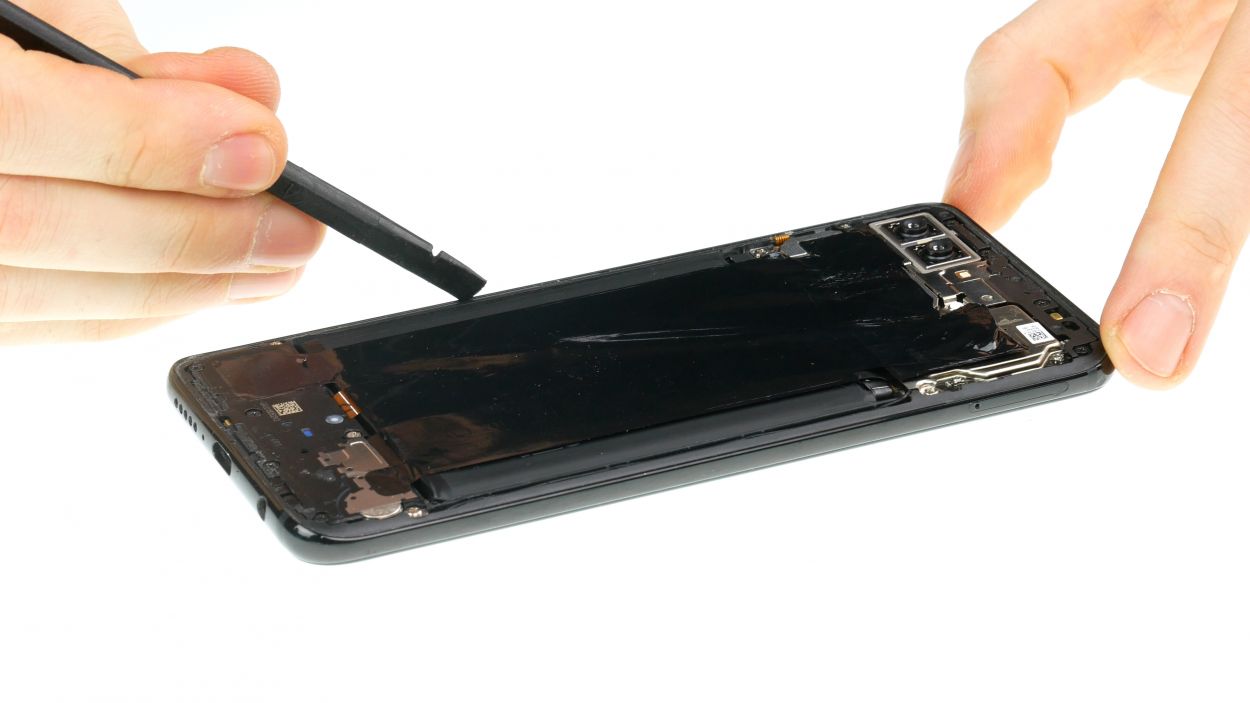
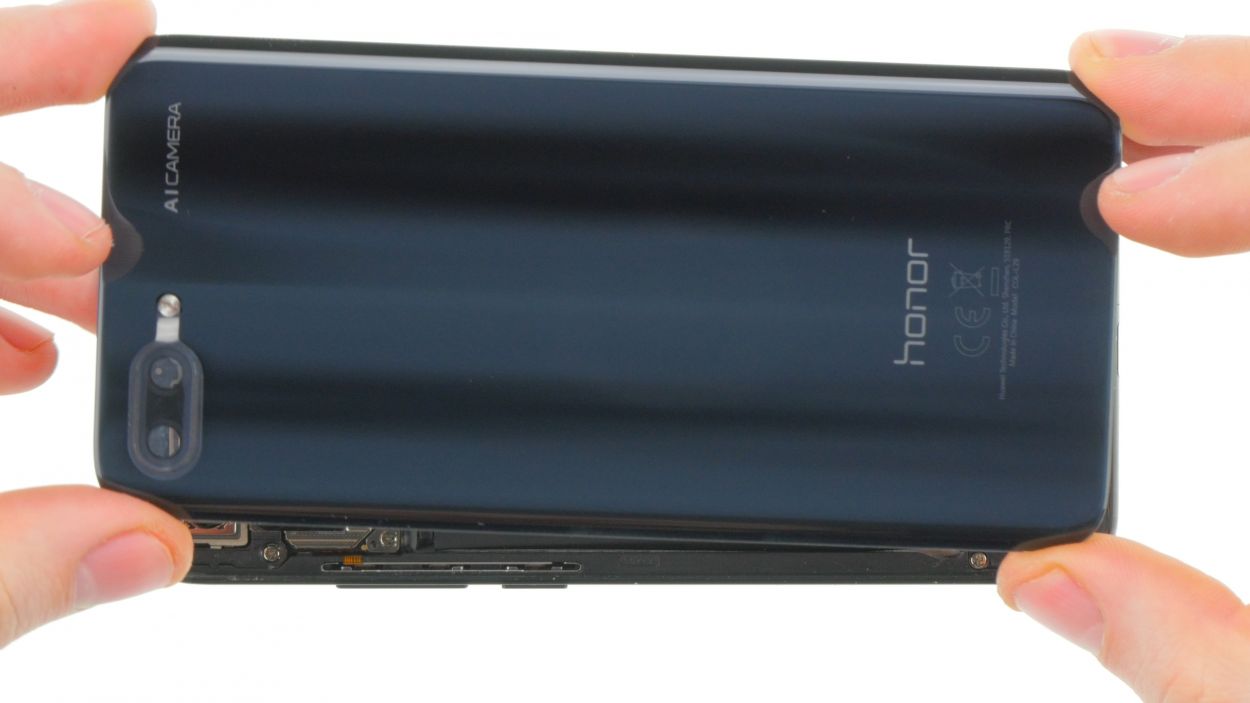
– The back cover is stuck on there pretty well, but don’t worry! Just warm up your device evenly with some hot air to help loosen that glue. A cozy temperature of 60 – 80°C should do the trick. Remember, it should still be comfortable to touch – we want to keep those fingers safe and happy!
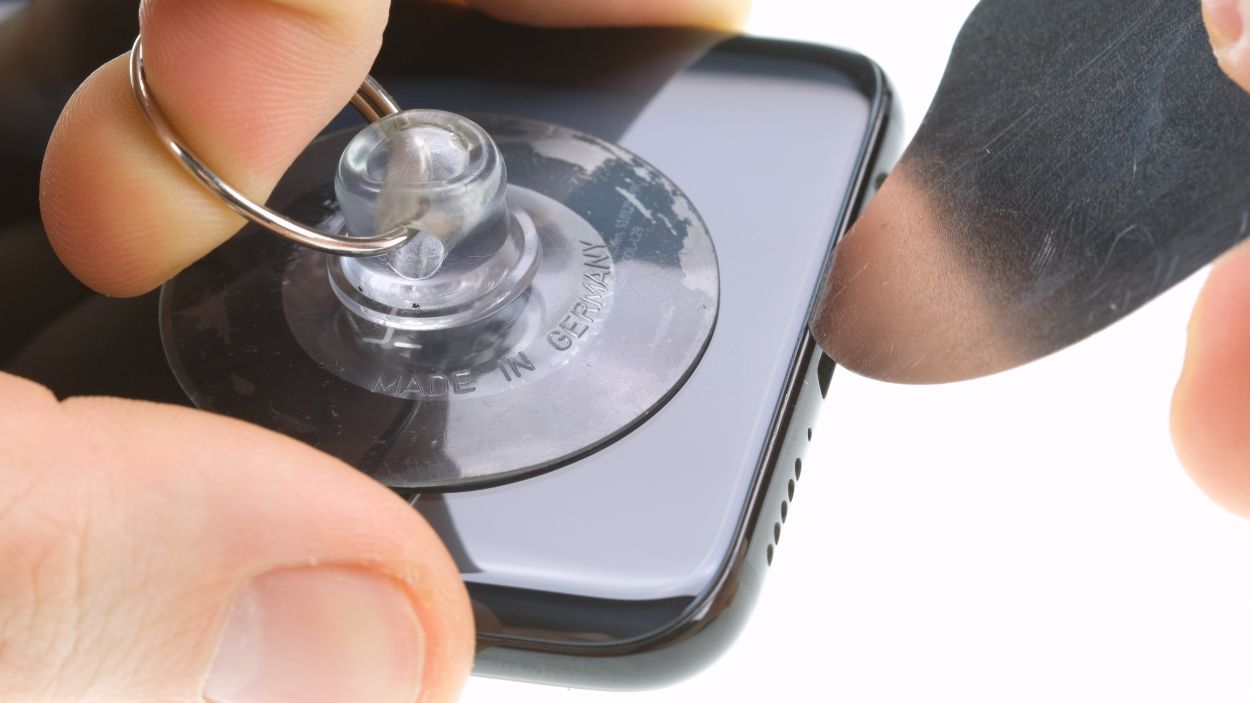
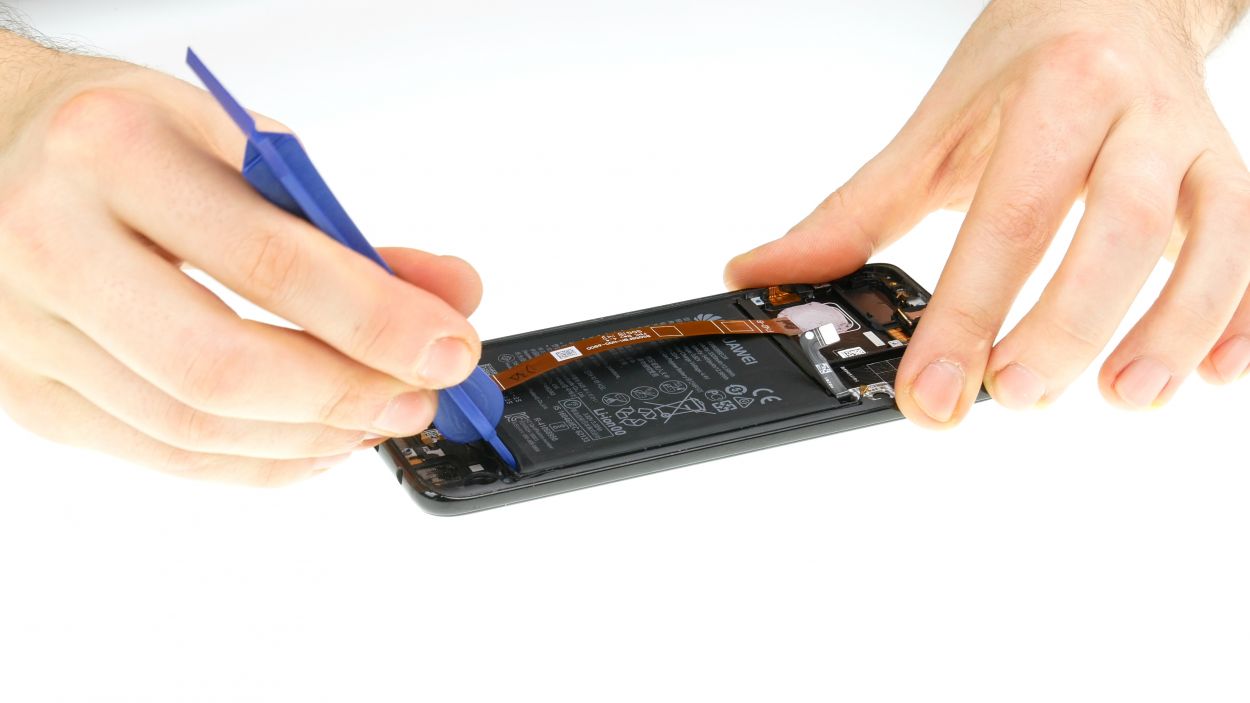
– To get that back cover off, grab a flat and flexible tool like the iPlastix or iFlex. You’ll also want a few picks handy to help unstick the cover all the way around. You’re doing great!
Hey there, repair rockstar! Be gentle with that back cover – it can be a bit fragile. If you need to, go ahead and apply some heat a few times to help it loosen up. Removing it might take a bit longer, but don’t rush it! Take your time and work carefully to avoid any damage. And remember, if you need a hand, you can always schedule a repair
The iPlastix is crafted from plastic, which means it’s gentle on your device and won’t leave any scratches. Just a heads up, it’s a bit on the soft side and might take some finesse to get it in place!
Step 3

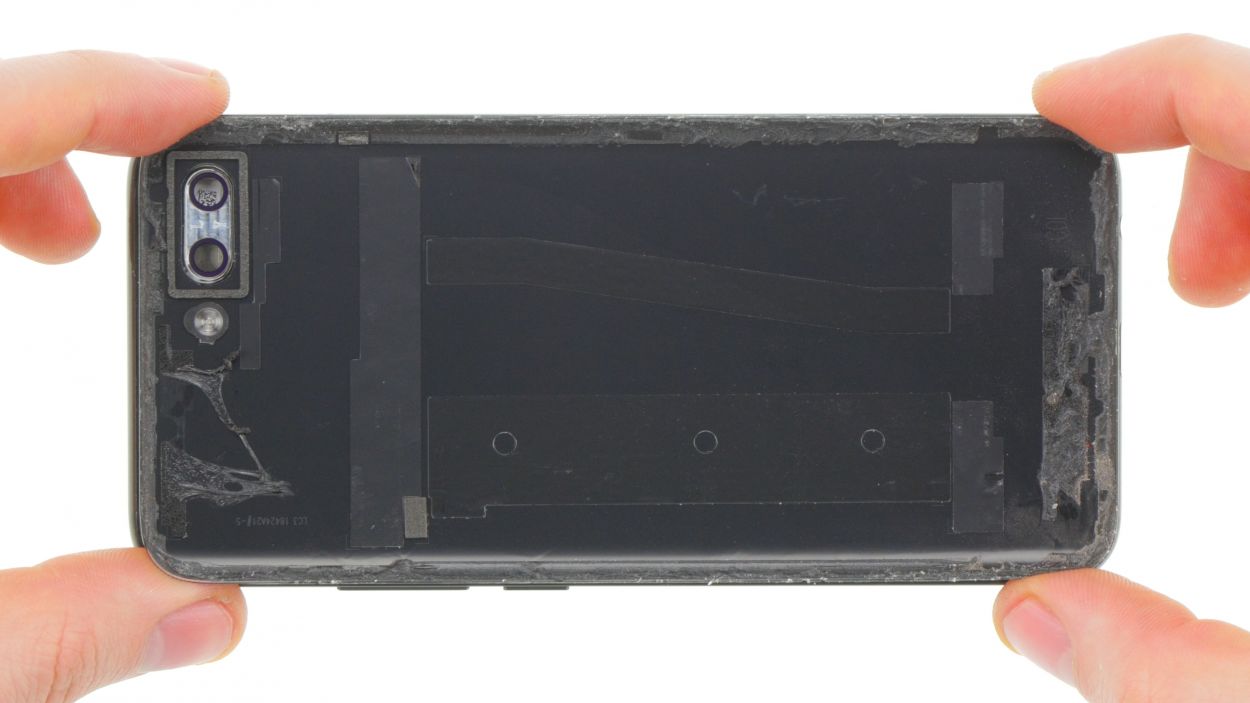
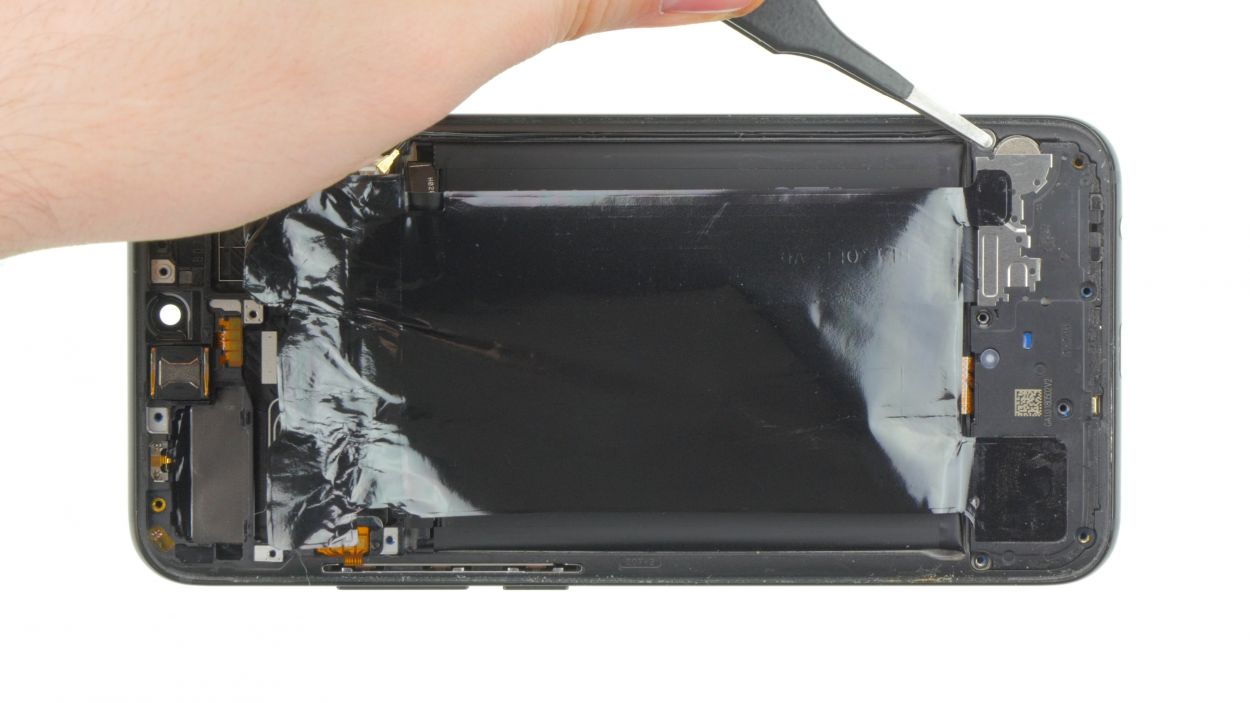
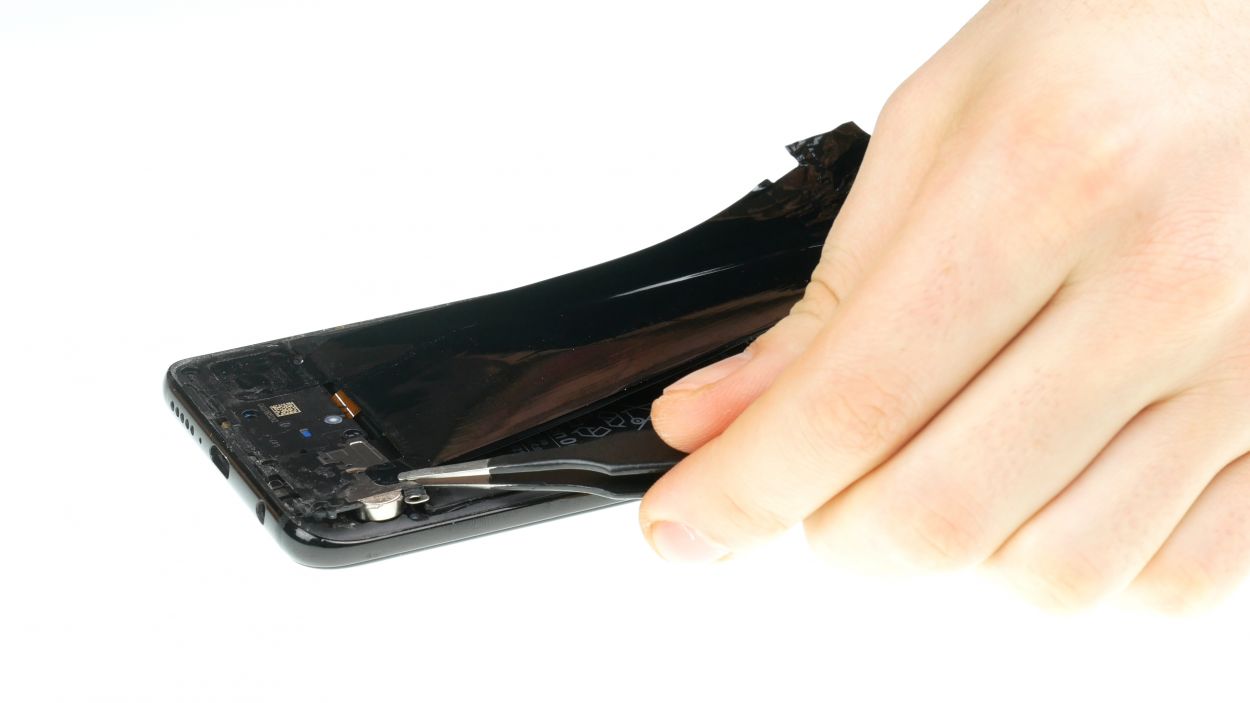
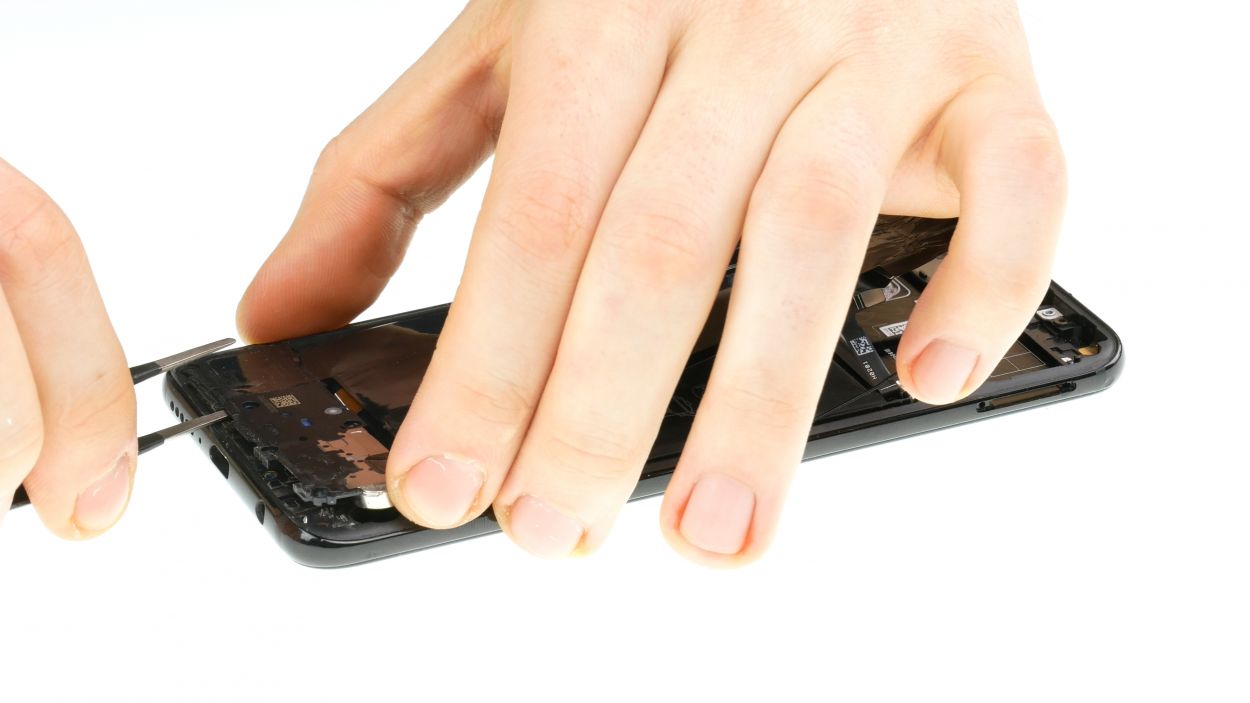
– Gently peel back the foil on the top side and let it drop down like it’s taking a break.
– Feeling stuck? Warm up that adhesive again to make the process smoother and breezier!
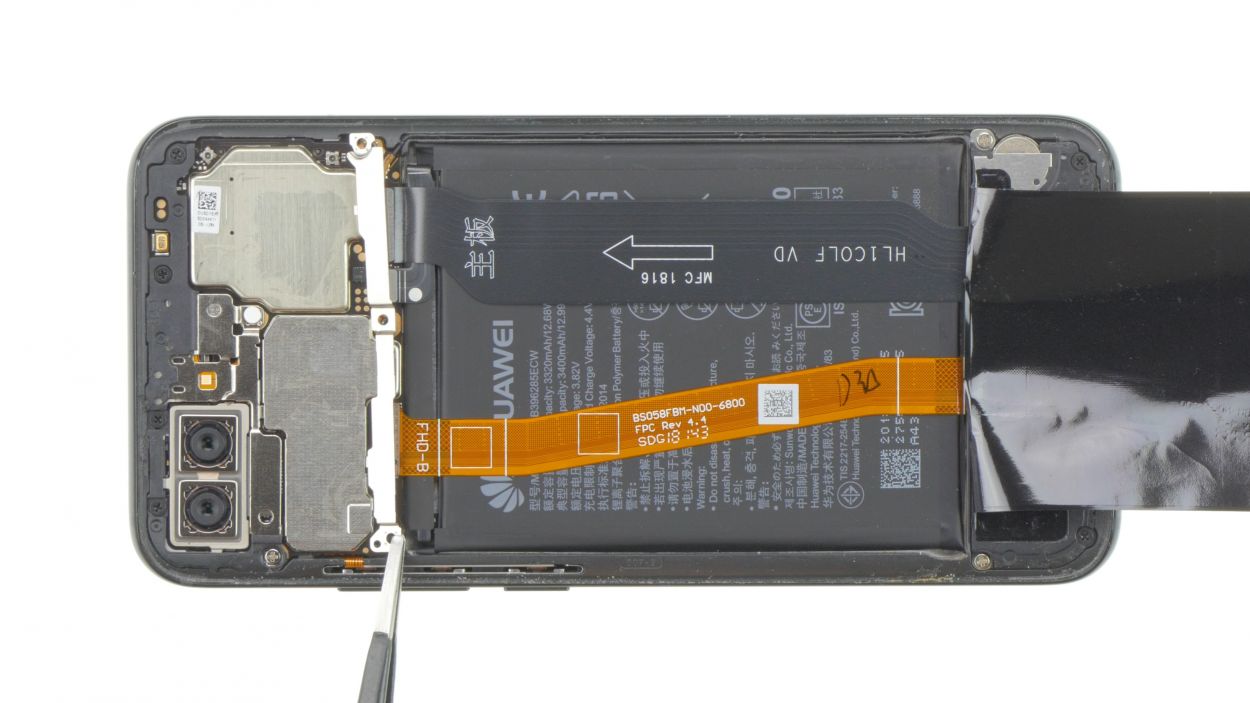
Step 4


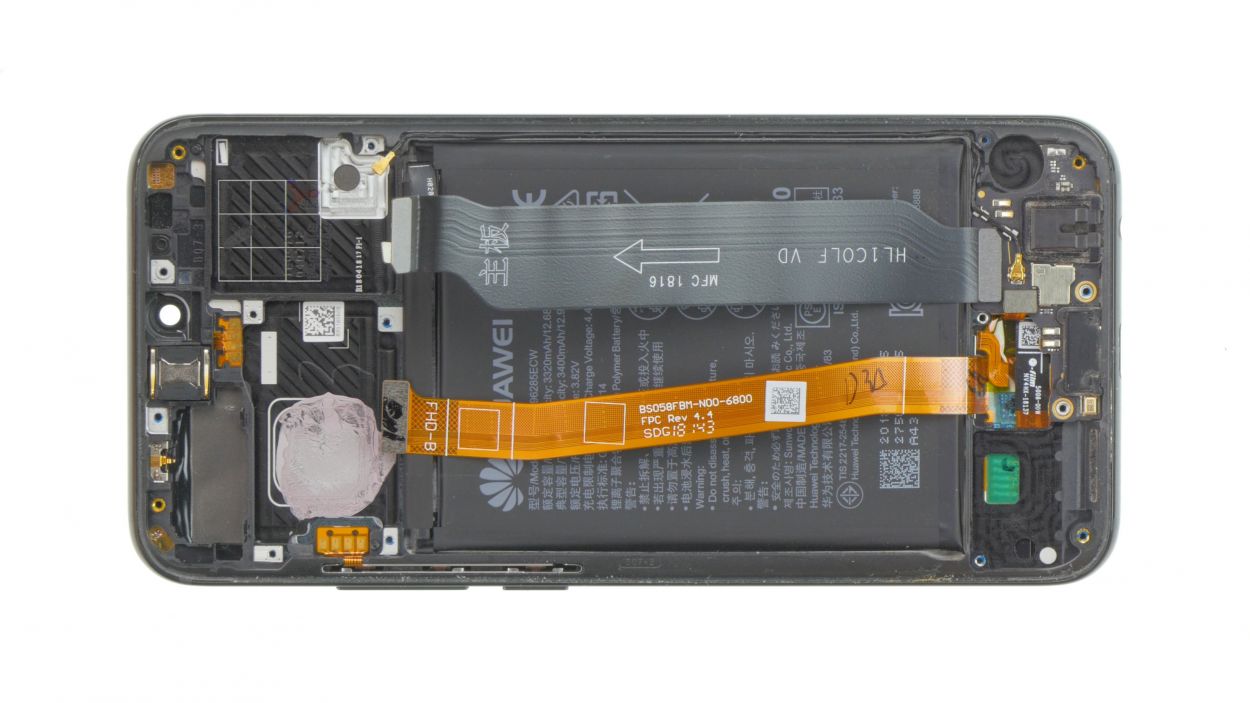
– Grab your trusty Phillips screwdriver (PH00) and let’s tackle those Phillips screws! Once they’re out of the way, gently lift off the cover. Just a heads up, it’s attached at the top, so give it a little nudge. Remember to keep all your bits and bobs in the same spot on your magnetic pad to avoid any wandering screws.
– Now, take your spudger and with some finesse, disconnect the battery contact from the motherboard. A plastic tool here is your best pal to keep things safe from any sneaky short circuits.
3 × 2,8 mm Phillips
Battery connector
Alright, before you dive into the repair adventure, make sure to unplug that battery contact first! It’s like giving your device a little nap, helping to avoid any surprise short circuits or accidental power-ups while you’re working your magic.
When you’re prying things open, make sure to start from the side that’s free of tiny components on the mainboard. This little tip will help you steer clear of any accidental damage!
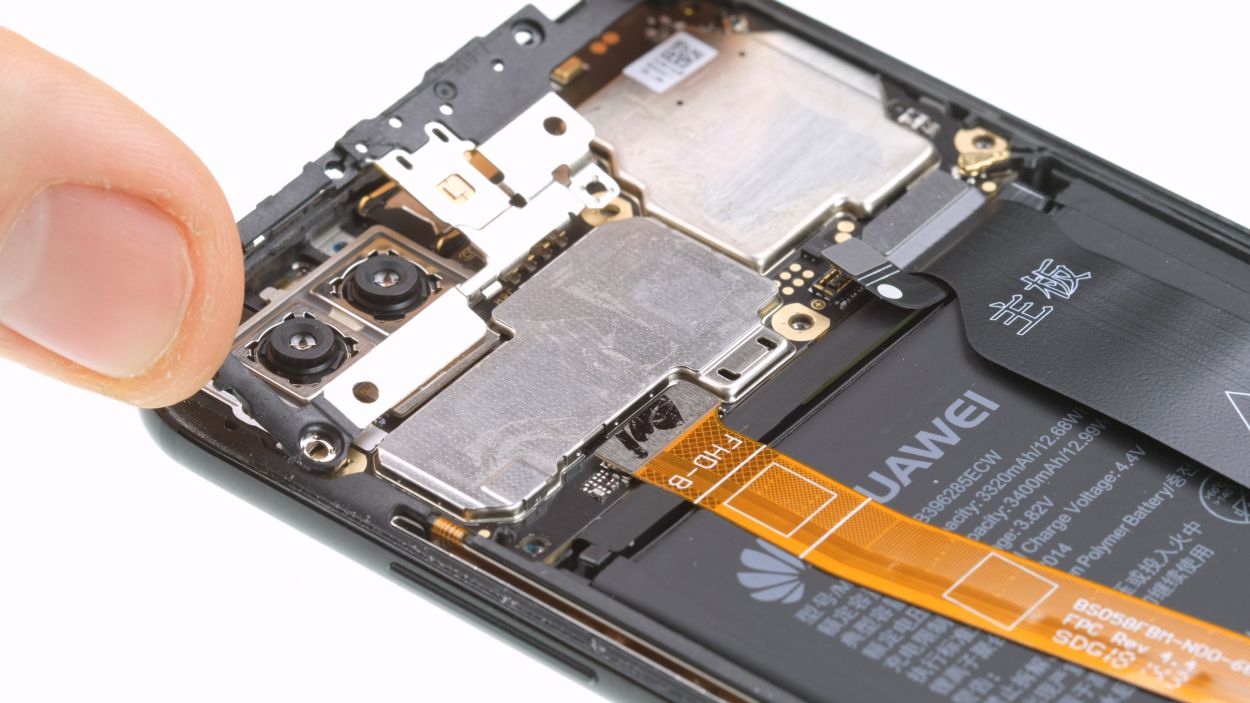
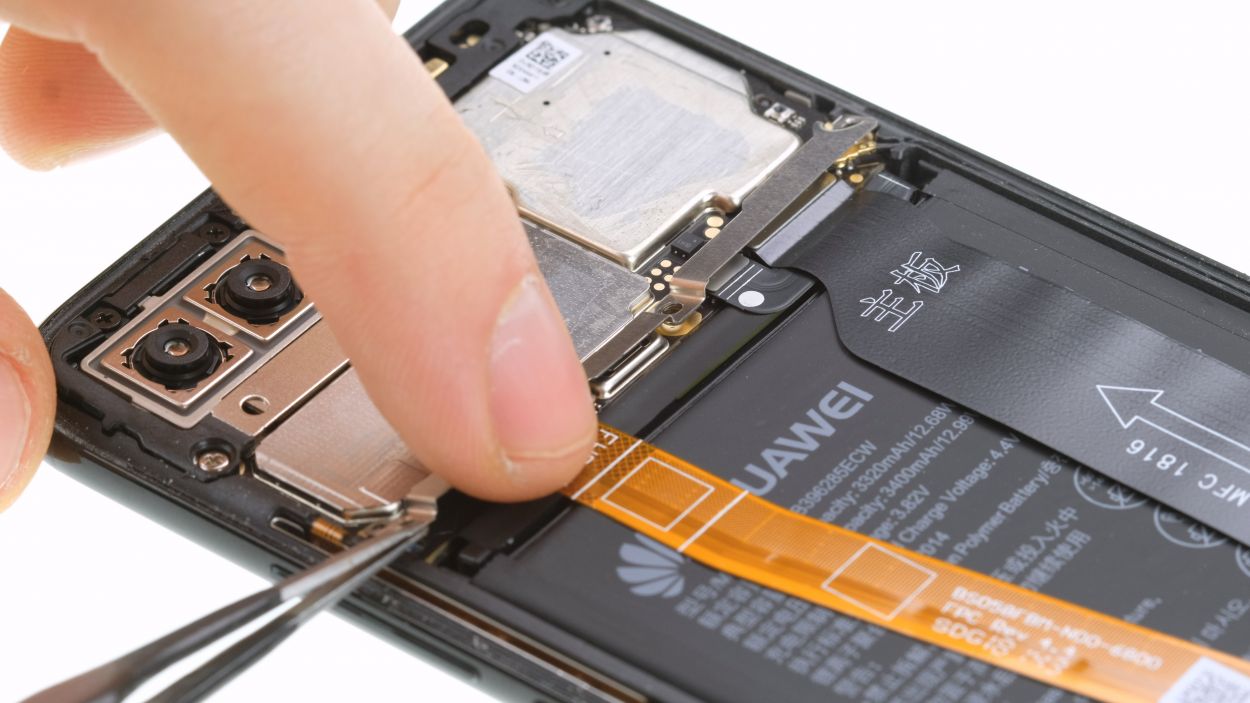
Step 5
4 × 3,4 mm Phillips
2 × 2,8 mm Phillips
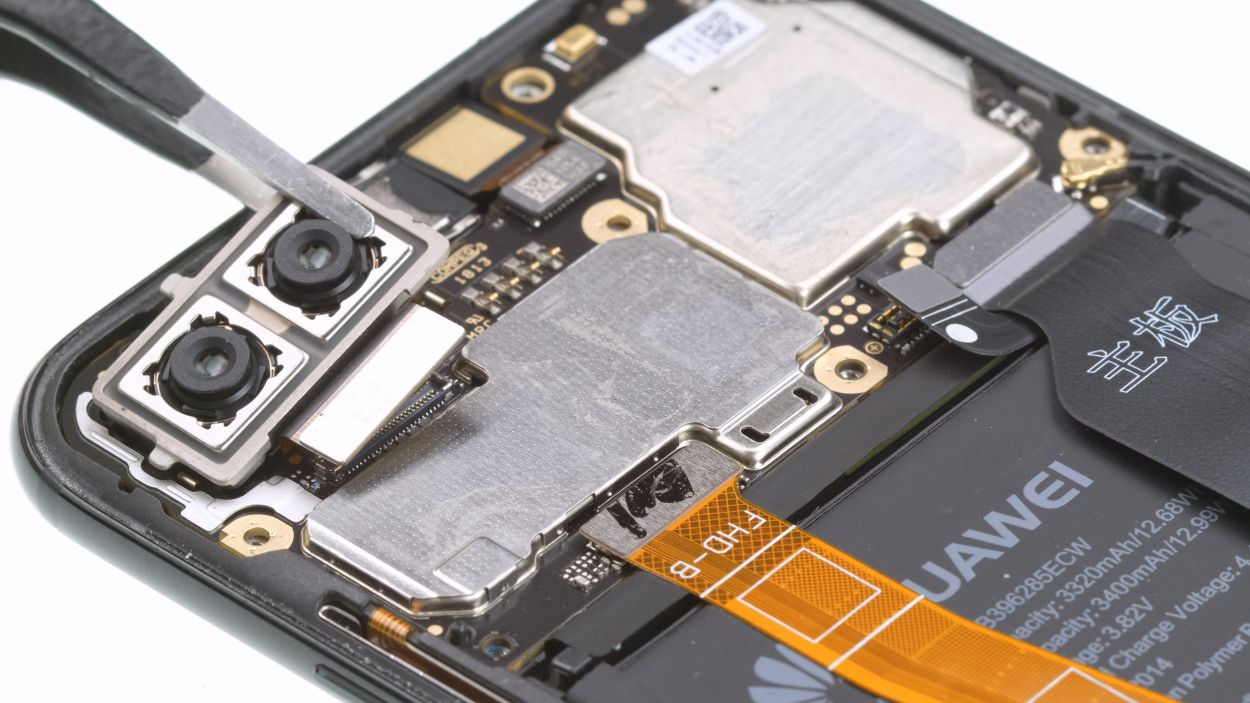
Camera connector
Watch out! The screws in the Honor 10 come in all shapes and sizes. Keep them in their own little corners so they don’t mingle and cause a mix-up!
Make sure that no dirt or fingerprints get on the camera lenses.
– Start by loosening all those Phillips screws! Keep an eye out for one that’s sneaky and hiding behind a little white sticker.
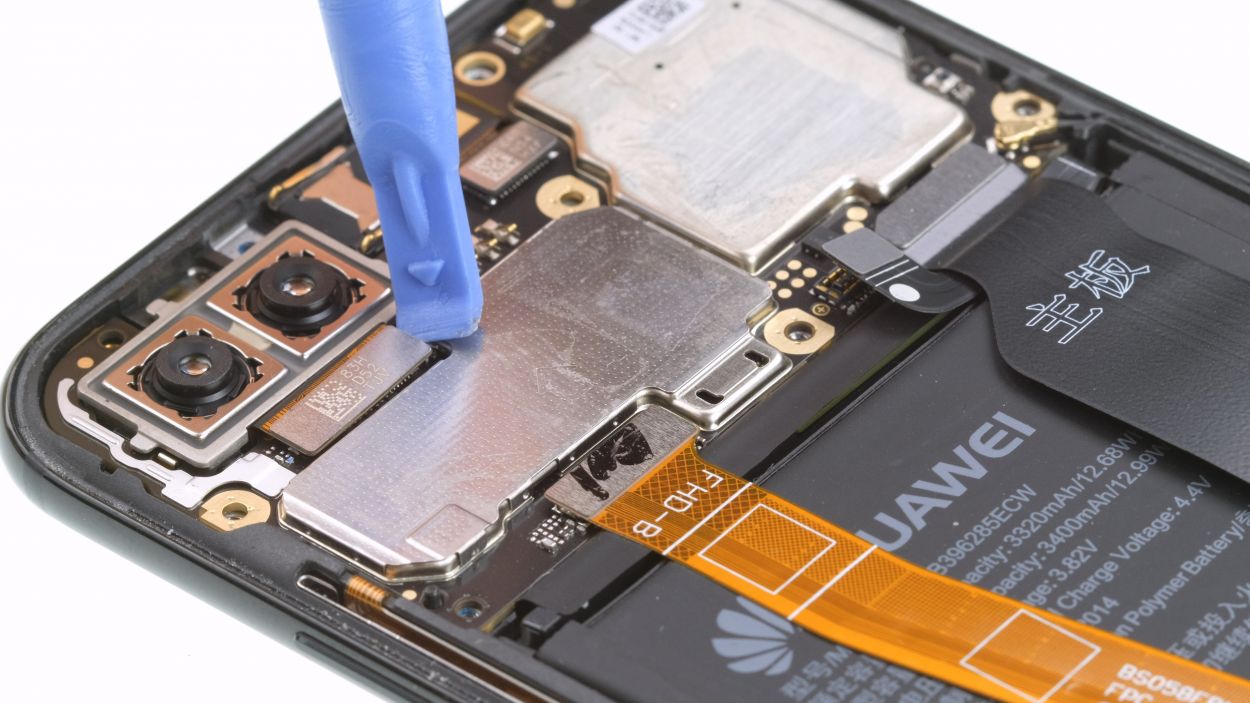
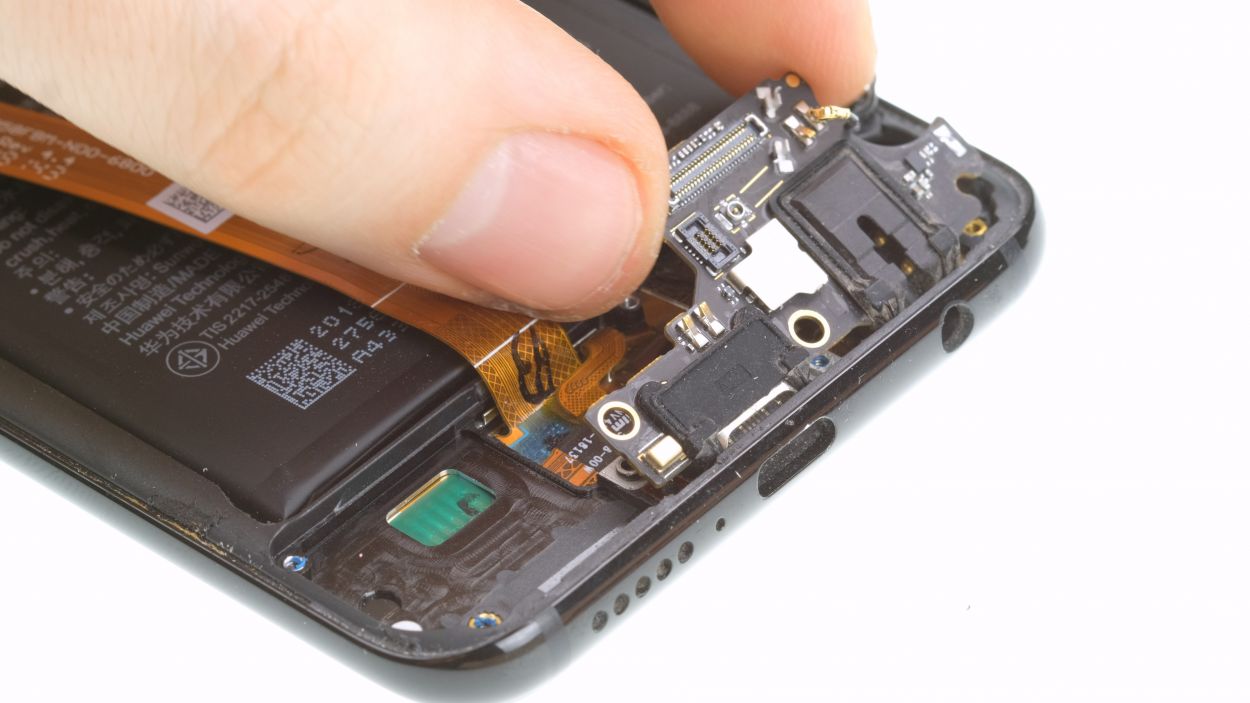
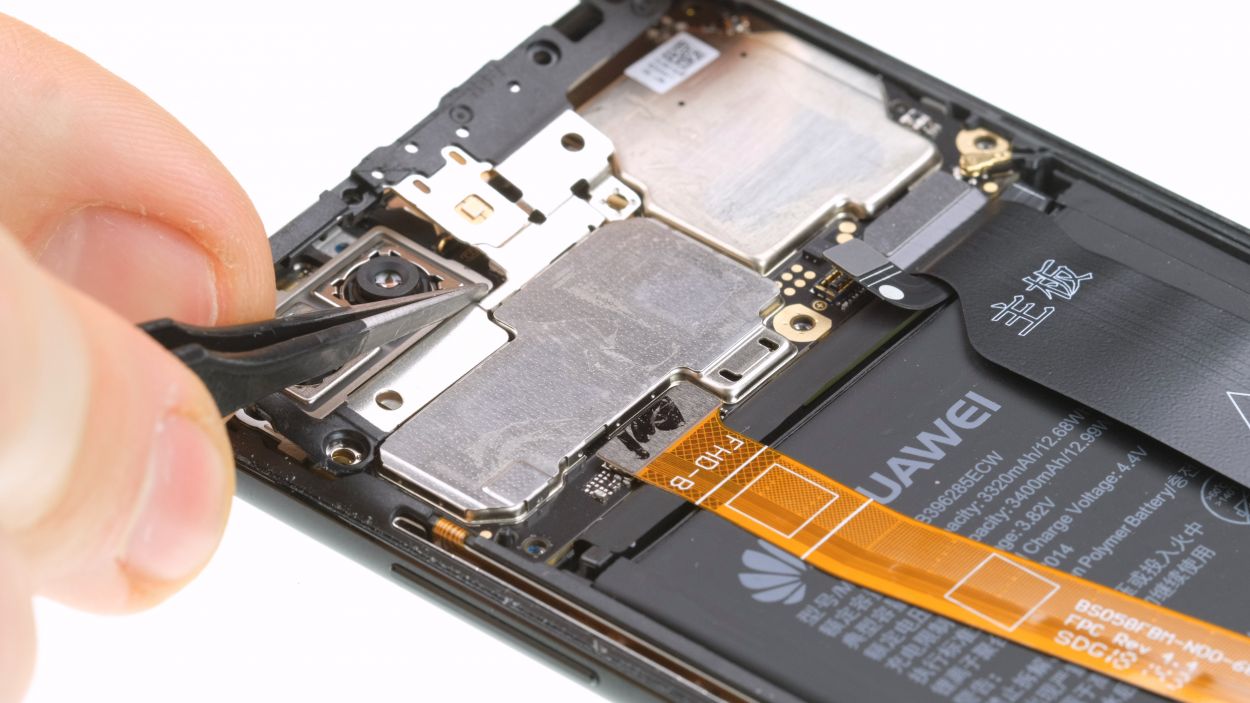
Step 6

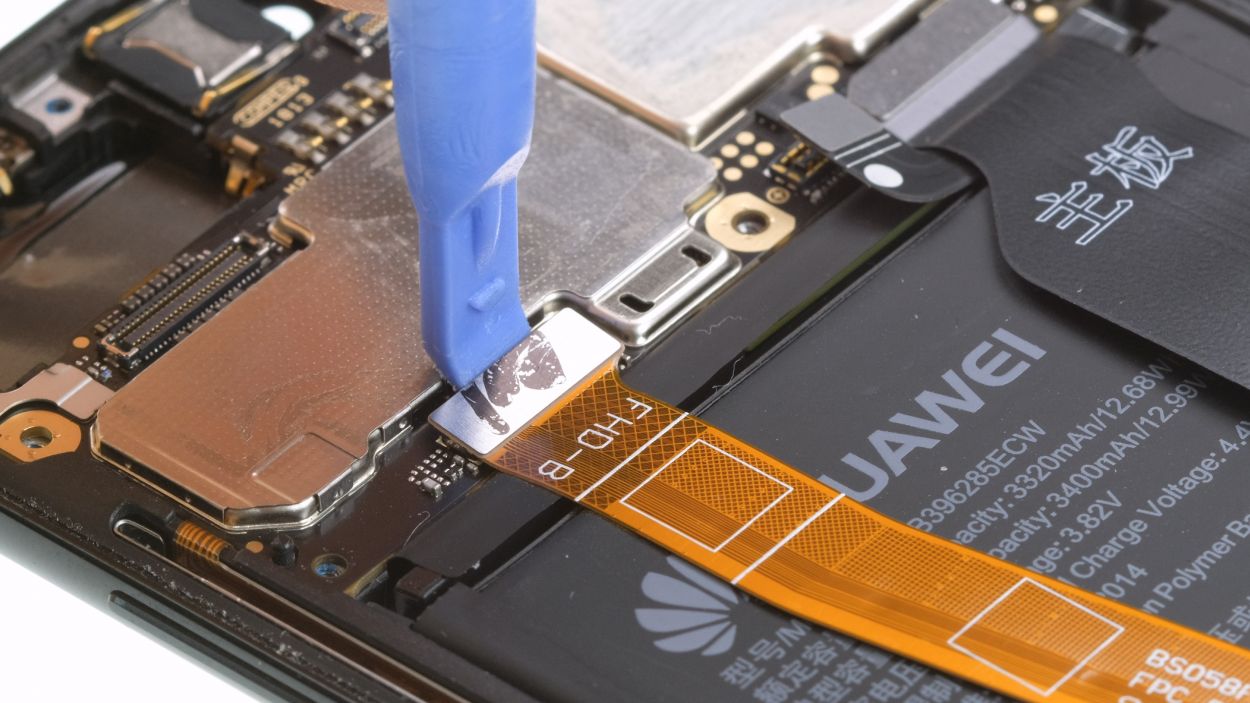
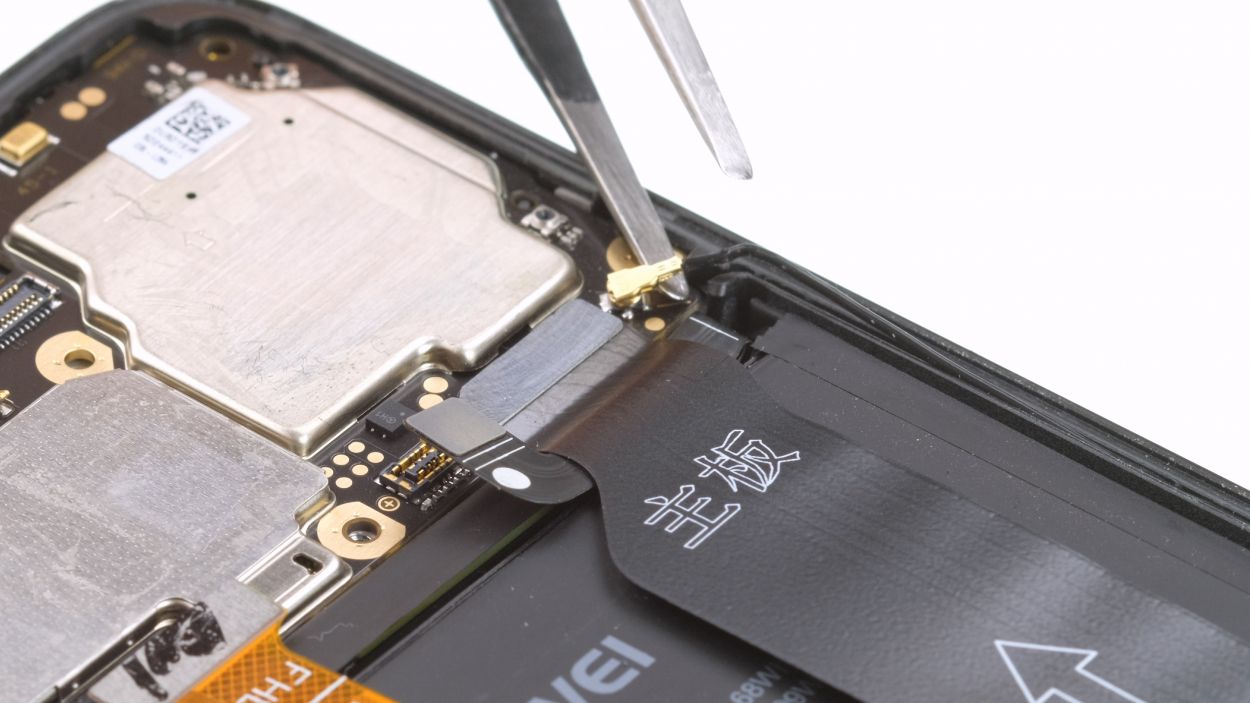
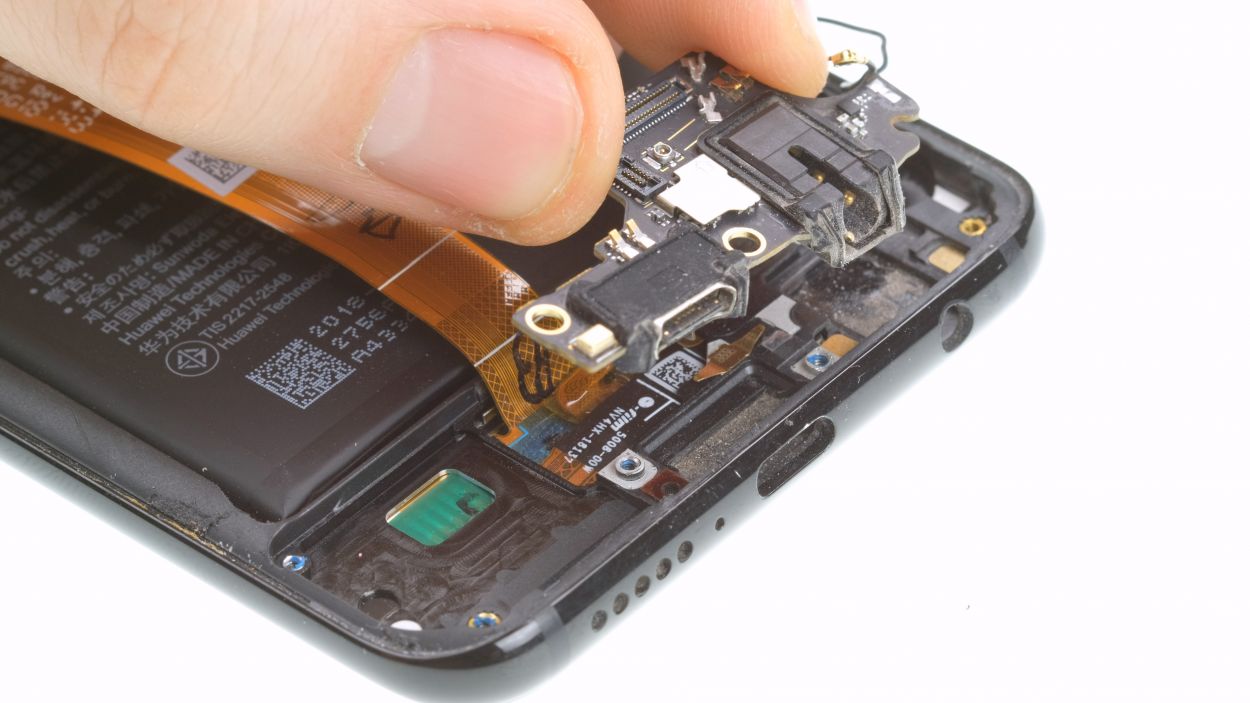
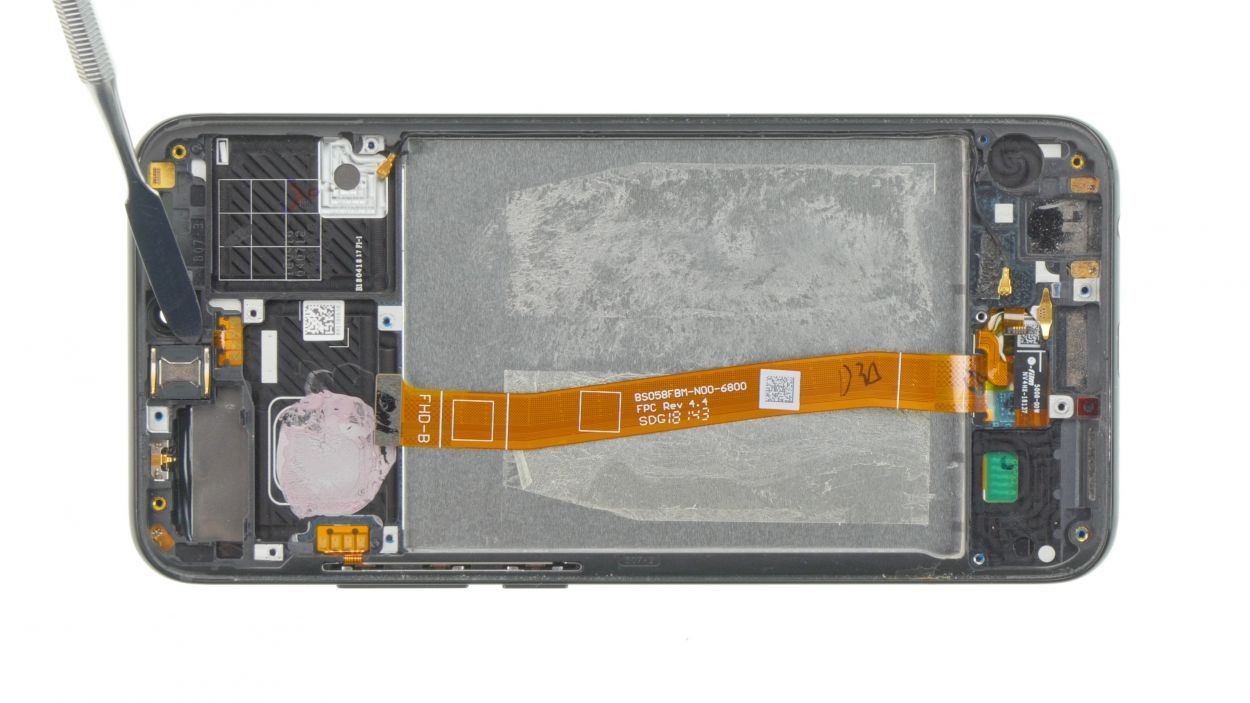
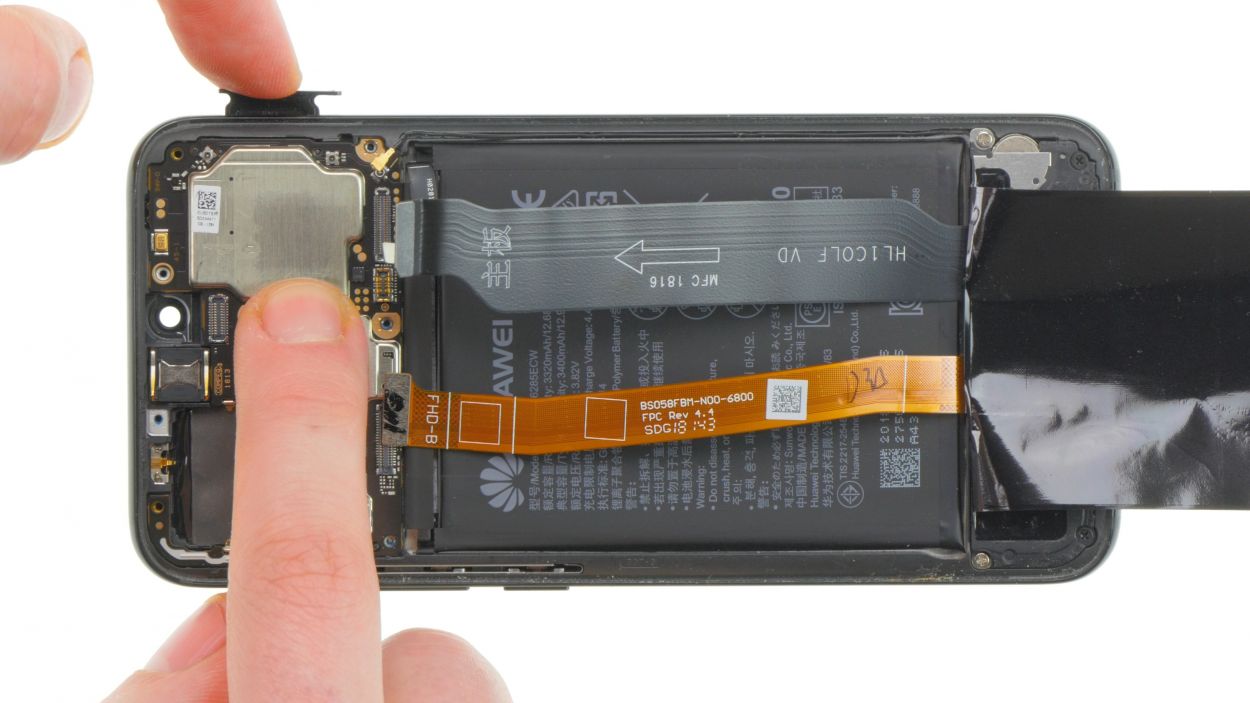
– Gently loosen the flexible flat cable connections with your trusty spudger. These cables are the lifelines between the display and the USB board connecting them to the motherboard.
– Carefully twist the antenna cable loose using tweezers. Remember, no prying with a spudger here—let’s keep that circuit board socket safe and sound.
– If the SIM card holder is still hanging out in your device, it’s time to give it a nudge and remove it.
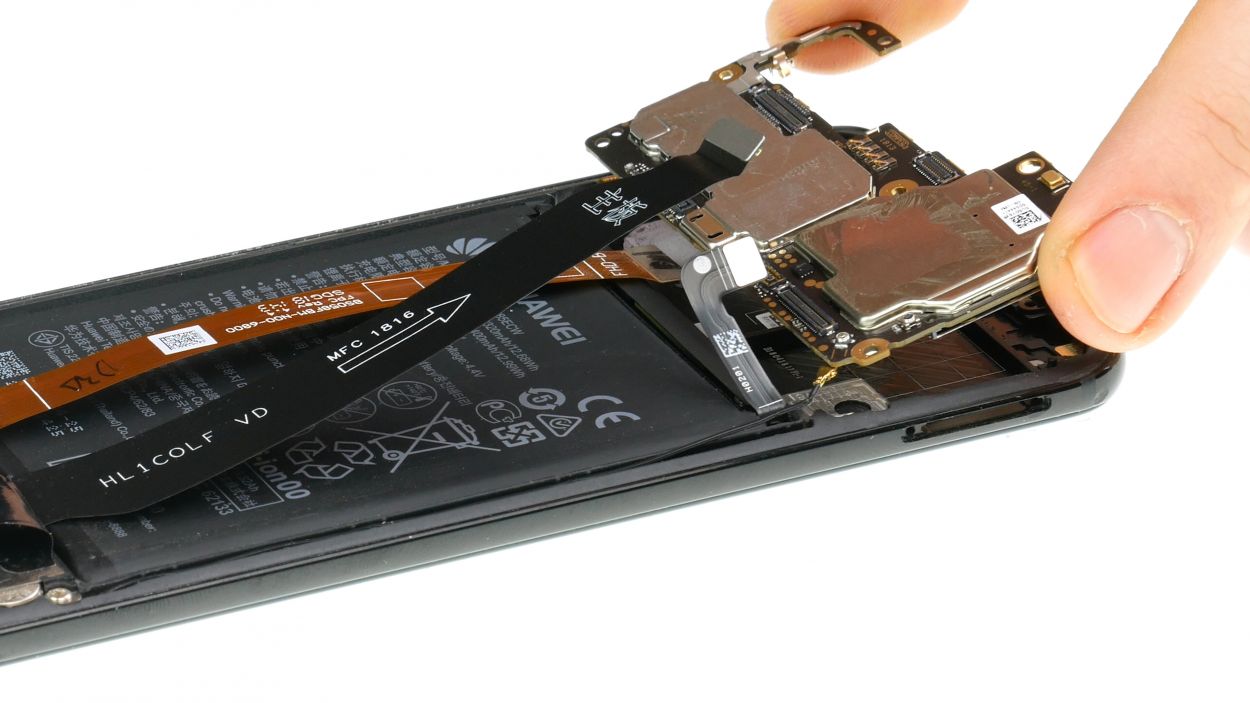
– Now, with a gentle touch, lift the board ever so slightly and then pull it out like a pro.
Step 7

4 × 2,8 mm Phillips
3 × 3,4 mm Phillips
– First, let’s fold over that heat shield like a pro!
– Next up, loosen those Phillips screws of various lengths. A magnetic mat can be your best buddy here, keeping everything sorted so you won’t mix them up when it’s time to put them back.
– Now, gently lever the speaker at a few points until you can lift it just enough to pop it out.
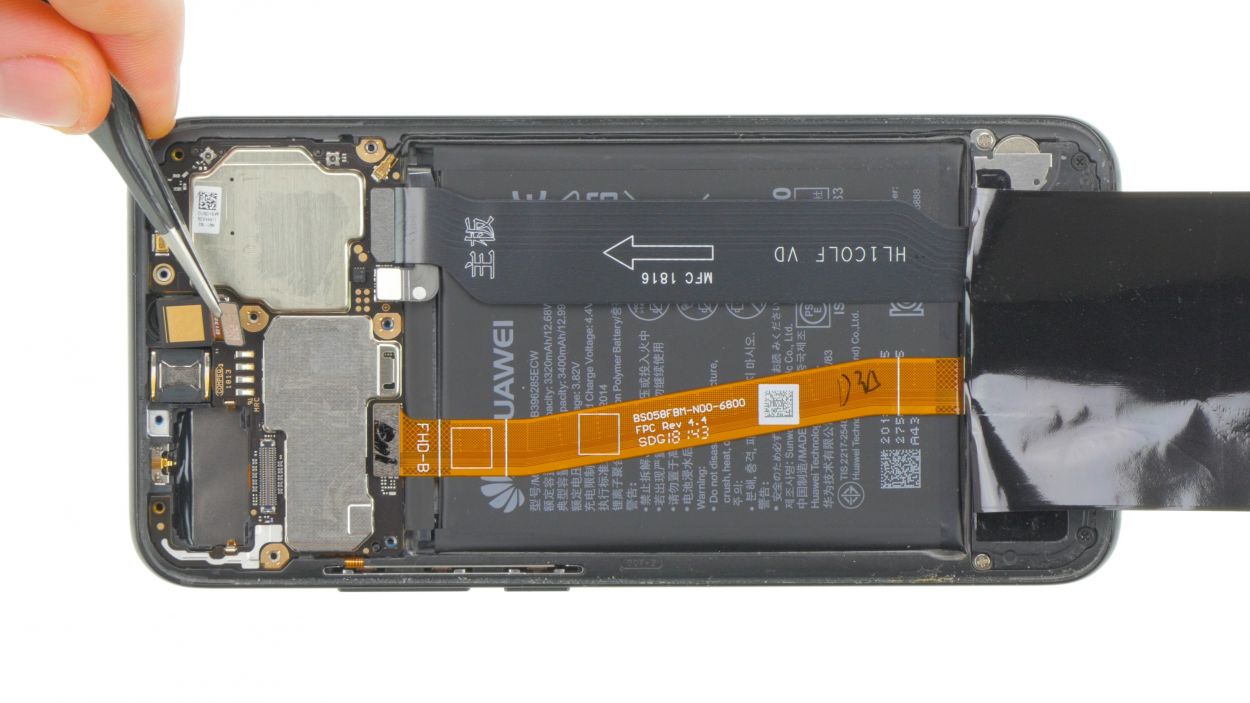
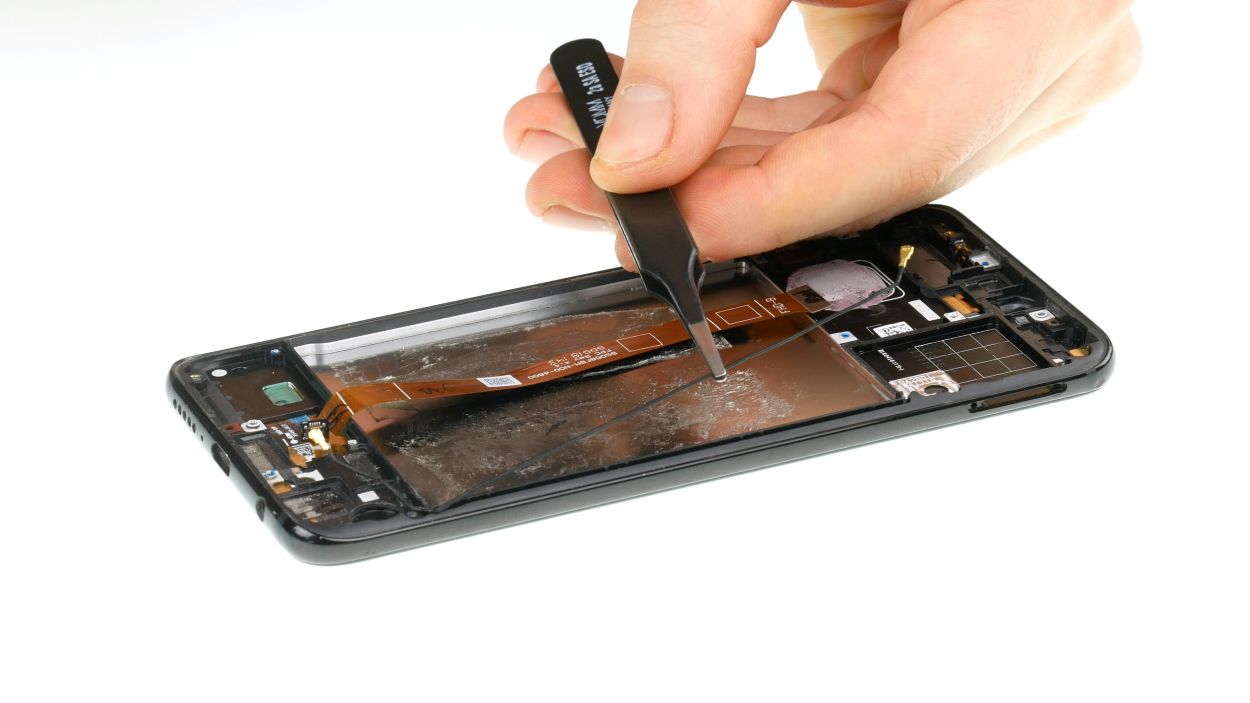
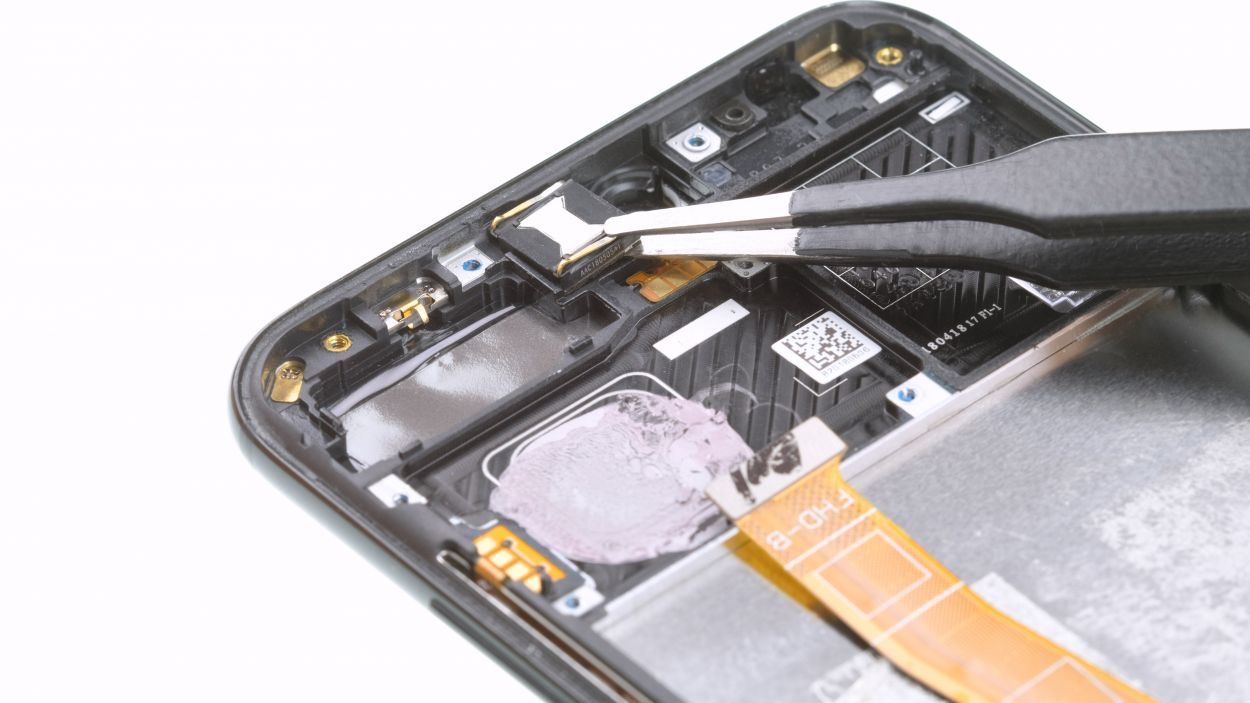
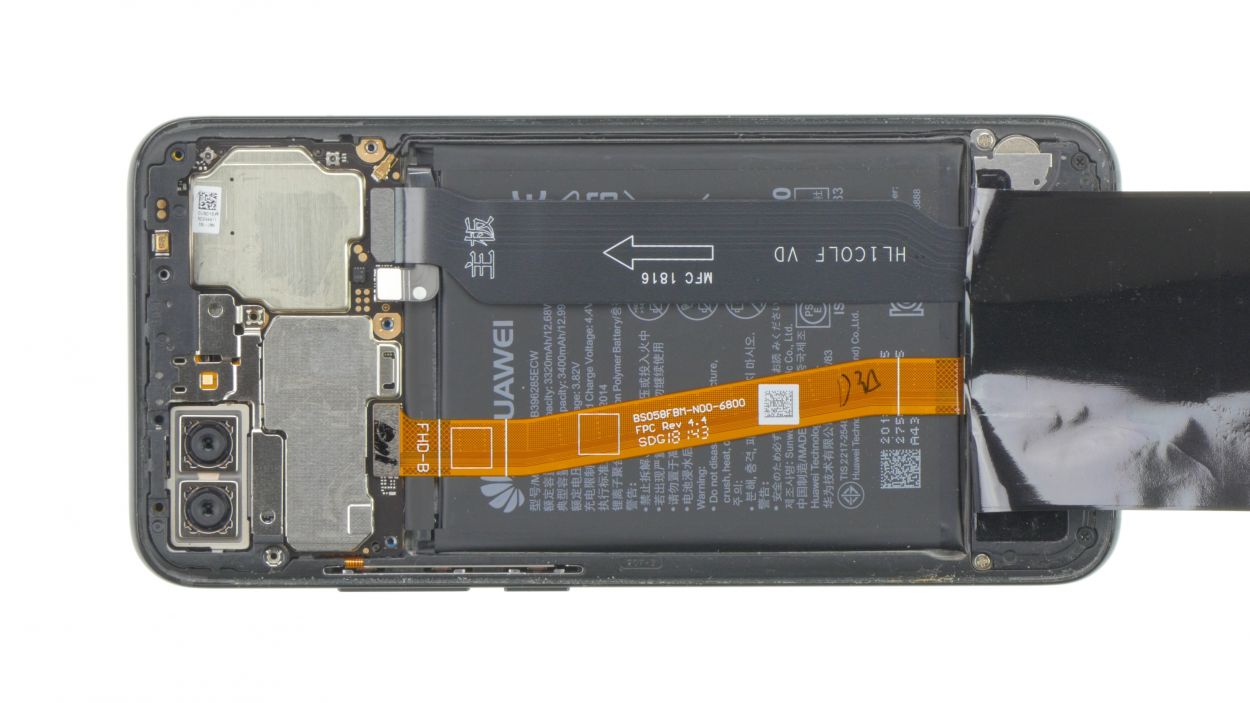
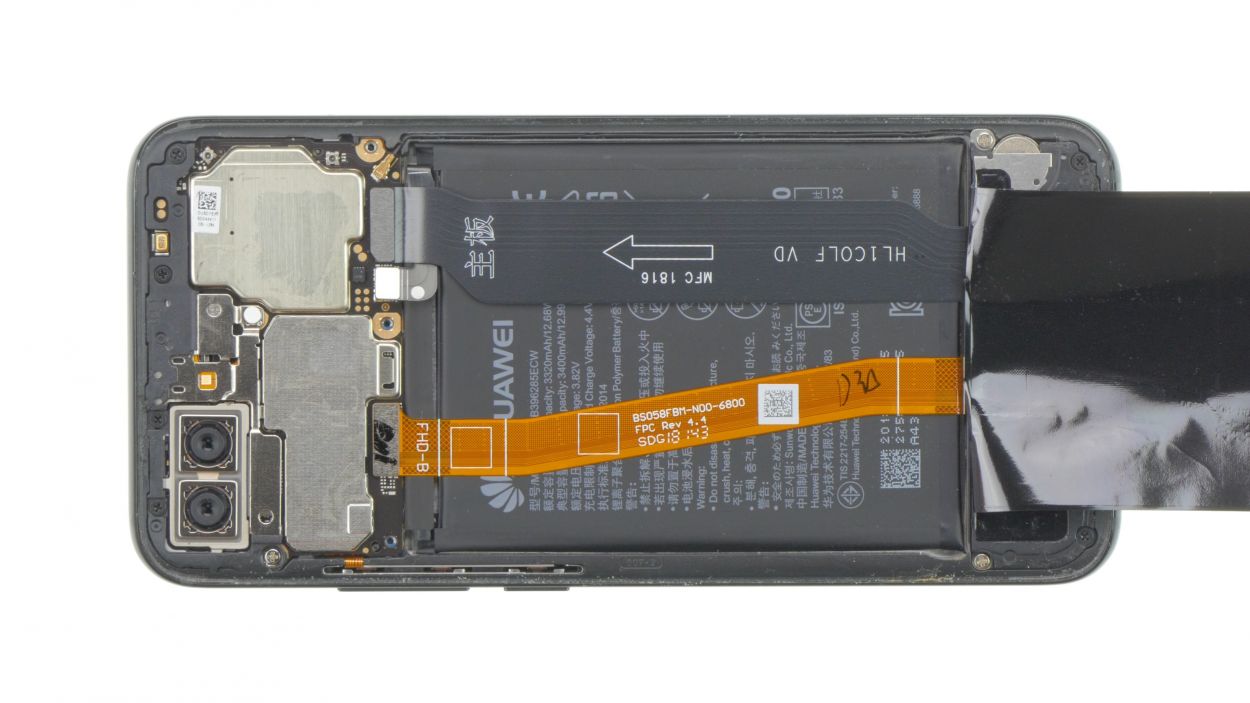
Step 8
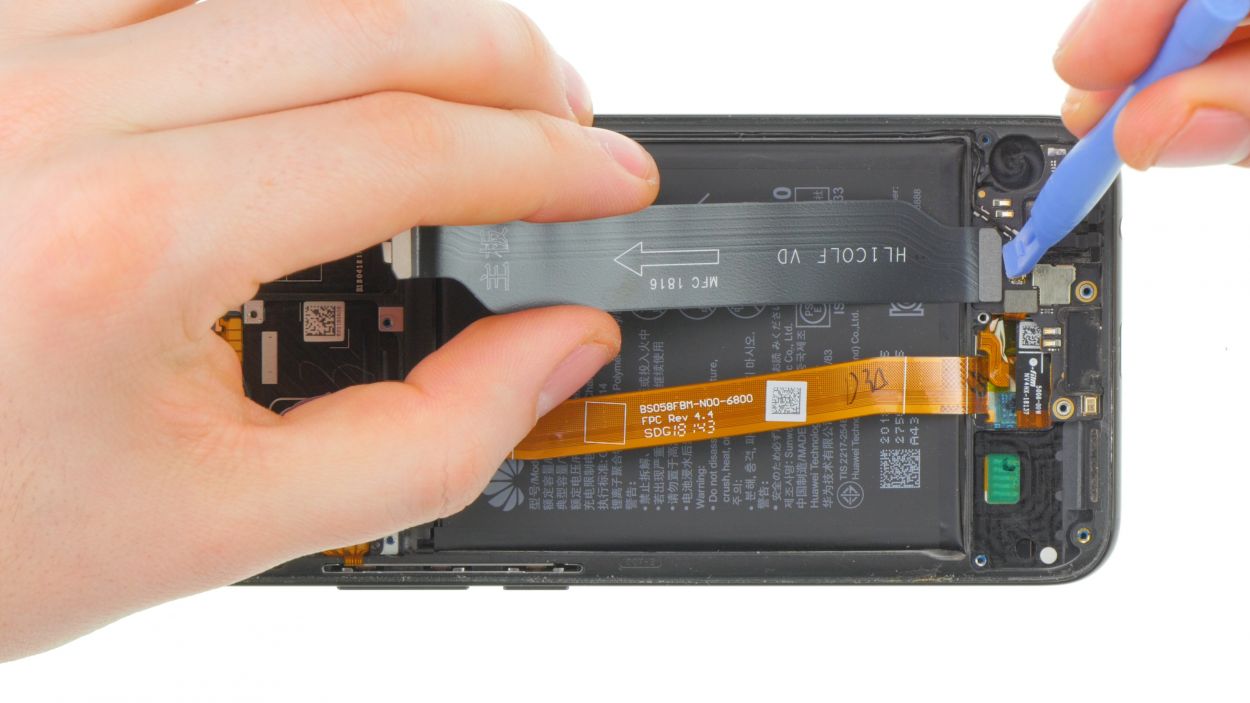
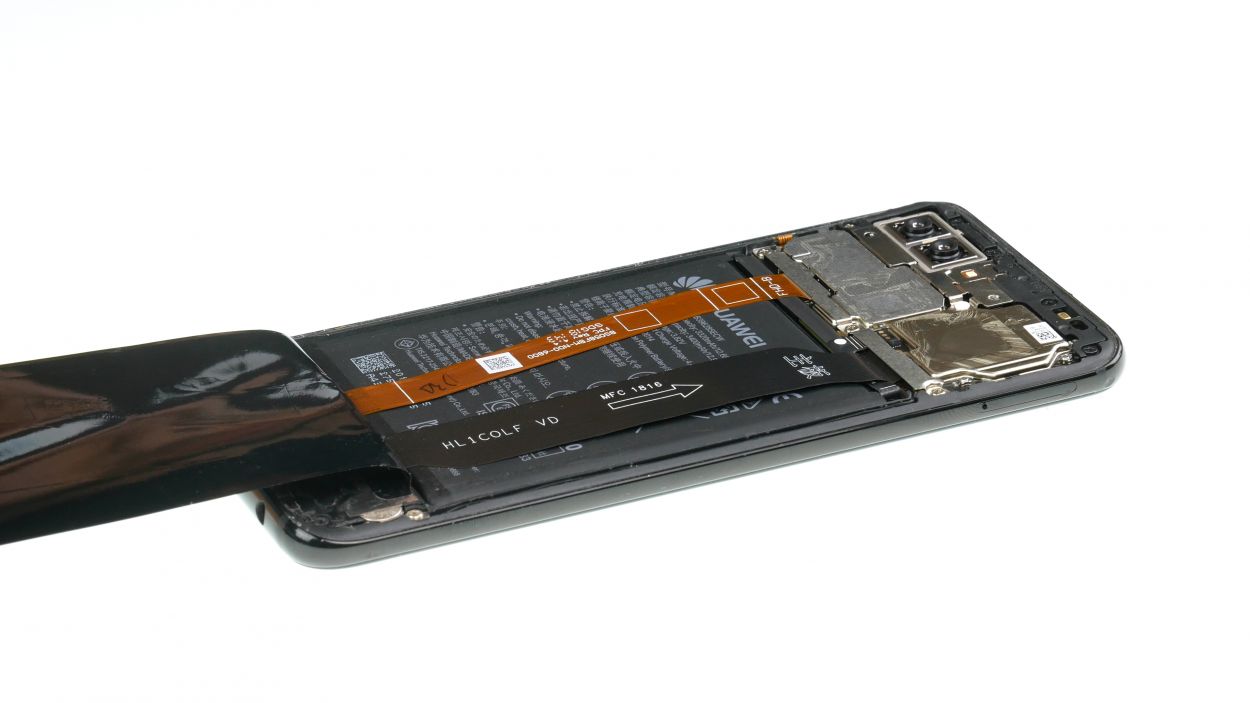
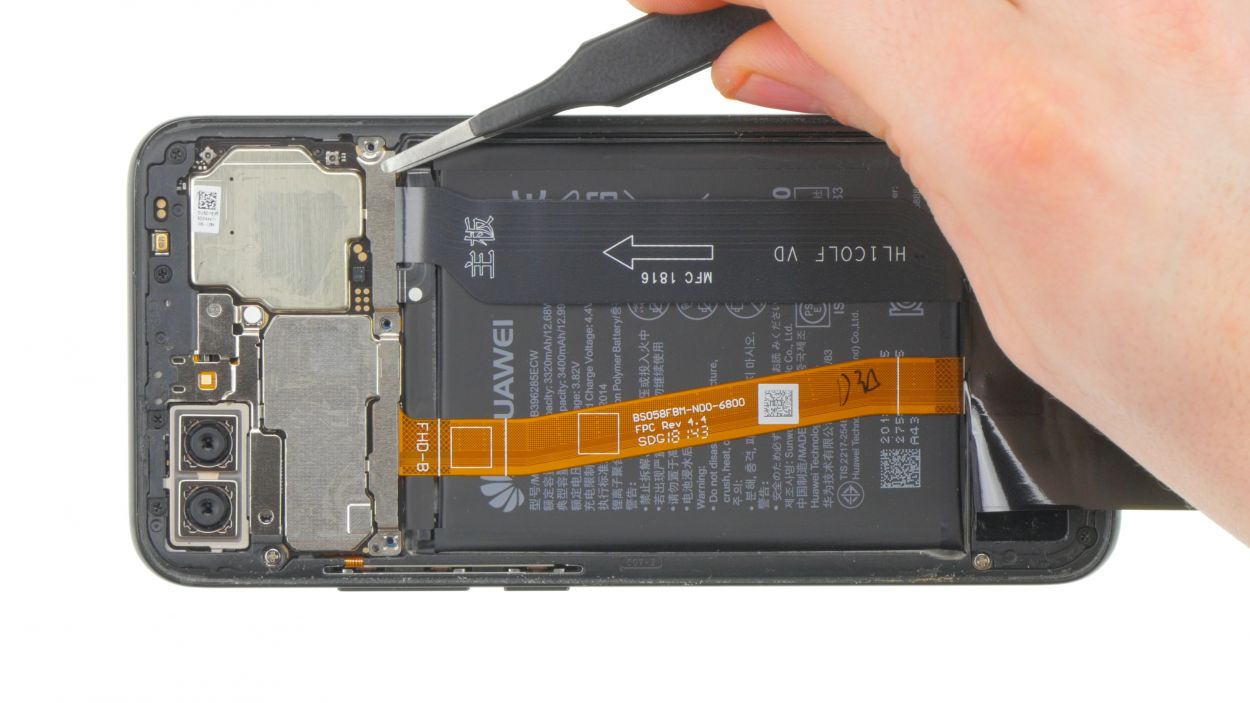
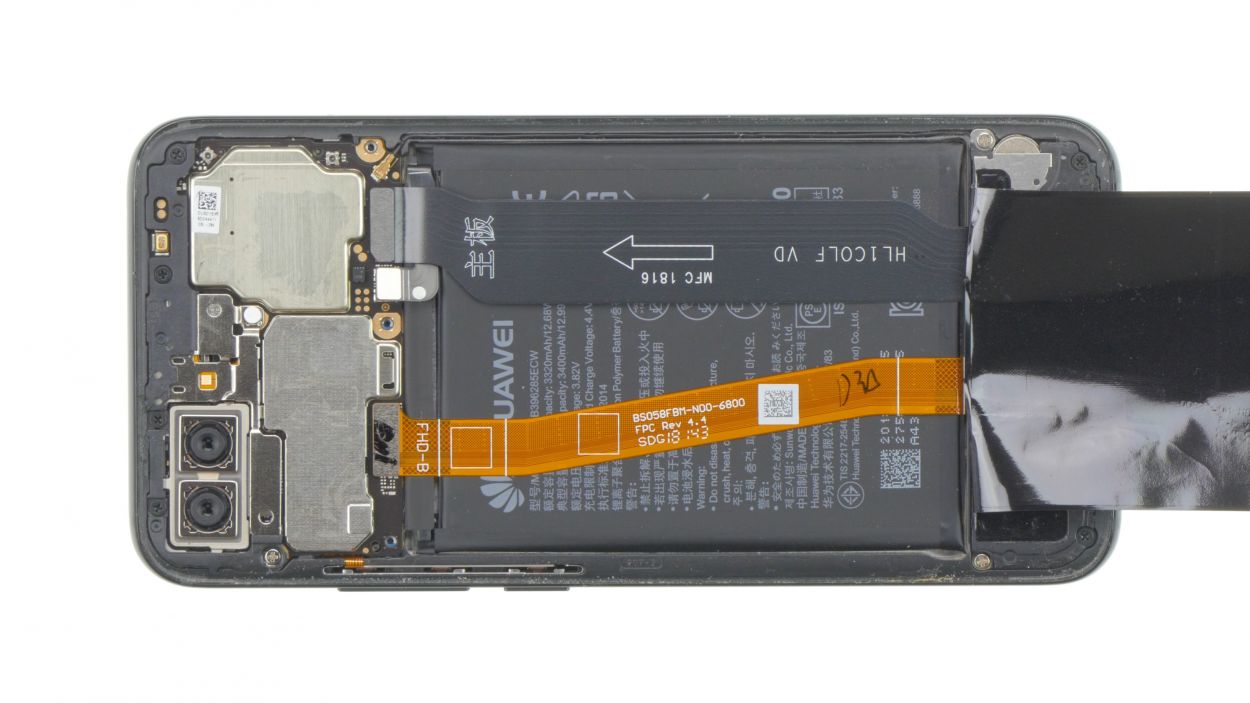
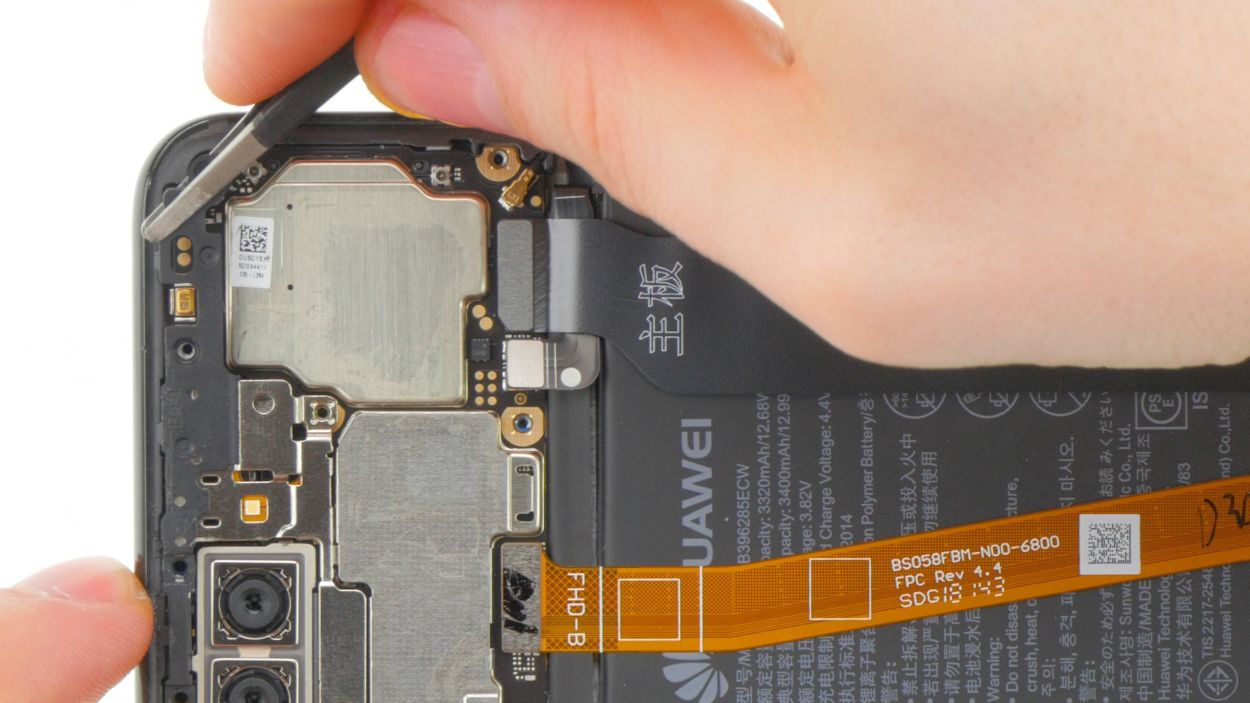
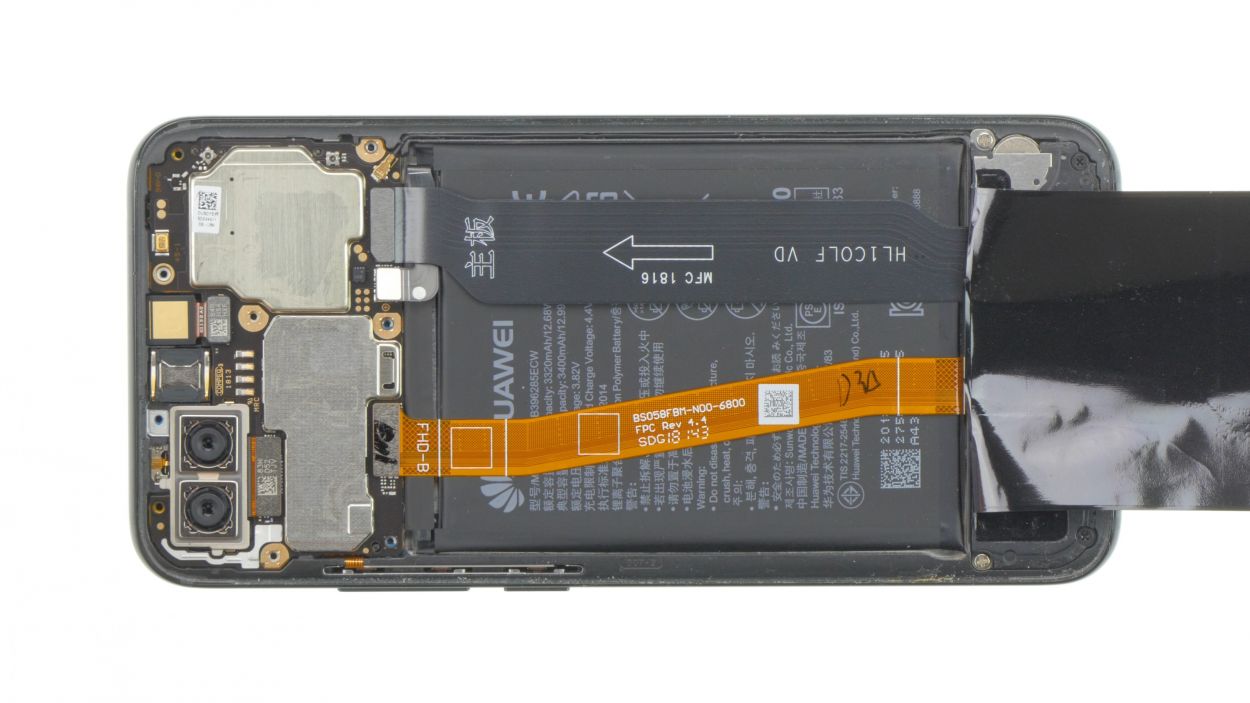
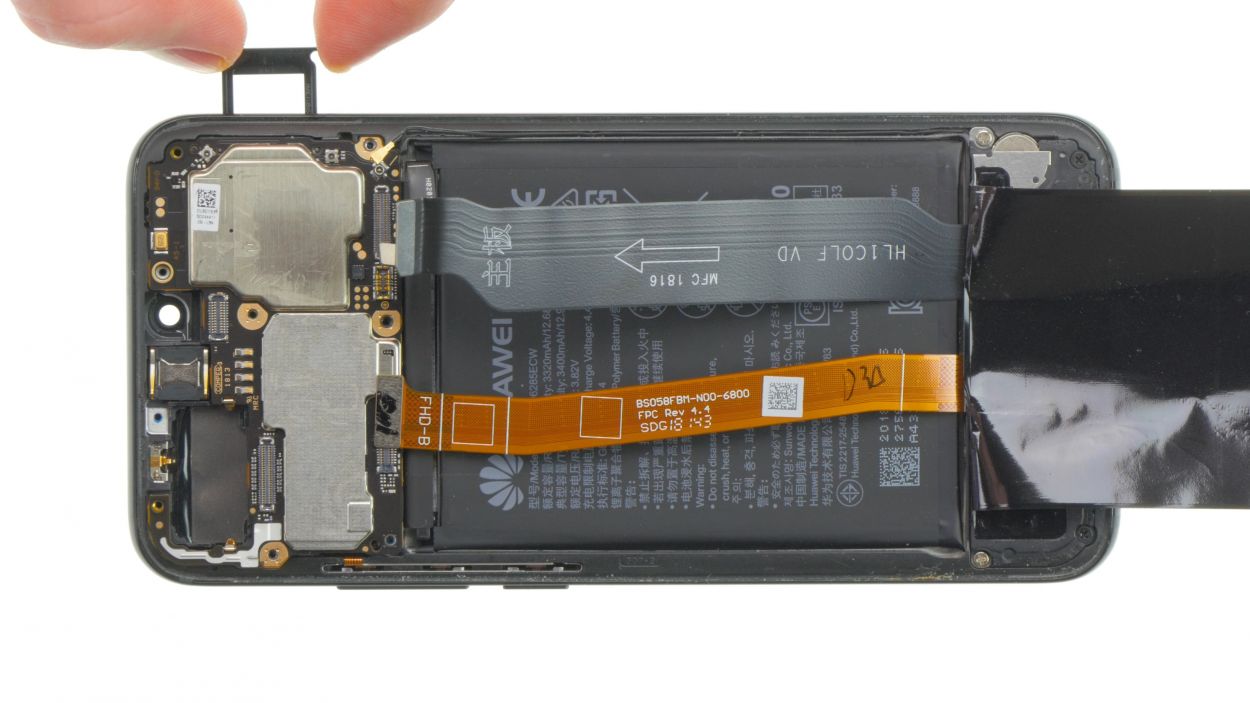
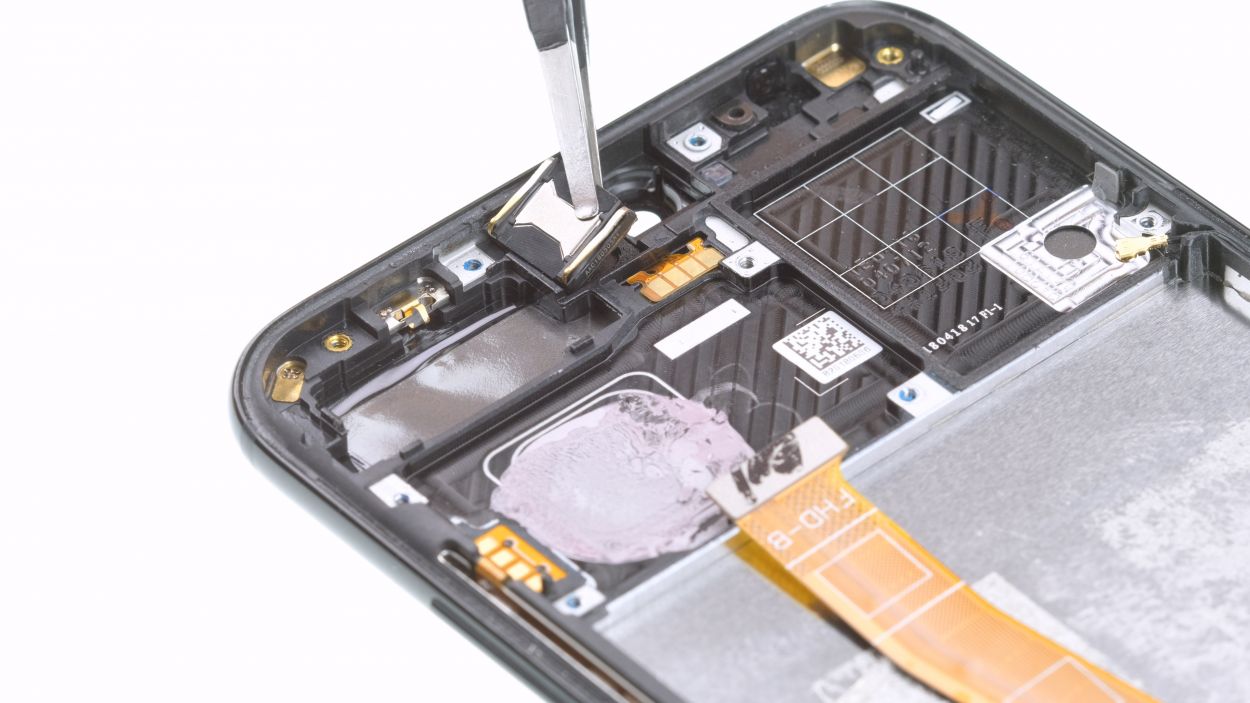
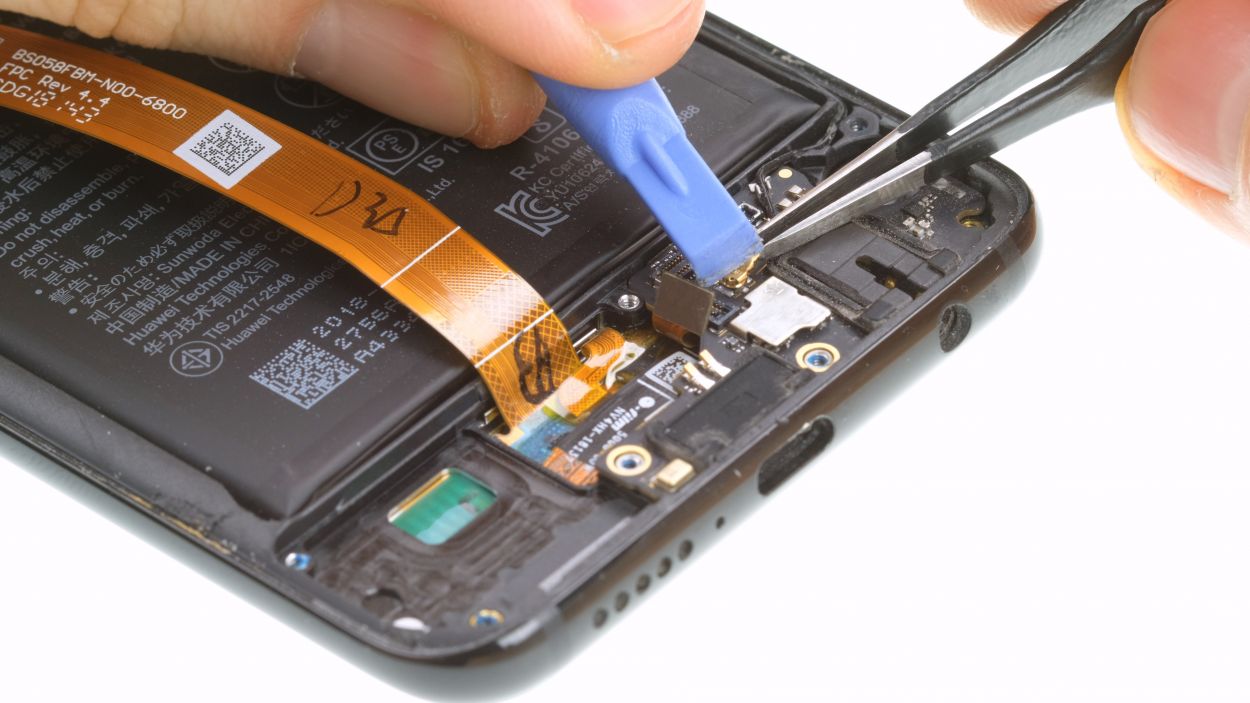
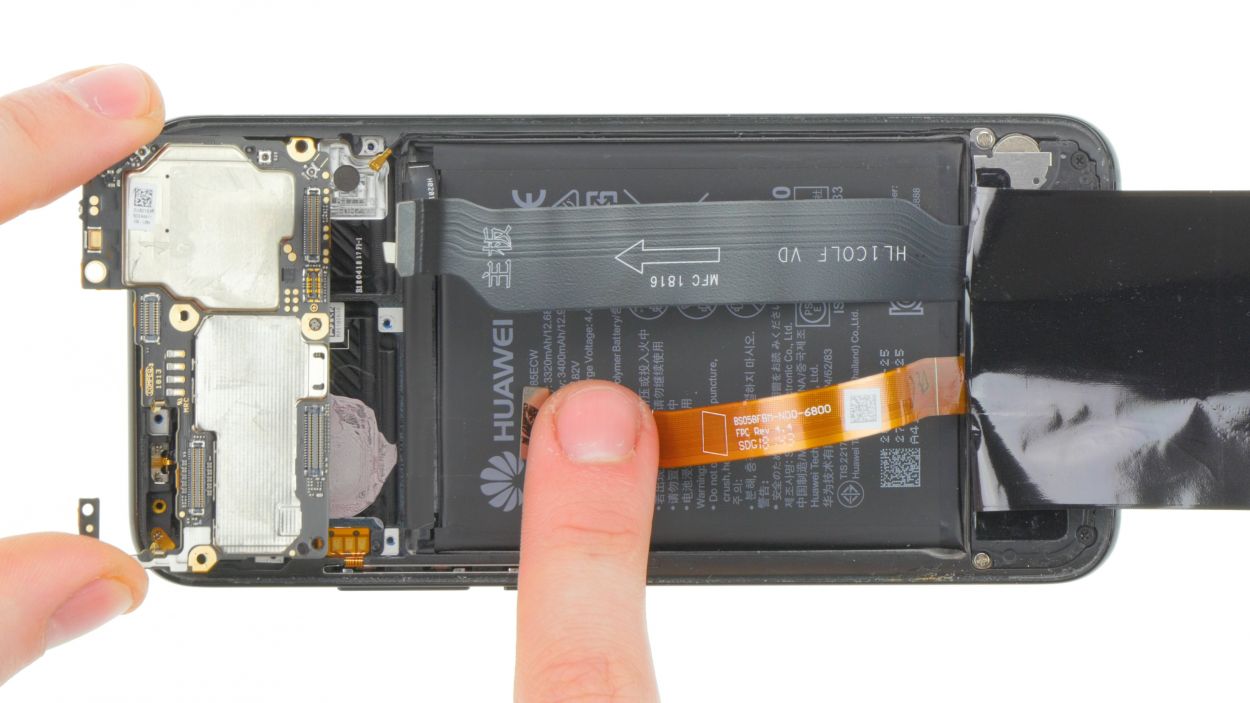
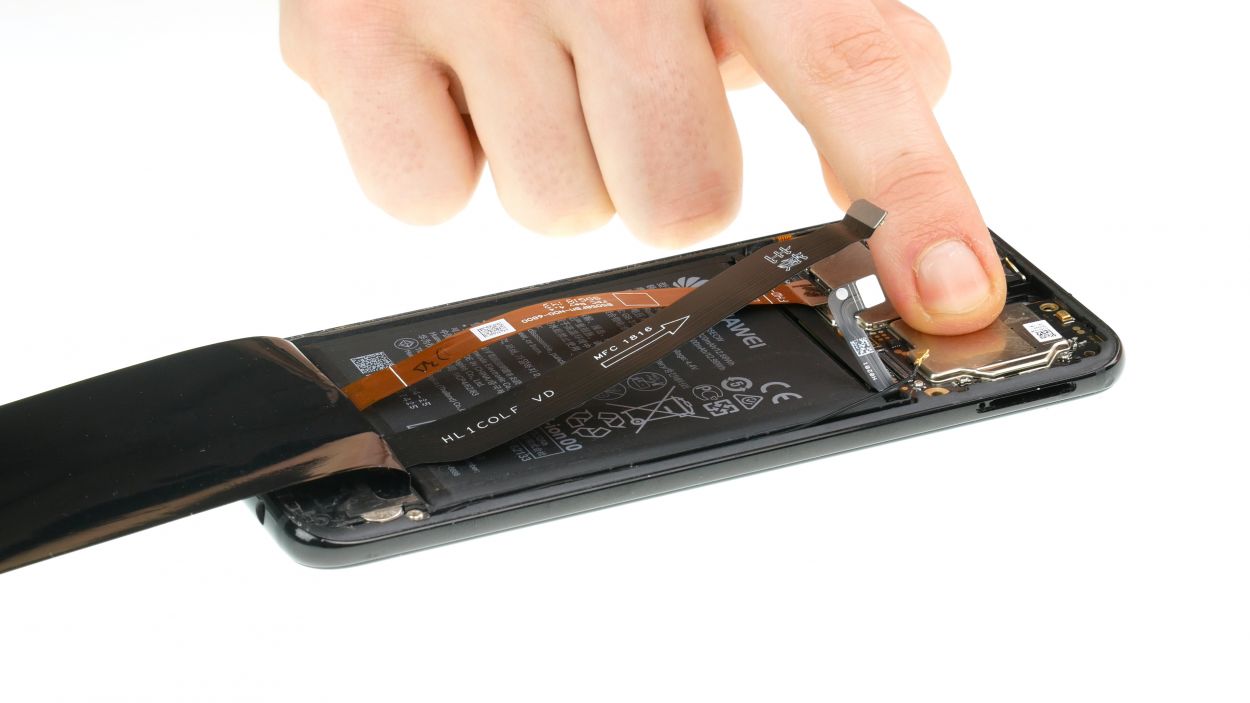
– First up, let’s gently detach the flex cable that’s lounging over the battery.
– Next, loosen that connector and slide the cable out with ease.
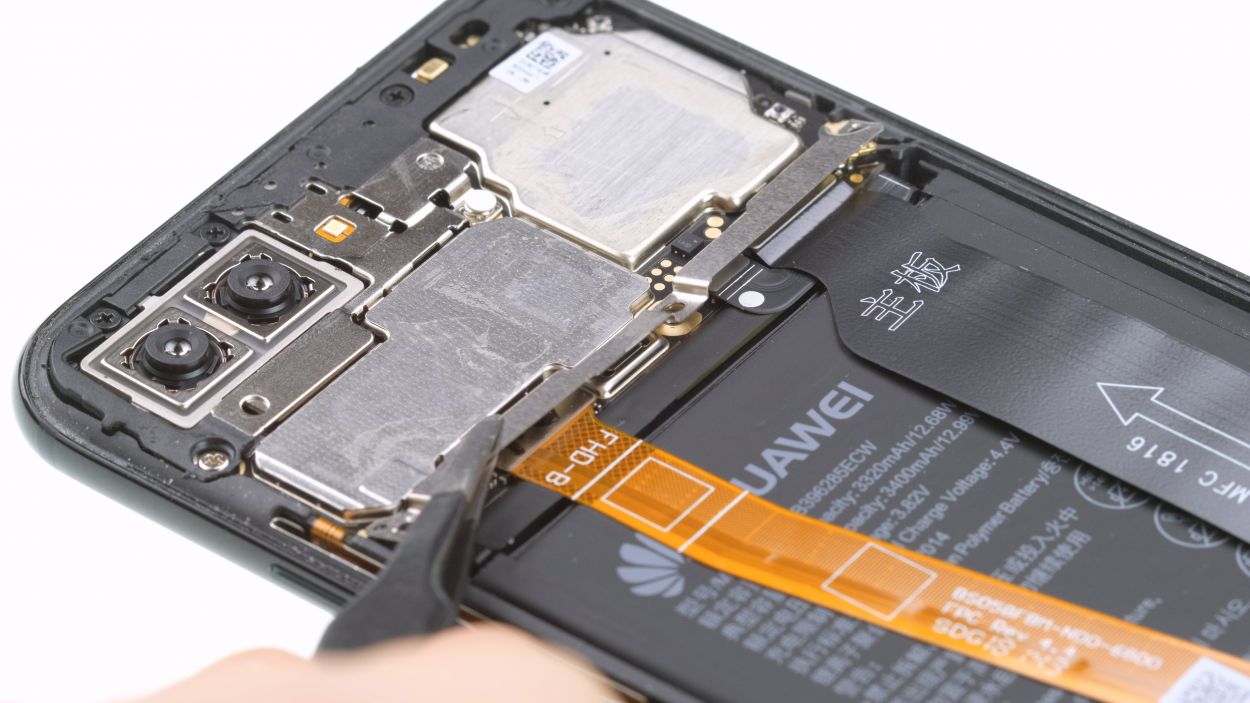
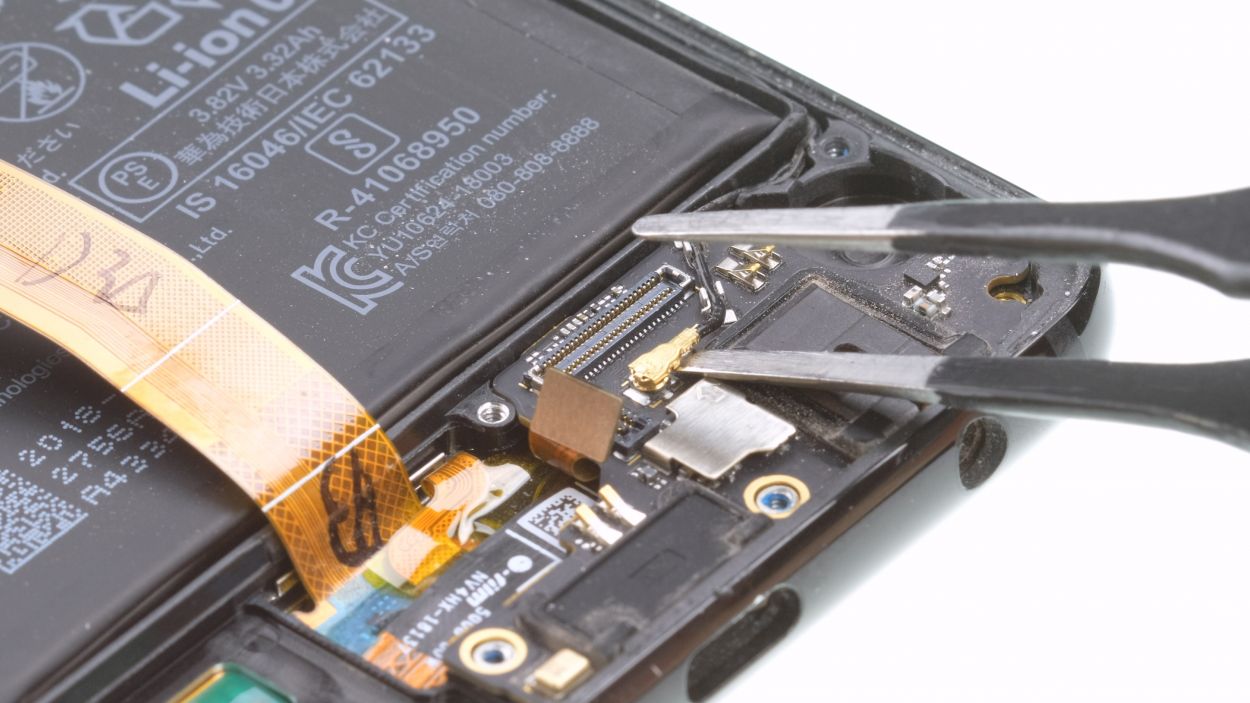
– Grab your trusty tweezers and carefully pop off the black antenna cable, giving it a little nudge out of those metal clamps.
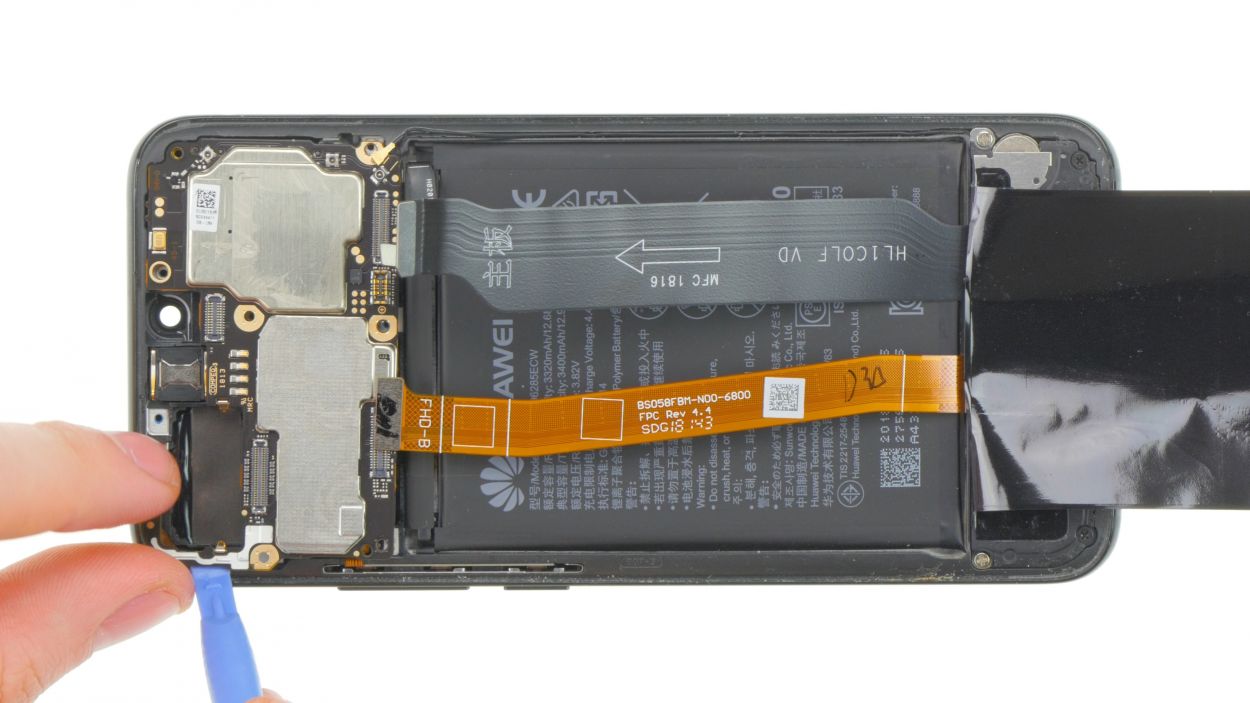
– Now, loosen the tiny contact for the fingerprint sensor—no pressure, just a gentle touch!
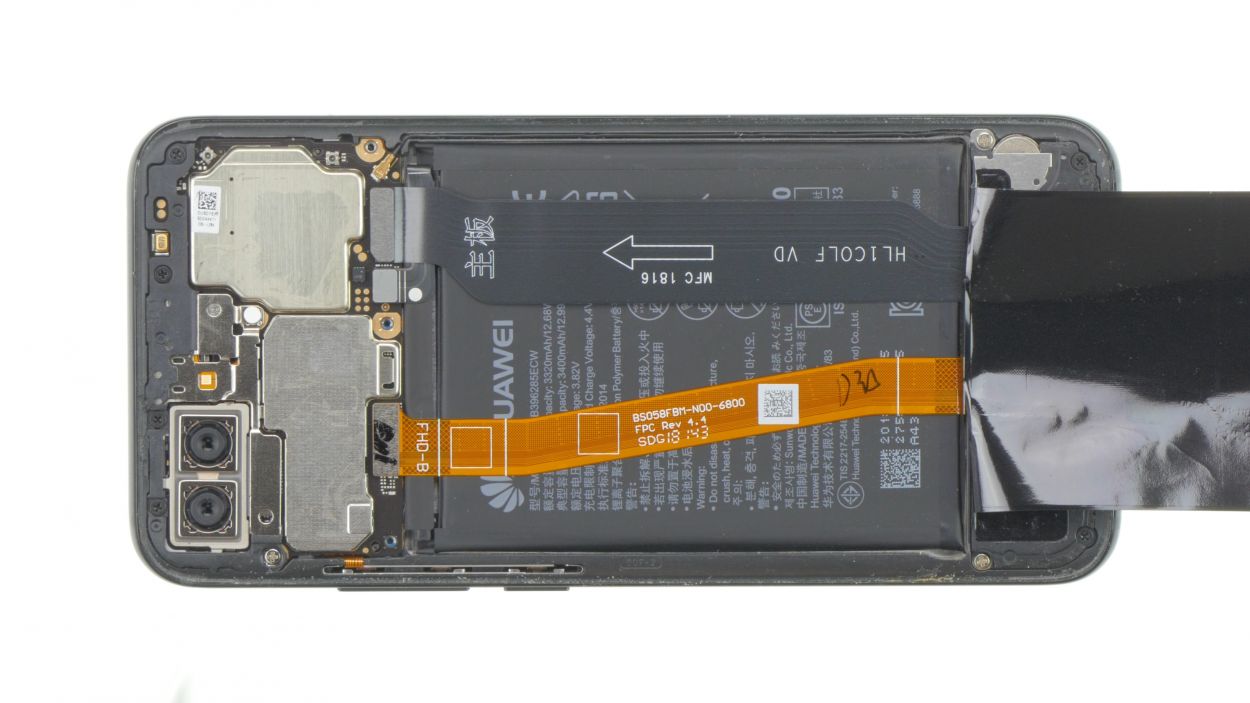
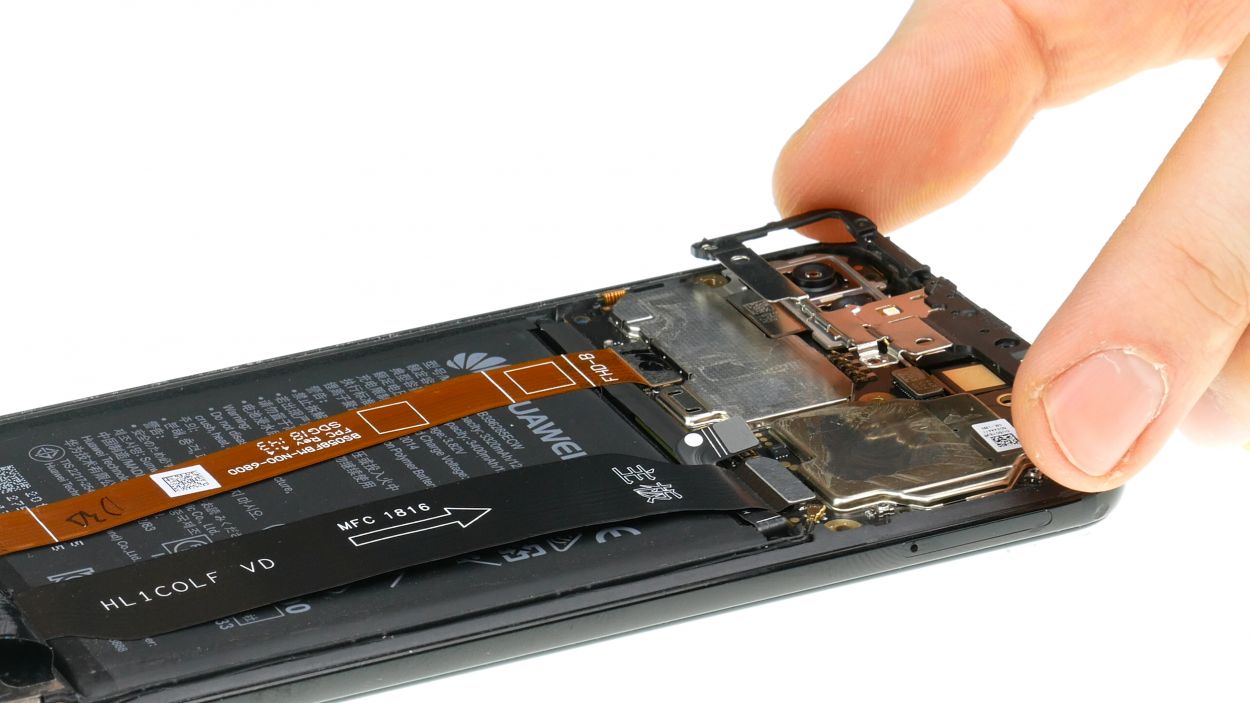
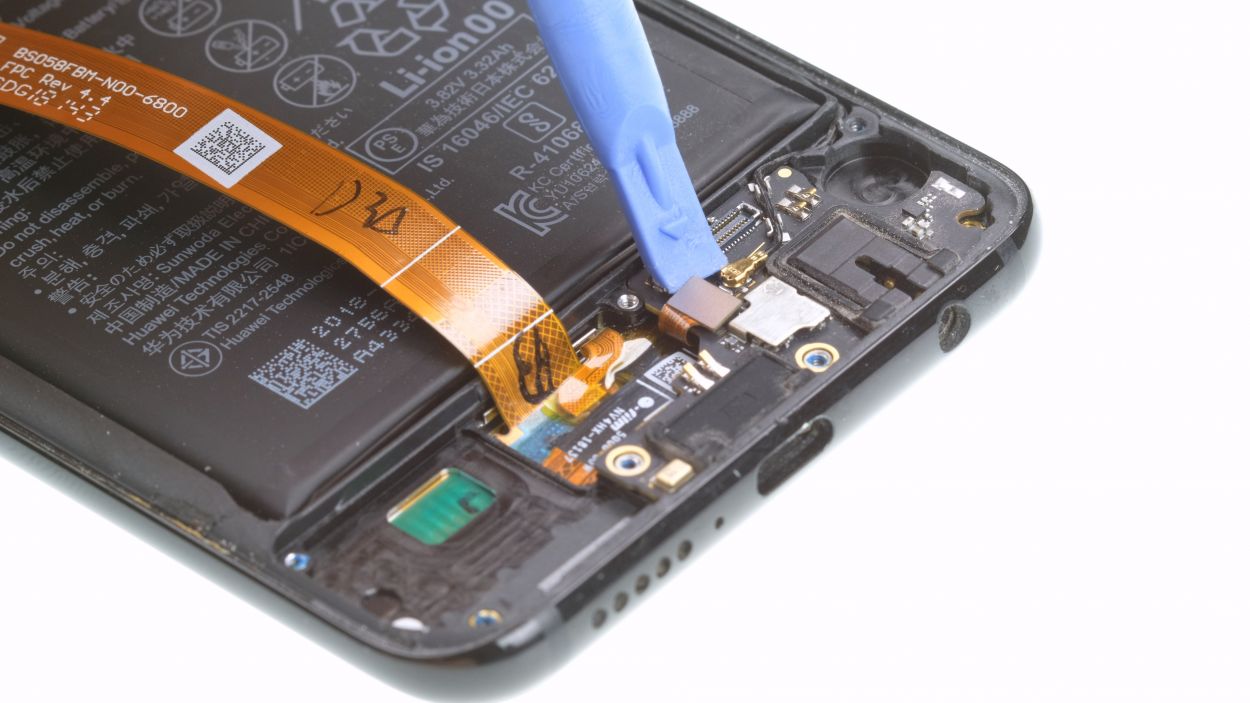
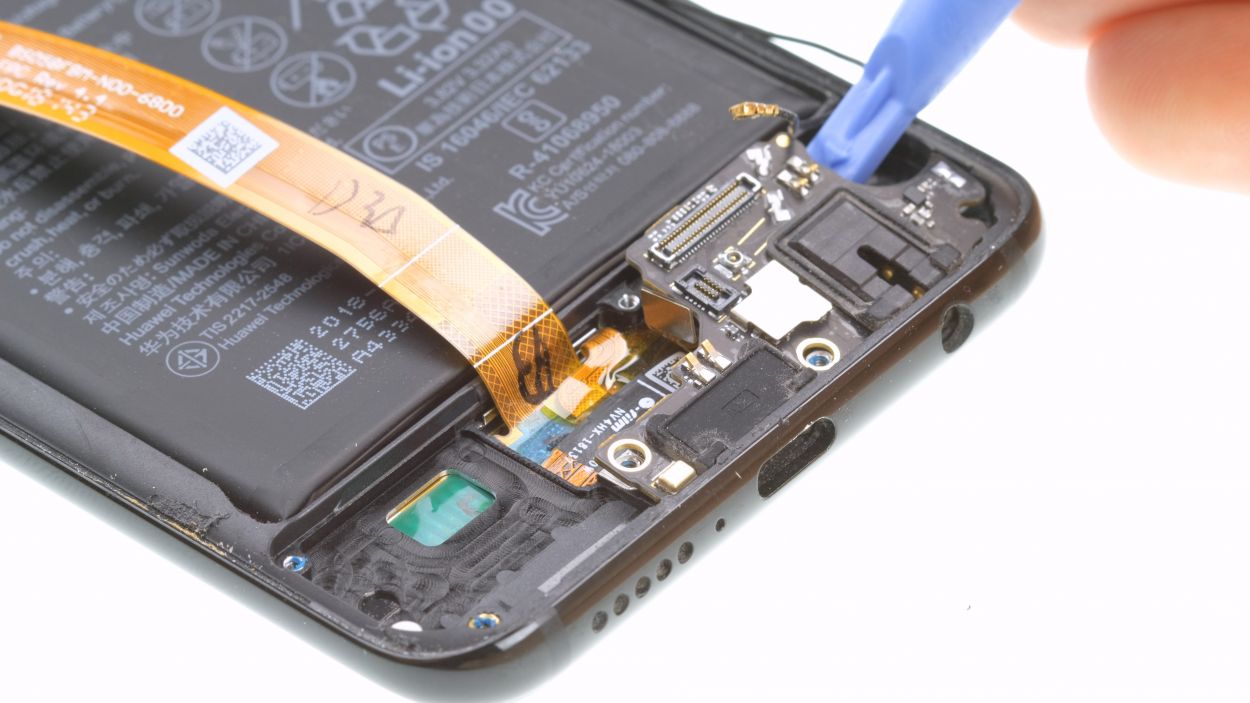
– With a spudger in hand, carefully lift the USB board up and push it away from the frame at the bottom to set it free.
– Finally, remove the board from the device, and don’t forget to check that those rubber seals for the USB and headphone sockets are still on the board. If they’ve decided to stay behind in the case, simply grab them and attach them back to the board.
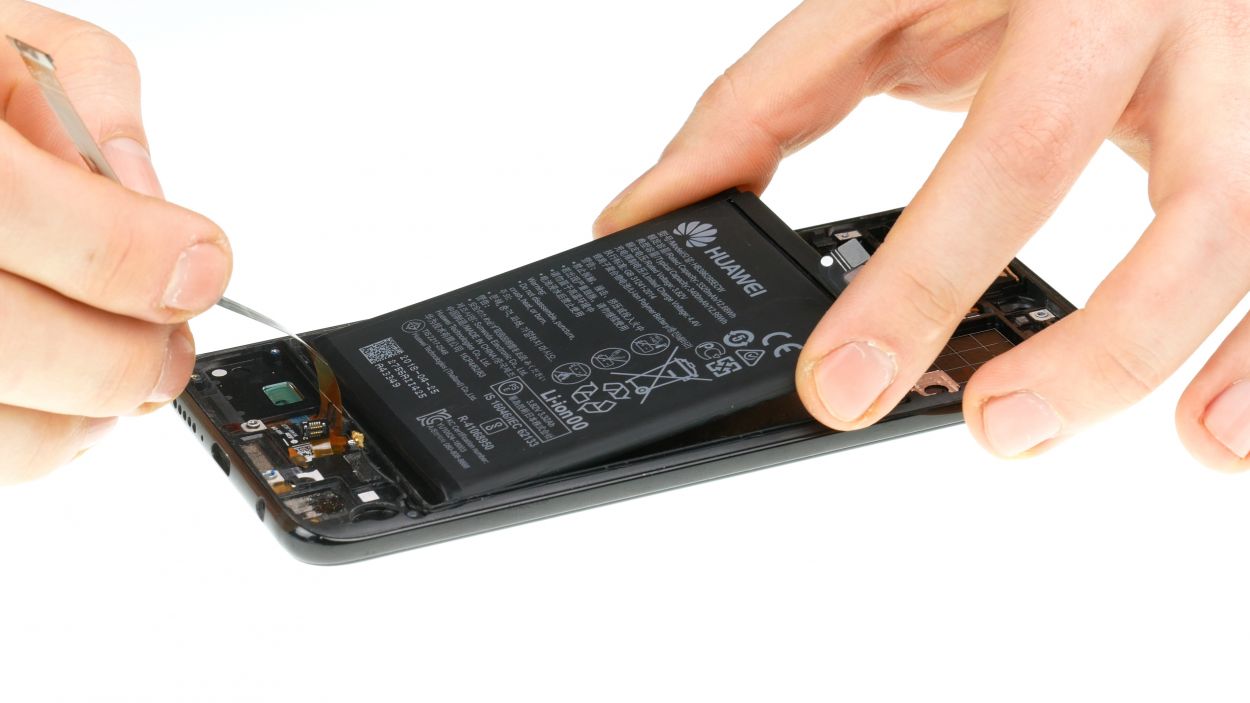
Step 9

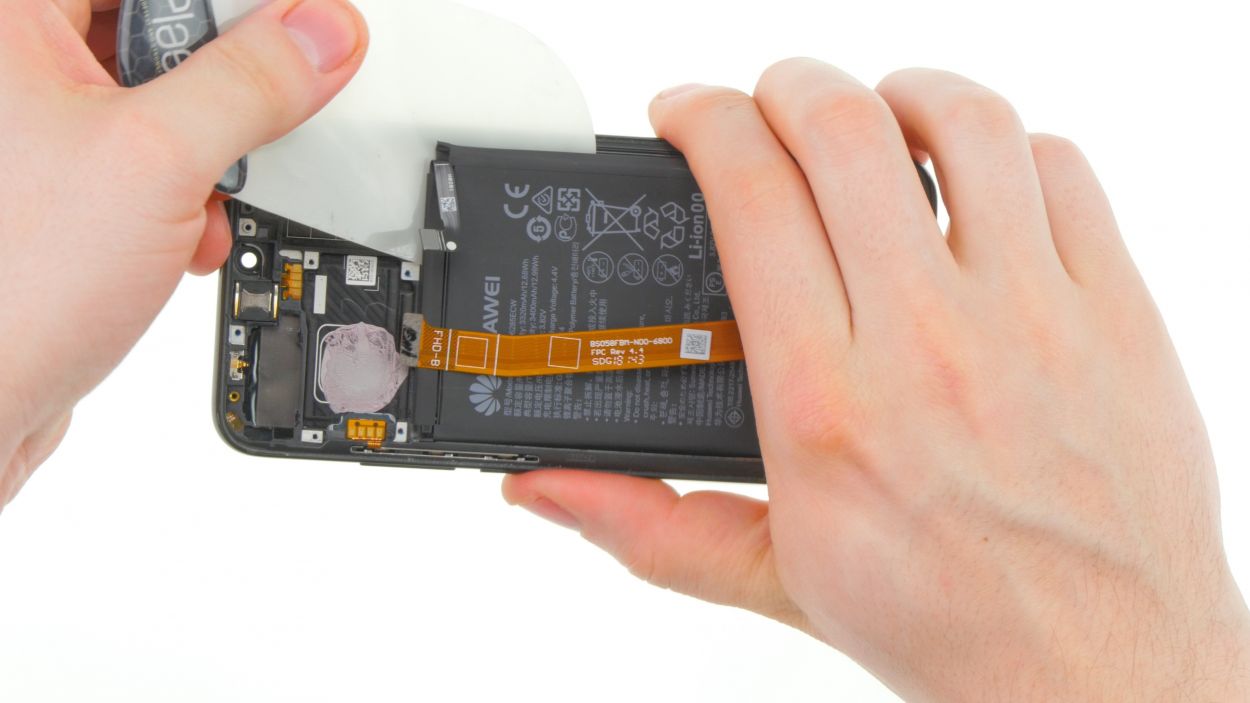

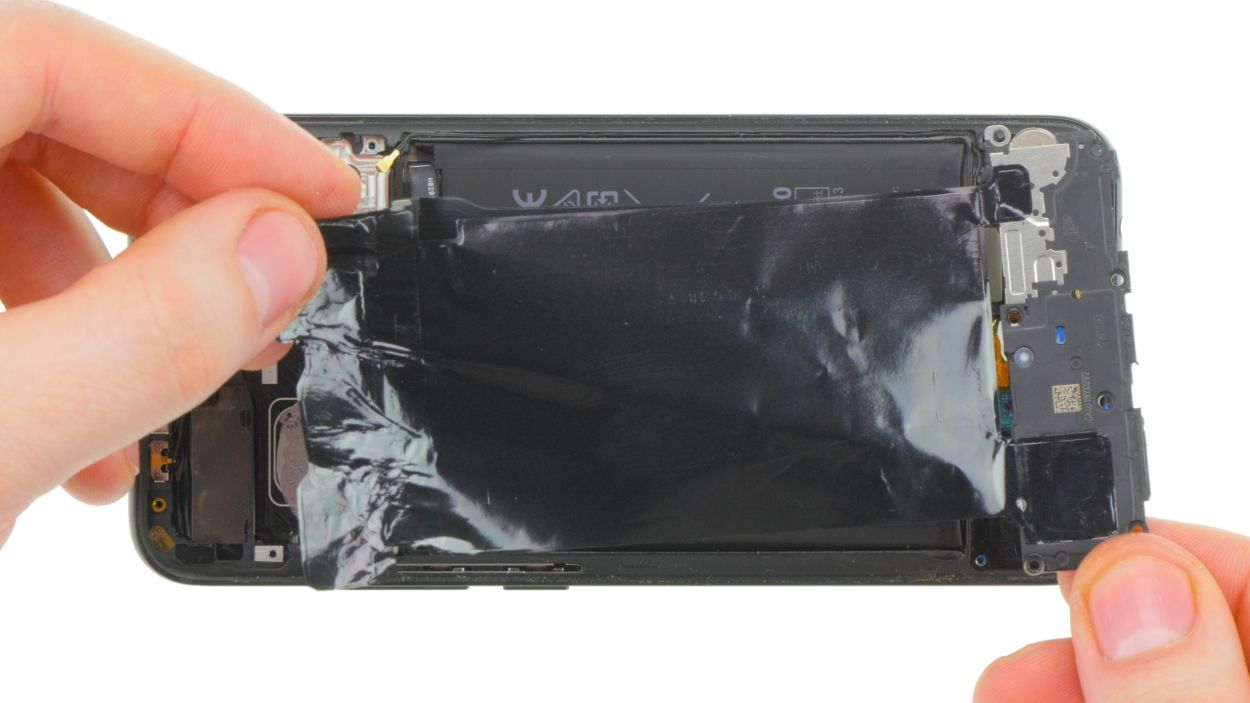
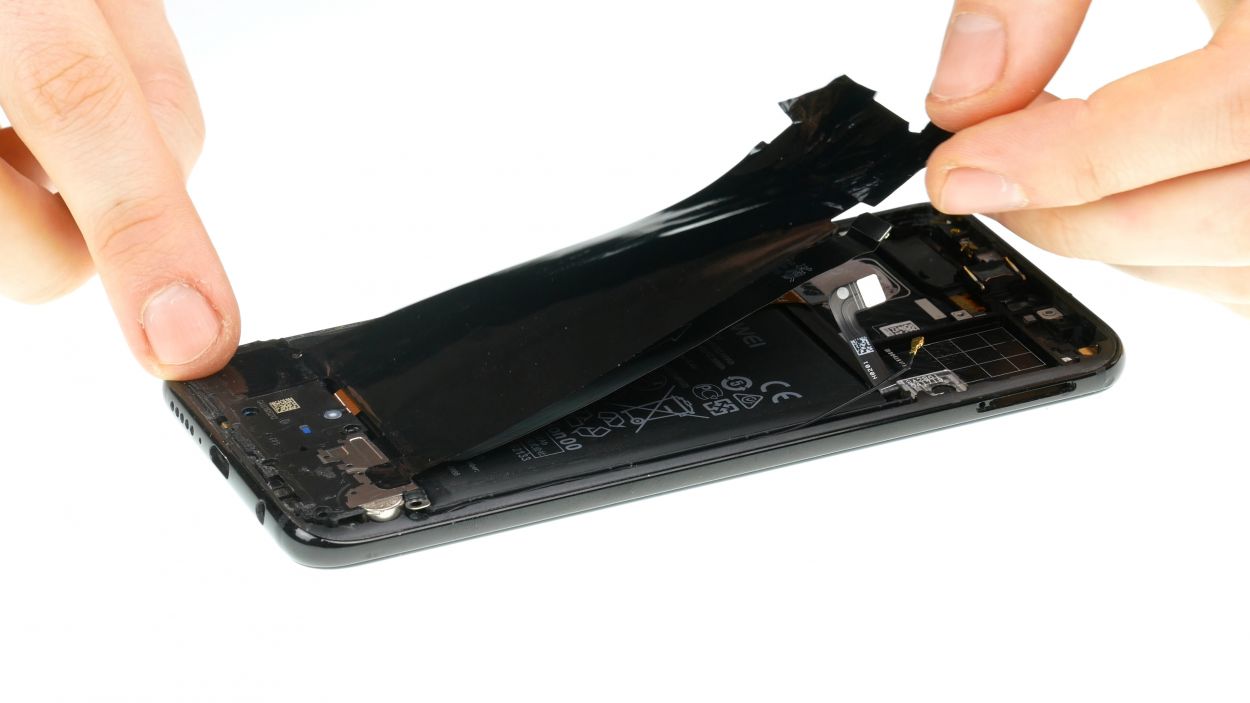
Be gentle with that battery! Try to keep the bending to a minimum and be careful not to scratch or dent the surface. After all, we want everything to look spick and span!
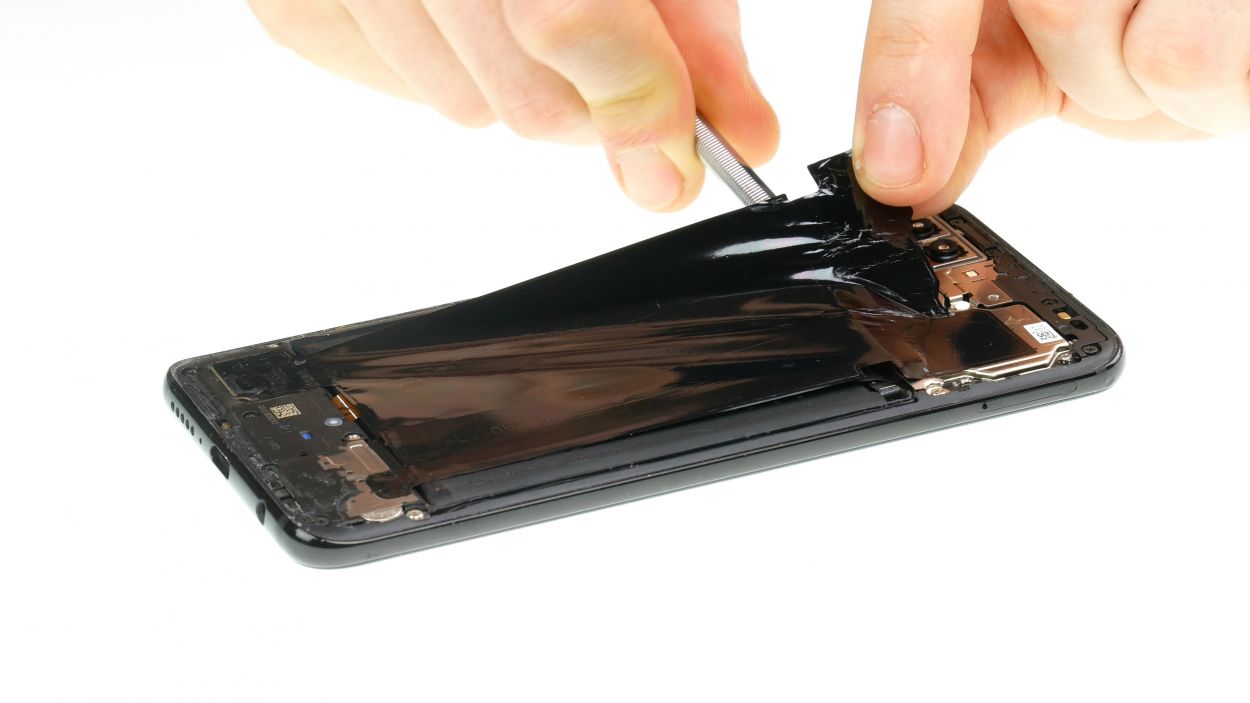
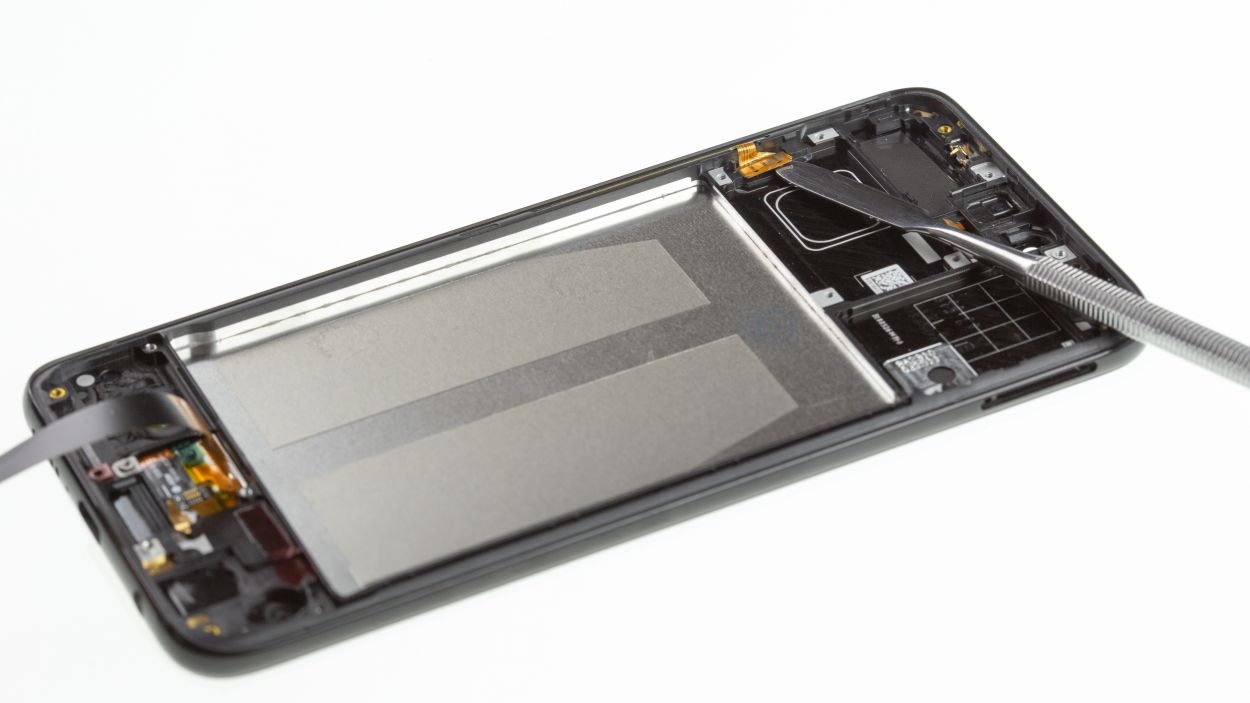
– To make loosening that glue a breeze, give it a little warmth! Just remember, keep the heat away from the battery and focus on the display instead.
– Grab a flat tool, like the iPlastix, and gently slide it under the battery.
– If that tool isn’t quite fitting, no worries! A wider, sturdier option like the Battery Spudger can do the trick.
– Now, carefully maneuver your flat tool around and slowly lift the battery out of the device. You’ve got this!
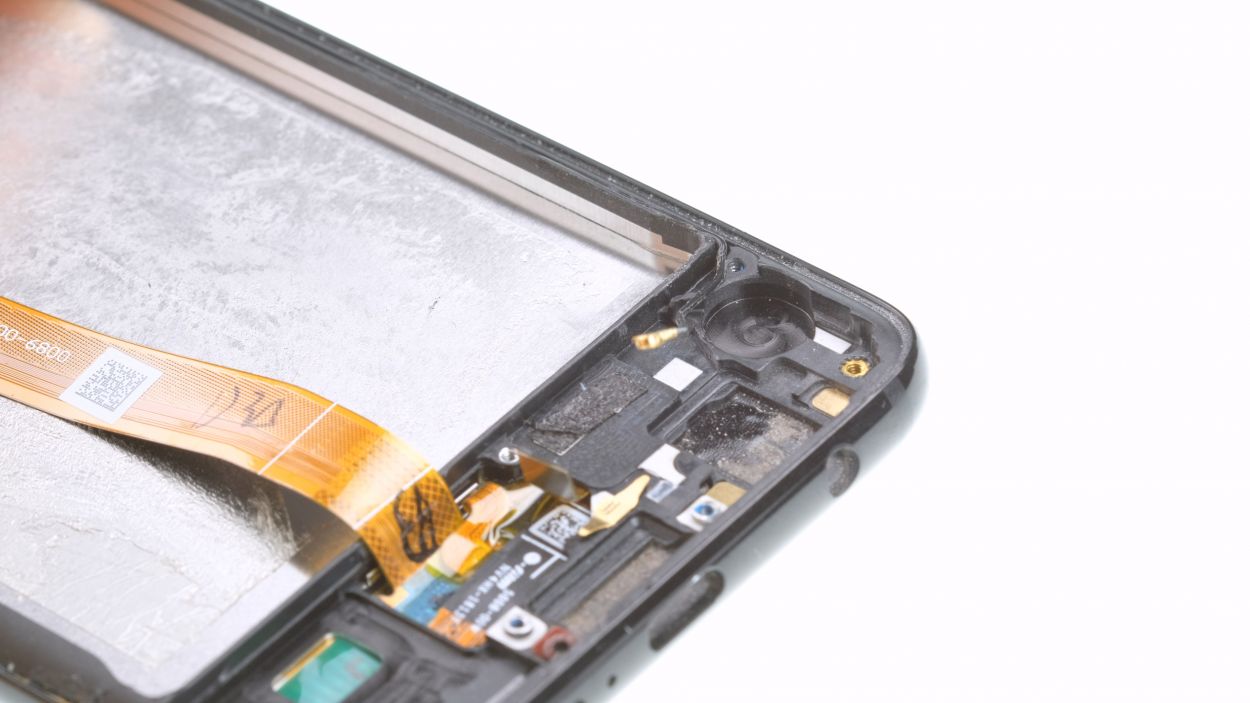
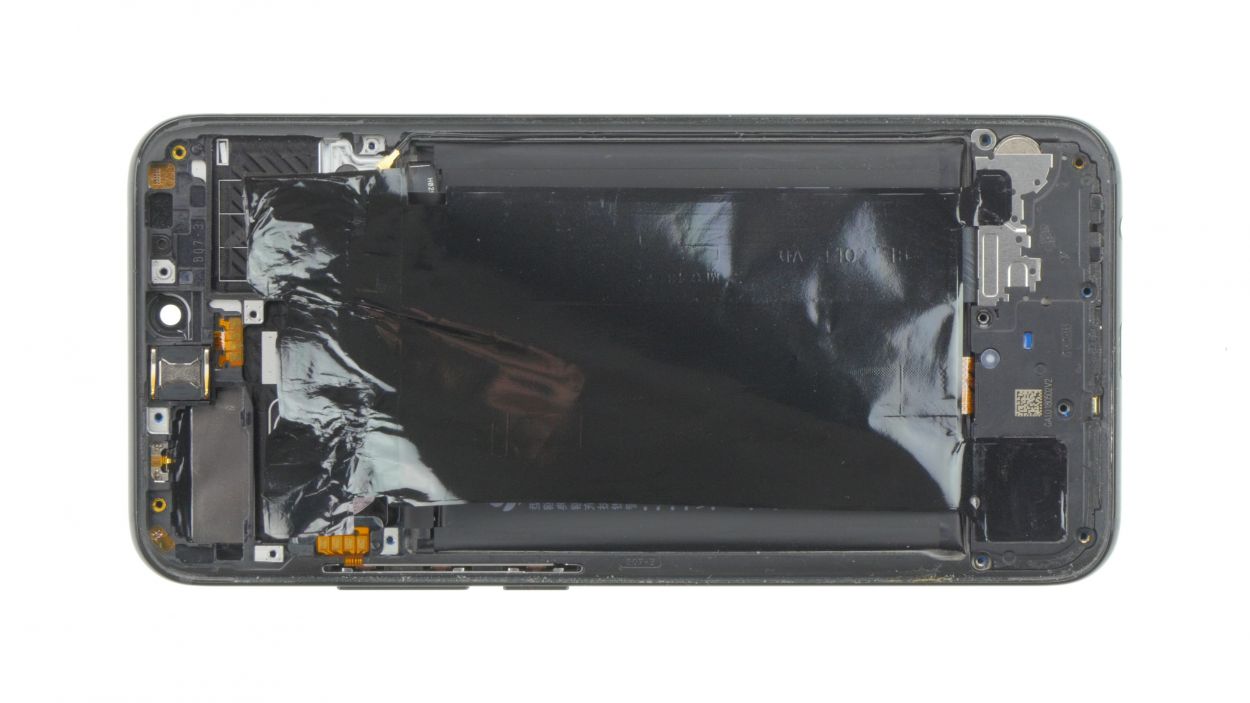
Step 10

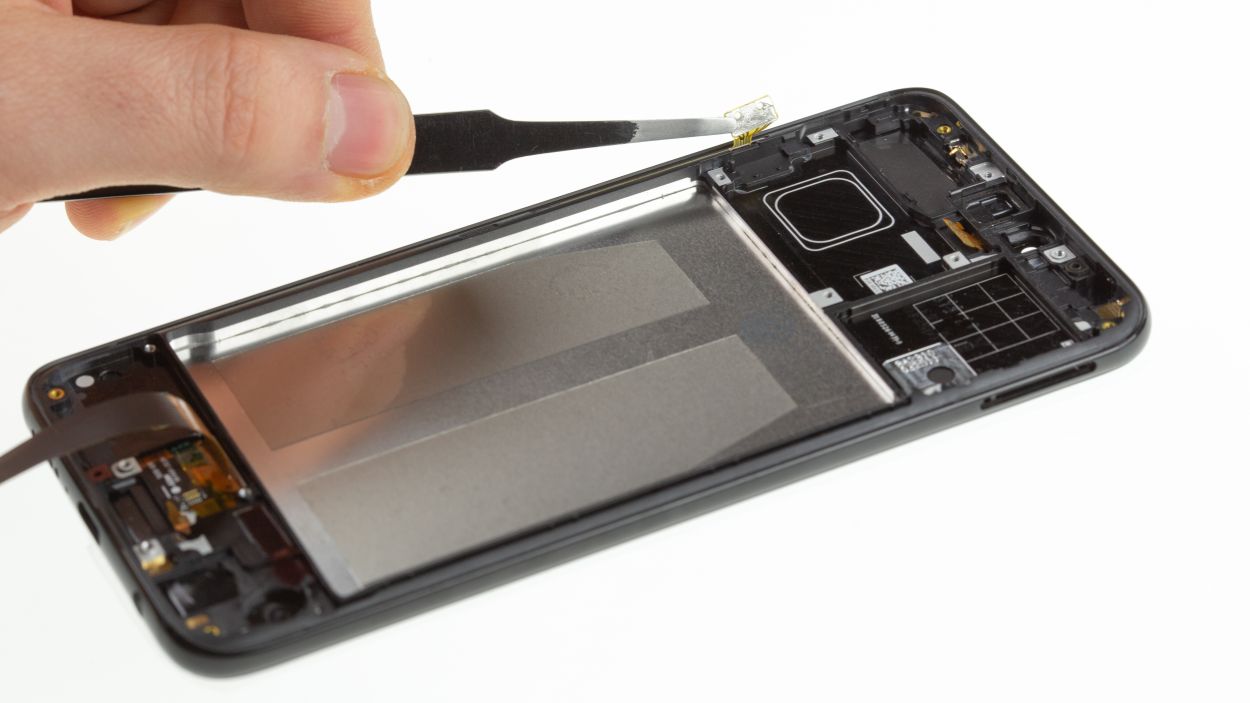
– The earpiece is snugly stuck in there, just a little bit of adhesive holding it in place.
– Warm up that adhesive and gently wiggle the earpiece free.
– Remember how the golden contacts are positioned so you can pop the earpiece back in just right later on.
– Carefully slide the black antenna out of its sideways guide.
Step 11

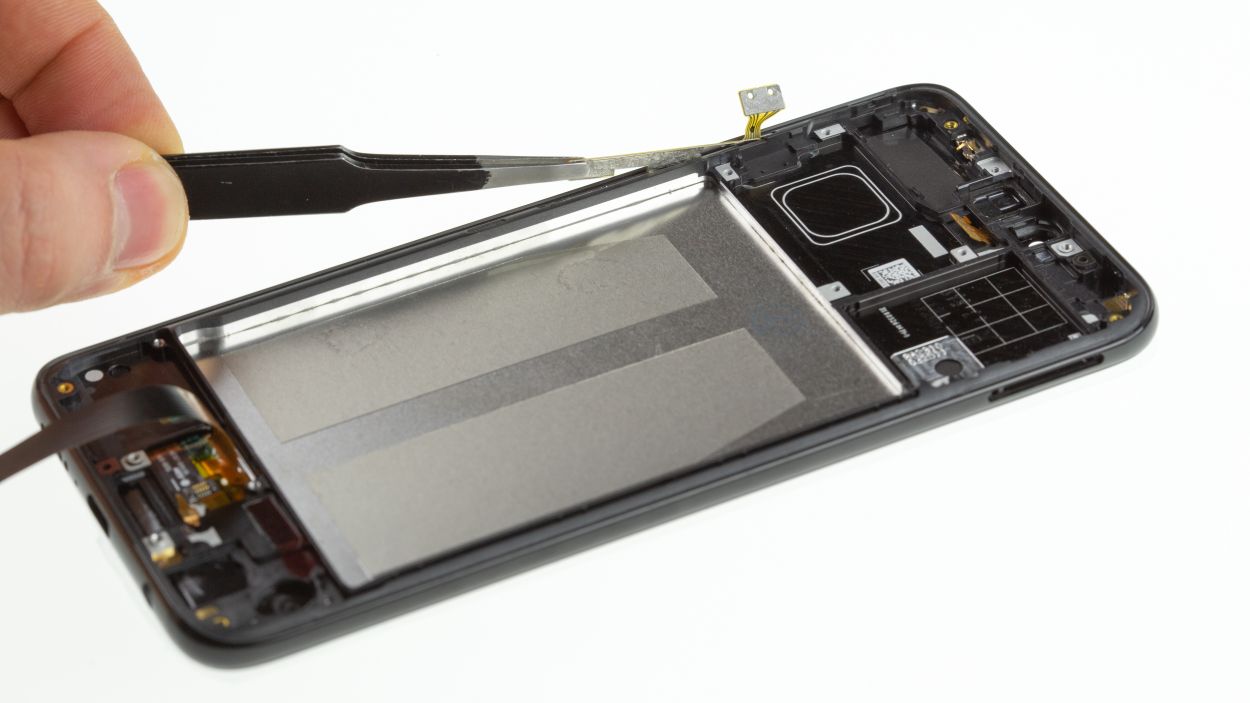
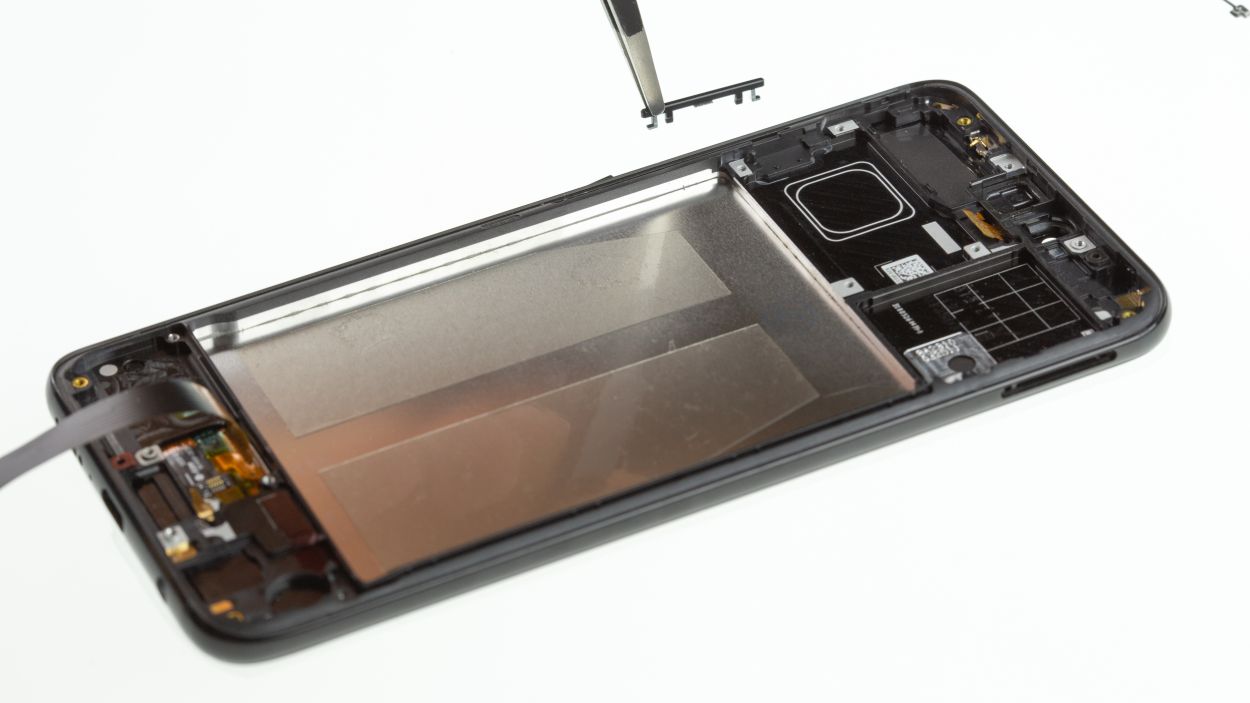
– First things first, check if your shiny new display comes with those standby and volume keys already attached. If they’re missing, no worries! Just snag them from your old display.
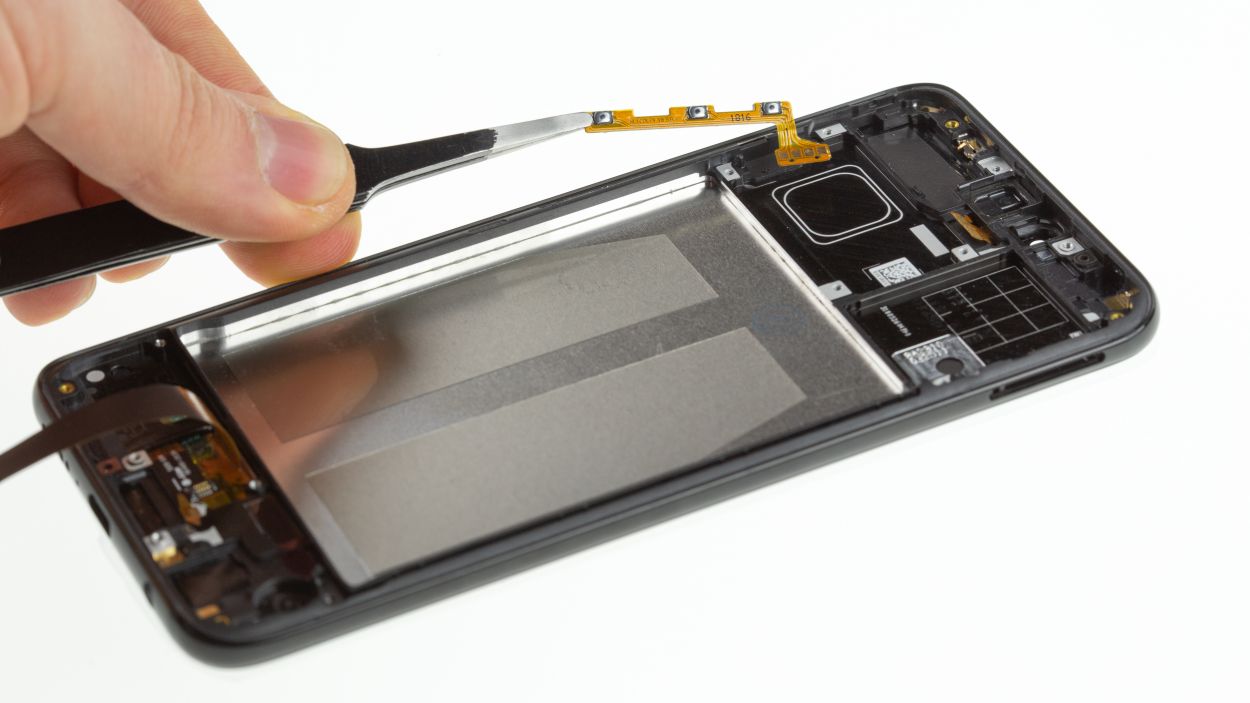
– Next up, gently warm up the flex cable where those four golden contact surfaces are. Use a steel spatula or another super thin tool to loosen it up carefully.
– Now, slide that steel spatula between the cable and the housing frame, and loosen up the adhesive there too. We’re making progress!
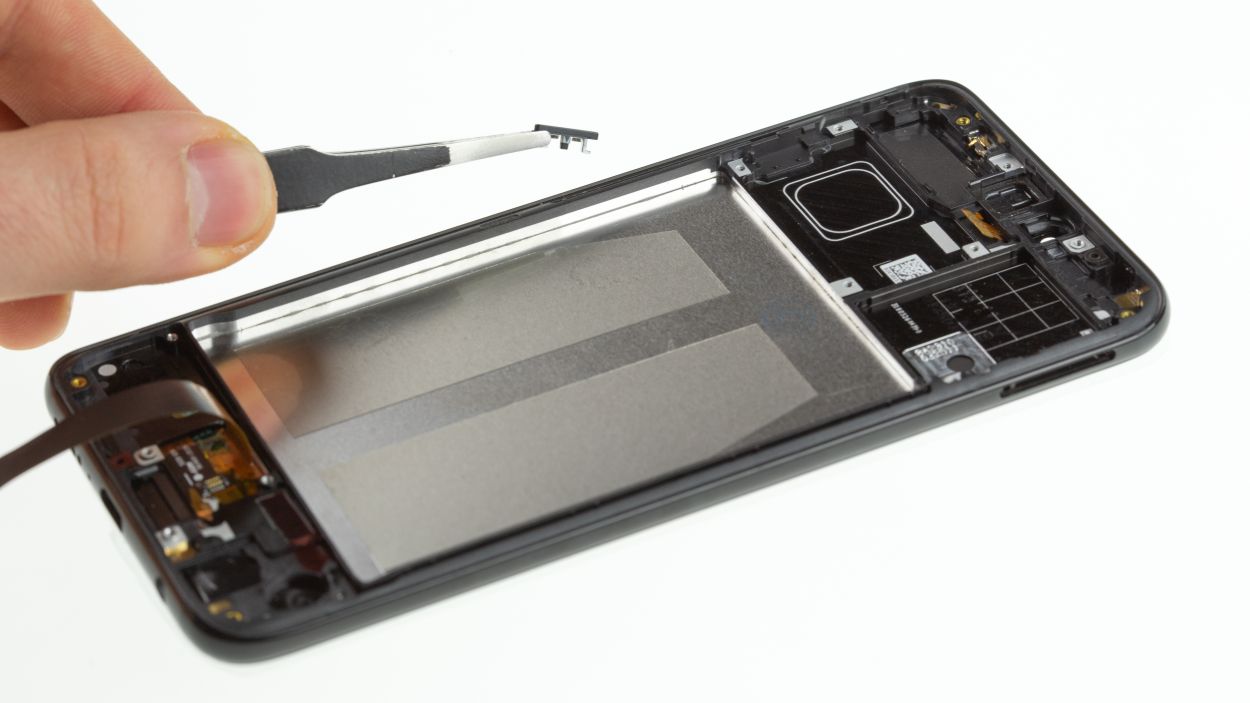
– Time to remove the component from the frame along with the buttons. You’ve got this!
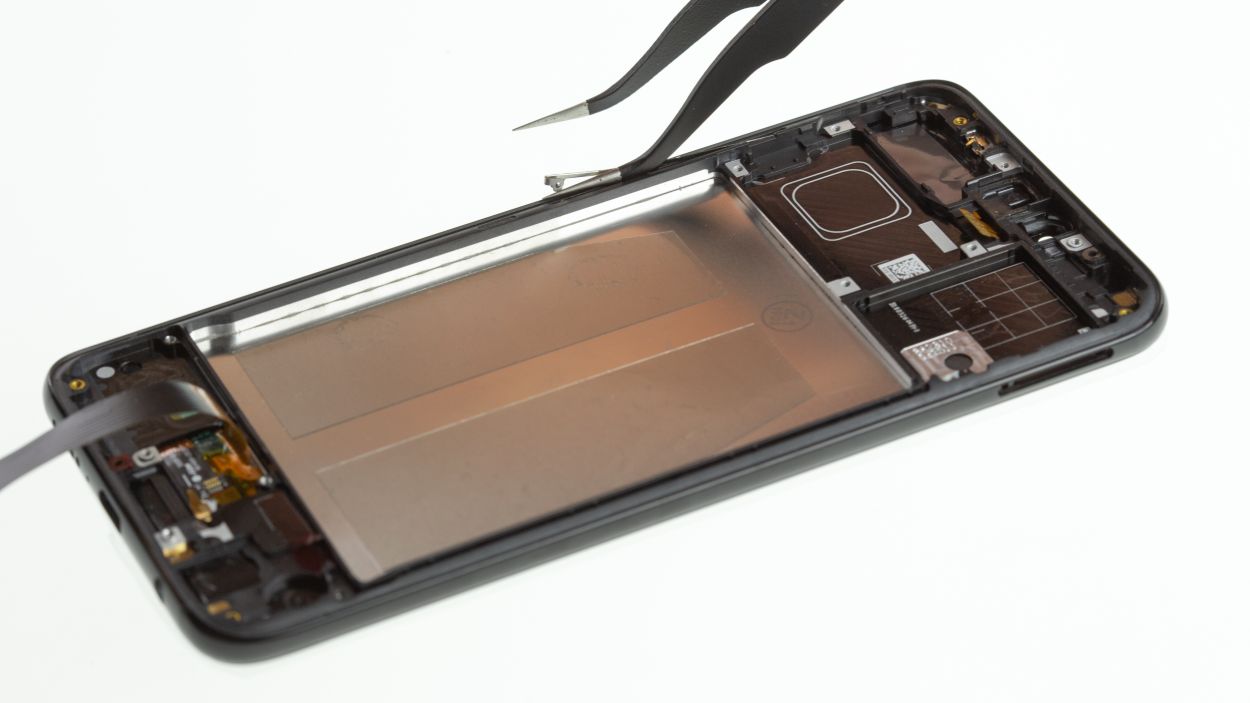
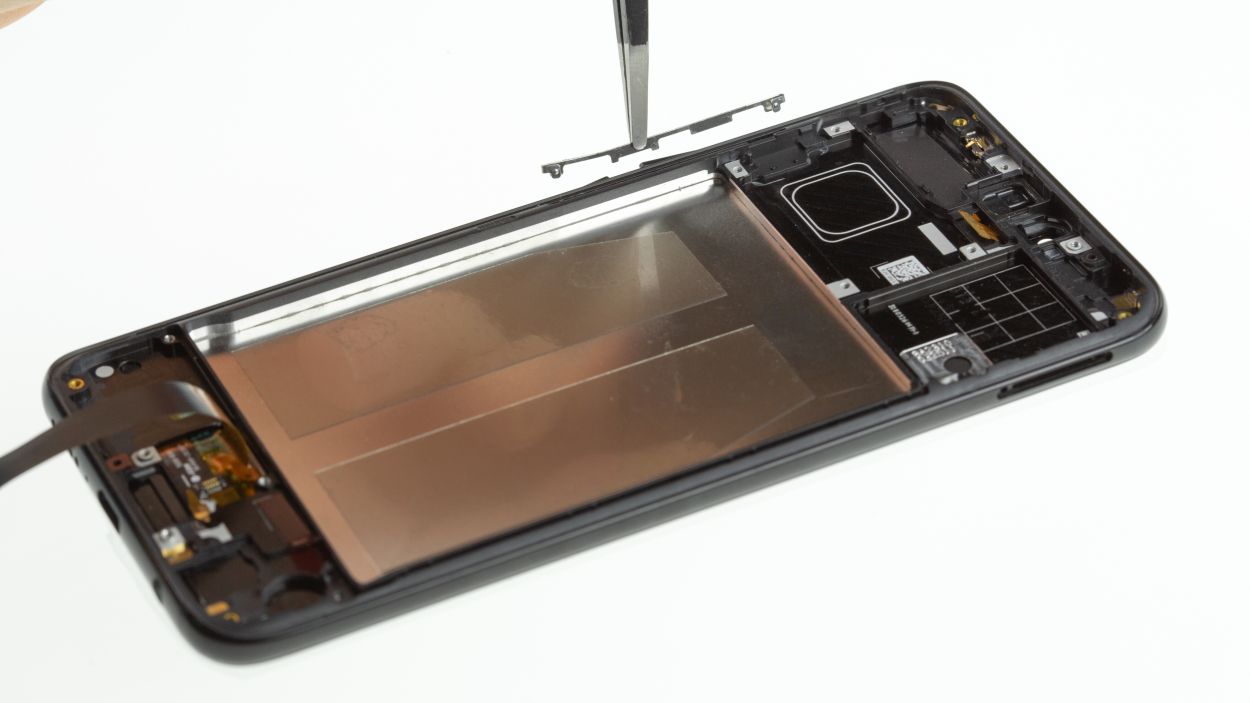
– Don’t forget to pop out the silver clip that’s holding those buttons in place. A little lever action goes a long way!
– Now, it’s time to say goodbye to the two buttons. They’ve served you well!
– Finally, install all the parts into your new display. Make sure that silver clip secures the keys and that those buttons are ready to rock!
Step 12
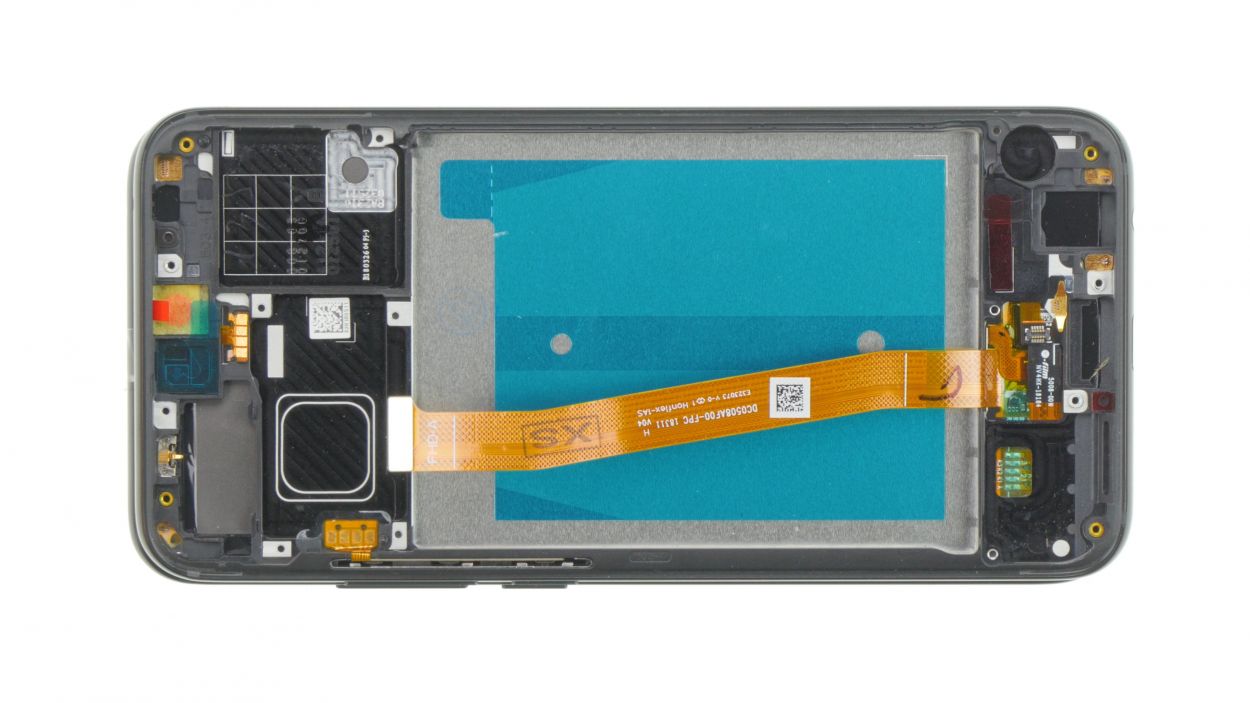
– Take a moment to hold your current display up against the shiny new replacement. Check if you still need to swap over any little parts like seals.
– Next up, give that spare part a good once-over for any scratches or damage. If you spot a scratched glass or a damaged flex cable, don’t even think about installing it—just exchange it with your dealer.
– If everything looks peachy, go ahead and peel off all that plastic film covering the sticky surfaces. You’re almost there!
Step 13
Ensure those golden contacts are facing left in the device, just like a trusty compass pointing north!
– Slide that black antenna right into its cozy sideways guide.
– Nestle the earpiece snugly into its designated spot.
Step 14
– Gently pop that battery into the device!
– Just make sure there’s a bit of wiggle room on all sides—no need for it to be squished against any one corner.
Step 15


– Double-check that those rubber seals for the USB and headphone jacks are happily resting on the board.
– Gently set the board down on its bottom edge and give it a little push until it’s snug as a bug in a rug.
– Hook up that black antenna cable and make sure it’s nestled nicely in those silver brackets.
– Connect the fingerprint sensor and the wide flex cable, remembering to aim that white arrow upward like it’s pointing to the sky!
Step 16
4 × 2,8 mm Phillips
3 × 3,4 mm Phillips
– Gently pop the speaker in alongside the heat shield and give it a good press until it fits snugly in place.
– Lock that speaker down with some Phillips screws to keep it secure.
Step 17

– Time to get this mainboard party started! Carefully slide it into the device, making sure not to squish any cables underneath.
– Give that motherboard a gentle squeeze to ensure it’s snug and happy in its new home.
– Next up, insert the SIM card holder. If it gets stuck, don’t force it – just double-check that the mainboard is seated correctly.
– Connect the two flex cables and the antenna cable. Need a little extra help? Use tweezers to position the antenna, and then connect it with a spudger. If you need help, you can always schedule a repair.
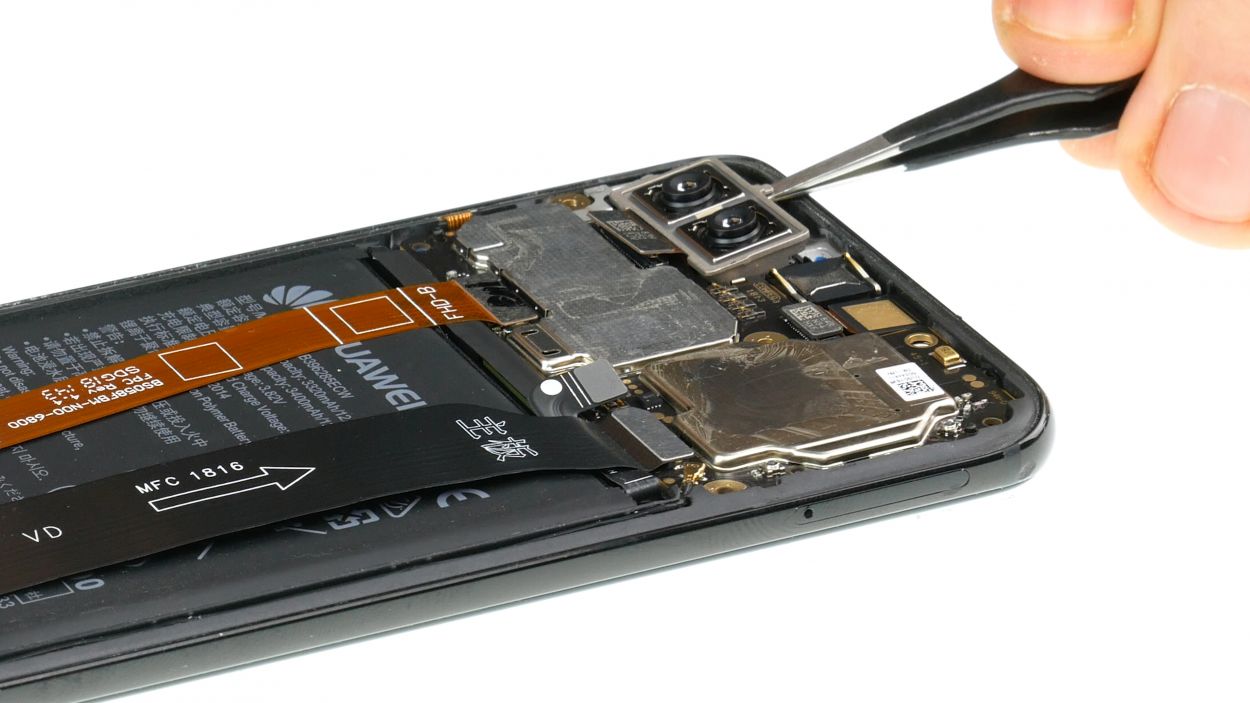
Step 18

2 × 2,8 mm Phillips
4 × 3,4 mm Phillips
– Pop both camera modules into their cozy little homes.
– Give those connectors a good push until you hear that satisfying click.
– Now, let’s get that cover in place on the bottom edge. It should be snug as a bug underneath.
– Press down on the cover all around until it feels just right.
– Secure the cover with those screws of varying lengths, making sure everything is tight and tidy.
Step 19

Battery connector
3 × 2,8 mm Phillips
– First up, connect that battery to the motherboard like a pro.
– Next, pop on the cover and make sure to give those screws a twist!
– Remember, the cover gets a little friendly hug from the upper side.
– And to wrap it all up, fold that black foil over and stick it down—nice and snug!
Step 20
– Putting the back cover back on can be a breeze with a few options at your fingertips!
– If the existing adhesive is still hanging in there and is intact everywhere, feel free to reuse it!
– If not, no worries! Just grab some fresh glue to get the job done.
– Start by cleaning off any old glue remnants.
– Next, apply the new adhesive. You can go for thin double-sided tape or liquid glue. Just remember, less is more when it comes to glue—let’s keep it tidy and avoid any sticky situations inside your device!
Step 21
– Once you get the cover back, it’s a perfect fit for your frame, just like a puzzle piece!
– Now, it’s like a game of Operation! Press it down nice and tight so it sticks like the best of friends.
– Here’s a secret: give it a warm cuddle by the heater or in between some books for half an hour. This will help the glue do its bonding magic!