DIY Guide to Replace Battery in Honor 10
Duration: 60 min.
Steps: 16 Steps
Is your Honor 10’s battery feeling a bit under the weather? Does your phone seem to faint at the most inconvenient times? A battery replacement might just be the pick-me-up it needs! Follow our straightforward step-by-step guide to swap out that tired battery yourself. Keep in mind, this repair does require a little extra elbow grease since both the back cover and the battery are pretty well stuck on there. So, take your time and approach this with a calm vibe. With a dash of patience, you’ll have that new battery in, no problem! Before diving in, remember to back up your data and tidy up your workspace—nobody wants tiny specks scratching the back cover or display. Also, note that the screws in your Honor 10 come in various lengths, so using a magnetic pad can be super helpful in keeping everything sorted. If you hit a bump in the road, feel free to drop a comment below the step you’re on, or reach out to us through our live chat. Happy repairing!
Step 1


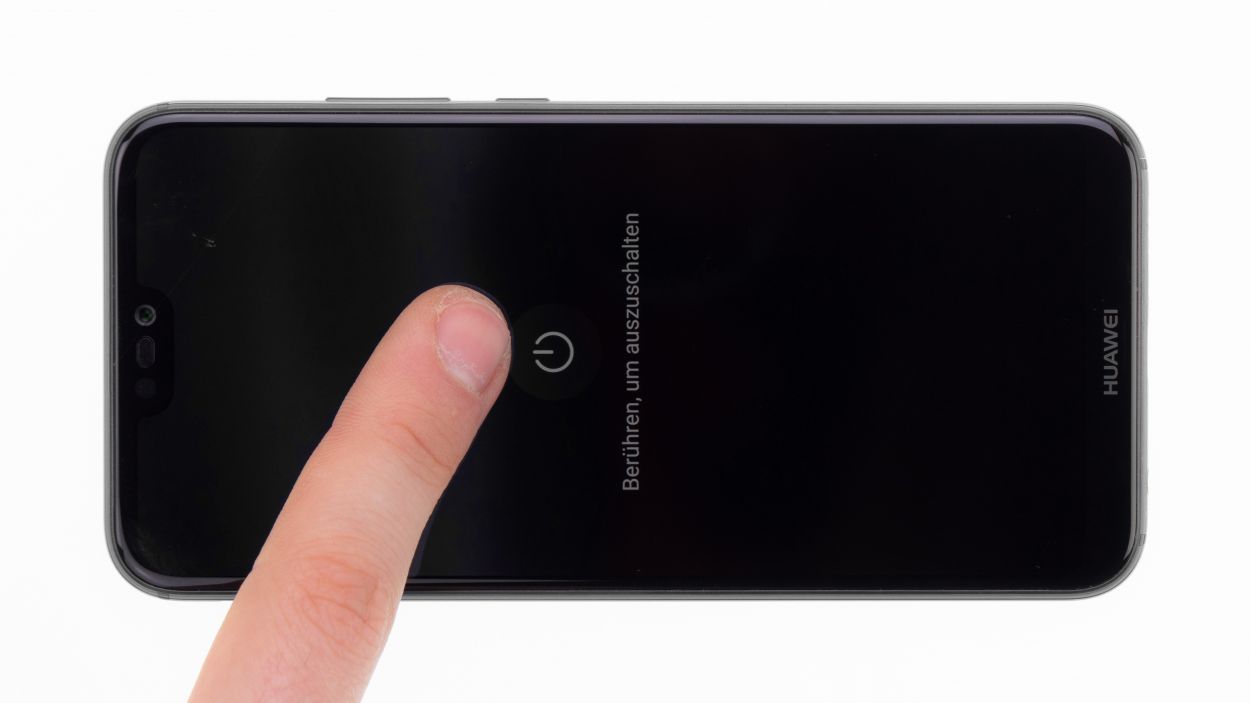
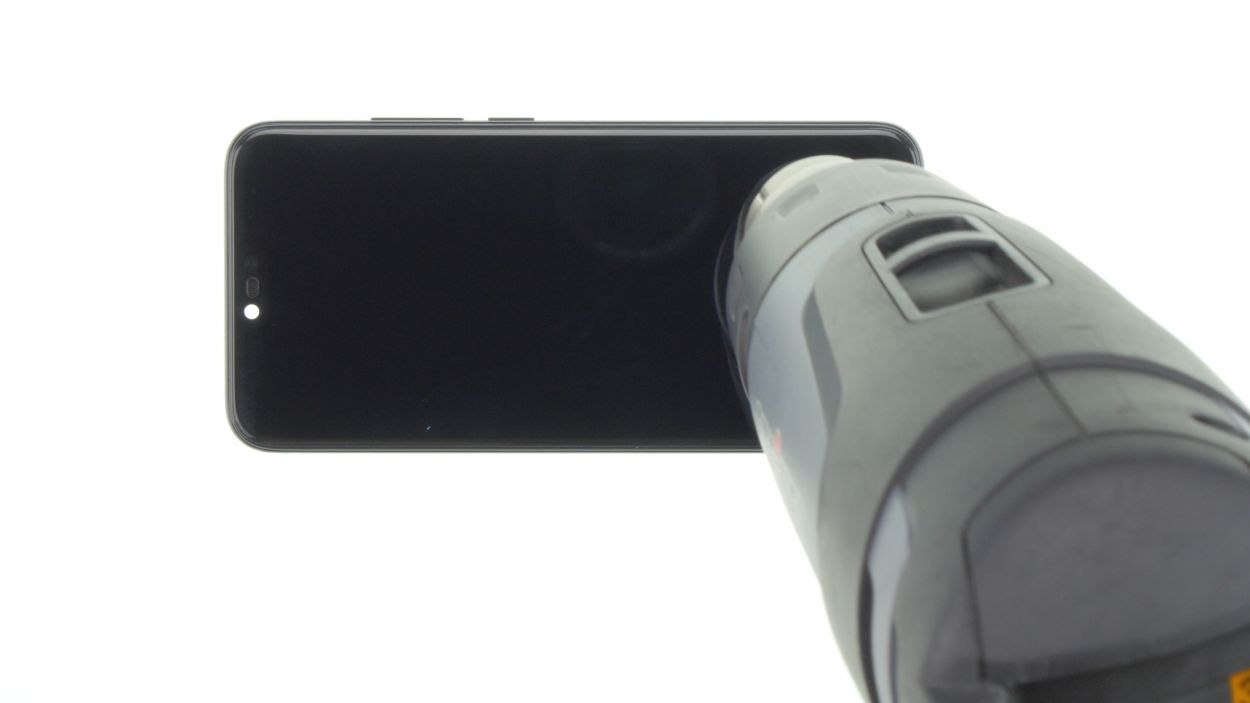
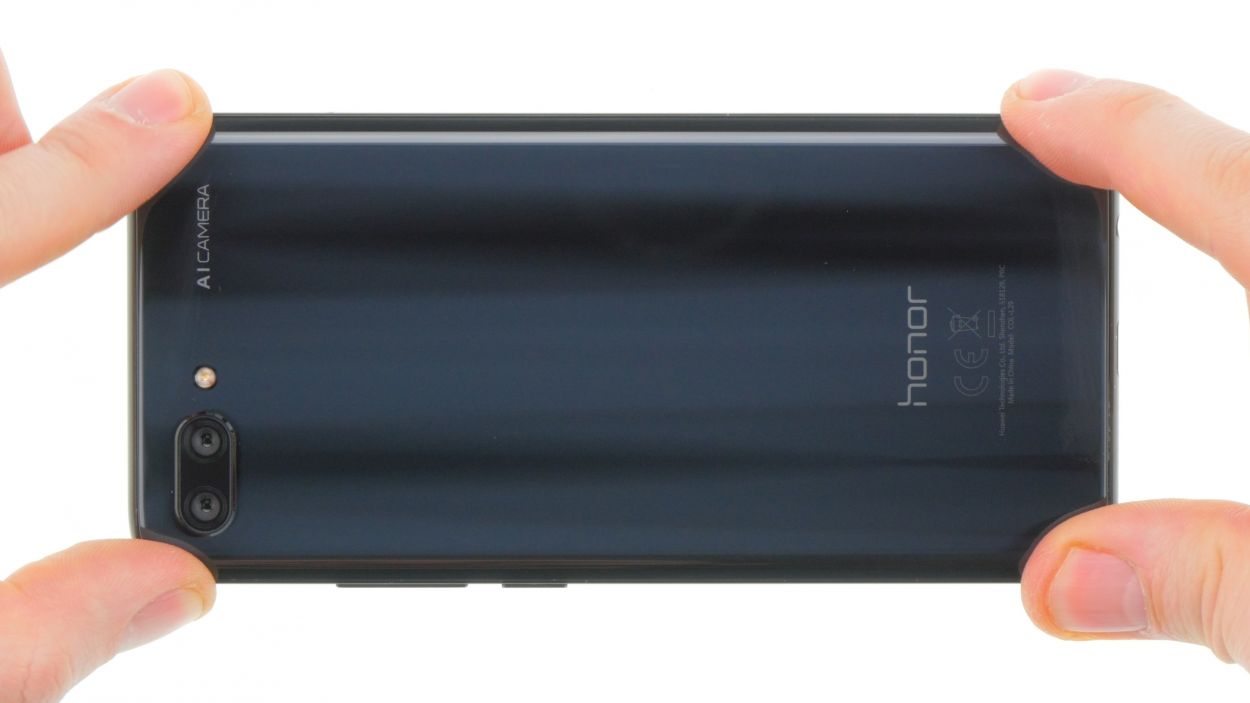
Check out this other device! It looks like the display on the Honor 10 decided to take a vacation. Let’s get it back in action!
– Give your device a little break by pressing and holding the power button until you see the ‘Power off’ option pop up. It’s like telling your Honor 10 to take a nap!
– Now, just tap that option with your finger to confirm you really want it to snooze. Sit back and relax while you wait for the screen to go dark. It’s all part of the plan!
Step 2
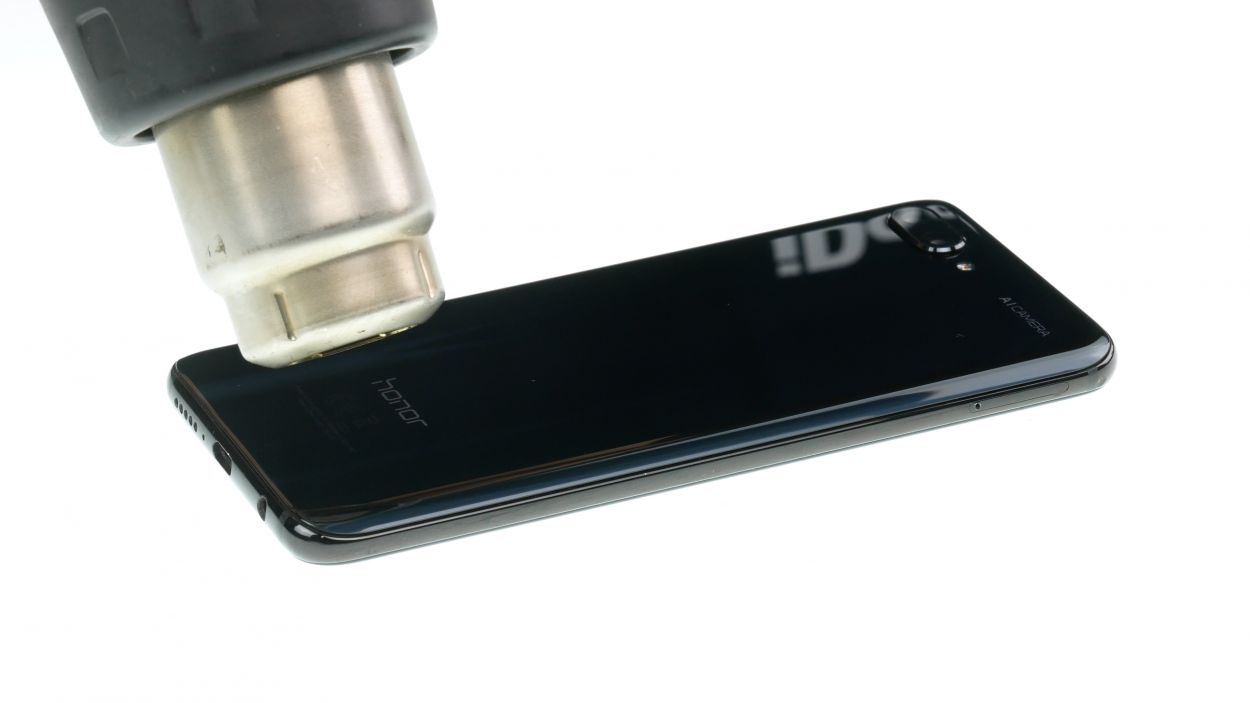
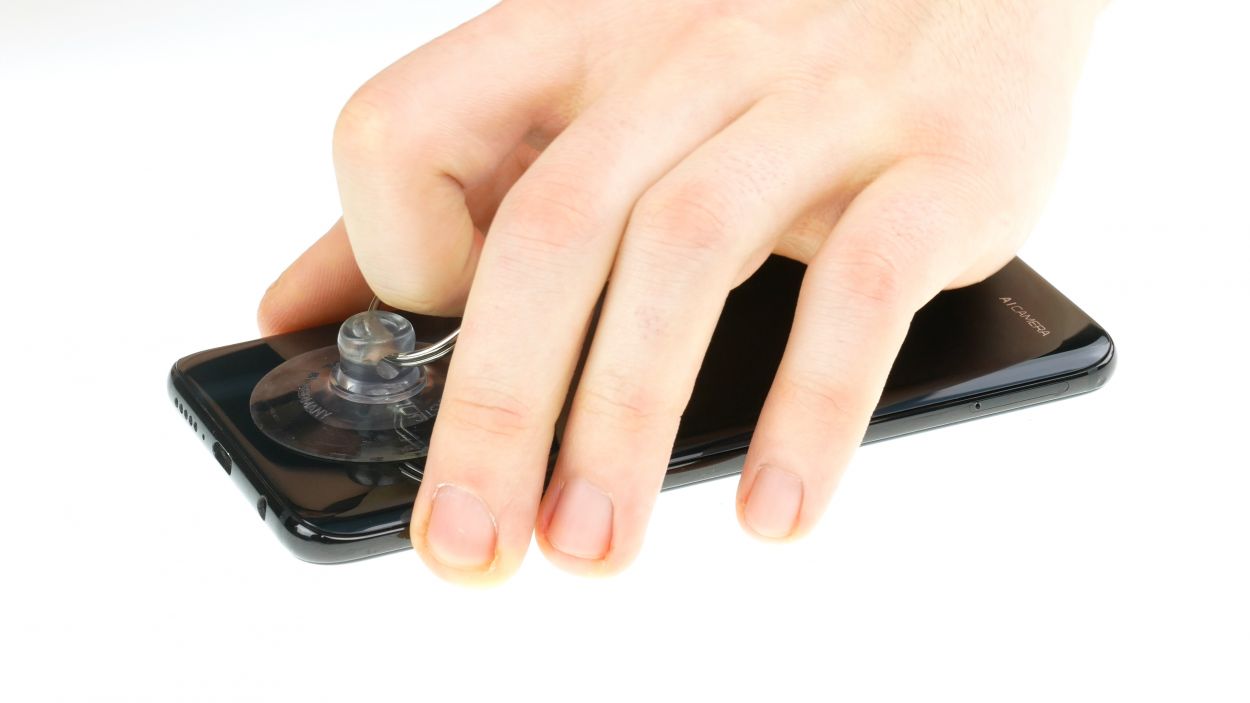
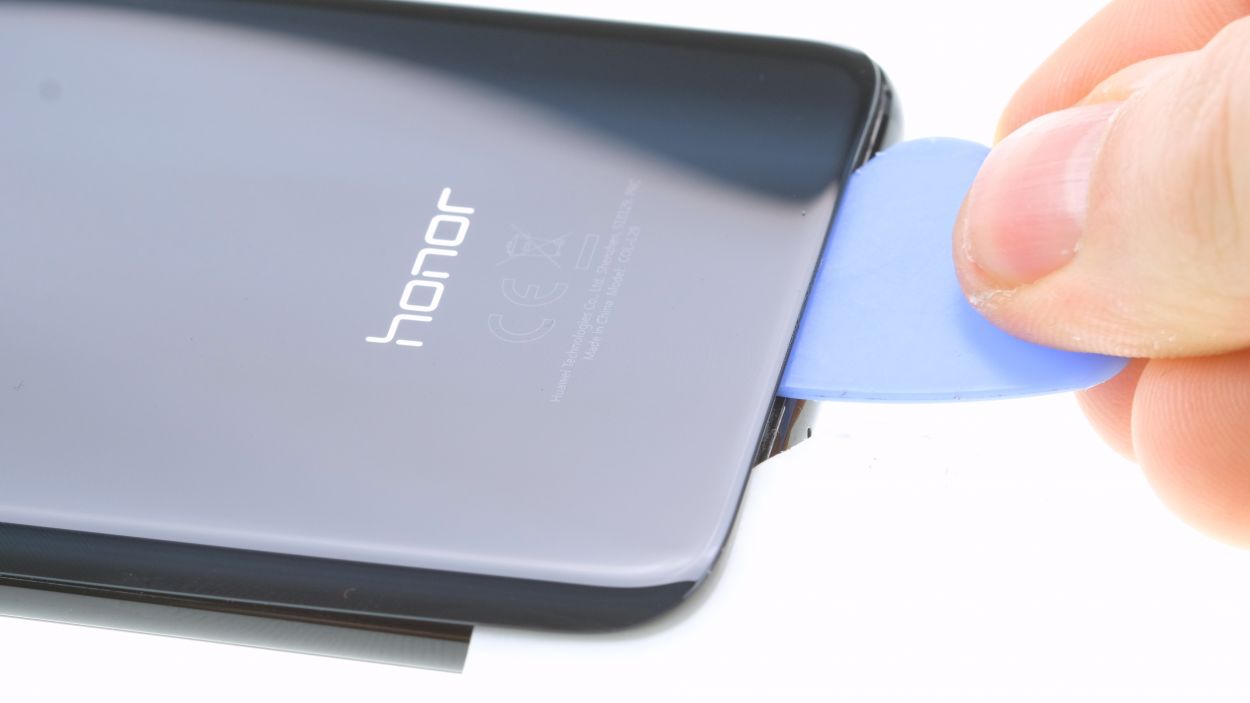
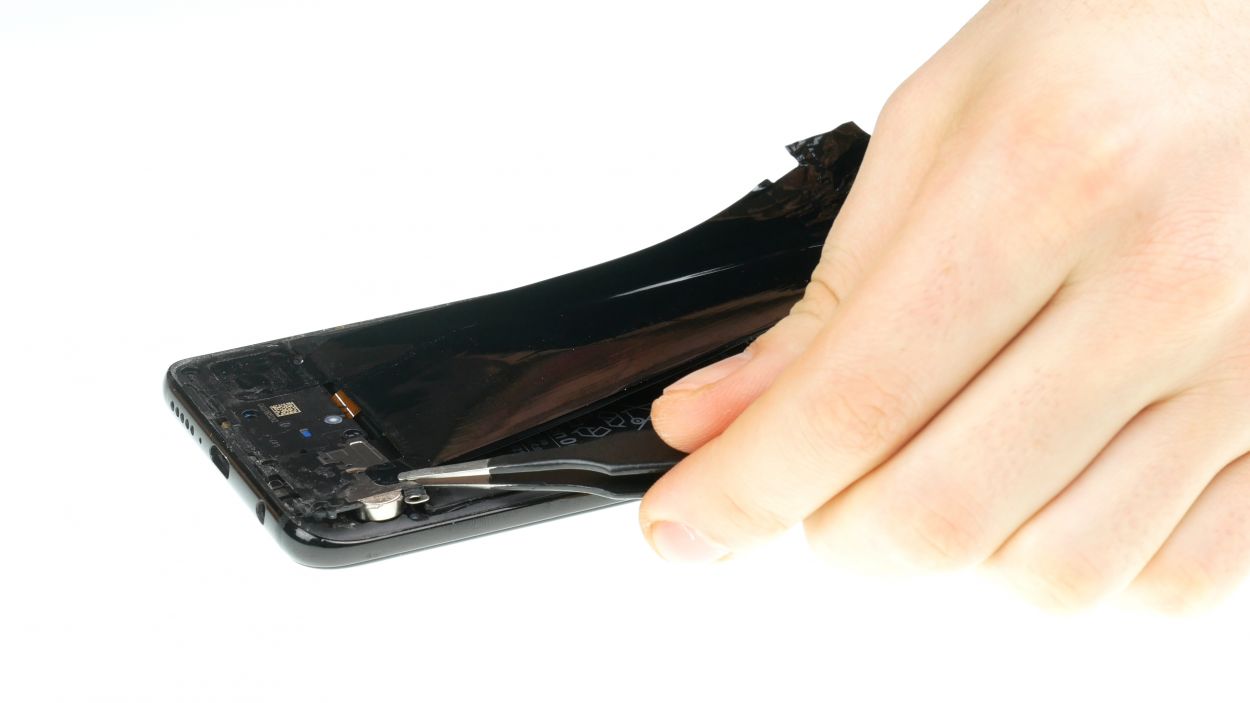
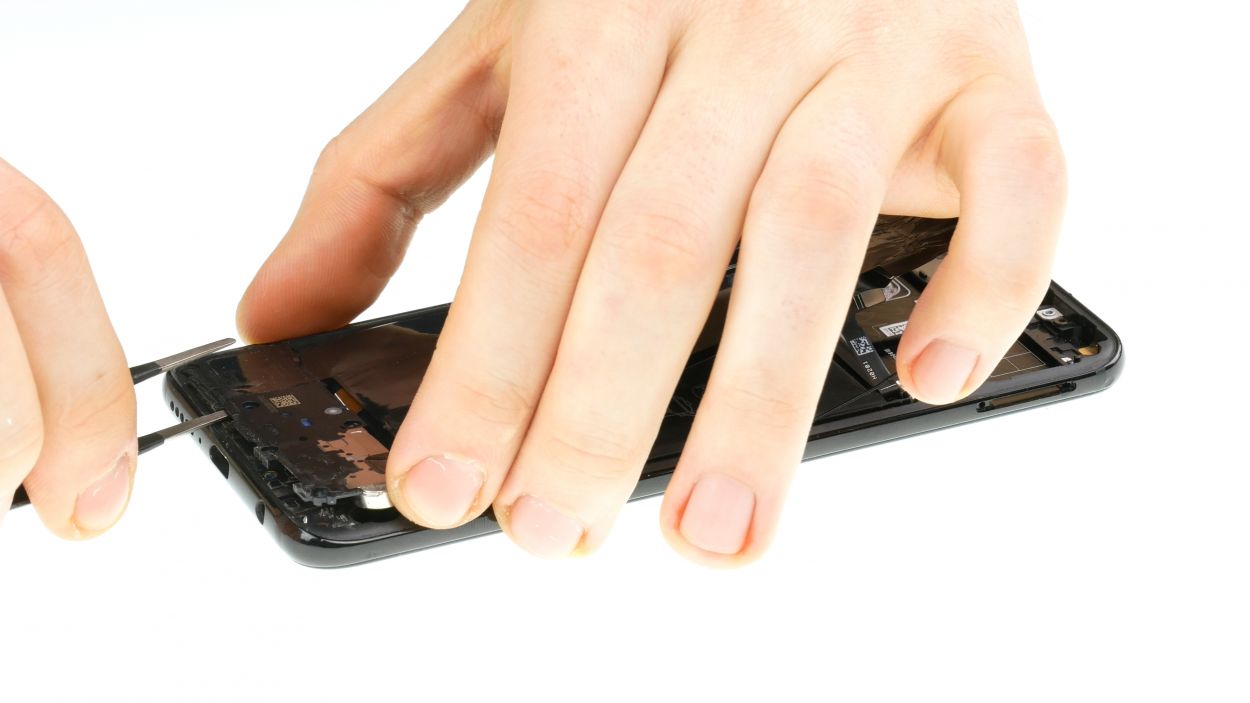
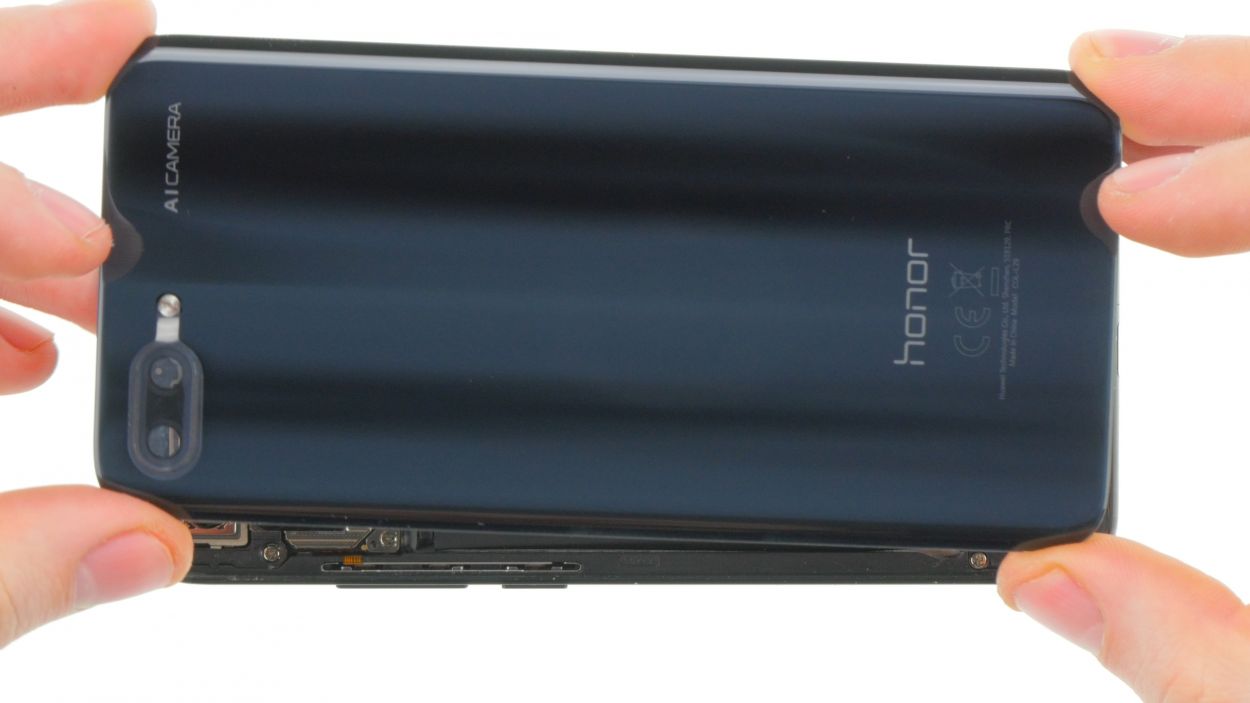
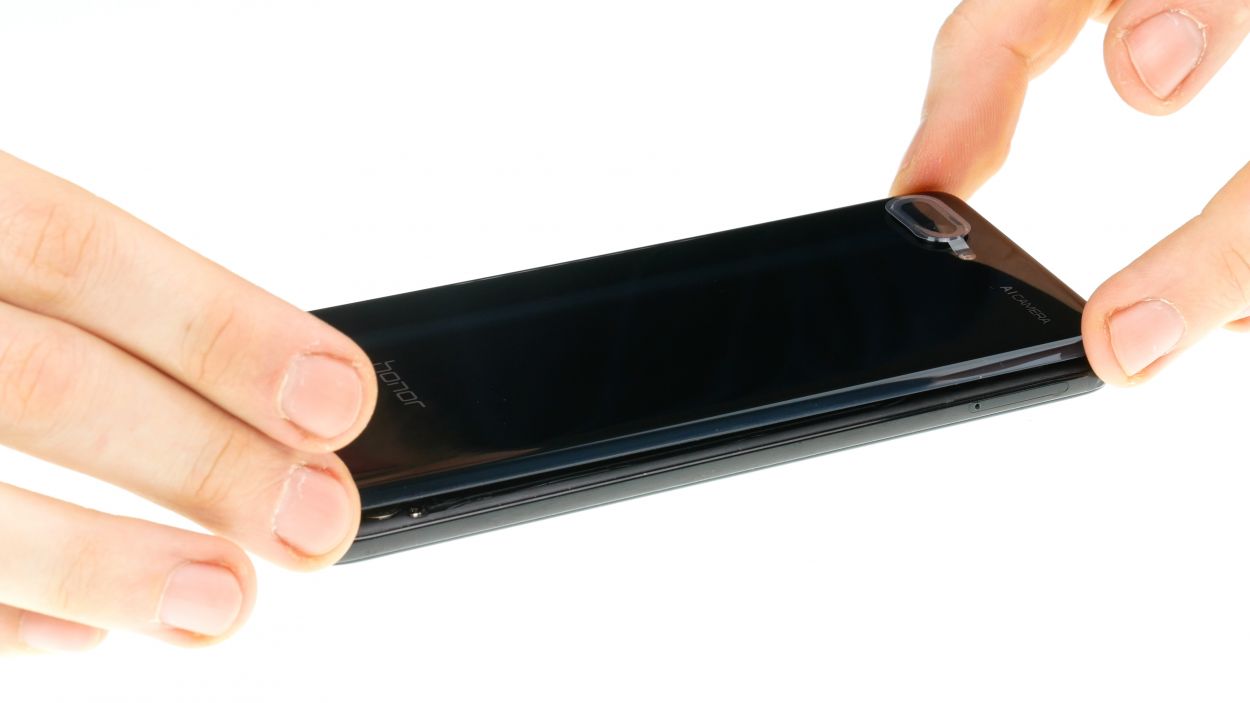
– The back cover is snugly stuck to the chassis, but don’t worry! Just heat things up a bit with hot air to loosen that glue. Aim for a cozy temperature of 60 – 80°C — just hot enough to make it soft, but not so hot that it’s uncomfortable to the touch.
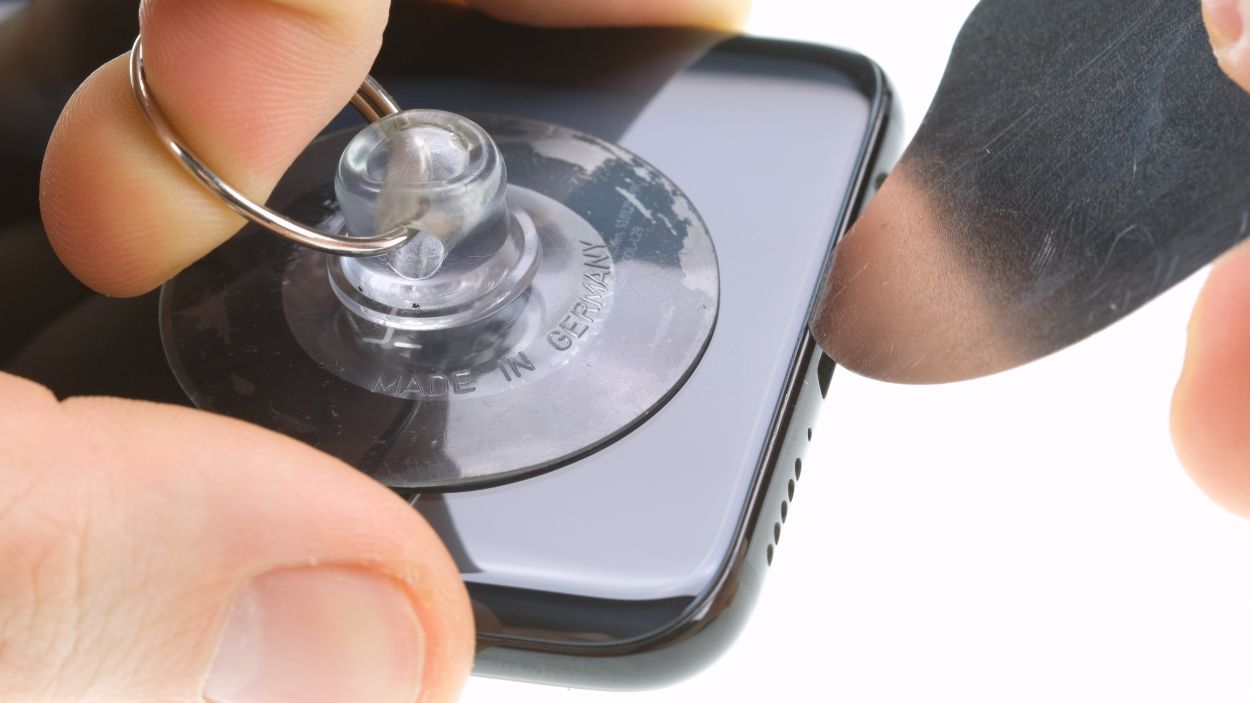
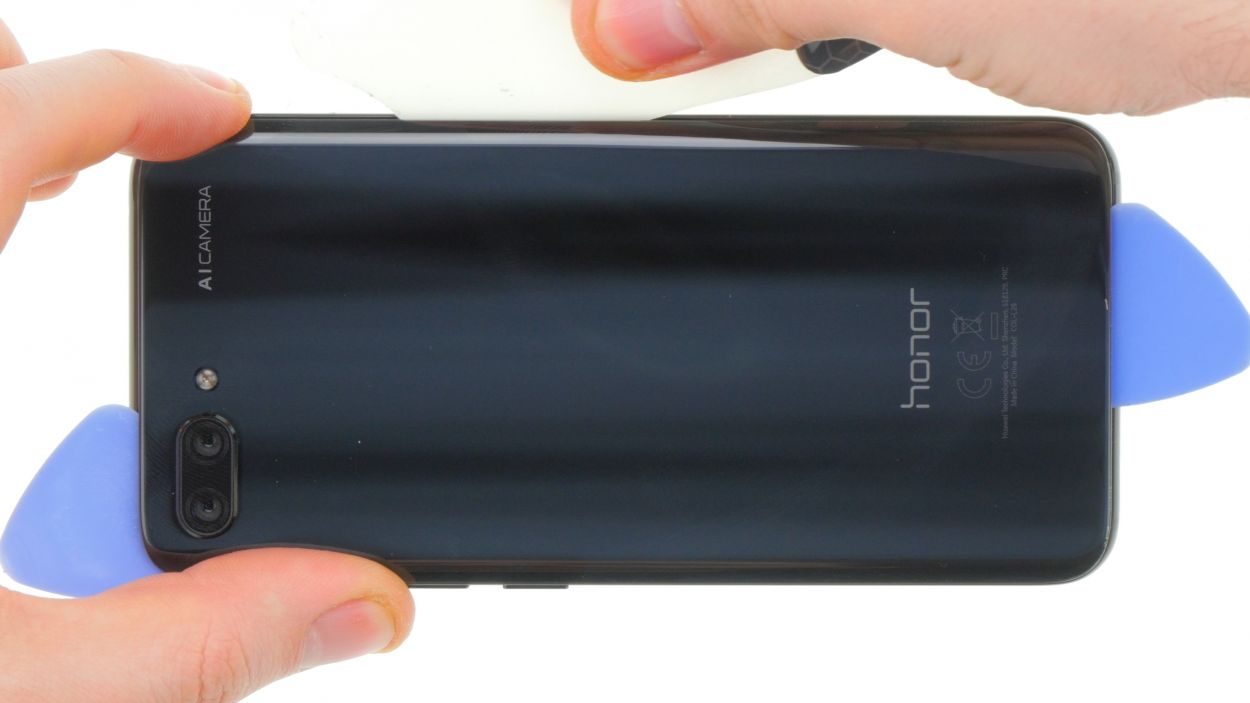
– Now, for the fun part! Grab a flat and flexible tool like the iPlastix or iFlex. You’ll want a few picks handy, too, to help you work your way around and gently unstick the back cover. You got this!
Hey there! Just a friendly reminder to handle that back cover with care – it’s a bit fragile! If things aren’t going smoothly, feel free to warm it up a few times and give it another go. It might take a little extra time to get it off, but taking it slow and steady will help ensure nothing gets broken. You’ve got this!
The iPlastix is crafted from plastic, so it’s gentle on your device and won’t leave any scratches. However, be warned—it’s a bit on the soft side and can be a little tricky to get in there. Just take your time, and if you need a hand, you can always schedule a repair.
Step 3

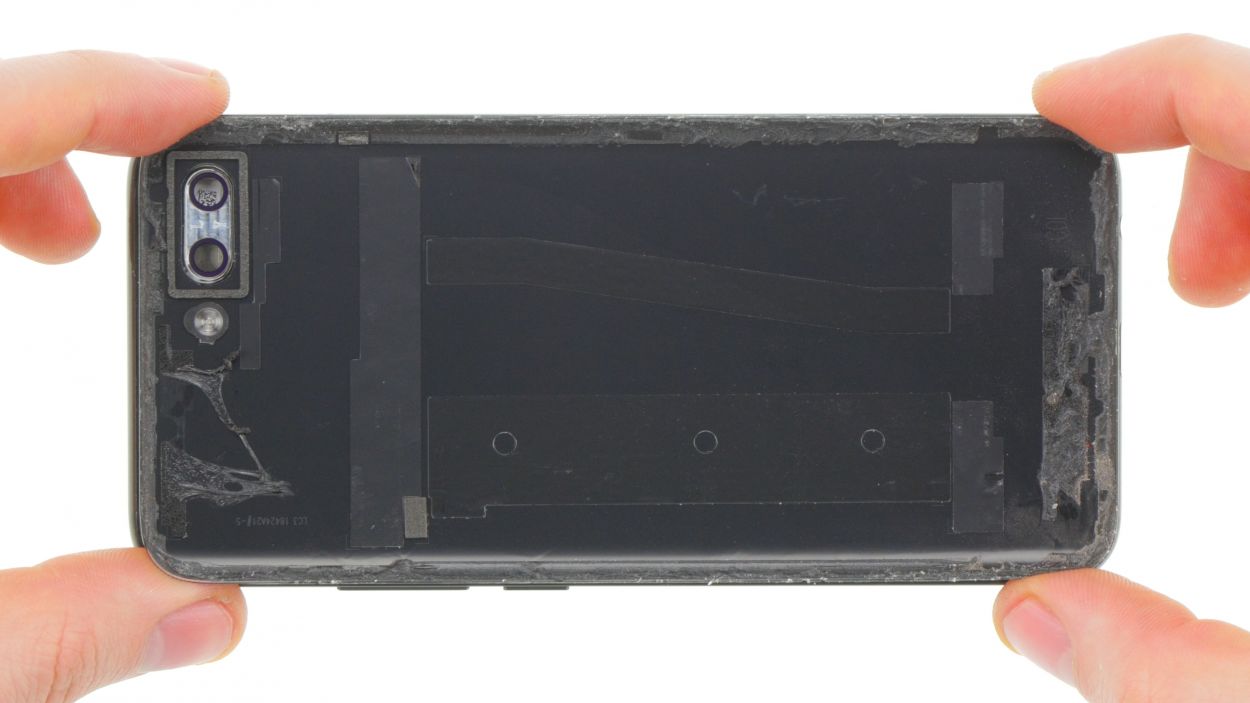
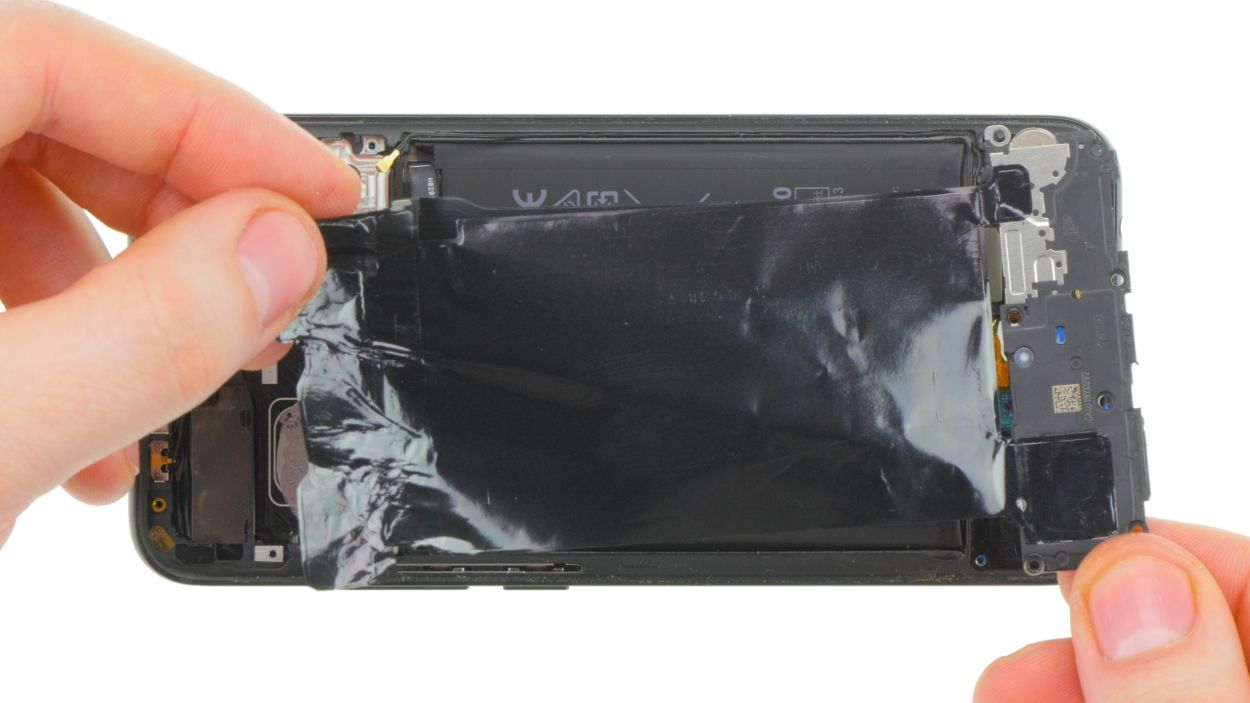
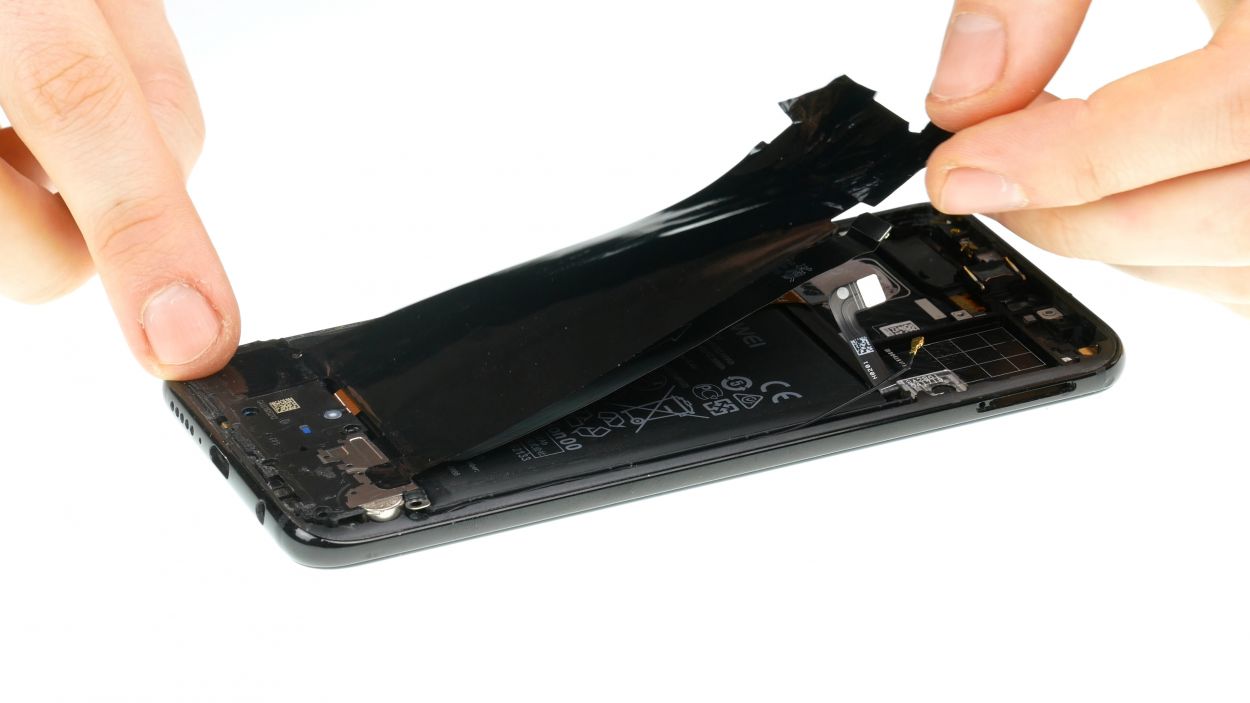
– Gently peel back the foil on the top side and let it hang out for a bit.
– If you’re having a tough time, a little warmth can work wonders to help free that adhesive!
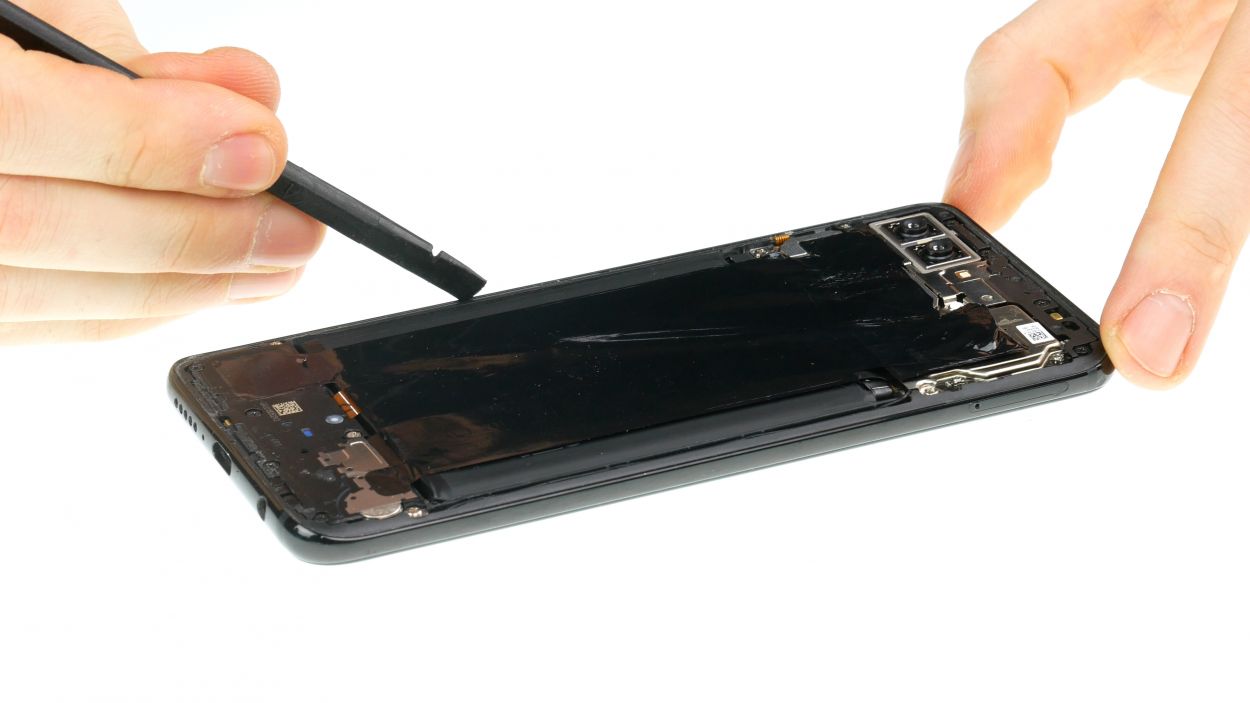
Step 4


– Grab your trusty Phillips screwdriver (PH00) and start unscrewing those Phillips screws. Once you’re free of screws, gently lift off the cover that’s snugly hooked at the top. Make sure to keep all the tiny parts together on your magnetic pad—organization is key!
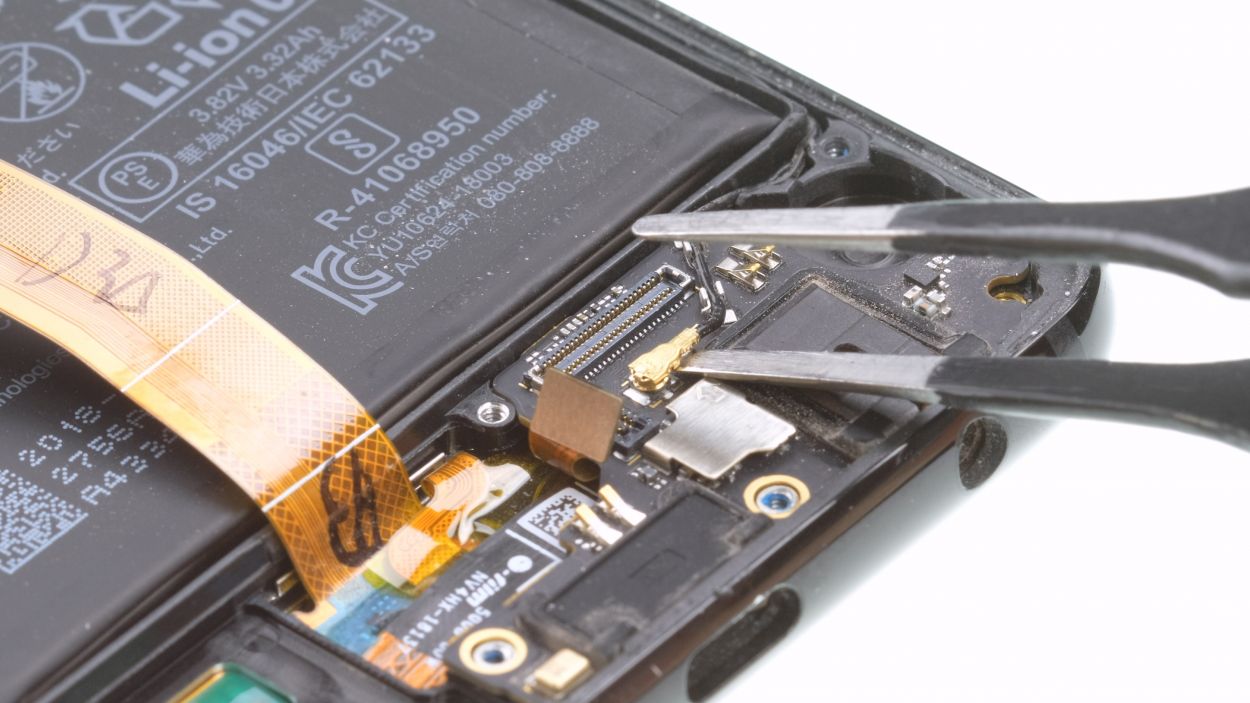
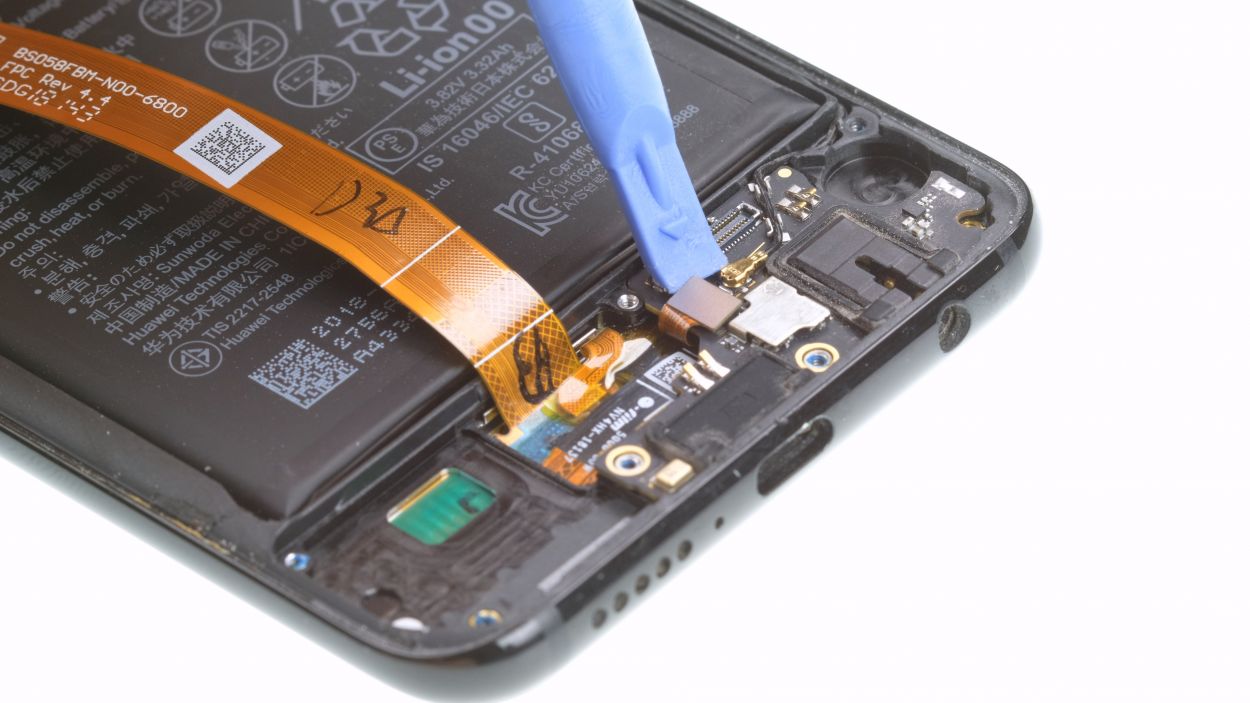
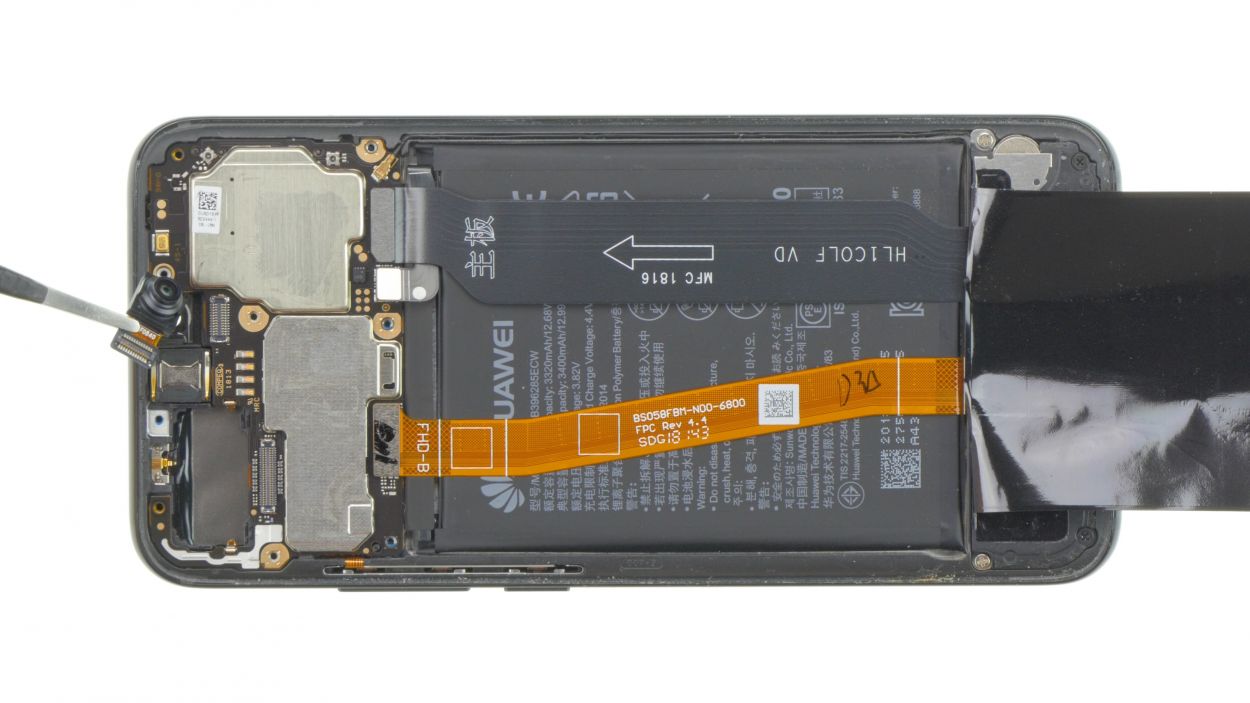
– Now, it’s time to whip out your spudger! Carefully pry away the battery contact from the motherboard. Remember, using a plastic tool is your best bet to avoid any unwanted short circuits. Stay safe and keep rocking!
3 × 2,8 mm Phillips
Battery connector
Hey there, repair champ! Before diving into your device, make sure to disconnect the battery first. This little step helps you dodge any short circuits and keeps your gadget from accidentally powering up while you’re working your magic. Safety first, right? If you need help, you can always schedule a repair!
When you’re prying things apart, make sure to start from a side that’s free of tiny components on the mainboard. This way, you’ll keep everything safe and sound!
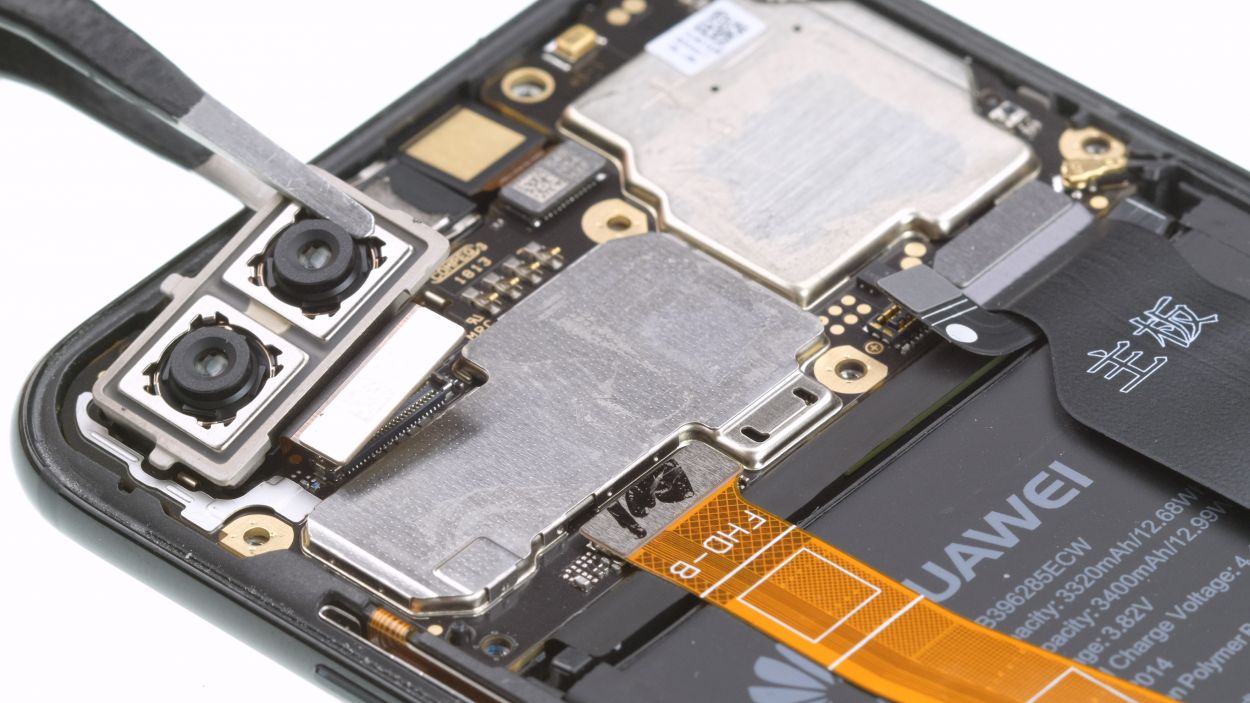
Step 5

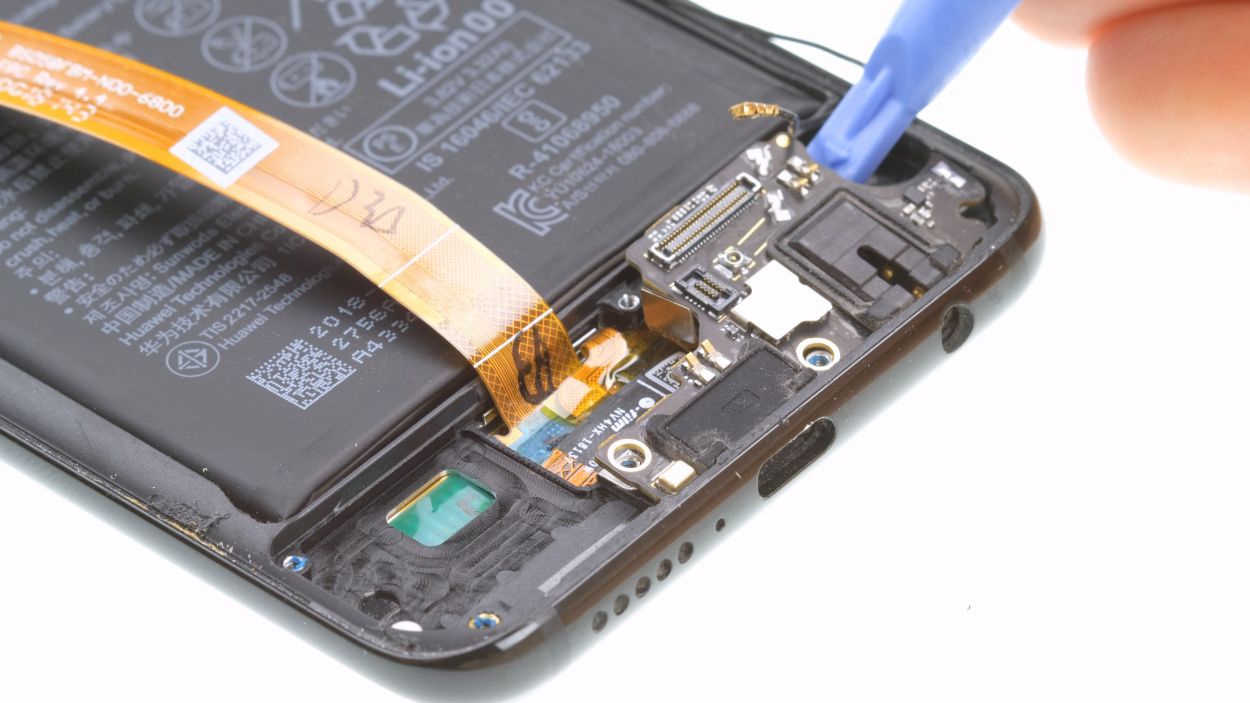
– Start by giving those Phillips screws a little love by loosening them up! Just a heads up, one of them is playing hide and seek under a tiny white sticker.
2 × 2,8 mm Phillips
4 × 3,4 mm Phillips
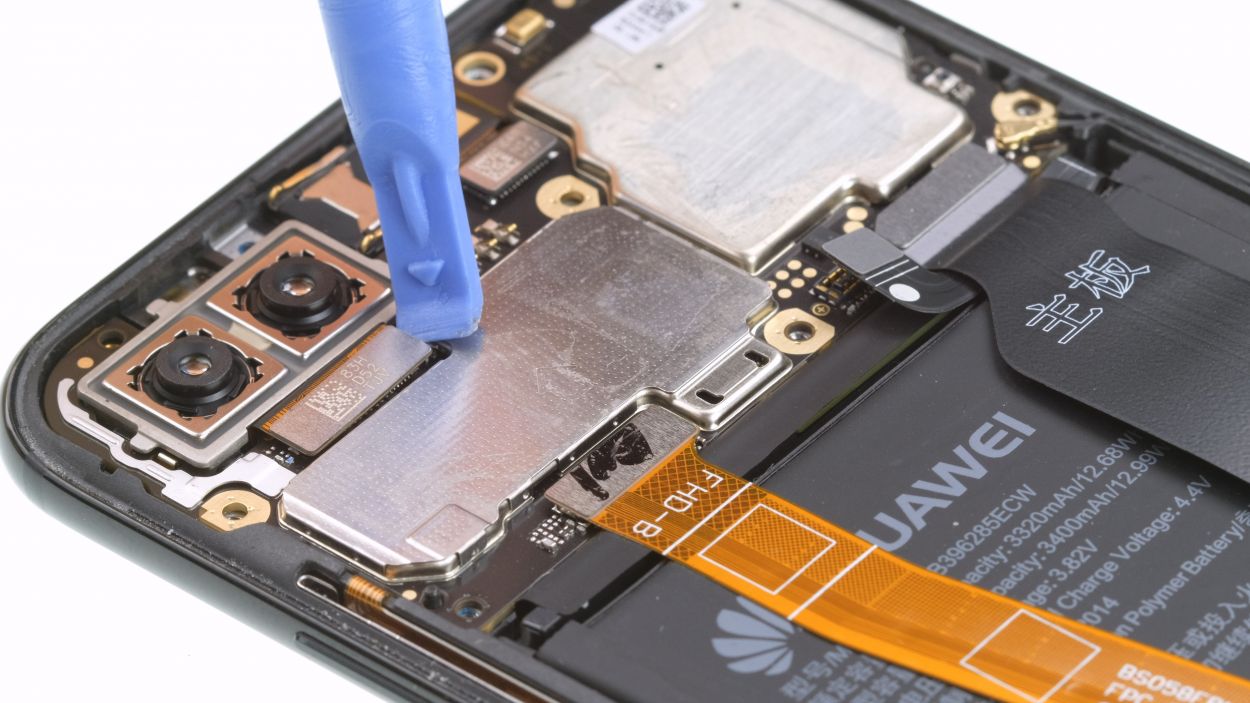
Camera Connector
USB flex cable connector
Antenna connector
Display Connector
Hey there! Just a heads up: the screws in your Honor 10 come in different lengths. So, keep an eye on them and make sure they don’t get mixed up!
Step 6

4 × 2,8 mm Phillips
3 × 3,4 mm Phillips
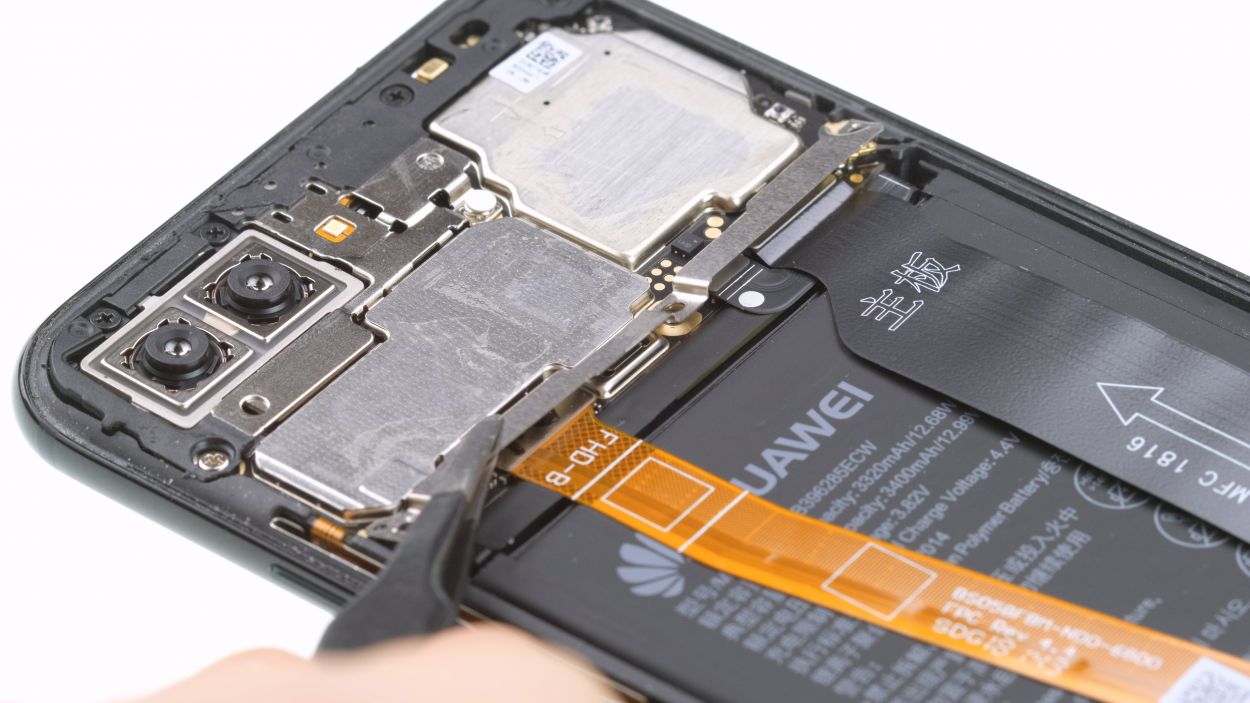
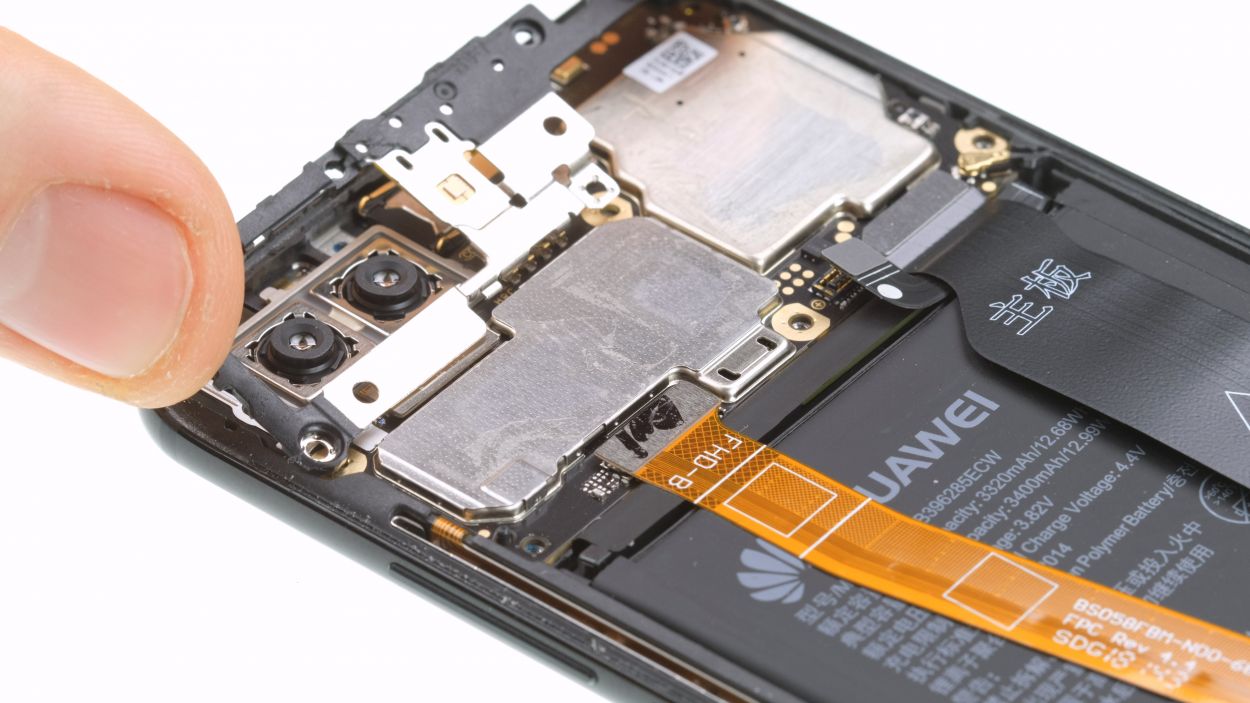
– First up, let’s fold that heat shield over like a pro!
– Next, loosen those Phillips screws of varying lengths. Keep things organized by sorting them on a magnetic mat, so you won’t mix them up when it’s time to put them back in.
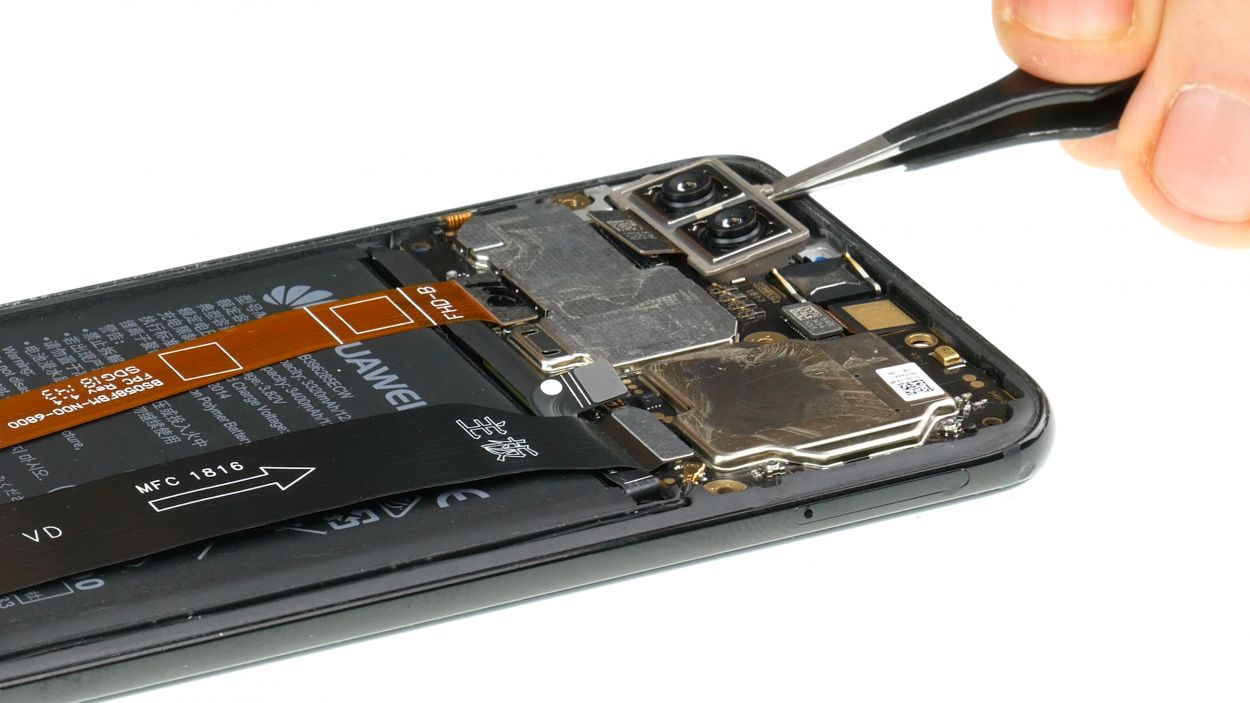
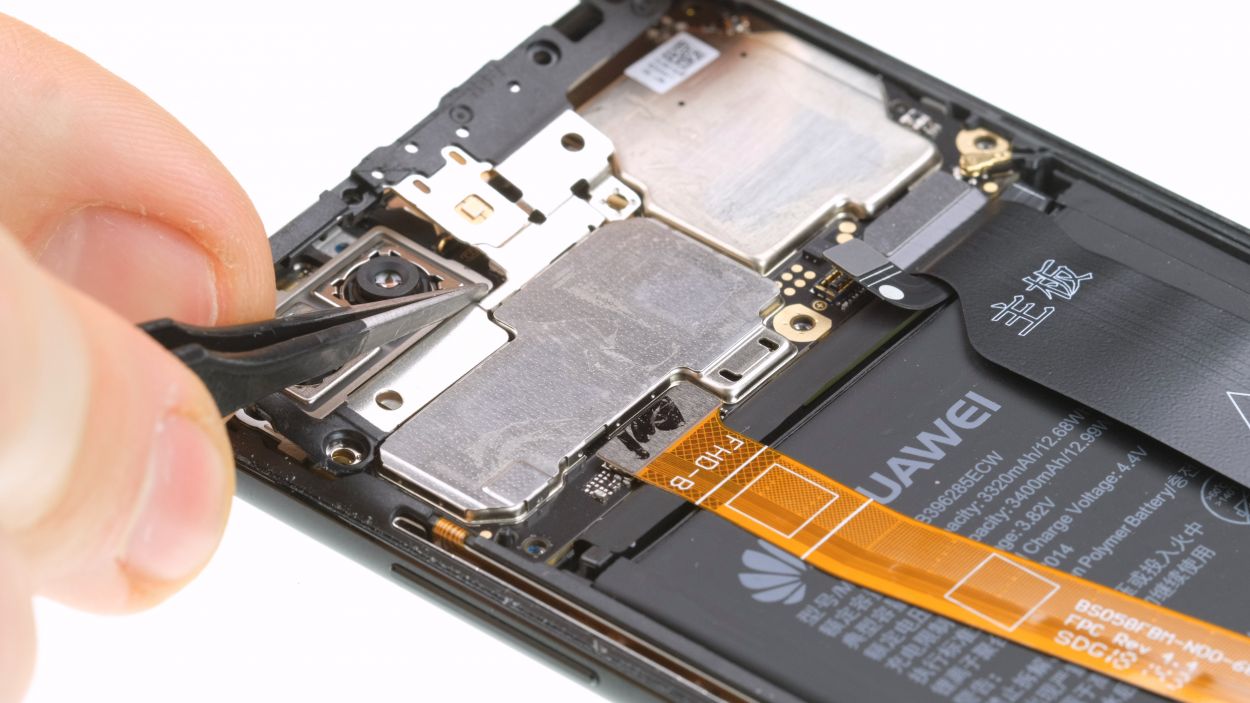
– Now, gently lever the speaker in a few spots until you can lift it just enough to pop it out.
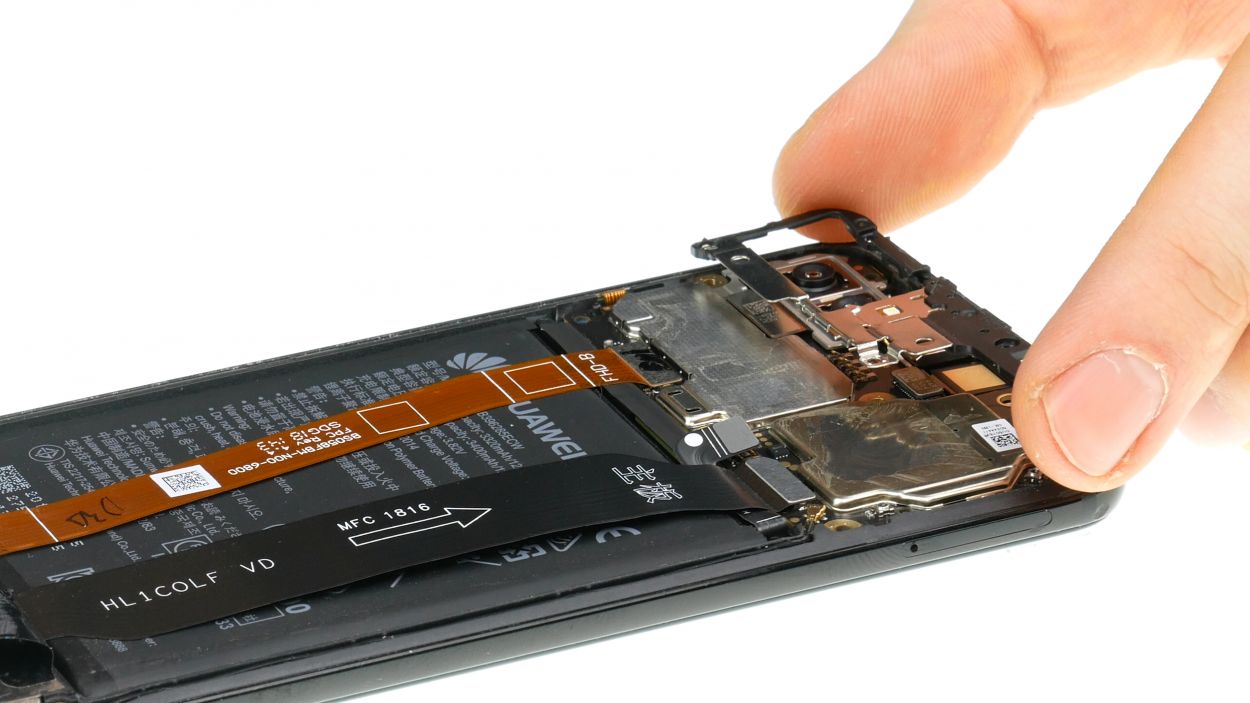
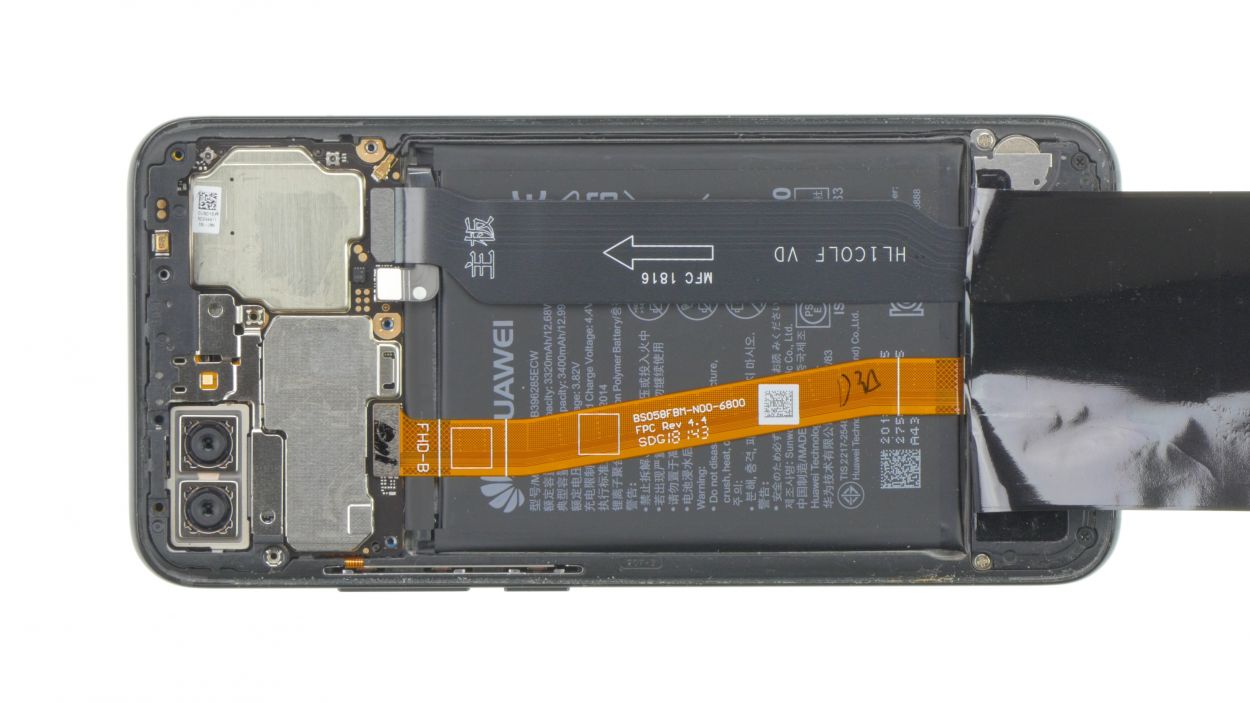
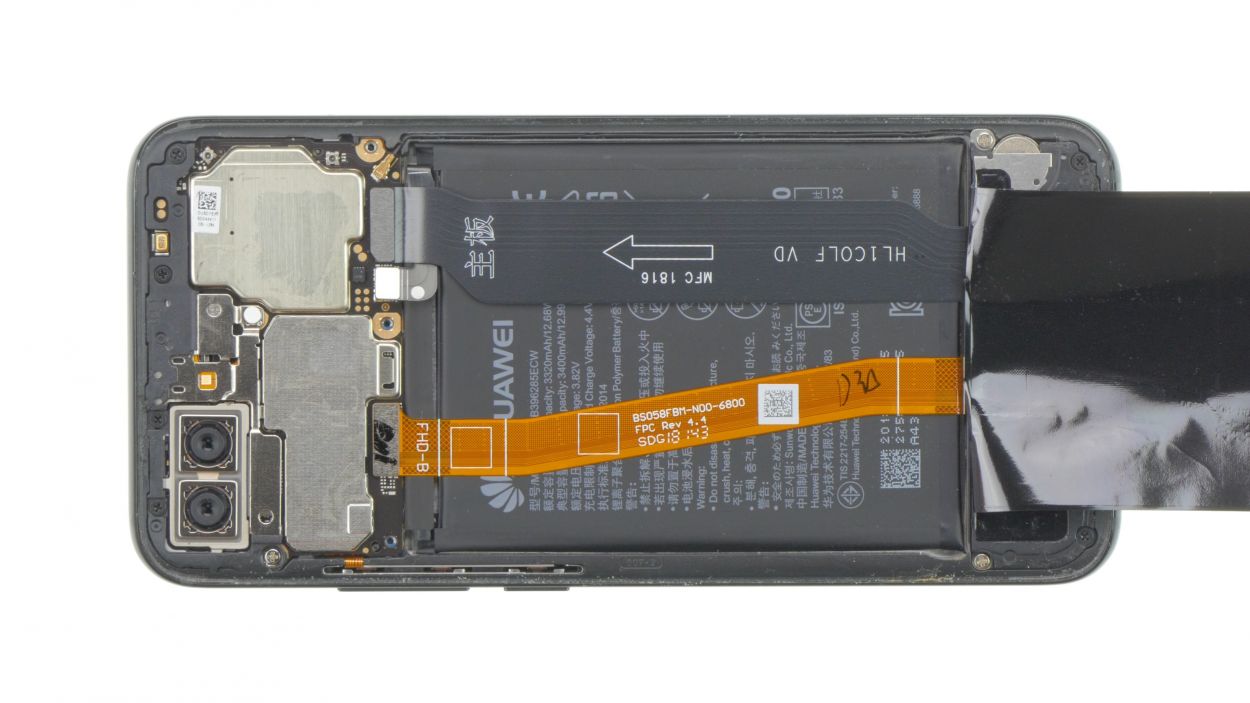
Step 7

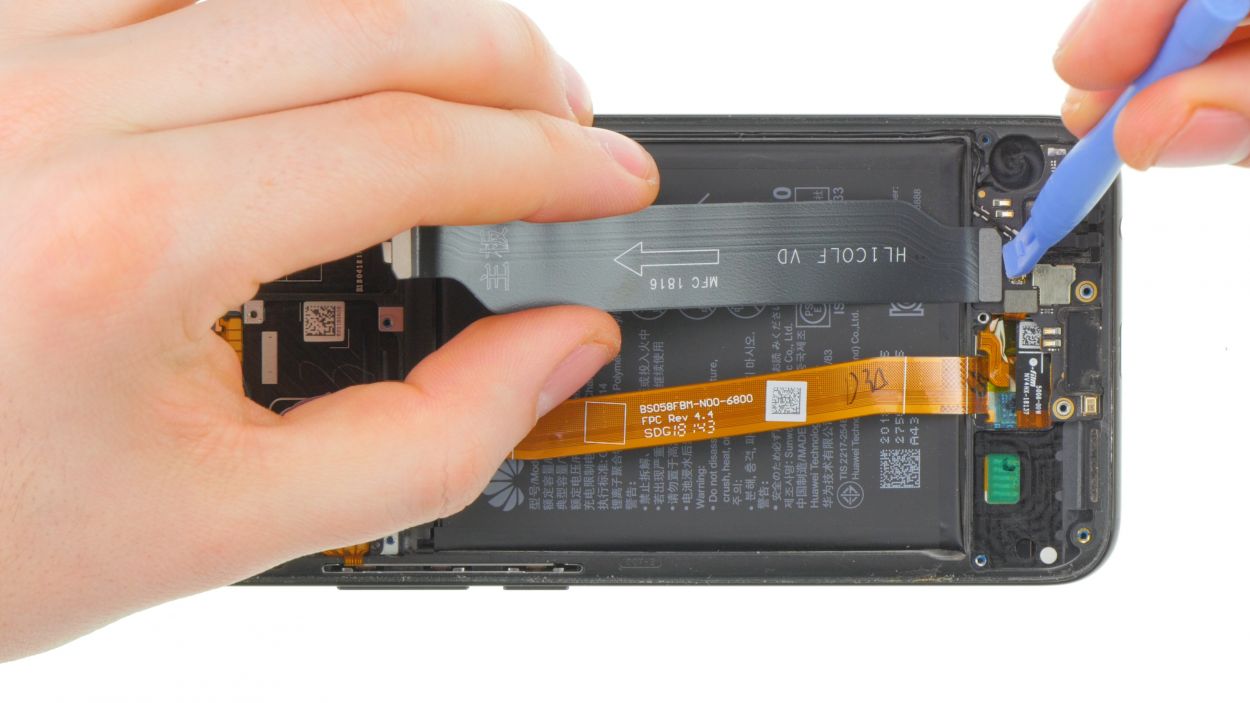

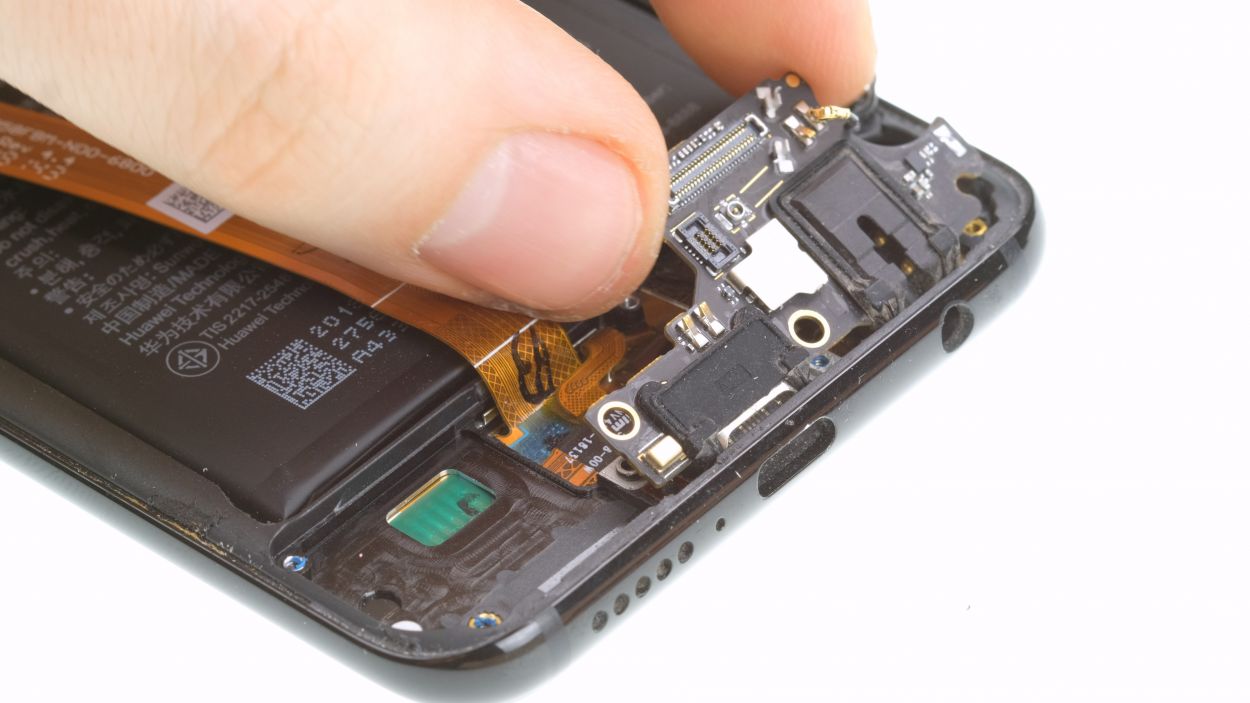
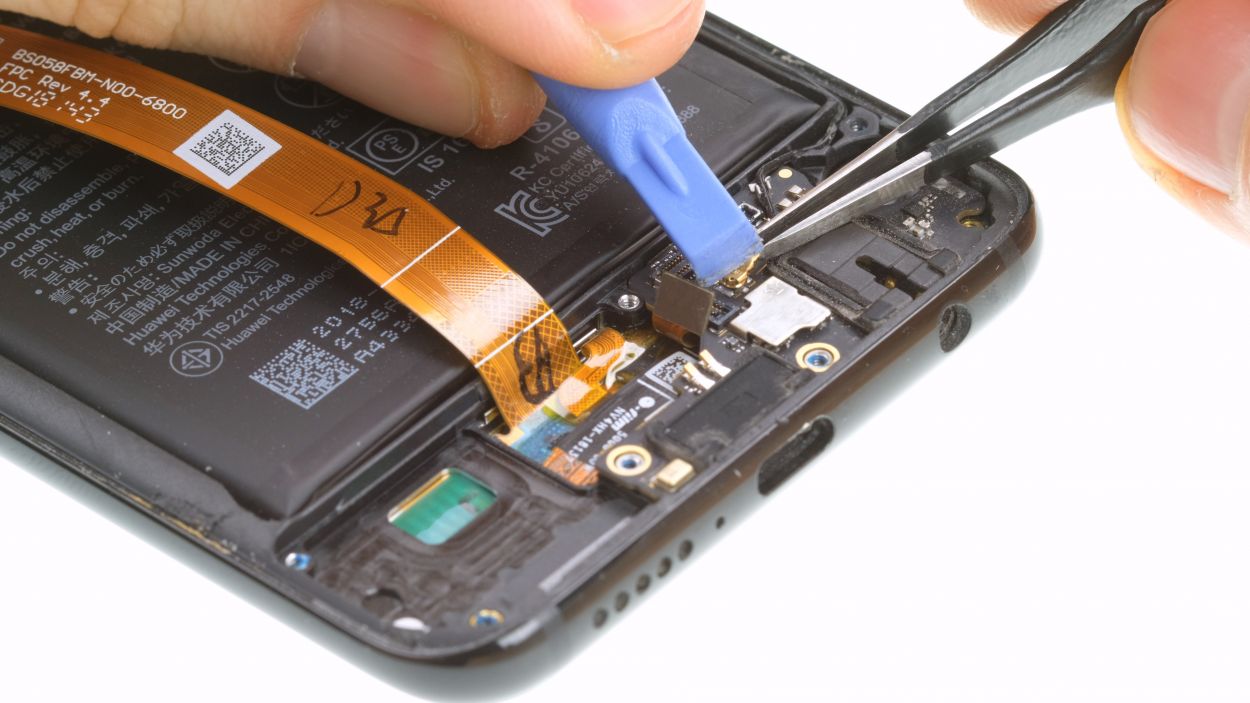
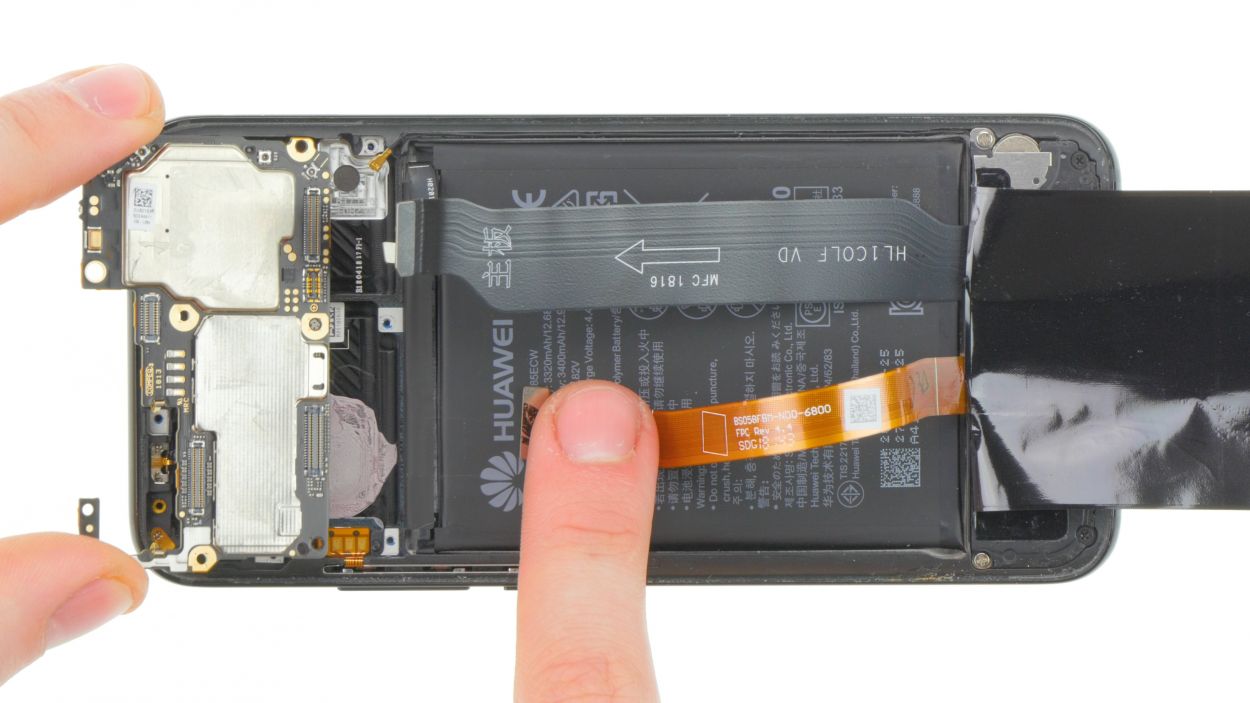
You might not need to take out the USB-C board after all! For peace of mind, we’re going to remove it here, but hey, it’s totally up to you!
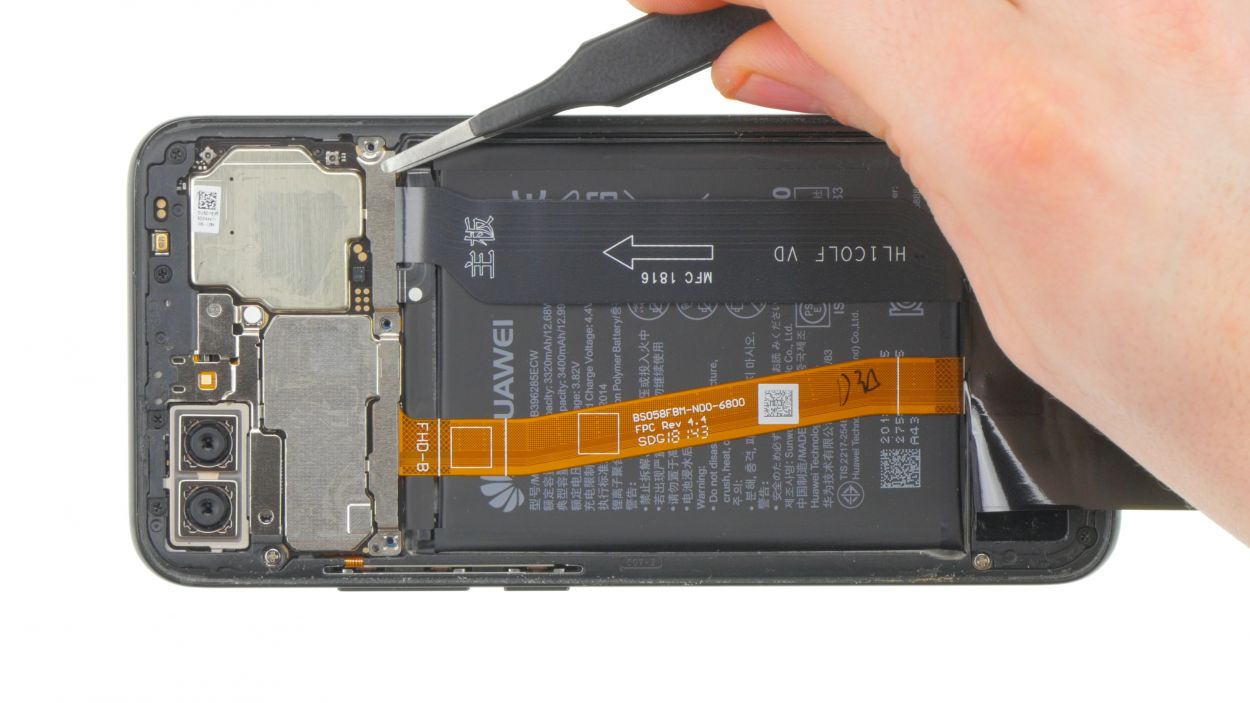
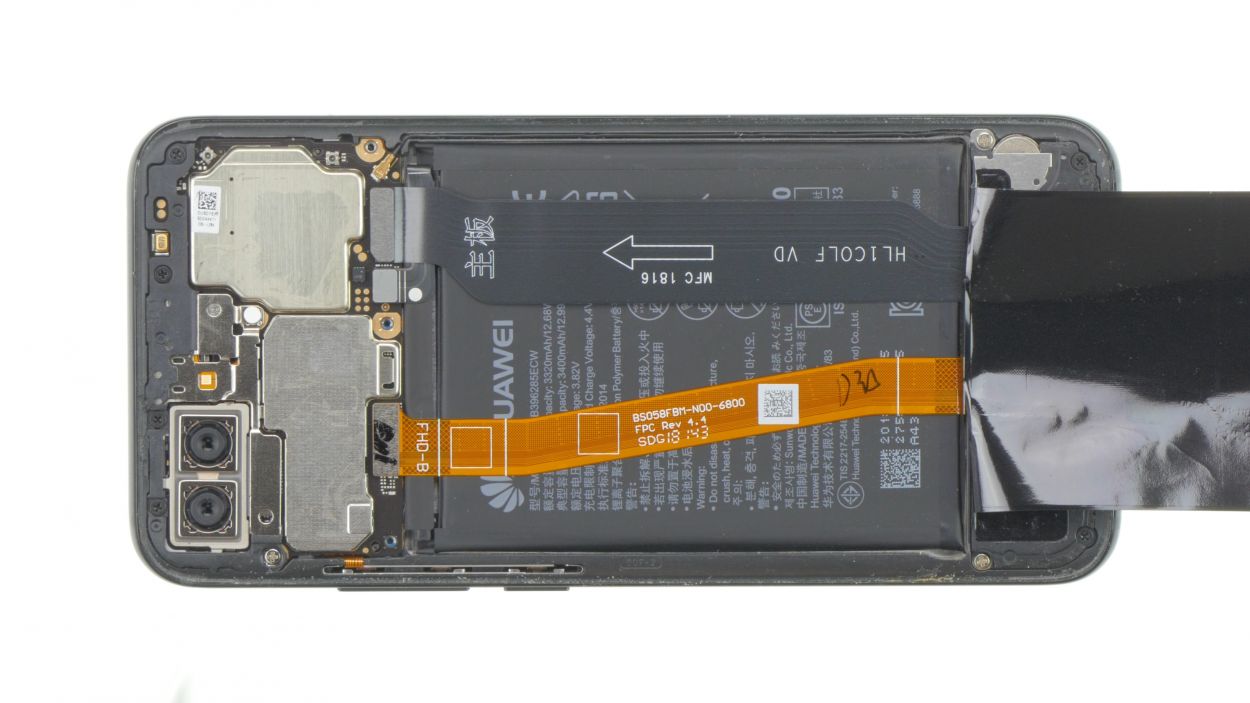
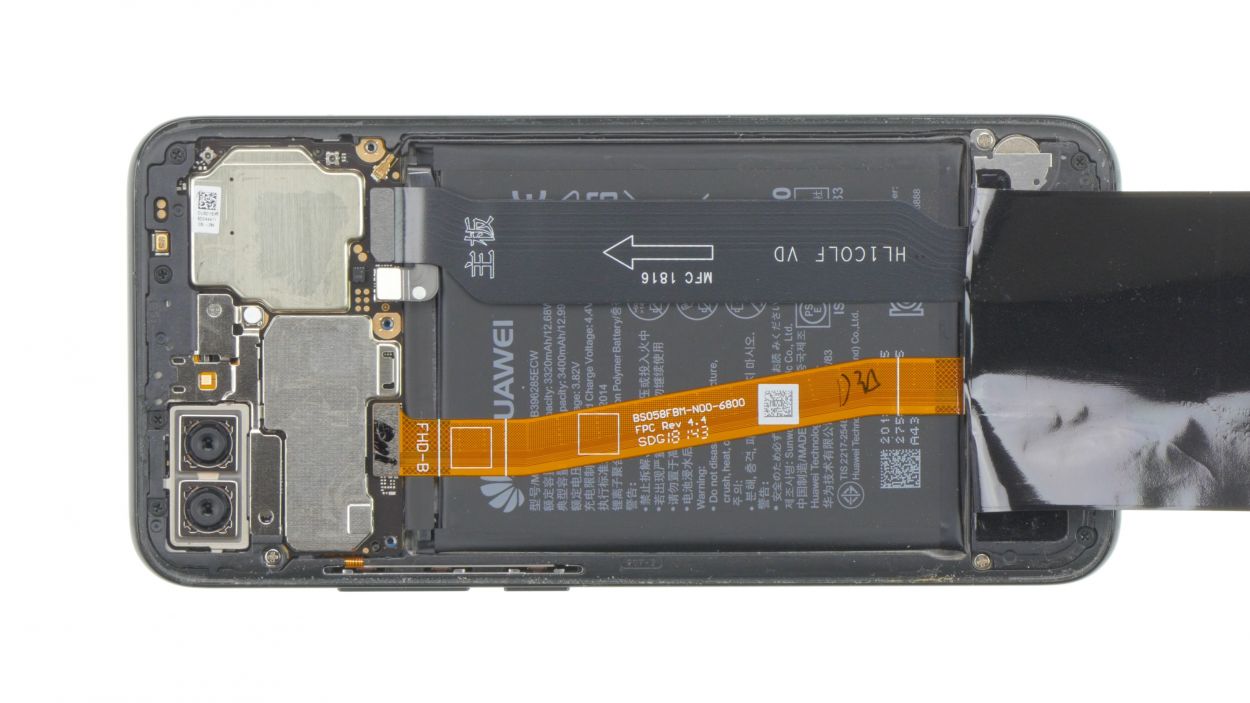
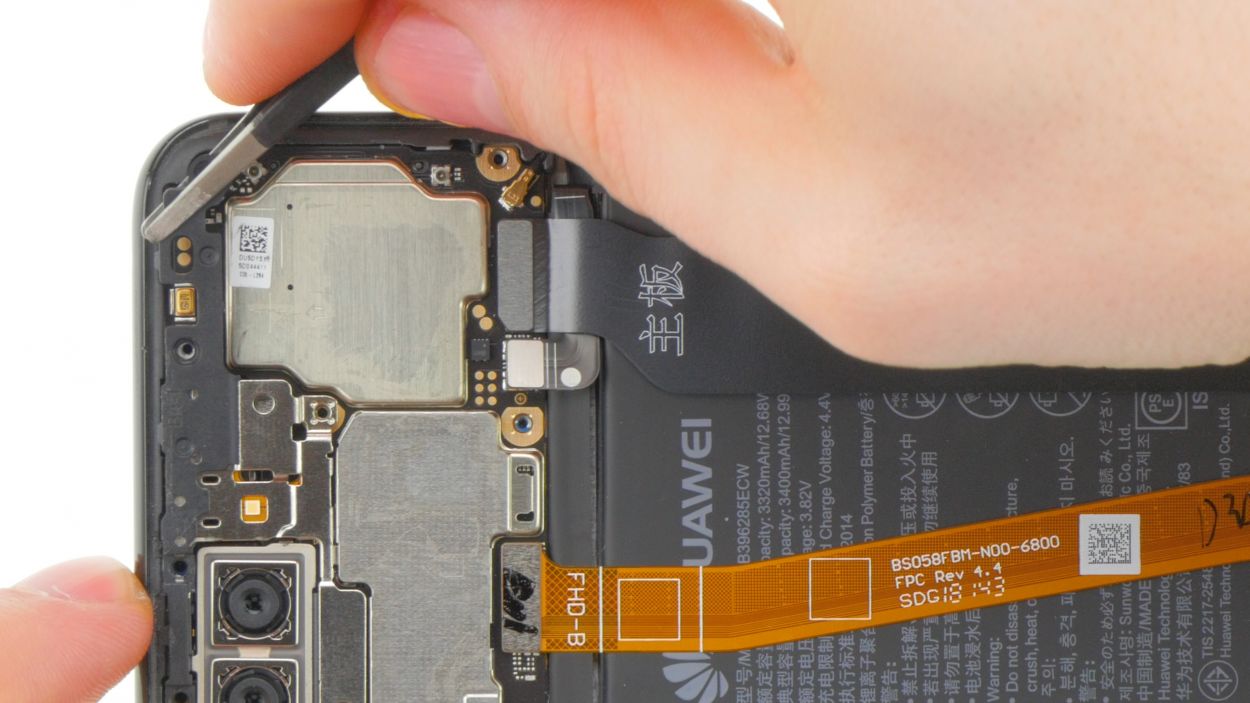
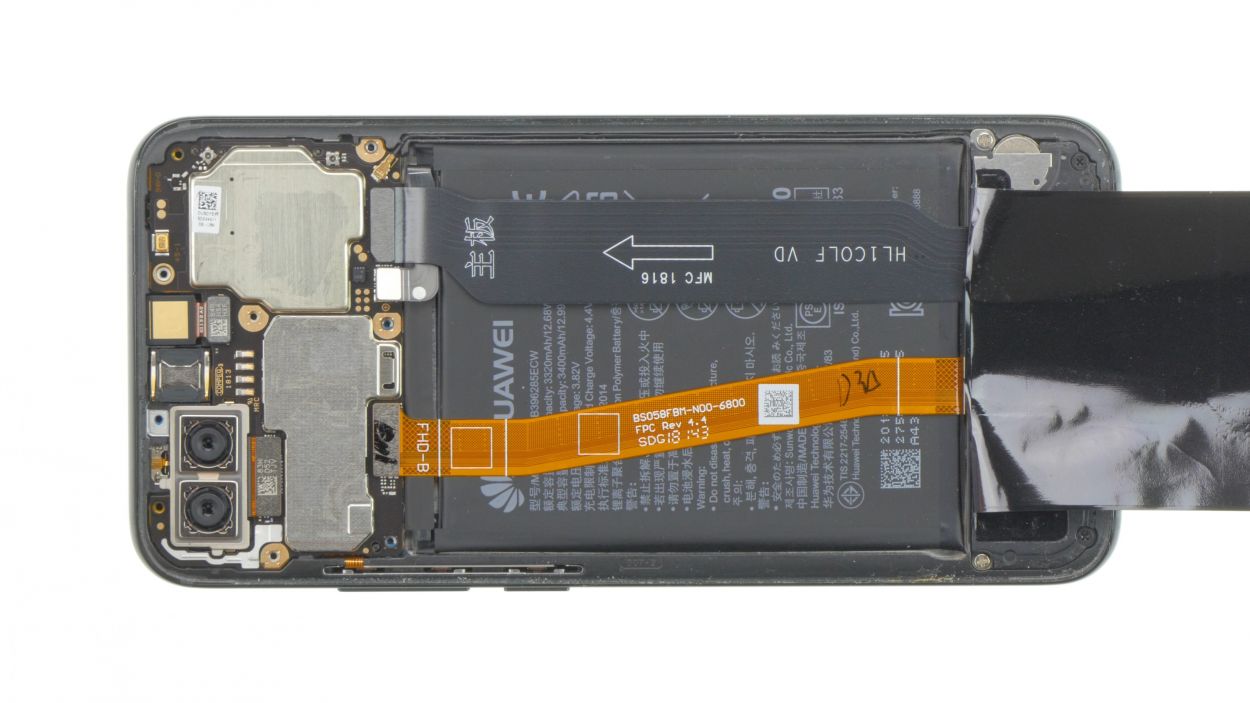
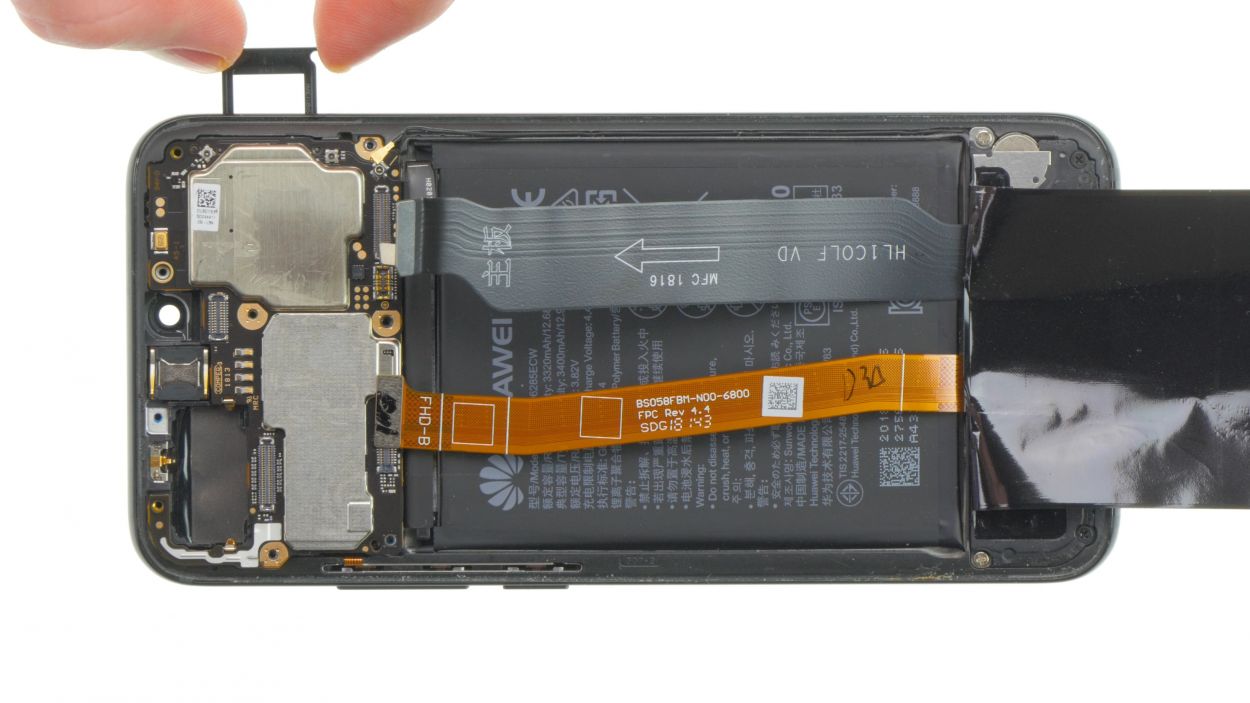
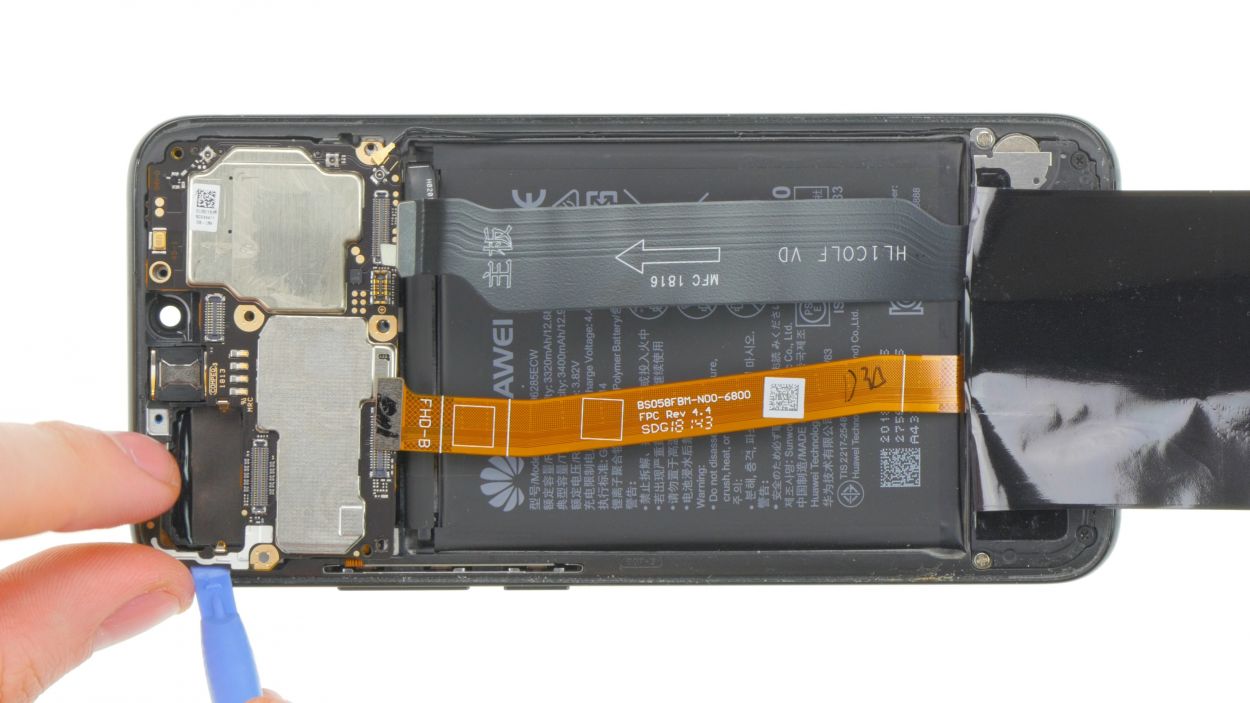
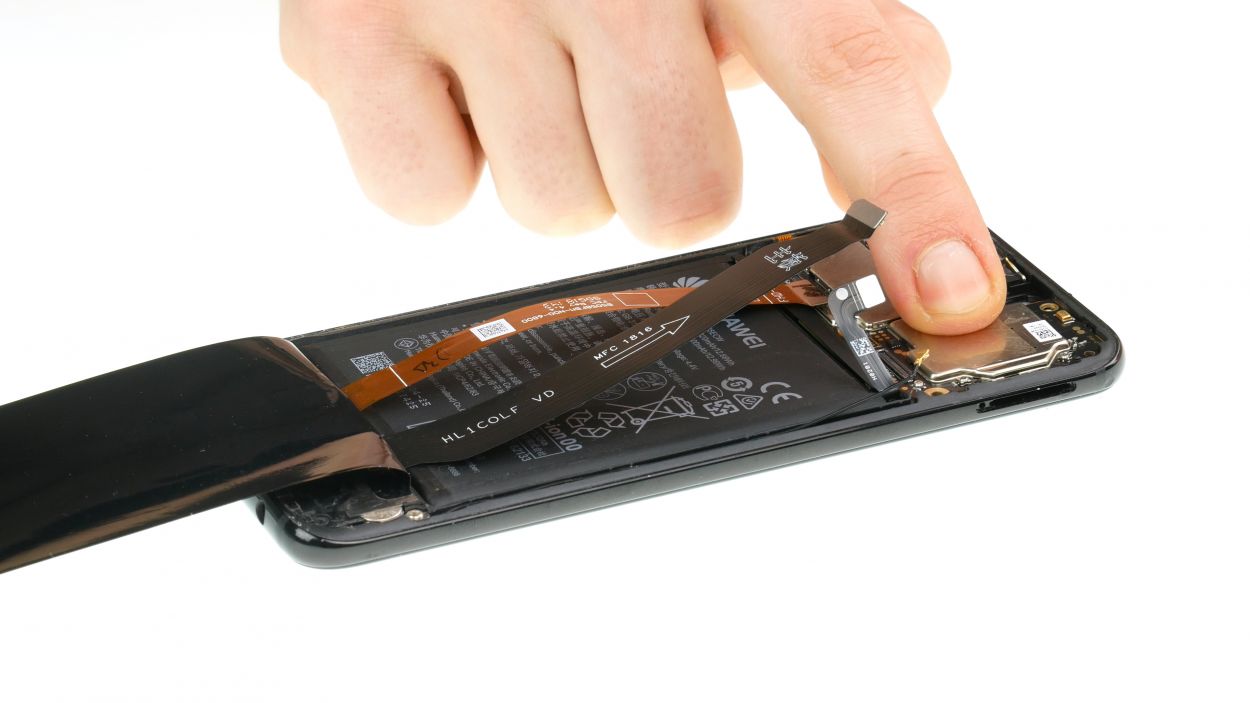
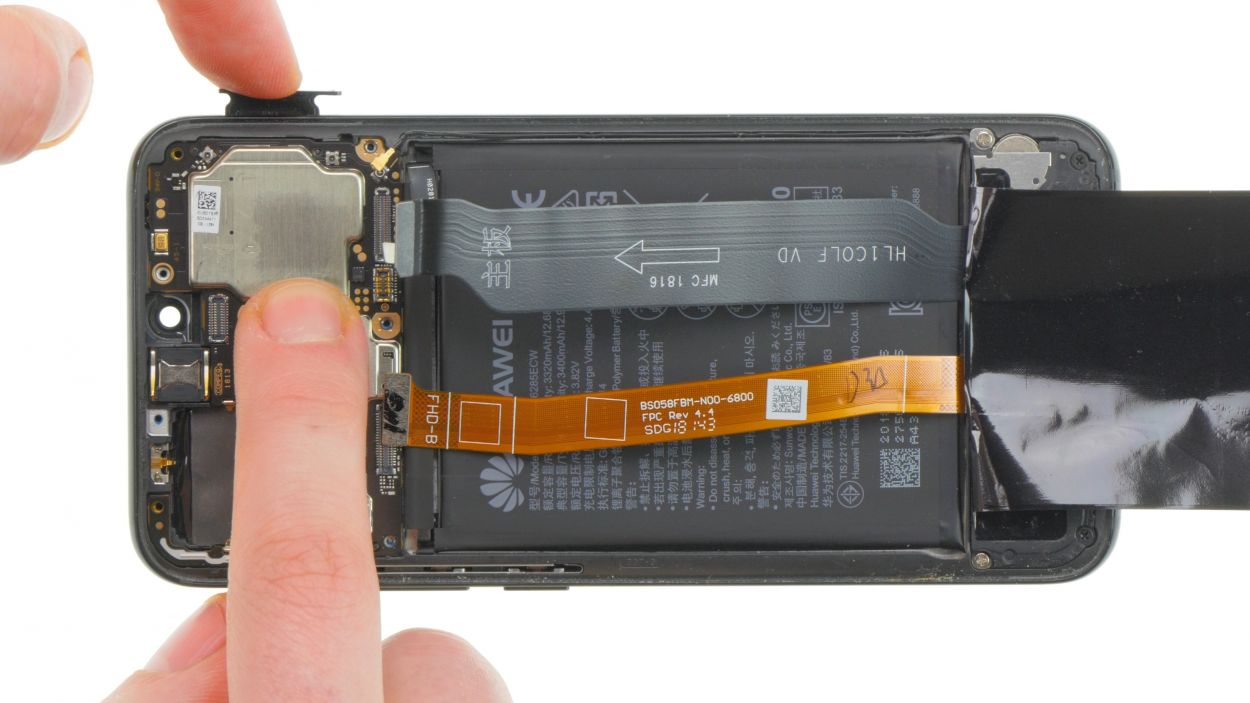
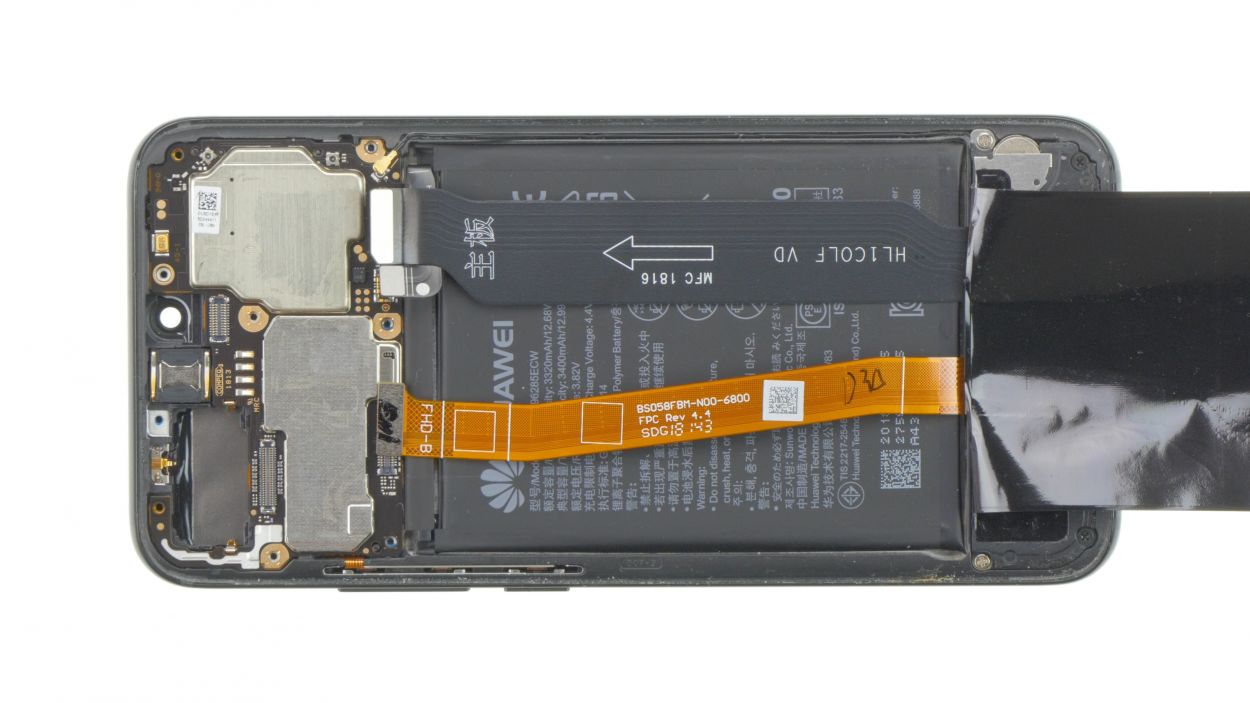
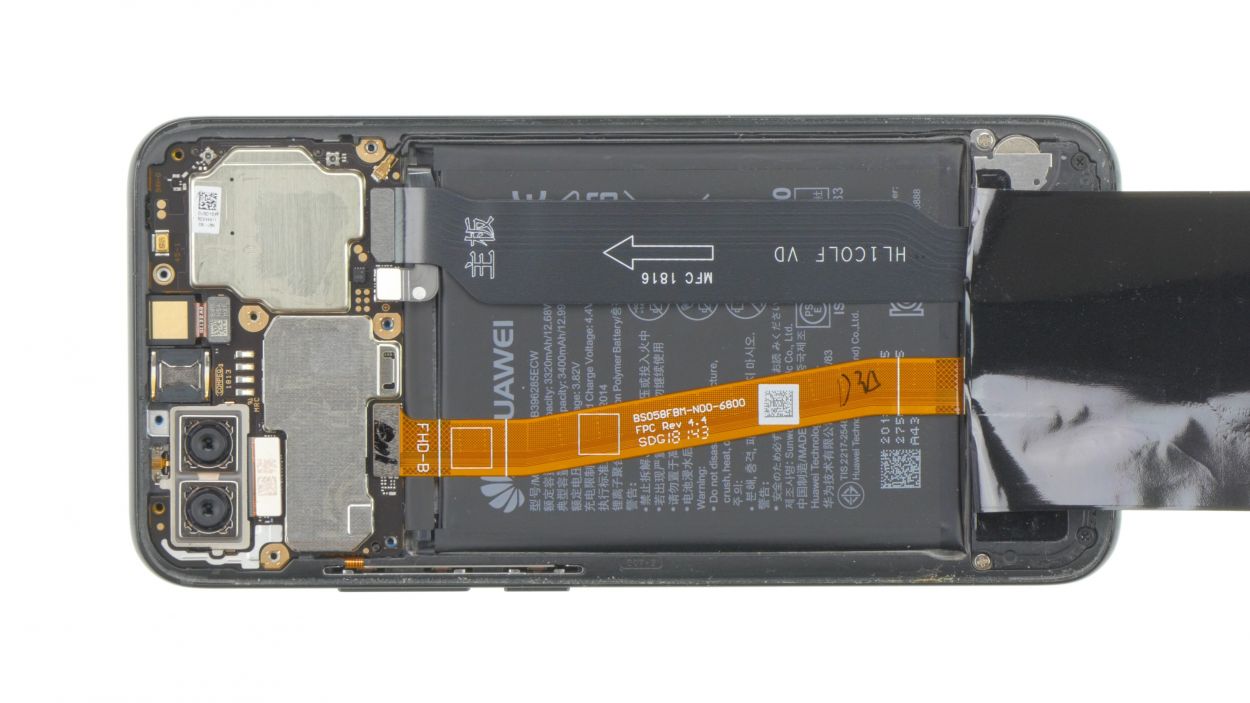
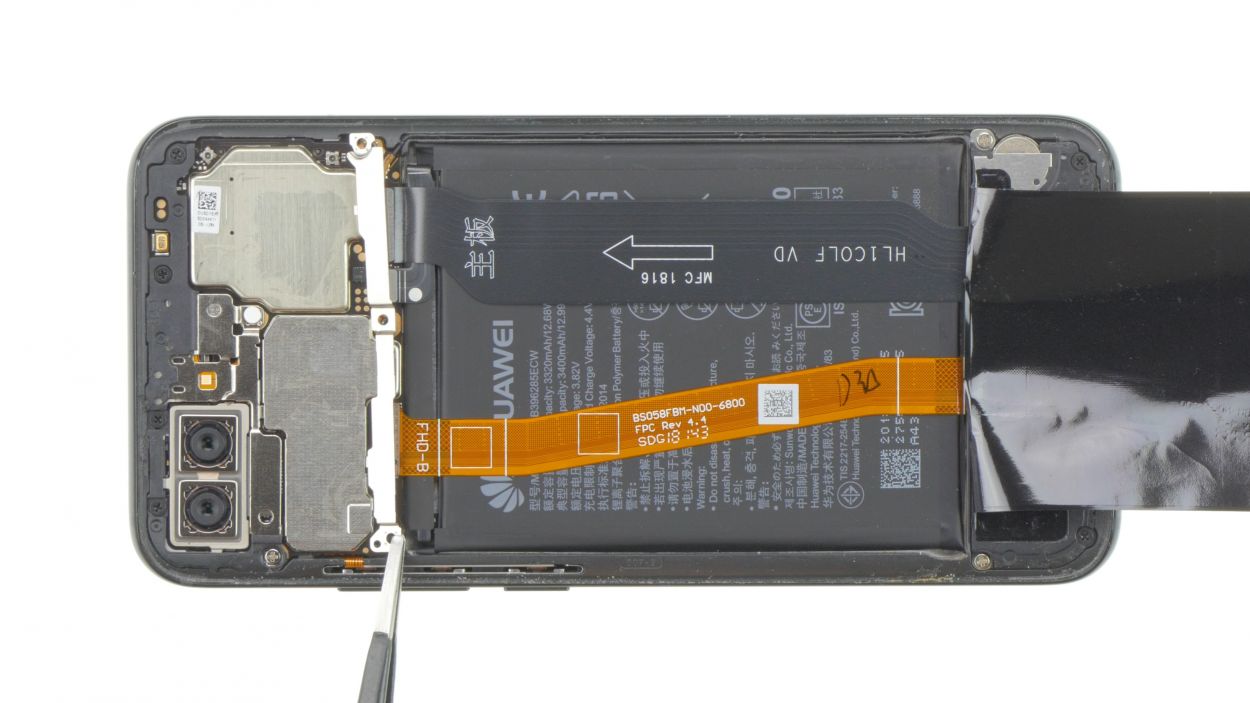
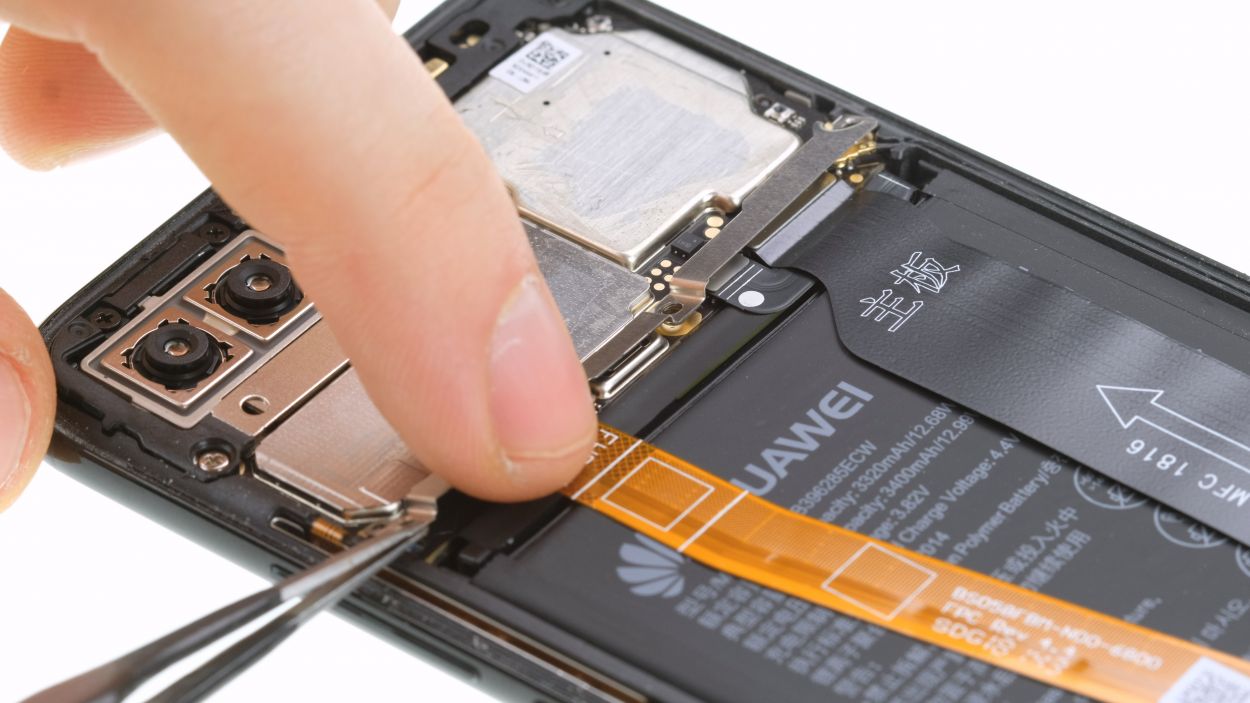
– Start by carefully disconnecting the flex cable that’s lounging on top of the battery. It’s trying to relax, but you’ve got work to do!
– Gently loosen the connector and say goodbye to the cable. You’ve got this!
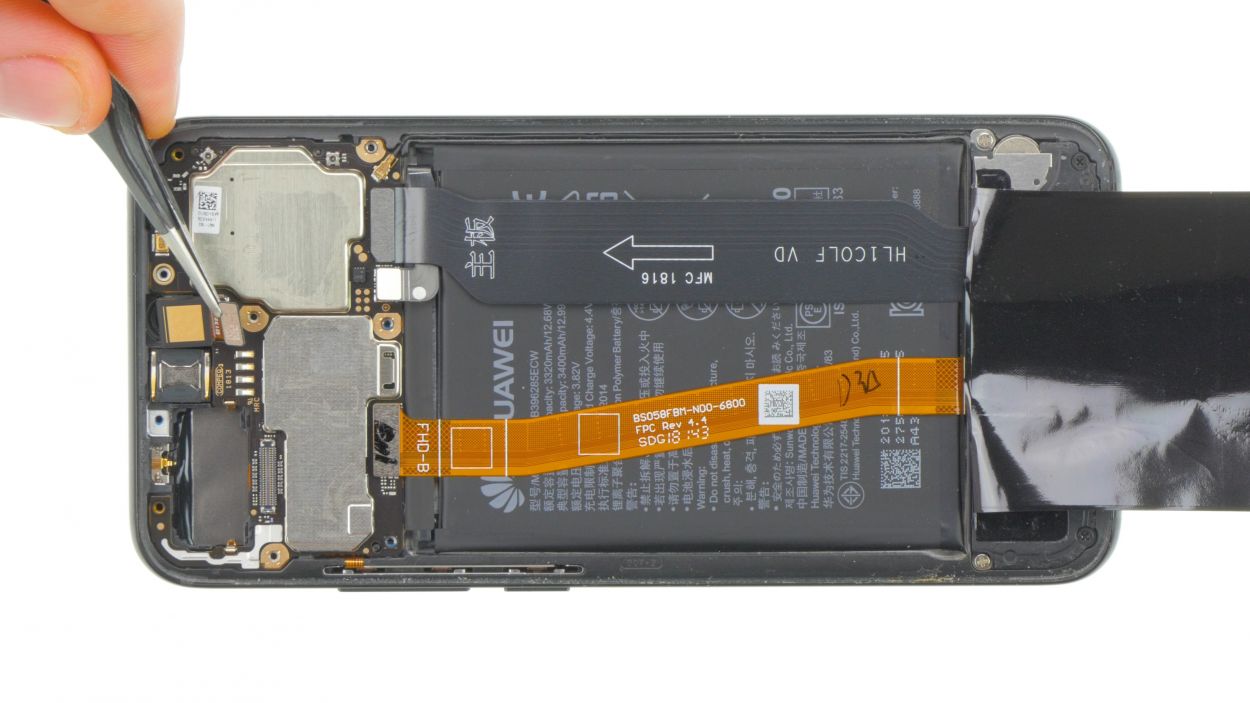
Step 8
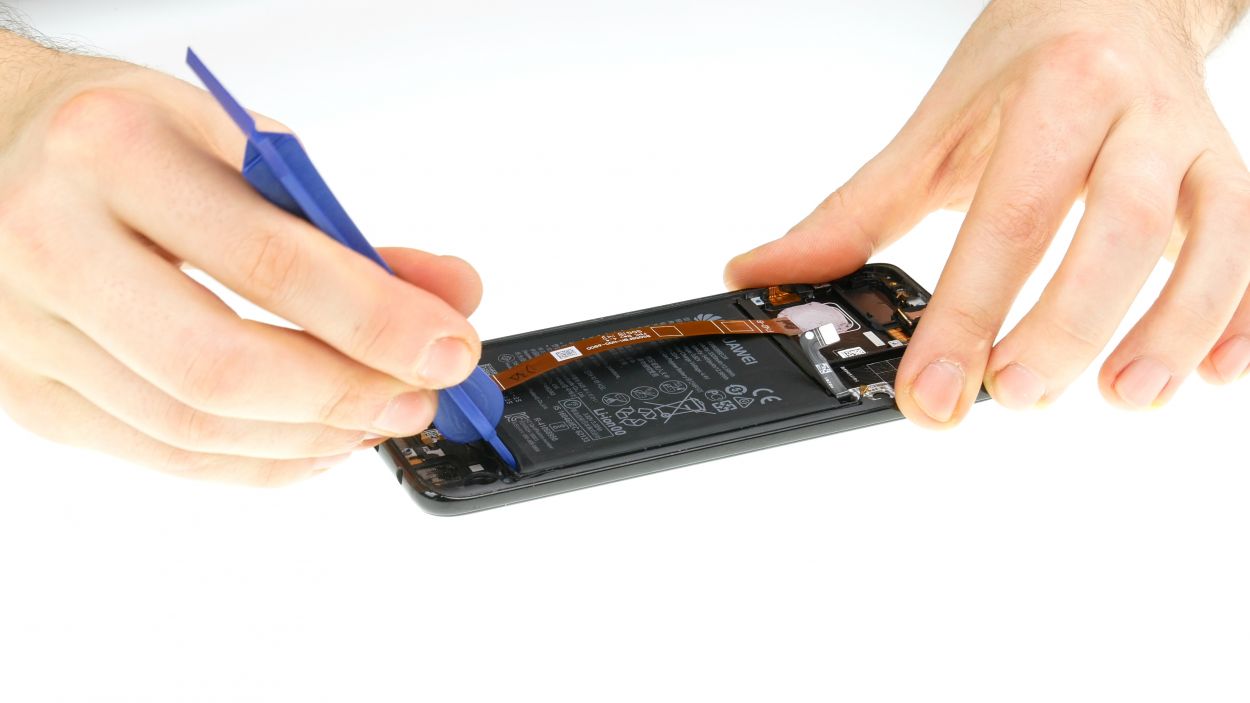

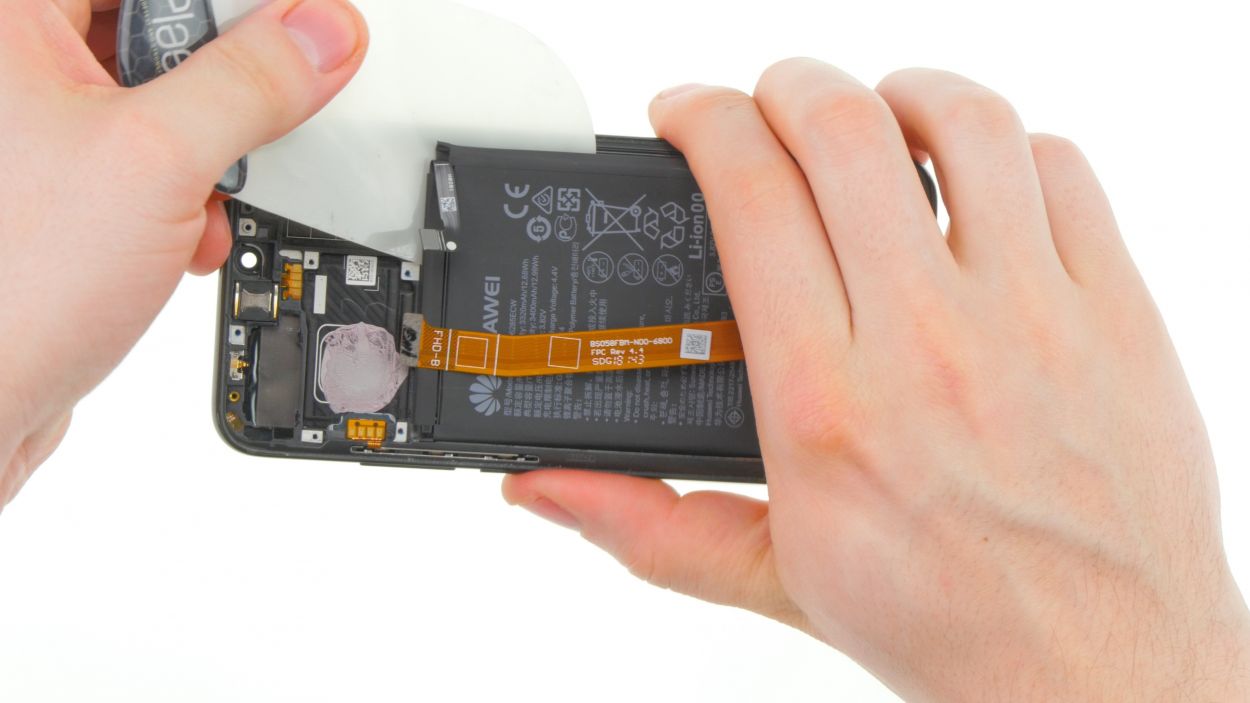

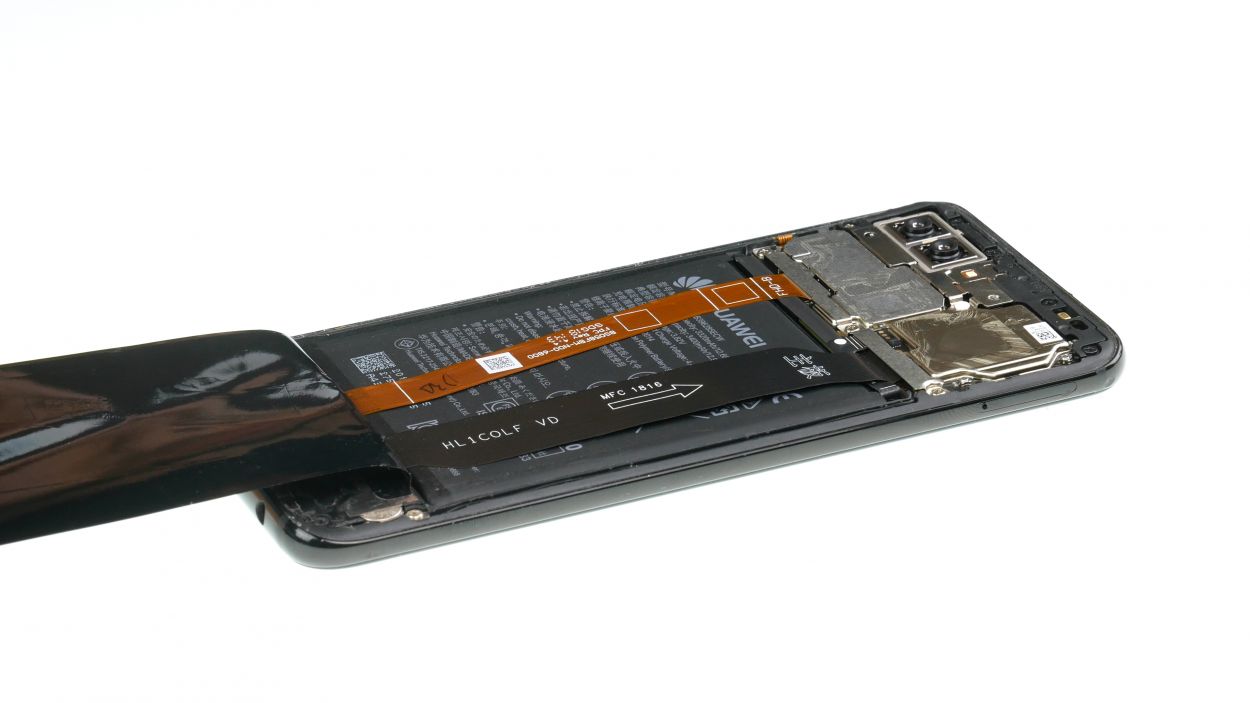
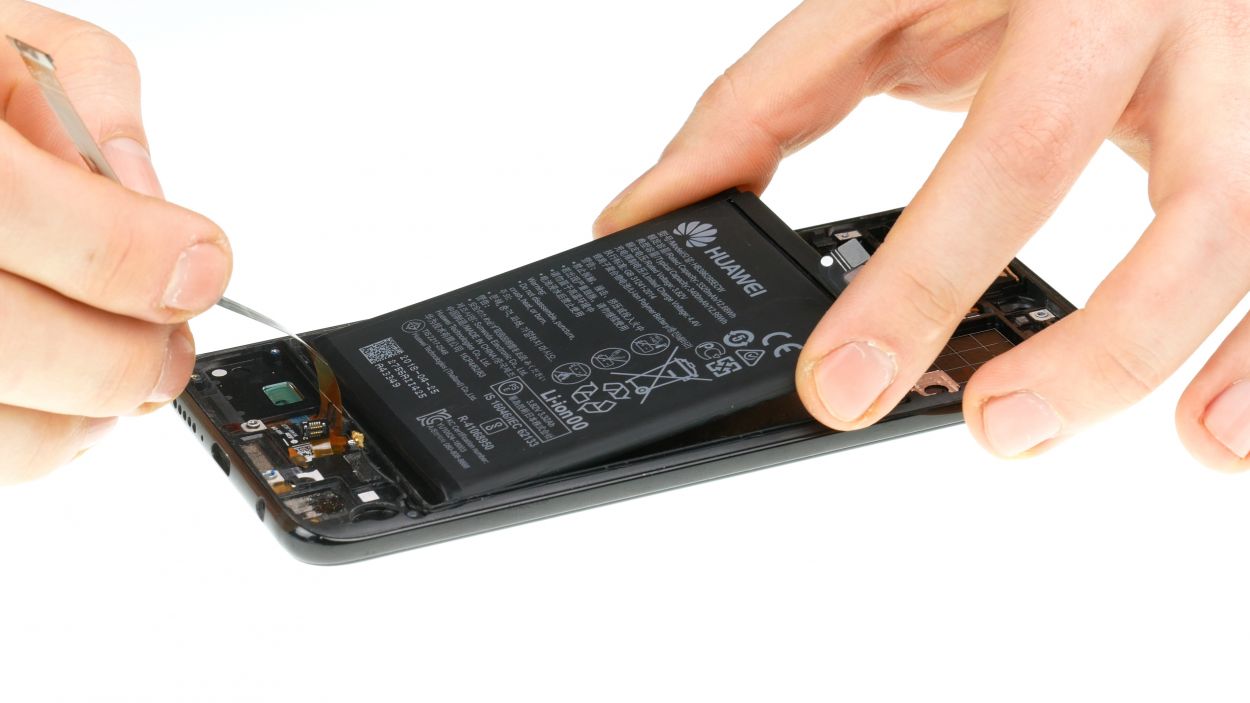
Be gentle with that battery! Try to avoid bending it too much and make sure the surface stays safe and sound.
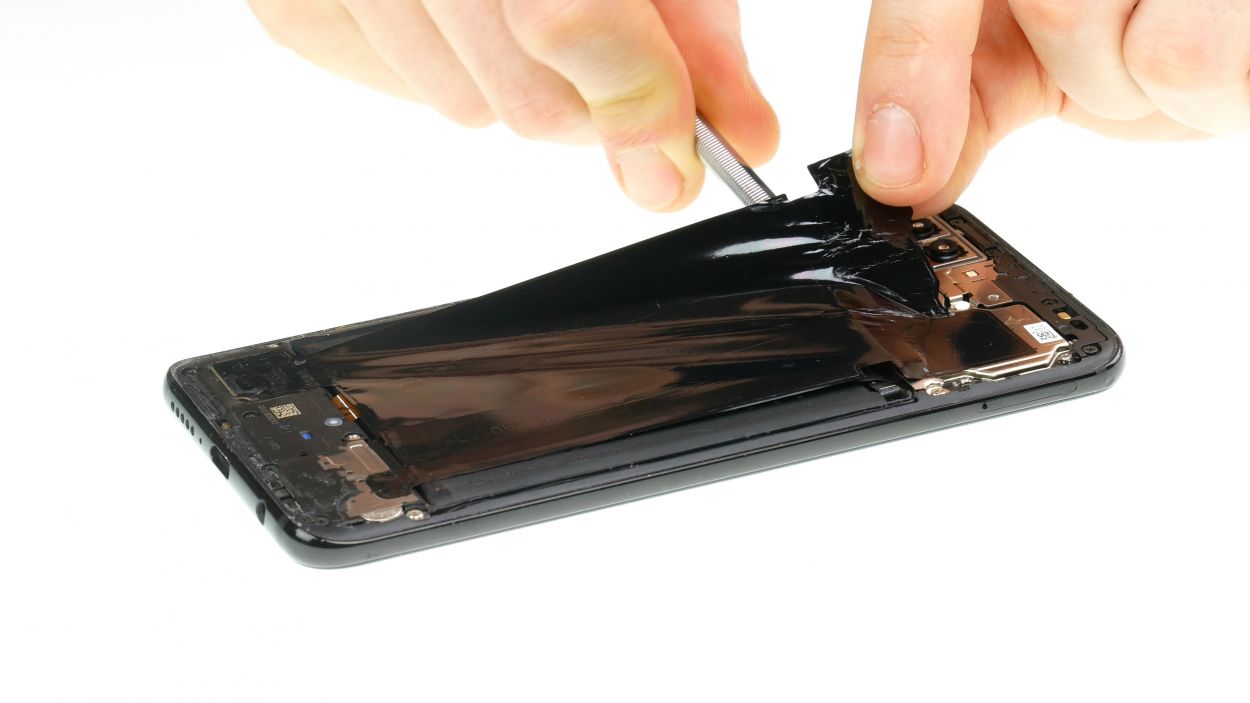
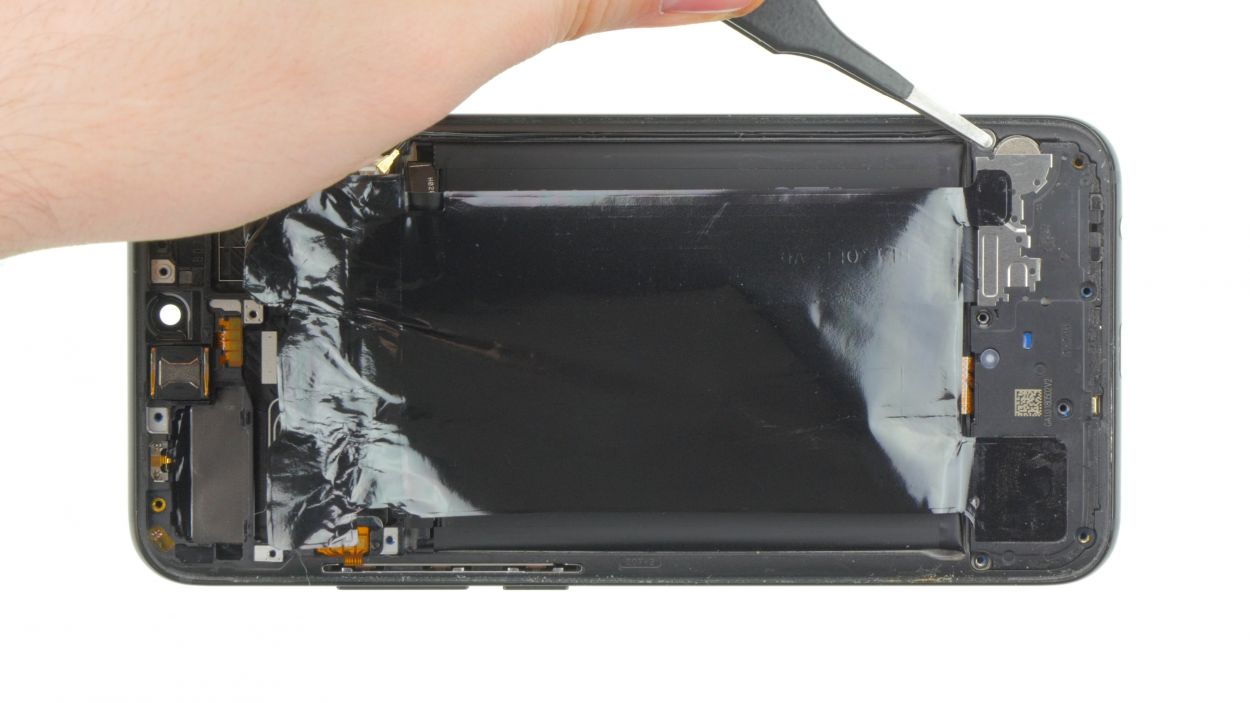
– To make loosening that pesky glue a breeze, give it a little warmth! Just remember, keep the heat away from the battery and focus on the display instead.
– Grab a flat tool like the iPlastix and slide it gently under the battery.
– If that tool isn’t quite cutting it, feel free to switch to a wider, sturdier option like the Battery Spudger.
– Now, take your flat tool and carefully work your way around the battery, gradually lifting it out of the device. You’ve got this!
Step 9
– First things first! Let’s tidy up the workspace. Make sure to wipe away any pesky adhesive residue lingering inside your device so the new battery can slide in like it was meant to be there.
– Next up, carefully peel off those protective films on the adhesive surfaces of your shiny new battery. It’s time to let that battery shine!
Step 10
– Time to bring your device back to life! Place the battery in the device, making sure it’s got some breathing room on all sides and isn’t squished up against anything.
– Double-check that it’s snug and secure, but not too tight. You got this!
Step 11


– First things first, check that the rubber seals for both the USB socket and the headphone socket are snug on the board. You want a good seal to keep things tidy!
– Next up, flip the board onto its bottom edge and give it a gentle push down until it sits perfectly in place. We want it to fit like a glove!
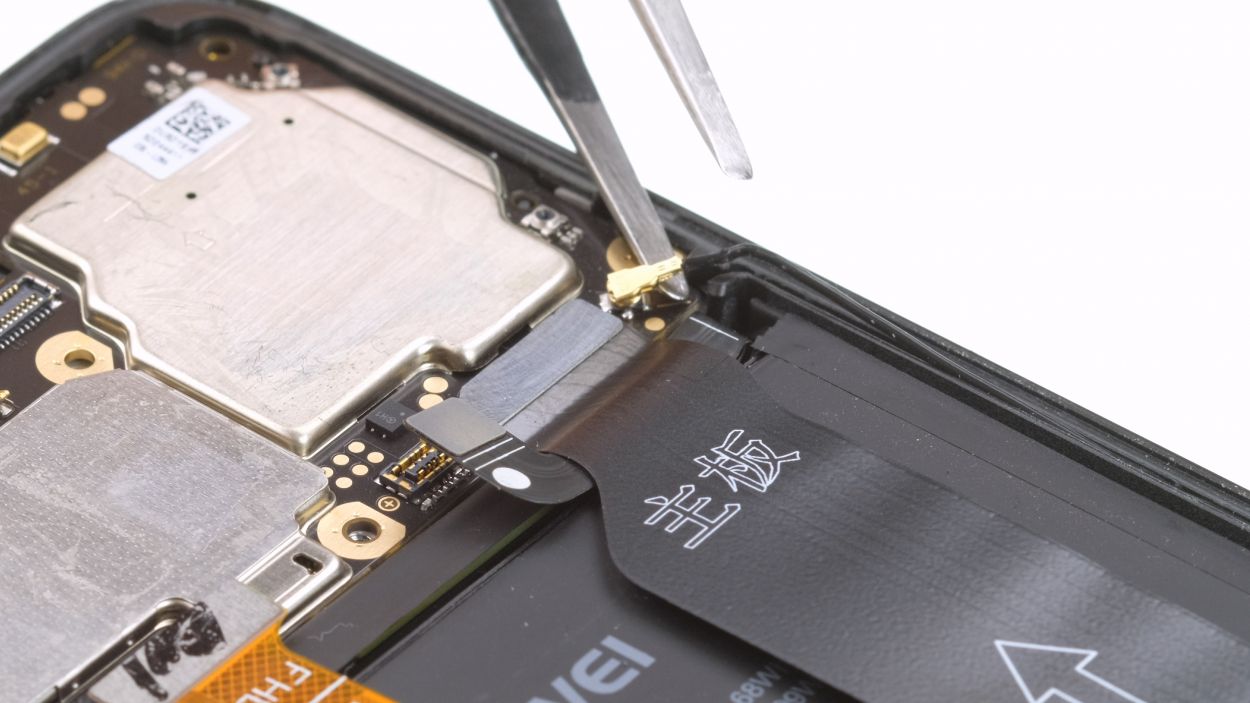
– Now, let’s connect the black antenna cable and tuck it into those shiny silver brackets. Make sure it’s secure, we need great connections!
– Finally, it’s time to hook up the fingerprint sensor along with that wide flex cable. Just remember, the white arrow should be pointing upward to keep things aligned!
Step 12
4 × 2,8 mm Phillips
3 × 3,4 mm Phillips
– Carefully place the speaker along with the heat shield into the device and give it a gentle push until it fits snugly.
– Fasten the speaker in place using the Phillips screws to keep everything secure.
Step 13
Antenna connector
Display connector
USB flex cable connector
Camera Connector
2 × 2,8 mm Phillips
4 × 3,4 mm Phillips
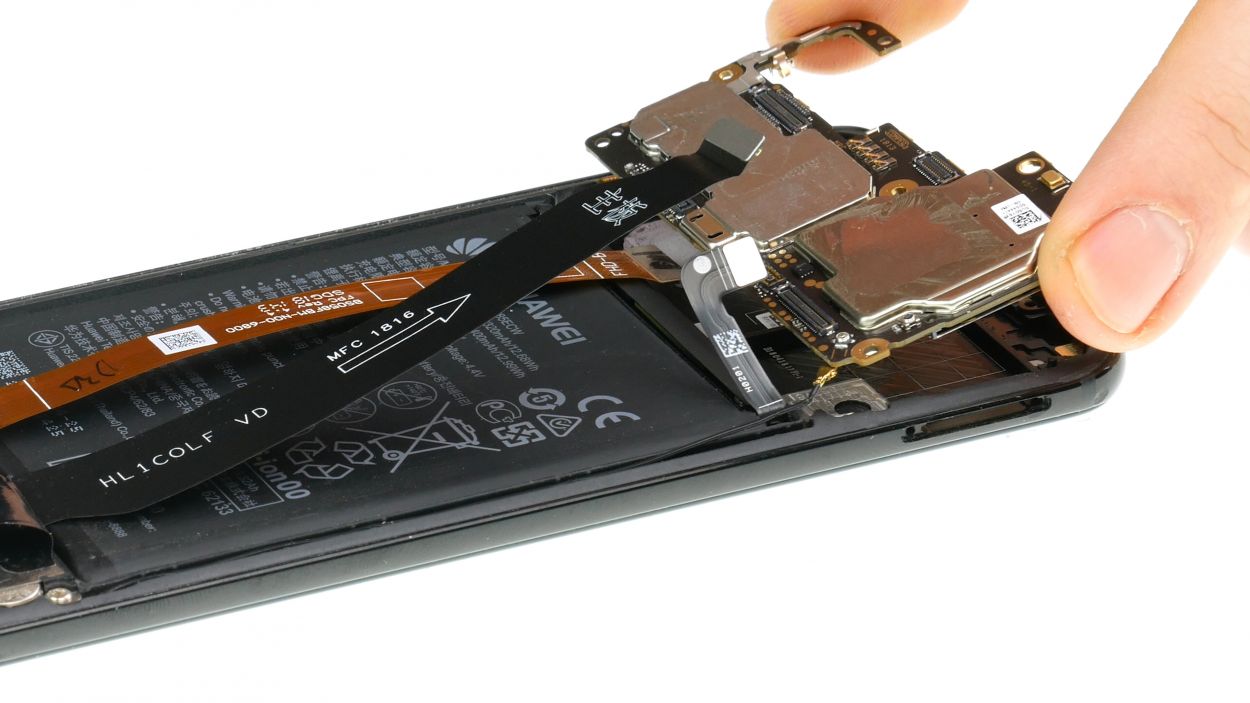
– Gently place the mainboard into the device, making sure to avoid pinching any cables underneath. We want everything to fit snugly!
– Give the motherboard a little press and see if it settles in just right.
– Pop in the SIM card holder. If it feels stuck, don’t force it! Just double-check that the mainboard is sitting properly.
– Connect the two flex cables and the antenna cable. A pair of tweezers can help you position the antenna perfectly before you connect it with a spudger.
Step 14

Battery connector
3 × 2,8 mm Phillips
– First up, connect that battery to the motherboard like a pro!
– Next, let’s get that cover back on and screw it tight.
– Remember, the cover hooks into the upper side, so make sure it’s snug.
– And finally, fold over that black foil and stick it down like you mean it!
Step 15
– Putting the back cover back on can be done in a few different ways!
– If the old adhesive is still hanging in there and is intact, feel free to reuse it.
– If not, no worries! Just grab some new glue.
– Start by cleaning off any old glue remnants.
– Next, apply the new glue. You can opt for thin double-sided tape or liquid glue. Just remember, a little goes a long way, and keep it away from the inside of your device!
Step 16
– Alright, hotshot, get that back cover lined up and centered like a boss!
– Press it down all fancy-like so that them adhesives cinch up tight.
– If you’re feeling artsy, you can even warm it up a smidgen and lay it flat between a few books for 30 minutes – tech magic!