DIY Guide to Replace Samsung Galaxy S3 Speaker Headphone Output
Duration: 30 min.
Steps: 11 Steps
In this guide, we’ll walk you through the process of swapping out the faulty speaker and headphone output on your Samsung Galaxy S3. If your tunes are coming through weak or not at all, or if your ringtone is playing hide and seek when calls come in, it’s time for a fix! This guide is also your go-to for addressing any loose connections with the headphone output or if your headset’s remote control is being a little too quiet. Plus, replacing this part can even help with any pesky Wi-Fi or GPS issues. Ready to get started? Let’s do this! And remember, if you need help, you can always schedule a repair.
Step 1

– Slide the spudger into the little gap next to the headphones and gently lift off the back cover. There are 16 sneaky clips hiding under there, so you’ll need to give them a little nudge by running the spudger around the smartphone once. If you’re feeling crafty, you can also use your fingernails to pop the back cover off.
– Once you’ve done that, go ahead and remove the back cover!
Step 2
– Alright, if your Samsung Galaxy is still powered on, let’s get it turned off! Just hold down the standby button for about three seconds and follow the on-screen prompt. You’ve got this!
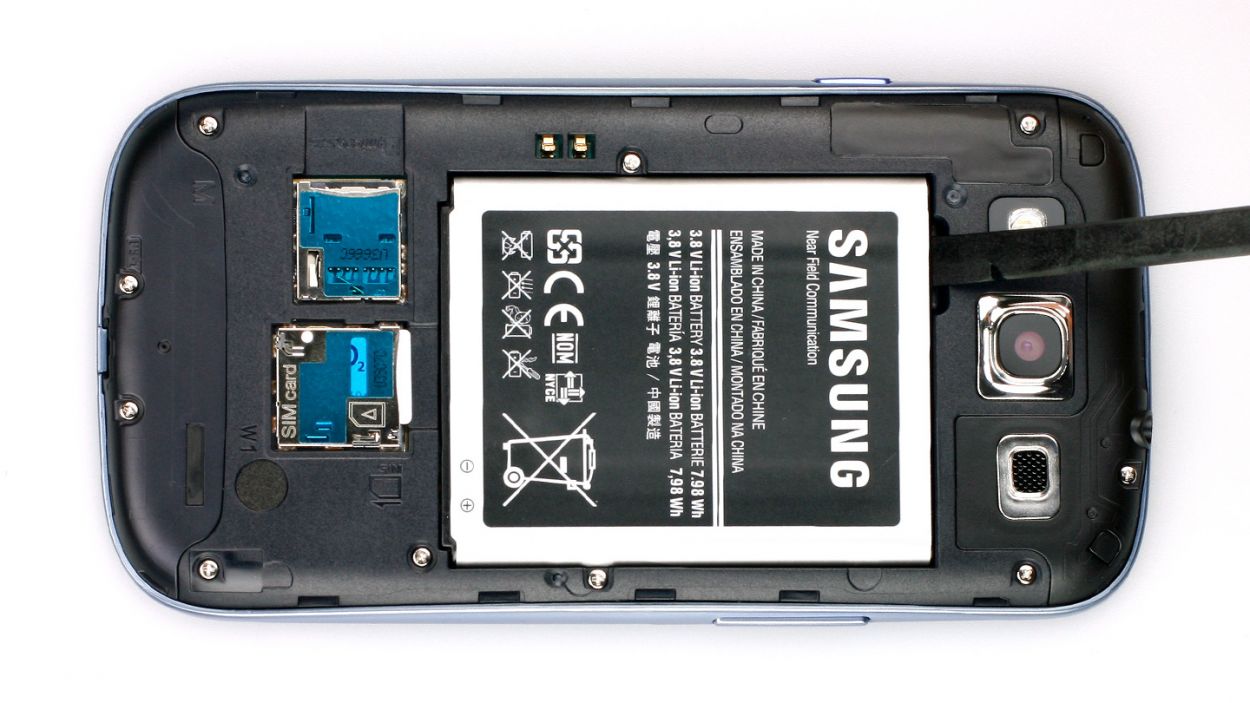
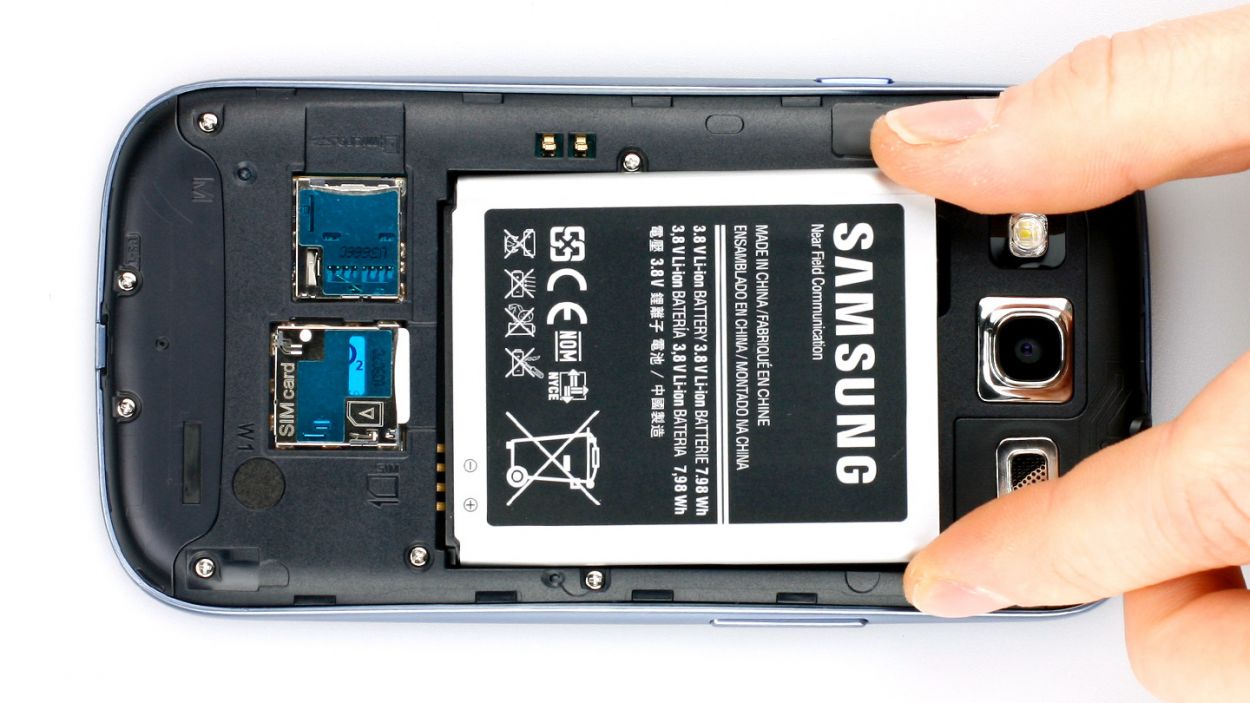
– Next up, grab that trusty spudger or just use your fingertip to gently lift the battery out (check out figure 1 for a visual). Once you’ve done that, go ahead and remove it completely (figure 2 is here to guide you).
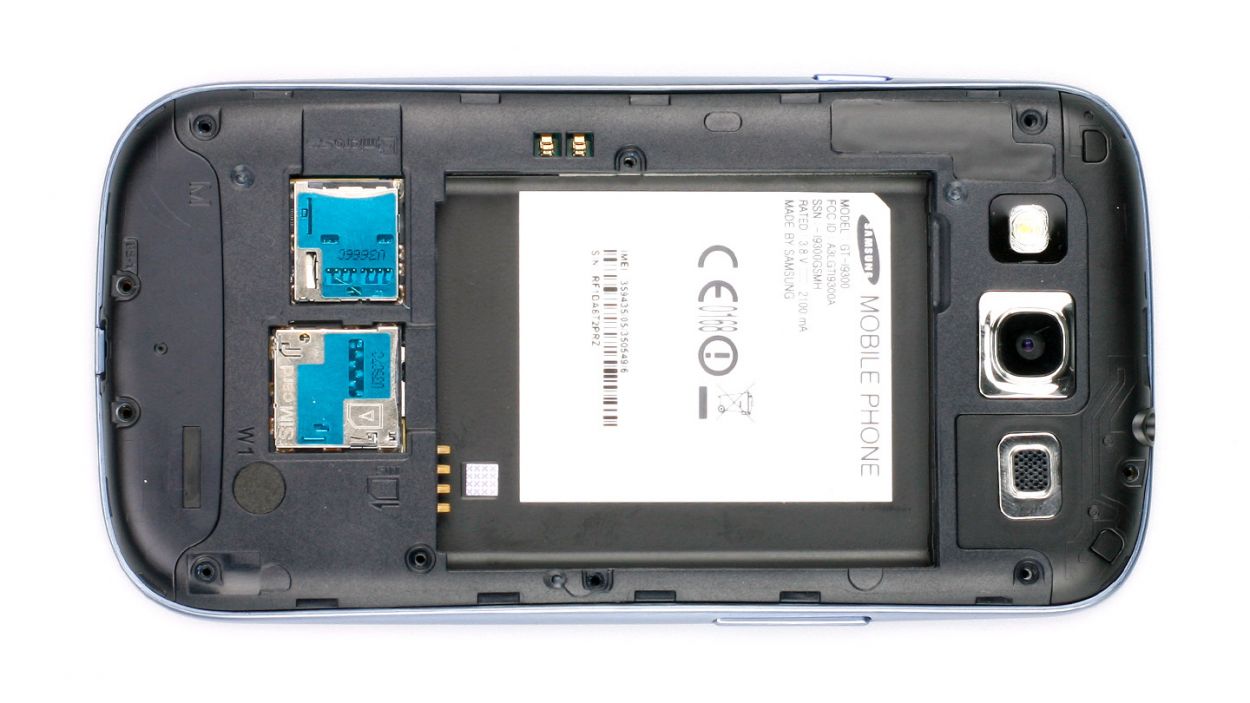
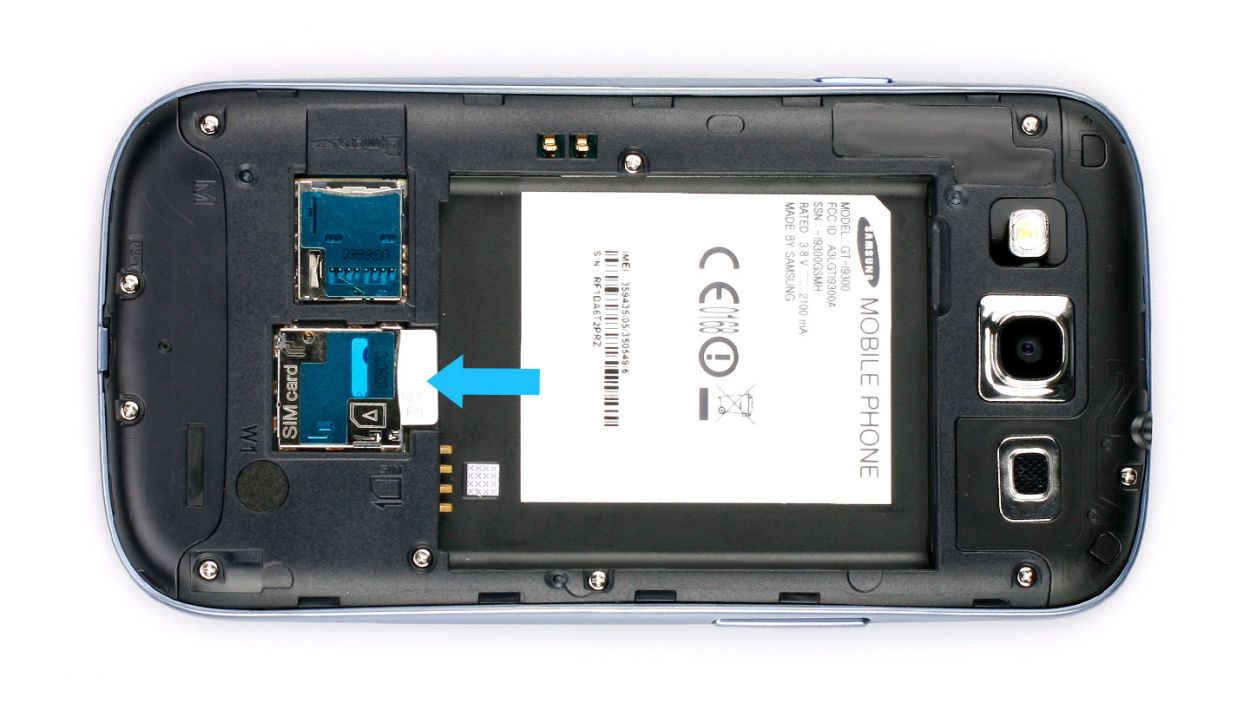
Step 3
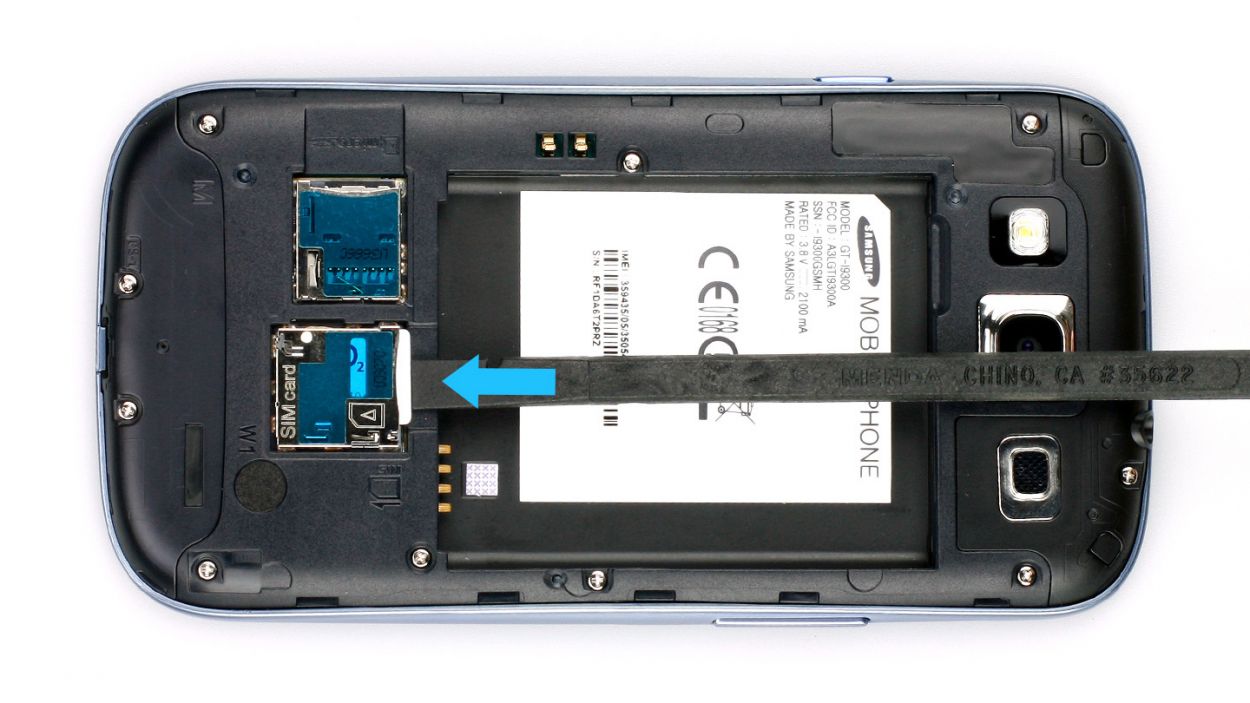
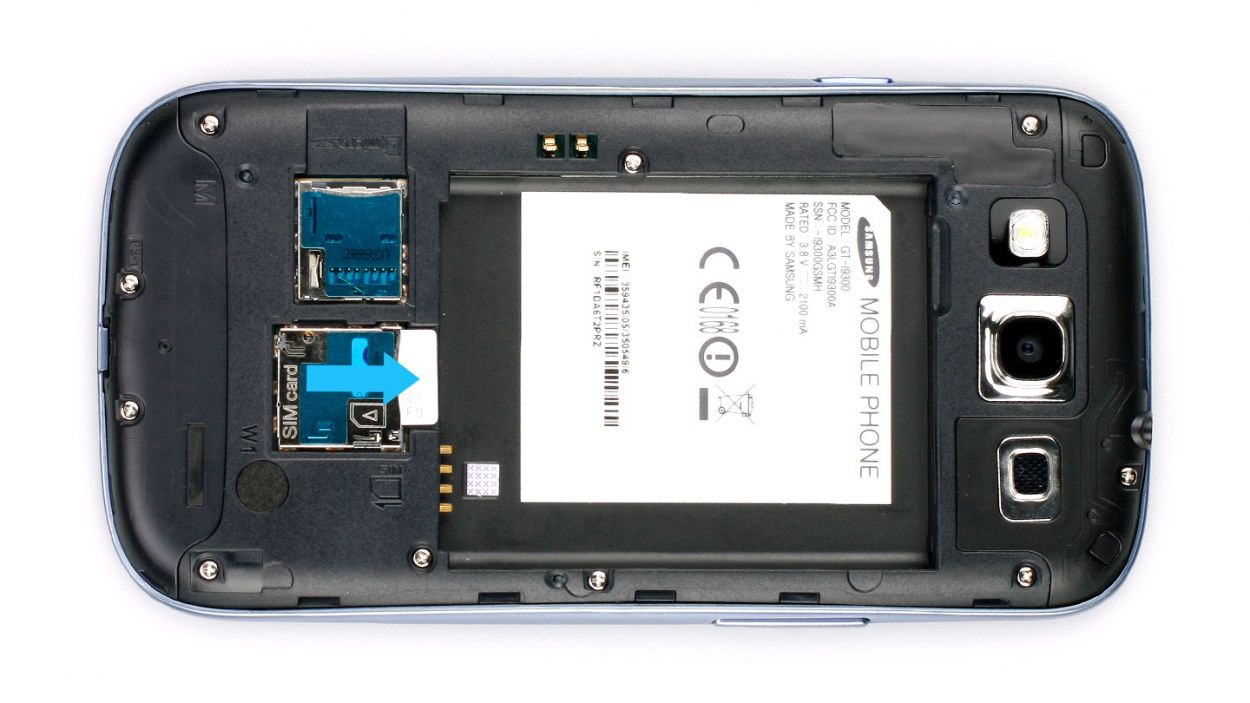
– Grab your trusty spudger or just use your finger to gently nudge that SIM card all the way into the slot (check out figure 1 for guidance). Once you hear a satisfying click, the SIM card will pop right out (see figure 2).
– Now, go ahead and pull it out with your fingers—easy peasy!
– If you’ve got a microSD card in there too, just rinse and repeat this process.
Step 4
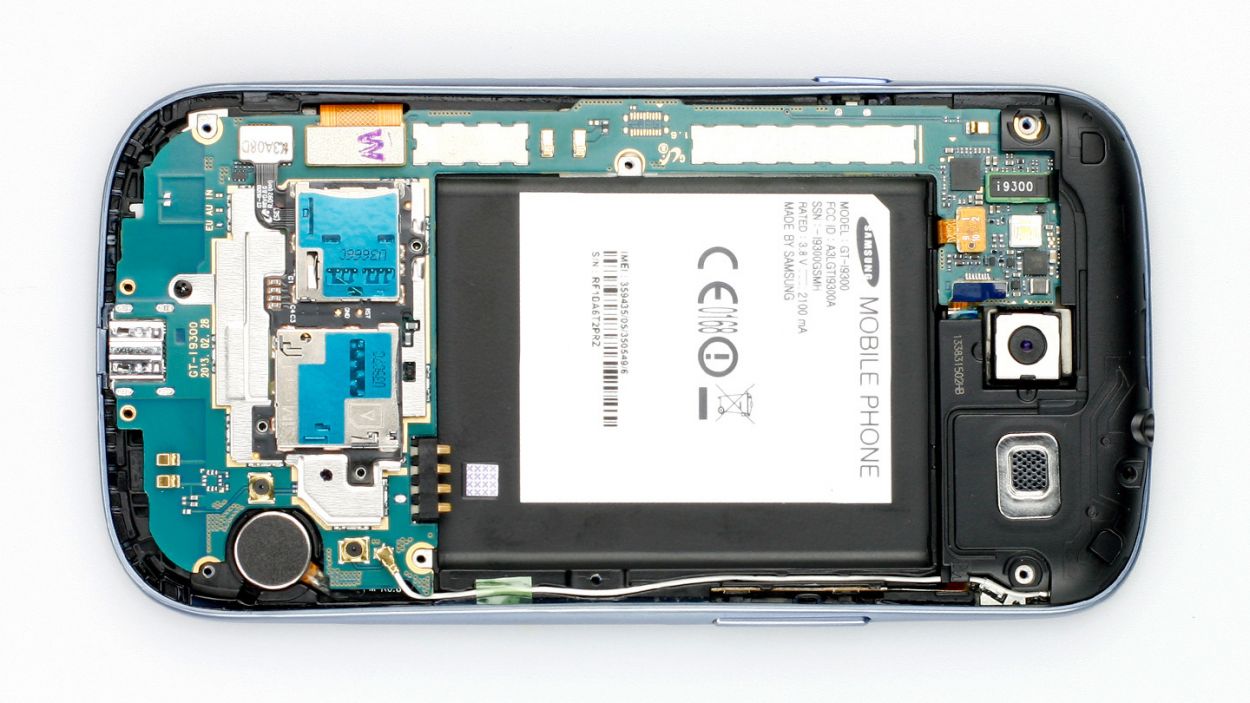
Be careful not to dislodge those little resistors that are snugly soldered onto the logic board. They’re counting on you!
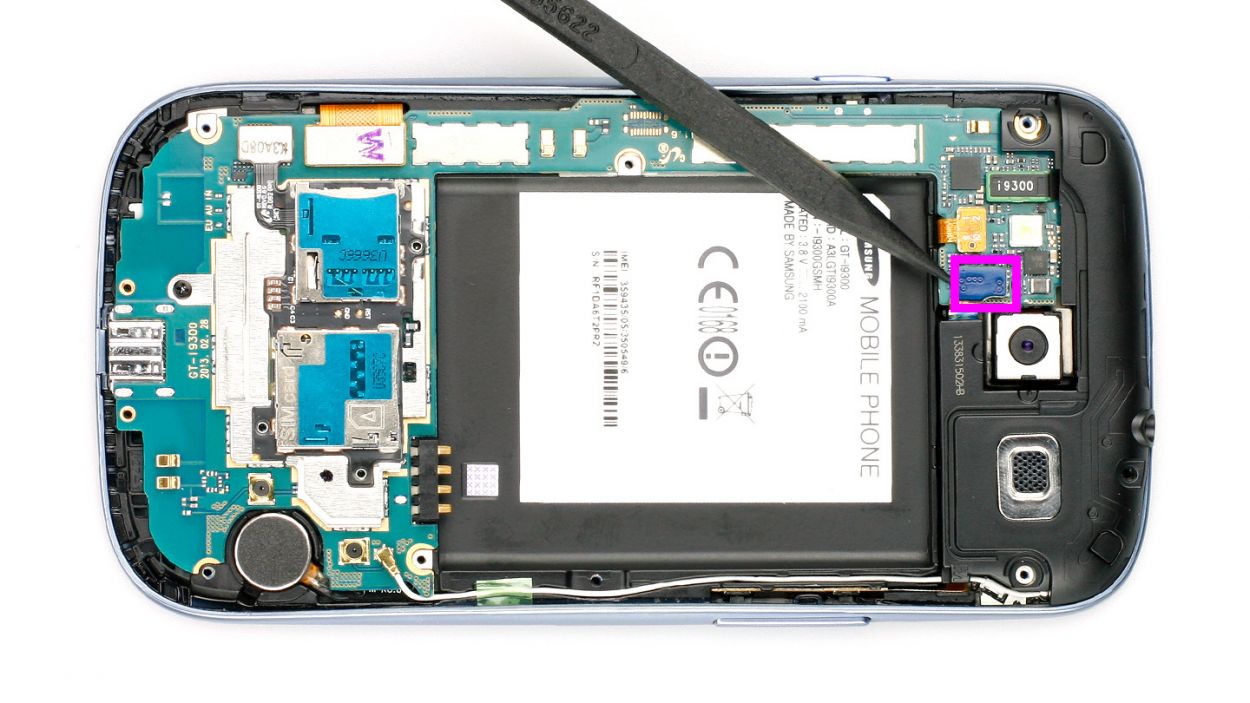
– First up, gently disconnect the connector on the speaker/headphone output cable. Just a heads up—be careful not to knock off those little resistors soldered onto the logic board. They’re important!
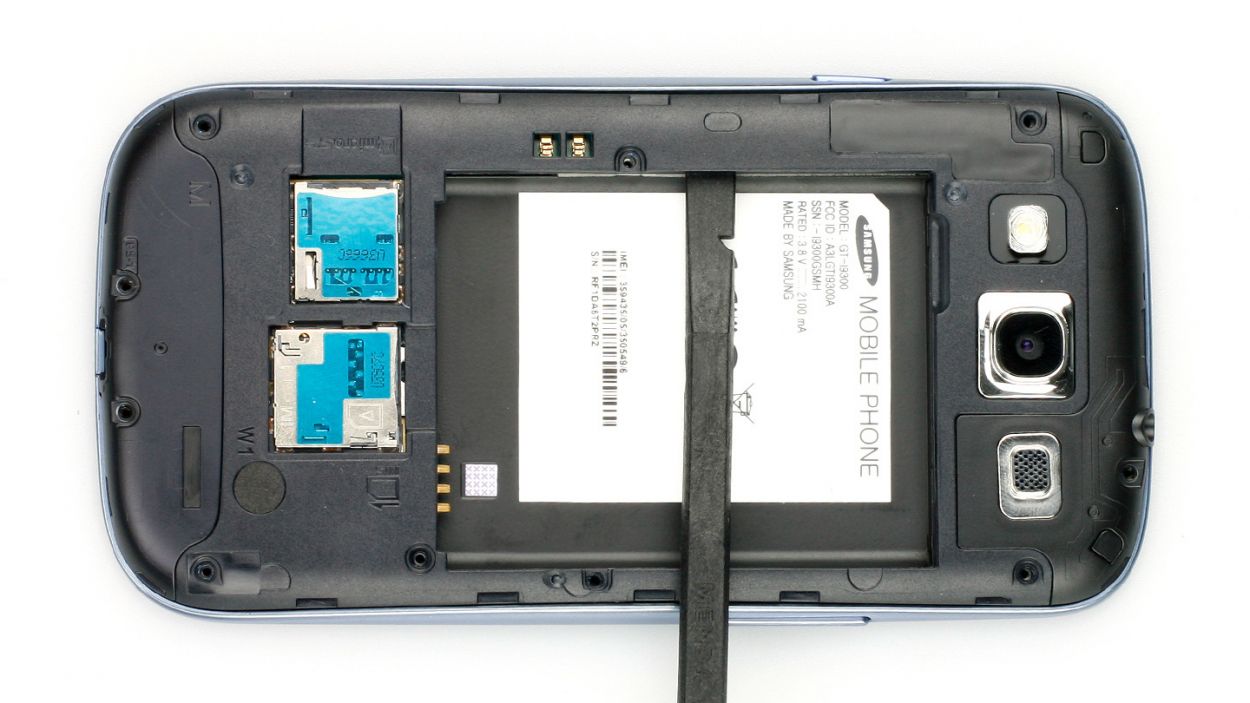
– Next, grab your trusty spudger and place the pointed tip just below the contact, then give it a little lift (check out figure 1 for guidance).
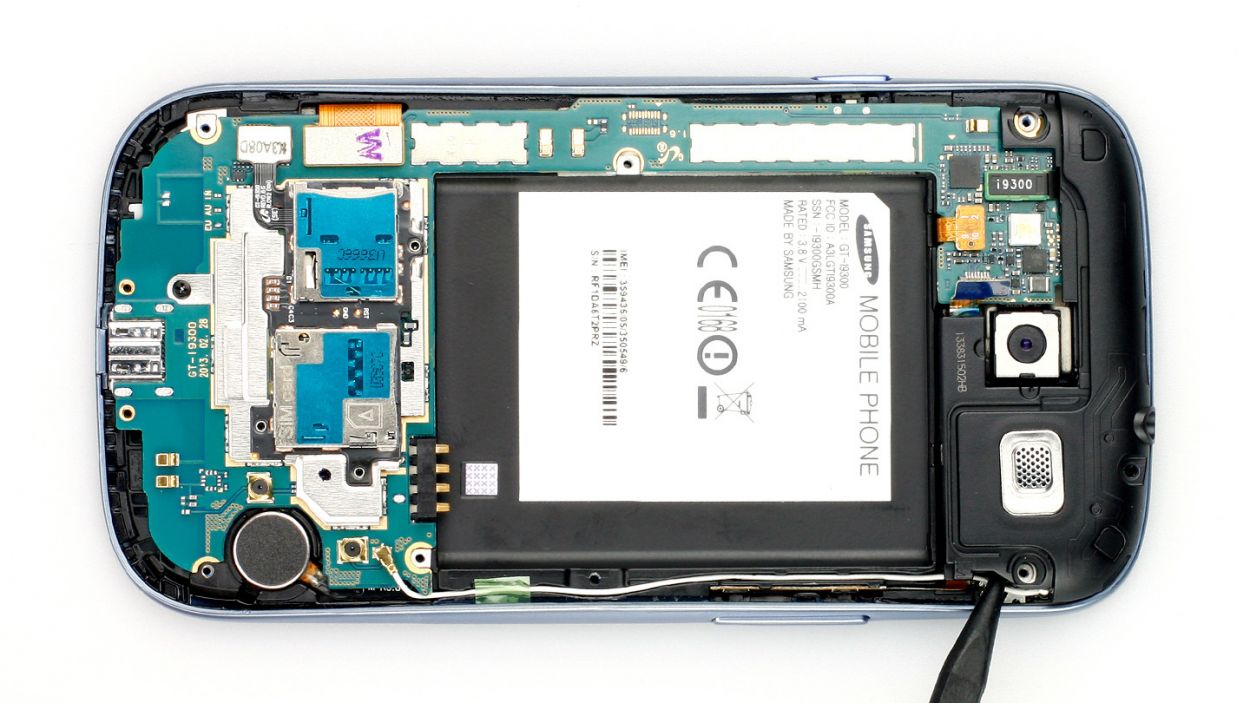
– Now, with the spudger in hand, carefully lift the speaker from the side (figure 2 will show you how it’s done).
Step 5
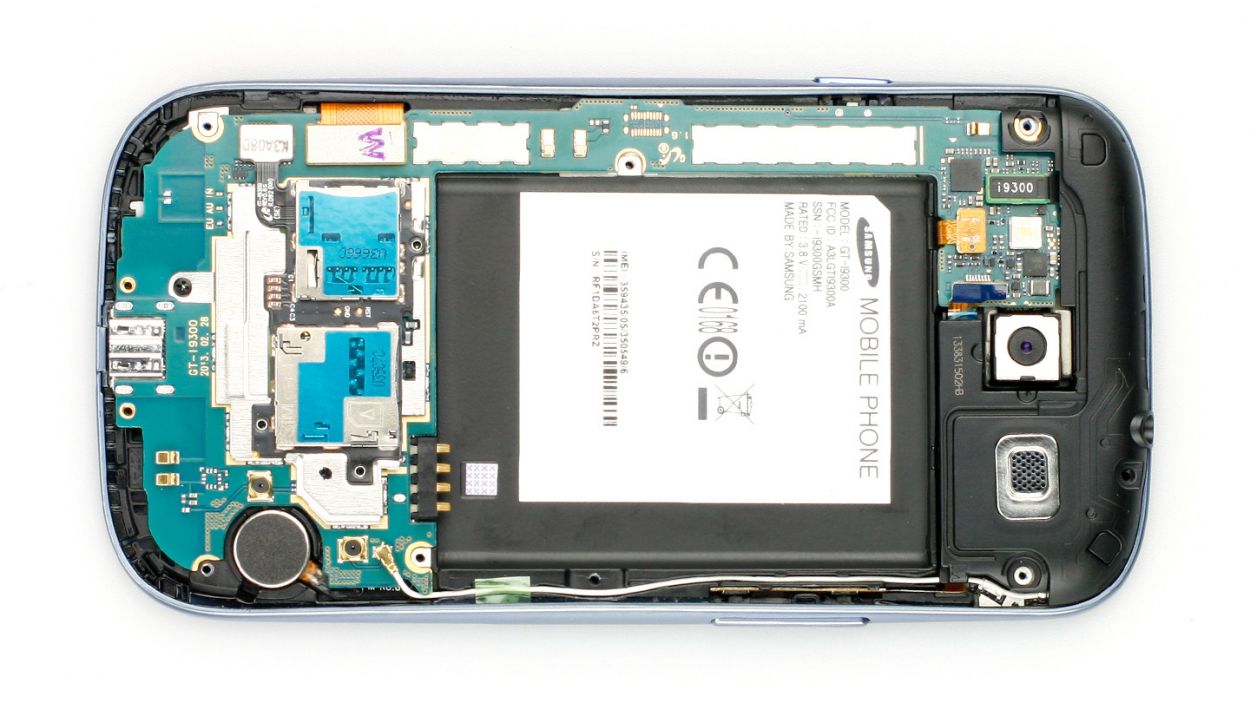
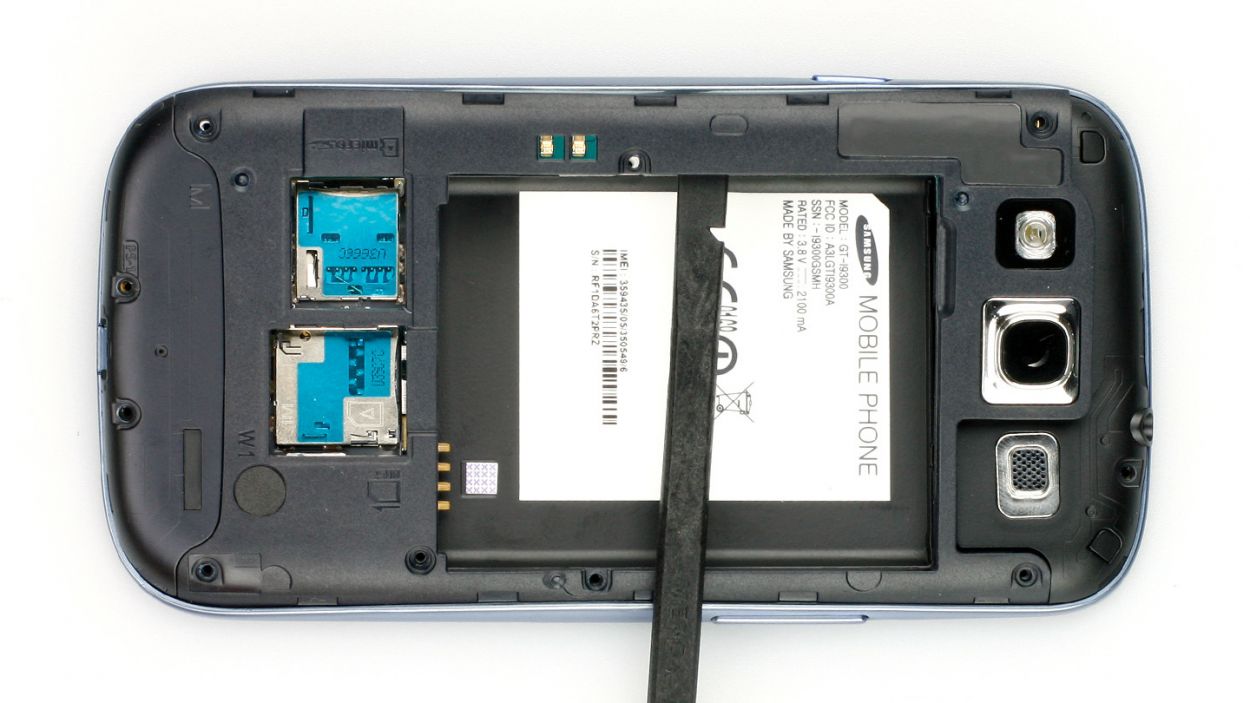
– Alright, it’s time to pop that speaker back in place (check out figure 1 for guidance).
– Once it’s snug and secure, go ahead and connect the connector (take a peek at figure 2).
Step 6

– Alright, it’s time to pop on that plastic cover! Give it a good press until you hear it click into place just right (check out figure 1 for a visual).
– Next up, grab those 10 x 4.0 mm Phillips screws and secure it all in place (see figure 2). You’re doing great!
Step 7
– Now gently slide the SIM card and, if you’re using one, the microSD card back into their cozy little slots.
Step 8

– Put the battery back in. The +/- symbols have to be touching the contact point.
Step 9

– Putting the back cover on is a piece of cake! Just align it correctly and give it a gentle press all around the phone until you hear those satisfying clicks from the clips locking into place. You’ve got this!
Step 10
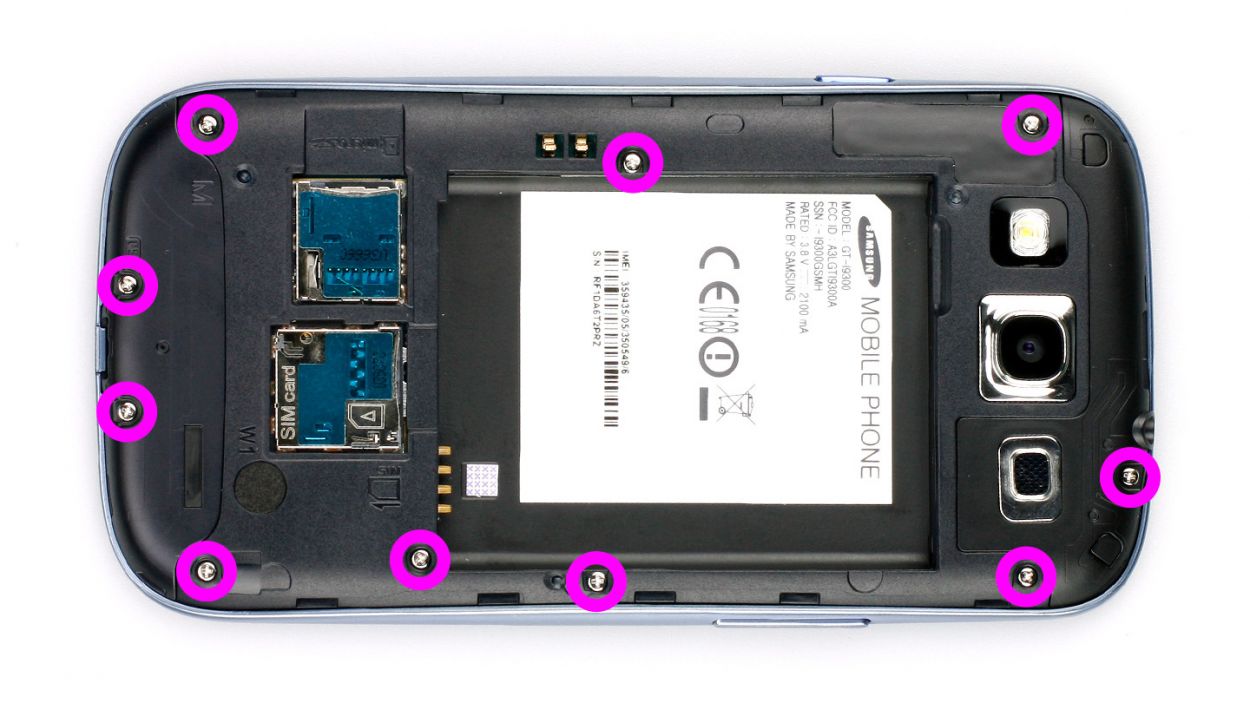
– First things first, let’s tackle those 10 Phillips screws holding the plastic cover snugly in place (check out figure 1 for a visual!). You’ll need 10 x 4.0 mm Phillips screws for this job.
– Now, grab your trusty spudger or even your fingernails to gently lift the cover from the inside. Just slide the spudger in about 2 millimeters (figure 2 will guide you) and carefully lift until the cover pops off (see figure 3 for the final reveal).
Step 11
– Fire up your Samsung Galaxy S4 and punch in this snazzy key combo: *#0*#.
– Next, hit that call button like a champ.
– Now, it’s time to give all the functions a good ol’ check-up!