DIY Guide to Replace Samsung Galaxy S5 Vibration Motor
Duration: 60 min.
Steps: 15 Steps
In this guide, we’ll walk you through the process of swapping out the faulty vibration motor in your Samsung Galaxy S5. If your phone isn’t buzzing like it used to or barely vibrates at all, this repair is just what you need! Just a heads up, though: your Samsung Galaxy S5 will lose its waterproof capabilities after this fix. Let’s get started!
Step 1
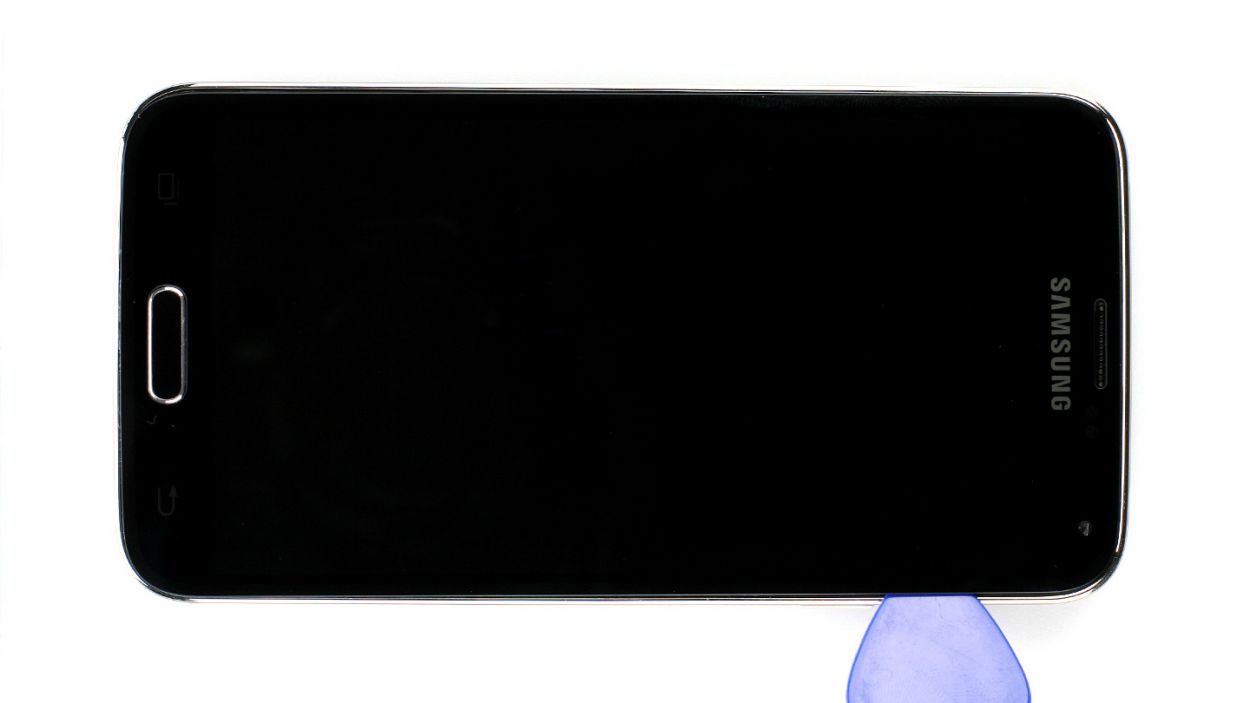
– Slide the spudger into the little gap next to the standby button. Gently lift the back cover off. There are 18 sneaky clips hiding under there, so you’ll want to run the spudger around the whole smartphone to disconnect them all. If you’re feeling adventurous, you can also use your fingernails to pop off the back cover.
– Once you’ve done that, go ahead and remove the back cover!
Step 2

– First things first, if your Samsung Galaxy is still awake, let’s give it a little nap! Just hold down that standby button for about three seconds and follow the friendly prompt that pops up on your screen.
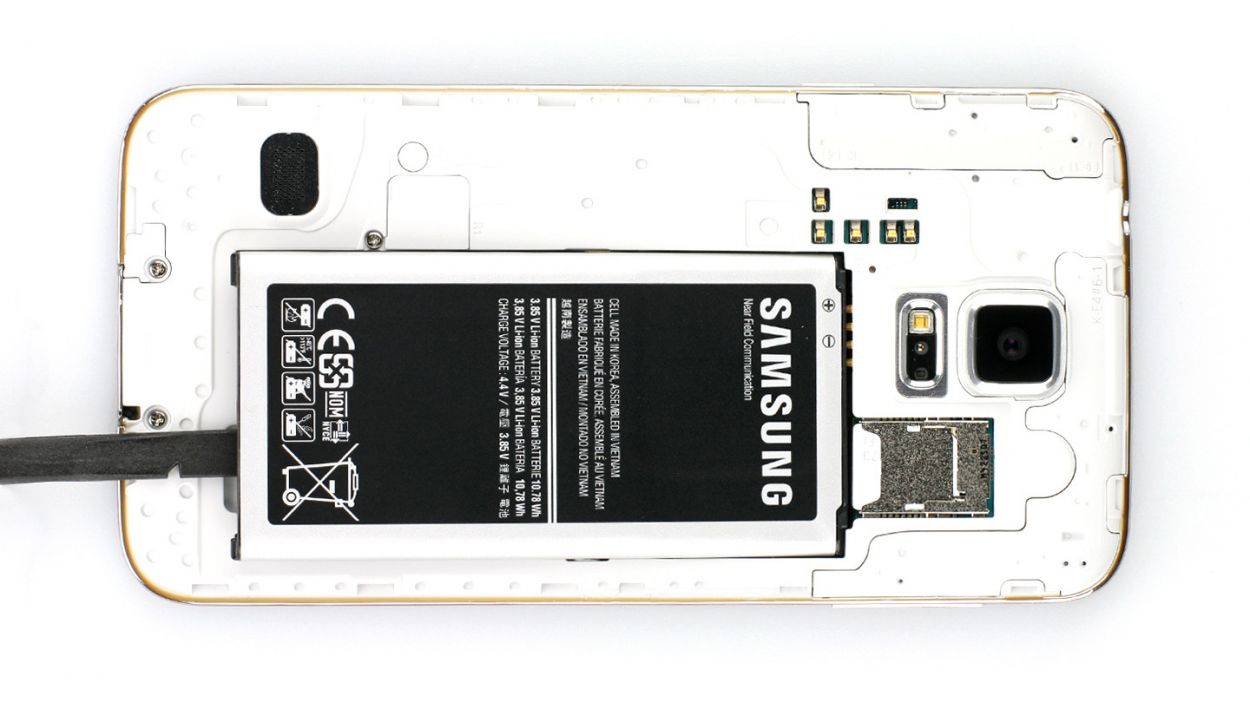
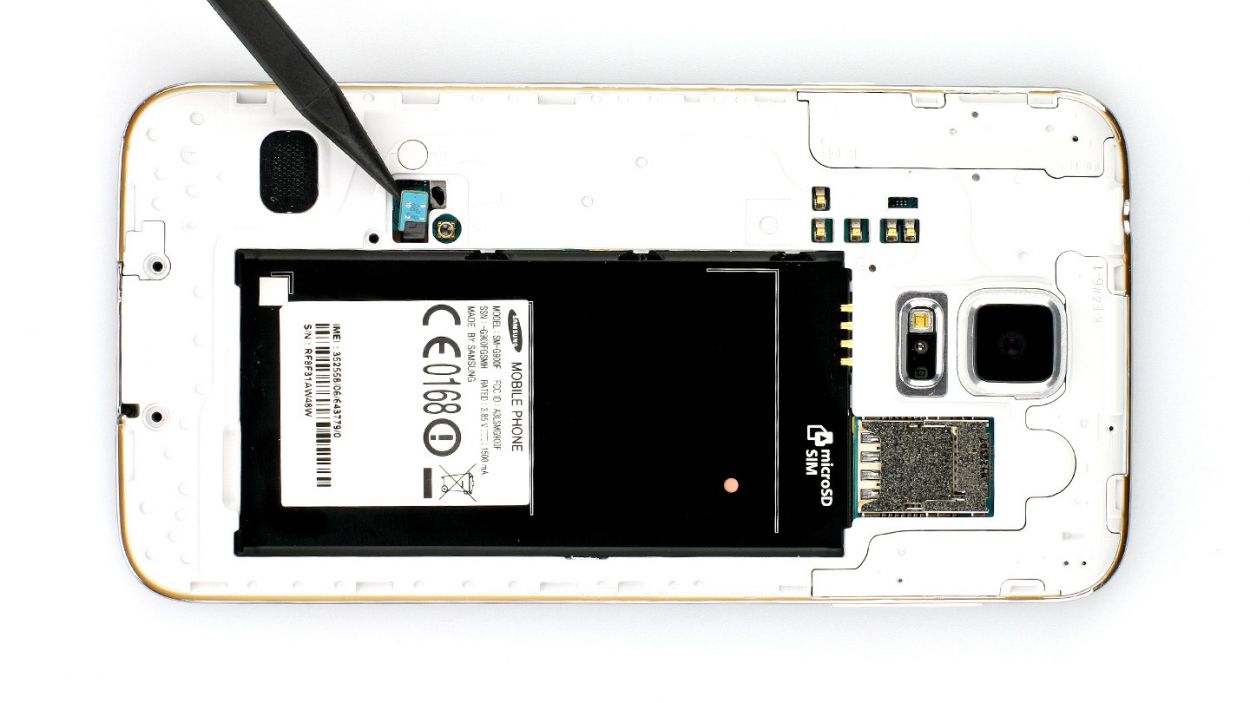
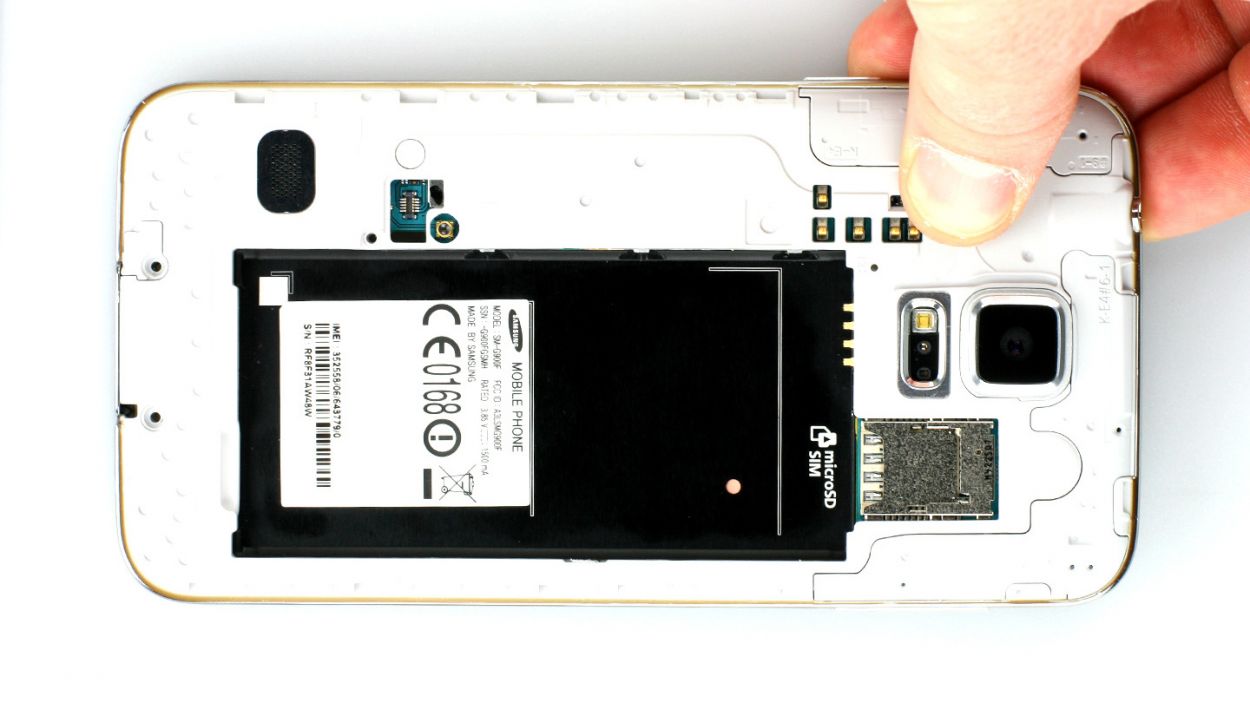
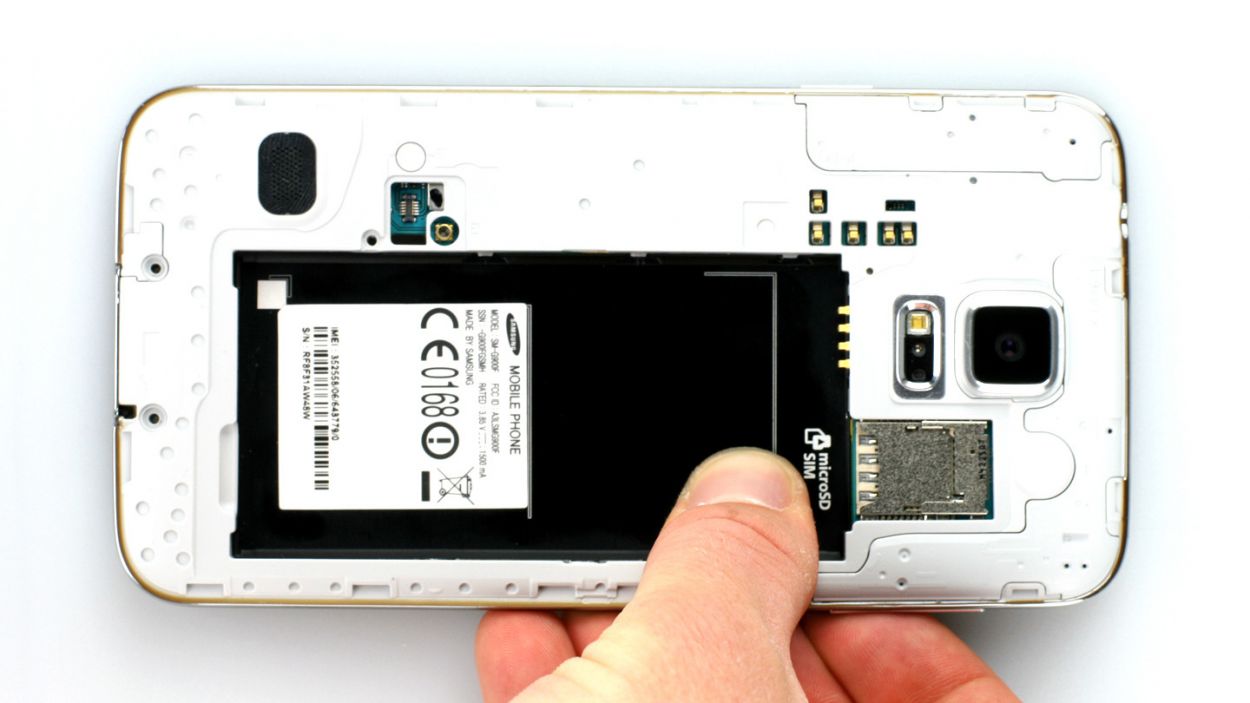
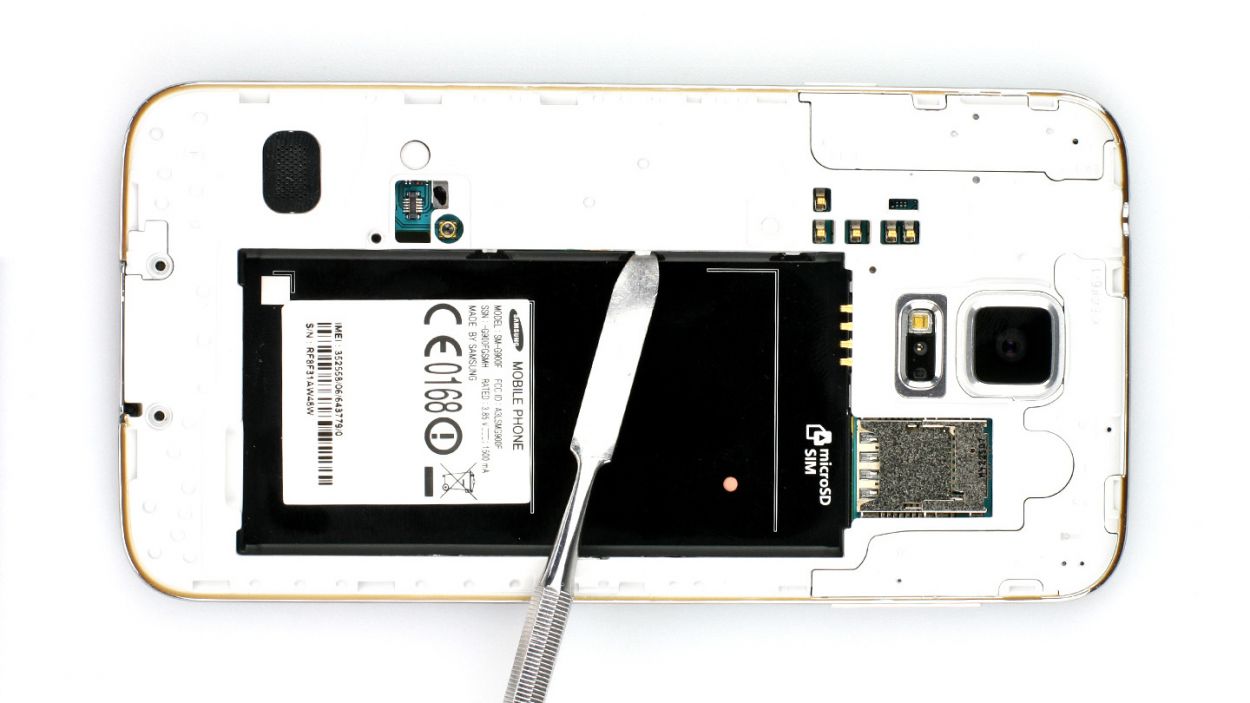
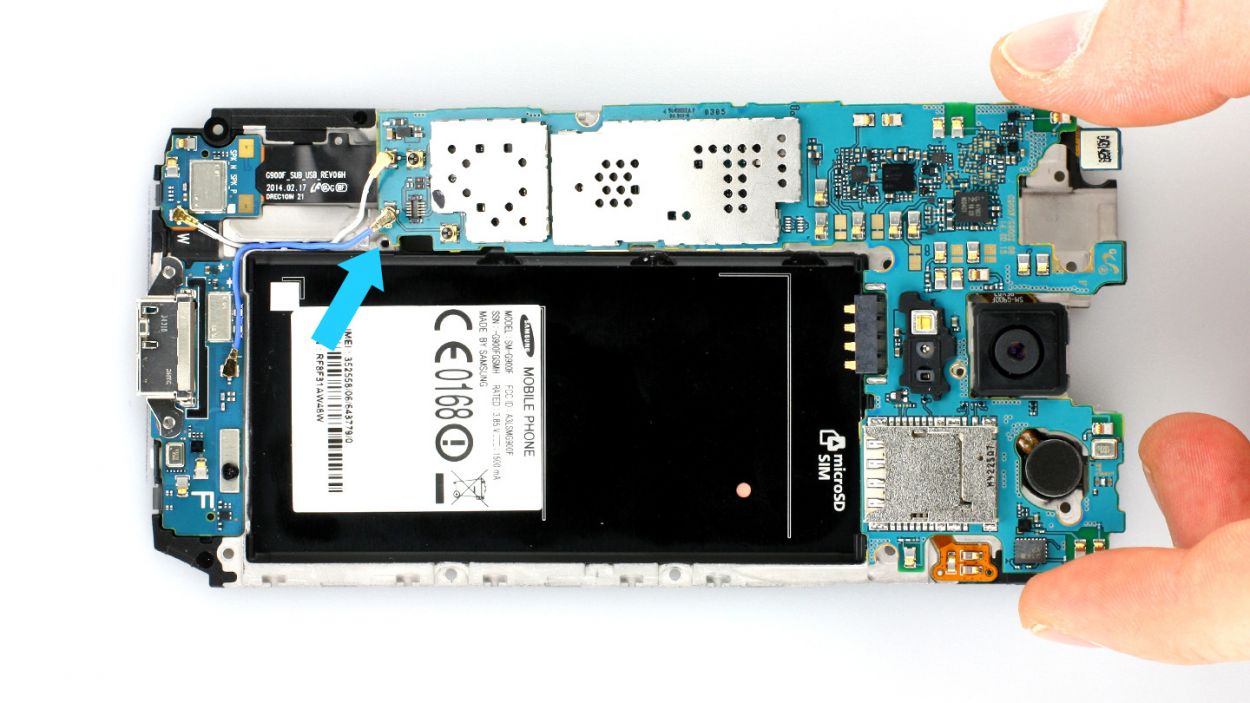
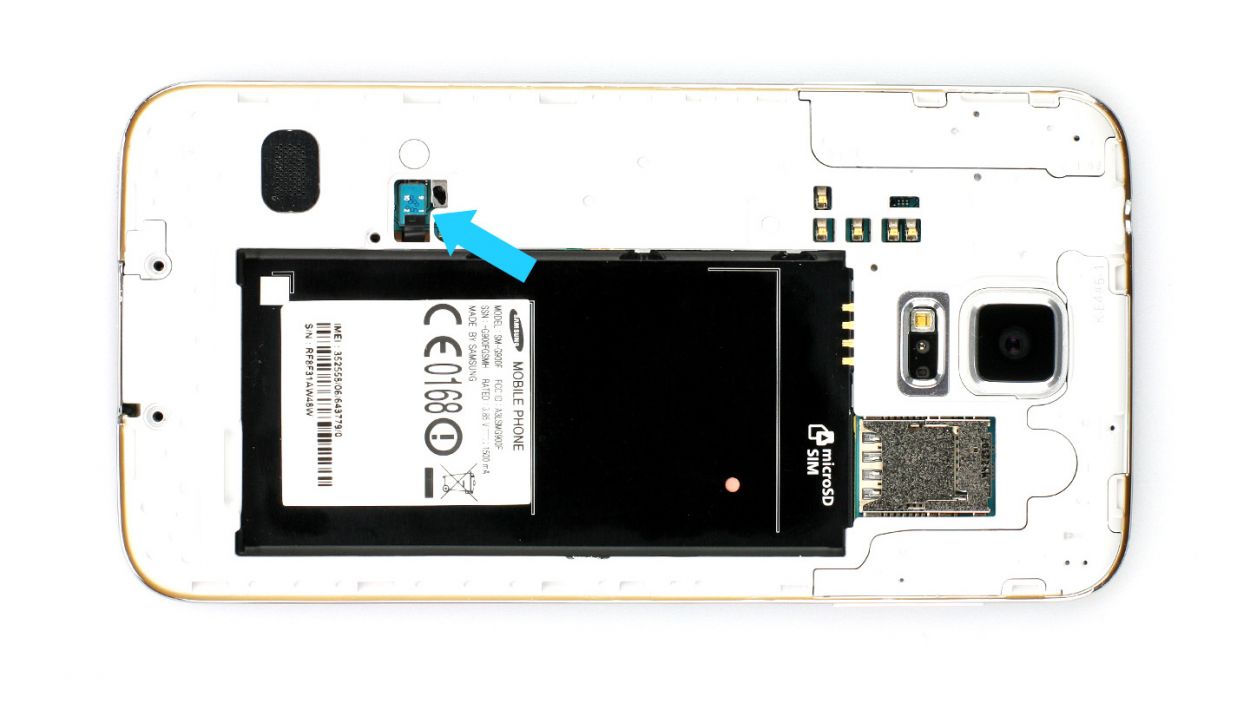
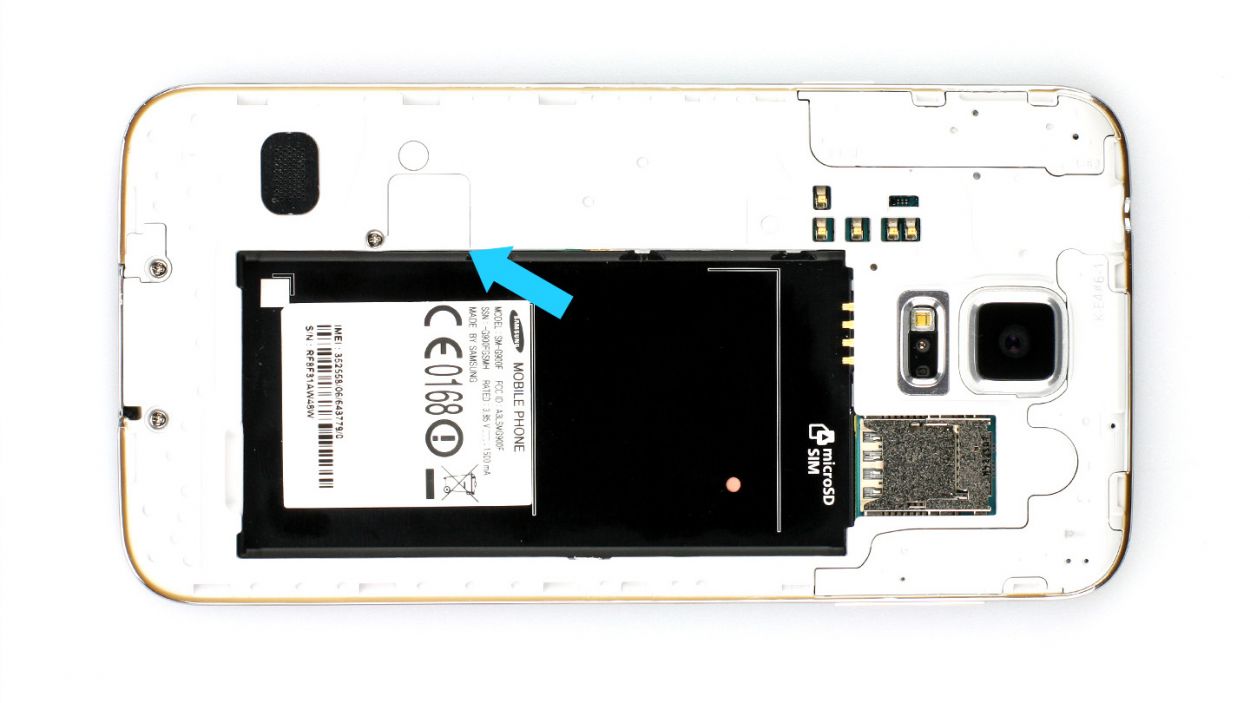
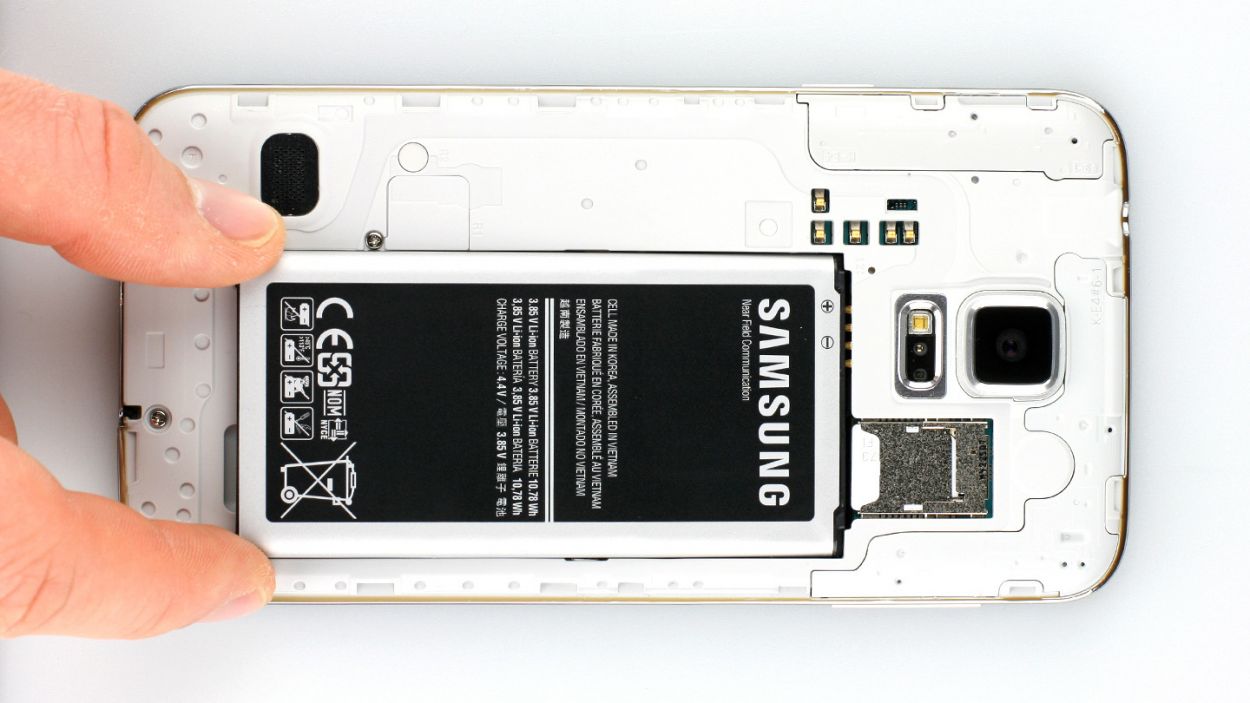
– Next up, grab your trusty spudger or even just your fingertip and gently lift that battery out (check out figure 1 for guidance). Once it’s up, go ahead and remove it completely (you’ll find figure 2 helpful for this part).
Step 3
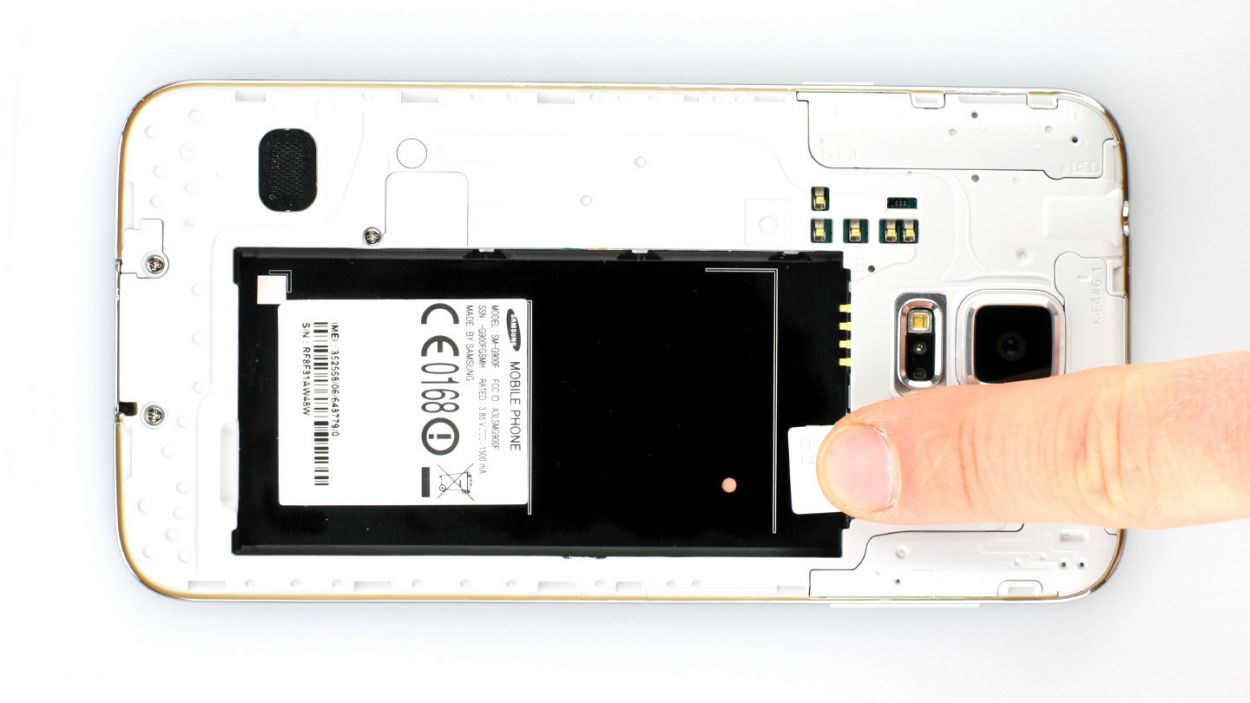
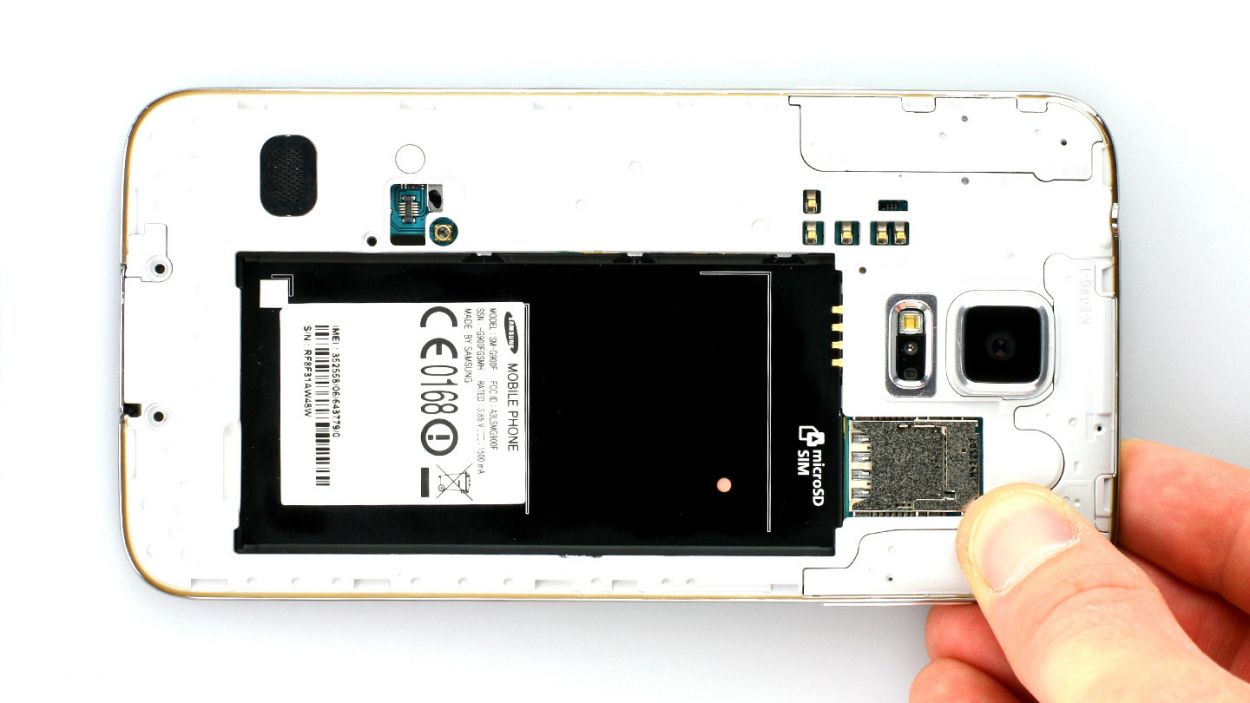
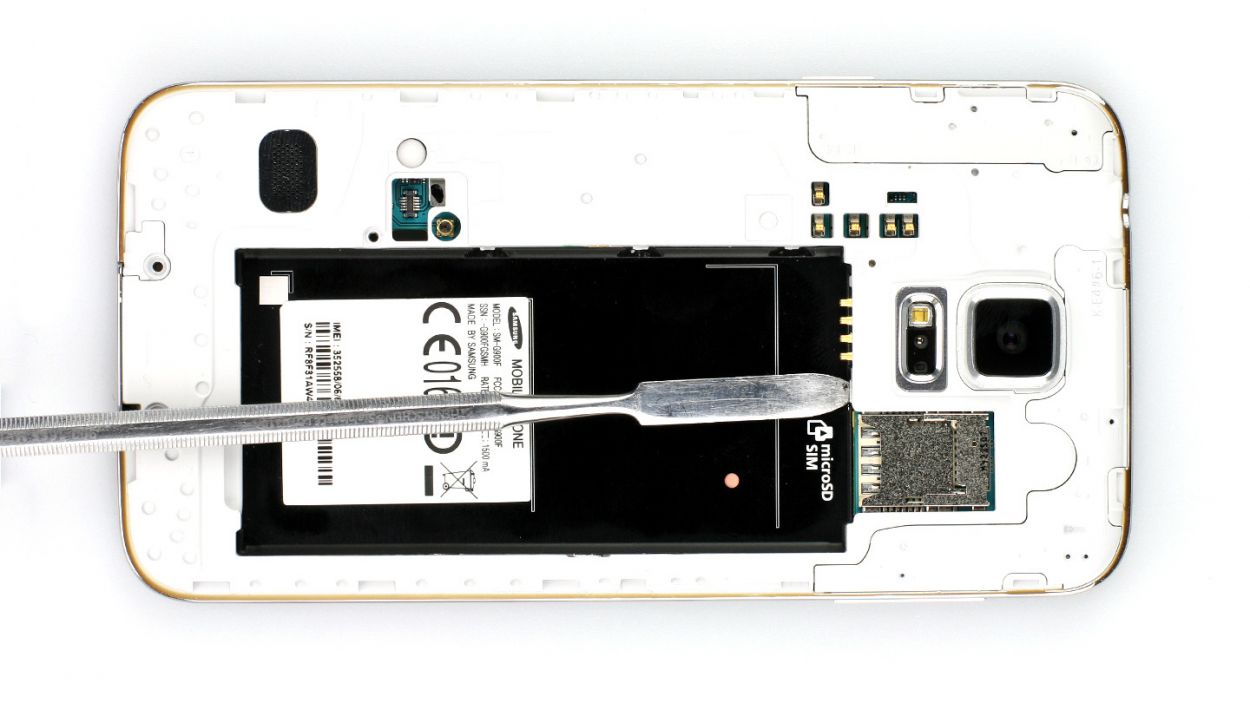
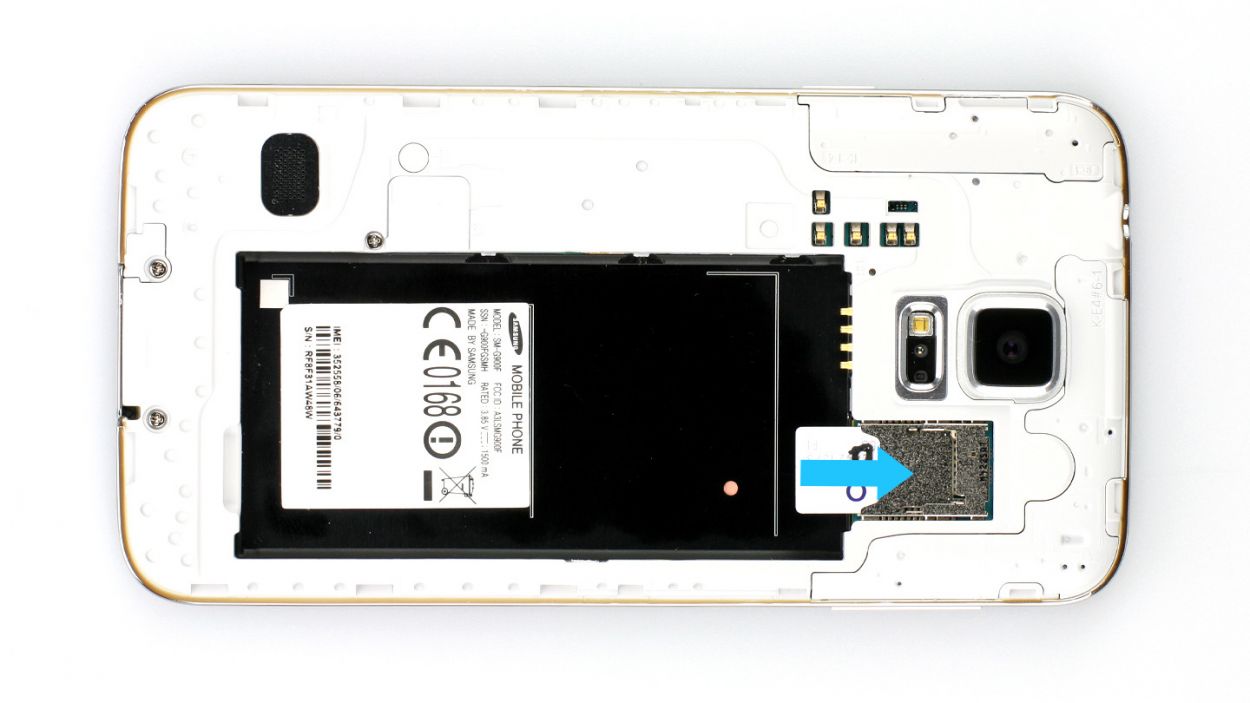
– Give that SIM card a little nudge with your finger and pop it out like a pro!
– If you’ve got a microSD card in there too, just repeat the same fun process.
Step 4
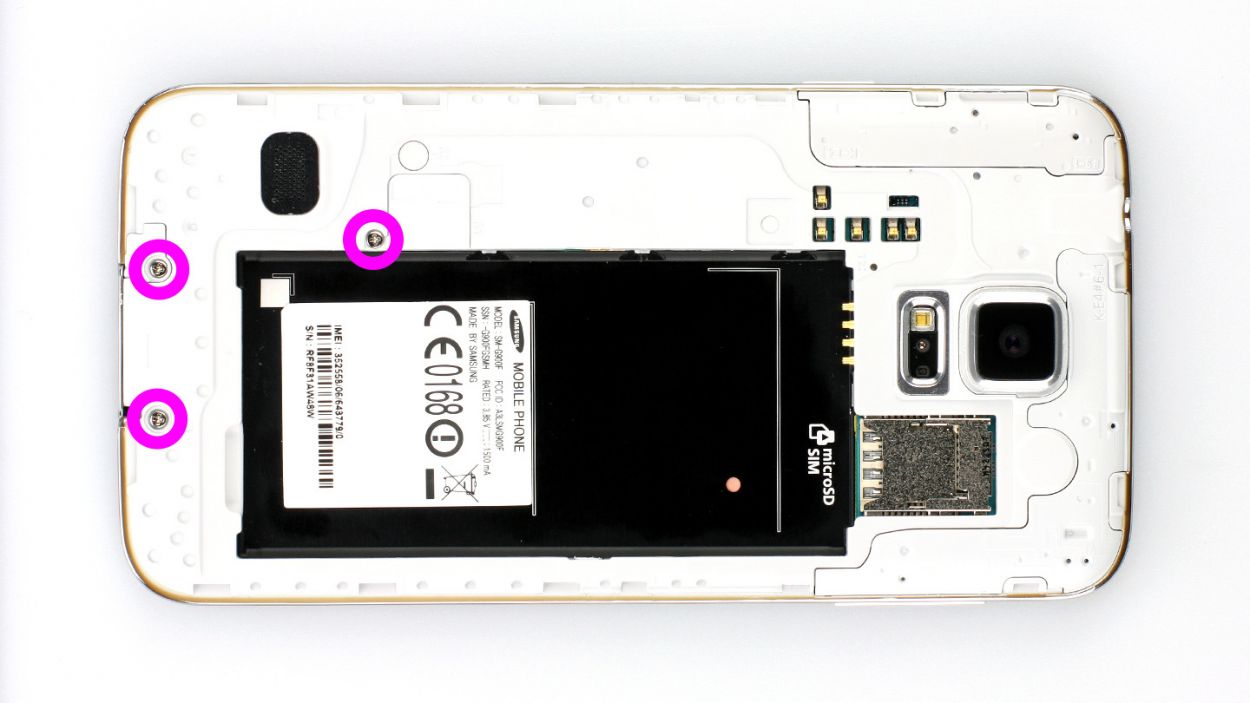
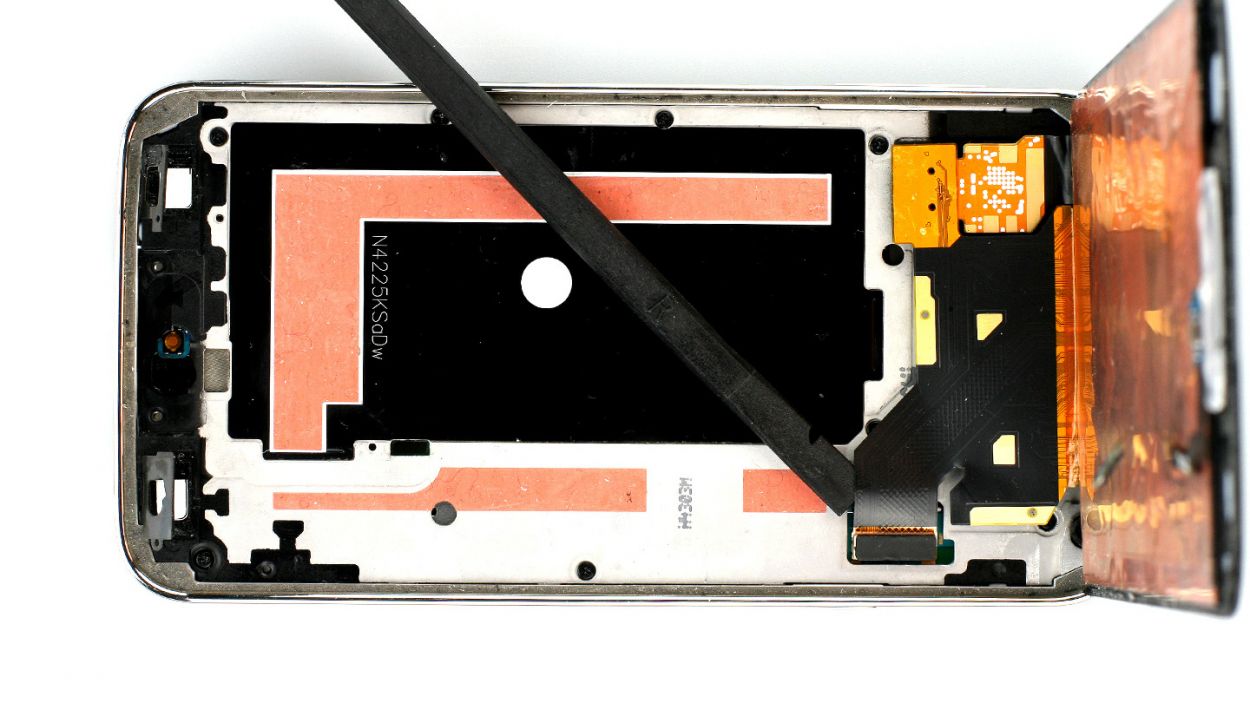
– First things first, let’s tackle those pesky 3 Phillips screws that are keeping the upper plastic cover snug as a bug! Grab your trusty screwdriver and get to work (check out figure 1 for guidance). 3 x 4.4 mm Phillips screws, you’re going down!
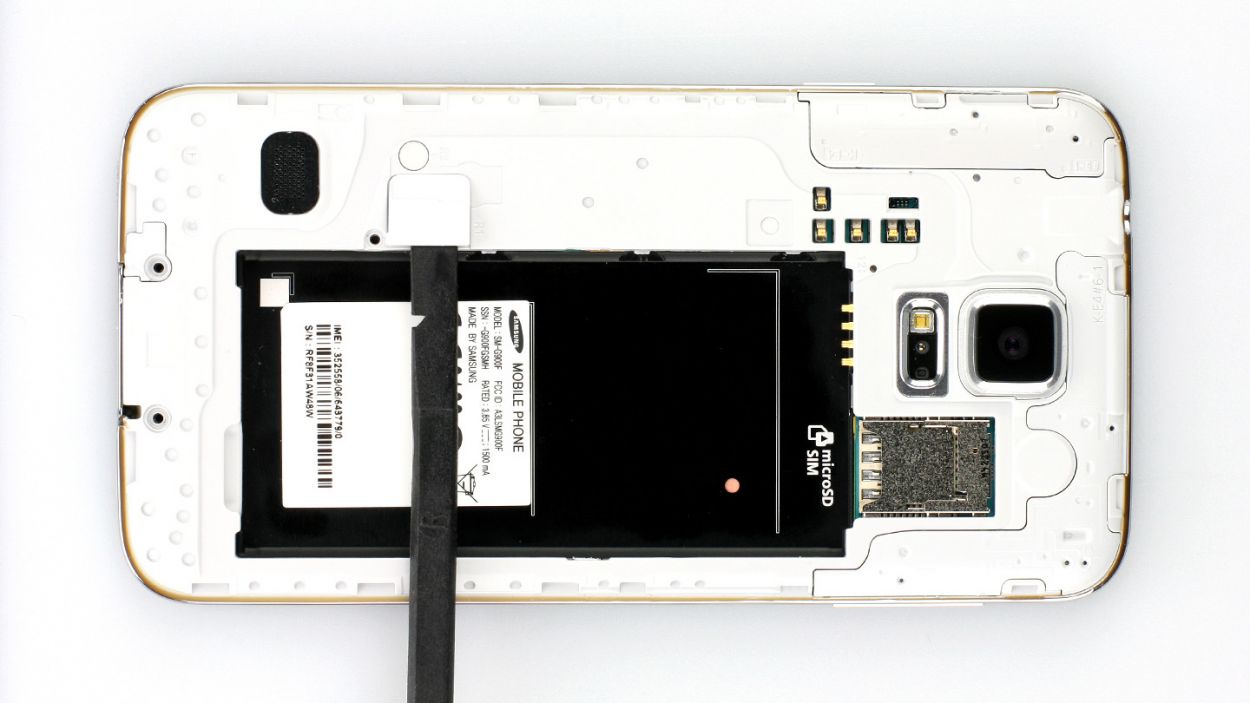
– Next up, gently lift off that little gray cap like you’re unveiling a surprise (see figure 2). Underneath, you’ll find the Home button connector waiting for you.
– Now, it’s time to channel your inner tech wizard! Use the pointed tip of the spudger to carefully disconnect the connector (see figure 3). You’ve got this!
Step 5
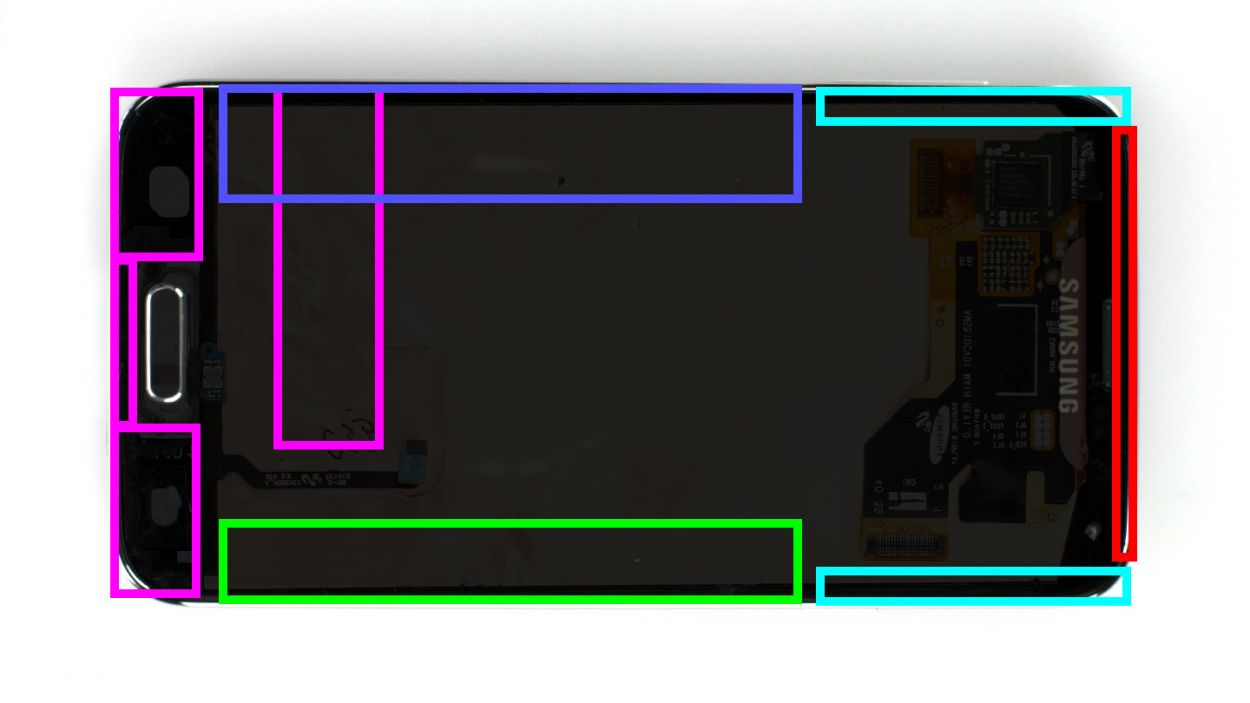


Hey there! Figure 1 gives you a bird’s-eye view of the display. We’ve cleverly added a semi-transparent peek at the back to show you where those sneaky cables are hiding. It’s like having X-ray vision (almost!).
– Alright, folks! The Samsung Galaxy S5’s display is stuck on there pretty well. To get it off, you’ll need to warm it up with a heat gun to soften that stubborn glue. Once it’s nice and toasty, grab a plastic pick and slide it into the gap between the frame and the display to break that adhesive seal. Check out Figure 1 for a top-down view of the display. We’ve even included a mirror image of the back with just 10% coverage so you can spot those sneaky cables hiding underneath. Remember to heat the right section before diving into each step!
– Now, gently insert the plastic pick up to 1.7 cm (see figure 2).
– Next up, slide that plastic pick in up to 1.2 cm (see figure 3).
– Keep going! Insert the plastic pick up to another 1.2 cm (see figure 4). Just a heads up, you’ll want to stop 0.2 cm before the Home button. For the last bit, grab a spudger. Heat the display again and lift it carefully, guiding the Home button cable through the midframe as you go.
– Insert the plastic pick up to 0.5 cm (see figure 5).
– Almost there! Now, insert the plastic pick up to 0.3 cm (see figure 6).
– Finally, continue lifting the display gently so you can disconnect the display connector from the logic board (see figure 7).
Step 6


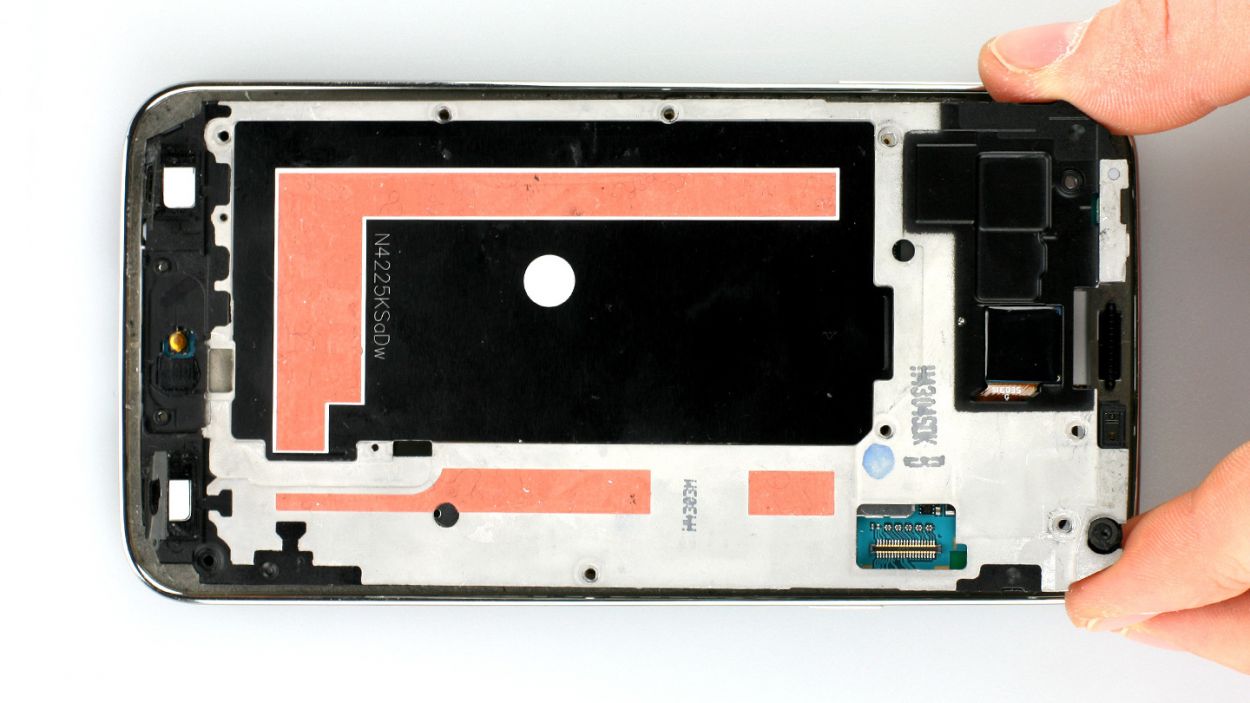
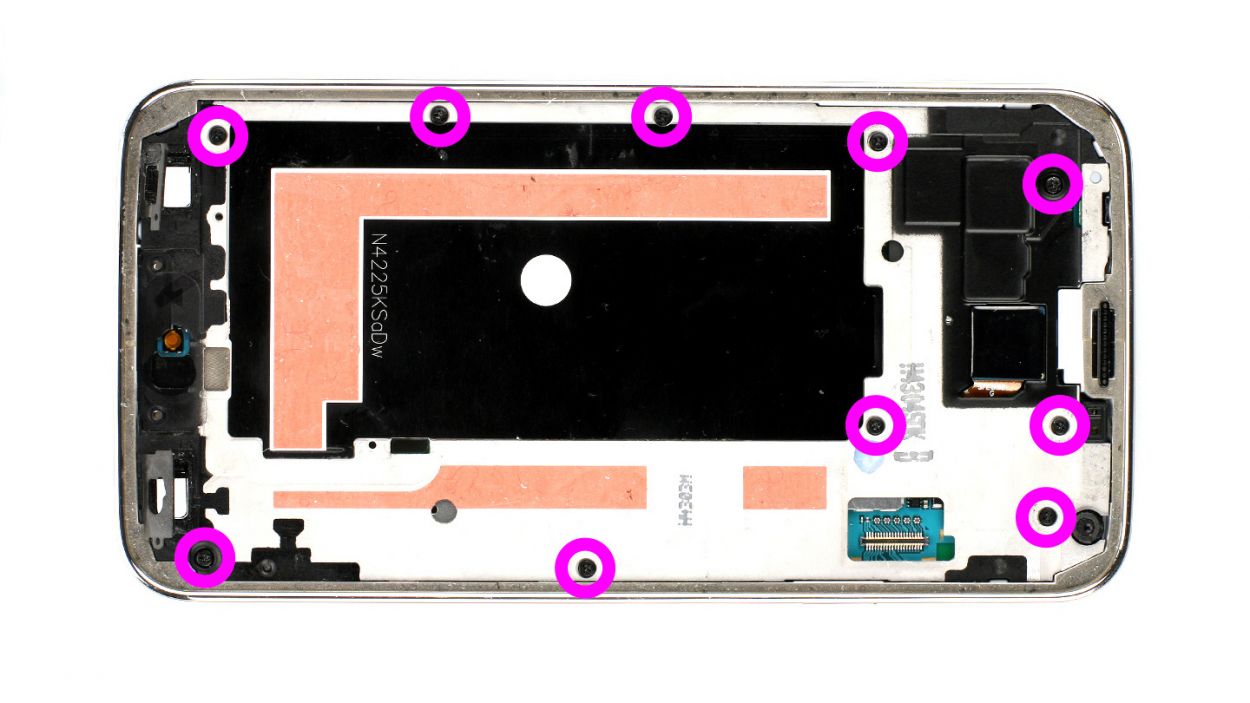
– Time to get started! Remove the 10 Phillips screws that hold the plastic cover in place (see figure 1). Yep, you’ll need to take out all 10 of those 3.3 mm Phillips screws.
– Now it’s time to get a little tricky. You’ll need to separate the gray part of the frame (the part that looks chrome-plated on the outside) from the rest of it. Press down on the gray frame between the headphone output and the rear camera, and use your other fingers to press the outer chrome frame upward (see figures 2 and 3). Keep pushing until the black metal frame comes out.
– Next up, let’s tackle the volume buttons on the opposite side (see figures 4 and 5). You got this!
– There are a few more clips to detach, and you’ll need to use your trusty laboratory spatula to get the job done. Head to where the battery used to be (see figures 6 and 7) and get to work.
– Almost there! Now you can carefully pull off the gray chrome frame. Just be careful not to damage the dock connector (see figure 8).
– Oh, and one more thing – a little gray cover that used to be next to the Home button cover might fall off. Don’t worry, it’s supposed to do that!
Step 7
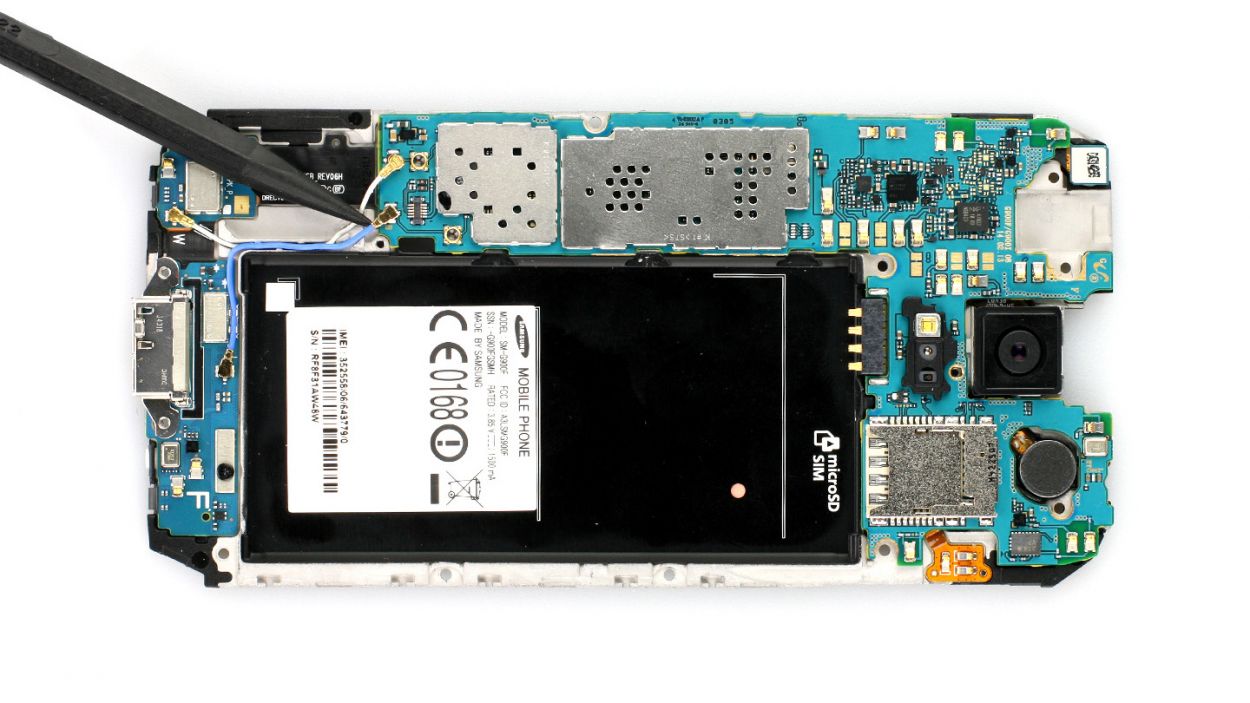
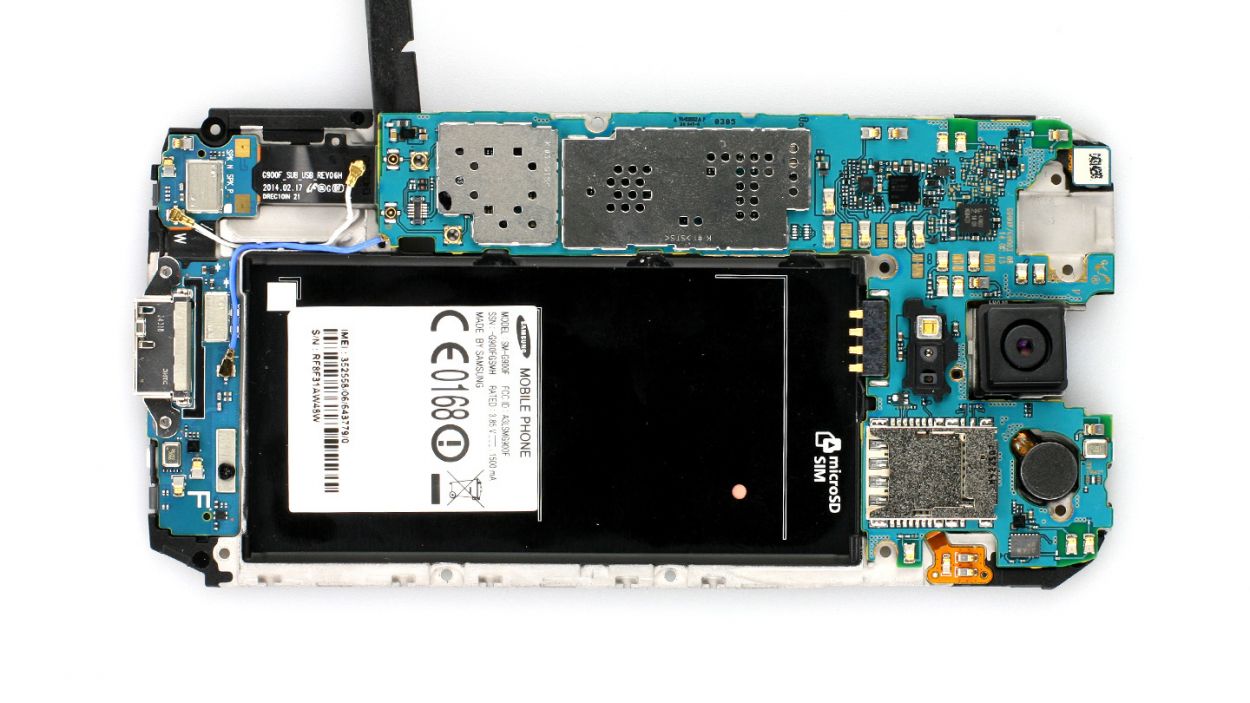
– First up, grab your trusty Phillips screwdriver and remove the screw that’s holding the logic board to the frame (check out figure 1 for a visual!). It’s a 1 x 3.0 mm Phillips screw, so you got this!
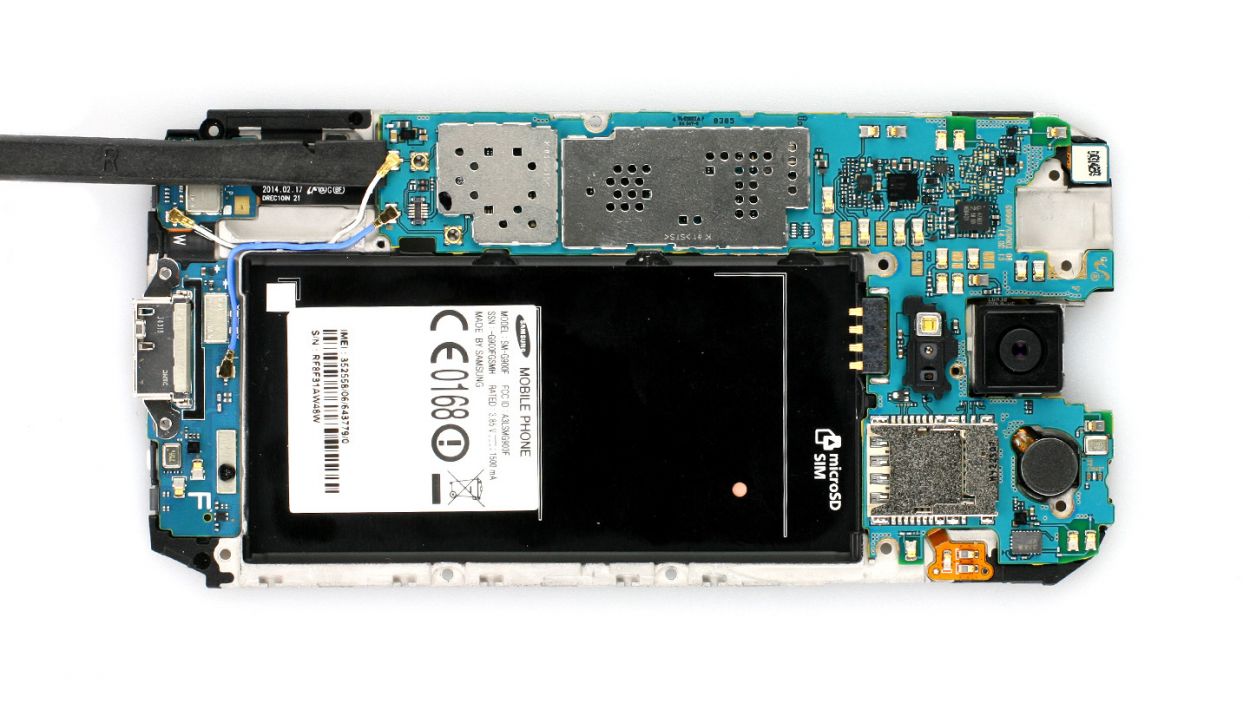
– Next, it’s time to disconnect those white and blue antenna cables from the logic board. Use a spudger to gently lift them off at the cable heads (figures 2 and 3 will guide you). Easy peasy!
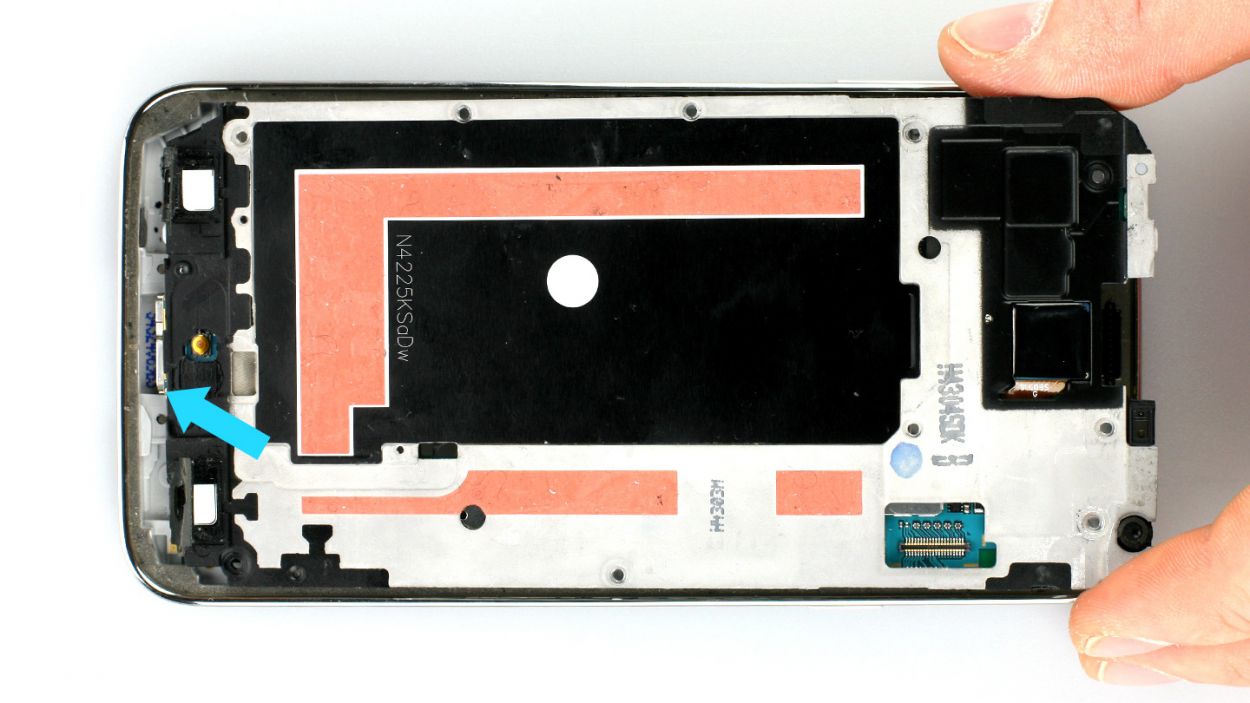
– Now, let’s locate the dock connector cable. It’s hiding right under the logic board, level with the antenna connector. Give it a gentle disconnect (see figures 4 and 5 for help). You’re doing great!
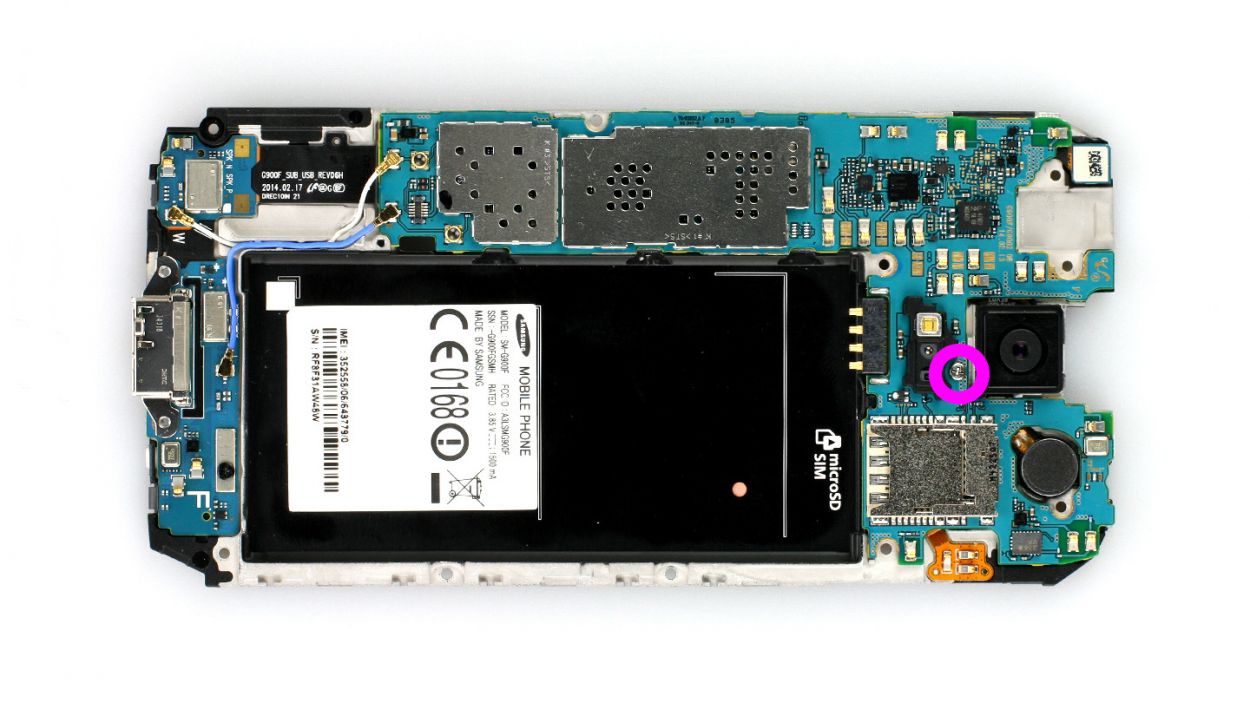
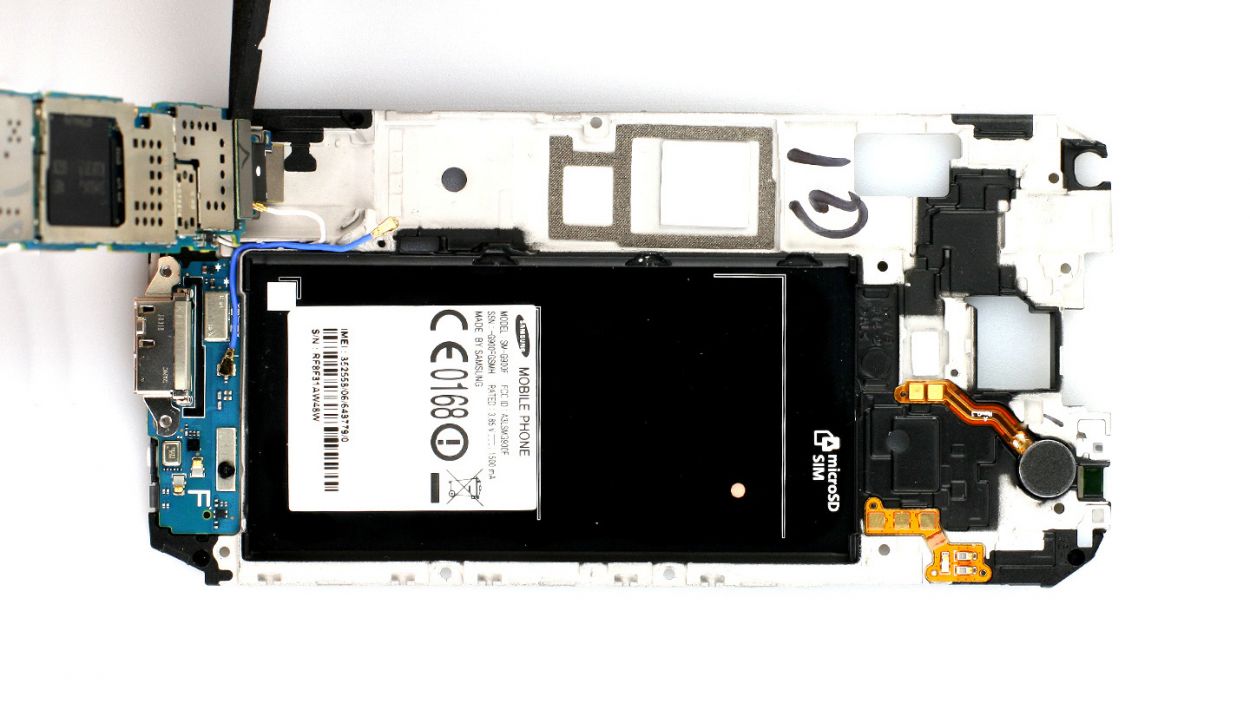
Step 8
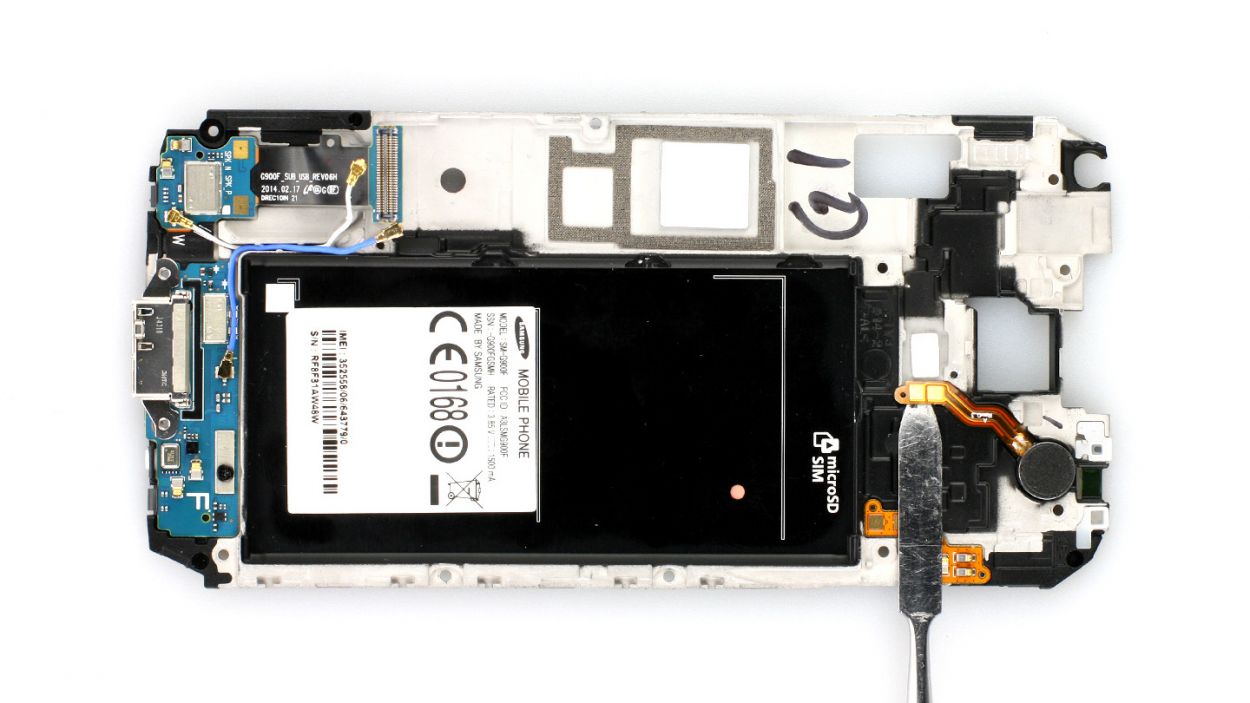
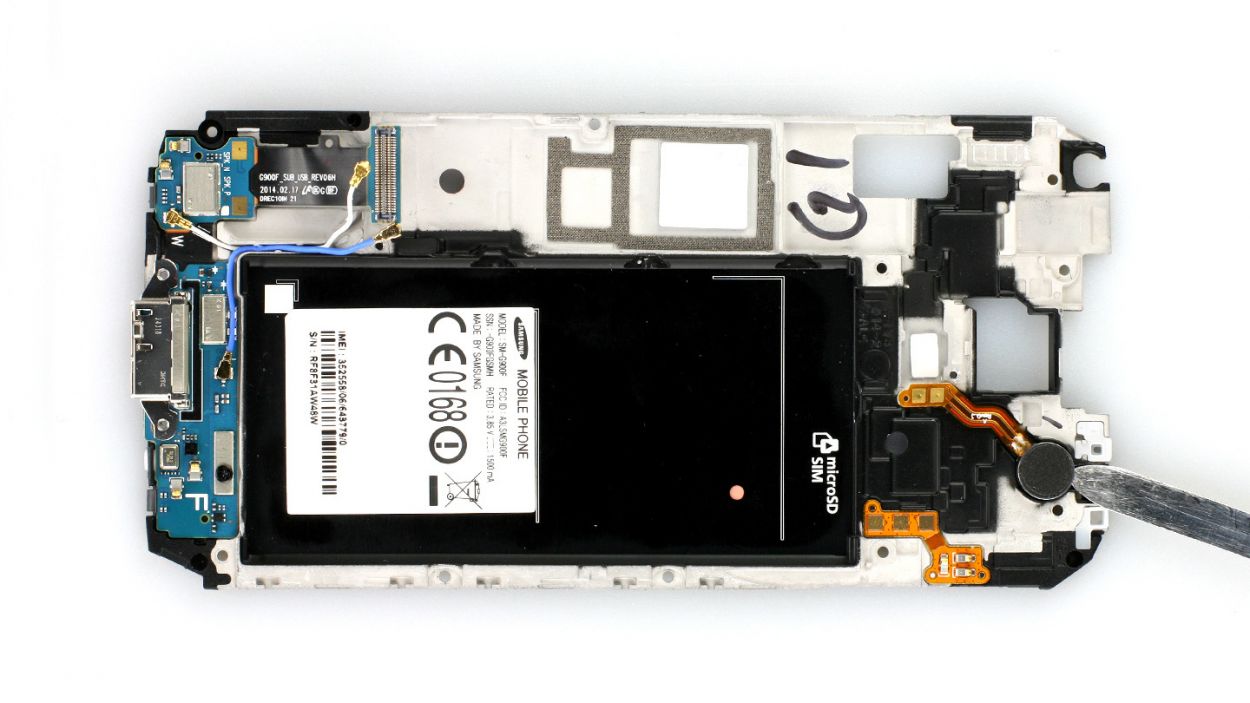
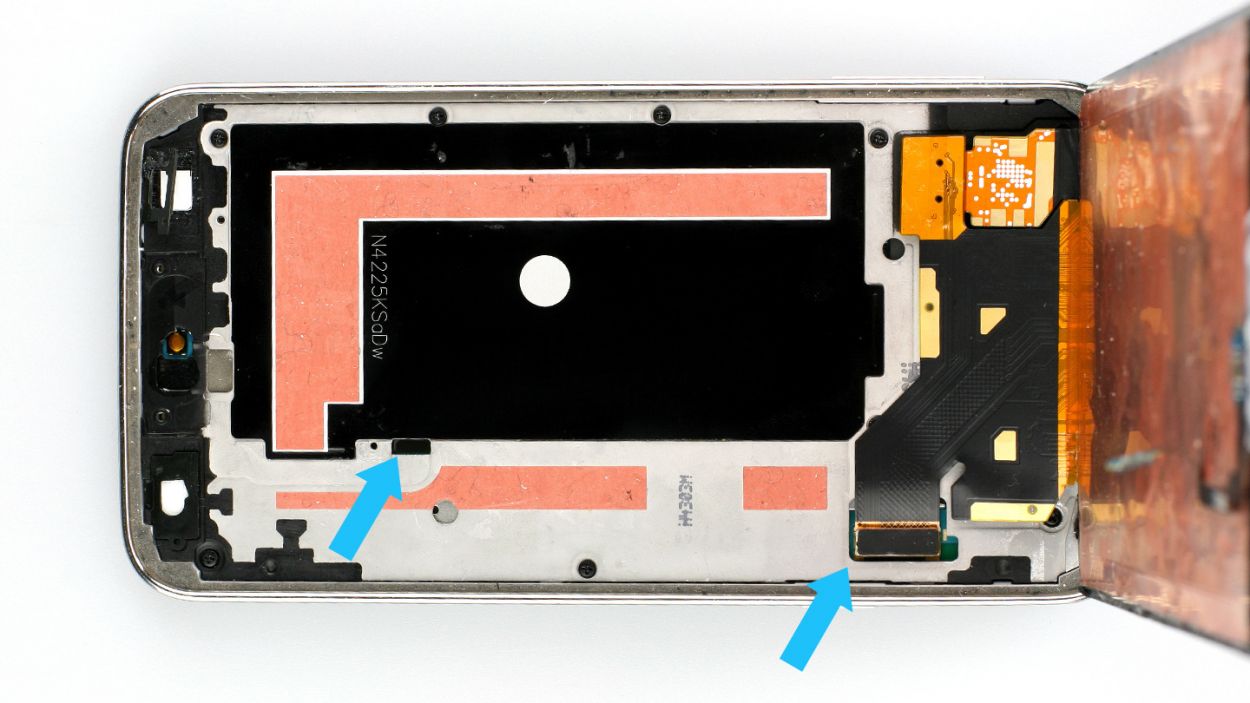
– Alright, let’s get that vibration motor out! Grab your trusty laboratory spatula or spudger and gently slide the pointed tip underneath the cable set (check out figure 1 for a visual guide). Work your way toward the motor, but be careful—sometimes it’s stuck on there pretty good with some glue. If it’s playing hard to get, a little warmth from a heat gun can help loosen things up.
– Once you’ve successfully evicted the old vibration motor (see figure 2), it’s time to pop in a shiny new one!
Step 9


– Get that dock connector cable plugged into the logic board just right (check out figure 1 for a visual guide) and make sure it’s snug in the frame. Watch out for those sneaky blue and white antenna cables—keep them above the board (see figure 2).
– Next up, connect those blue and white antenna cables and tuck them back into the cable guide. Just a heads up, be gentle—those contacts can get a little bendy if you’re not careful!
– Now, grab your trusty 3.0 mm Phillips screw and fasten it onto the logic board (see figure 3).
Step 10
– Time to reunite the interior metal frame with its gray plastic cover! Begin at the dock connector (check out figure 1) and give those two frame parts a good squeeze together.
– Next up, let’s secure them in place with 10 x 4.0 mm Phillips screws. Tighten away!
Step 11

– First things first, let’s see if that old glue is still doing its job! If it’s lost its stickiness, it’s time for a replacement.
– Next up, reconnect the display cable and carefully thread the Home button cable through the metal frame (check out figure 1 for a visual!).
– Power up your Samsung Galaxy S5 and make sure everything’s running smoothly. To dive into the test menu, just enter this magic combo in the call app’s keypad: *#0*#.
– If all systems are go, give that display a solid press onto the metal frame to secure everything in place!
Step 12

– First things first, let’s reconnect that Home button connector nice and snug (check out figure 1 for guidance).
– Next up, pop that little gray cap back on like a pro (see figure 2 for a visual).
– Now, grab those 3 Phillips screws and secure the upper plastic cover back in place (figure 3 has your back). Remember, these are the 3 x 4.4 mm Phillips screws!
Step 13
– Now gently slide the SIM card and any microSD card you have back into their cozy little slots.
Step 14
– Pop that battery back in! Just make sure the +/- symbols are cozying up to the contact point.
Step 15
– Putting the back cover on is a piece of cake! Just align it properly and give it a gentle press all around the phone until you hear that satisfying click. You’ve got this!