DIY Guide to Replace Samsung Galaxy S5 Screen
Duration: 45 min.
Steps: 12 Steps
In this guide, we’ll walk you through the steps to swap out your Samsung Galaxy S5’s faulty display unit all by yourself! If your screen is cracked, the touchscreen is playing hard to get, or the LCD is stuck in a black hole or flickering like a disco ball, it’s time for a change. Let’s get your device looking and working like new again!
Step 1
– Slide that spudger into the little gap next to the standby button and give the back cover a gentle lift. There are 18 clips hanging out under there, so you’ll want to run the spudger around the whole smartphone to disconnect them. If you’re feeling adventurous, you can also use your trusty fingernails to pop off the back cover.
– Once you’ve worked your magic, go ahead and remove the back cover!
Step 2

– Alright, if your Samsung Galaxy is still awake, let’s put it to bed! Press and hold that standby button for about three seconds, and follow the prompt that pops up on your screen.
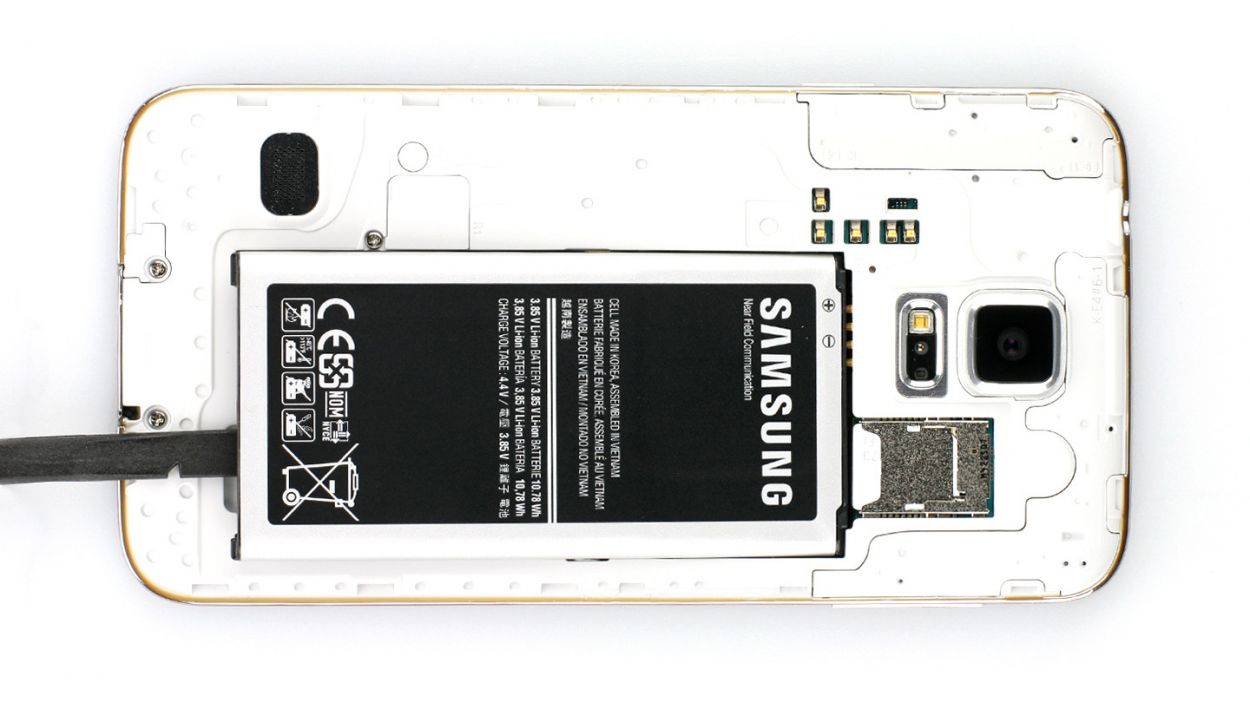
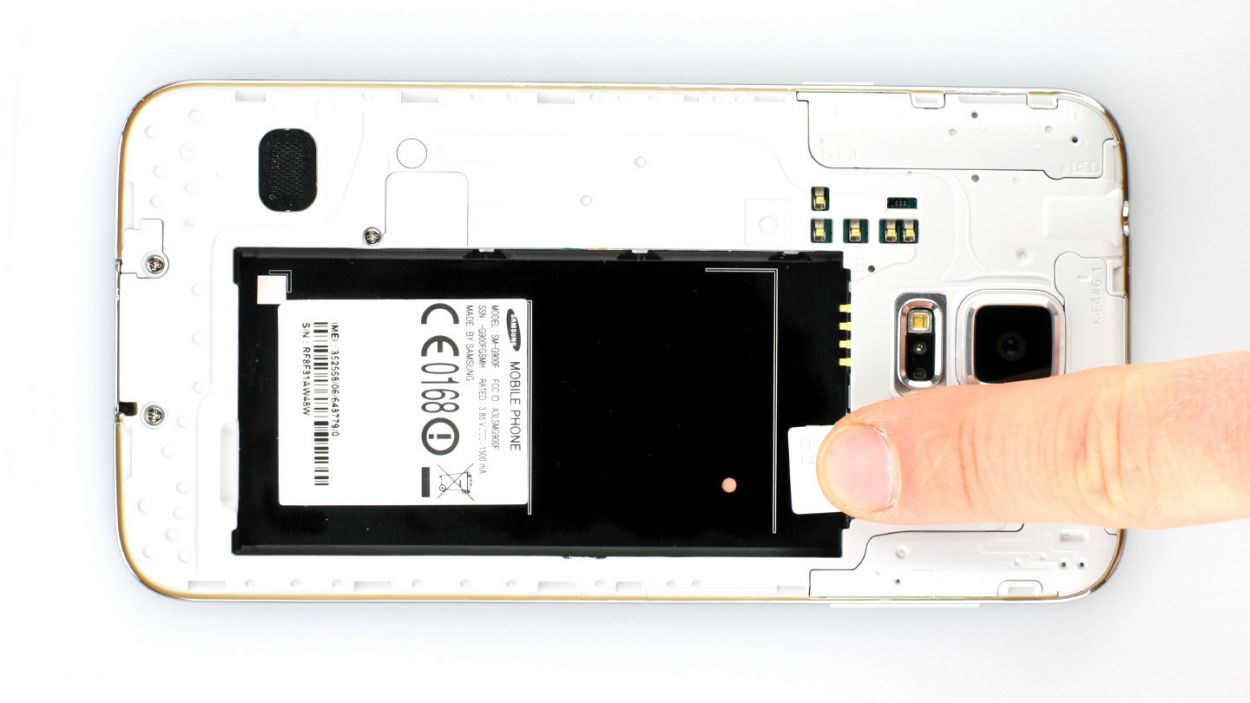
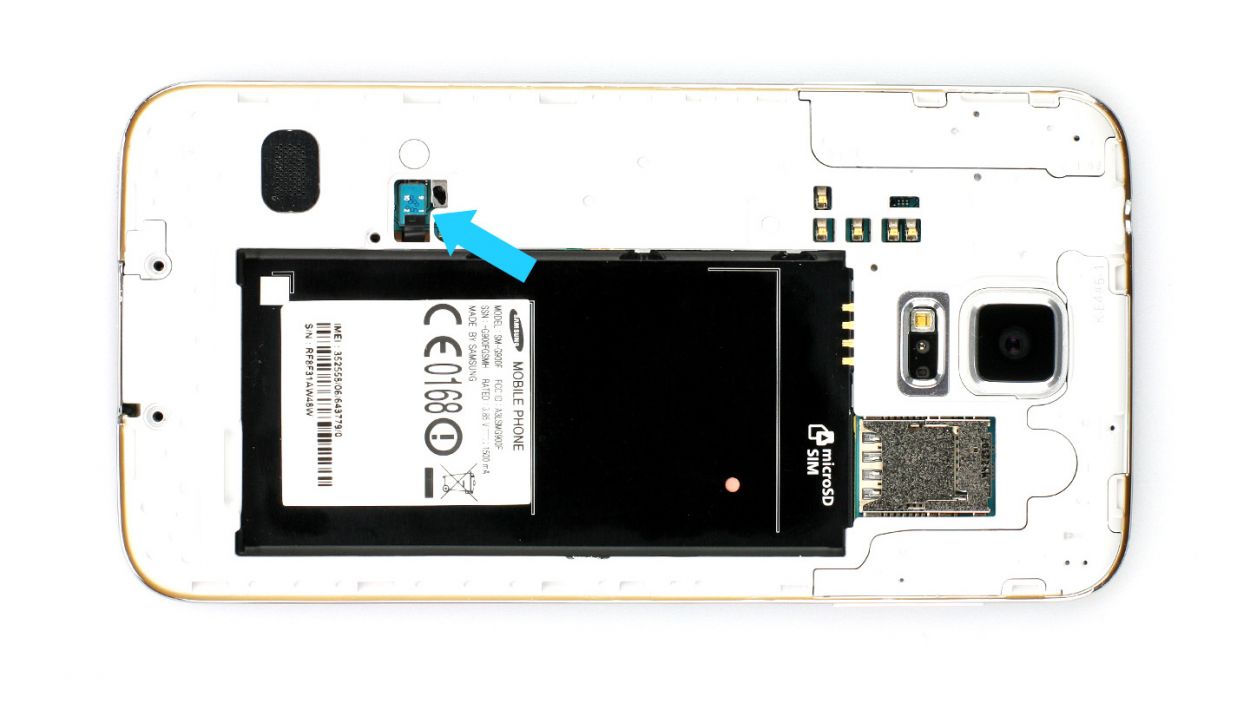
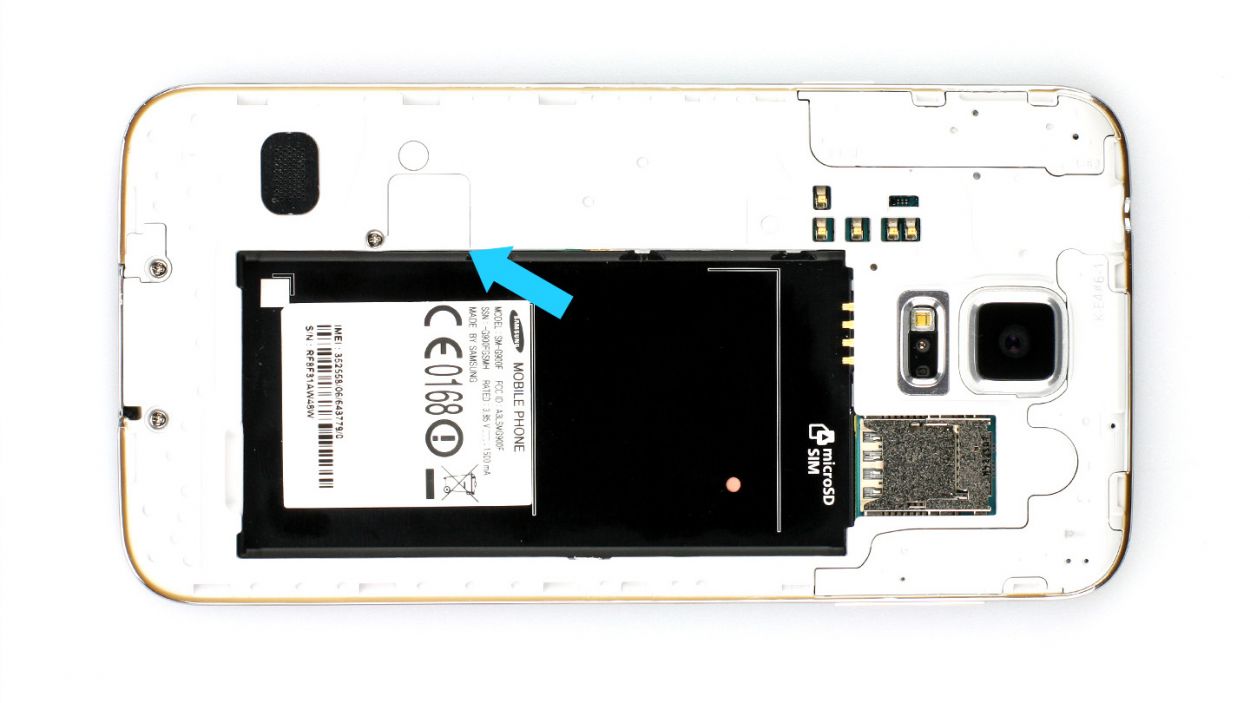
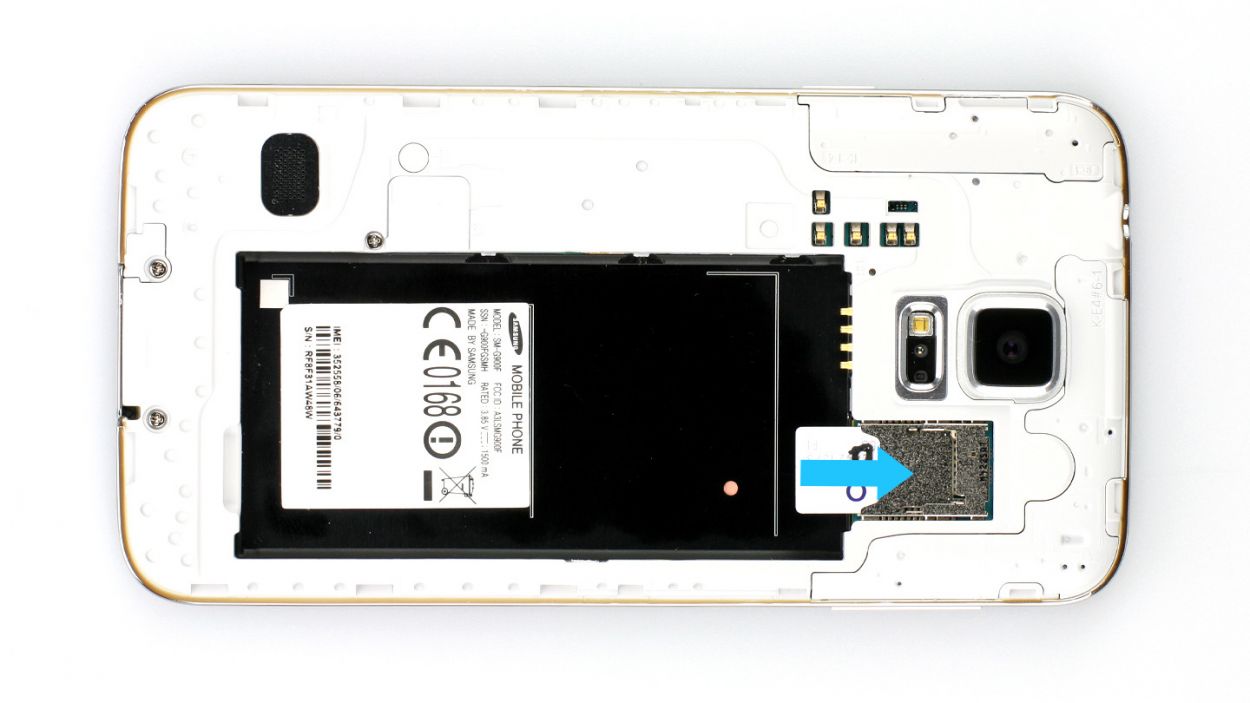
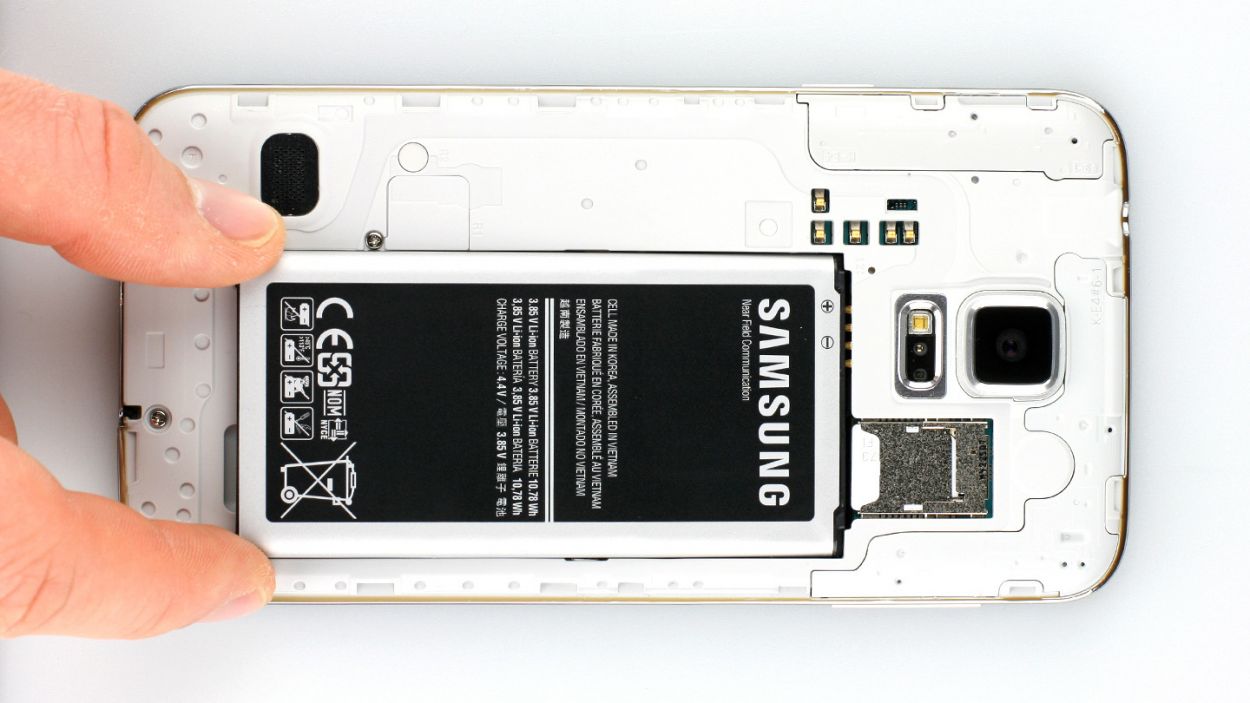
– Next up, grab your trusty spudger or just your fingertip, and gently pry up the battery (check out figure 1). Once it’s loose, go ahead and remove it (see figure 2).
Step 3
– Give that SIM card a little nudge with your finger and pop it out like a champ!
– If you’ve got a microSD card in there, just rinse and repeat this process!
Step 4
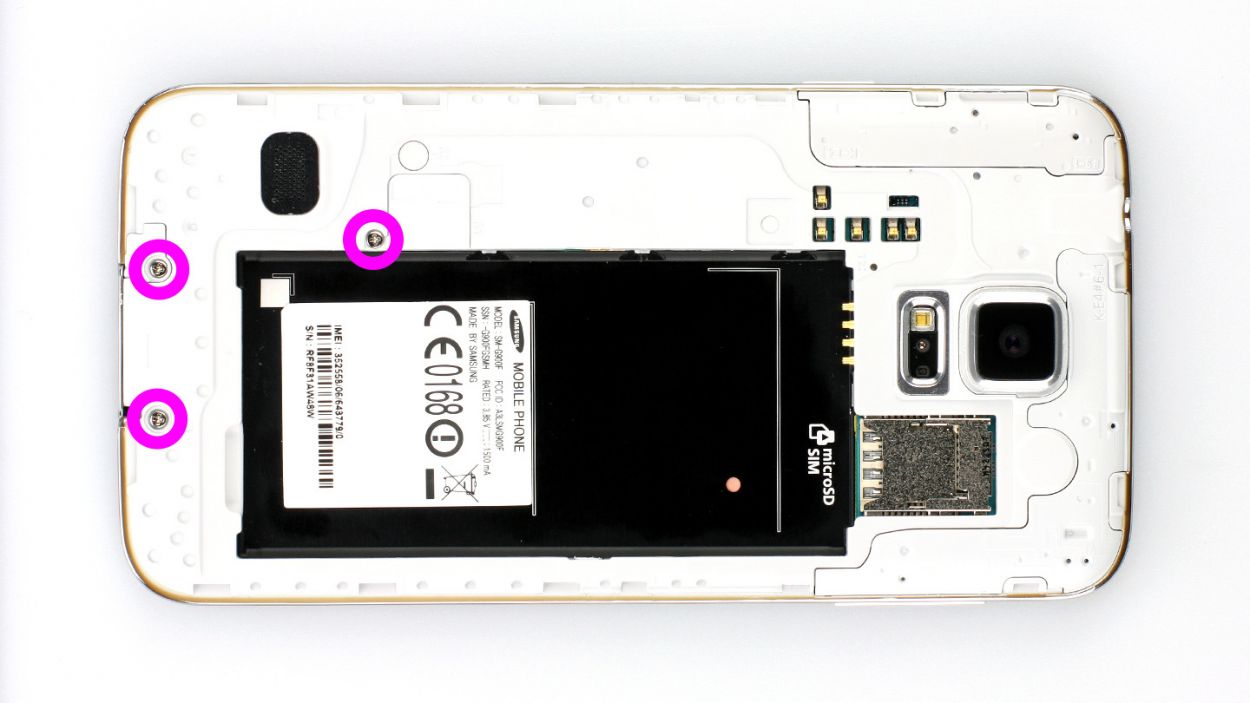
– First things first, grab your trusty screwdriver and take out those 3 Phillips screws holding the upper plastic cover snugly in place (check out figure 1 for a visual!). They’re 3 x 4.4 mm Phillips screws, so make sure you’ve got the right one!
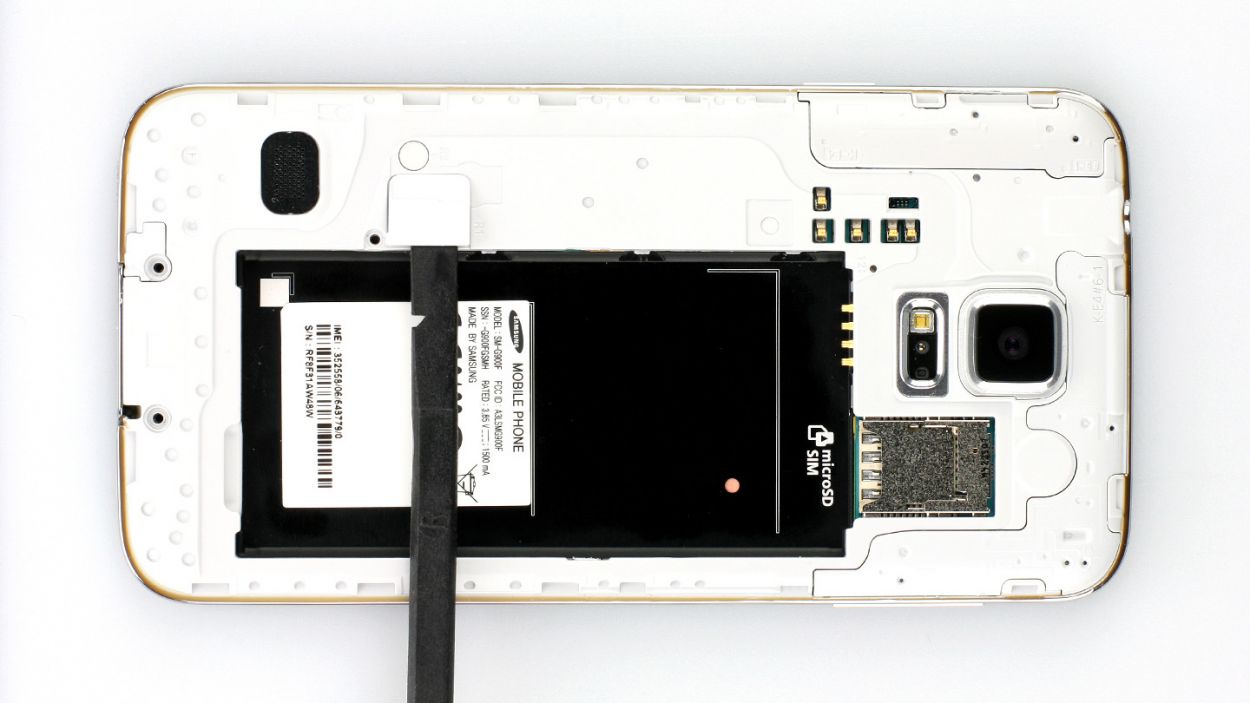
– Next up, gently lift off the little gray cap (figure 2 is your guide here). Underneath, you’ll find the Home button connector waiting for you.
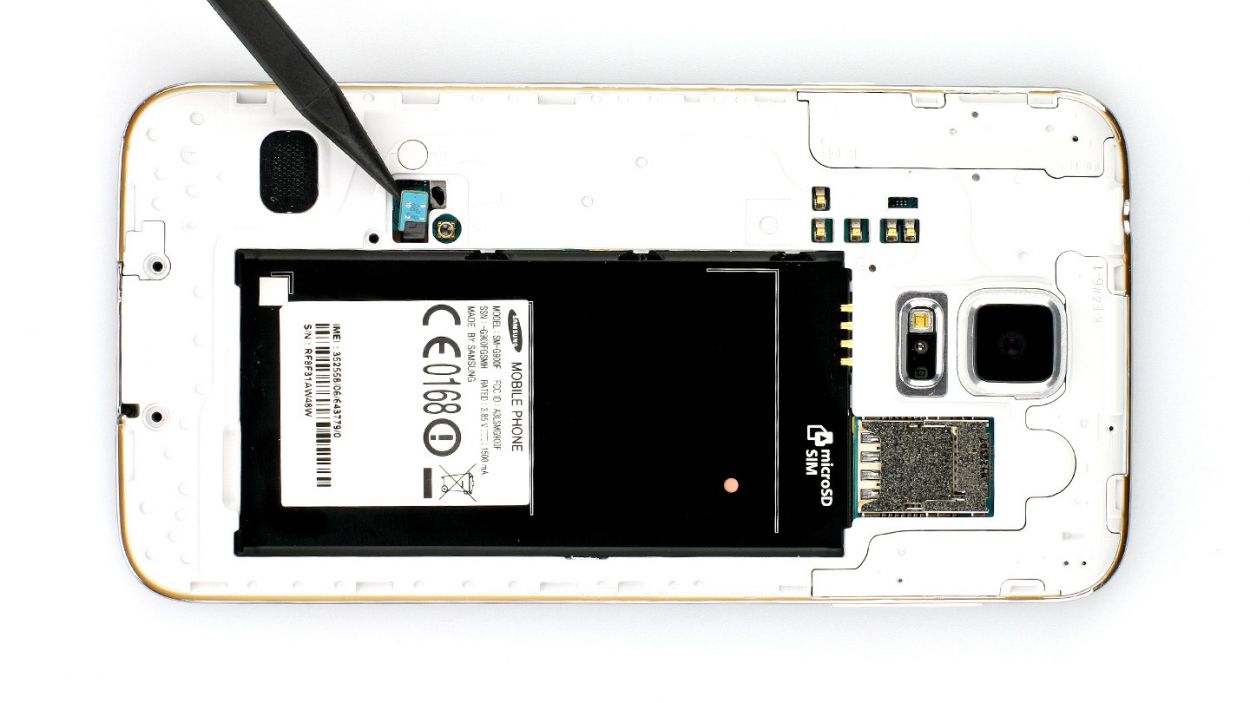
– Now, with the pointed tip of your spudger, carefully disconnect that connector (figure 3 will show you how it’s done). Easy peasy!
Step 5
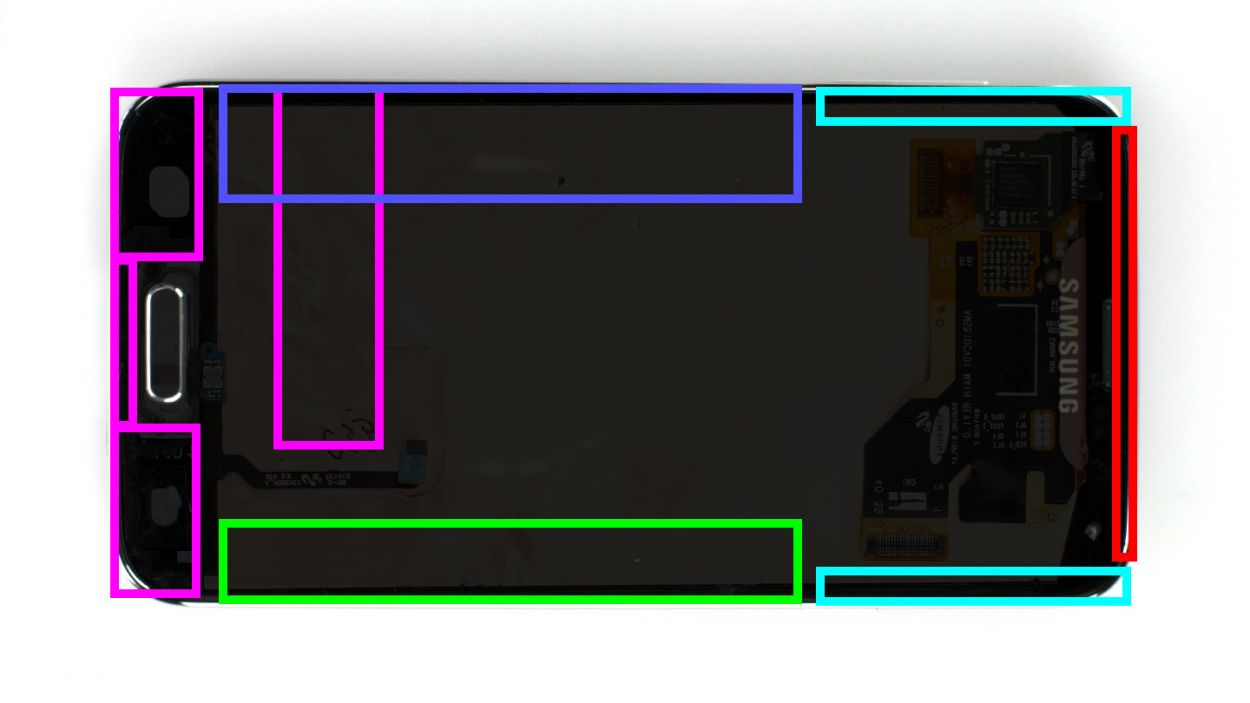


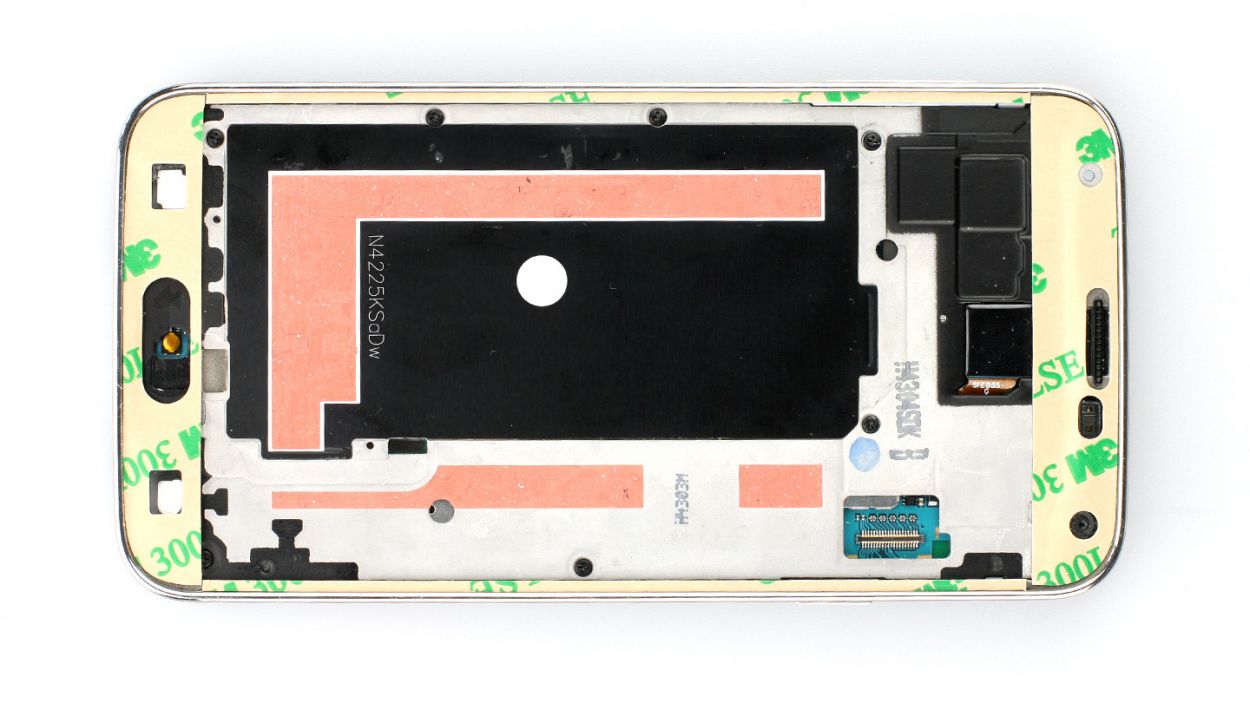
– Alright, folks! The Samsung Galaxy S5’s display is stuck on there pretty well. To get it off, you’ll need to warm it up with a heat gun to soften that stubborn glue. Once it’s nice and toasty, slide a plastic pick into the gap between the frame and the display to break that adhesive seal. Check out Figure 1 for a top-down view of the display. We’ve even added a mirror image of the back with just 10% coverage so you can spot those sneaky cables hiding underneath. Remember to heat the right section before diving into each step!
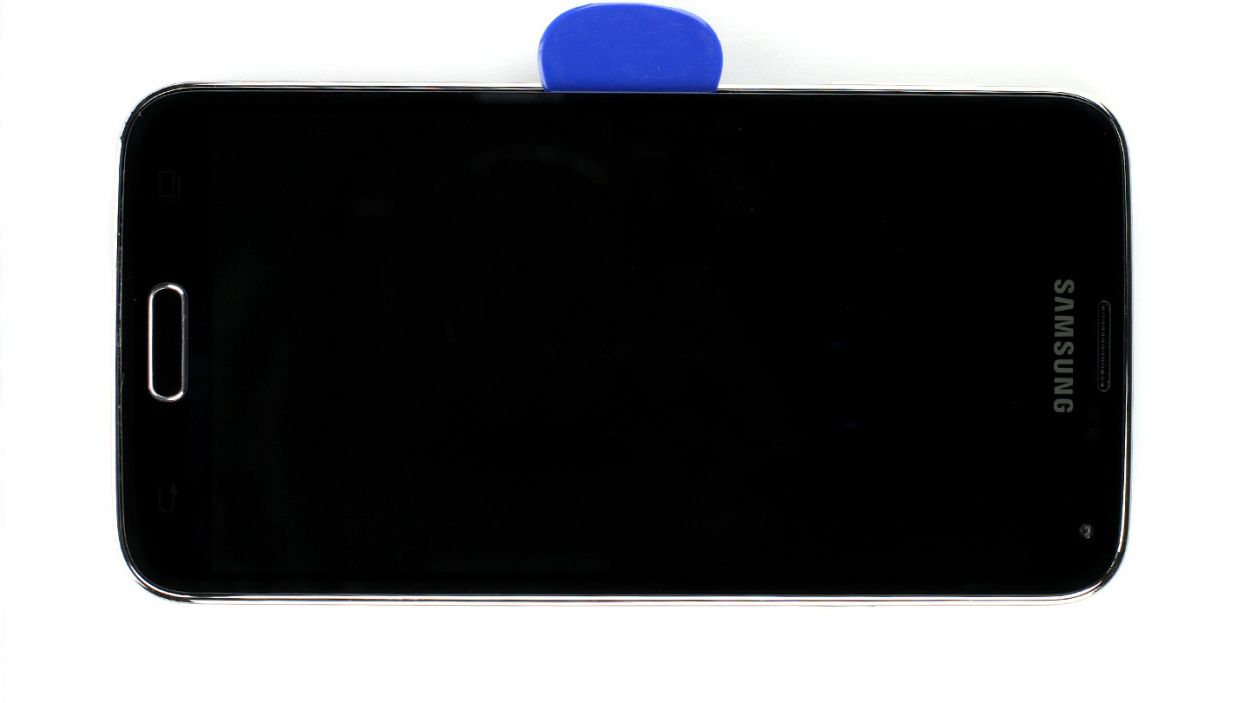
– Now, gently insert the plastic pick up to 1.7 cm (see figure 2).
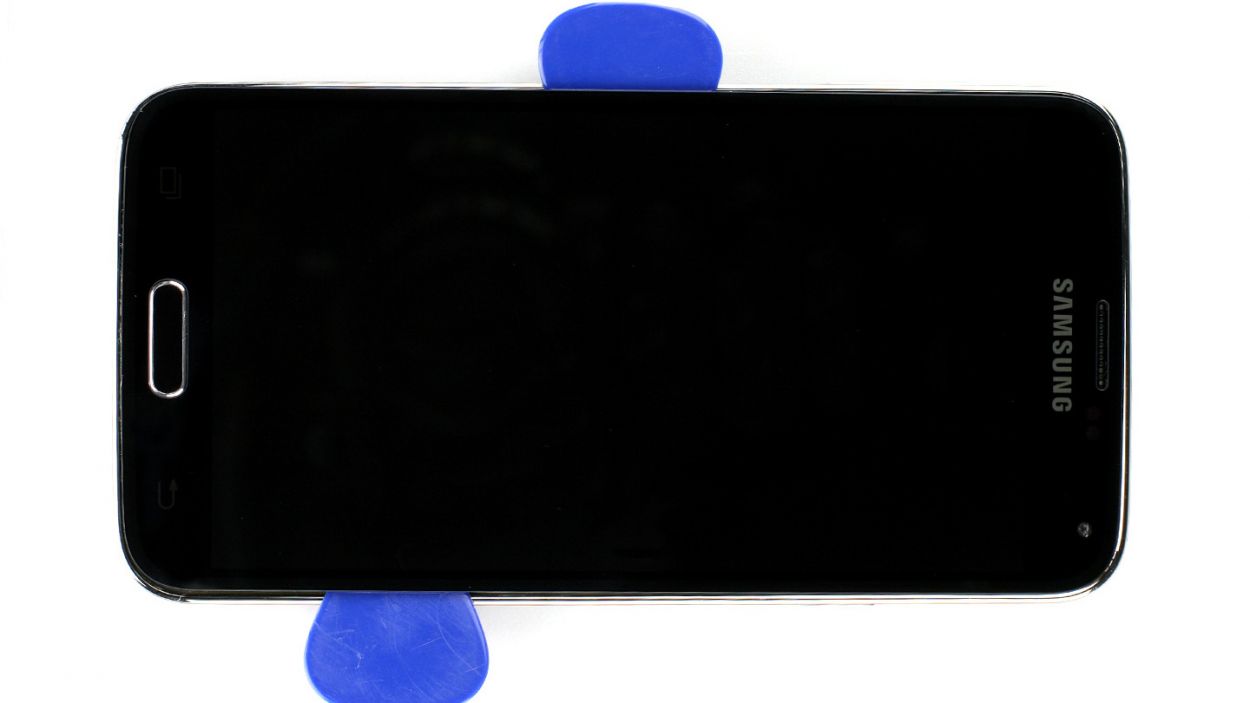
– Next, slide that plastic pick in up to 1.2 cm (see figure 3).
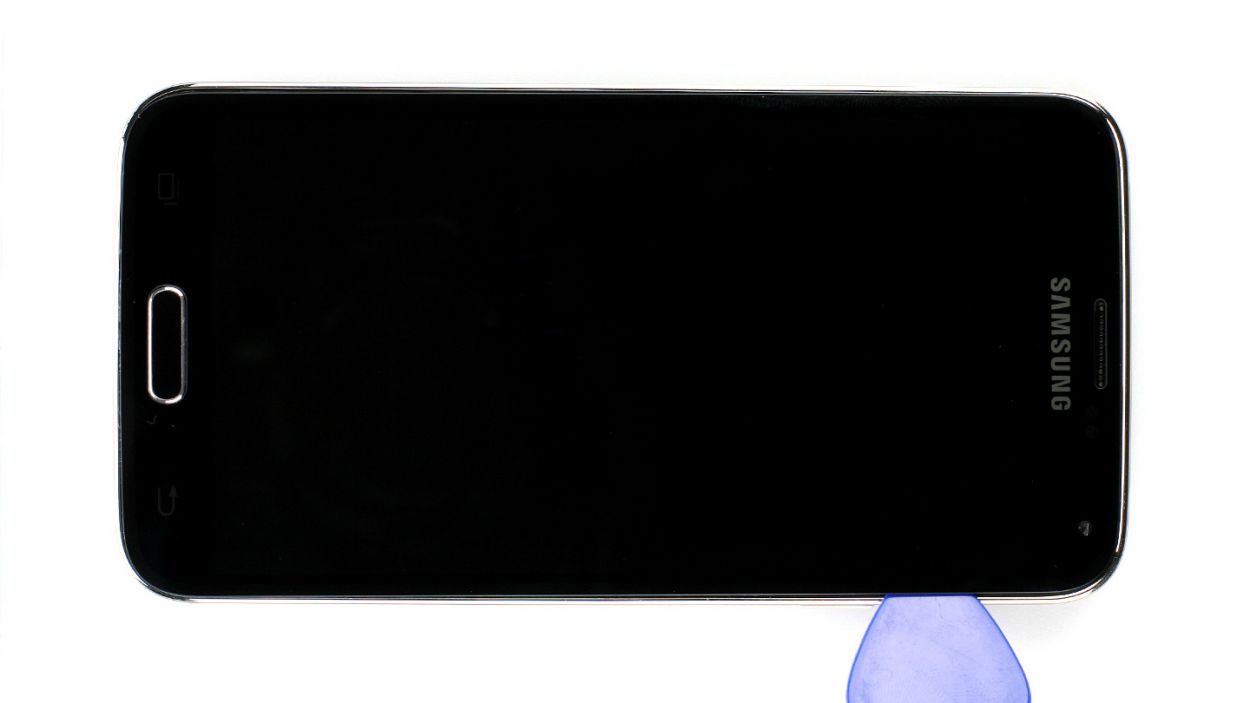
– Keep going! Insert the plastic pick up to another 1.2 cm (see figure 4). Just aim for 0.2 cm in front of the Home button. For the last bit, grab a spudger to help you out. Heat the display again and lift it carefully, guiding the Home button cable through the midframe as you go.
– Insert the plastic pick up to 0.5 cm (see figure 5).
– Almost there! Insert the plastic pick up to 0.3 cm (see figure 6).
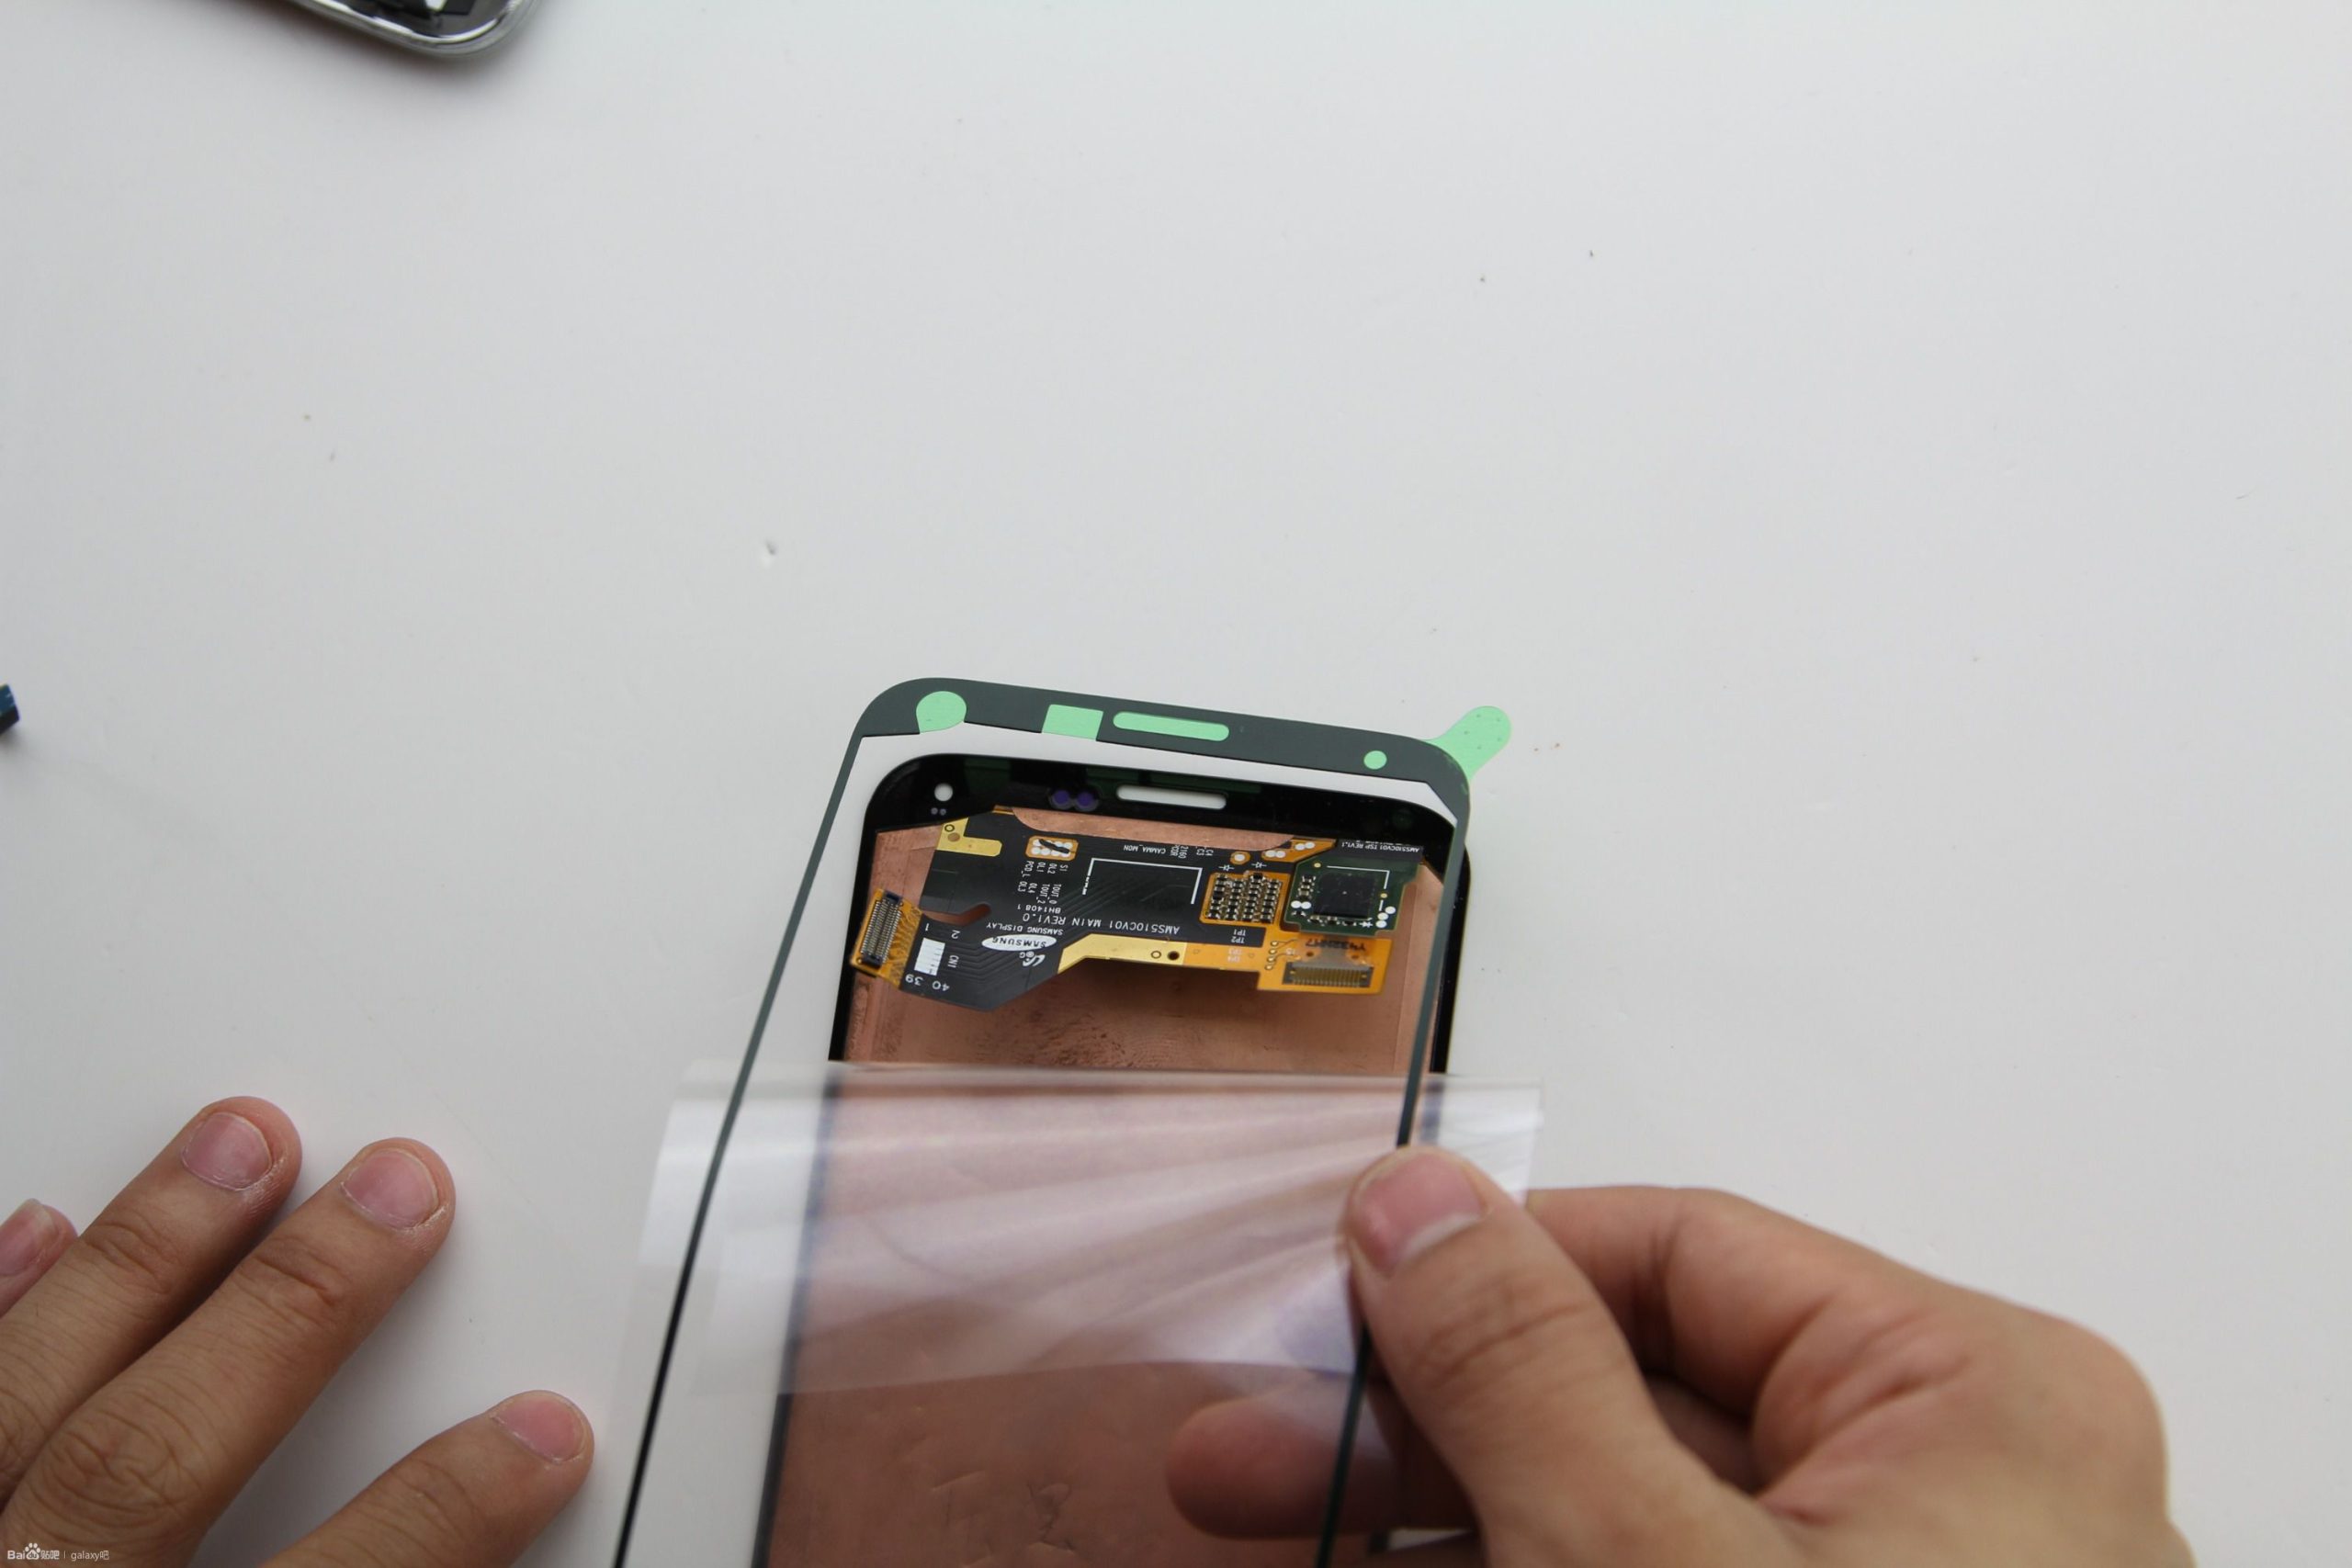
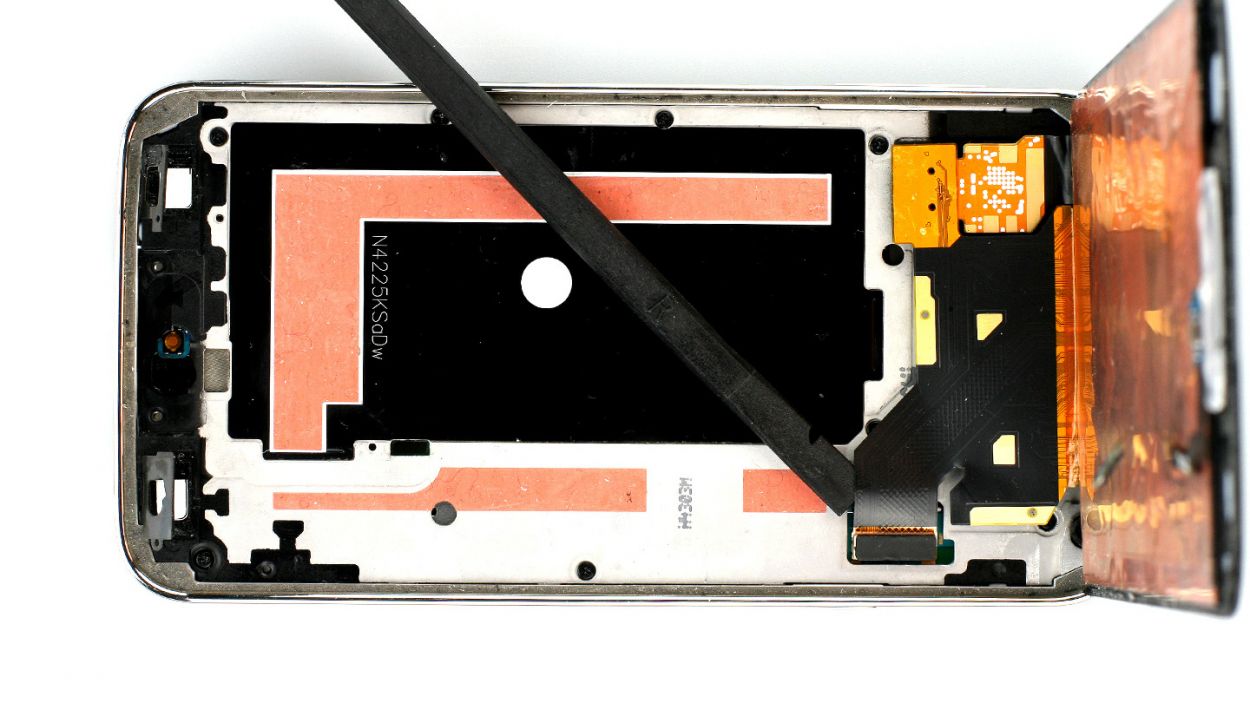
– Now, with a gentle touch, continue lifting the display so you can disconnect the display connector from the logic board (see figure 7).
Step 7
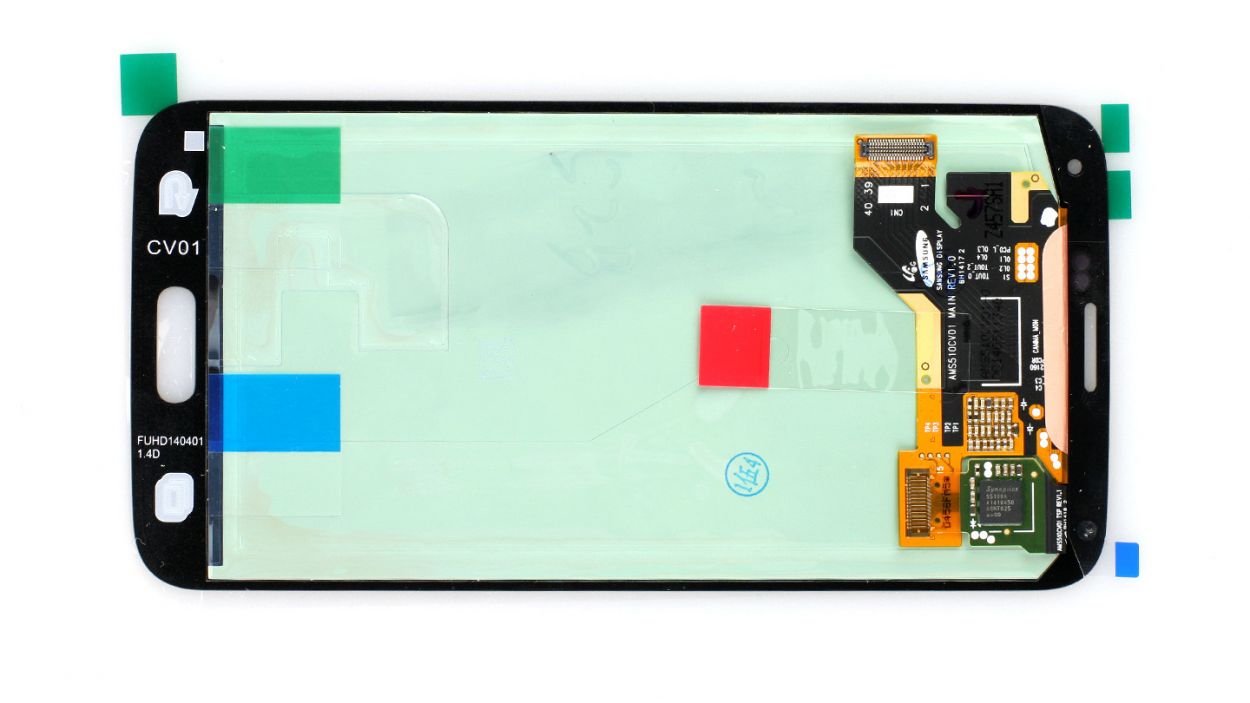
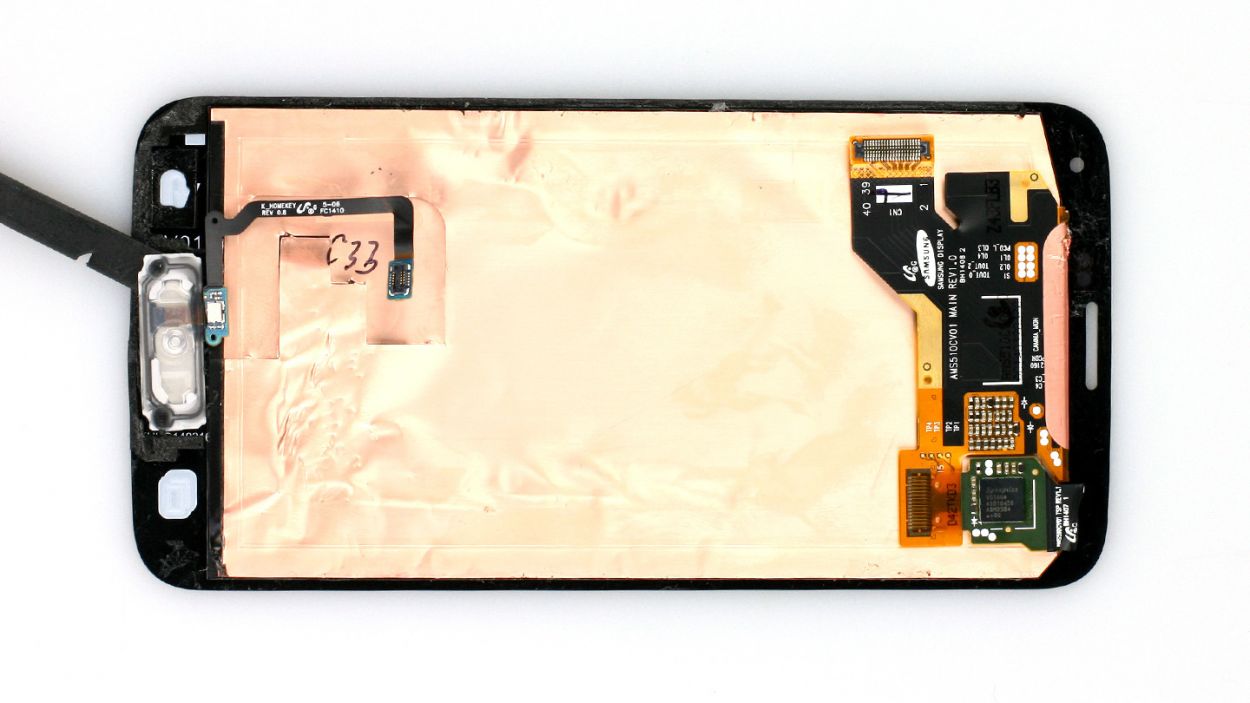
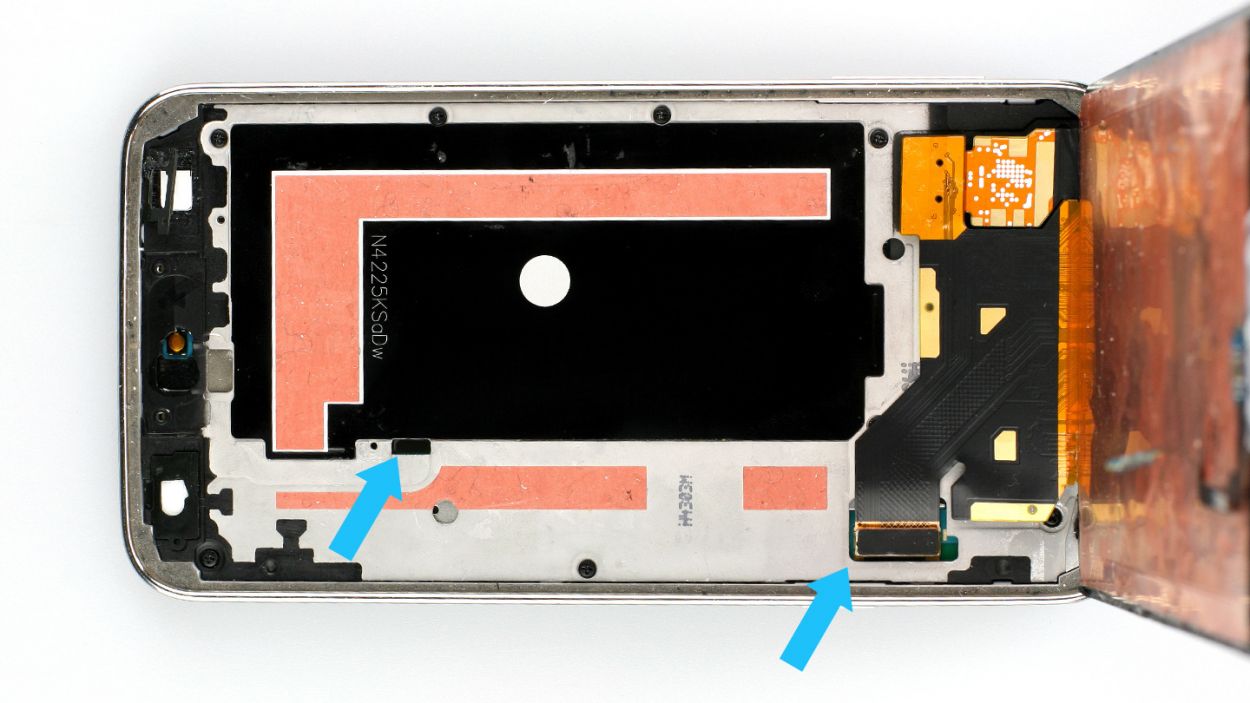
– First things first, let’s get rid of those pesky stickers on the back! Start with the red one and gently lift up the ribbon cable. Next, say goodbye to the green sticker, followed by the two blue stickers (check out figure 1 for guidance).
– Keep in mind that not all displays are created equal! The back of your new display might look a bit different from the one shown here.
– Now, it’s time to attach the Home button! Make sure the cable is snugly fitted (see figure 2 for a visual).
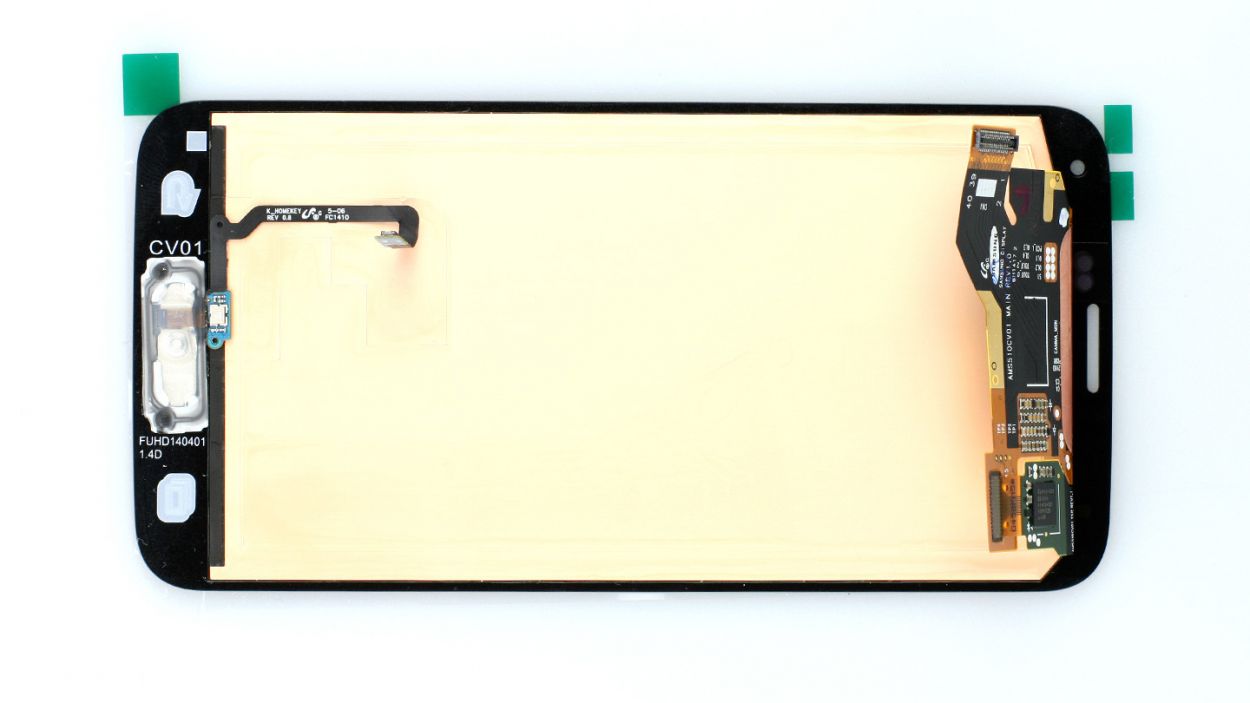
– Don’t forget to add those new adhesive+strips+Samsung+Galaxy+S5&crid=1TJIMMAJSUJUZ&sprefix=repair+tools%2Caps%2C165&linkCode=ll2&tag=salvationrepa-20&linkId=c486487cf454ce8edd6f5beefab4110f&language=en_US&ref_=as_li_ss_tl’>adhesive strips to the frame! This will ensure your display sticks like a champ (see figure 3).
Step 8
– Alright, let’s get that display cable connected again! Don’t forget to thread the Home button cable through the metal frame (check out figure 1 for a visual guide).
– Now, power up your Samsung Galaxy S5 and see if everything is running smoothly. To access the test menu, just enter this magical combo in the call app’s keypad: *#0*#.
– Once everything is working like a charm, peel off that protective film from the adhesive+strips+Samsung+Galaxy+S5&crid=1TJIMMAJSUJUZ&sprefix=repair+tools%2Caps%2C165&linkCode=ll2&tag=salvationrepa-20&linkId=c486487cf454ce8edd6f5beefab4110f&language=en_US&ref_=as_li_ss_tl’>adhesive strips. Give the display a good press onto the metal frame to make sure it’s snug as a bug!
Step 9

– Let’s securely reunite the Home button connector (refer to figure 1).
– Pop that little gray cap back on it (check out figure 2).
– Get those 3 Phillips screws snug as a bug to keep the upper plastic cover in place (see figure 3). 3 x 4.4 mm Phillips screws
Step 10
– Now slide the SIM card and the microSD card, if you have one, back into the corresponding slots.
Step 11
– Pop that battery back in! Just make sure the +/- symbols are snuggling up to the contact point.
Step 12
– It’s very easy to put the back cover back on. Put it on in the correct position and press it on all the way around the phone until it’s completely clicked into place.