
DIY Guide to Replace Galaxy S10 Back Cover
Duration: around 60 minutes
Steps: 5 Steps
In this fun and easy-to-follow photo guide, we’ll walk you through the process of swapping out the back cover of your Galaxy S10 all on your own! Keep in mind, this back cover is made of glass and is glued down pretty well, so it might take a bit of patience to get it off. Plus, it’s a bit delicate, which is why we’ve rated this repair as moderately tricky. Good luck with your back cover replacement! If you need assistance, you can always schedule a repair and let us know how we did!


Step 2
Step 3
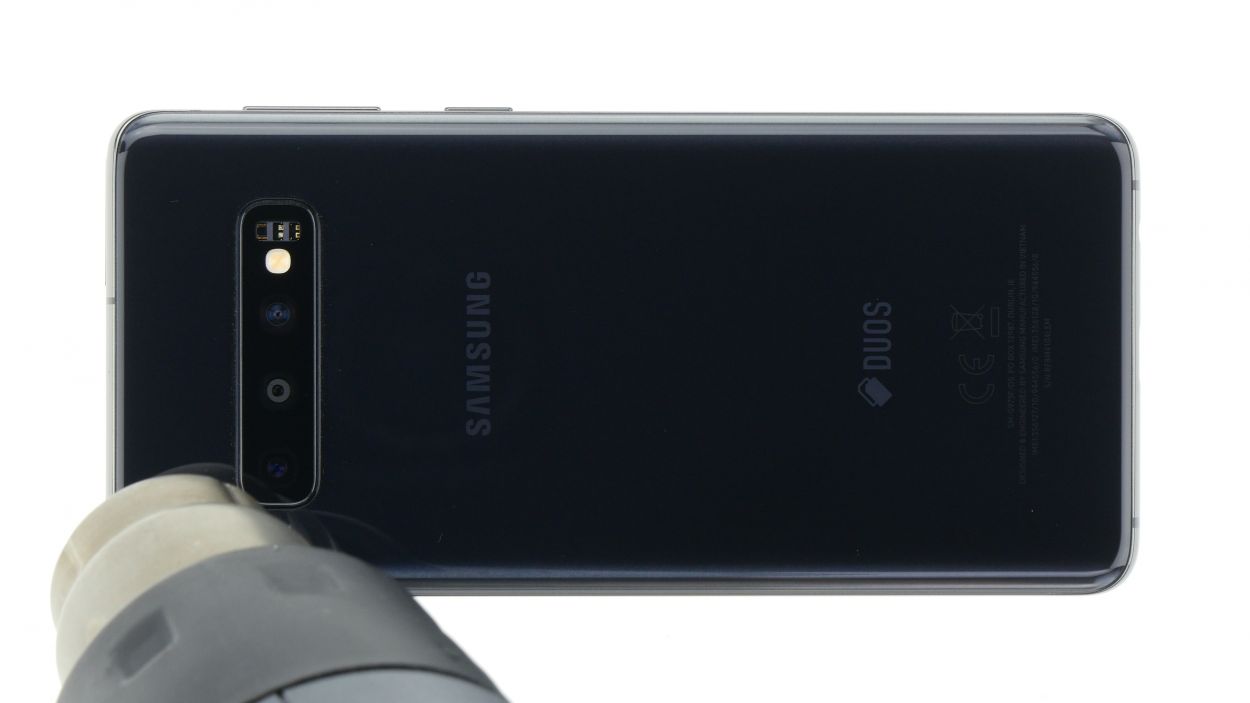
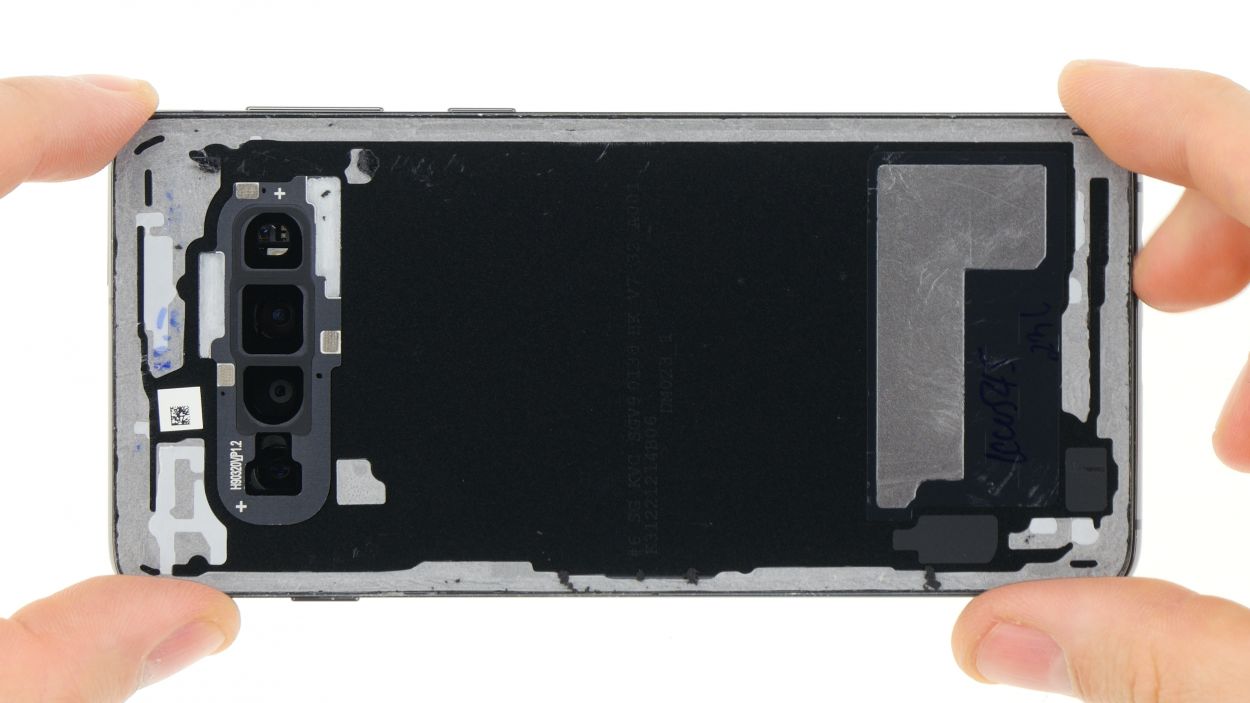
Heads up! Once you pop open your Galaxy S10, it waves goodbye to its waterproof charm, and the warranty for dust and splash protection takes a hike. Keep that in mind as you dive into the repair!
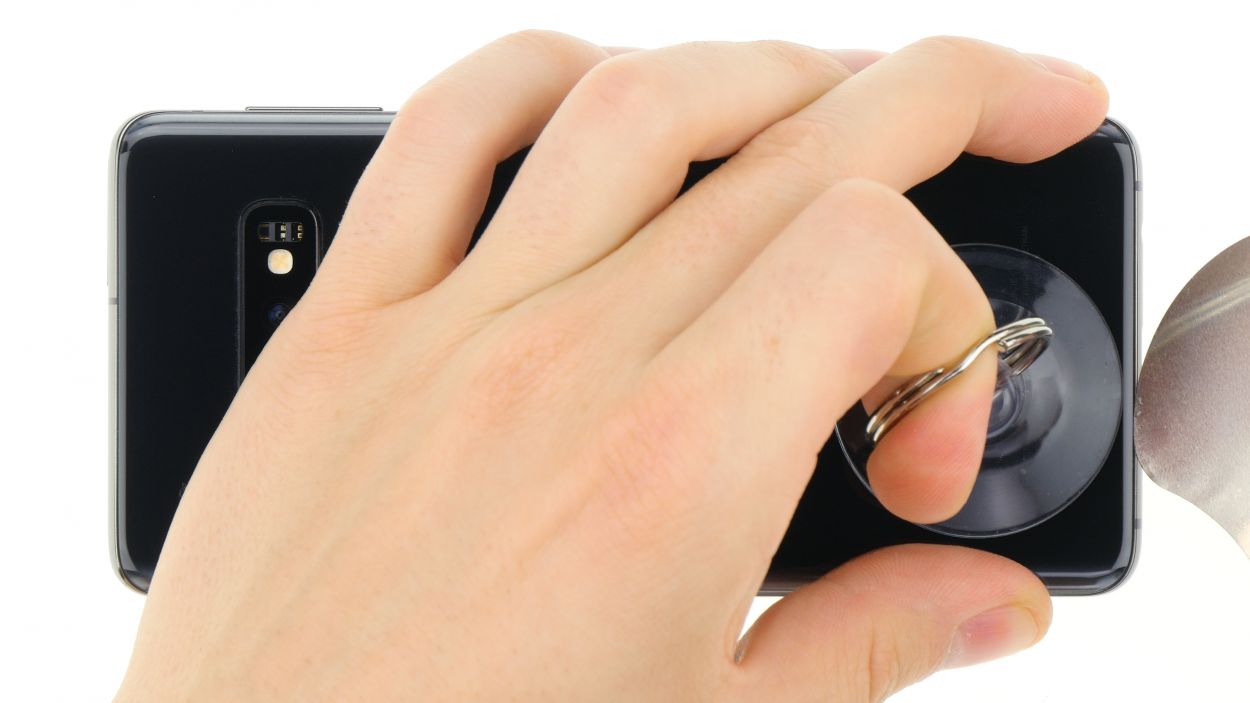
– Grab a suction cup and stick it to the bottom of the back cover. Give it a gentle pull upwards to create a little gap between the back cover and the housing frame. You’re doing great!
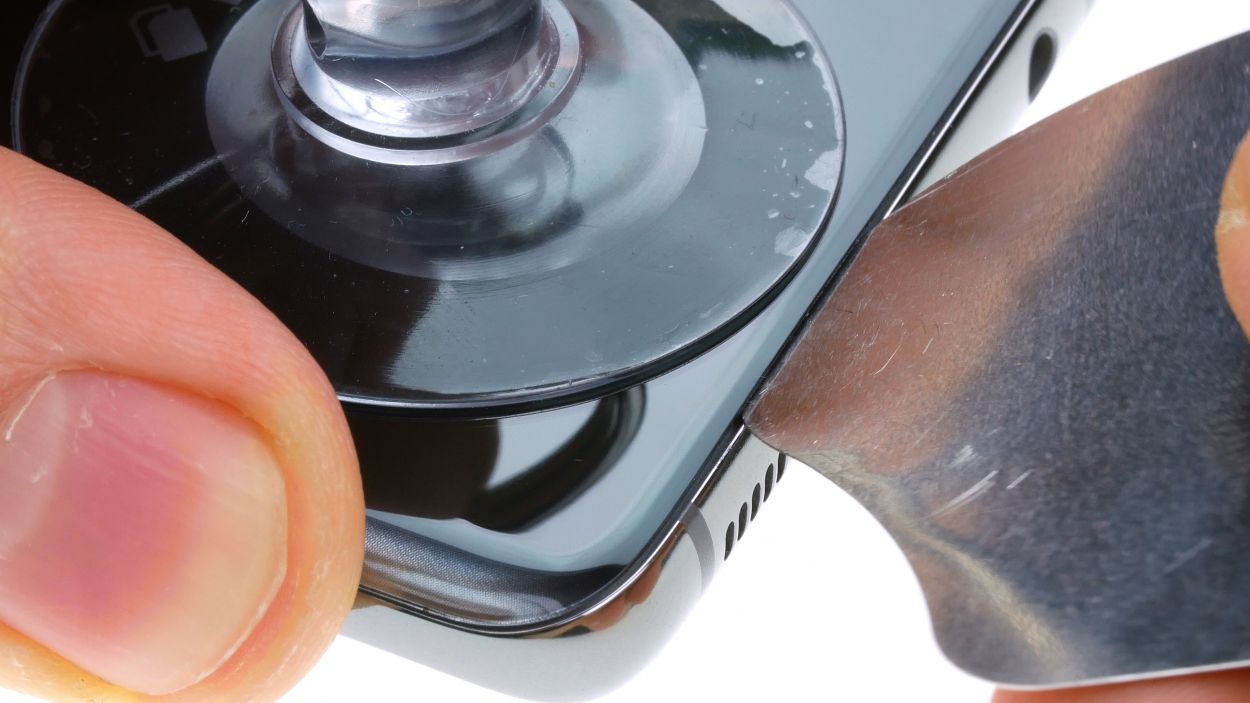
– Now, take a flat, sturdy tool and slide it into that gap you just made. Give it a little nudge to widen the gap by pushing the back cover up a bit more. The iFlex is perfect for this job!
Tools Used
- screen and the frame. The practical iFlex is made of stainless steel and sits comfortably in the hand. This makes it the perfect assistant for every smartphone repair.” rel=”noopener nofollow”>iFlex Opening Tool
- VAKUPLASTIC Suction Cup
Step 4
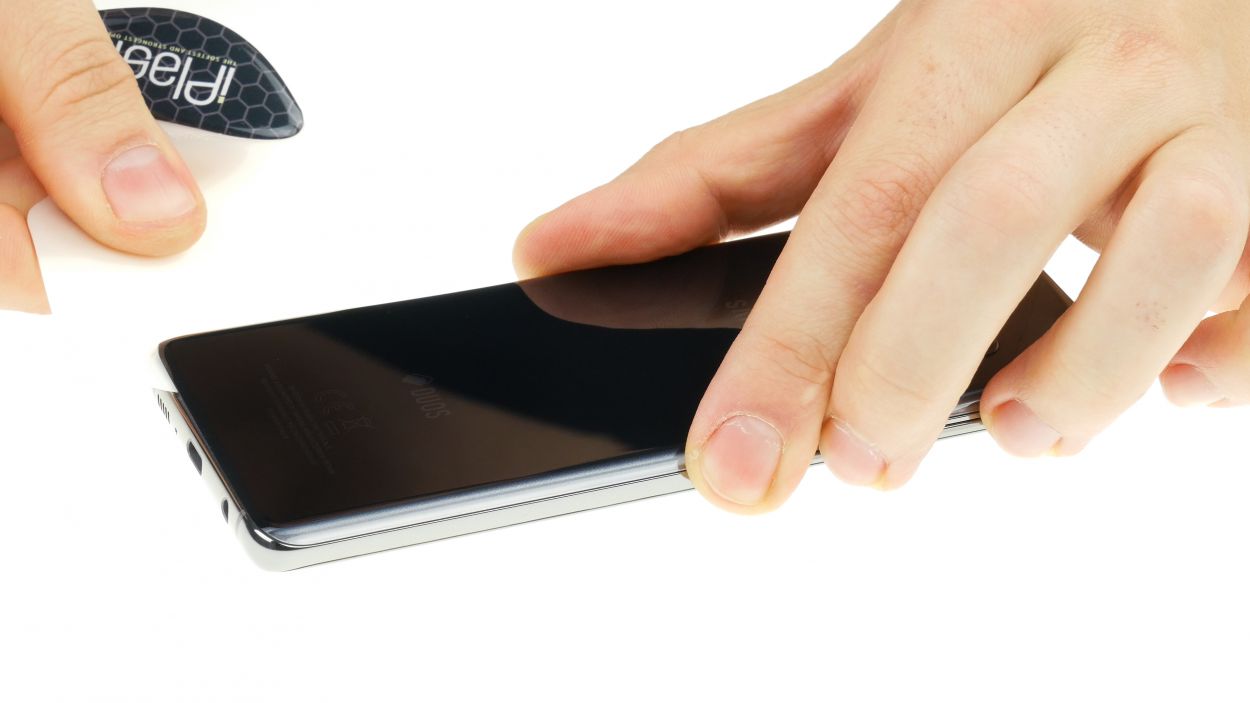

– Use a flat plastic tool to go around the edge of the housing piece by piece. We use the iPlastix for this.
Be gentle with your tool and don’t go too deep, or you might accidentally poke something you didn’t mean to under that back cover!
The iFlex is made of thin, sturdy metal, making it easier to get into the gap between the back cover and the case frame. However, the sharp edges of the iFlex make it easier to scratch the frame. We therefore recommend that you use the iFlex only initially and continue with iPlastix, which is made of flexible plastic, as soon as possible.
Tools Used
- Flat Picks
- battery? Then the iPlastix with its large blade will help you. The practical assistant is made of flexible, especially sturdy plastic and lies comfortably in the hand. Thanks to its design, you can even get into smaller gaps, for example to lift the screen or to prevent it from sticking together again.” rel=”noopener nofollow”>iPlastix Opening Tool
Step 5


For an even stronger adhesive connection, try warming up the back cover frame with a bit of hot air. Once it’s nice and toasty, just give it a little extra love by placing some books on top to weigh it down. Easy peasy!
– Peel off those protective stickers from the adhesive surfaces of your snazzy new back cover.
– Position it just like the original and give it a good press all around so that the adhesive can set in nicely.