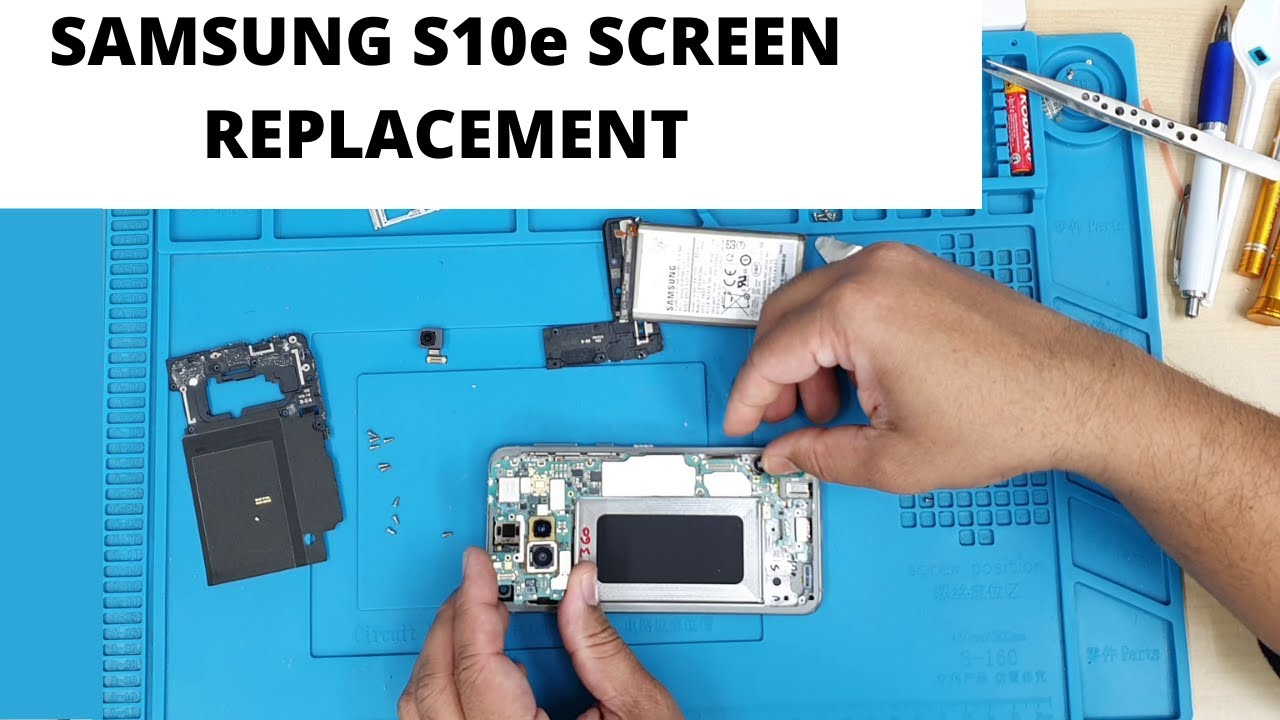
DIY Guide to Replace Vibration Motor in Galaxy S10e
Duration: 90 min.
Steps: 18 Steps
Is your Galaxy S10e’s vibration motor feeling a bit under the weather? Don’t worry, you can bring it back to life with this handy guide. Let’s get that phone buzzing again!
Step 1

Tap the little Play button in the upper right corner of an image to watch a video for each step. It’s like having your own repair buddy right there with you!
– First things first, let’s power down your device! Press and hold that power button until you see the ‘Power off’ option pop up on your screen.
– Now, give it a tap with your finger to confirm you really want to shut it down. Hang tight and wait for the screen to go dark—it’s like a little nap for your device!
Step 2

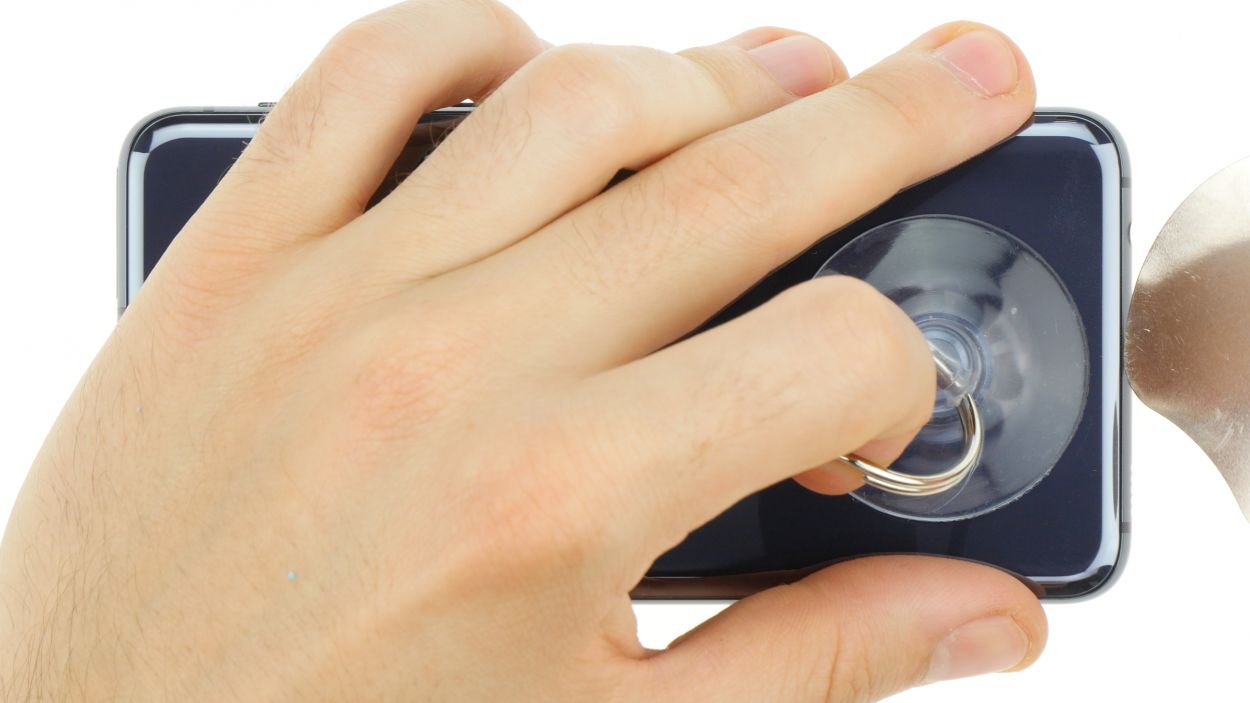

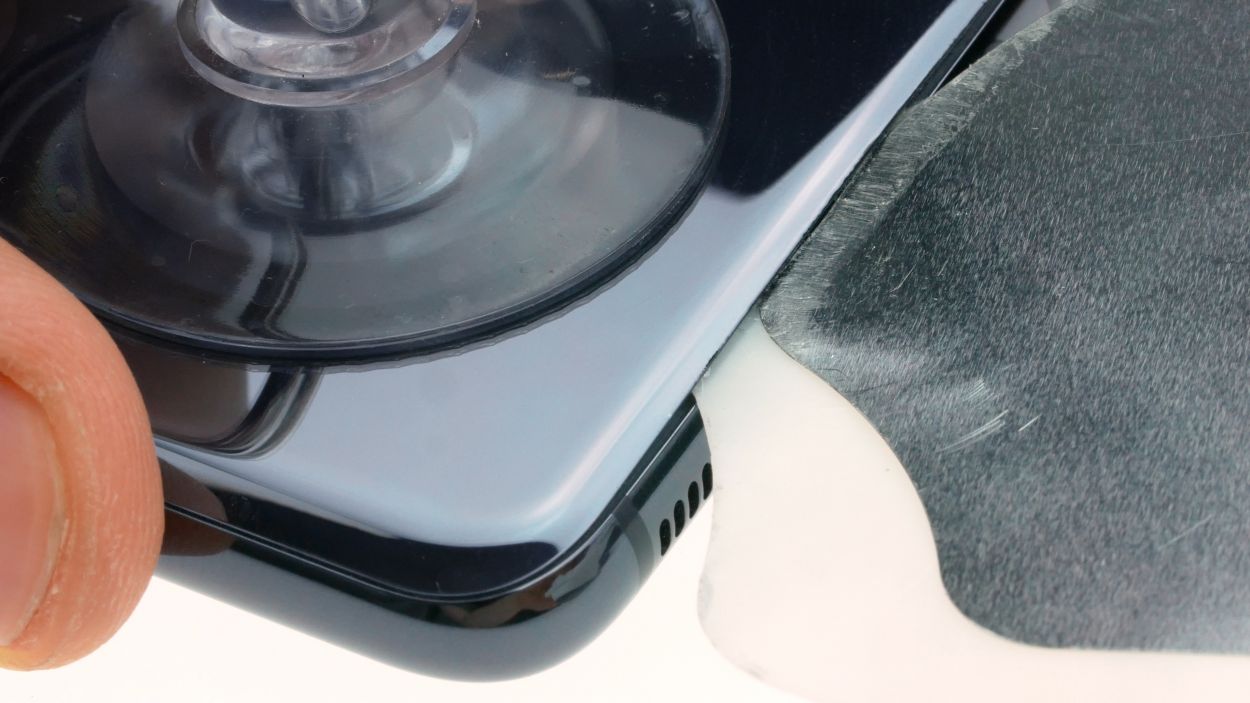


– Alright, let’s tackle that back cover! It’s glued on pretty tight, so we’ll need to give it a little warmth. Use some hot air to evenly heat up the device—aim for a cozy 60 to 80°C. Just make sure it’s still comfortable enough to touch; we want to keep things friendly!
– Now, to get that back cover loosened up, grab a flat and flexible tool like the iPlastix or iFlex. You’ll also want a few picks handy to help unstick the cover all the way around. It’s like a little dance to get it off smoothly!
– Start by heating up the area where you’re going to dive in, then slide that flat tool between the back cover and the frame. Let’s get this party started!
Hey there! Just a heads-up: the back cover is a bit fragile, so handle it with care. If it doesn’t budge right away, no worries! A little heat and a second try can do the trick. Remember, taking your time—maybe around half an hour—will help you avoid any mishaps. So, slow and steady wins the race! If you need help, you can always schedule a repair.
The iPlastix is your go-to plastic buddy that won’t leave any scratches on your device. It’s a bit soft and can be a little tricky to slide in, but don’t worry! The iFlex is here to save the day, making it super easy to slip into that gap between the glass and the frame thanks to its thin and sturdy metal design. Just a heads up, though—while it’s great for getting in, it might scratch the frame of your S10e. So, here’s the game plan: start with the iFlex to get into that gap, and then switch to the iPlastix as soon as you can for a smooth finish. If you need help, you can always schedule a repair.
Tools Used
- heat gun to heat parts that are glued on so they’re easier to remove.
In most cases, you can also use a hairdryer.” rel=”noopener”>Heat gun - screen and the frame. The practical iFlex is made of stainless steel and sits comfortably in the hand. This makes it the perfect assistant for every smartphone repair.” rel=”noopener”>iFlex Opening Tool
- battery? Then the iPlastix with its large blade will help you. The practical assistant is made of flexible, especially sturdy plastic and lies comfortably in the hand. Thanks to its design, you can even get into smaller gaps, for example to lift the screen or to prevent it from sticking together again.” rel=”noopener”>iPlastix Opening Tool
- VAKUPLASTIC Suction Cup
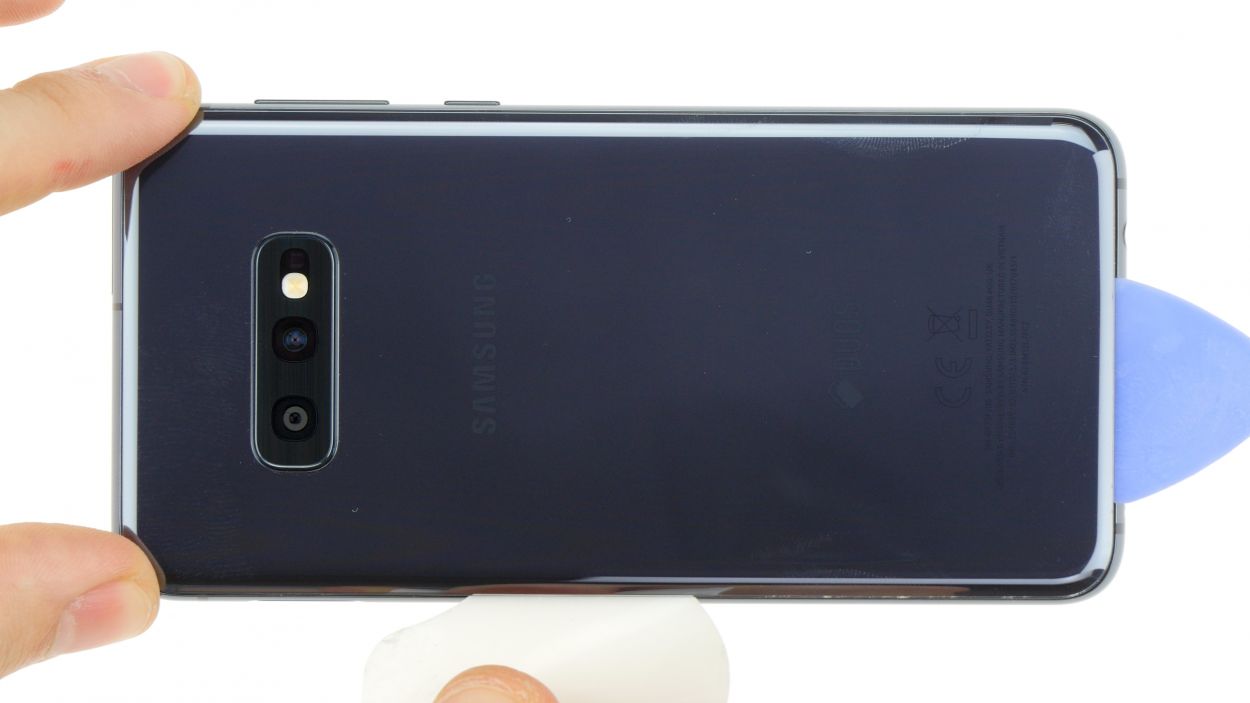
Step 3


8 × 3,9 mm Phillips
– Start by loosening those Phillips screws holding the cover in place. Just a heads up, the contactless charging coil and NFC antenna are cozying up to that plastic cover.
– The cover is snugly hooked at the top of the housing and has a light glue holding it down at the bottom. Gently slide a flat tool underneath the attached spots and give it a little wiggle to loosen things up.
– Now, it’s time to lift off the cover along with the coil. You got this!
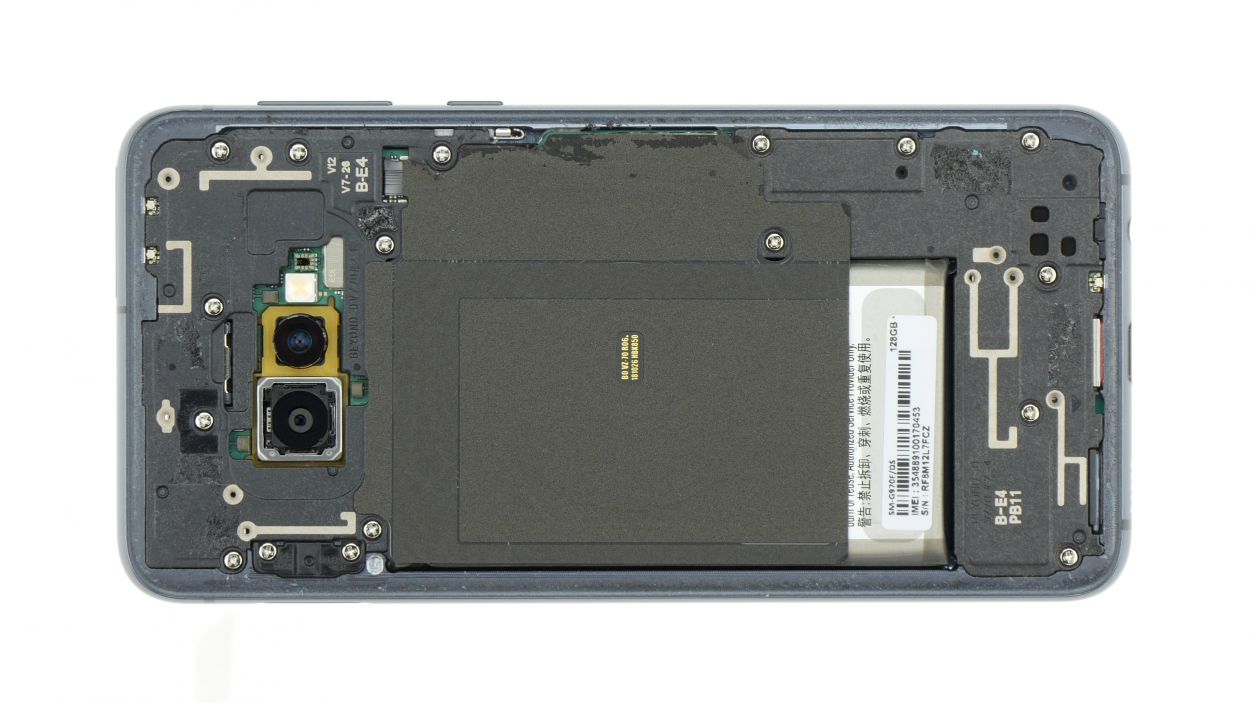
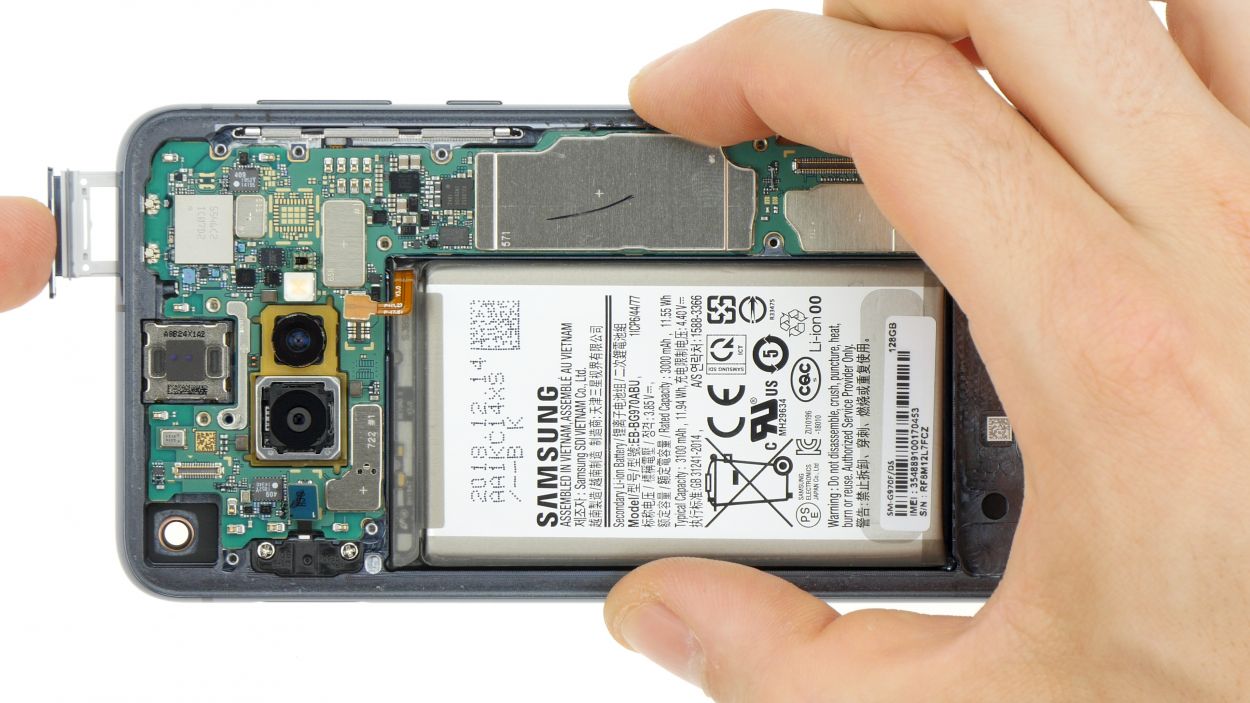
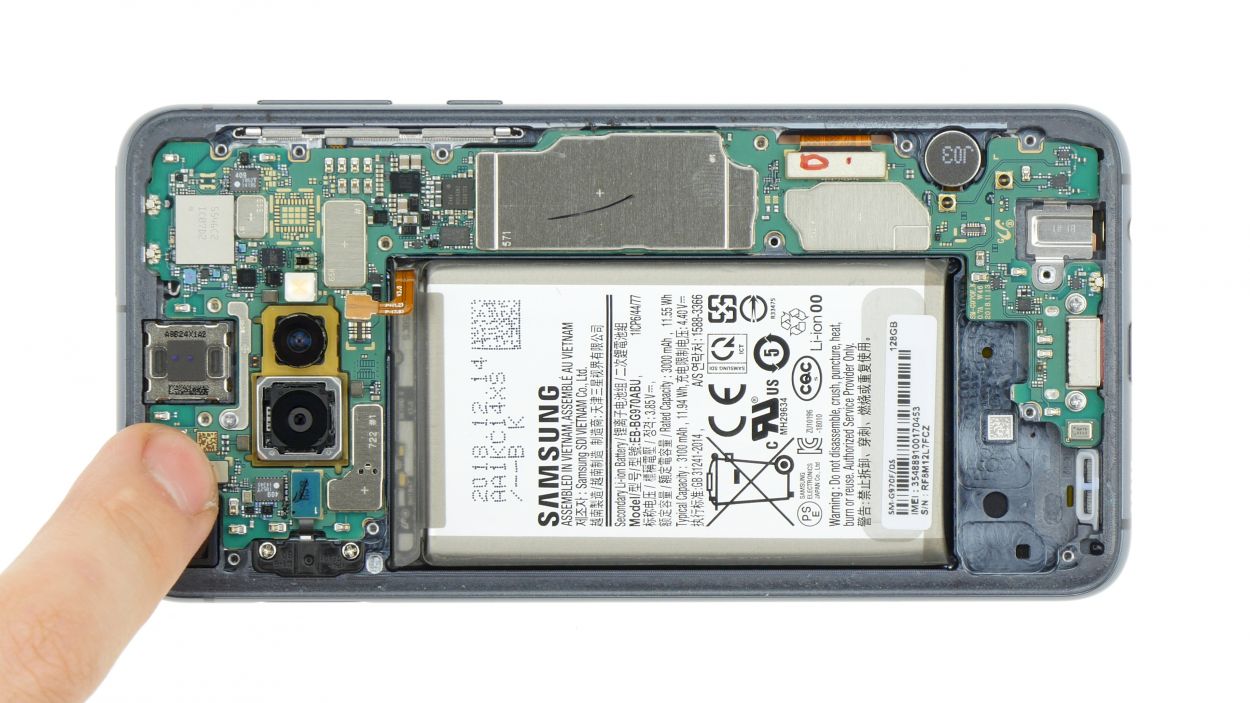
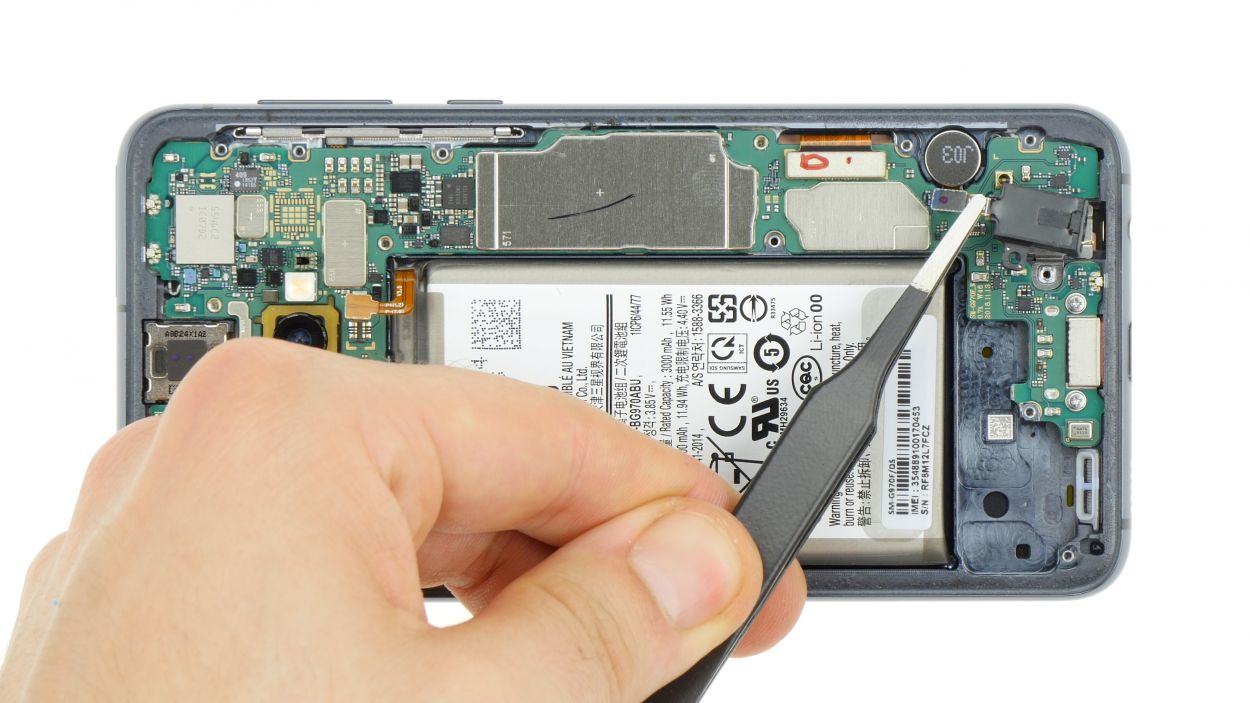
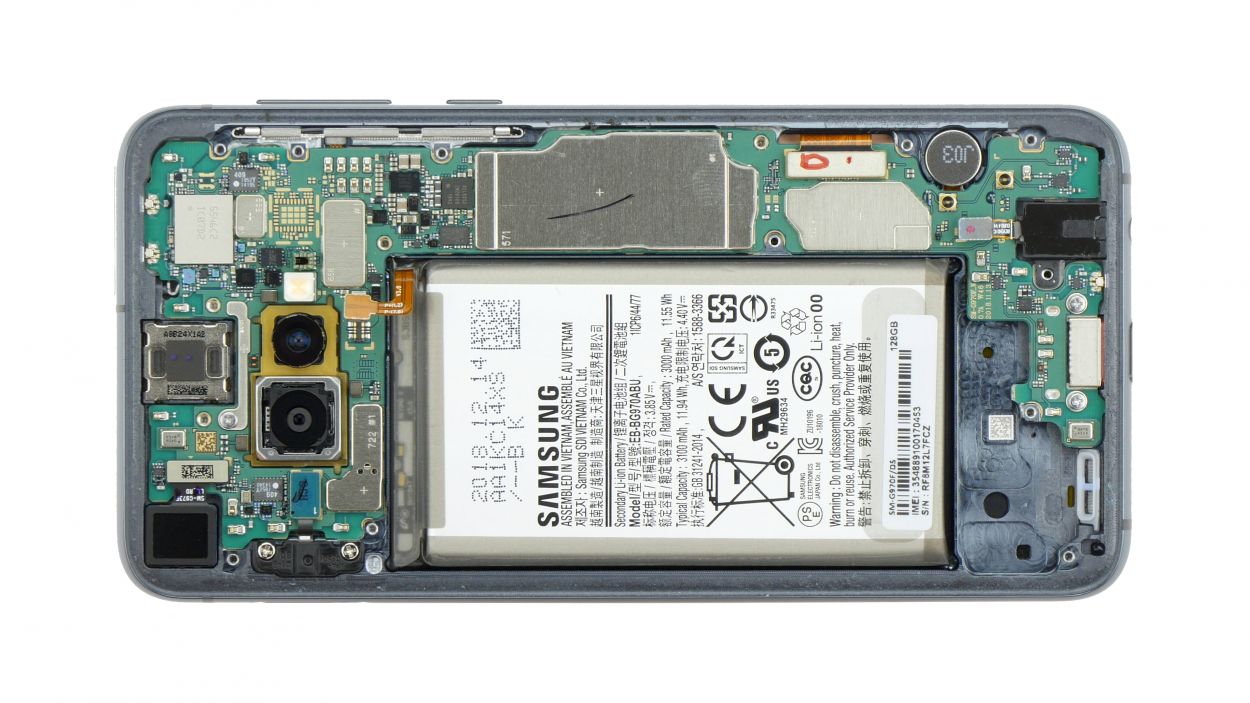
Step 4
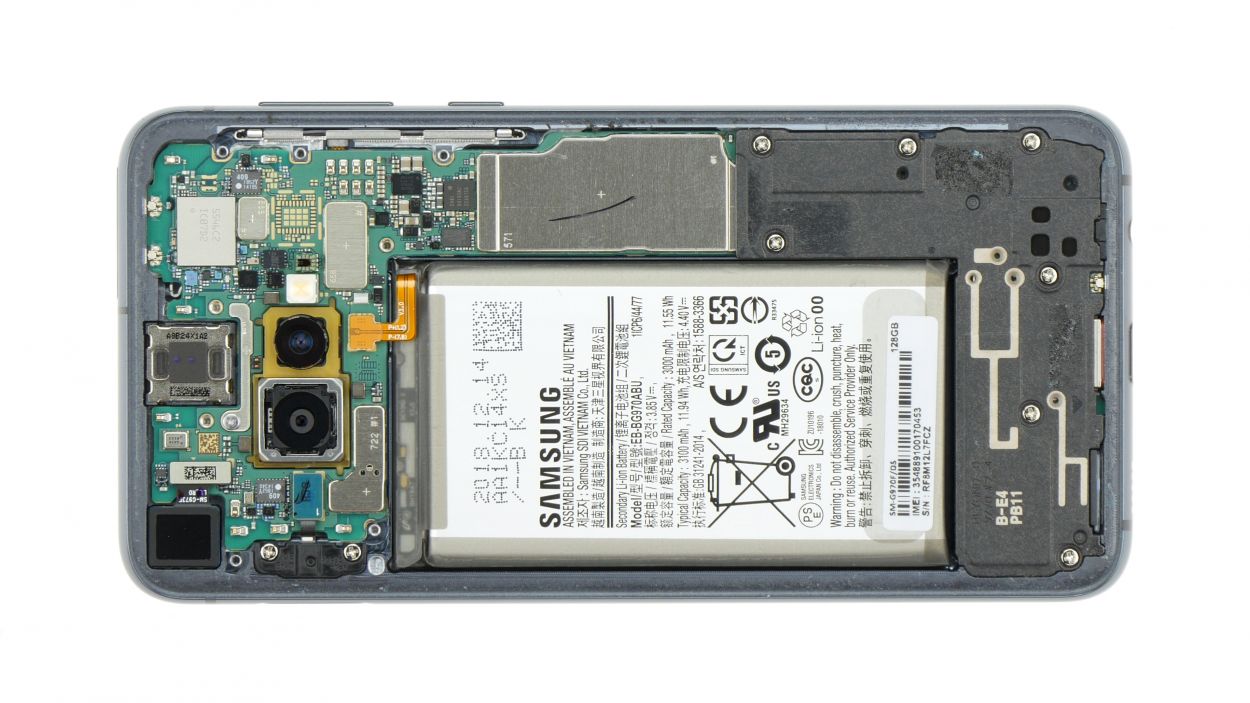
Battery Connector
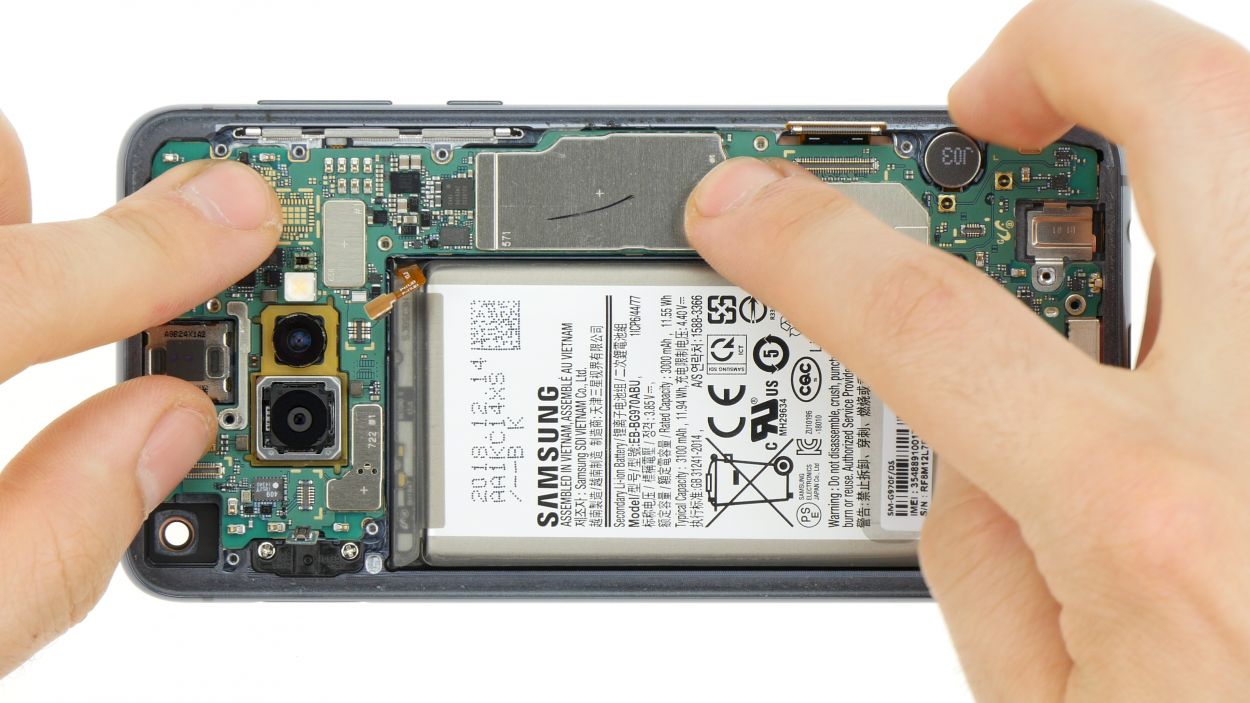
When you’re prying things open, make sure to start from a side that doesn’t have any tiny components hanging out on the motherboard. This way, you can steer clear of accidentally giving your capacitors or ICs a rough time!
– Grab your trusty spudger and gently pry away the battery contact from the motherboard. Easy peasy!
Tools Used
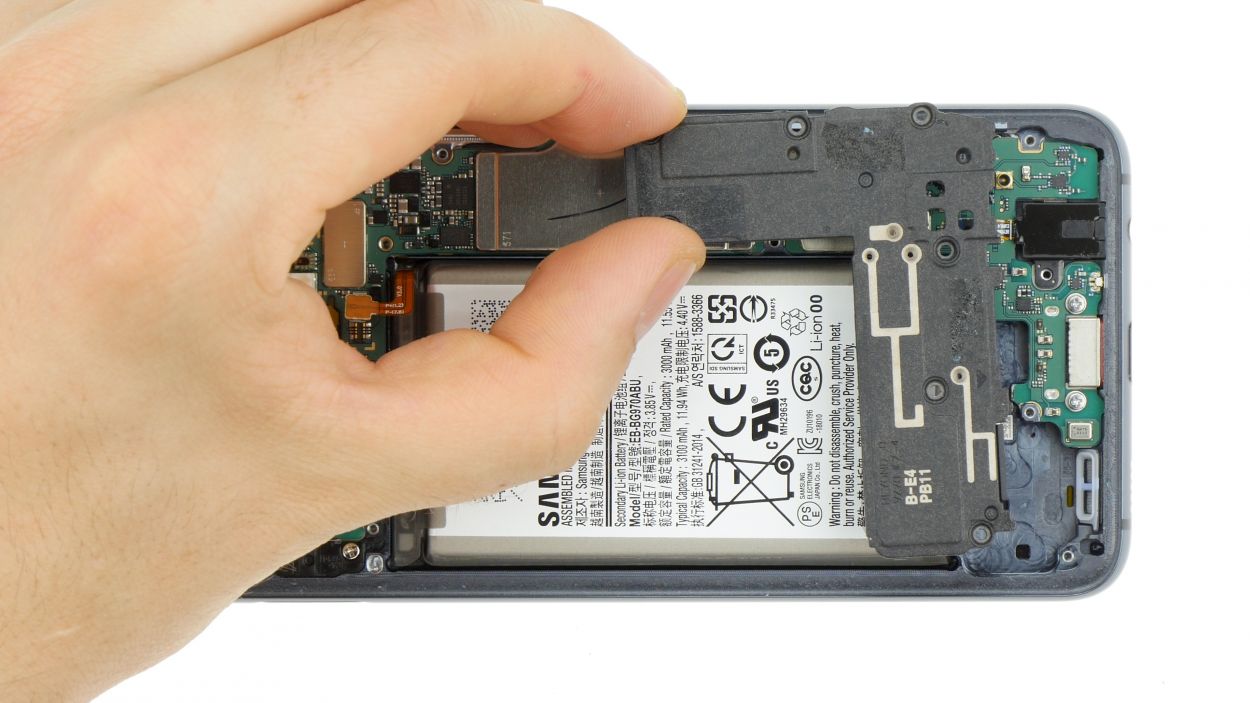
Step 5

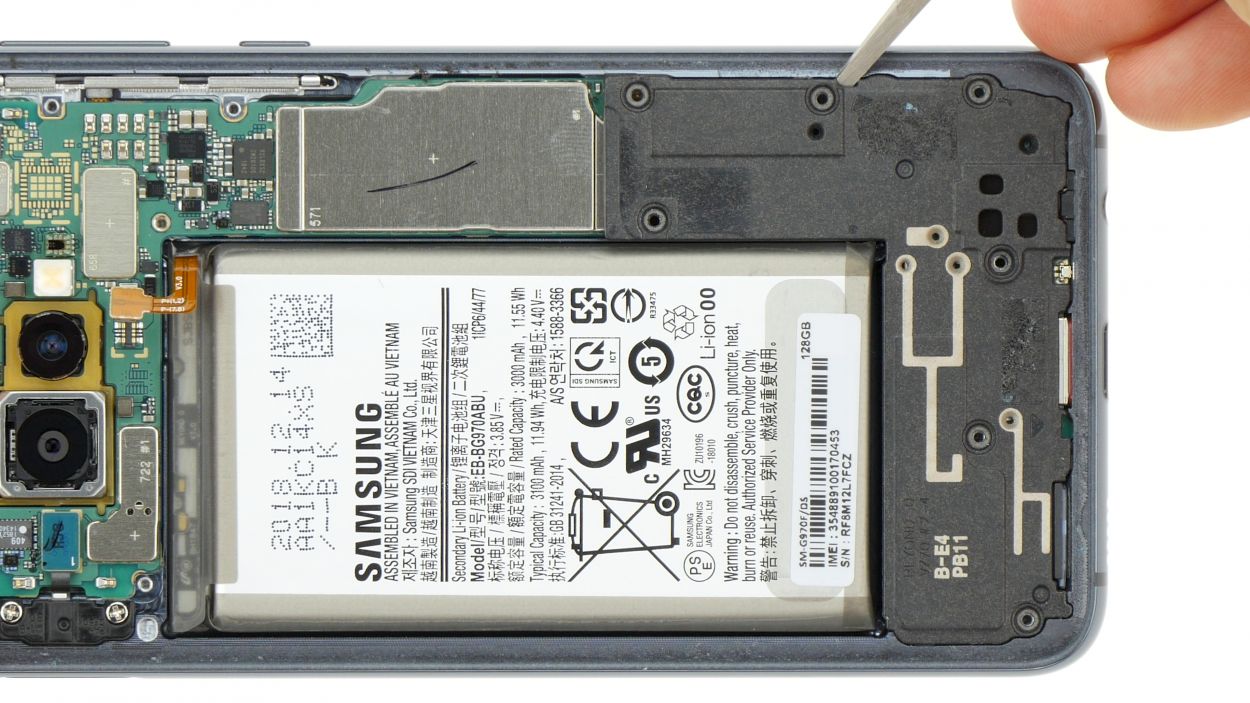
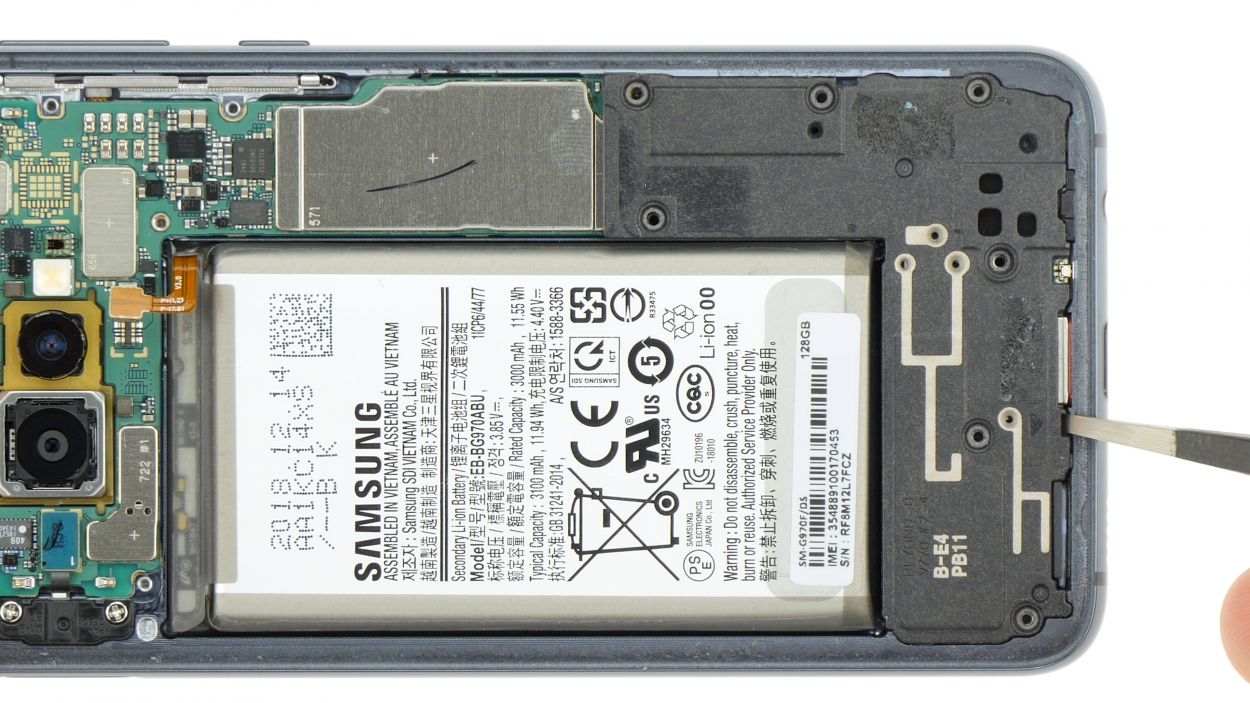
7 × 3,9 mm Phillips
– Unscrew those Phillips screws holding the speaker in place, and then gently take it out.
– Need a little extra oomph? Just lift the speaker slightly at the side openings, which are marked with cute little triangular arrows. It makes things a whole lot easier!
Step 6


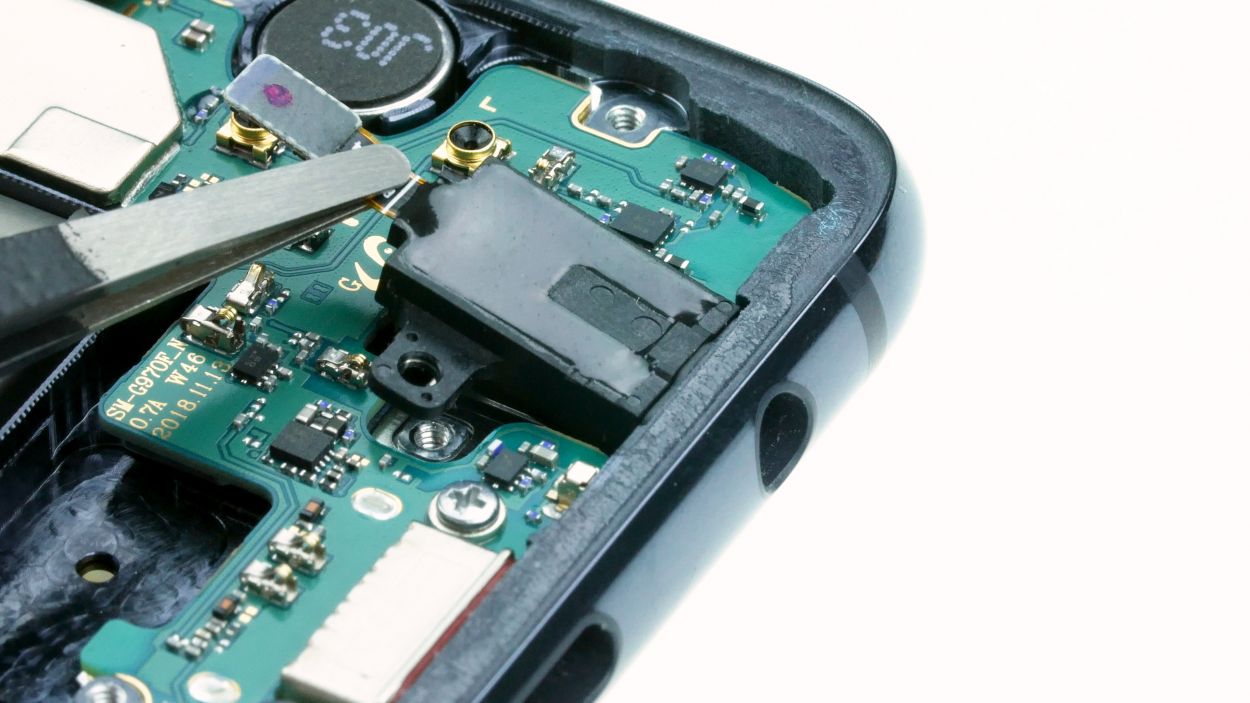
– Unplug the headphone jack connector from the motherboard. Gently use the spudger to lift and detach the connector.
– Pop the side of the jack to free it and then take it out of the case.
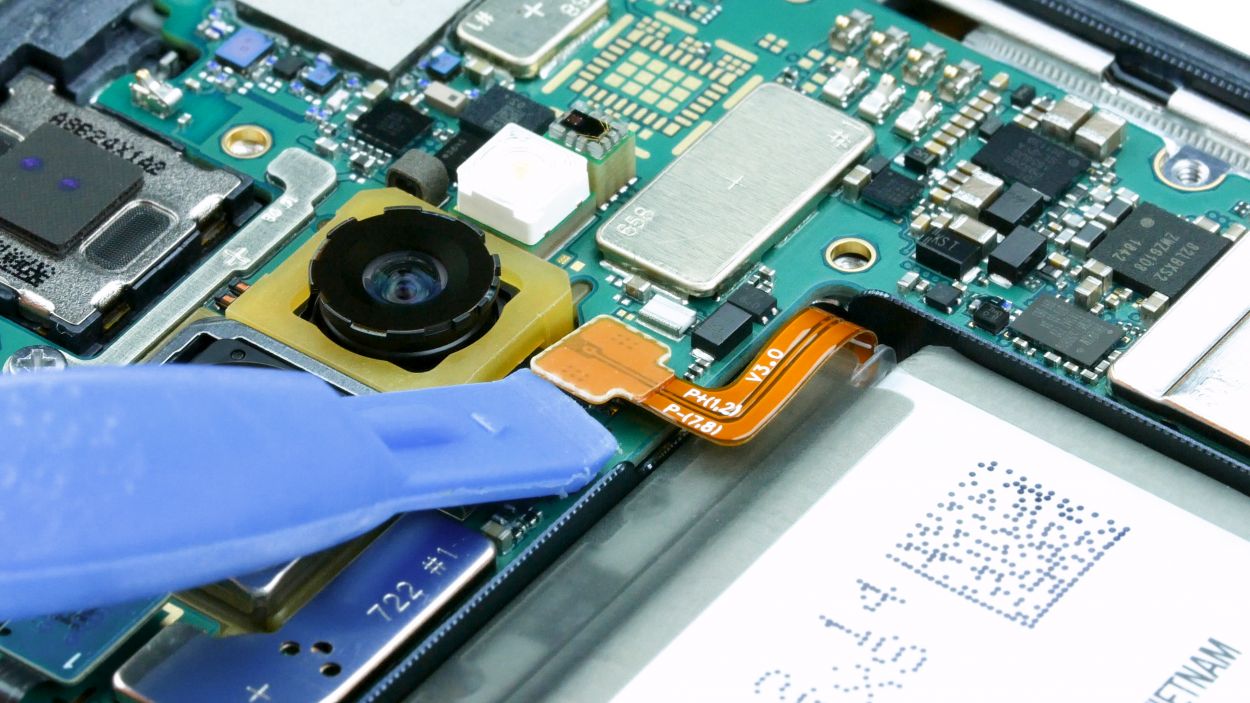
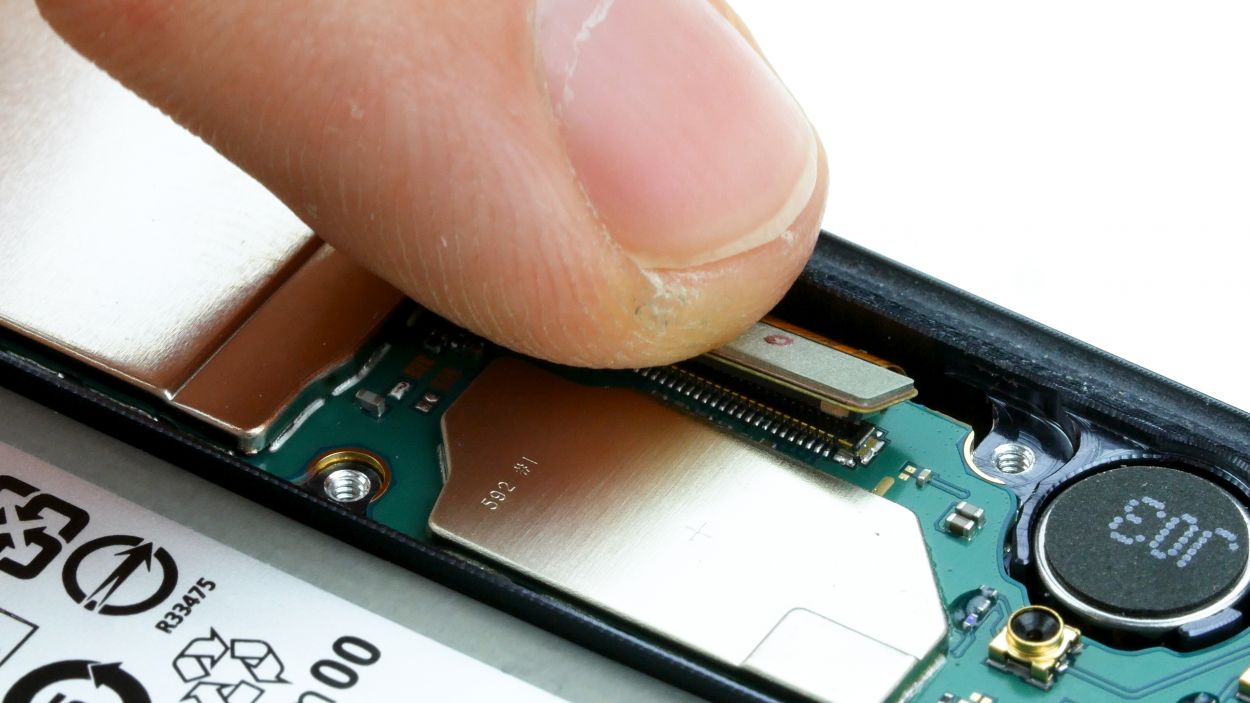
Step 7

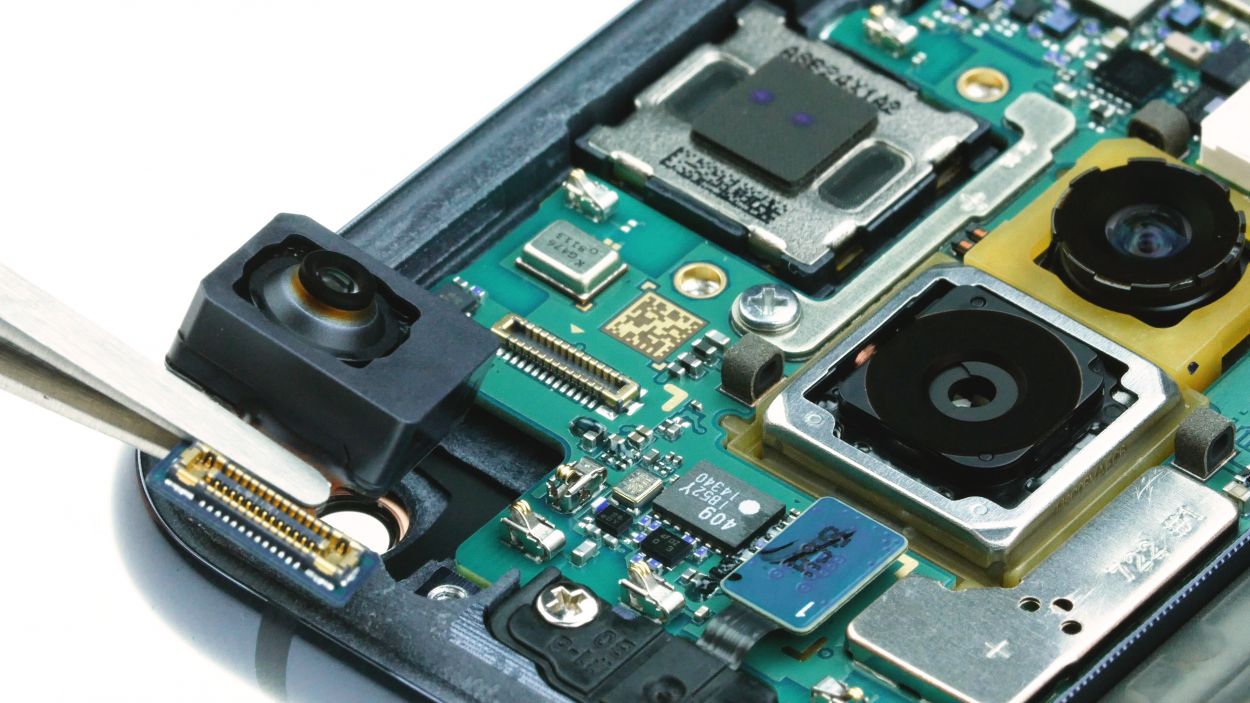
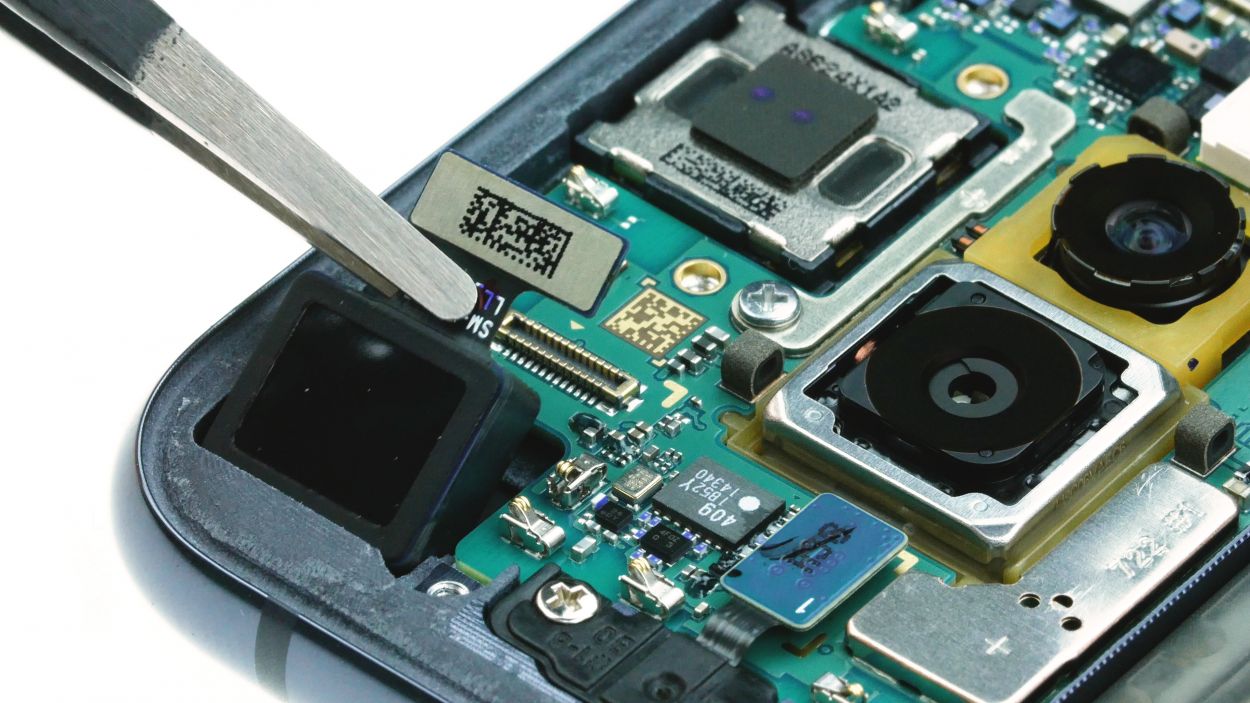
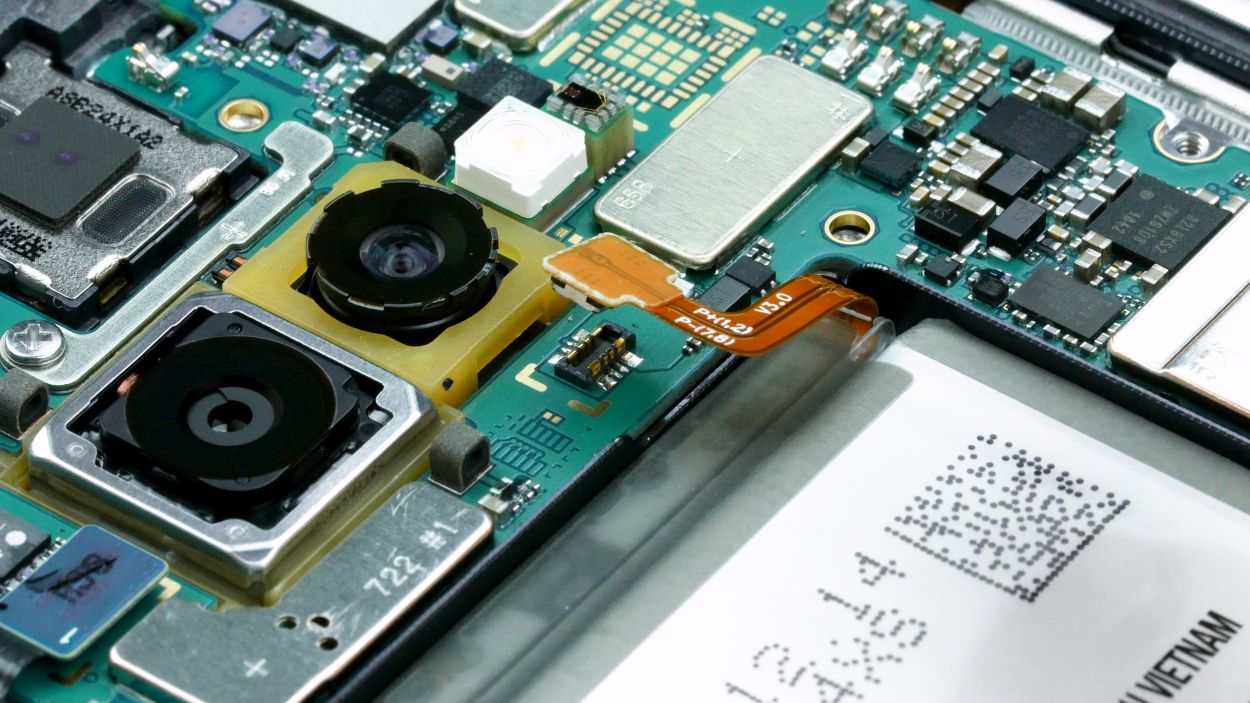
Camera Connector
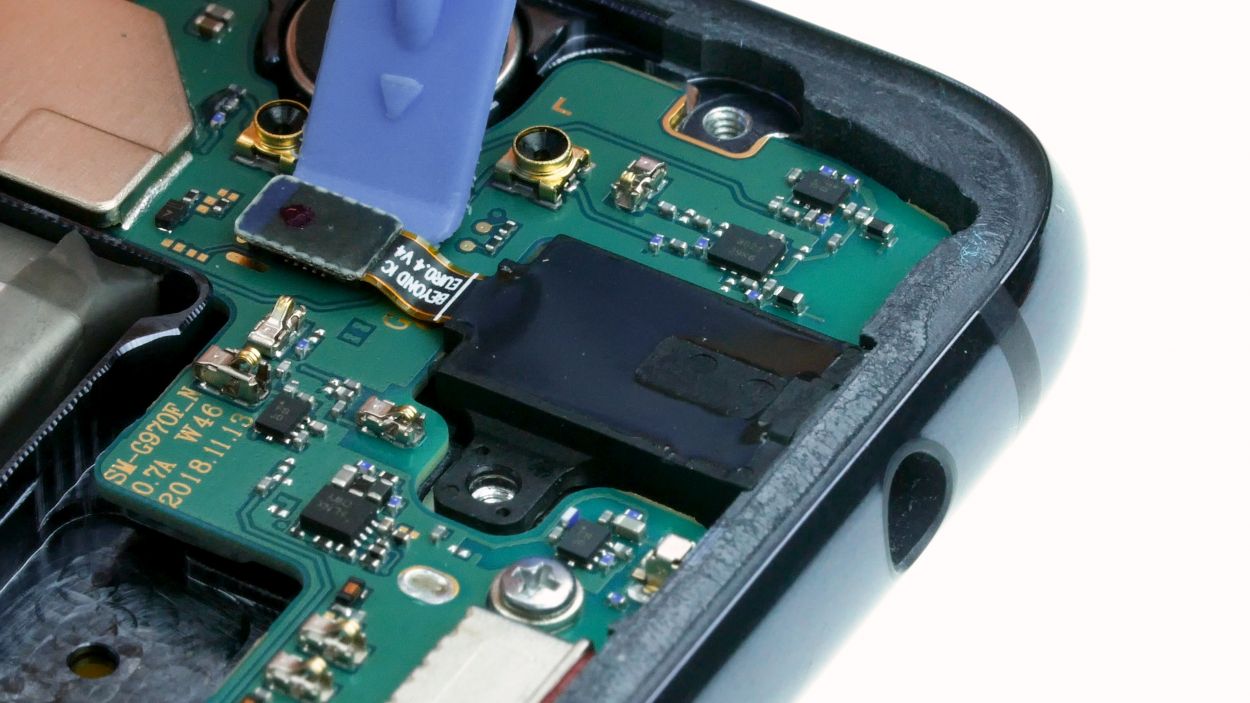
– First up, gently detach the front camera connector using your trusty spudger.
– Carefully lift it from the side that’s free of any PCB components.
– Now, with a little finesse, take the camera out of its snug little holder.
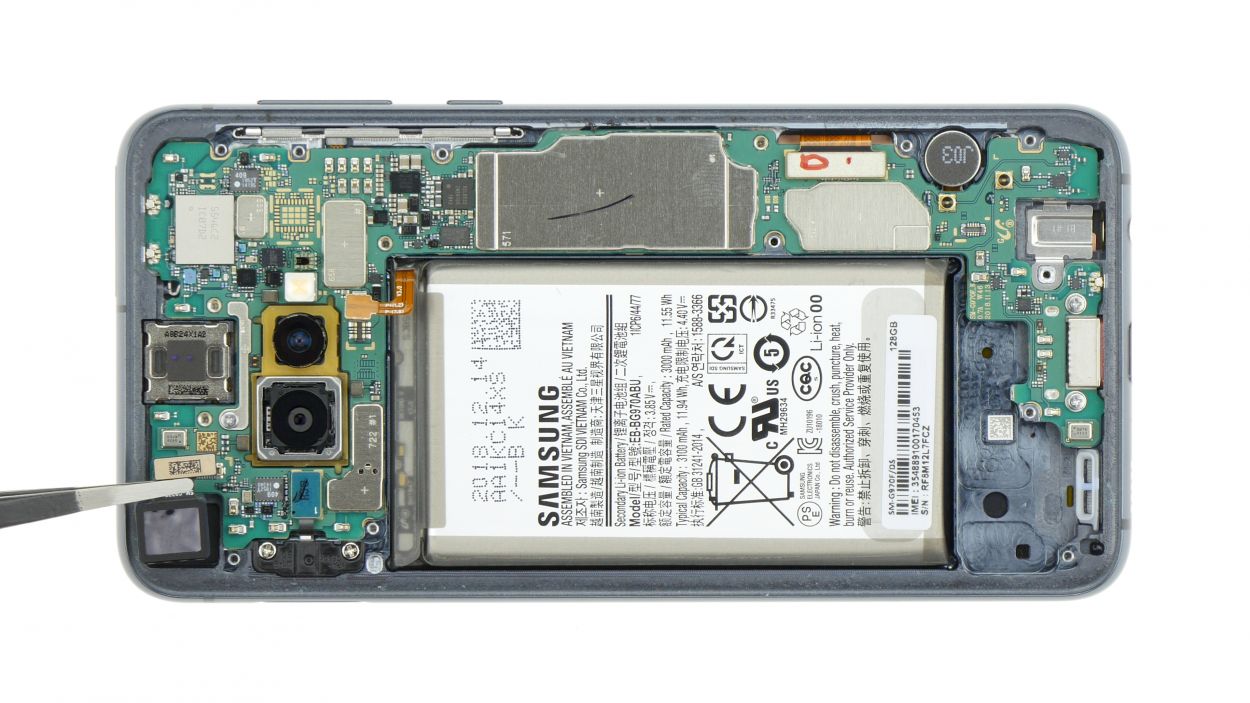
Step 8


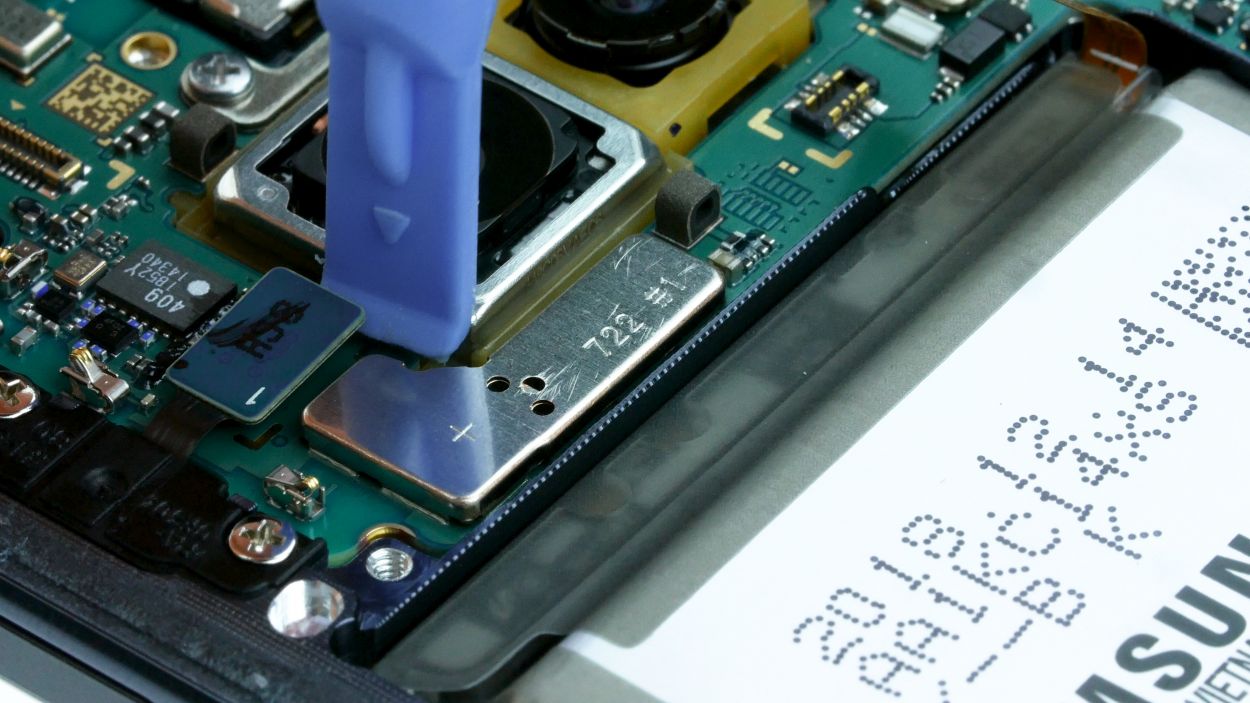

3 × 3,7 mm Phillips
Display connector
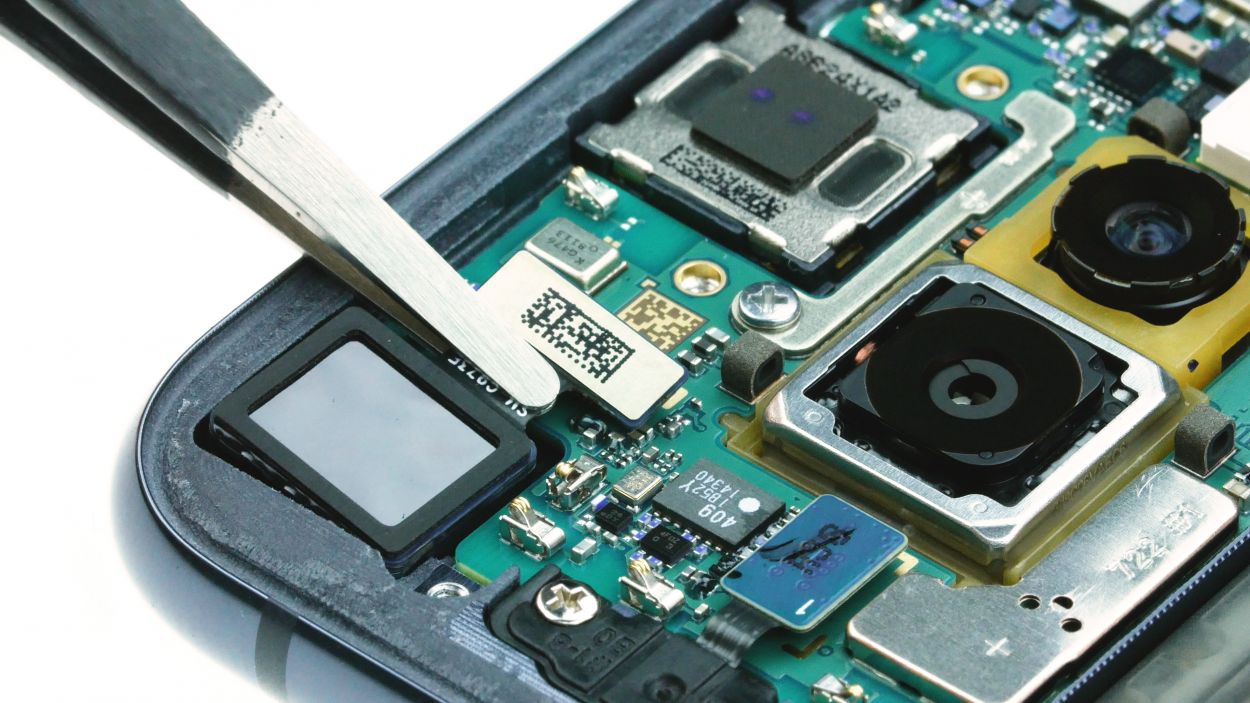
Fingerprint connector
Hey there! Just a heads up: there’s a little plastic pin hanging out in the SIM tray opening. Make sure it stays put and doesn’t take a tumble!
– Grab your trusty spudger and gently unplug the highlighted contacts from the motherboard. Easy peasy!
– Unscrew those Phillips screws like a pro; they’re just waiting to be removed.
– Pop out the SIM card holder; it’s time for a little break for that card.
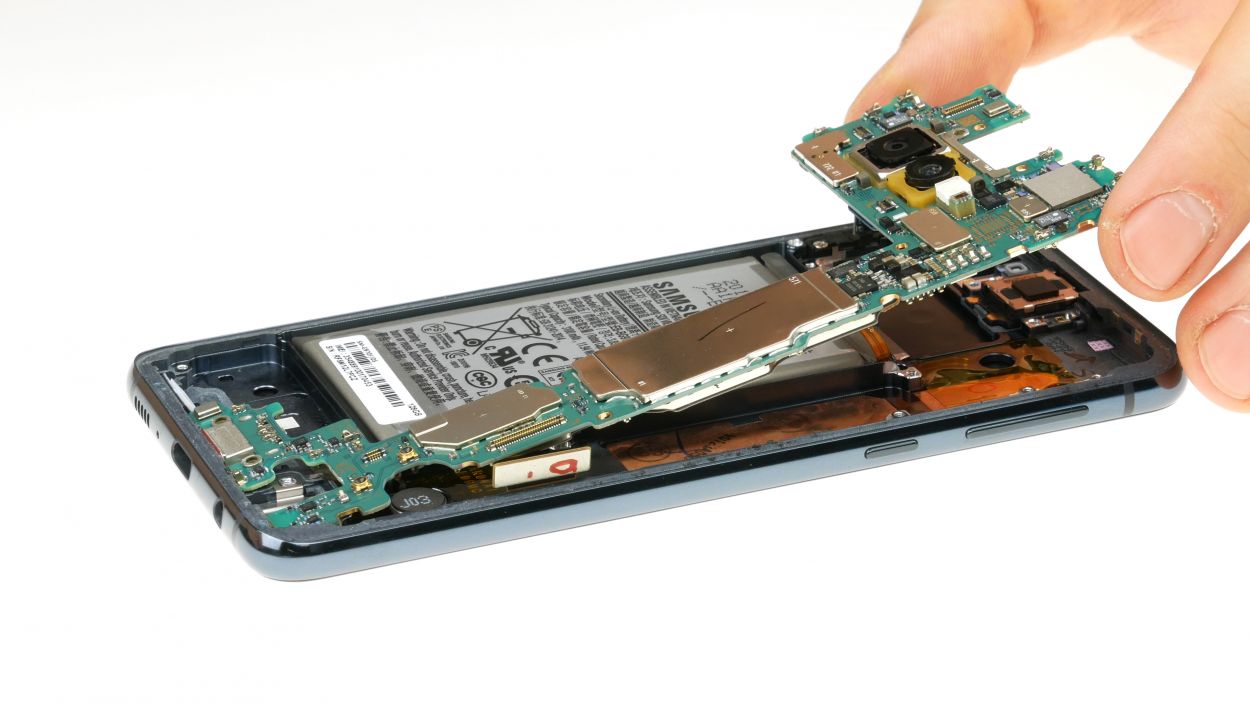
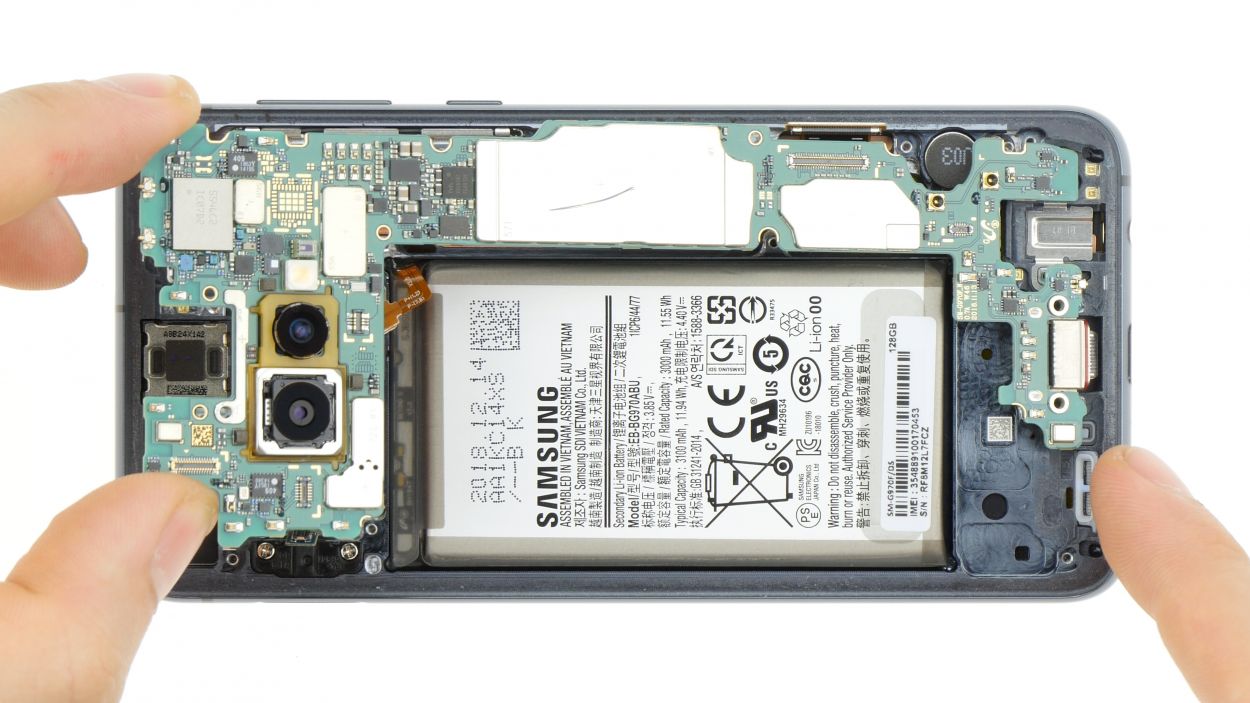
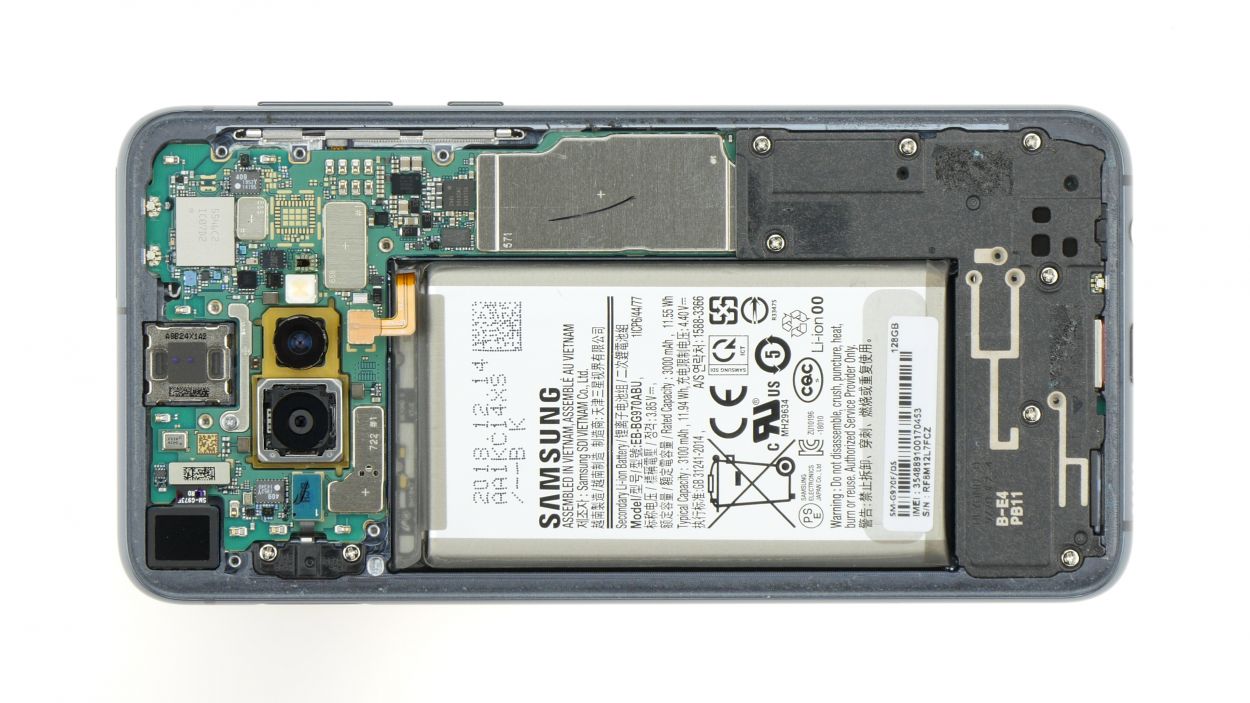
– Now, with a gentle touch, lift the motherboard out. Just be careful not to snag it on those connectors you’ve already freed.
– Once it’s out, set that board down somewhere safe and cozy.
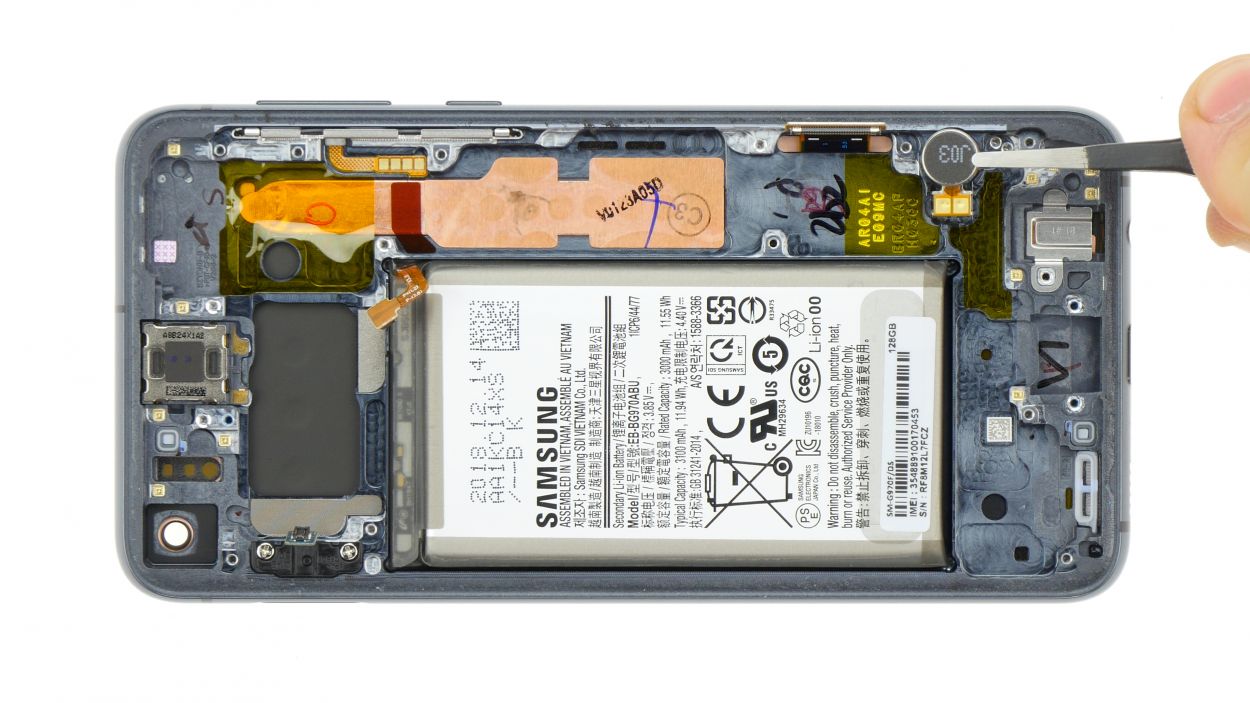
Step 9

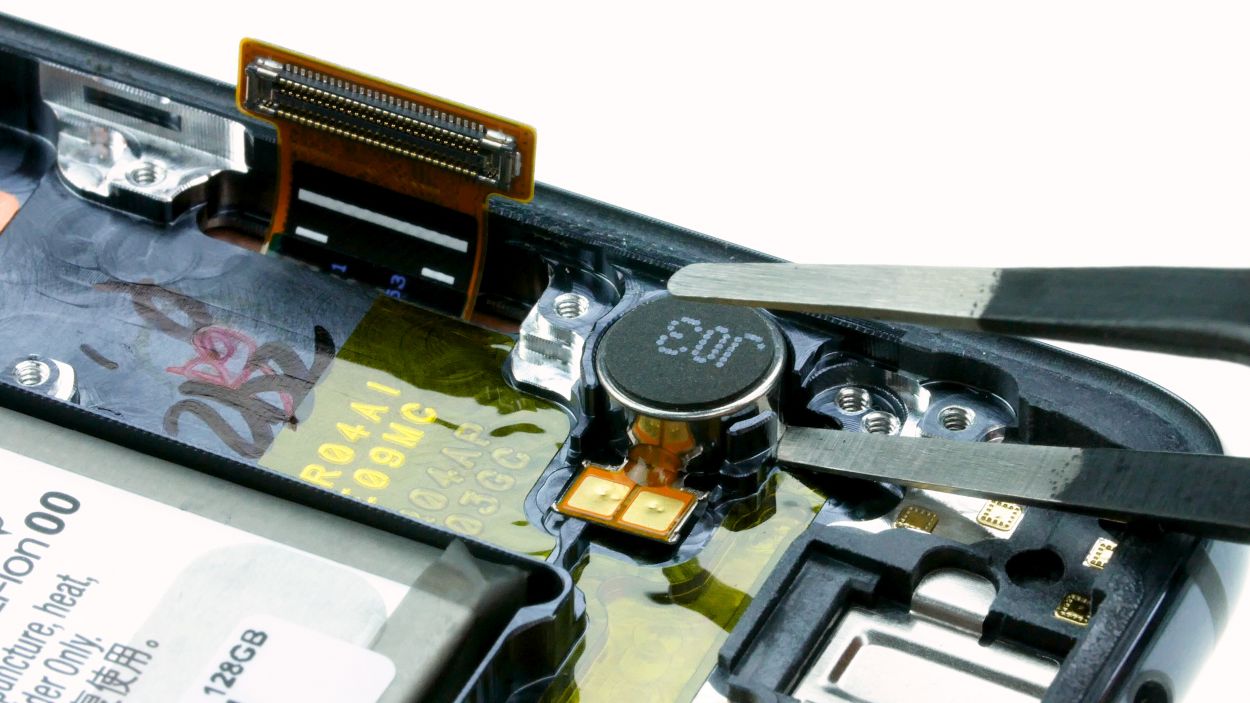
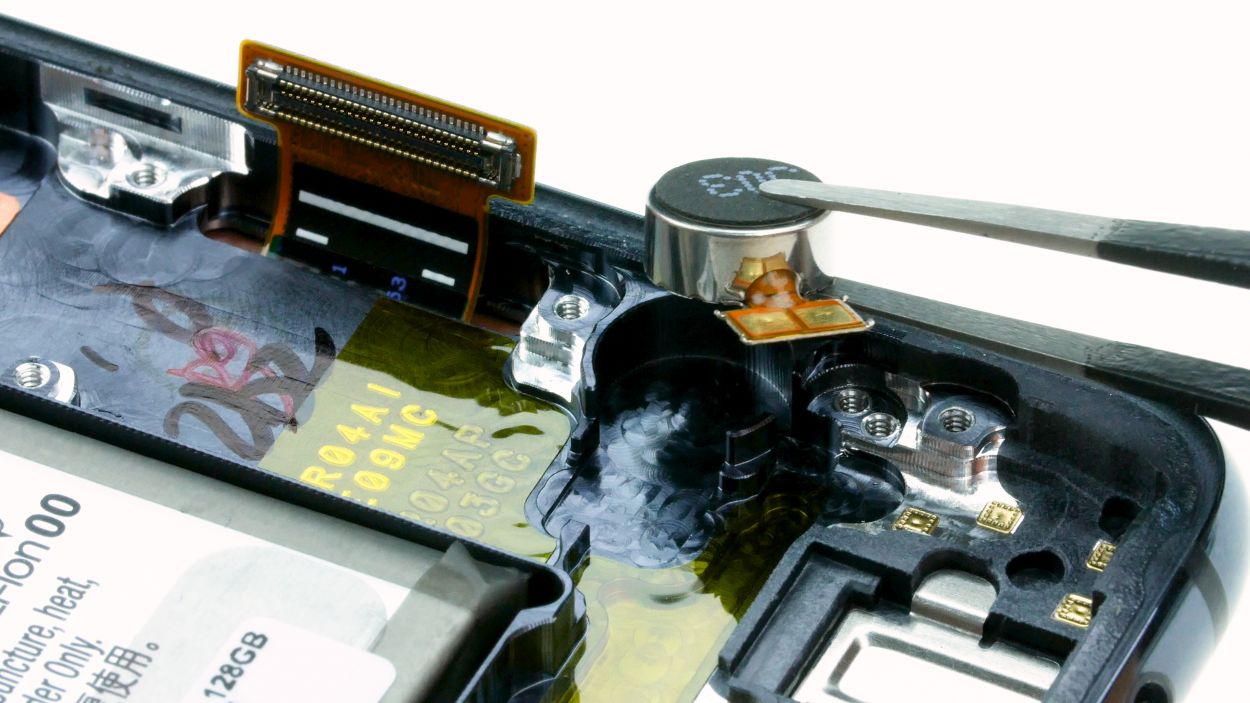
Be gentle and avoid applying pressure on the side with the golden contacts, as they are quite delicate and can easily break off.
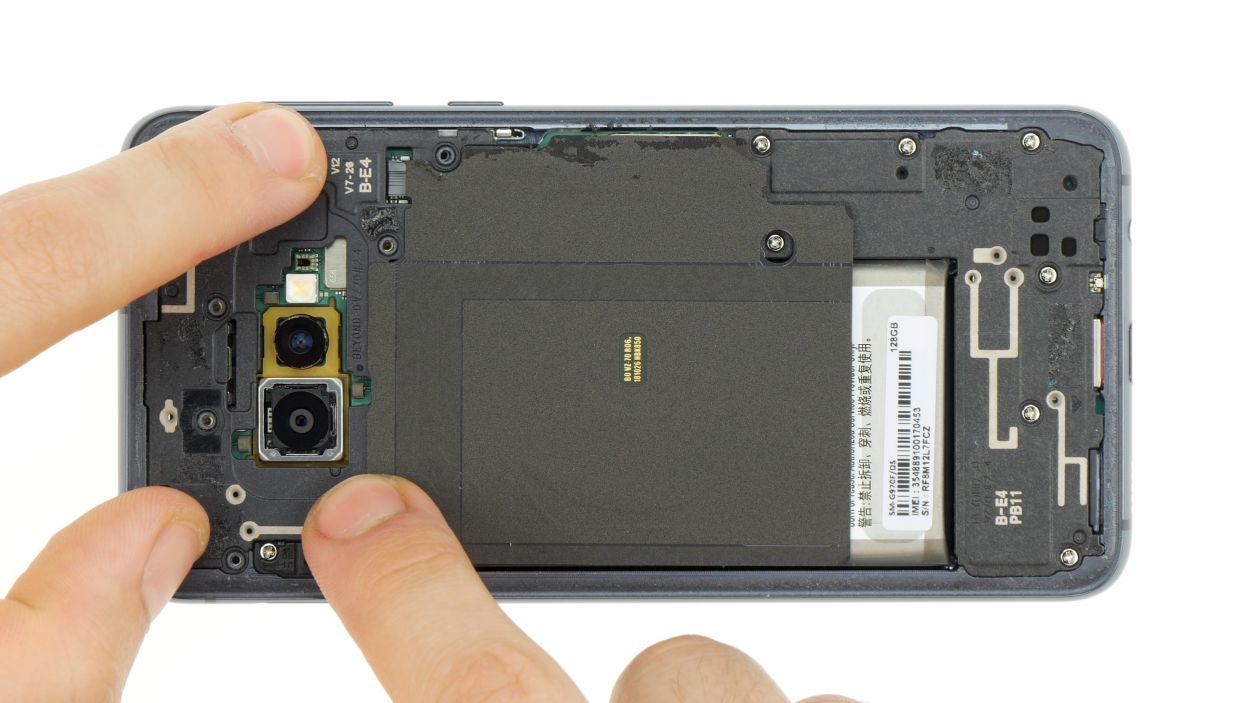
– The vibration motor is stuck to the enclosure with some adhesive love. Gently slide your tool in between the enclosure and the motor to separate them with care.
Step 10
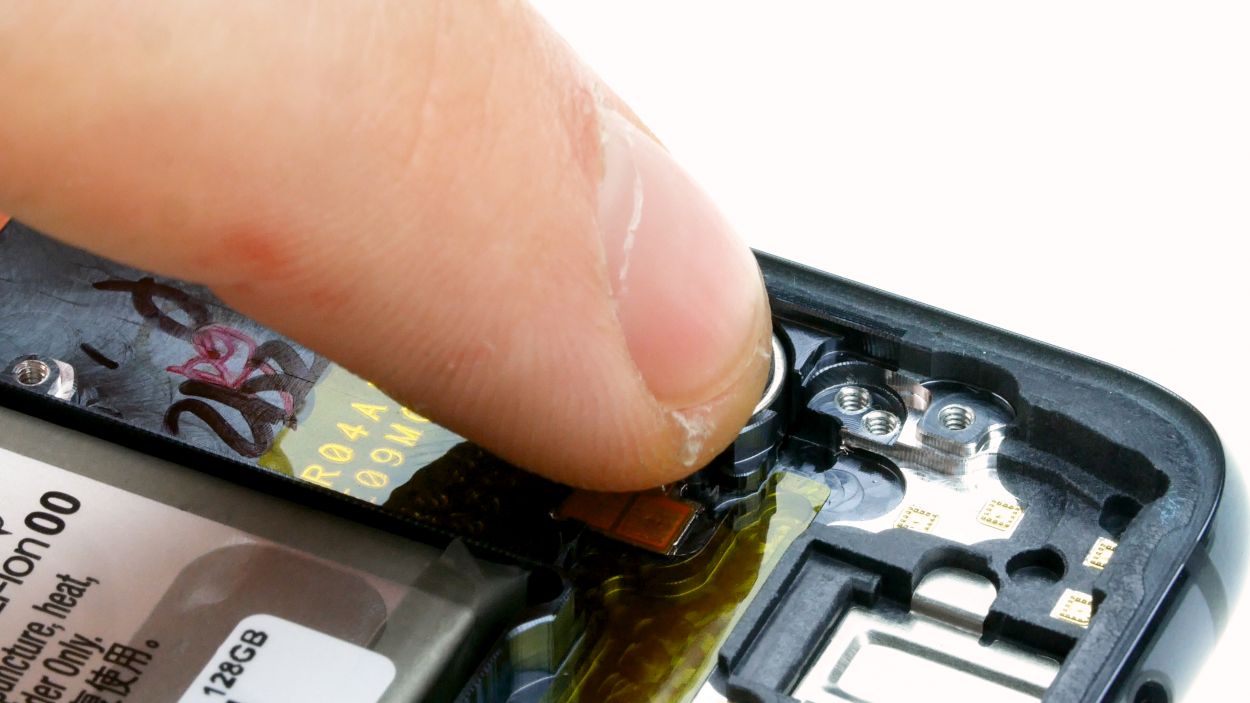
– Nestle that vibration motor right into the cozy little round spot on the side of the case.
– Give it a gentle but firm press with your fingers to make sure it feels right at home.
Step 11
3 × 3,7 mm Phillips
Display connector
Fingerprint connector
– Gently grab the motherboard and slide it into the device with care—let’s avoid pinching those pesky cables! Make sure to bend all connectors to the side for a smooth fit.
– Start by placing the board at the bottom and snugly pressing the charging socket into its designated spot. Then, give the board a gentle push down until it’s perfectly seated all around.
– Now, it’s time to pop in the SIM card holder! If it’s feeling a bit stubborn, no need to force it. Just double-check that the mainboard is snugly in place.
– Next up, secure the motherboard by fastening those screws—let’s keep everything nice and tight!
– Lastly, reconnect all those connectors. You’re almost there!
Step 12

Camera Connector
Don’t forget to peel off all those protective films and give that camera lens a good dusting! We want it sparkling clean for those picture-perfect moments.
– Pop in that front camera and give its connector a snug little hug!
– Camera Connector
Step 13

– Gently pop in the audio jack and give it a little nudge until you hear that satisfying click! It’s like a high-five for your device.
– Next up, reconnect that connector like a pro!
Step 14

7 × 3,9 mm Phillips
– Now, gently set the speaker back over the USB port, give it a little press to snug it in, and tighten those screws like a pro!
– Don’t forget to check that it’s securely latched at the bottom.
Step 15
Battery Connector
– Time to connect the battery to the motherboard! Just press that contact onto the connection until you hear a satisfying click. You’ve got this!
Step 16


8 × 3,9 mm Phillips
– Carefully place the cover with the antenna back into the enclosure, making sure to hook it onto the top first. You’re almost there!
– Now, give that cover a gentle press with your fingers until you hear a satisfying click. It’s like a little victory!
– Finally, grab your Phillips screws and fasten them up. You’ve got this!
Step 17

Be sure to give every function of the part you swapped out a thorough test. It’s like a little celebration for your device—make sure everything’s working smoothly! And remember, if you need help, you can always schedule a repair.
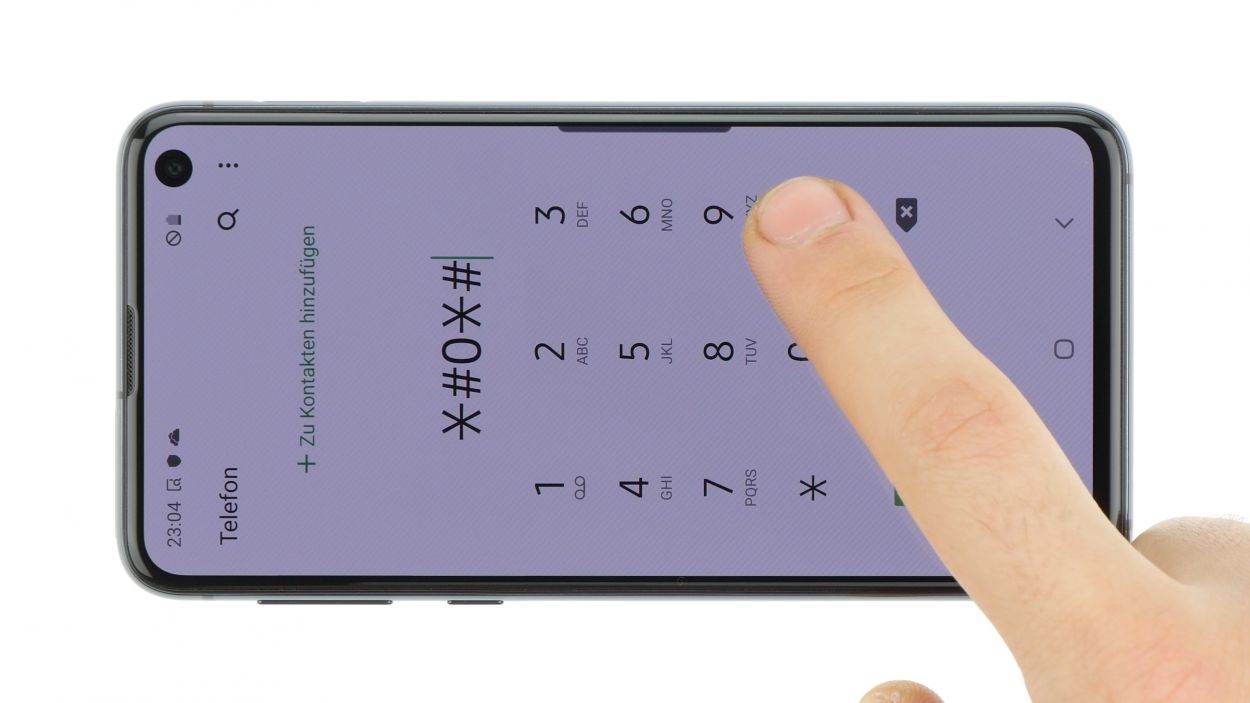
– Fire up your device and give it a whirl with the built-in test mode!
– To dive into the test mode, just dial *#0*# and you’re in!
– Follow the prompts to check out the screen, cameras, and sensors. You’ve got this!
Step 18


If the adhesive on the back cover is still holding strong, you’re in luck! You can wrap up your device without needing a fresh adhesive frame. Keep up the great work!
– Gently place the back cover back where it belongs, just like fitting a puzzle piece!
– Give that back cover a nice little press all around so the glue can do its magic and stick like best friends.