DIY Guide to Replace Samsung Galaxy A80 Screen
Duration: 60 min.
Steps: 22 Steps
Did your Samsung Galaxy A80 just slip from your grasp, tumble out of your pocket, or take a dive off the table? And this time, it’s not just a heart-stopping moment but also a display that’s now sporting a thick scratch or a crack? No worries! In this guide, we’ll walk you through the process of fixing that display yourself. This replacement is a lifesaver if your touchscreen is acting up, only responding partially, or if you’re dealing with those pesky pixel glitches. Replacing the display unit can usually solve these annoyances. We’ll guide you step by step on how to open your Samsung Galaxy A80 from the back cover, take out the components of the old display, and transfer them into your shiny new display. Plus, we’ll show you how to swap out the entire display unit, frame and all. So if your smartphone has any unsightly dents or scratches on the side, we’ve got you covered! If you run into any questions during the repair, feel free to reach out to our tech team or the community through the chat or comment sections. We’re here to help you out! We also love hearing your feedback and reviews! Now, let’s get started on that successful repair journey and enjoy your revitalized Samsung Galaxy A80!
Step 1

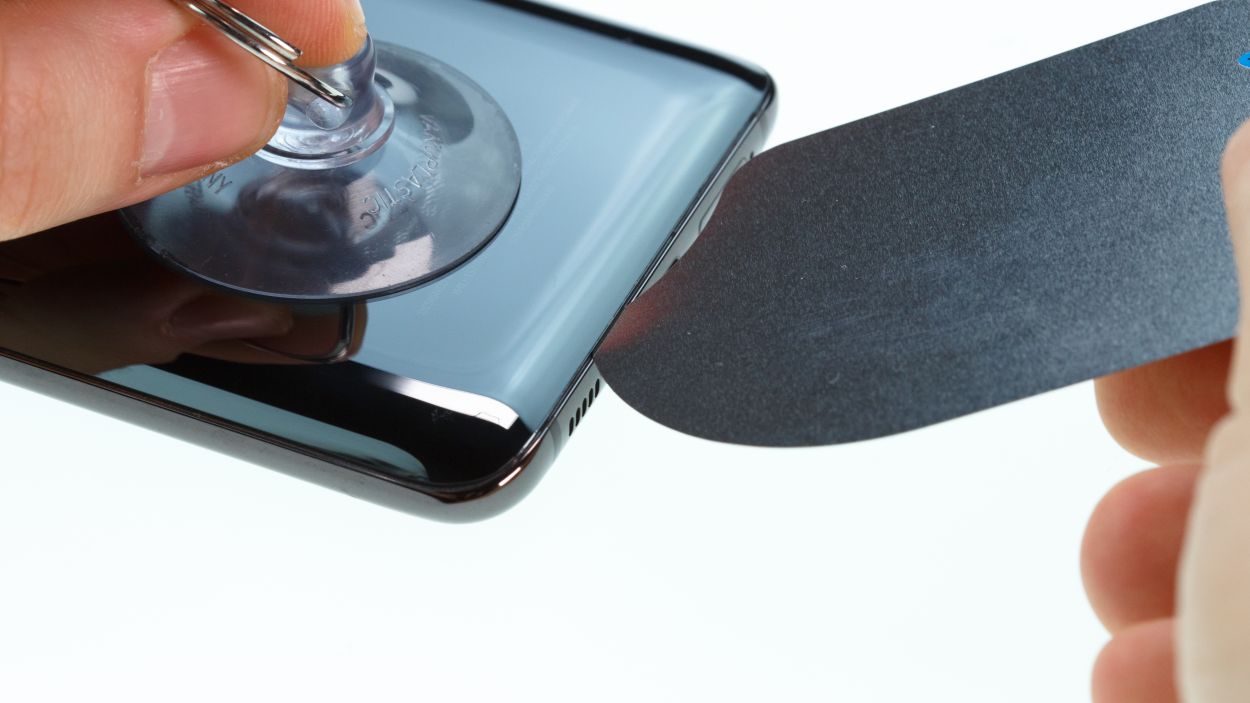
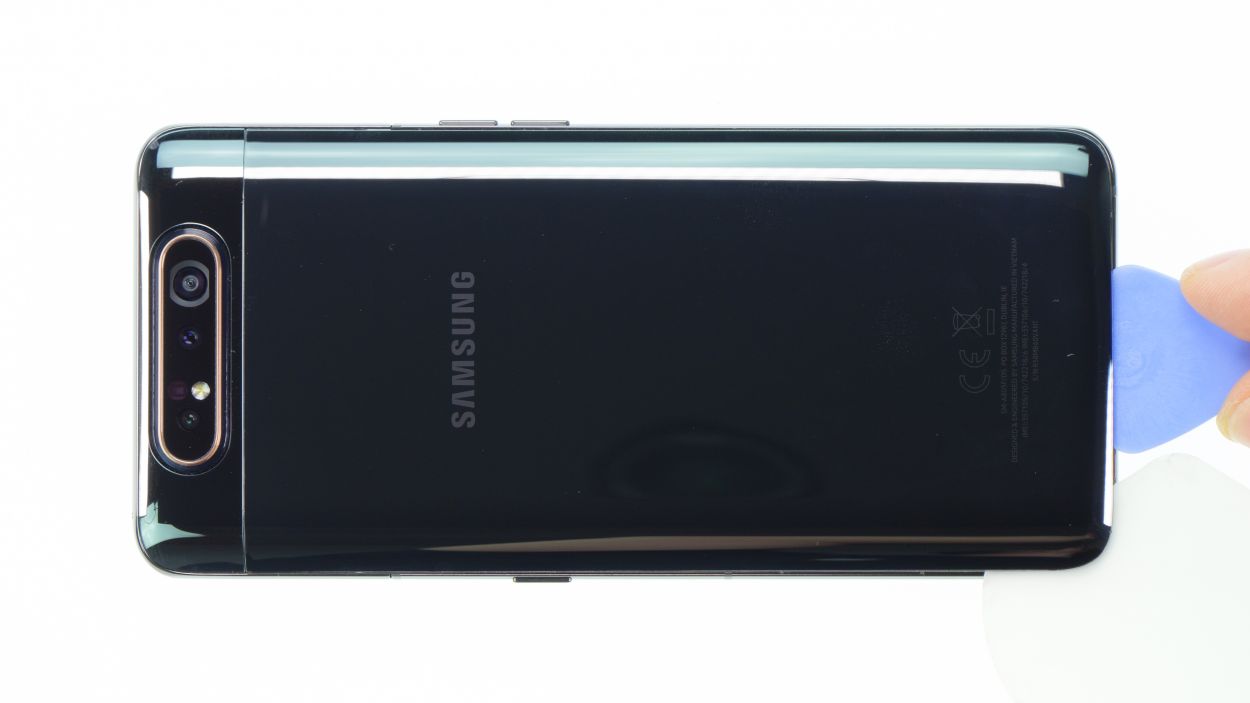


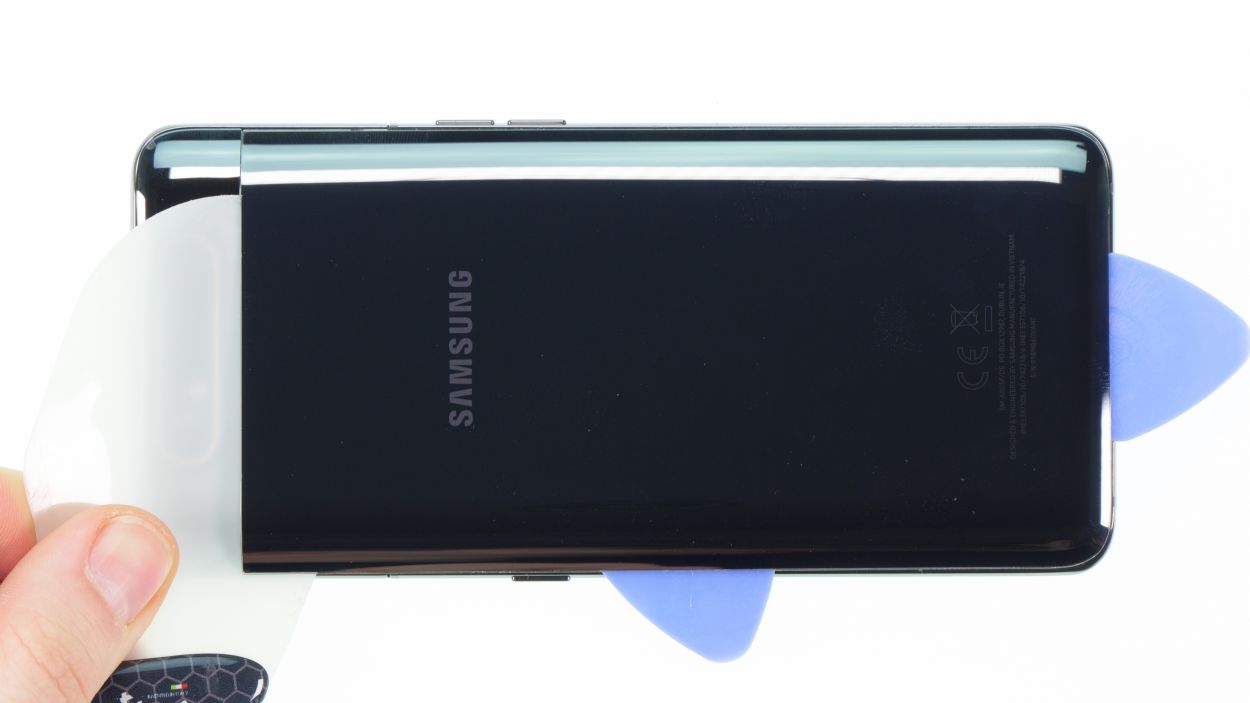


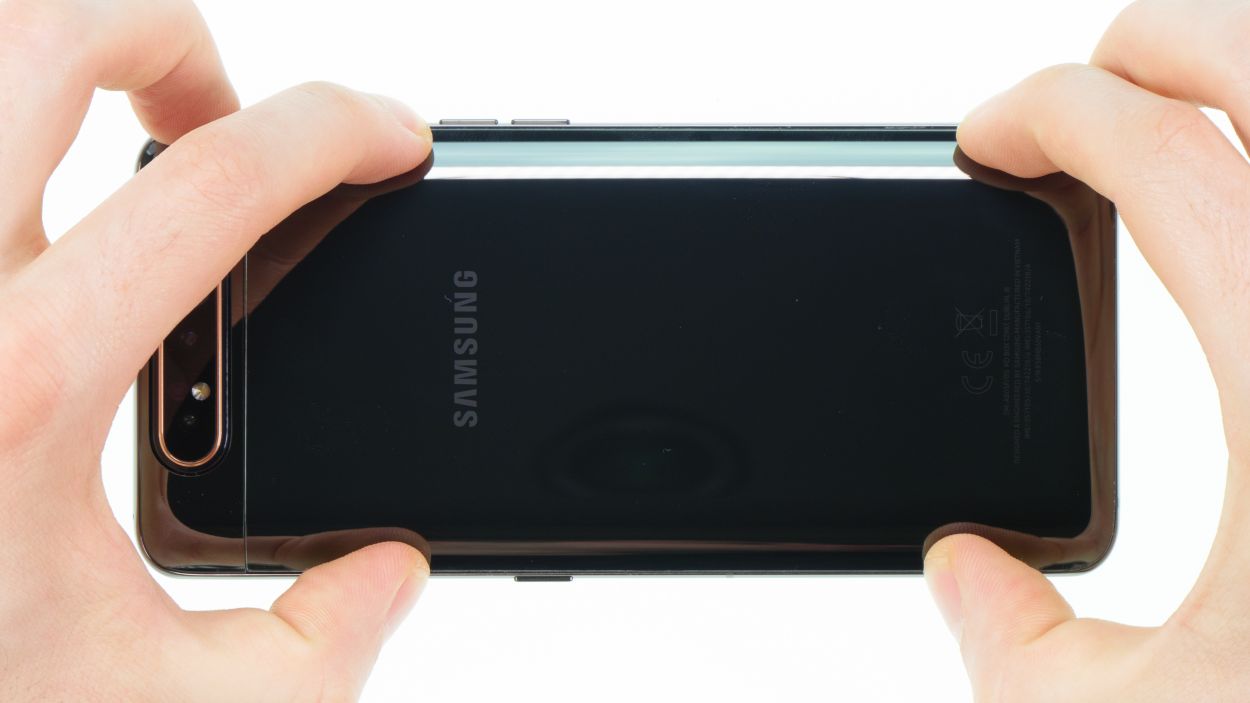
– Once you’ve warmed up that adhesive, grab a suction cup and stick it at the bottom of the back cover. Gently pull on the suction cup while using your trusty opening tool, like the iFlex or iPlastix, to slide into the gap forming between the back cover and the frame.
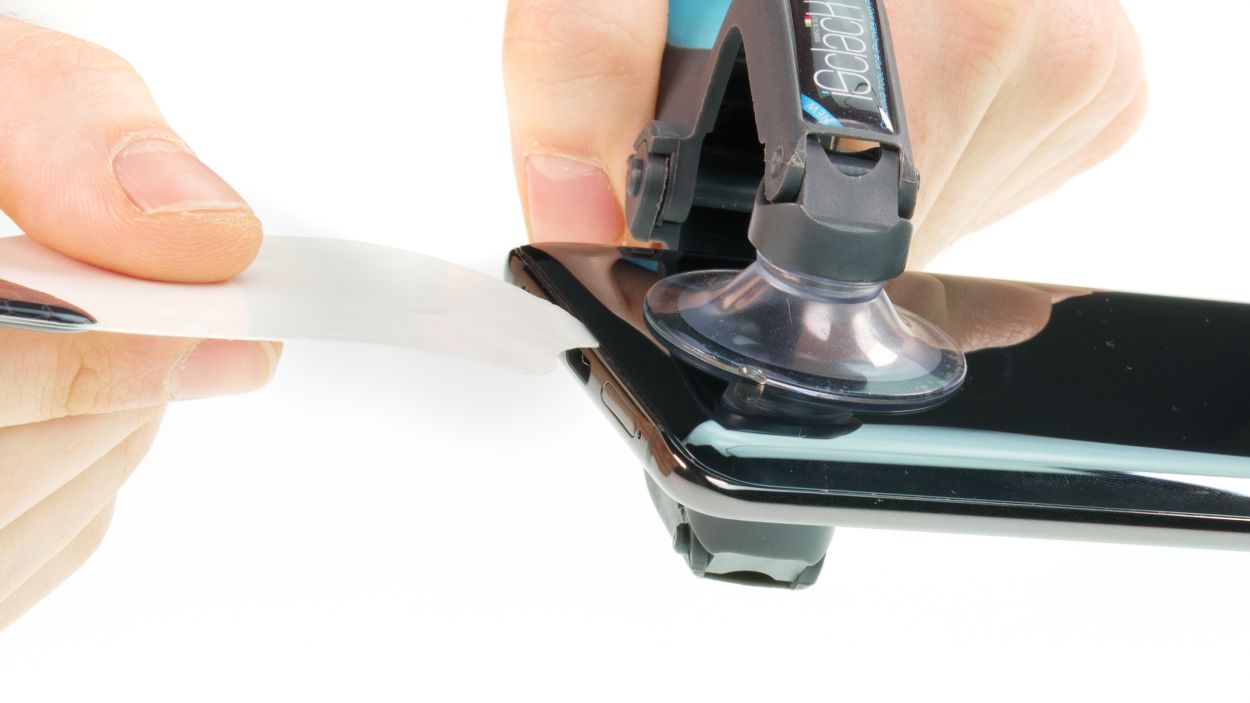
– If you want to make things even easier, the iSclack is your friend! This nifty tool has suction cups on both sides to help lift the back cover evenly, giving you a little extra help in your repair journey.
Hey there! When you’re working on the left edge of the back cover, just remember to keep your tool from diving too deep into the device. There’s a flex cable hiding in there that you’d want to keep safe. Also, take it easy near the camera module at the top; it’s super easy to scratch that area since the back cover is glued in pretty tightly. You’ve got this!
The iFlex is crafted from sleek yet sturdy metal, making it a breeze to slide into those tight spaces. Just a heads up, though—while it’s super handy, it can also be a bit rough on your device’s back glass or frame if you’re not careful. So, handle it with a gentle touch!
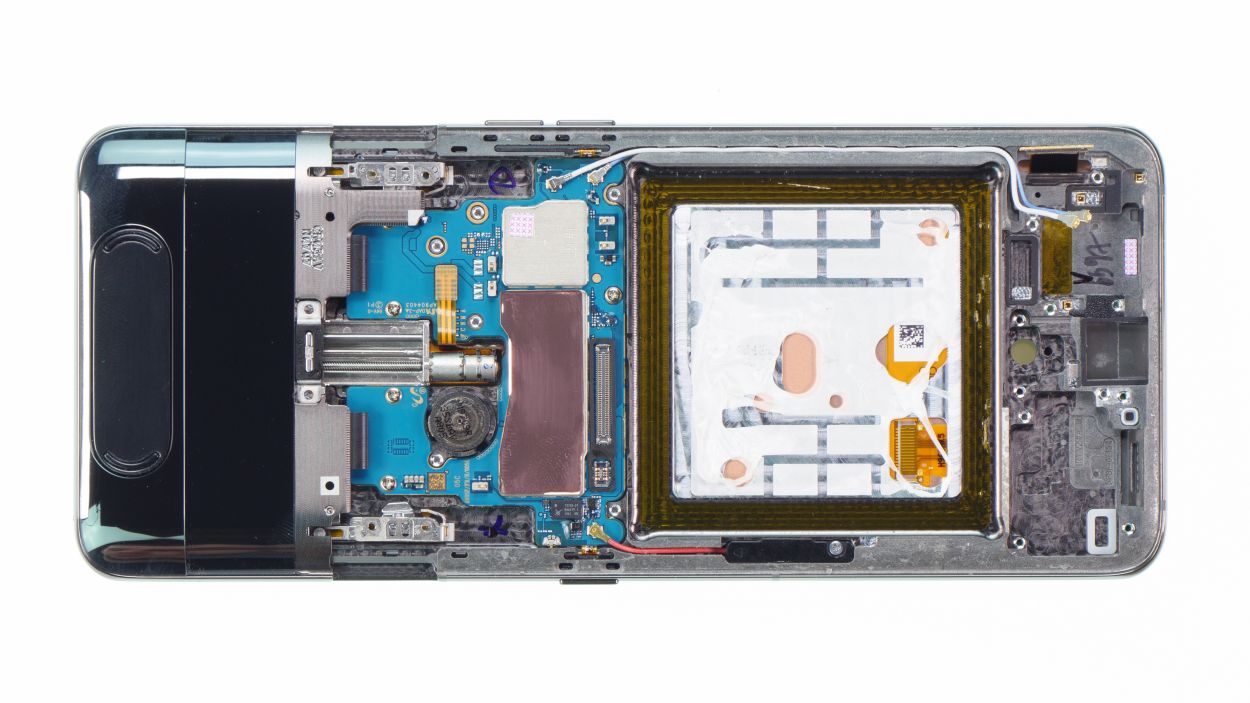
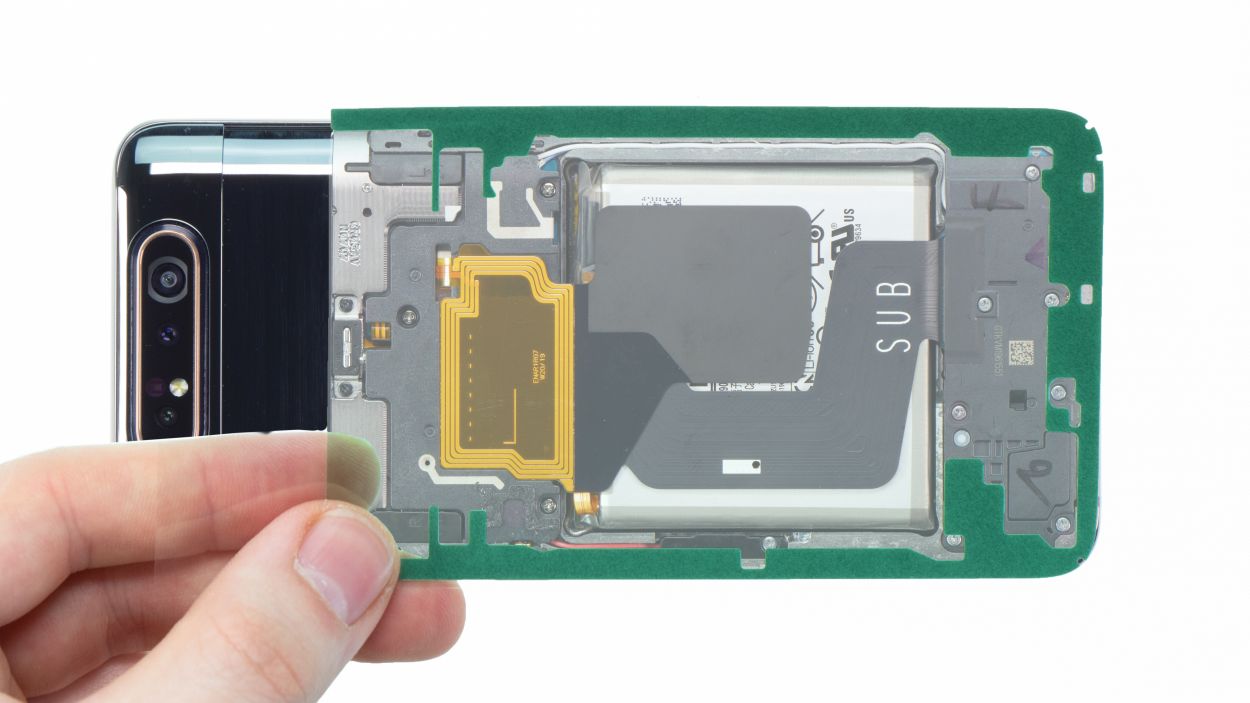
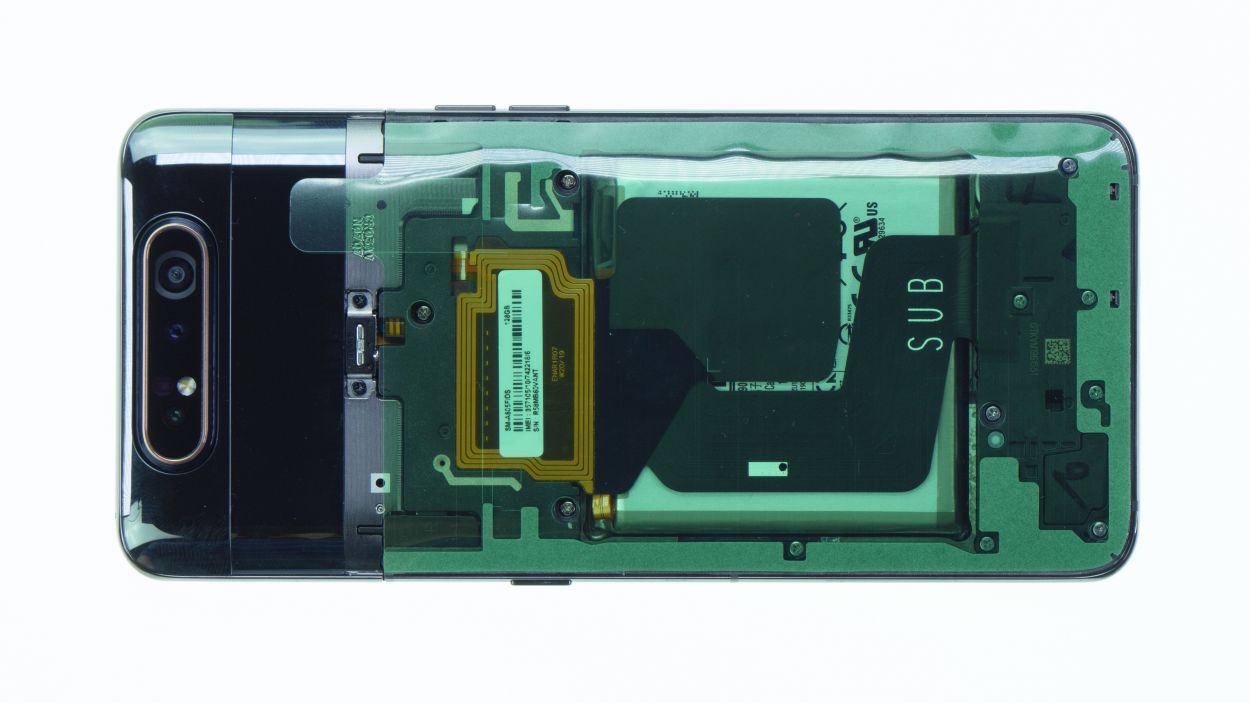
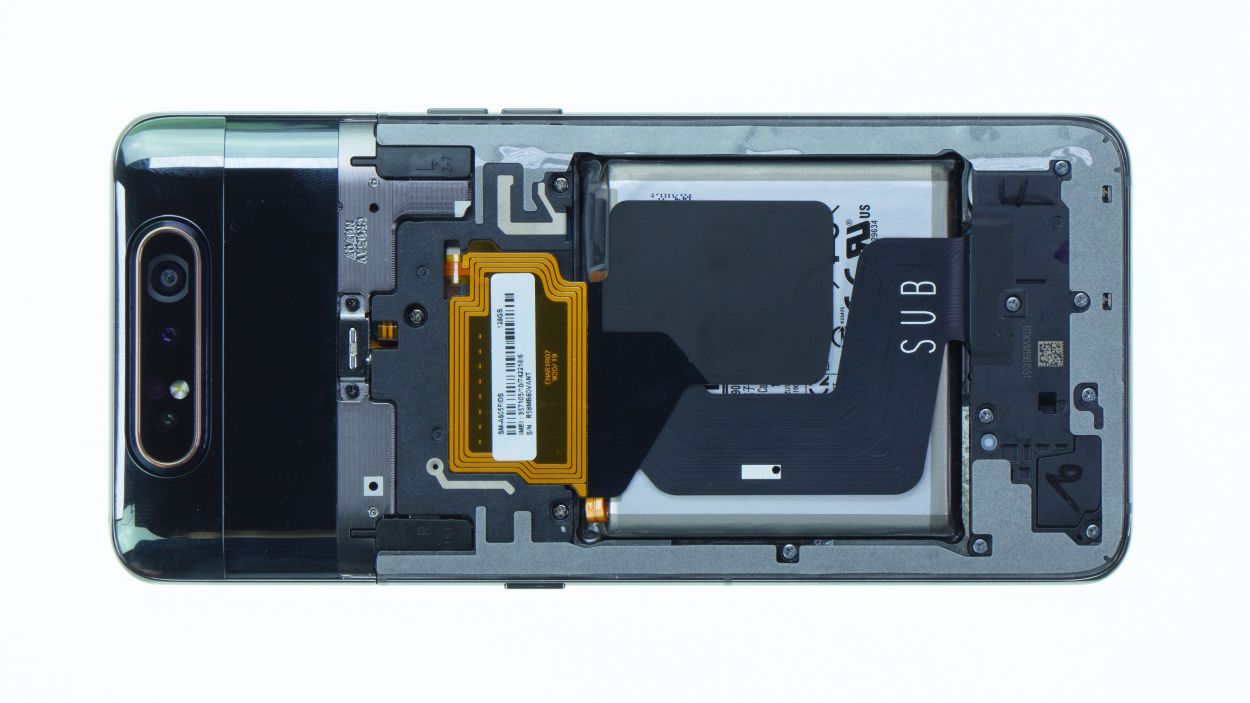
Step 2
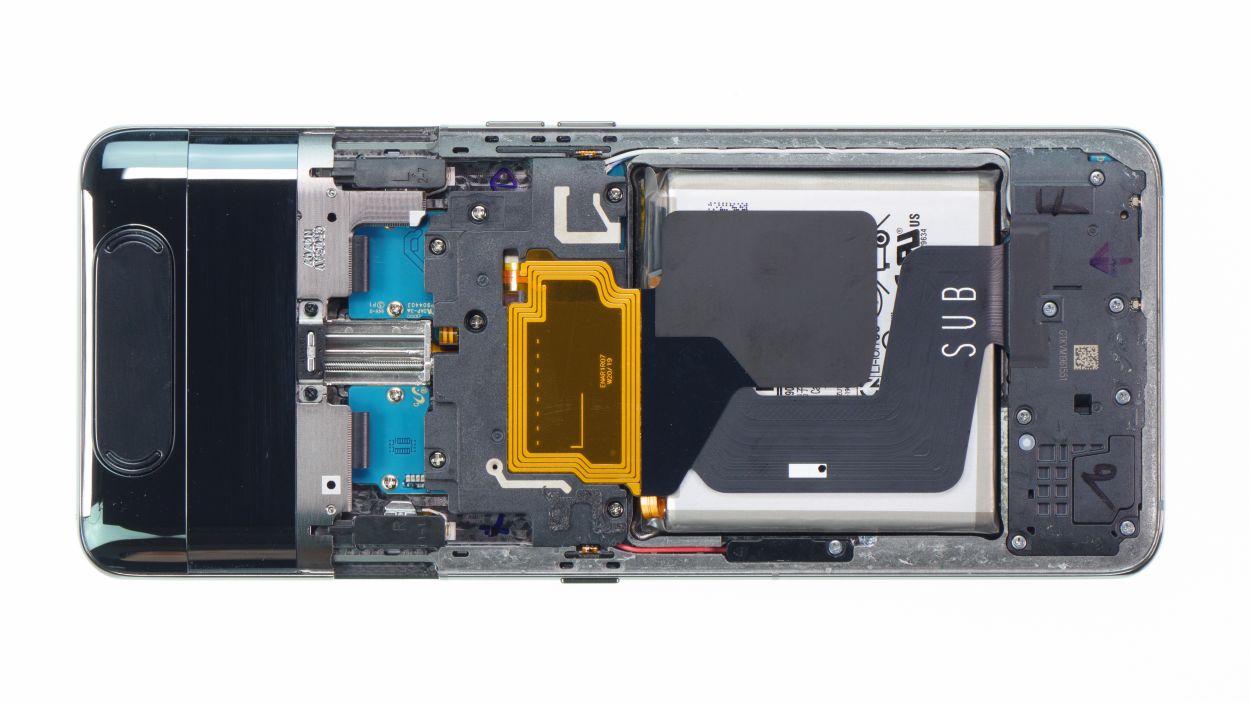


6 × 3,3 mm Phillips
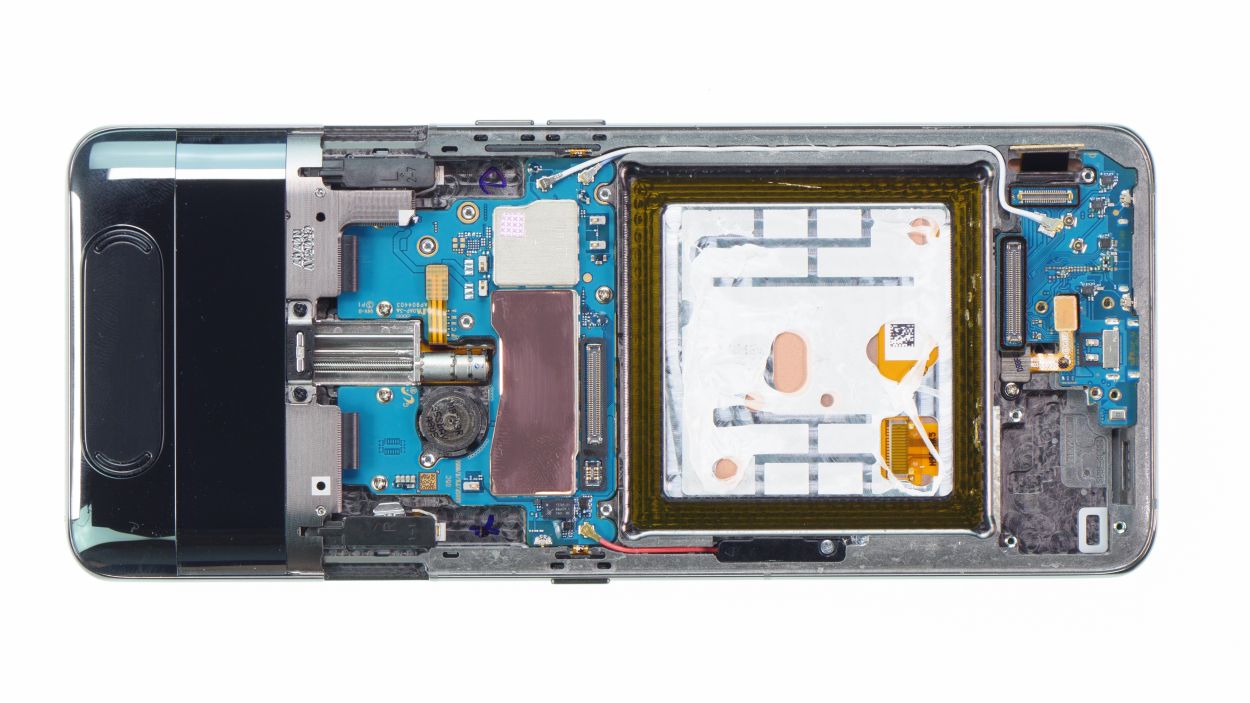
The NFC antenna is hanging out on the cover of the main board, ready to help you connect with all your favorite devices! Keep that in mind as you dive into your repair.
– First things first, let’s get that camera extended! You’ll need it out of the way to tackle the main board cover.
– Fire up your camera app and switch to the front camera mode. It’s showtime for that camera module!
– Once the camera module is fully extended and ready for action, you can go ahead and unscrew those six Phillips screws – they’re all the same length, so no need to stress about mixing them up!
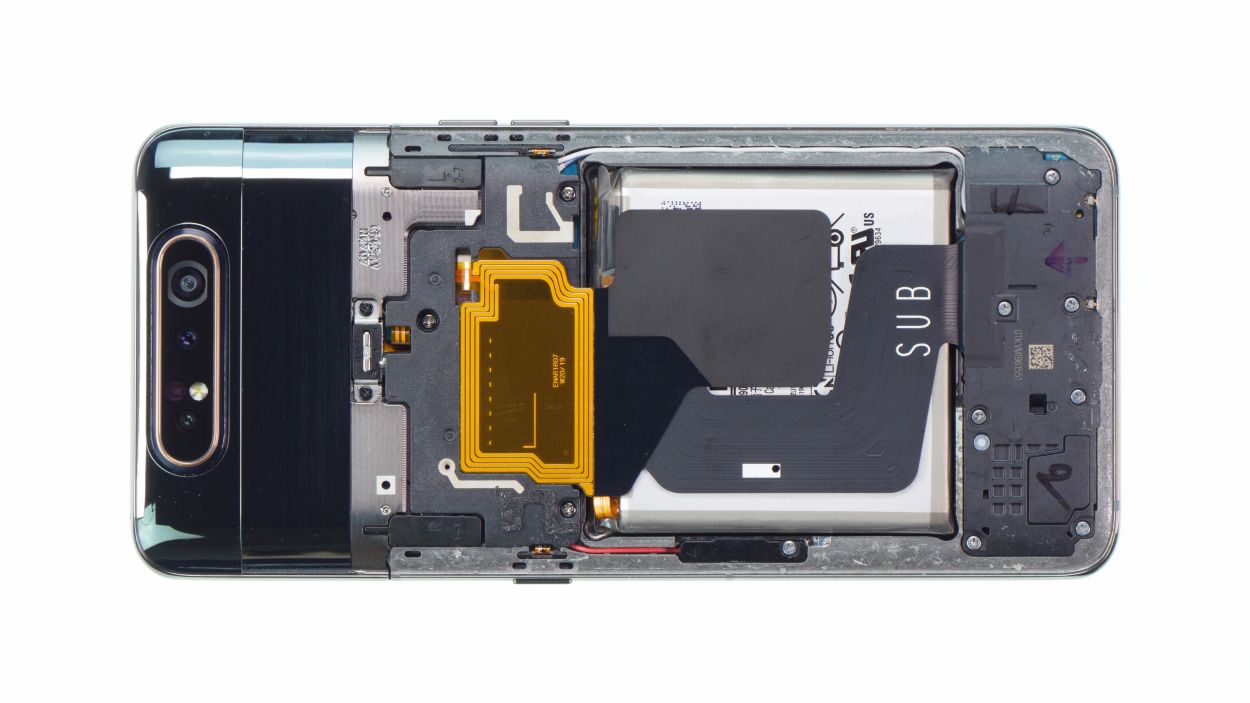
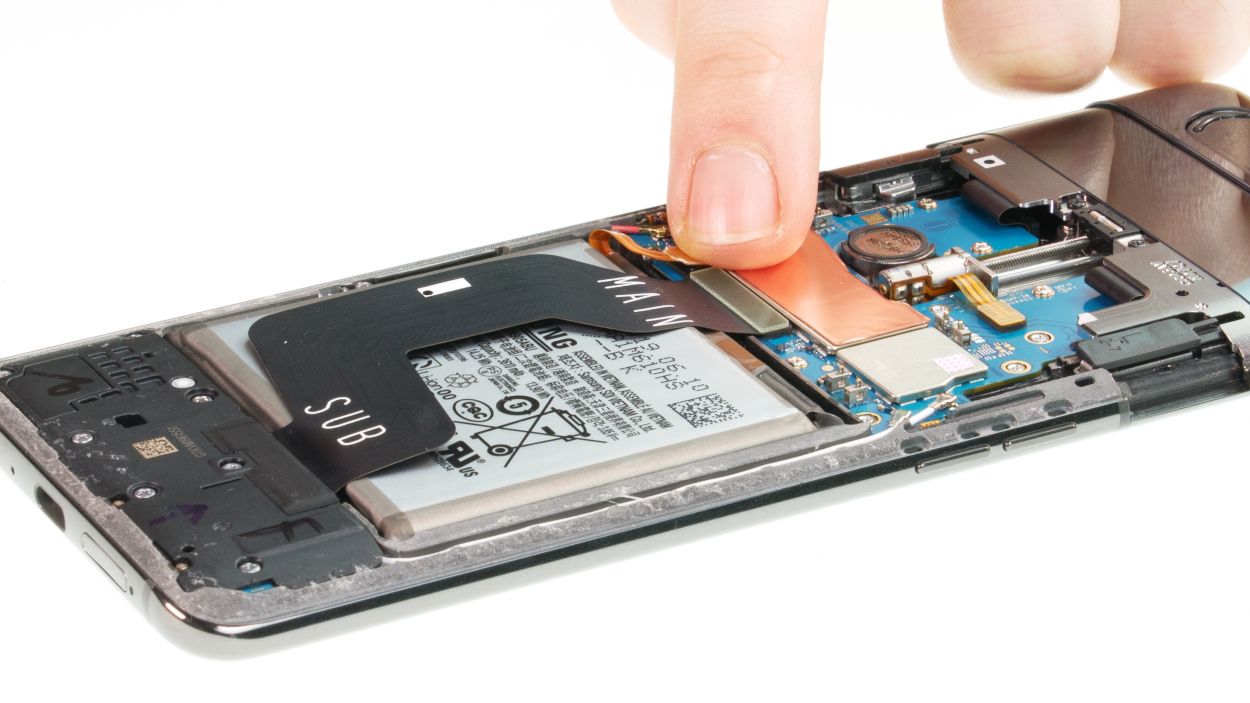
Step 3


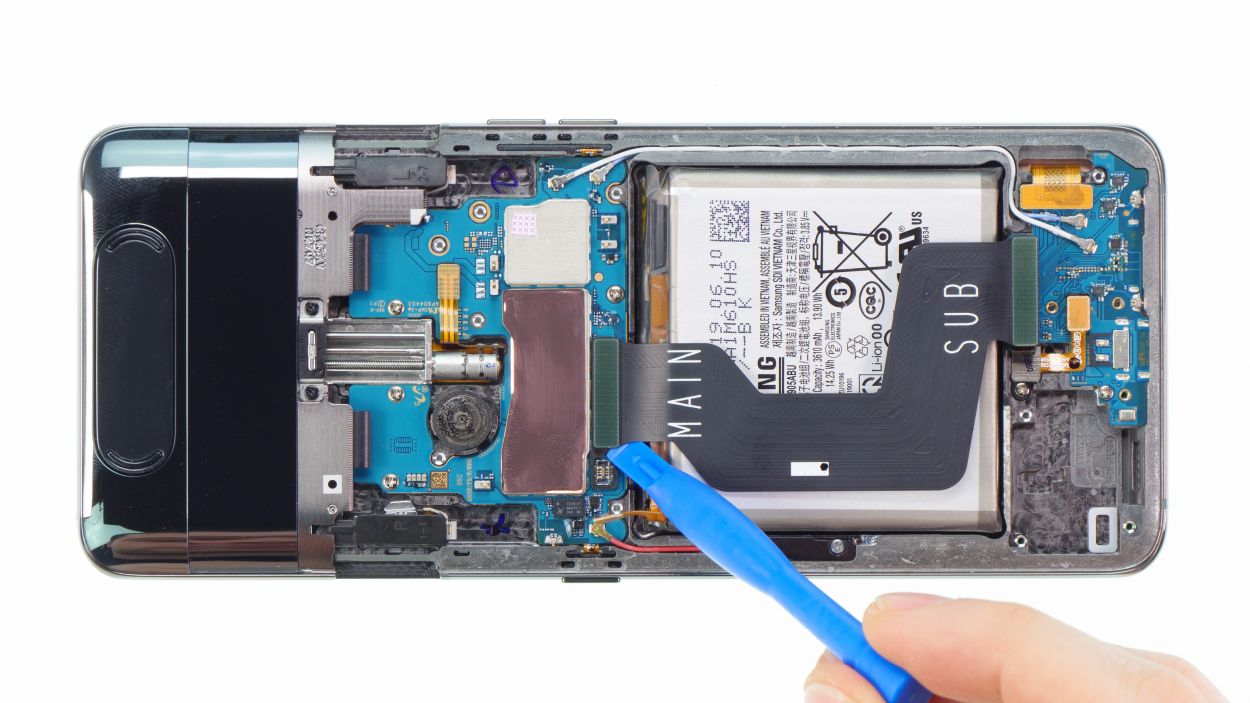
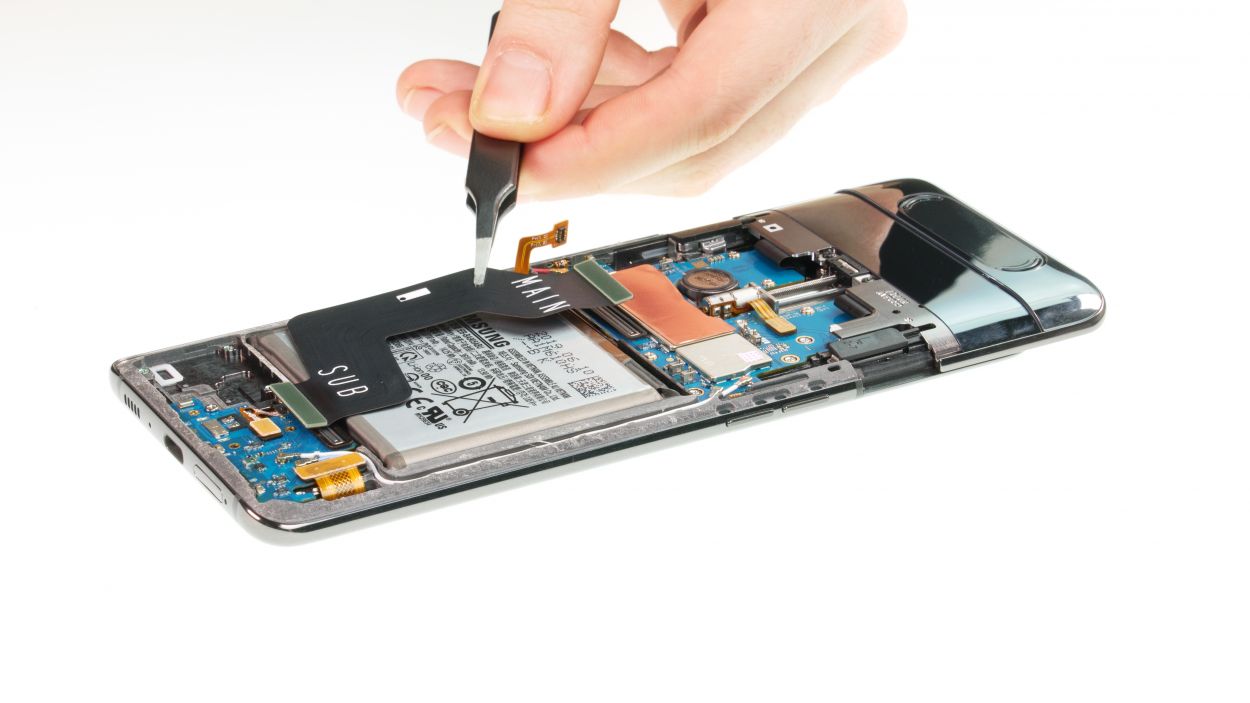
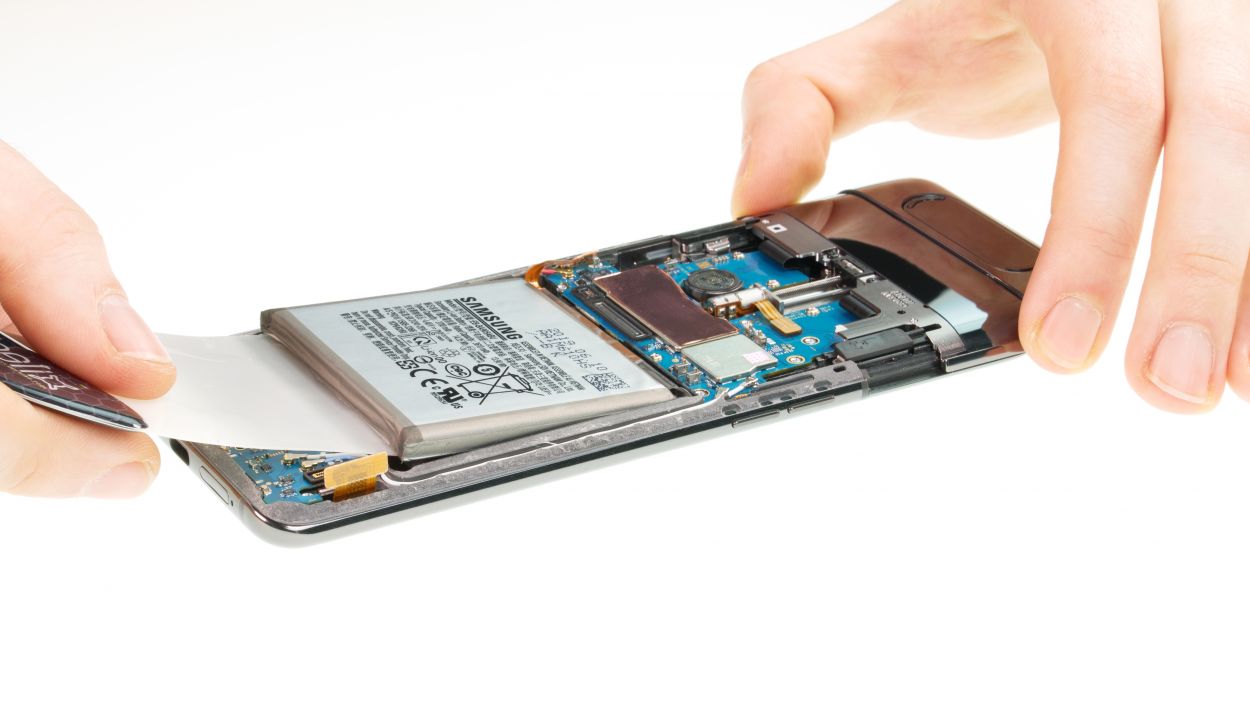
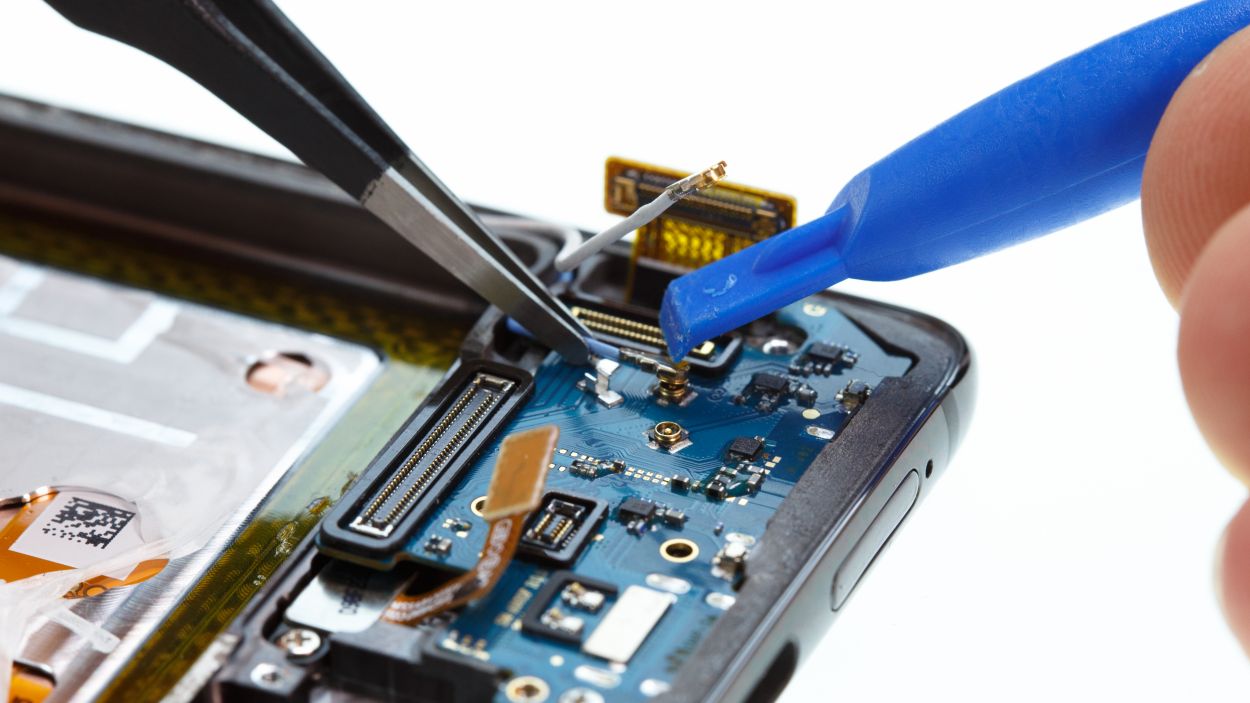
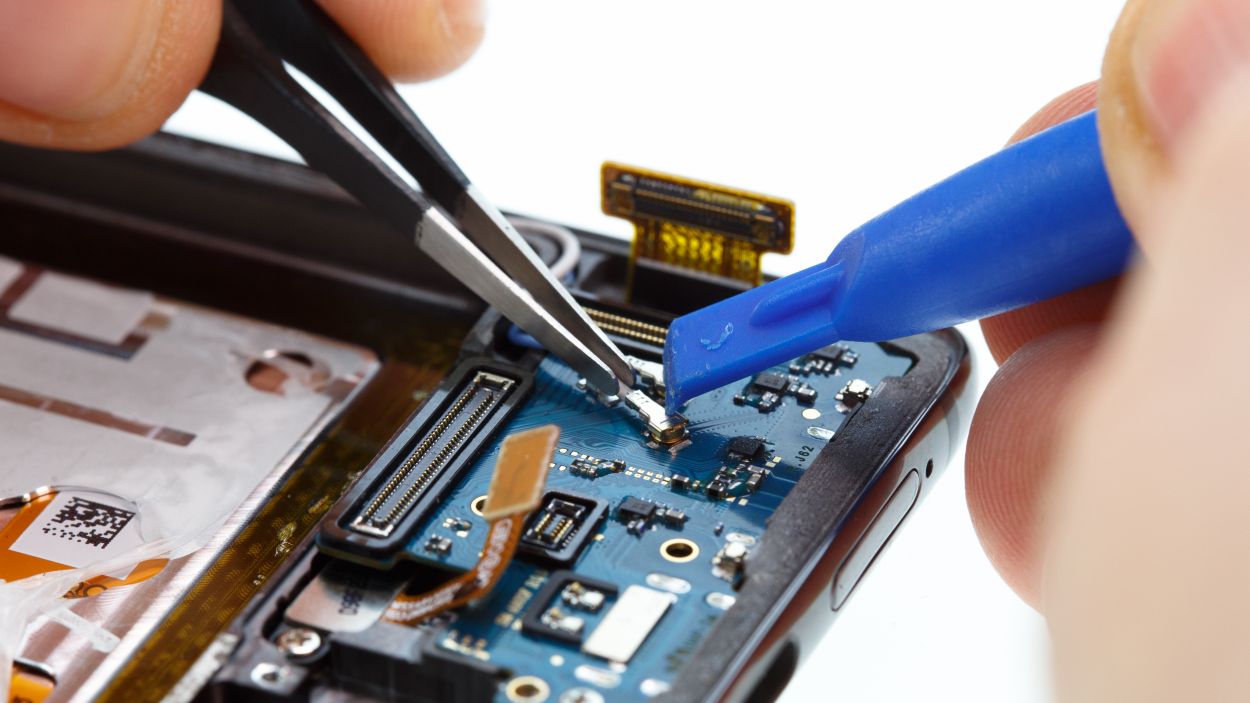
Battery Connector
Keep that camera module extended while you disconnect the battery contact! This little trick will ensure it stays in position for the rest of your repair adventure. You’re doing great!
– Next up, let’s disconnect that battery contact! This nifty step stops any power from flowing around the device, keeping you safe from those pesky short-circuits while you work your magic on the repair.
Step 4


7 × 3,9 mm Phillips
– Start by loosening those seven Phillips screws that are all the same length, keeping that speaker secure and sound! You’ve got this!
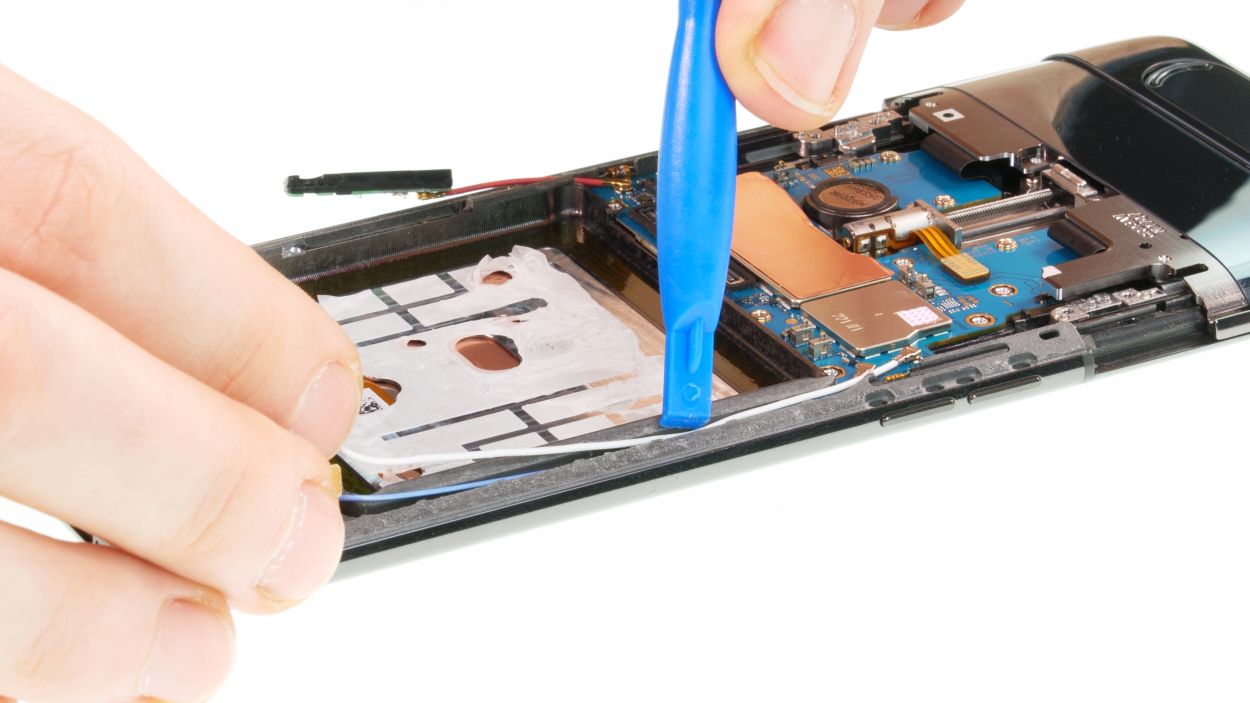
– Next, gently pry out the component that’s got a little glue holding it in place. Just a little nudge and it should pop right out!
Step 5
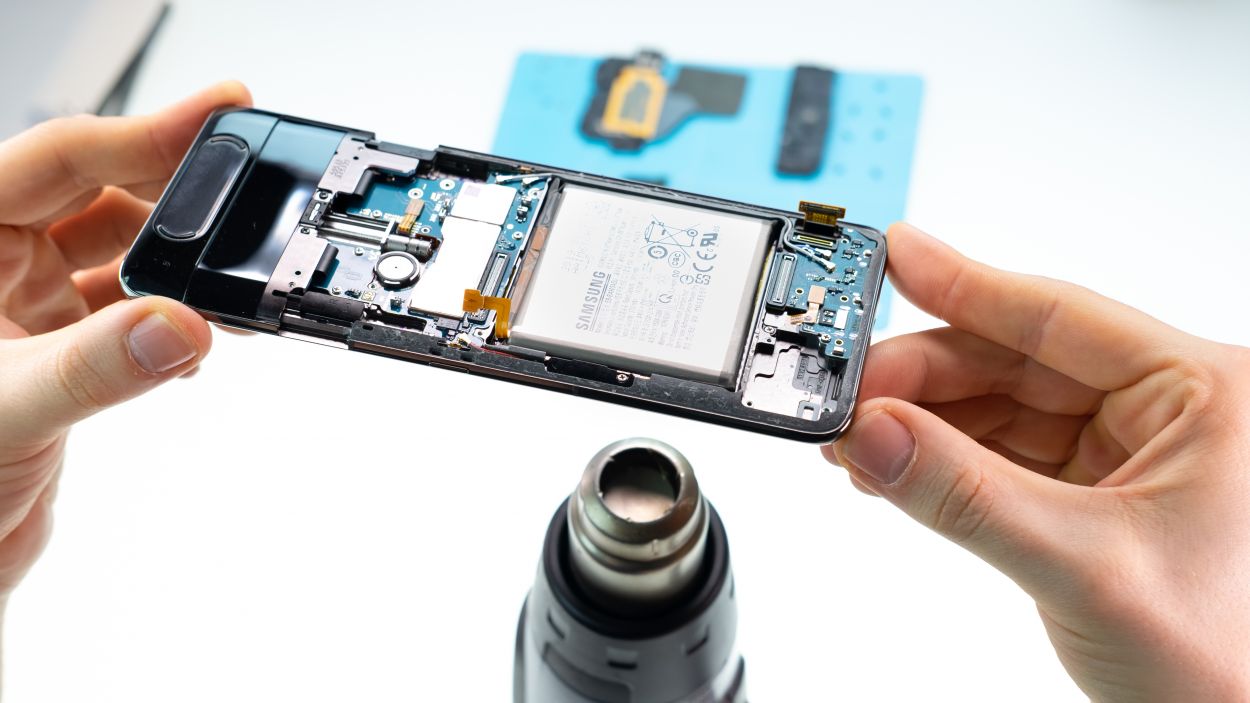
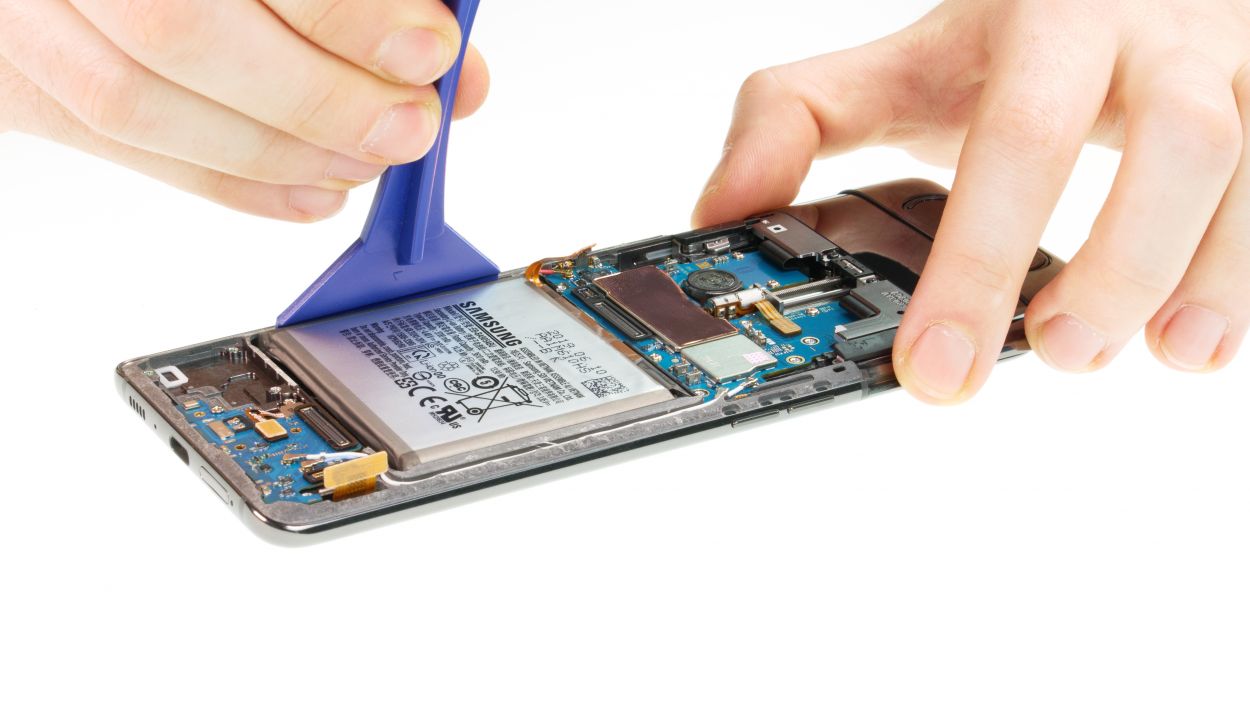
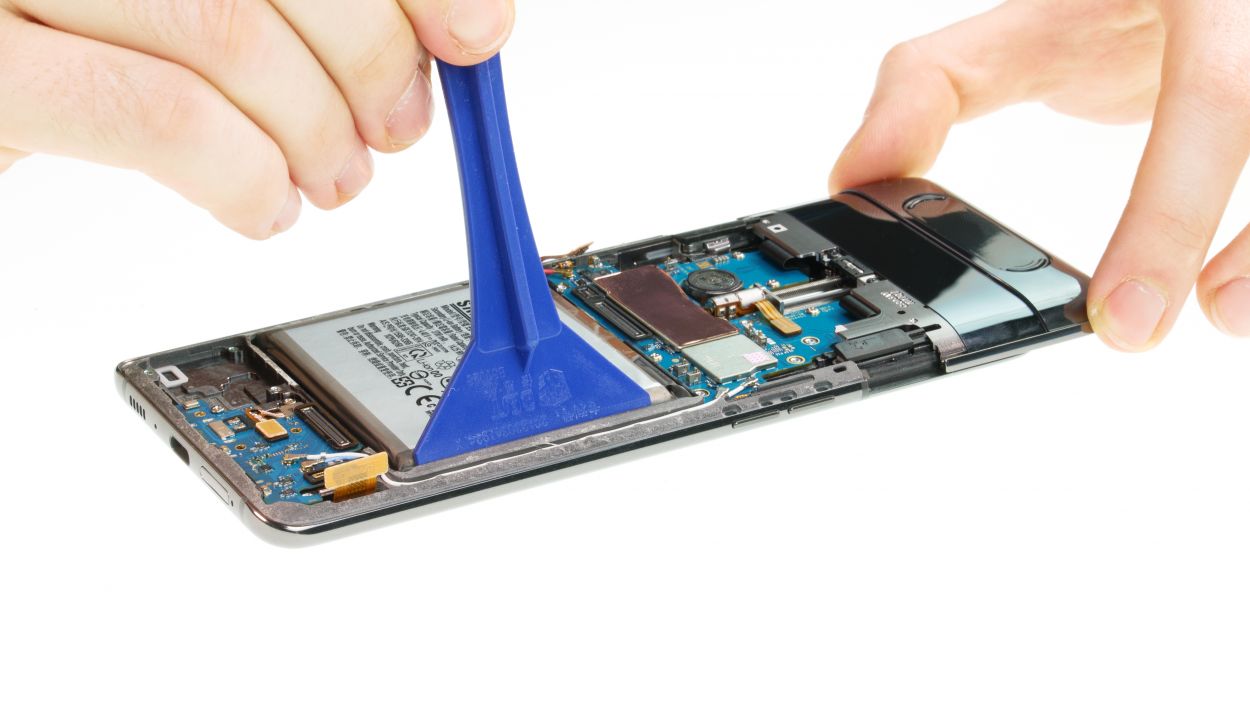
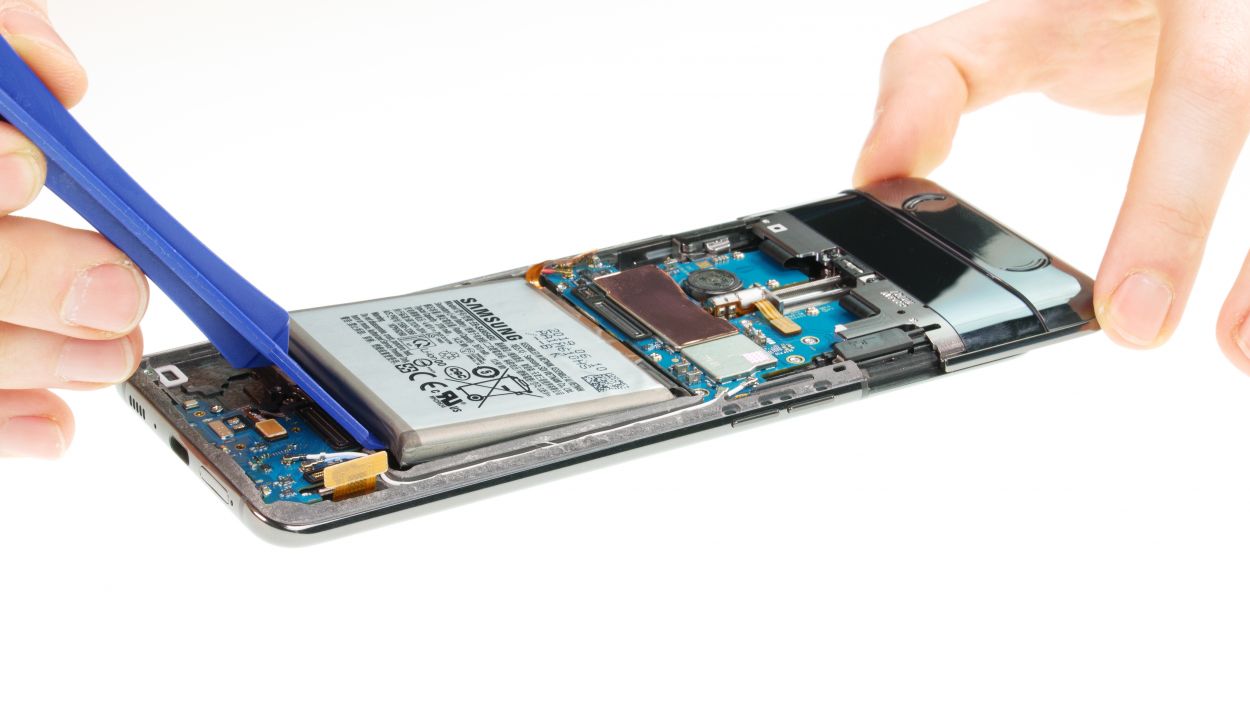

Hey there! When you’re heating things up, remember to give that battery some love from the sides of the display, not directly. It’s all about keeping it cozy without overdoing it! You’re doing awesome!
Remember to warm things up frequently and take your time! It’s super important to keep that battery safe; bending it or damaging its casing is a no-go. You’ve got this!
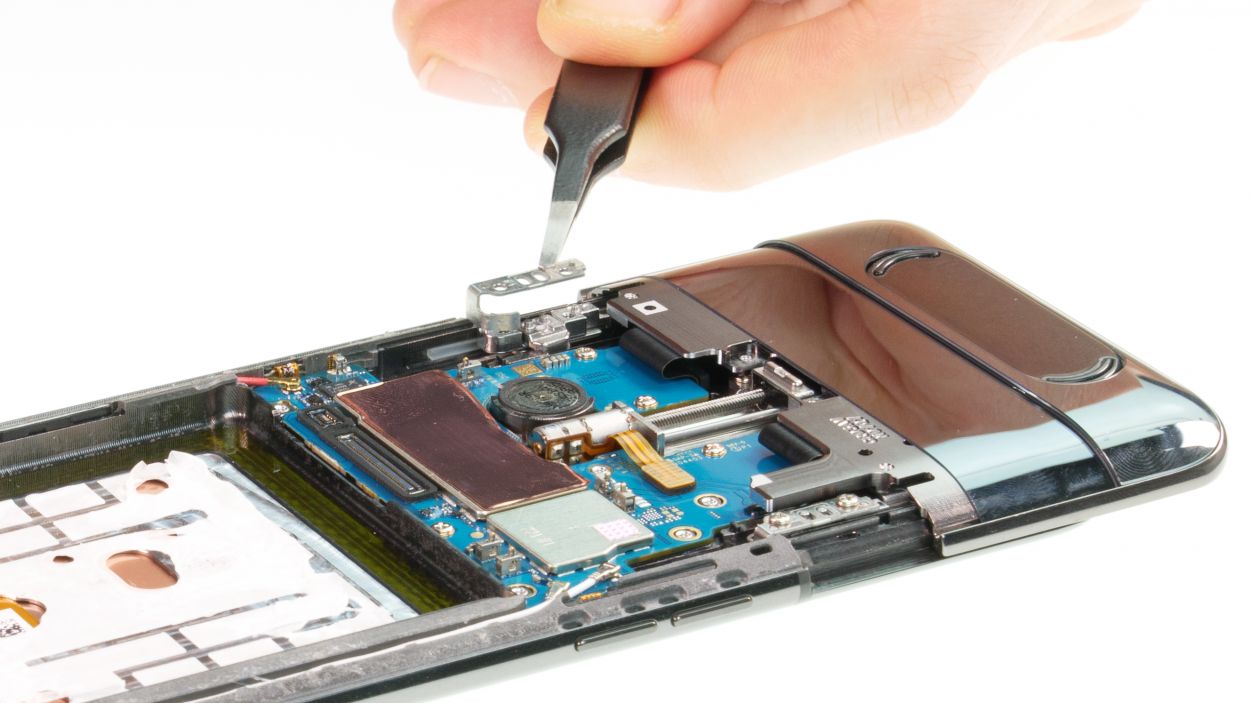
Step 6

1 × 2,9 mm Phillips
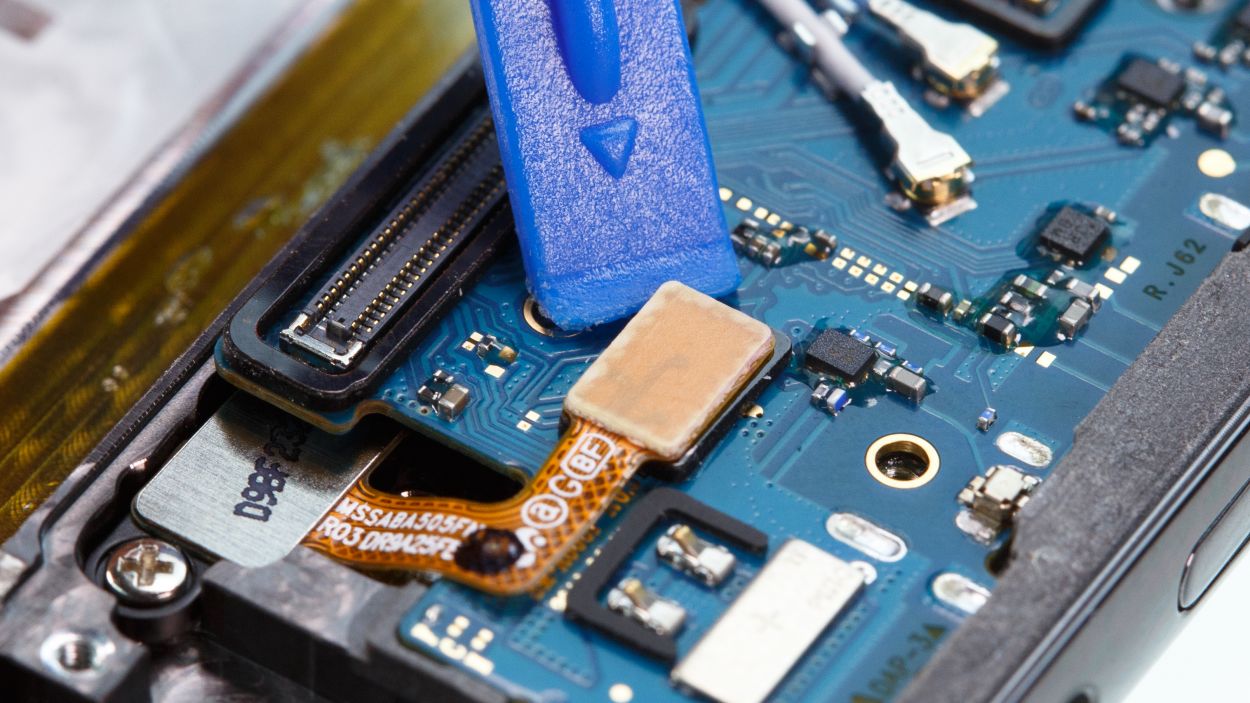
Antenna Connector
Fingerprint Connector
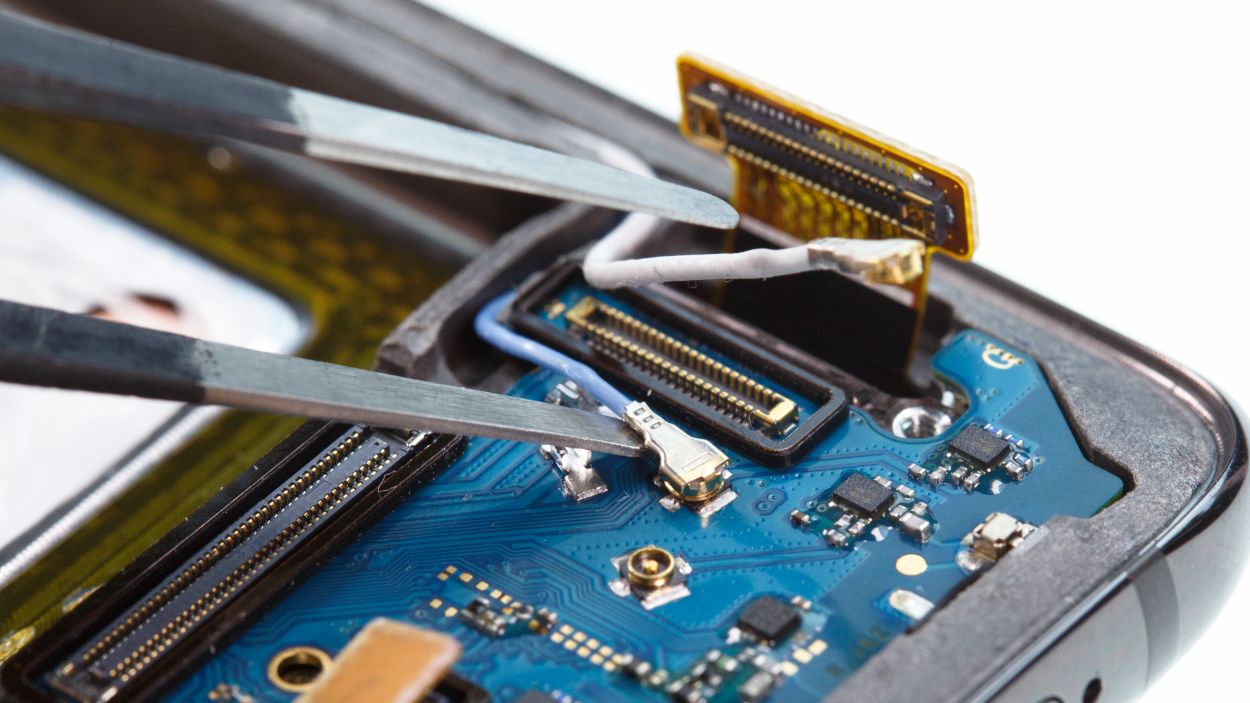
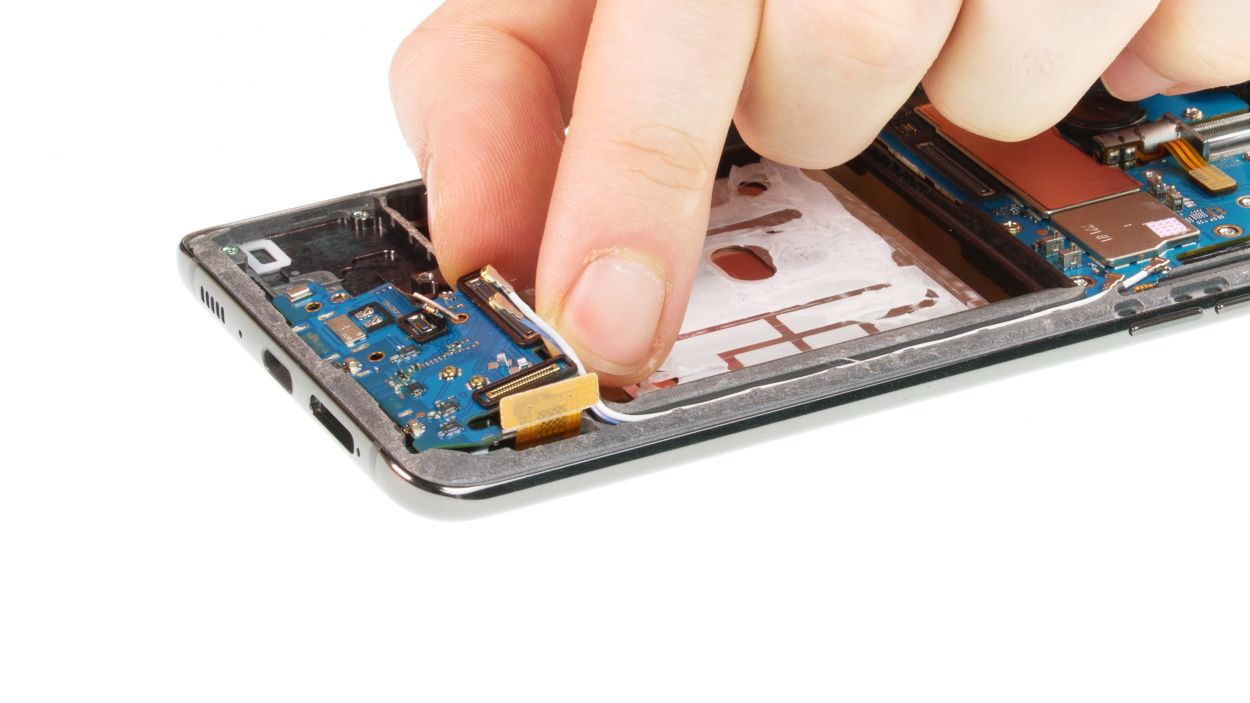
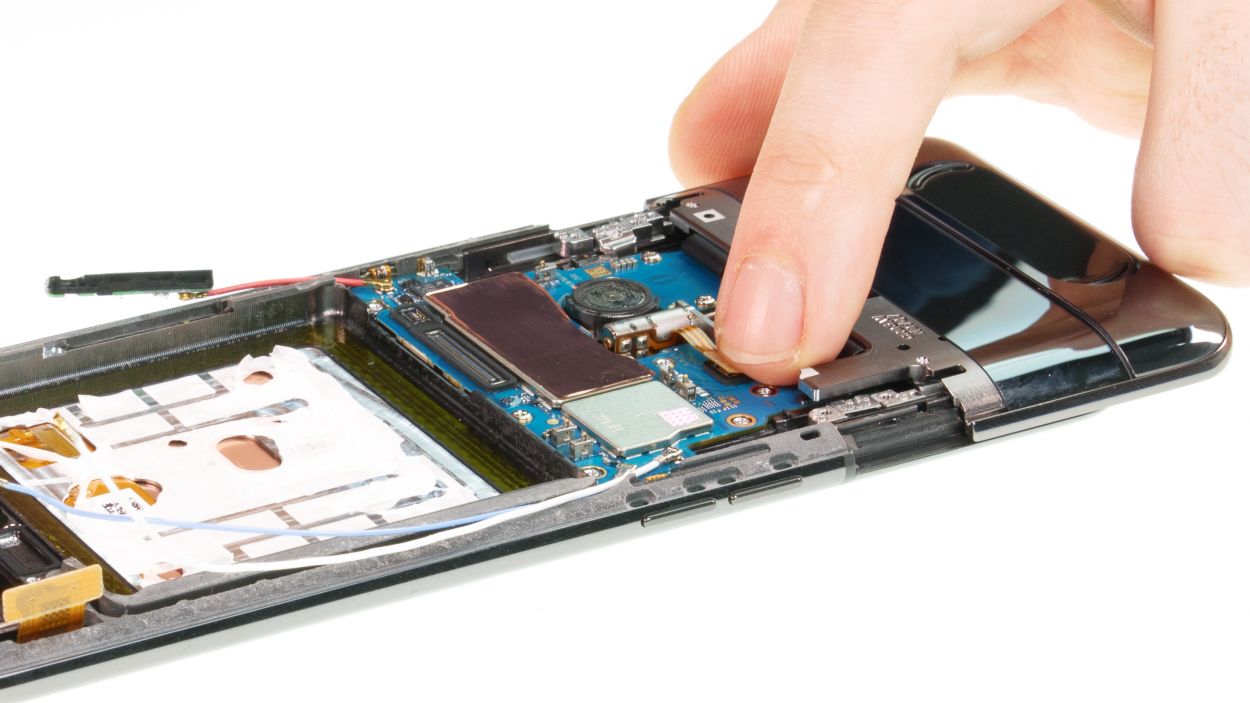
– First, take out that lone screw holding the USB board in place. It’s like the bouncer at the door—time to let it go!
– Next, give the fingerprint sensor connector a gentle disconnect. Treat it like a delicate handshake!
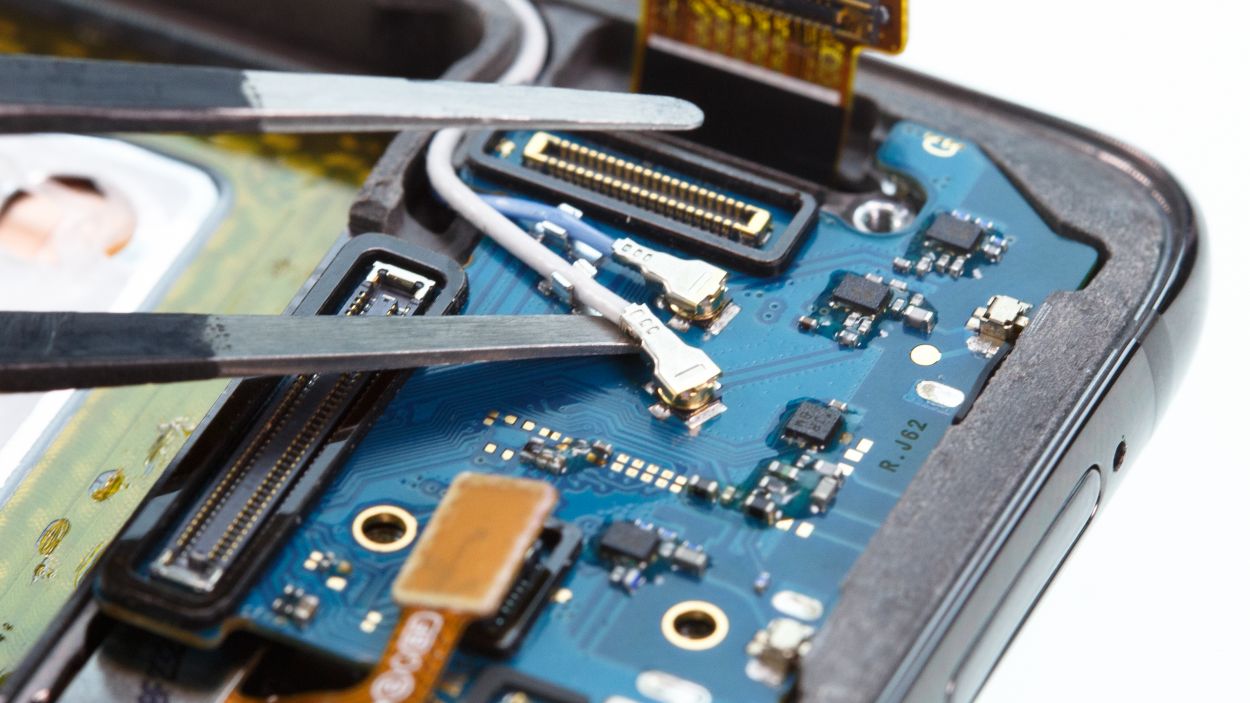
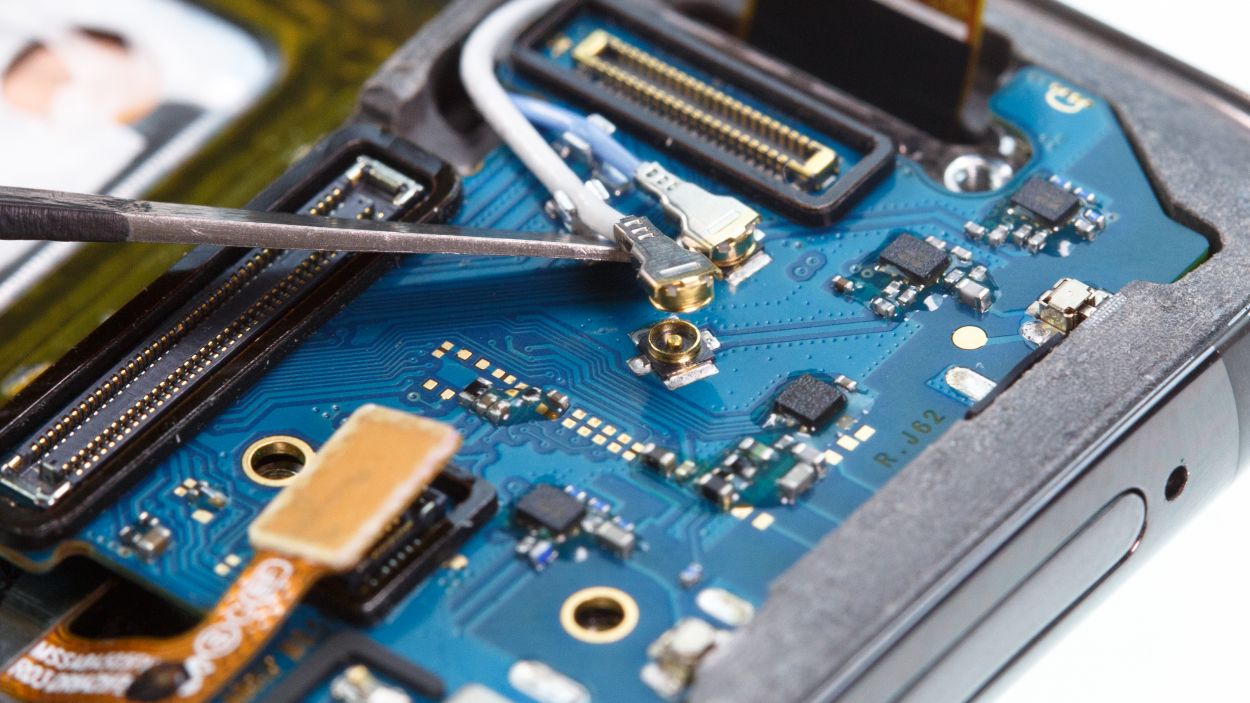
– Now, it’s time to disconnect those two antenna cables. Grab a pair of tweezers, slide them underneath the connectors, and give a little twist to loosen them up. Easy peasy!
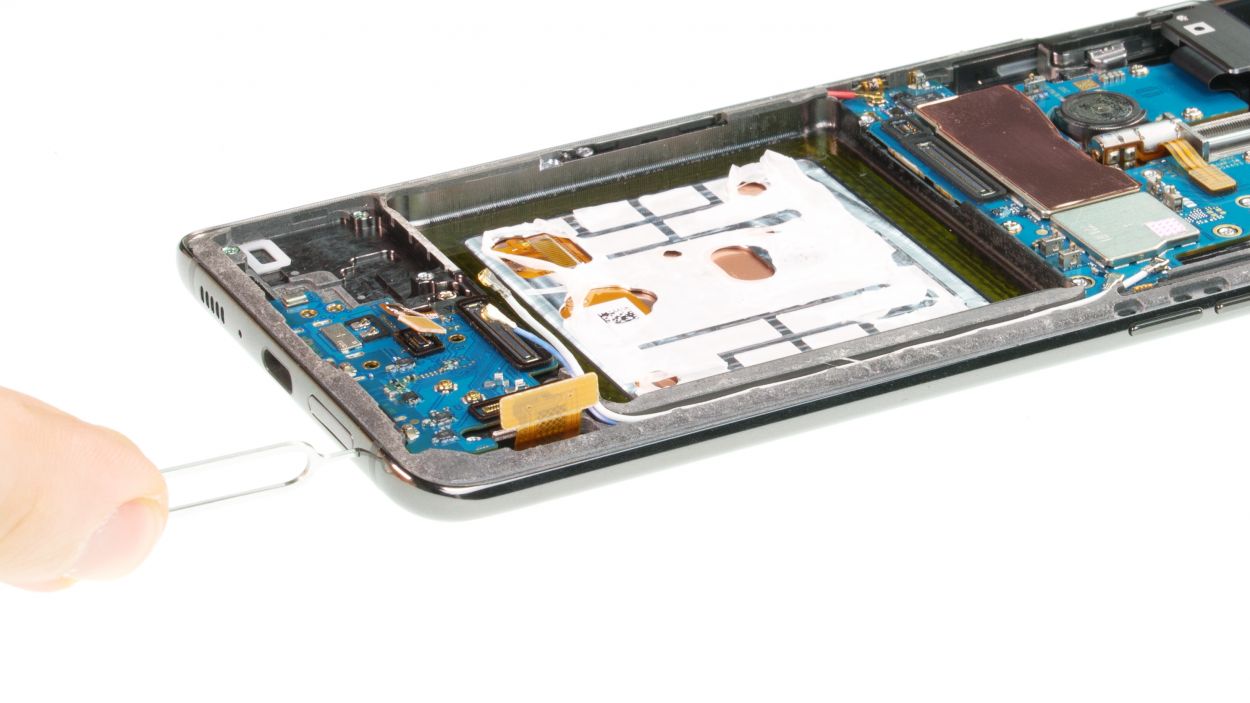
– Don’t forget to pop out the SIM card holder from the device. It’s like letting a friend out for some fresh air!
– With that done, you can now lift the lower circuit board out of the device. Just bend those cables a smidge to the side so they don’t get tangled with the board. You’re almost there!
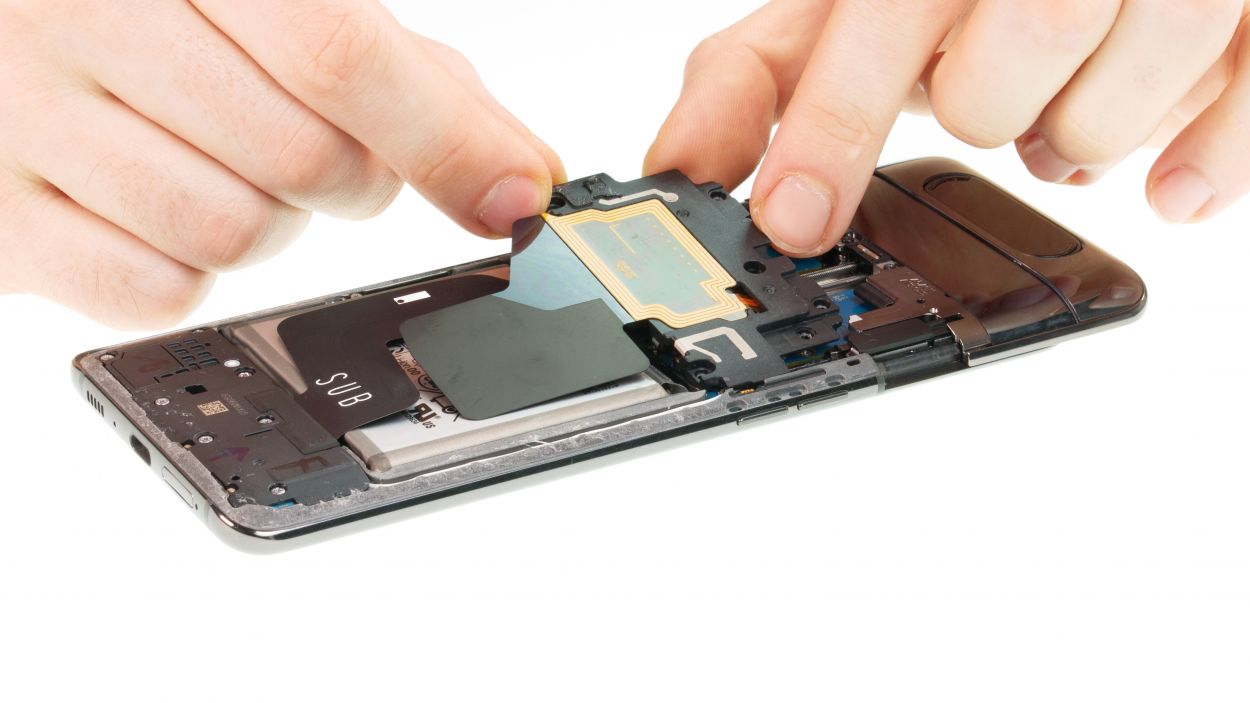
Step 7
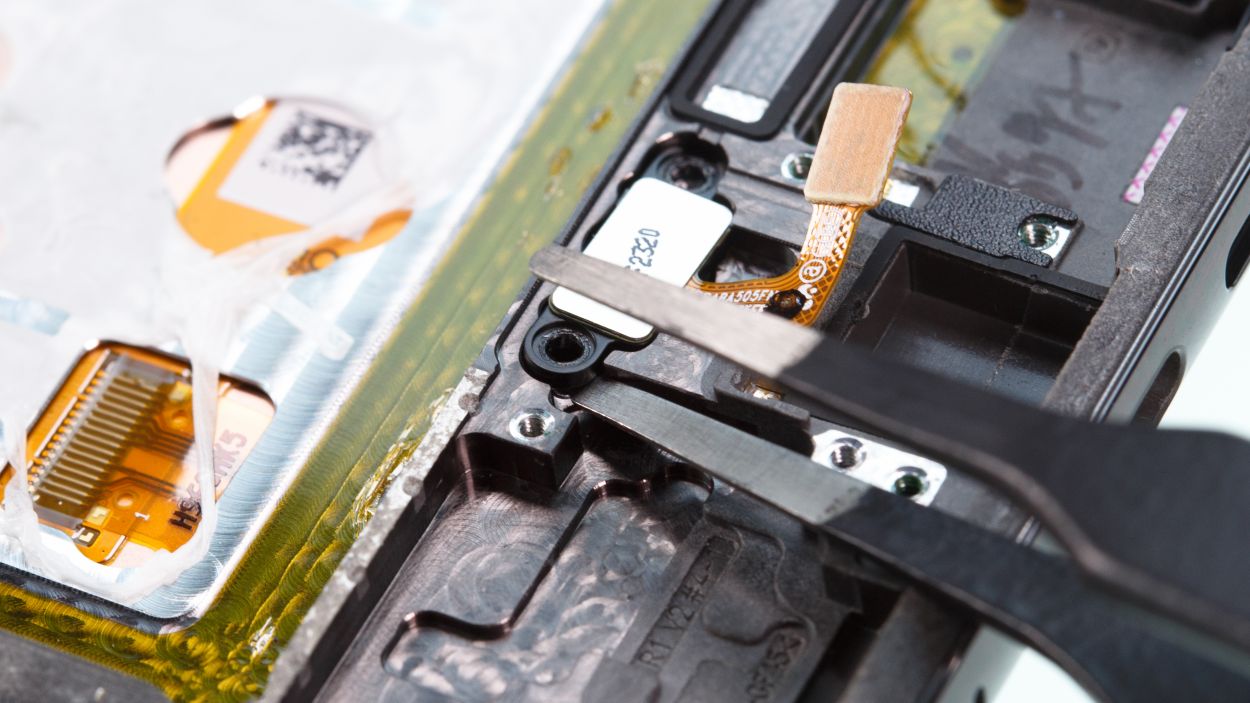


2 × 2,9 mm Phillips
– Loosen the two screws of the fingerprint sensor.
– Then lever with tweezers on the left plastic guide and take the sensor out of the device.
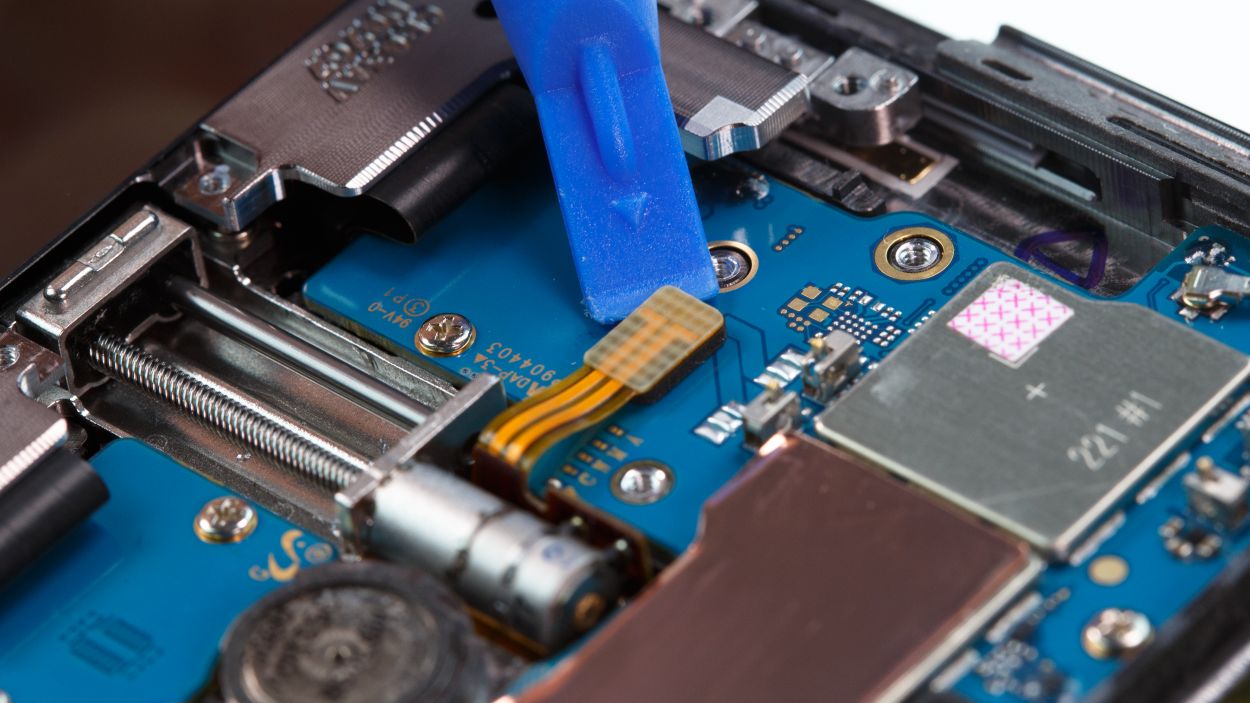
Step 8


2 × 2,3 mm Phillips
4 × 2,4 mm Phillips
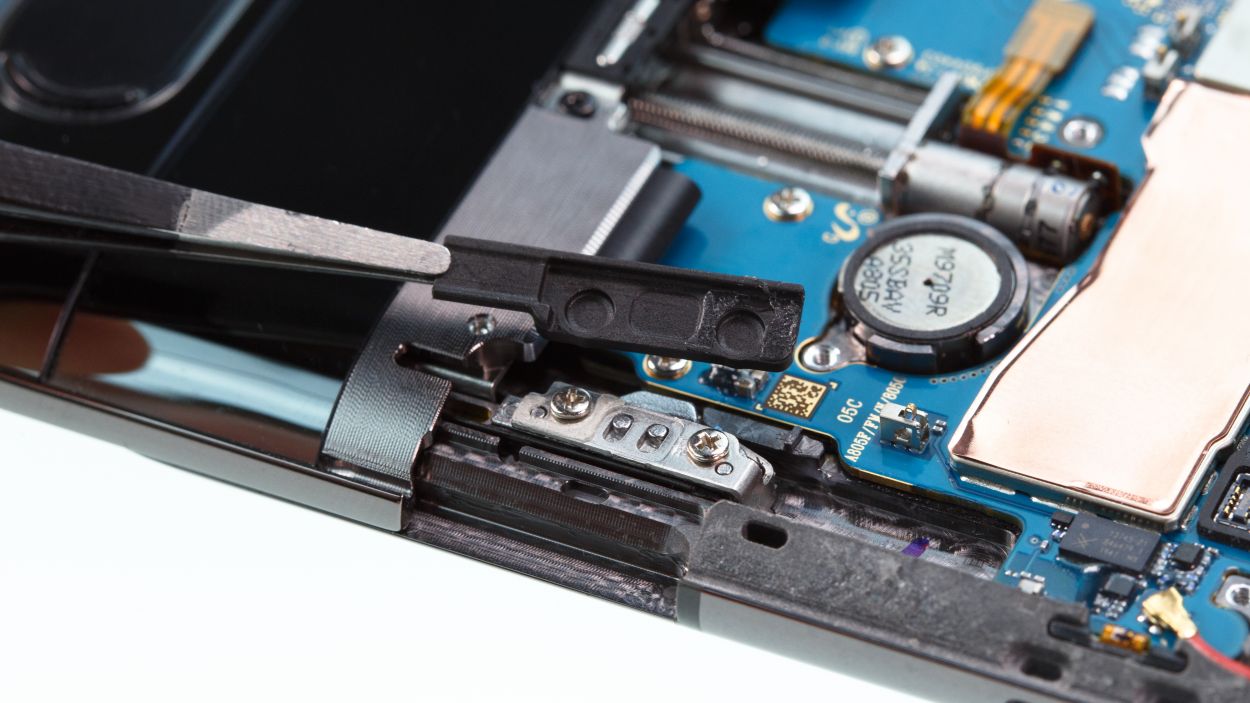
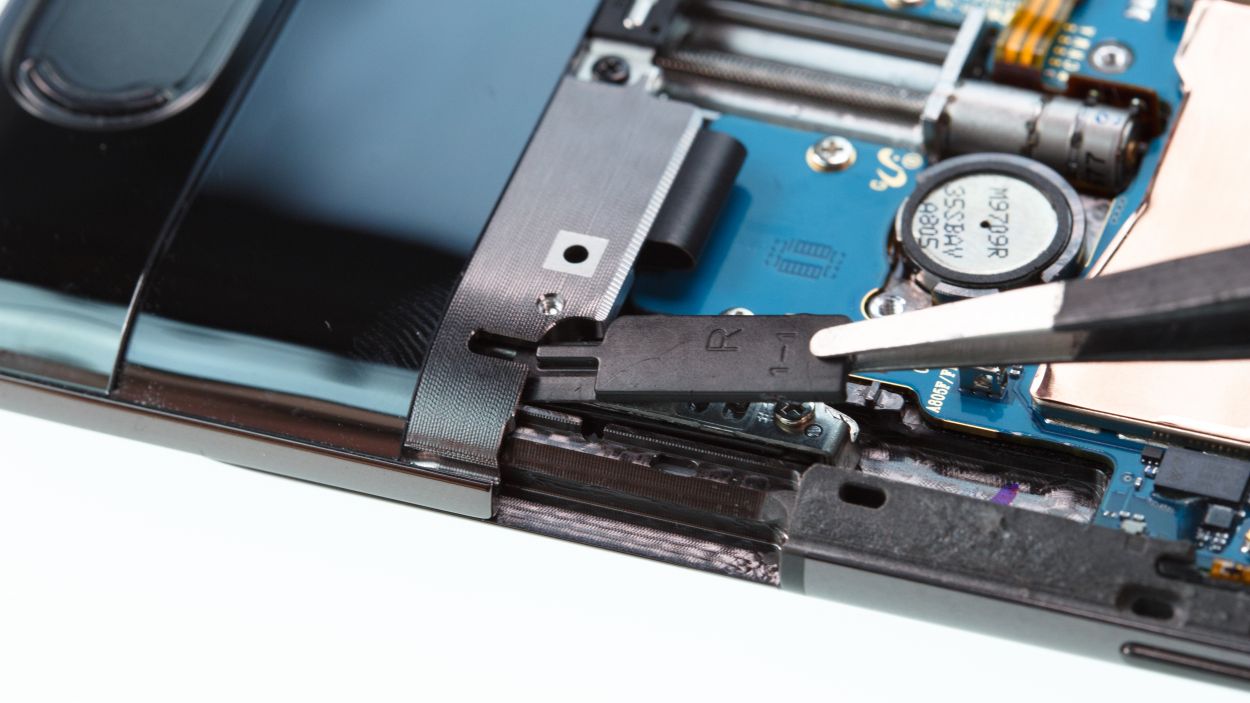
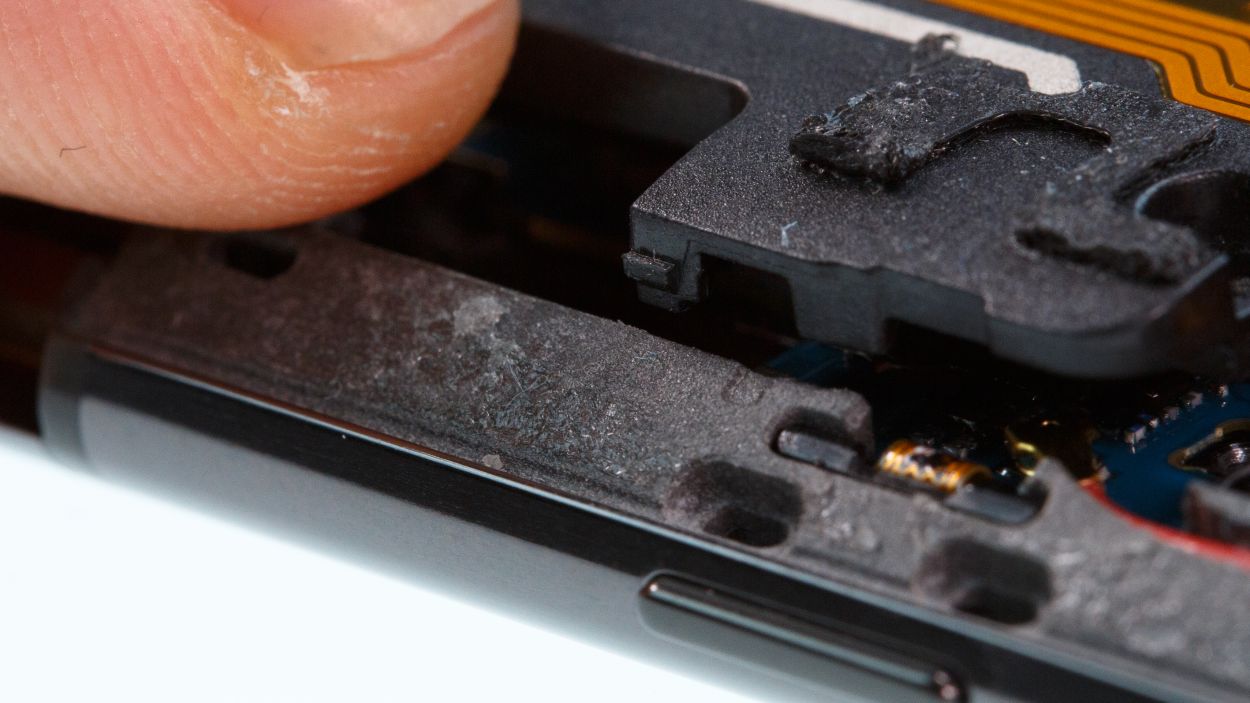
– First, let’s get those two plastic covers off the sides, marked ‘R’ and ‘L’—they’re just begging to be removed!
– Next, loosen up the screws on those metal covers. It’s like giving them a little stretch before the big reveal!
– Now, carefully take out the middle, right, and left covers from the device. You’re doing great—keep it up!
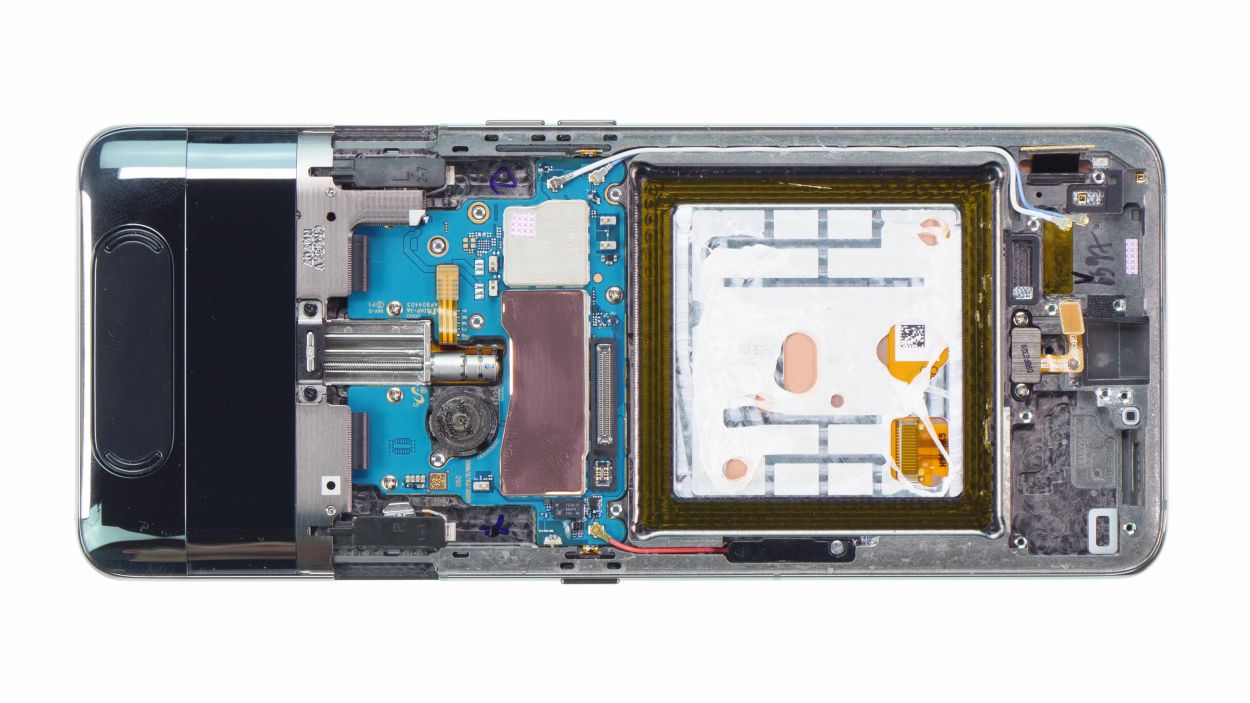
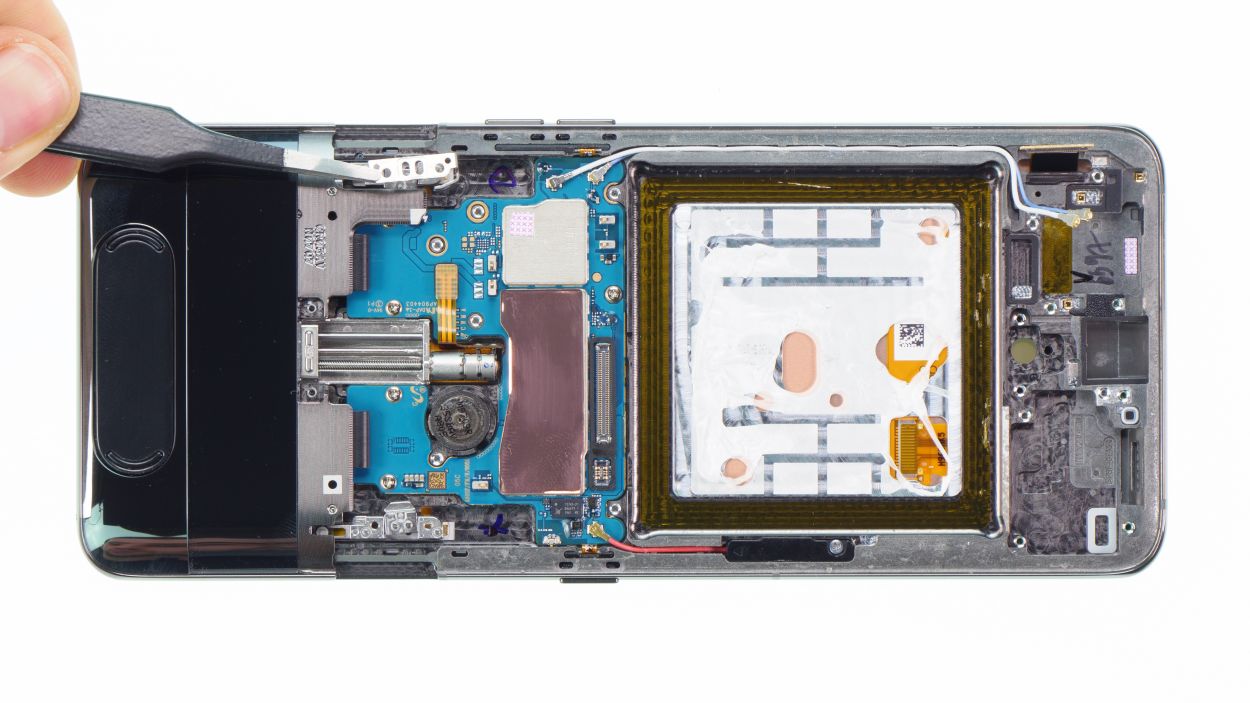
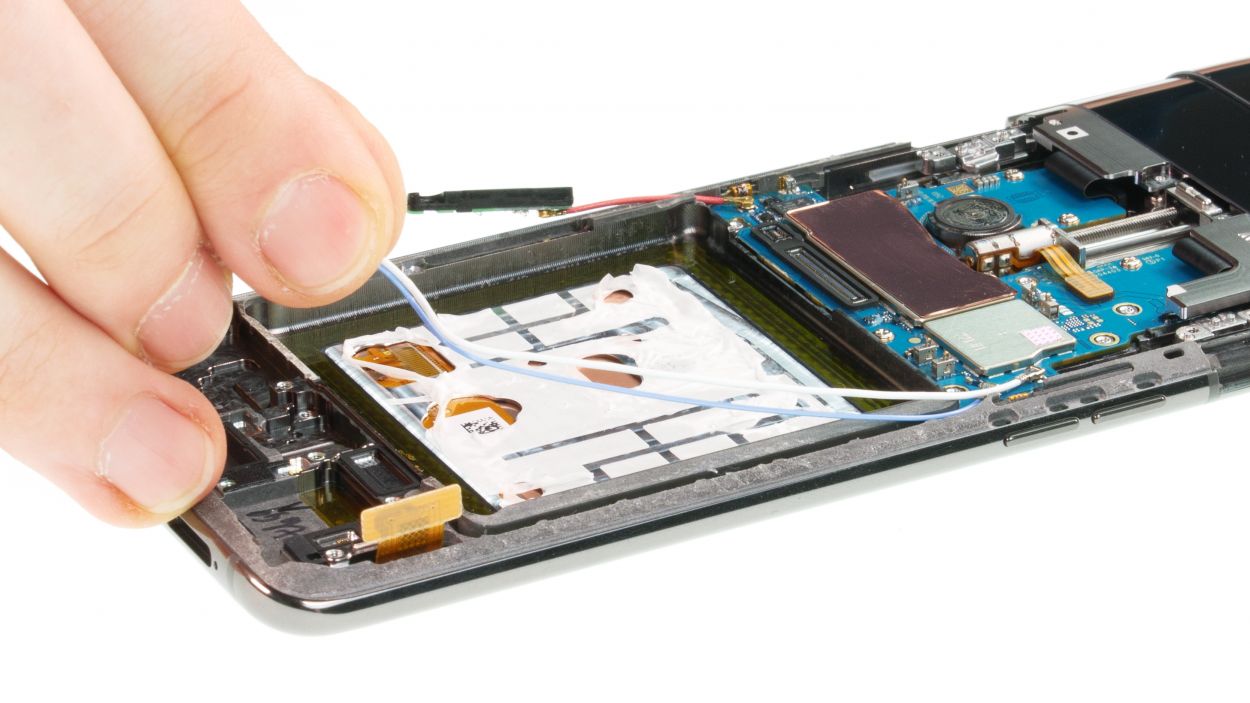
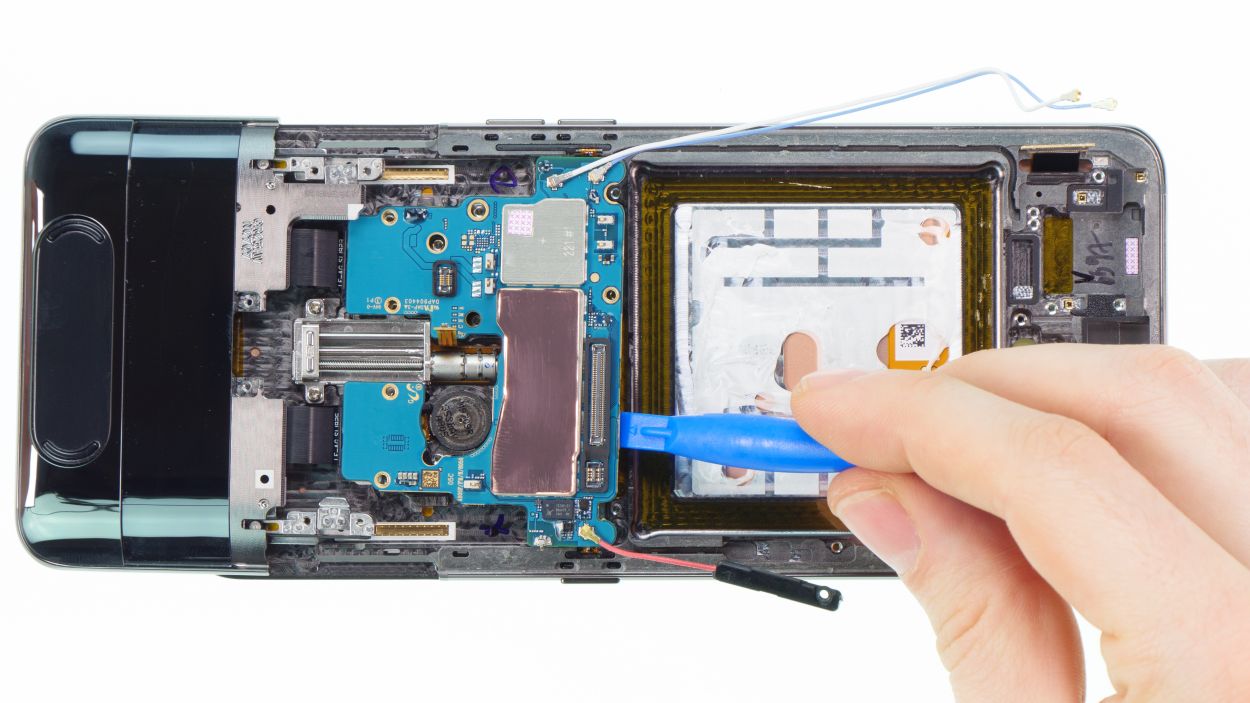
Step 9


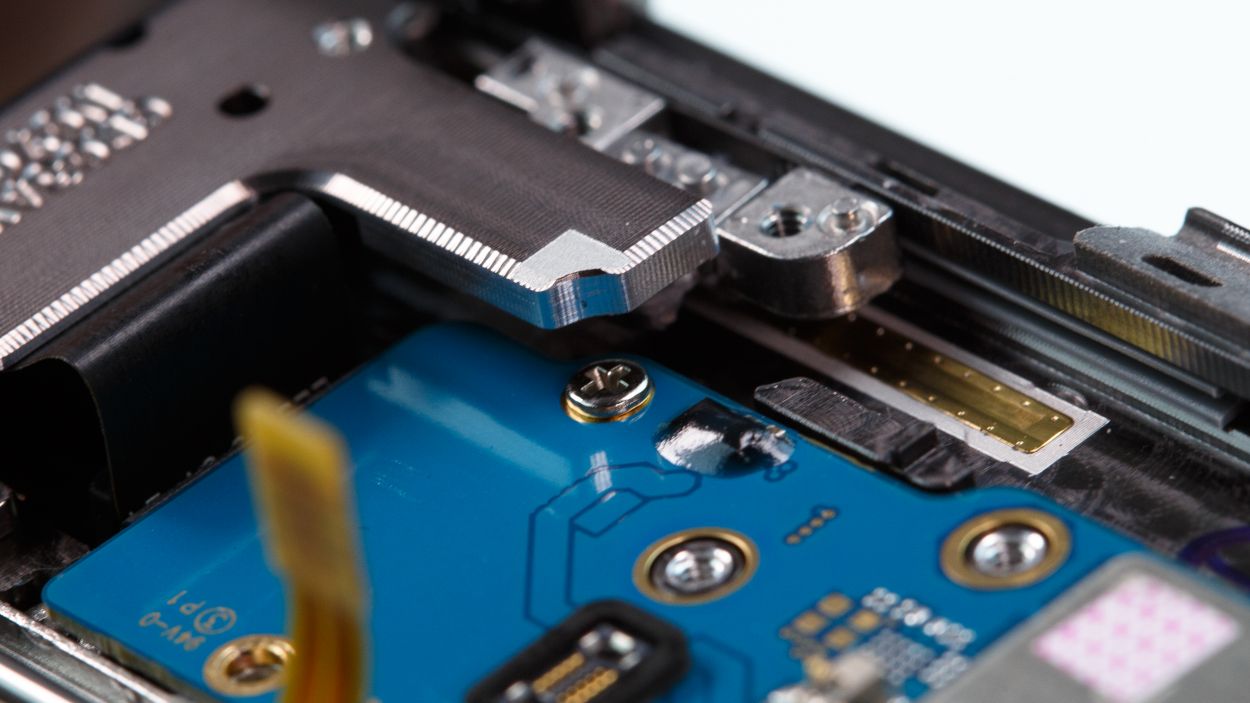

5 × 2,9 mm Phillips
1 × 3,9 mm Phillips
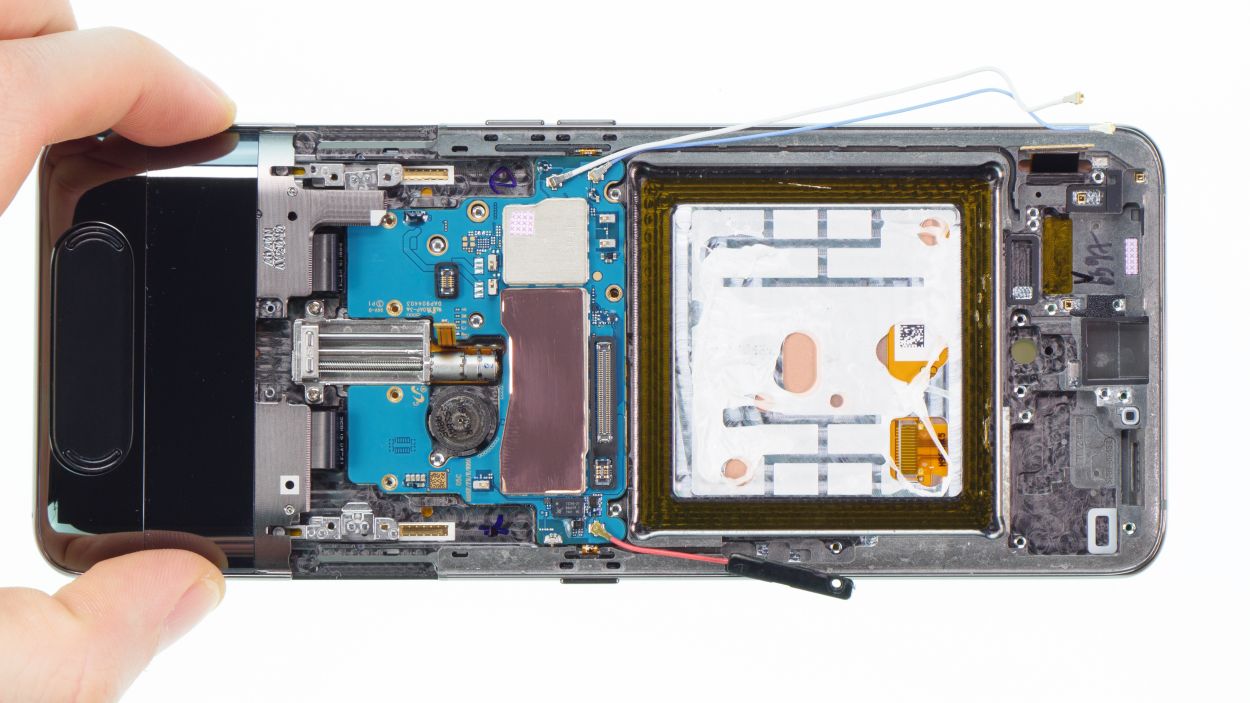
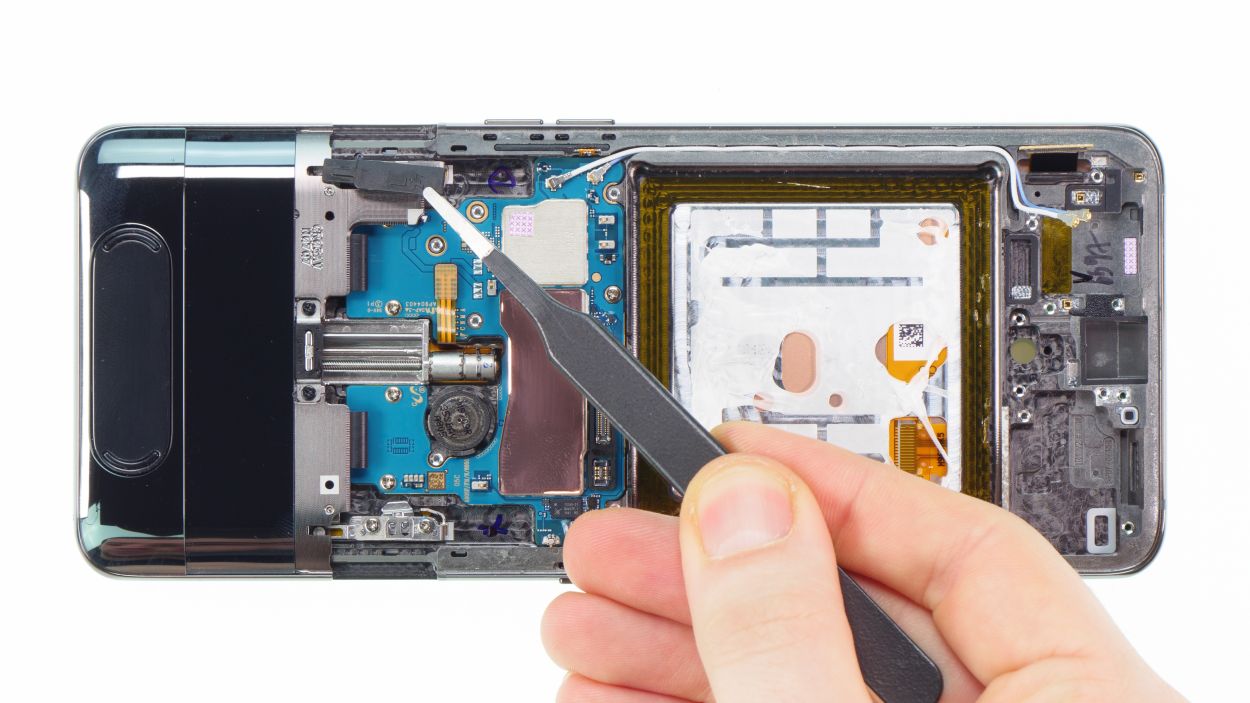
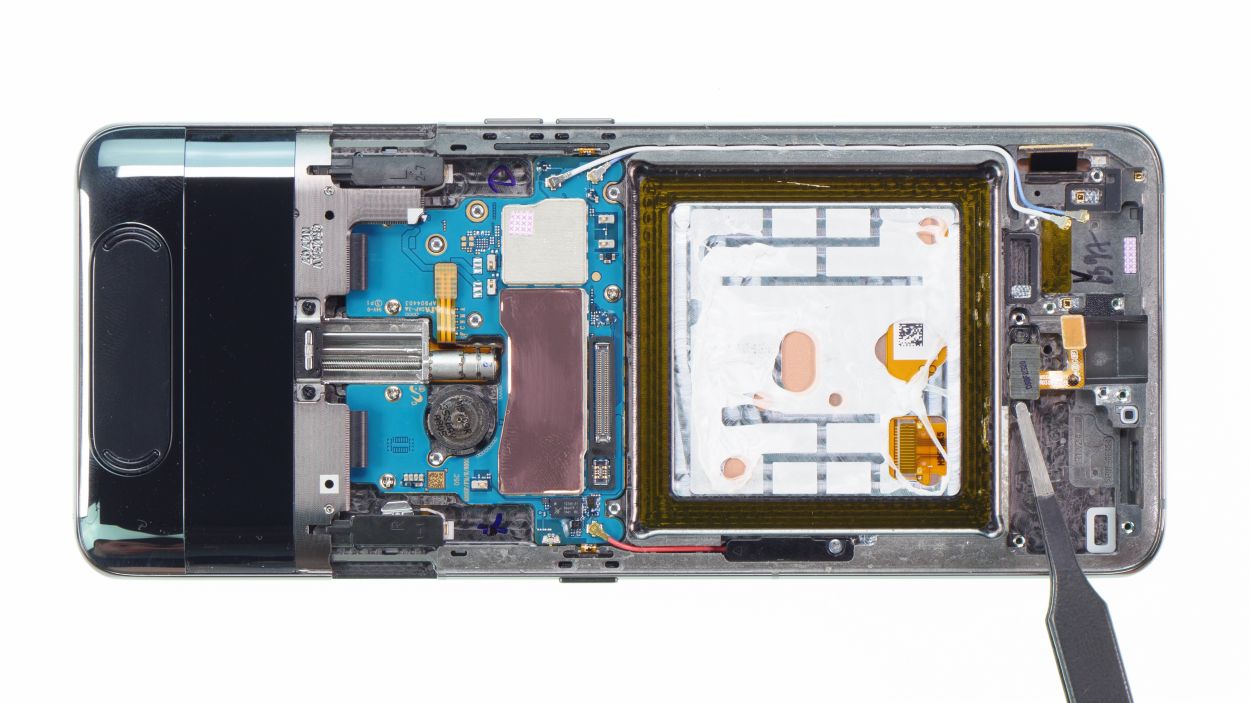
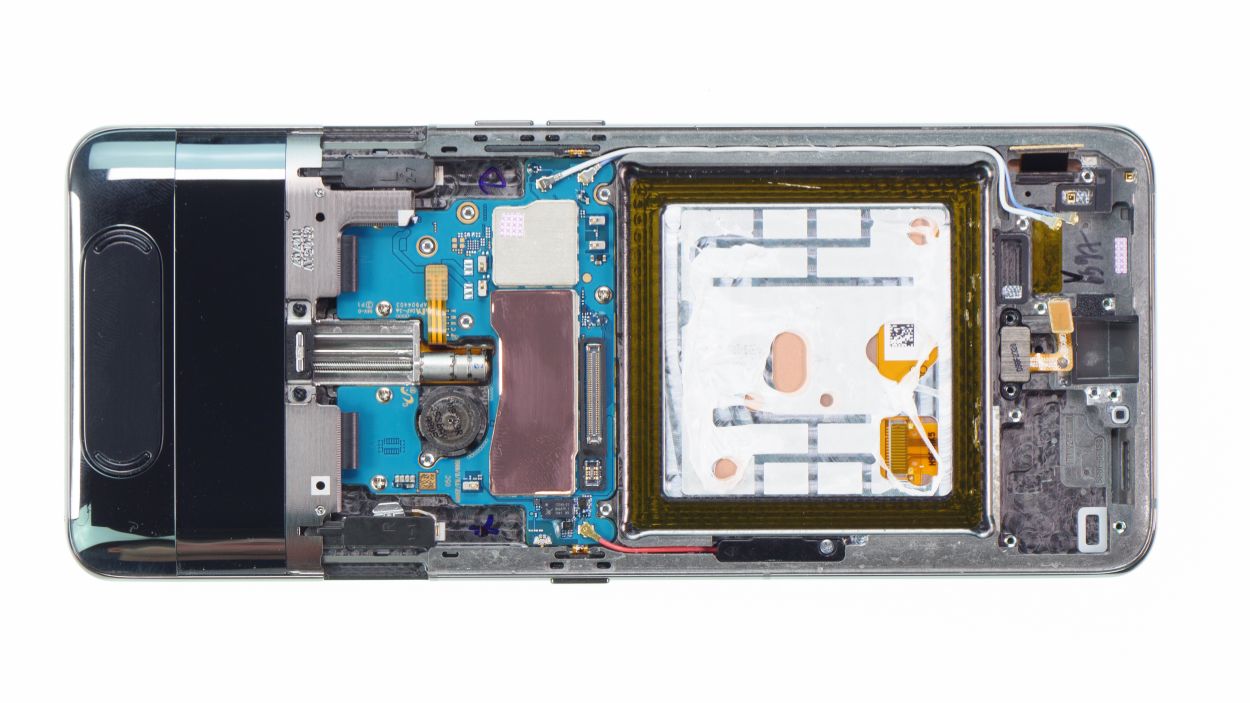
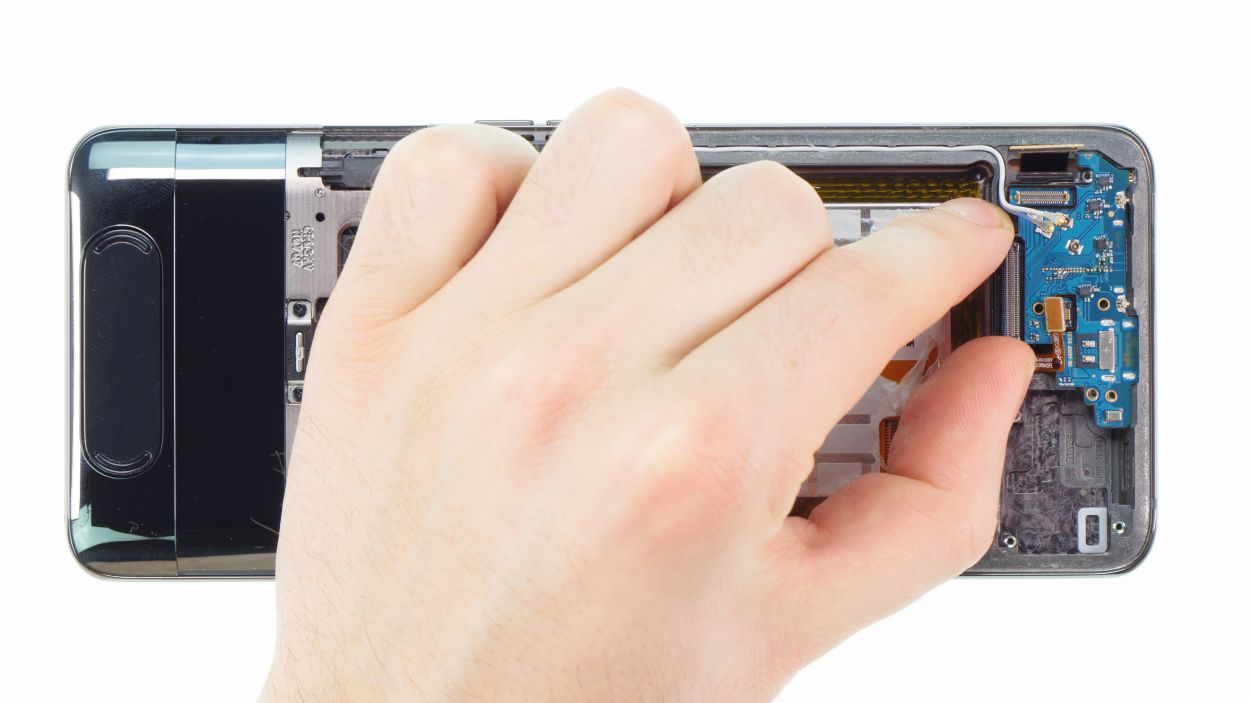
– First, let’s untangle those cables! Gently detach the red antenna cable on the left and the white and blue cables on the right from their snug little homes in the frame.
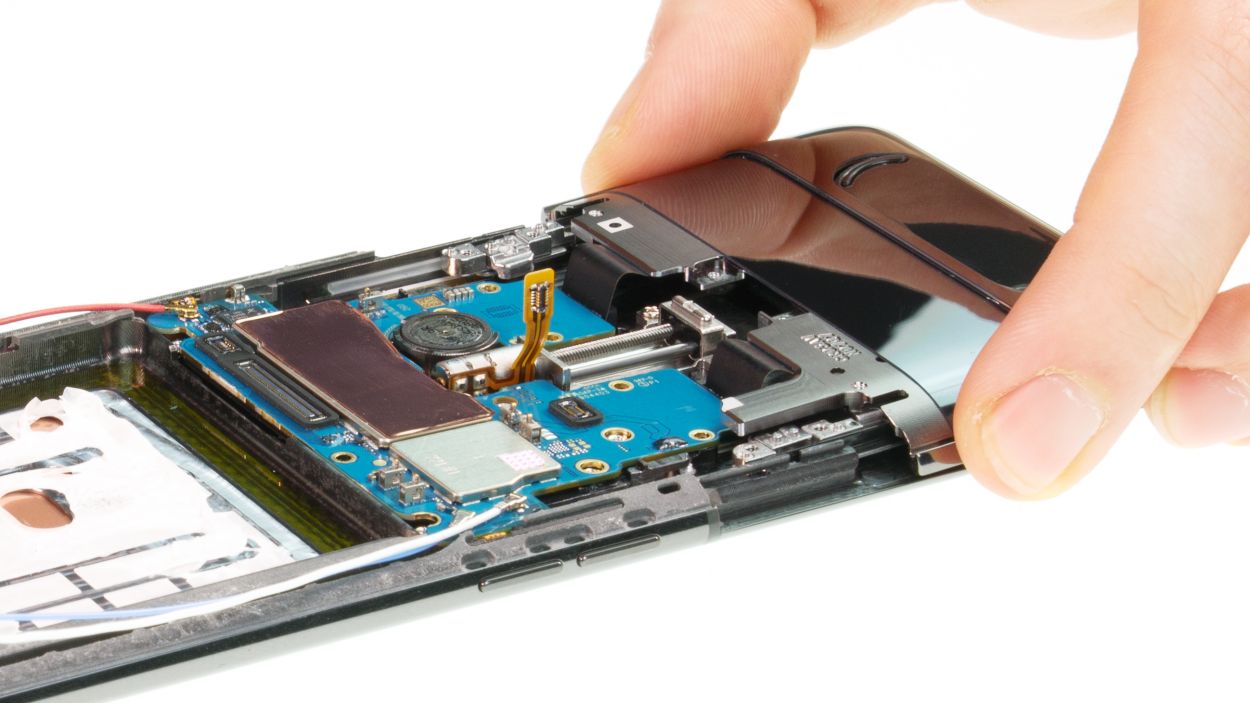
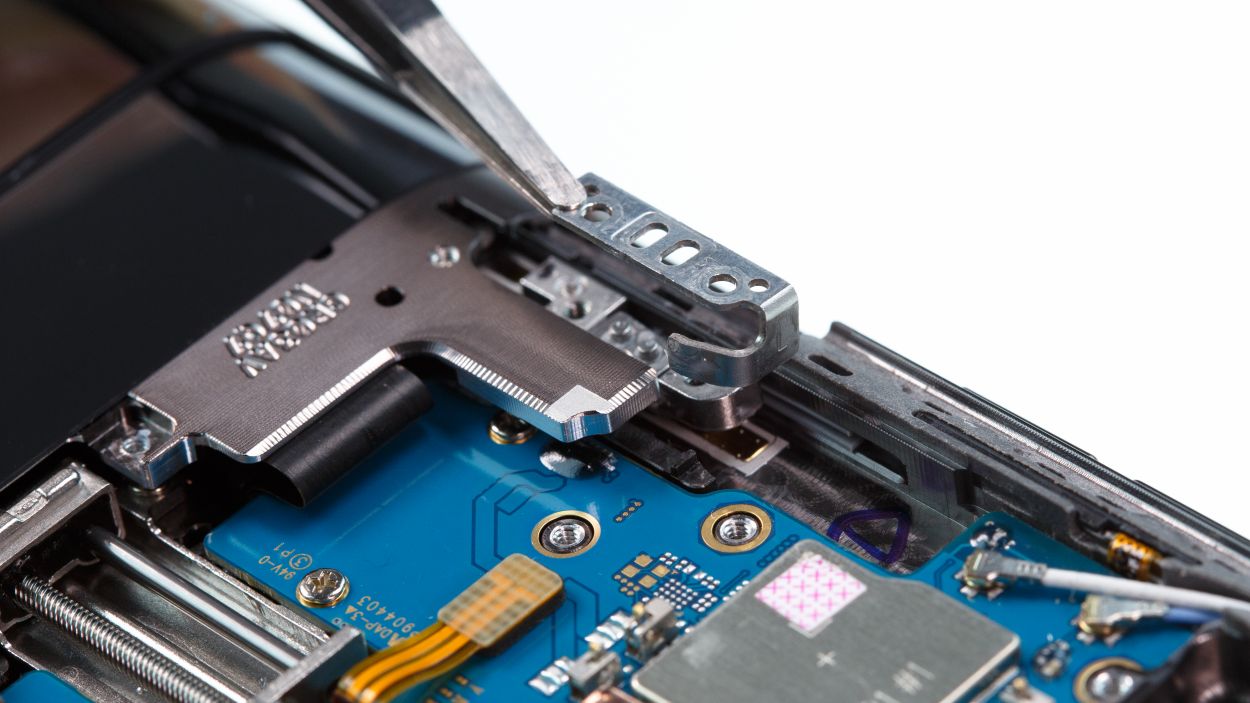
– Next, it’s time to set the camera motor free! Disconnect its connector from the main board with care.
– Now, there’s a sneaky screw hiding below the camera module that’s keeping the mainboard in place. Give the component a gentle tug upwards to loosen all five screws.
– Once you’ve done that, give the camera module a little lift until it slides right out of its side guides.
– Grab your trusty spudger and carefully nudge the main board upwards just a tad.
– With that done, you can set the camera module and the main board aside for now. You’re making great progress!
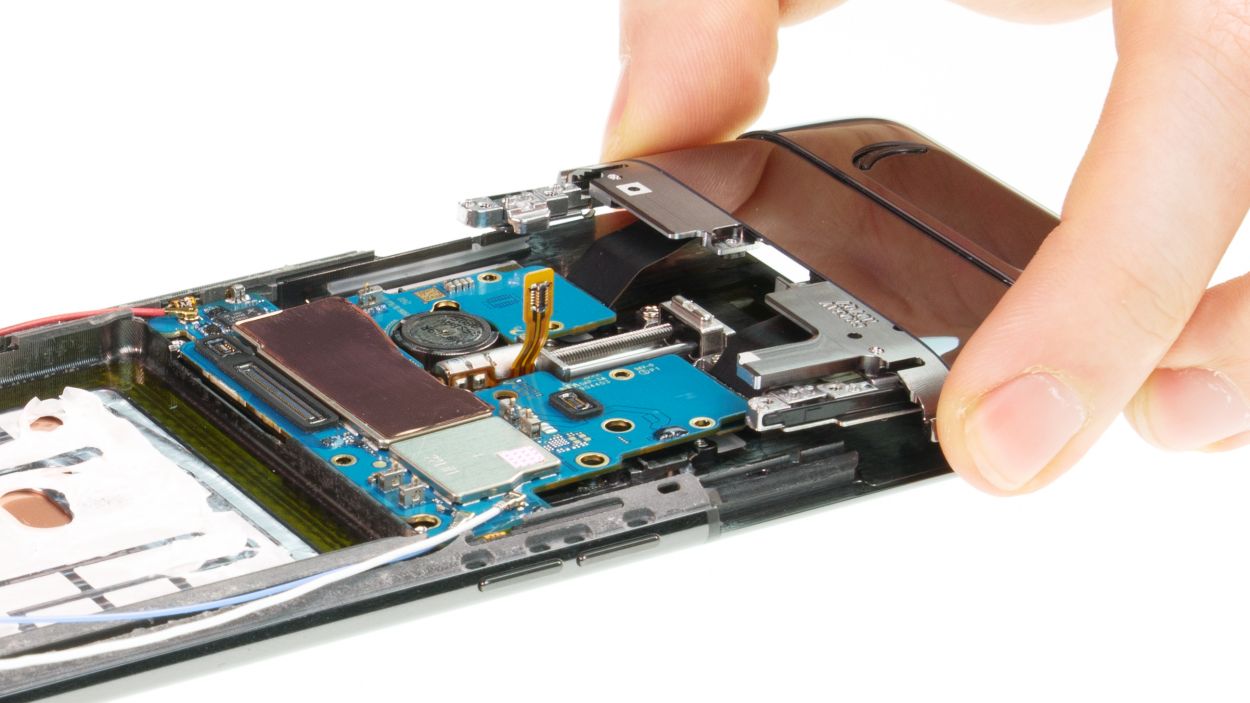
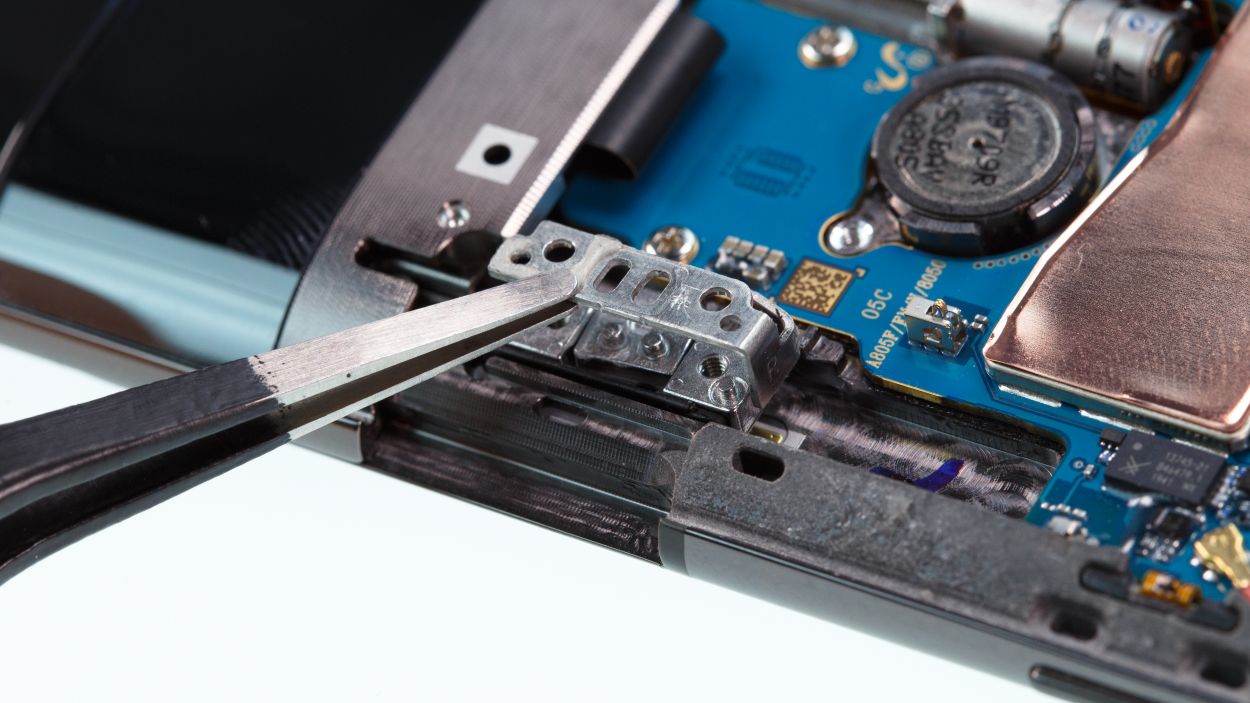
Step 10
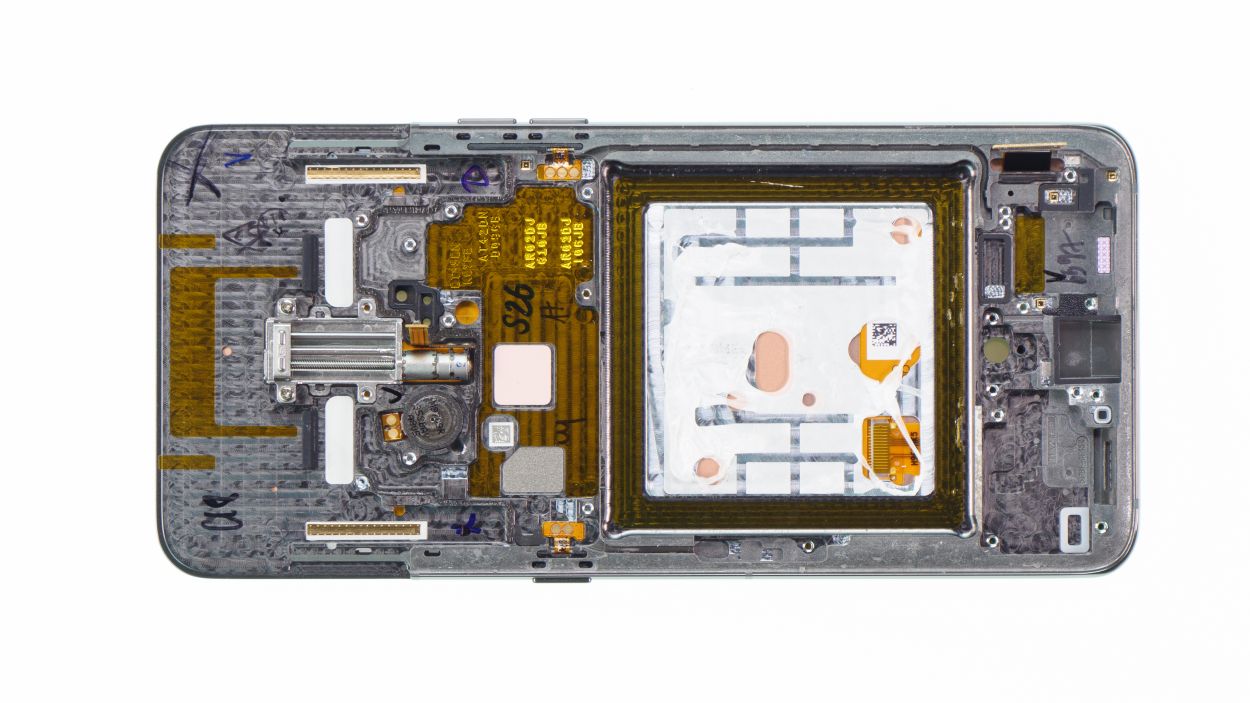
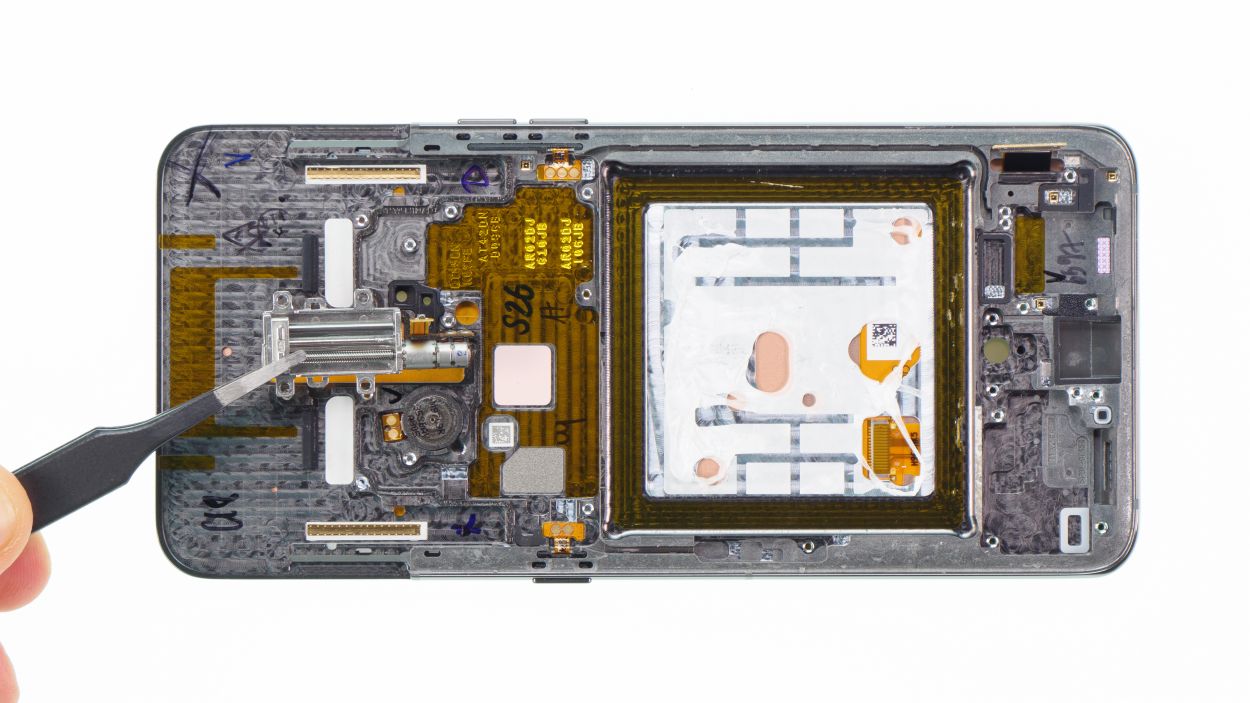
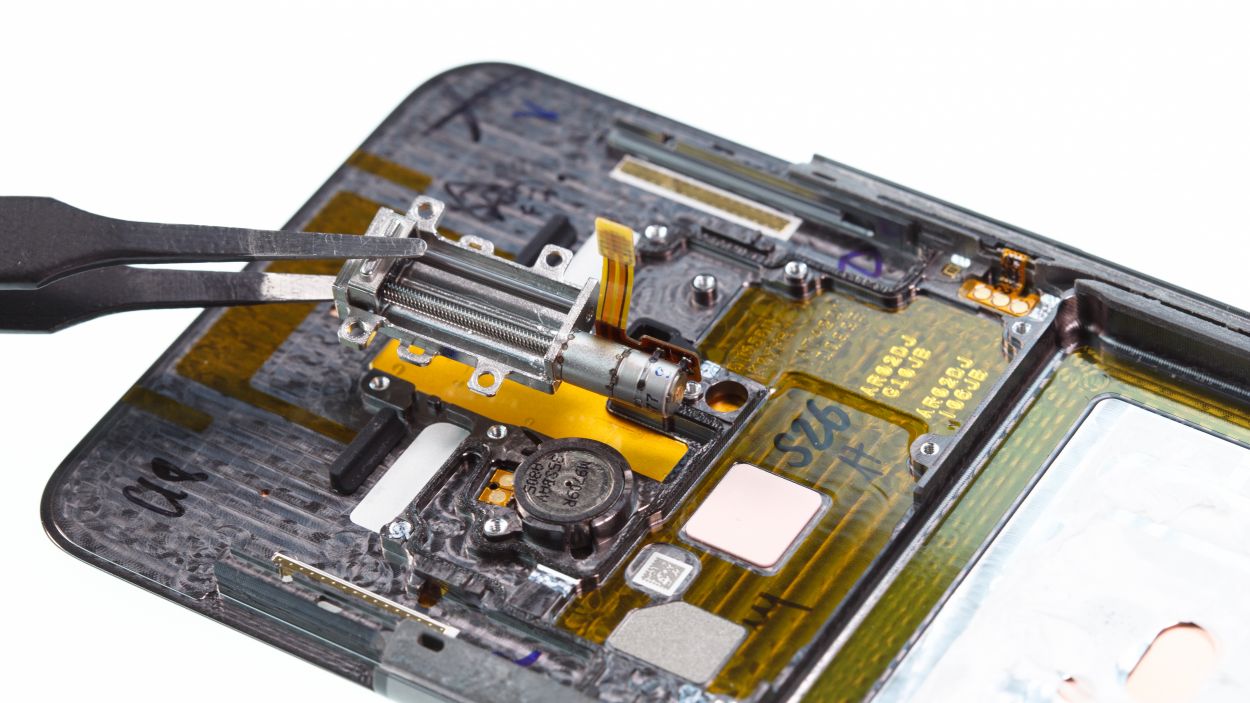
2 × 2,9 mm Phillips
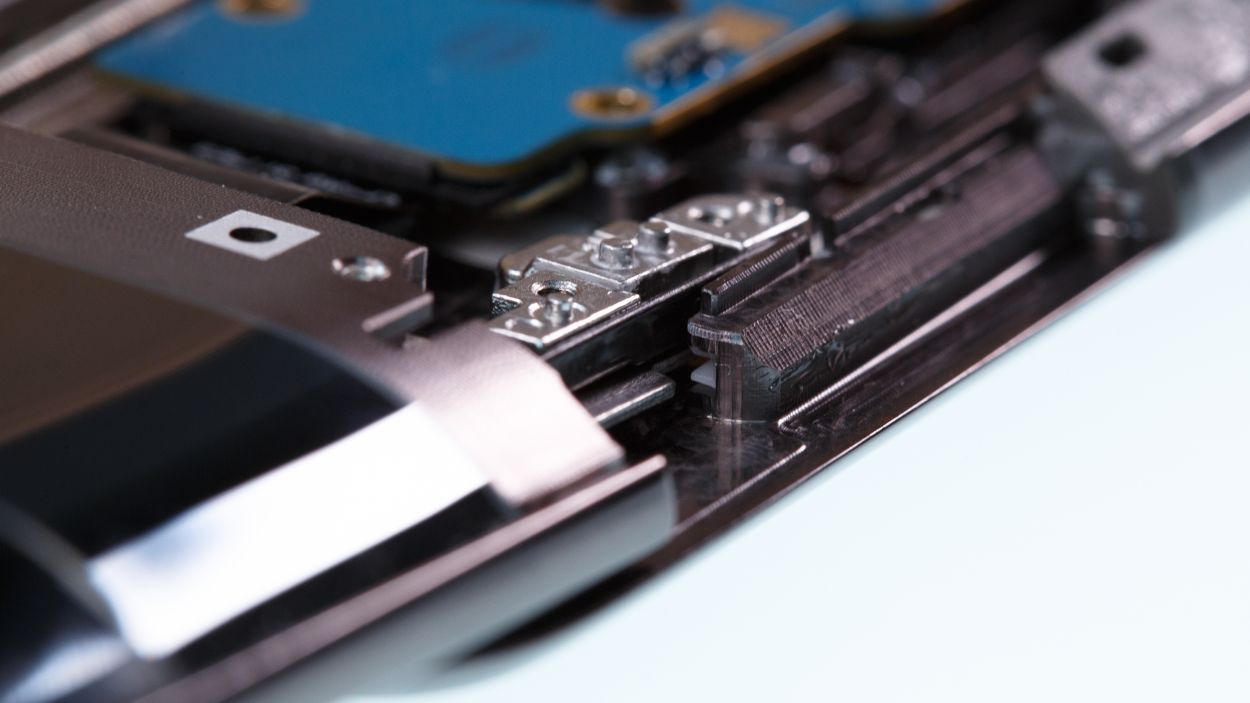
– Start by loosening those screws that hold the camera motor in place—it’s time for it to get a little freedom!
– With those screws loosened, the camera motor is now ready to be gently lifted out of the device.
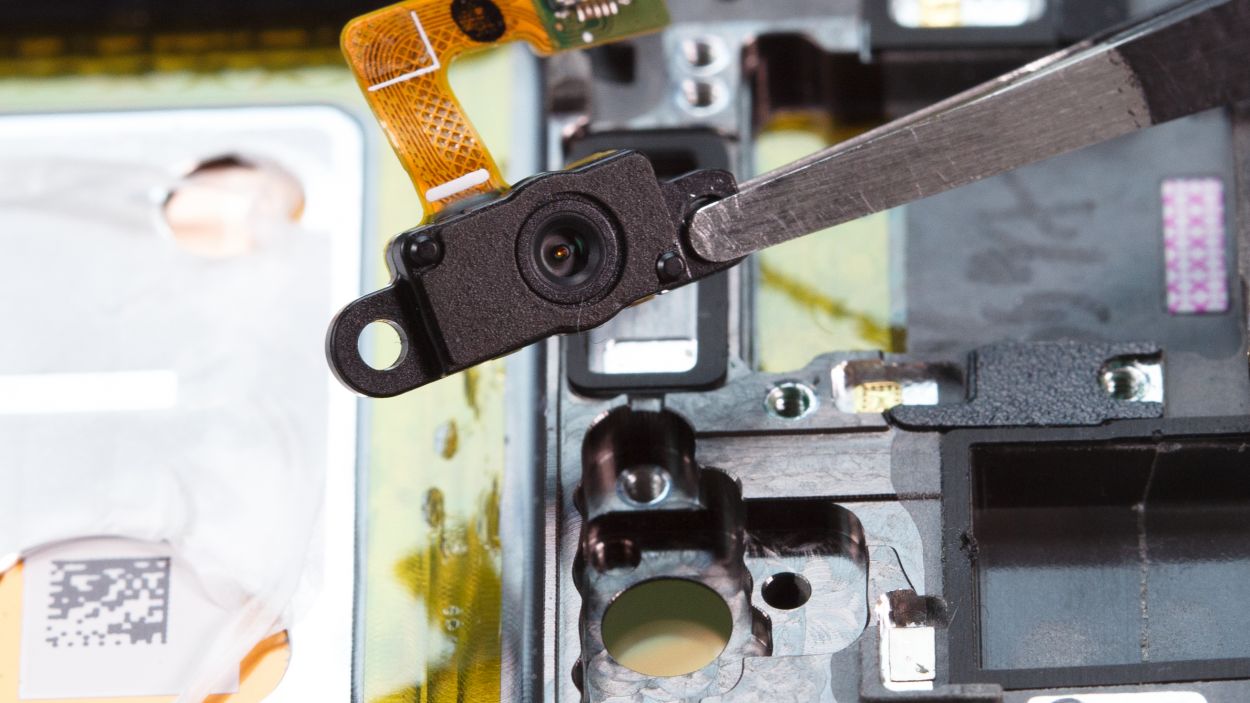
Step 11
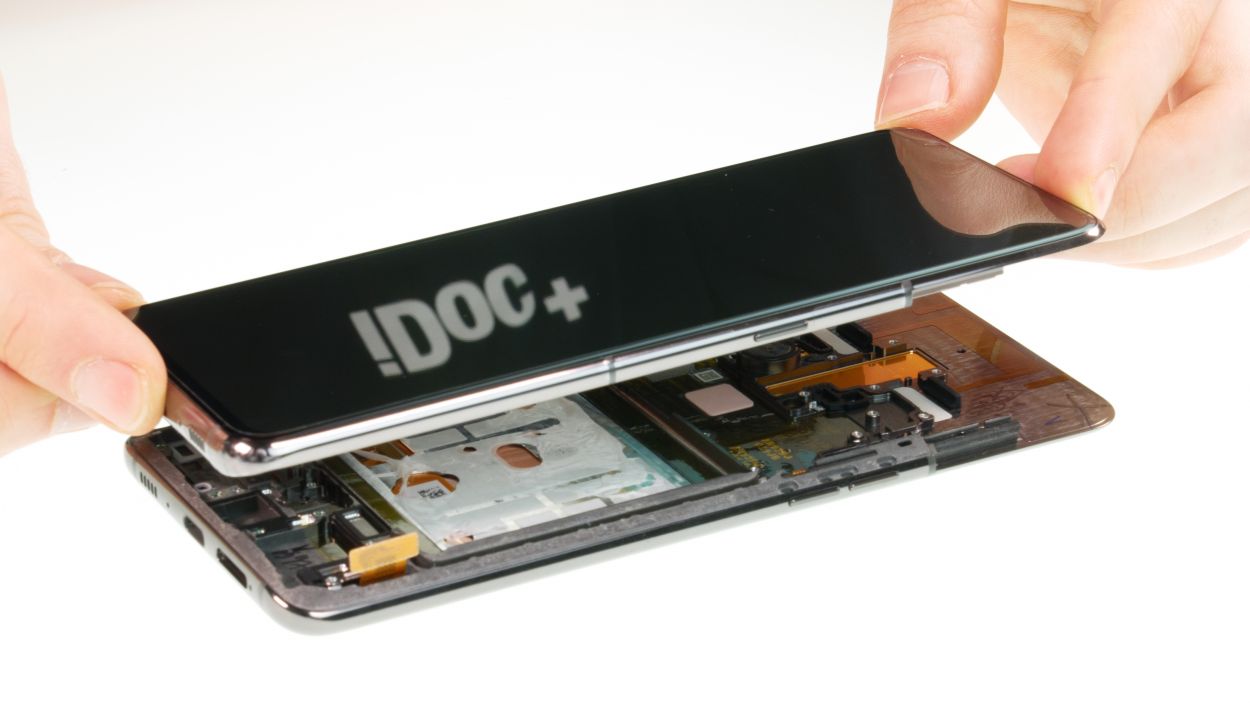
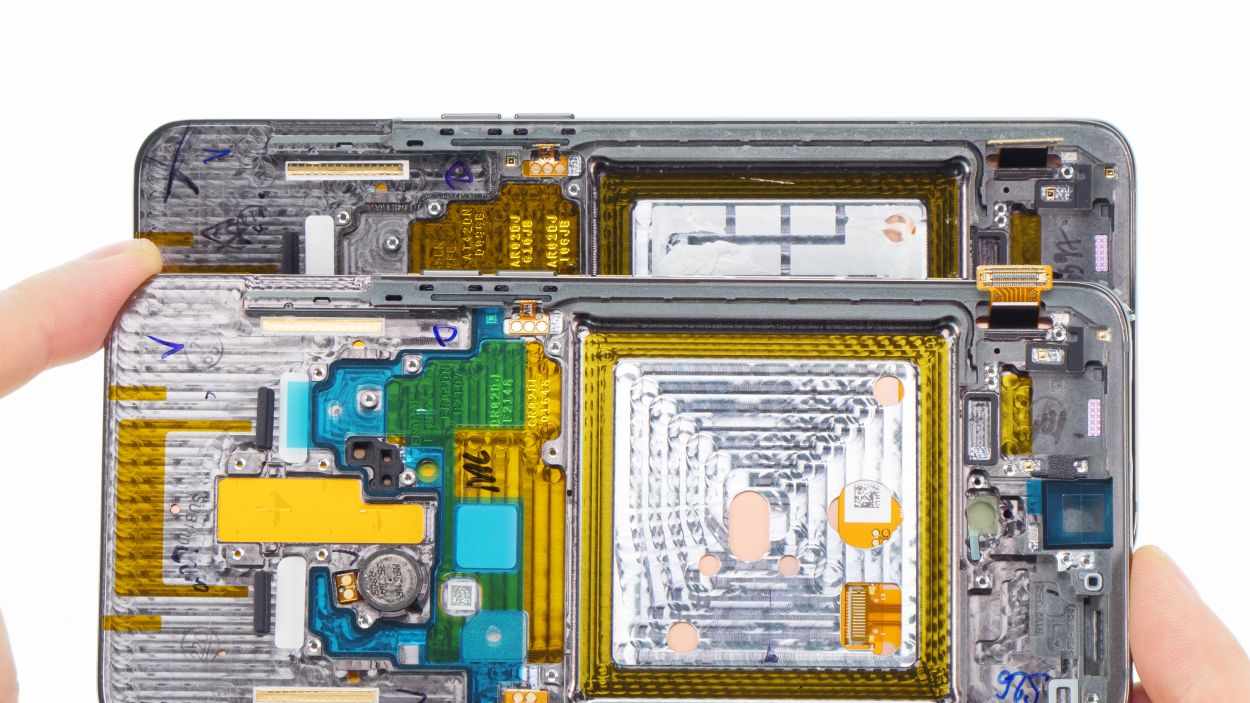
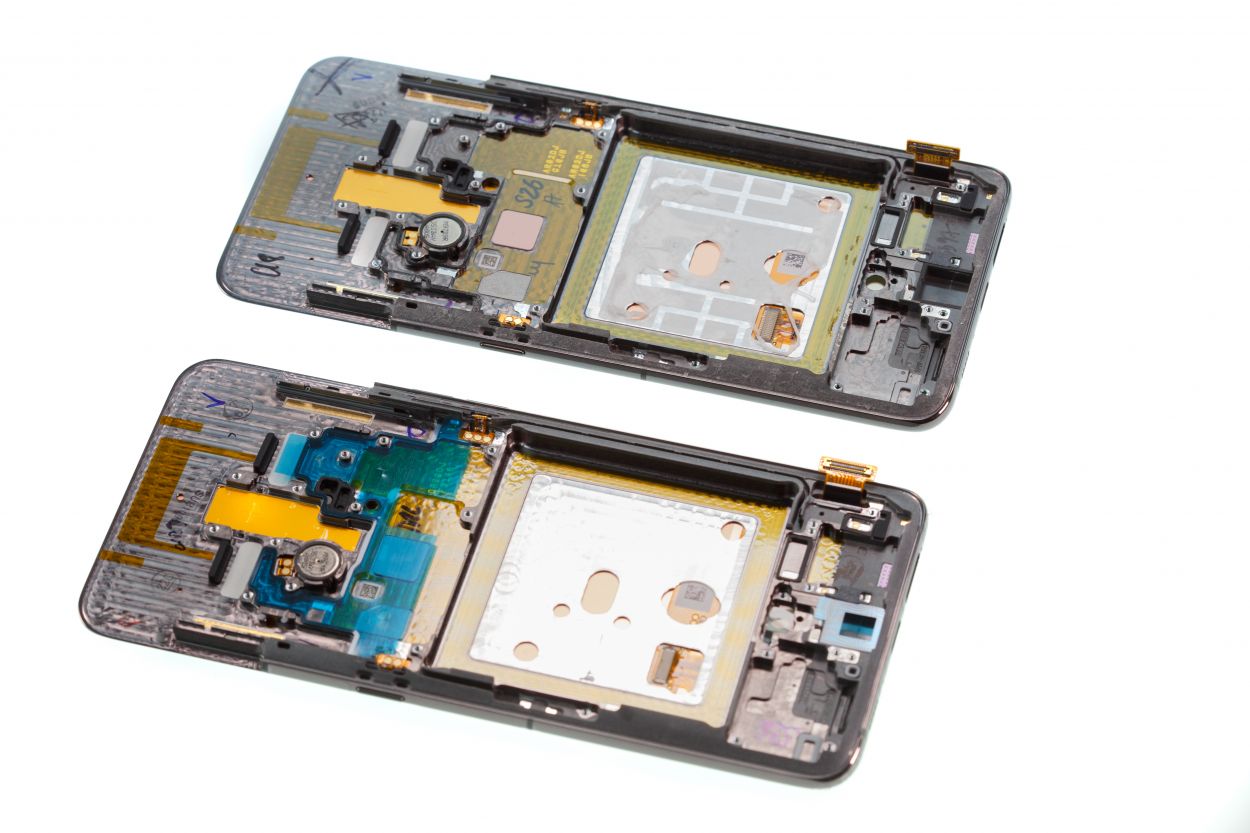
– Grab that shiny new display unit and do a quick side-by-side comparison with your old display. Make sure they match up!
– You might need to snag a few small parts, like the vibration motor, from the old display to make your new one sing.
– Next, peel off any protective foils from the openings and adhesive areas. Let’s get everything ready for a smooth installation!
Step 12

2 × 2,9 mm Phillips
– Pop that camera motor back into its cozy spot in the unit!
– Now, grab your trusty screwdriver and secure the camera motor in place.
Step 13

5 × 2,9 mm Phillips
1 × 3,9 mm Phillips
– Time to slide that motherboard back into its cozy home in the unit!
– Next, gently nudge the camera module back into its side guides—it’s like tucking it in for a nap.
– Reconnect the camera motor to the main board—let’s keep that connection strong!
– Now, screw the mainboard back on; we want it nice and secure.
– Don’t forget to tuck the red antenna cable on the left and the white and blue cables on the right back into their frame guides. A spudger or tweezers can help you give them a little push down if they need it.
– Lastly, screw in the plastic cover of the red antenna cable, and you’re all set!
Step 14
2 × 2,3 mm Phillips
4 × 2,4 mm Phillips
– Alright, time to reattach those metal clamps on either side of the camera module! They’re eager to get back to their cozy spot.
– Next up, let’s place the middle cover back on. Make sure it’s sitting just right! Look for that little nose on the left metal socket to help guide you.
– Now, it’s time to screw everything back together. Remember, black screws go for the middle cover, while the silver ones are for the side covers. You’ve got this!
– Finally, pop the plastic covers back into their designated spots. The ‘R’ and ‘L’ labels will help you out when you’re looking at the display side.
Step 15
2 × 2,9 mm Phillips
– Next, pop that fingerprint sensor back into its snug spot and give it a couple of screws to keep it secure. You’ve got this!
Step 16


1 × 2,9 mm Phillips
Antenna Connector
– Time to slide that lower board back into its rightful spot in the device! Just be sure to keep those cables safe and sound underneath.
– Next up, let’s get the SIM card holder back in its place. If it’s feeling a bit stubborn, don’t force it—check if the board is snugly in position first.
– Now, reconnect the fingerprint sensor connector. Let’s keep things connected!
– Position those antenna cable connectors over their sockets and give them a gentle push with a spudger until you hear that satisfying snap.
– Guide the white cable into its clamp on the board. Almost there!
– Finally, secure everything with that single screw. You’re doing great!
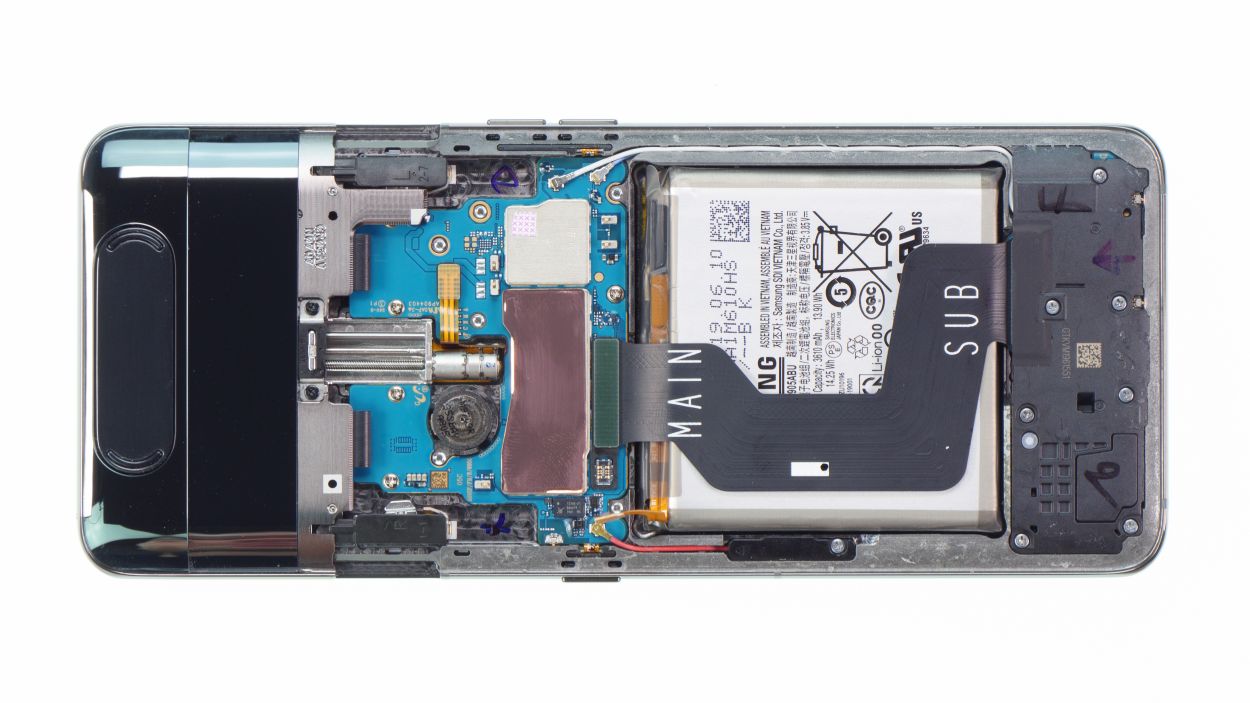
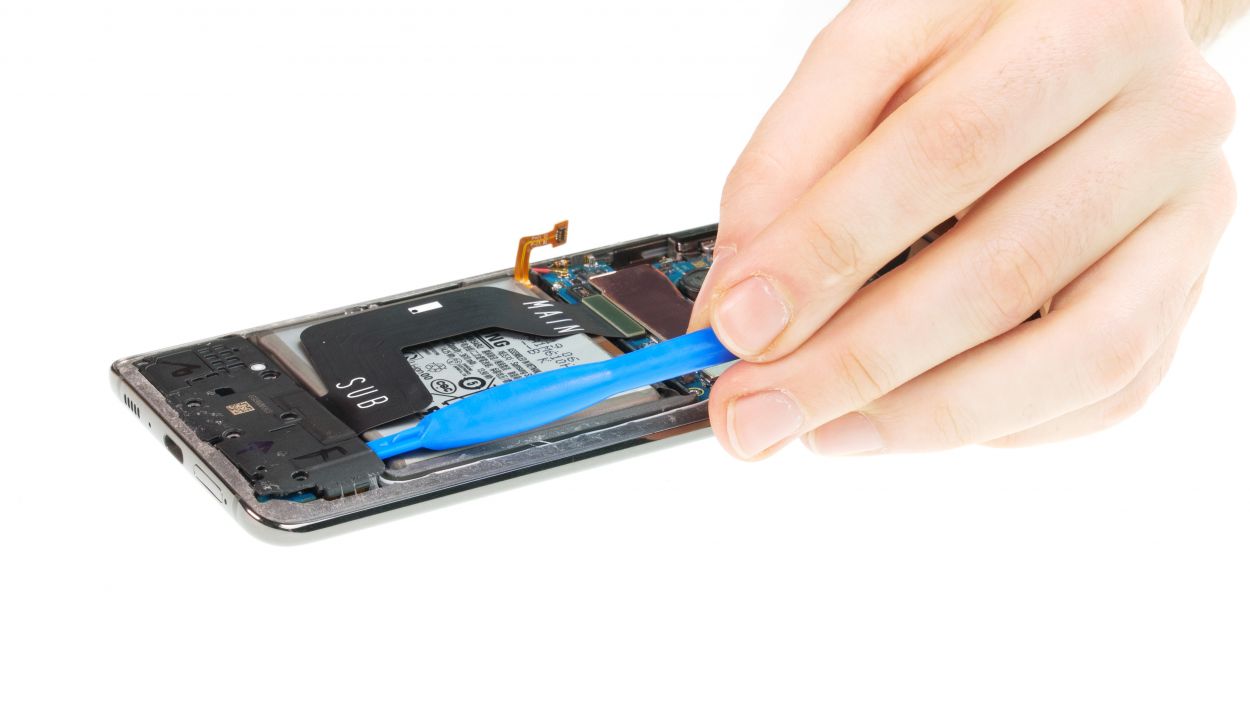
Step 17
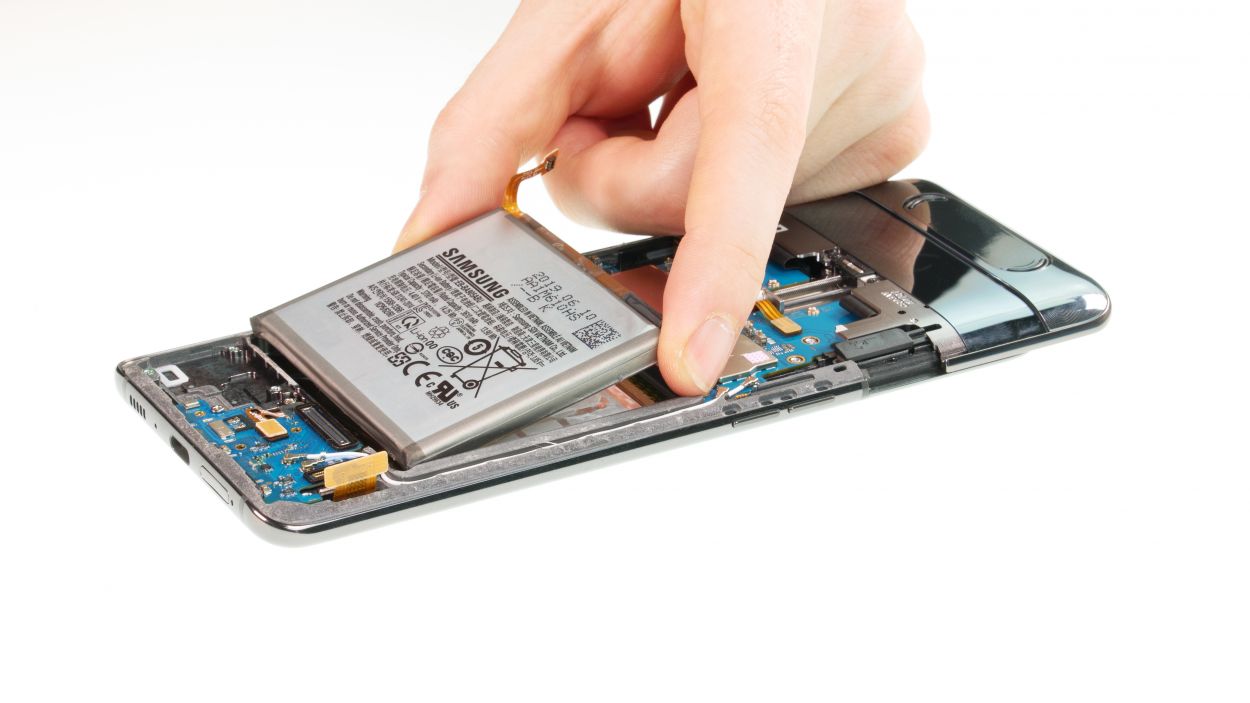
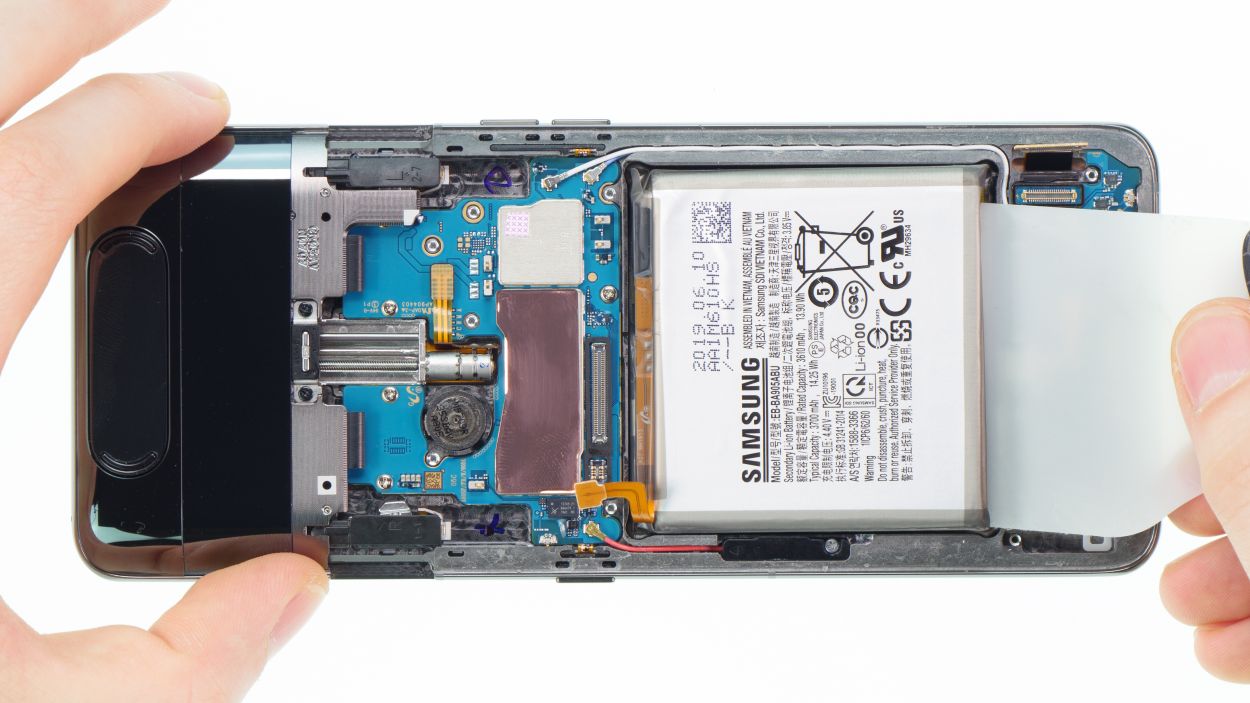
– Time to pop that battery back into its cozy spot! If your display isn’t sporting any new adhesive surfaces, don’t sweat it—just grab some thin double-sided tape to help it stick like a champ.
– While you’re at it, make sure there’s plenty of room all around the battery as you slide it in. You want it to fit snugly without any squishing!
Step 18


7 × 3,9 mm Phillips
– Slide that wide flex cable back into its cozy home in the device and make sure it connects nicely to both the main board and the USB board.
– Next, gently place the speaker back into the device, give it a little press down to settle it in, and secure it with screws. You’ve got this!

Step 20


6 × 3,3 mm Phillips
– Start by placing the main board cover on the right side and give it a little press to lock it in place.
– Check to ensure those tiny plastic nubs on either side are snapping back into their cozy homes.
– Once that’s done, go ahead and secure the cover in place!
Step 21
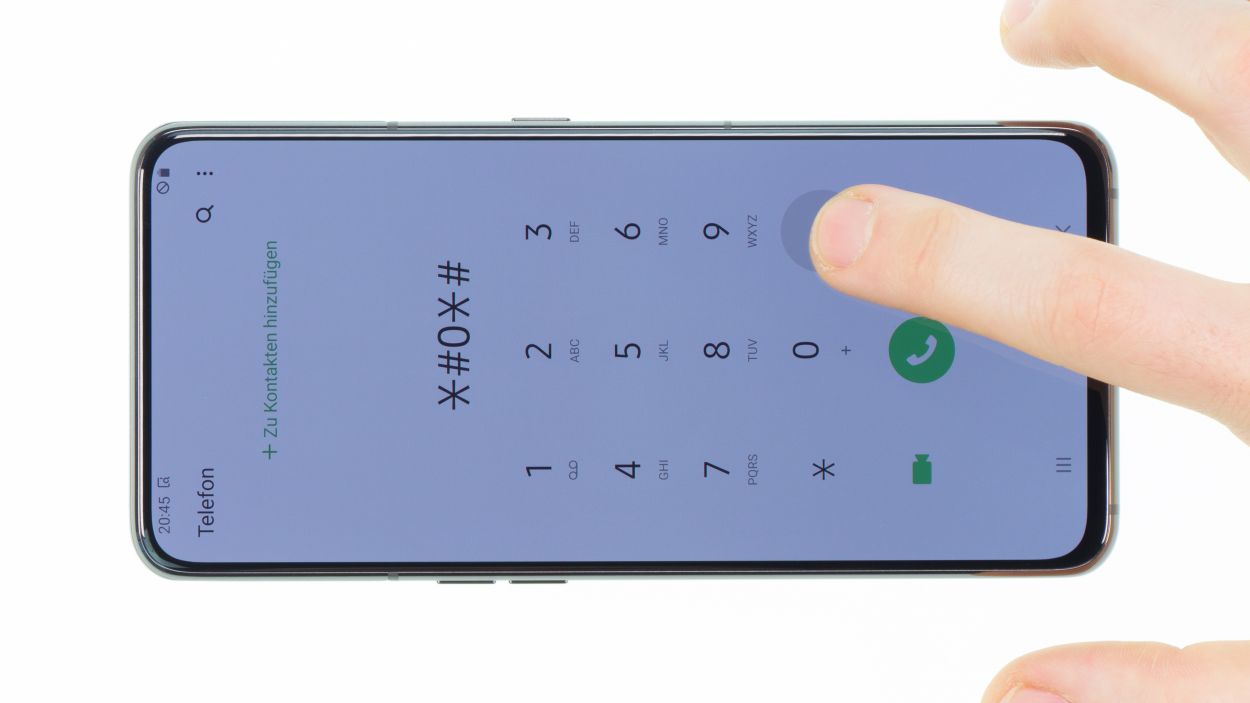
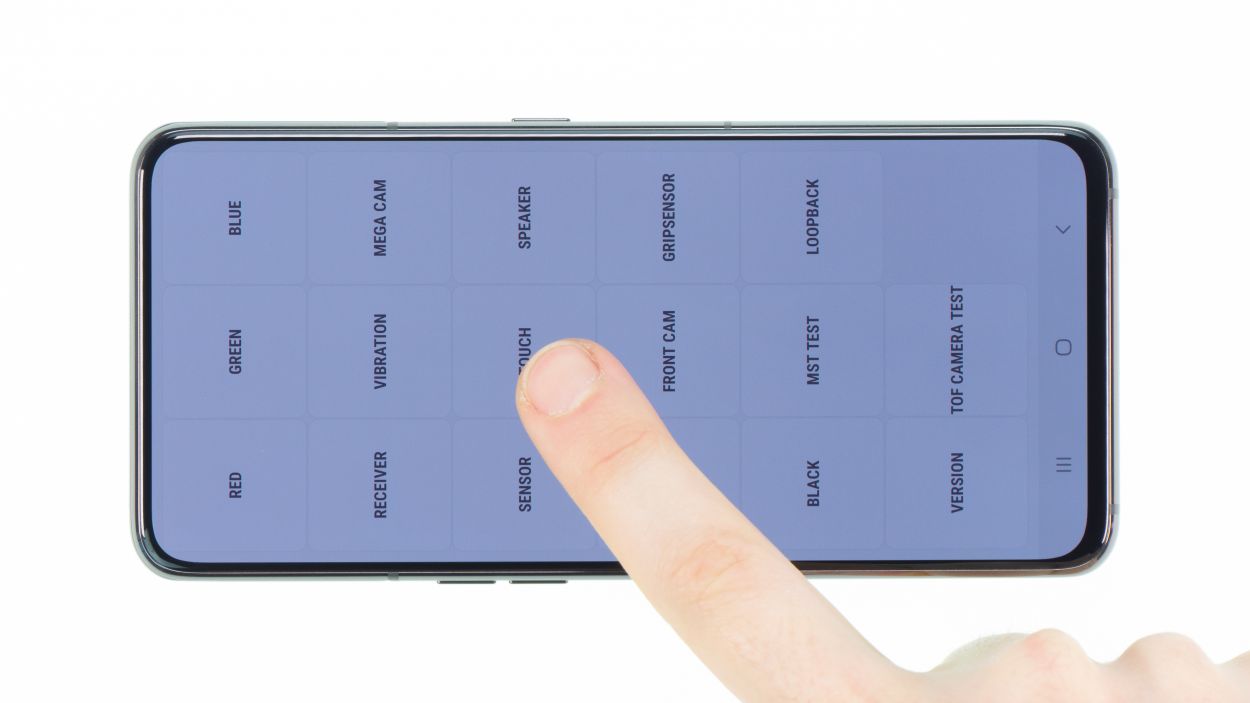


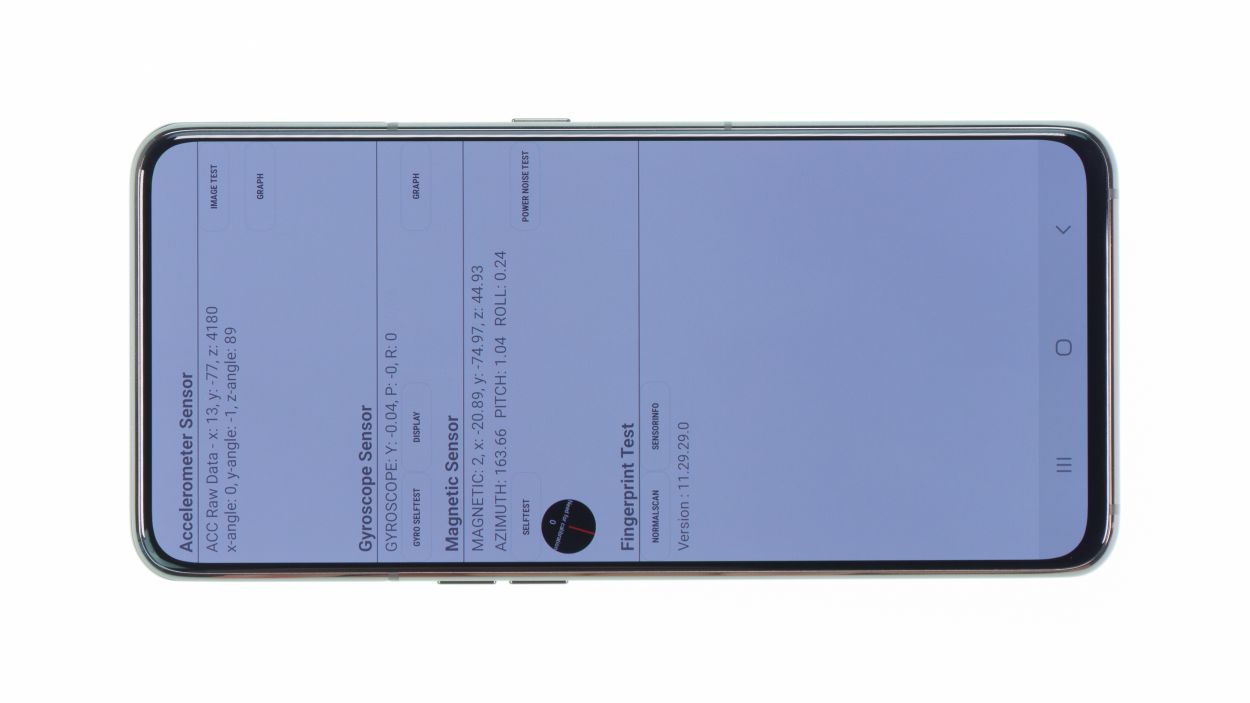
– Before you seal up your Samsung Galaxy A80 and reattach that back cover, let’s make sure everything is in tip-top shape!
– Power up your phone and dive into the phone app.
– Type in *#0*# in the number field and voilà, the Samsung test menu pops up!
– Here, you can put the display through its paces and check for any touch or display hiccups.
– Don’t forget to test out all the other cool features, like the speaker and vibration motor, too!
– If everything checks out and is working smoothly, it’s time to close up the device!
Step 22
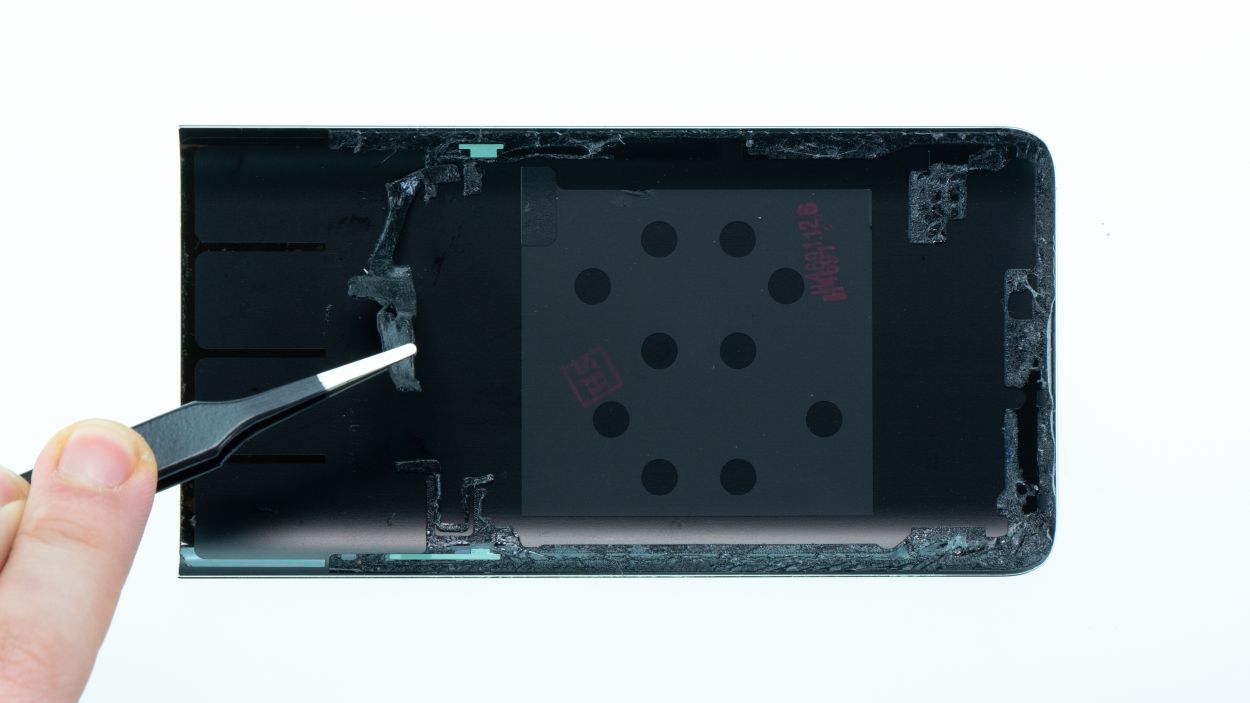


– Say goodbye to that stubborn adhesive! Get rid of any leftover sticky bits from the inside of the back cover and the device frame. A plastic tool, like a spudger, is your best buddy for this job. If you want to kick it up a notch, grab some rubbing alcohol (isopropanol works great) and a lint-free cloth. Make sure everything is squeaky clean so your device can close up like a champ.
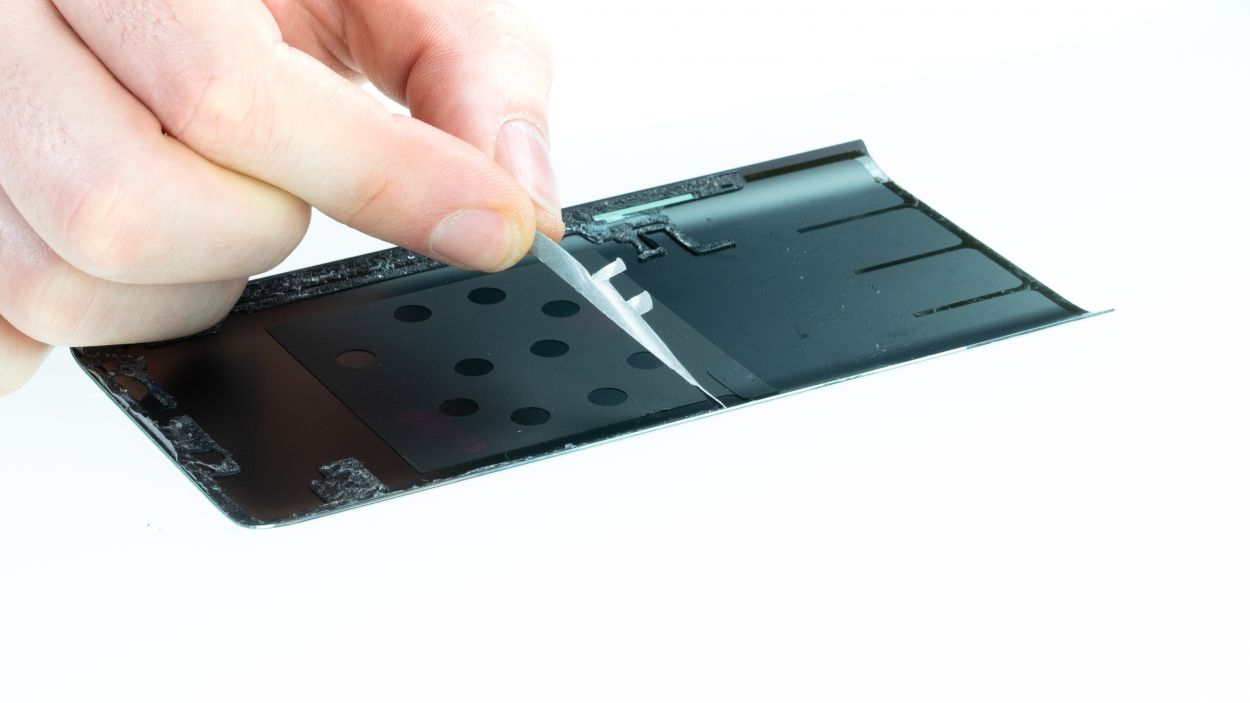
– Next, grab your new adhesive frame and give it a quick alignment check. Look for those little recesses and screw holes to guide you.
– Peel off that first transparent protective film and gently place the adhesive on the frame. Make sure it’s sitting just right and not sticking out anywhere it shouldn’t.
– Now, it’s time to remove the green protective foil. If any glue decides to play hard to get and lifts off the frame, just use your spudger to press it back into place.
– Once that’s sorted, pop on the back cover and give it a good press down.
– For the final touch, you can warm up the edge of the device again with your heat gun and place a few books on top to help the adhesive bond even better. You’re almost there!