Nintendo Wii mini Disc Drive Replacement
Duration: 45 minutes
Steps: 9 Steps
Ready to get your Wii mini spinning again? Here’s how to swap out the disc drive so your games can load up like they should. If your system isn’t accepting discs, it might be the drive, or it could just be a dusty or scratched disc making things weird. Try a different disc first, and check out the troubleshooting page for more tips. When you dive in, use tweezers for those tiny screws so nothing goes missing. And when disconnecting the fan, steer clear of tugging on cables or connectors—no one likes loose parts. Take it step by step, and if things get tricky, you can always schedule a repair.
Step 1


– Start by peeling off the two rubber feet on the back of the console to access the hidden screws. Then, unscrew the four 6mm Phillips #0 screws to continue with the repair. If you need help, you can always schedule a repair.
Step 2


– Set your Wii mini right-side up. Take a plastic opening tool and slide it all the way around the middle edge to loosen up the top cover.
– Carefully lift off the top cover and place it somewhere safe.
Step 3


Once the screws are loosened, grab a pair of tweezers and gently pull them out. Easy peasy!
– Flip the Wii mini over so the back is facing you. Get ready to dive in!
– Grab your Phillips #0 screwdriver and unscrew the two 6mm screws on each side of the fan. It’s just a couple of twists and you’re almost there!
Tools Used


Step 4


Avoid wiggling the connector or cable as you remove it—give it a straight pull to keep things snug and secure.
– With your fingers, give the top of the pin connector a gentle upward pull—this will unplug the fan from the console.
– Lift the fan out and set it aside for now.
Step 5


– Gently slide out the blue ribbon cable from the top of the power board using your fingers—no force needed, just a smooth pull.
– Grab your Phillips #0 screwdriver and unscrew those two 4mm screws at the top and bottom of the power board to free it up.
Tools Used
Step 6


– Gently grab the pin connector with your fingers and carefully disconnect the power board from the disc drive. If you need help, you can always schedule a repair.
Step 7


– Gently lift the power board out of the console and place it to the side for now.
Step 8


– Grab your Phillips #0 screwdriver and get ready to work. Unscrew the four 6mm screws with a steady hand, and you’ll be one step closer to getting things back in shape!
Tools Used
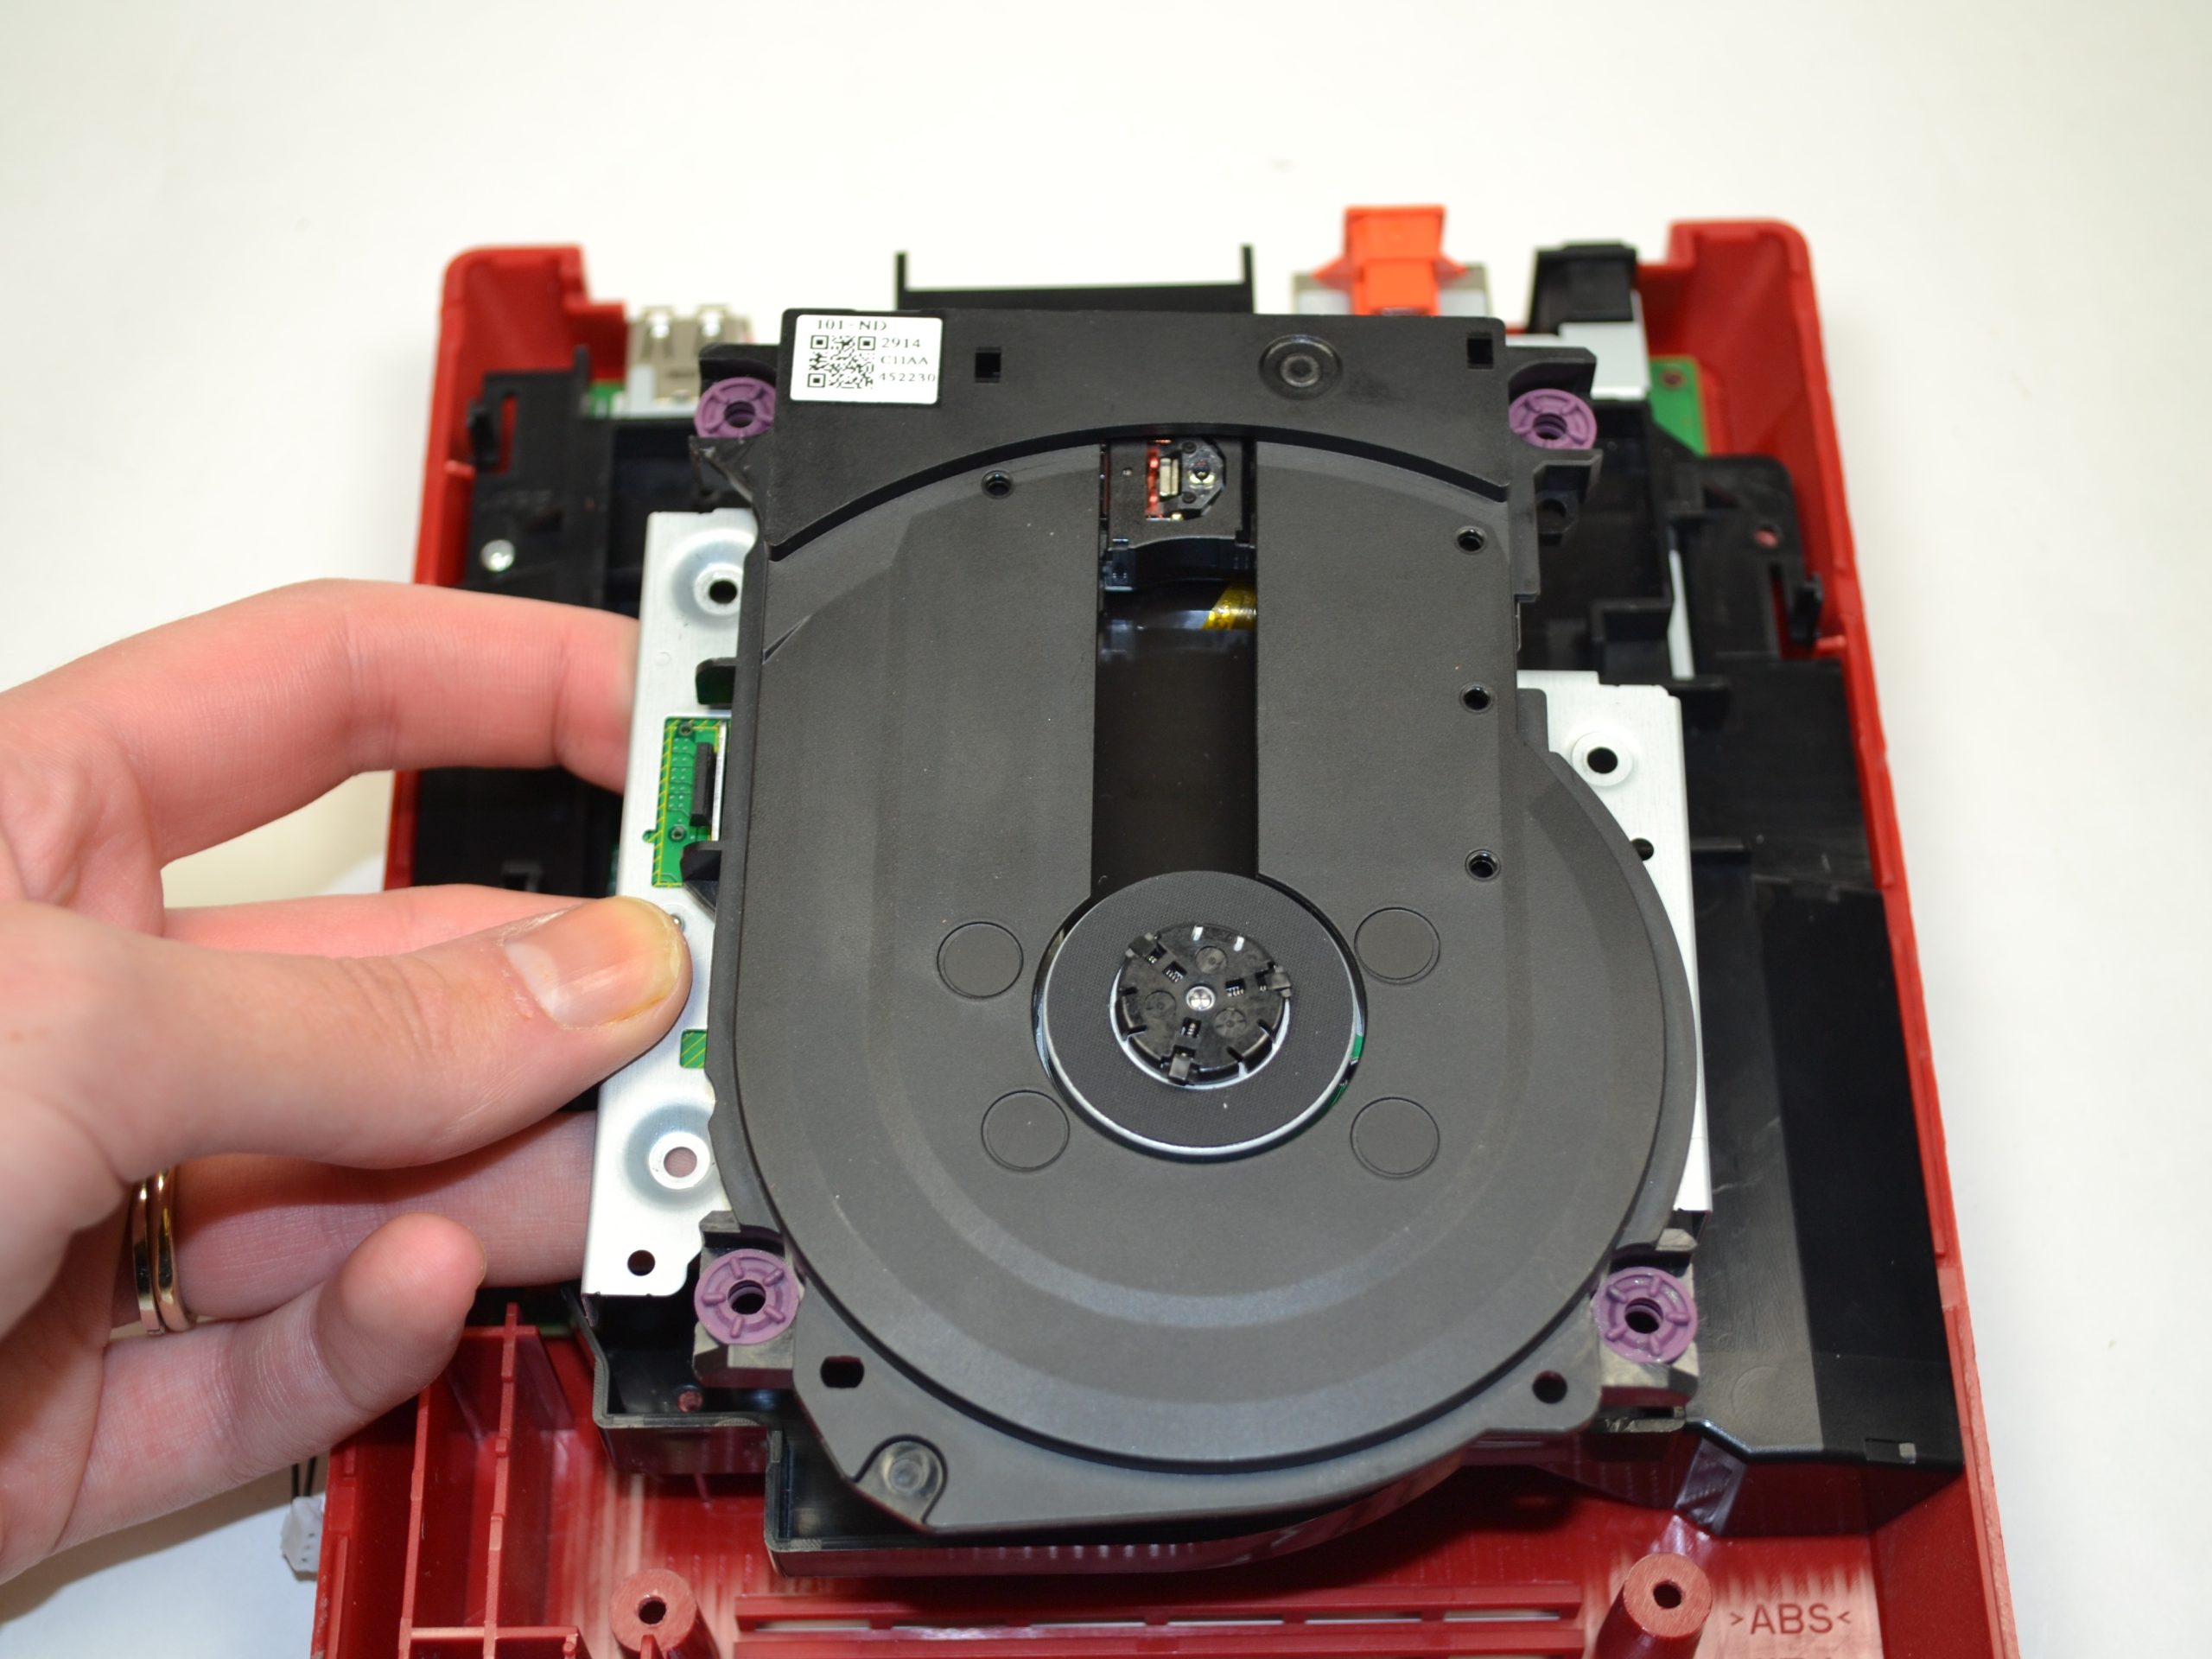
Step 9


– Carefully lift the disc drive out of the console and set it aside, making sure not to force anything. If you need a hand with this step, you can always schedule a repair.
Success!