DIY Guide to Replace iPhone 6s Lightning Connector
Duration: 45 min.
Steps: 20 Steps
Have you been wrestling with your iPhone 6s over its charging and microphone issues? Fear not! This guide walks you through the steps to swap out that pesky faulty Lightning connector like a pro. If your iPhone is playing hard to get with your computer, refusing to charge, or if the headphone jack is acting a little too loose for comfort—this repair is your golden ticket. And if your pals can’t hear you on calls because your microphone’s gone rogue, it’s definitely time to roll up your sleeves and get that Lightning connector replaced. Let’s fix this together! If you need extra assistance, feel free to schedule a repair.
Step 1


– Alright, champ, let’s get this show on the road! Before we start fiddling with your iPhone, let’s give it a little break. Hold down that power button for about three seconds—you’ll see a slider appear.
– Slide it to power off. Your phone will shut down in about 10 seconds. Piece of cake!
Step 2

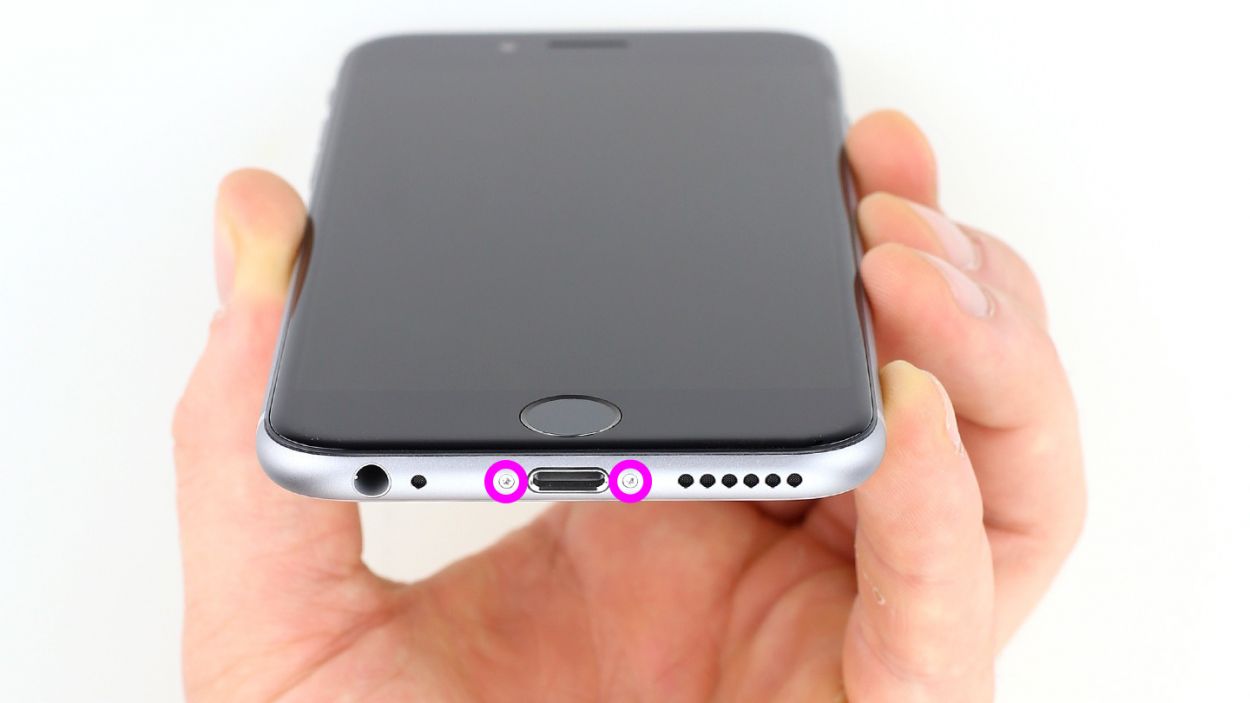
– Ready to get that iPhone 6s open? Grab your trusty pentalobe screwdriver, and let’s roll!
– Carefully remove the two pentalobe screws located just to the right and left of the lightning connector. To keep things tidy, we suggest using a magnetic pad to arrange those little screws just how you found them—trust us, your future self will thank you!
Step 3

If needed, give the edges of the display a few rounds of heat.
– Put your iPhone 6s on a soft, clean surface to avoid scratching the back.
– Use a suction cup to lift the front panel, a hard plastic plectrum and a hot-air gun. If the screen is severely damaged, cover it entirely with adhesive tape before you continue.
– The screen is slightly adhered to the frame. Use the hot-air gun to heat the outer edges of the display to about 60°C (140°F).
– Place the suction cup over the home button or next to it. While lifting the screen with the suction cup, insert the hard plastic plectrum between the aluminum frame and the display frame. Try to press down the aluminum frame as well as to push up the display with the hard plastic plectrum. Usually this takes several attempts.
– As soon as you can lift up the screen a few millimeters, slide carefully alongside the outer edges until the display is loosened on both sides.If necessary, heat the outer edges of the display several times.
Tools Used
- heat gun to heat parts that are glued on so they’re easier to remove.
In most cases, you can also use a hairdryer.” rel=”noopener nofollow”>Heat gun - Pick Set
- VAKUPLASTIC Suction Cup
Step 4
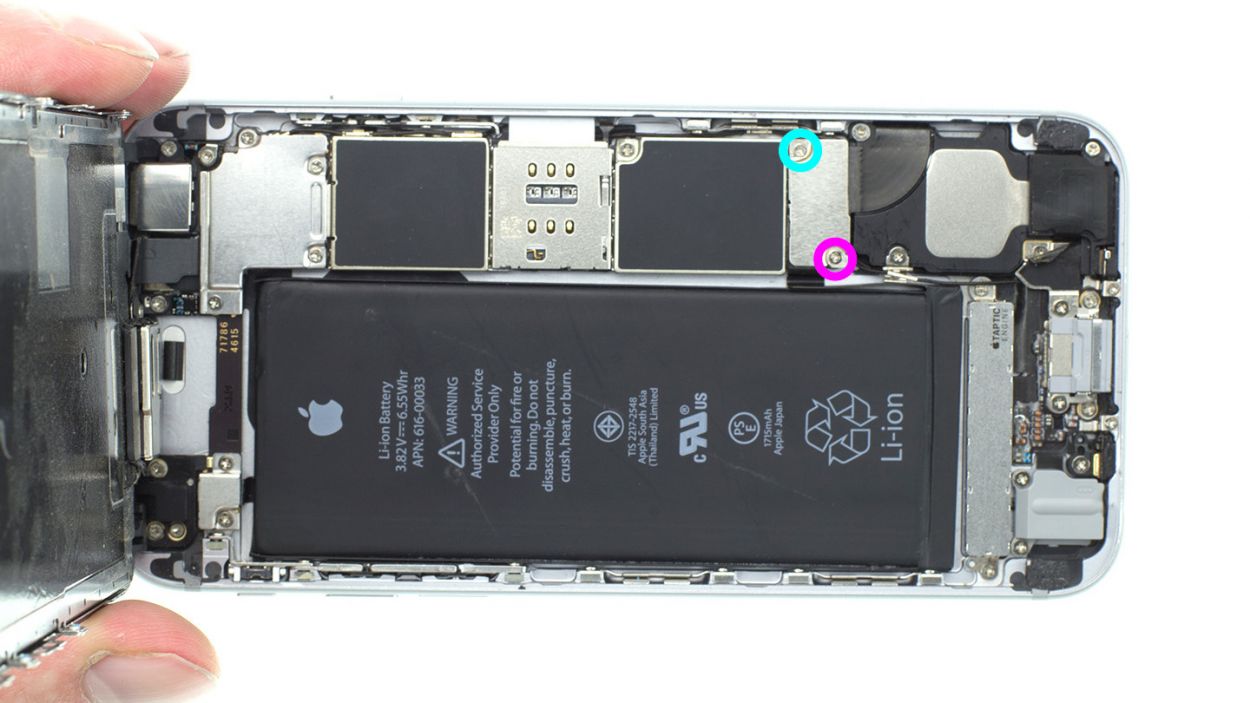

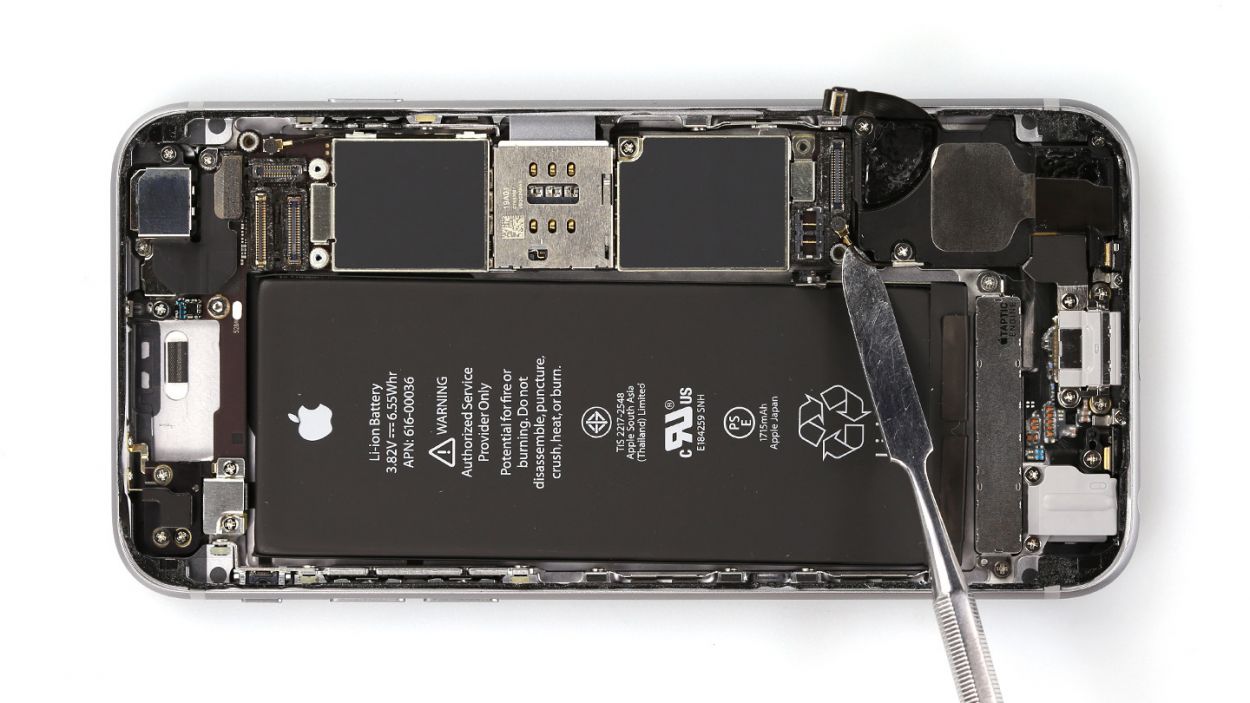
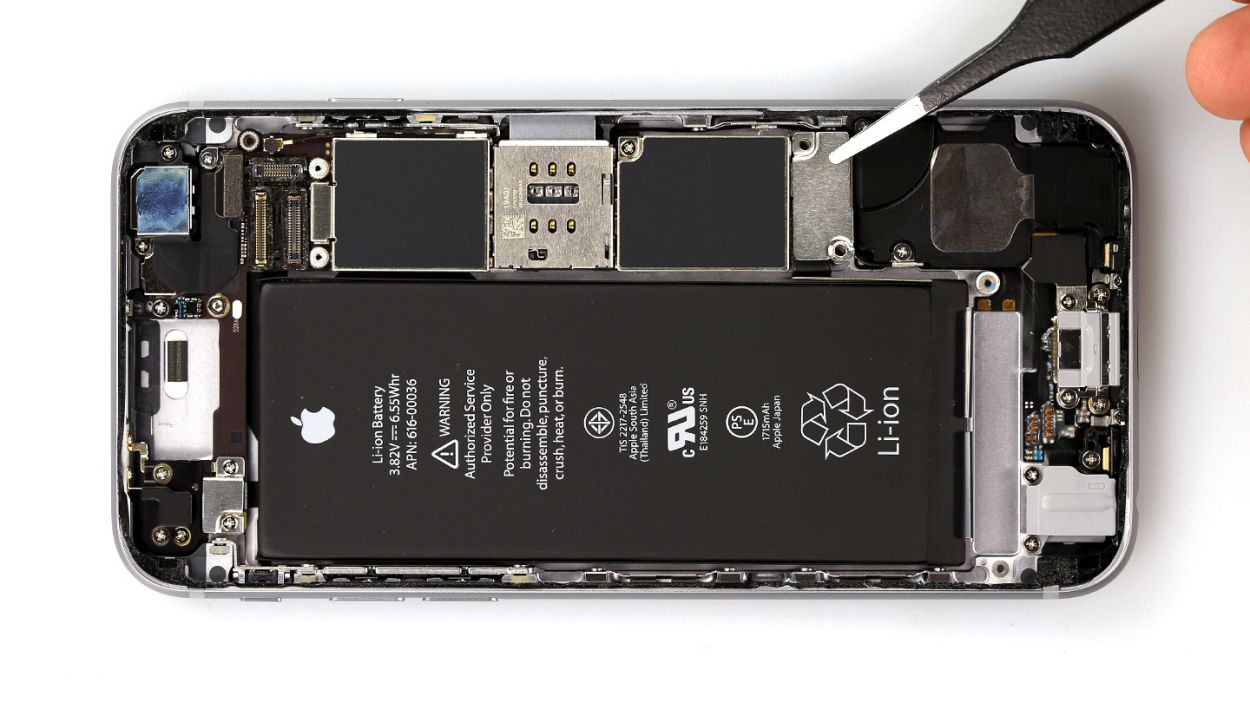
– Alright, let’s tackle this battery plug! First, grab your trusty Phillips screwdriver and unscrew those screws holding the plug cover in place. Don’t forget to put the screws on that magnetic pad—it’s like a treasure chest for all your little bits! You’ll need one 2.2 mm Phillips screw and one 2.9 mm Phillips screw, just in case you’re counting.
– Now it’s time to carefully release the battery plug. Slide an ESD spudger underneath the plug and gently lift it out. No spudger? No worries! Your fingernail can save the day too. Just go easy, and you’ll do great!
Step 5

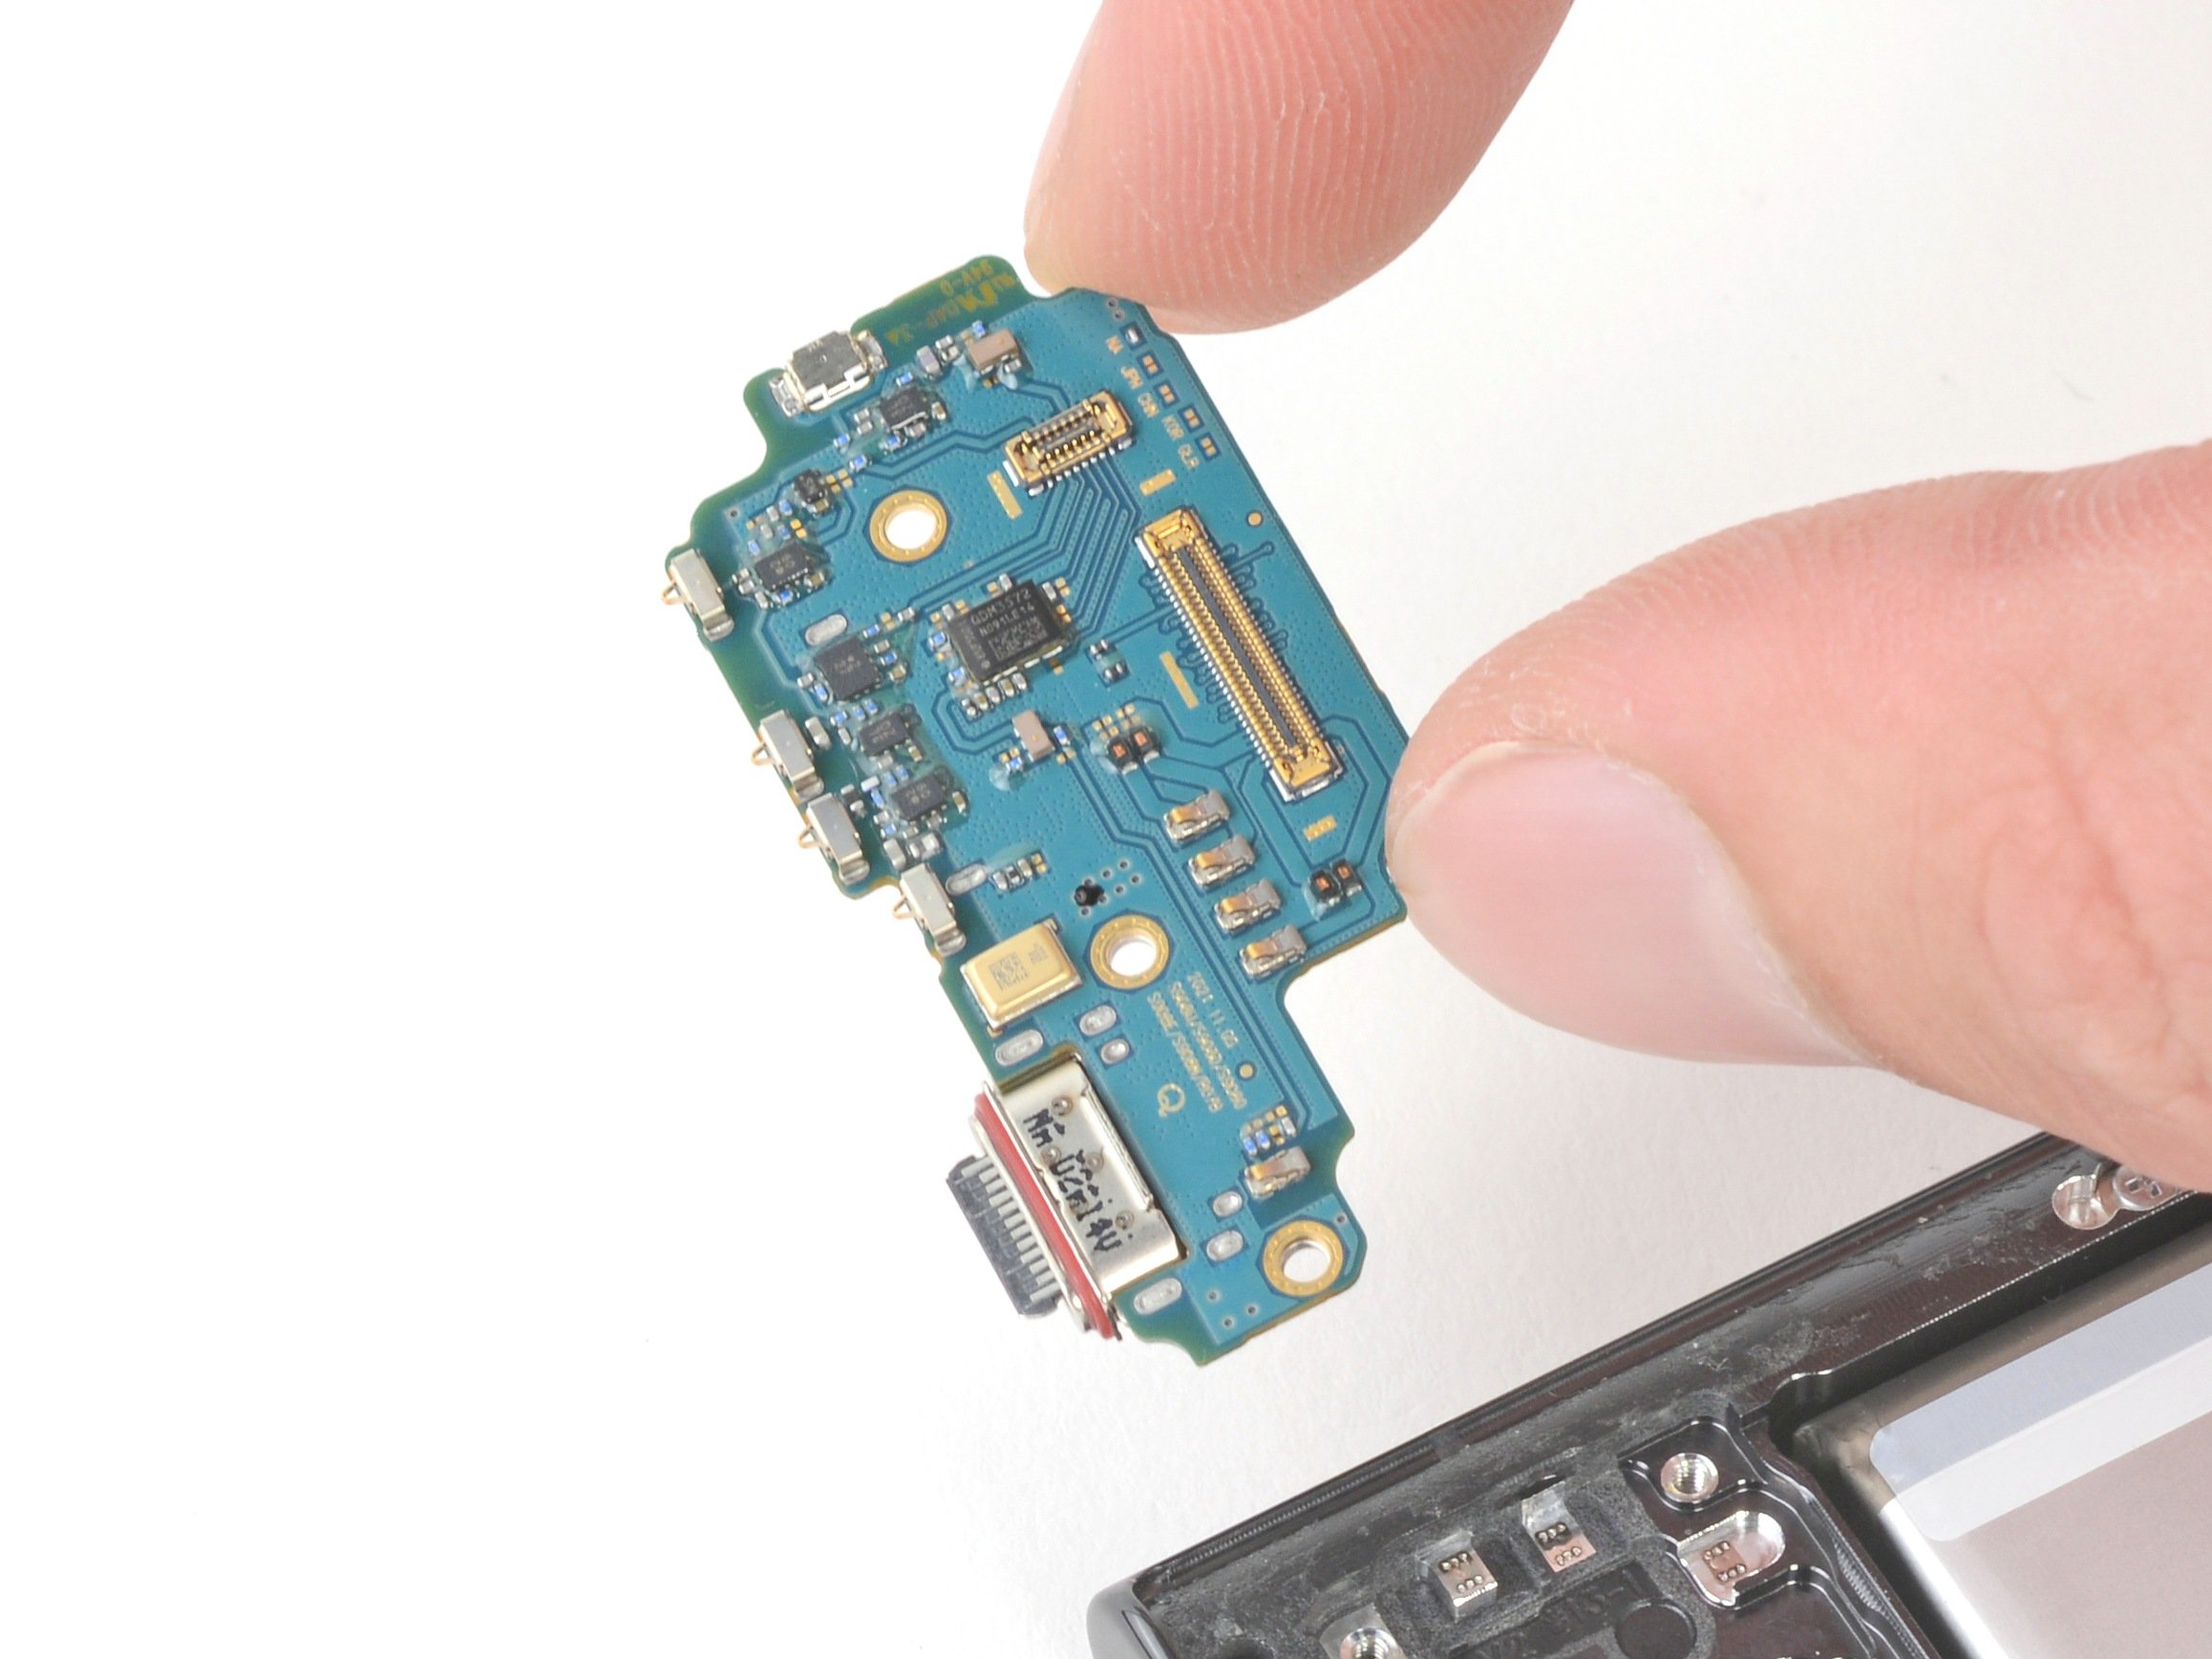
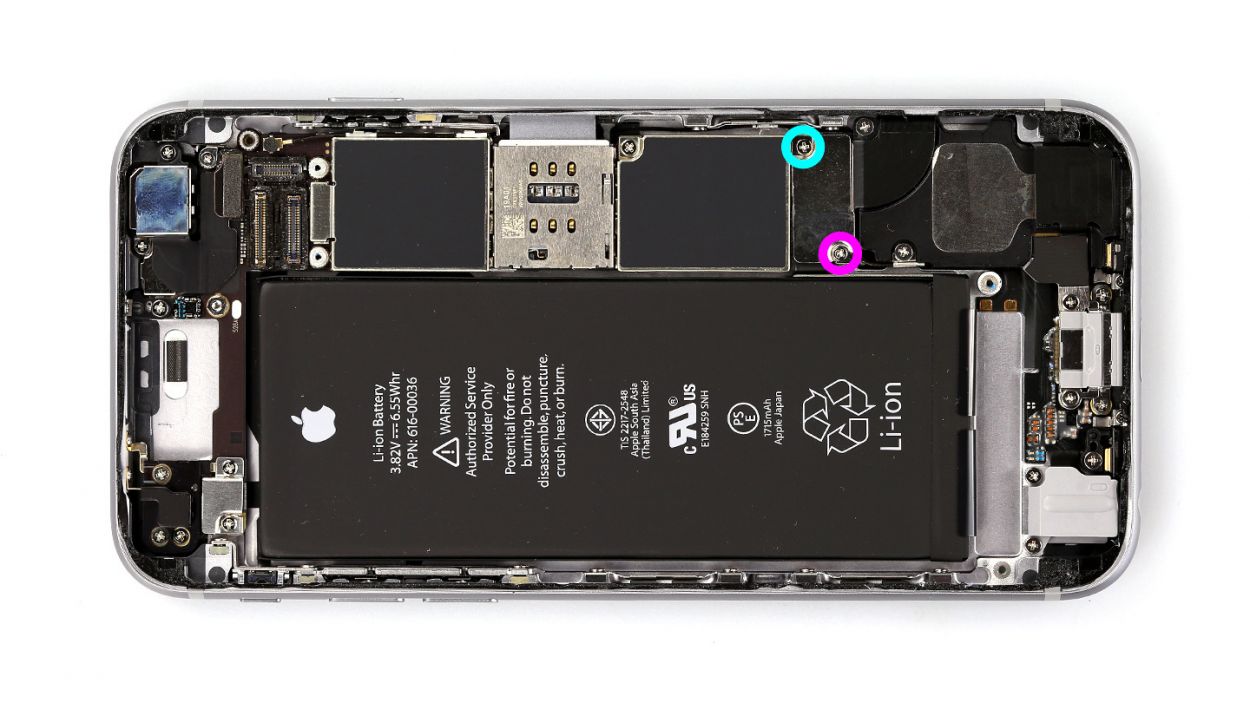
– First, let’s loosen those four Phillips screws on the shiny contact cover. Once they’re free, toss them along with the cover onto your magnetic pad—it’s like a cozy home for your screws, making them super easy to find later! You’ll need three 1.3 mm Phillips screws and one 2.9 mm Phillips screw.
– Next up, it’s time to release the three overlapping display connectors in the order shown below. Just slide your spudger under each connector and lift it gently. You’ve got this! The connectors to release are: Front camera/sensor/earpiece/ambient microphone, Touch ID cable, and the Display.
Step 6
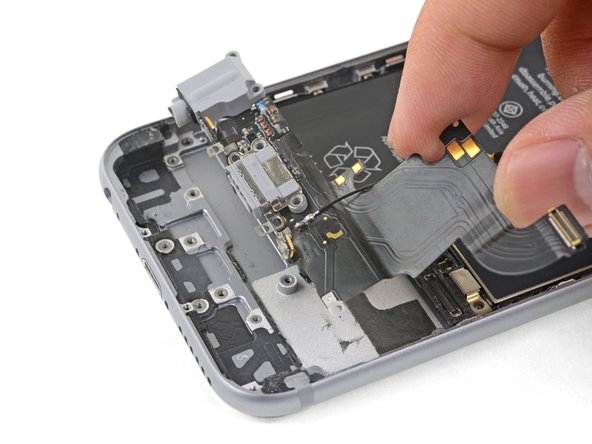
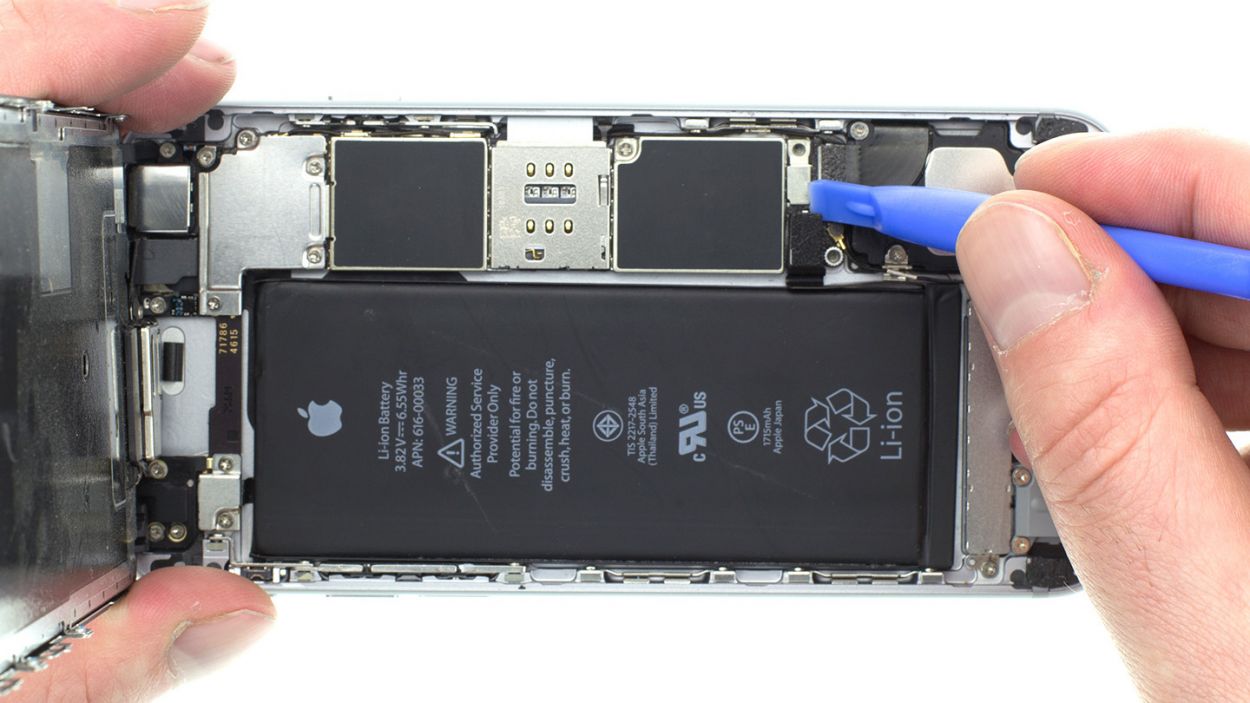
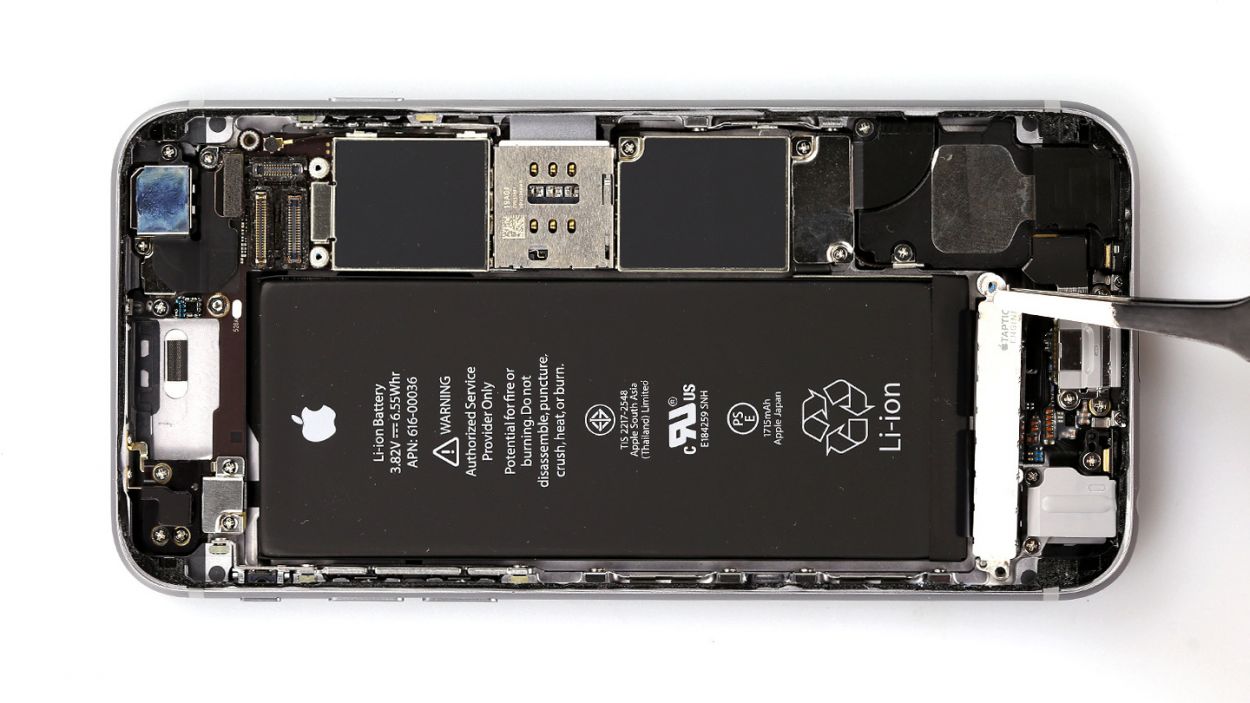
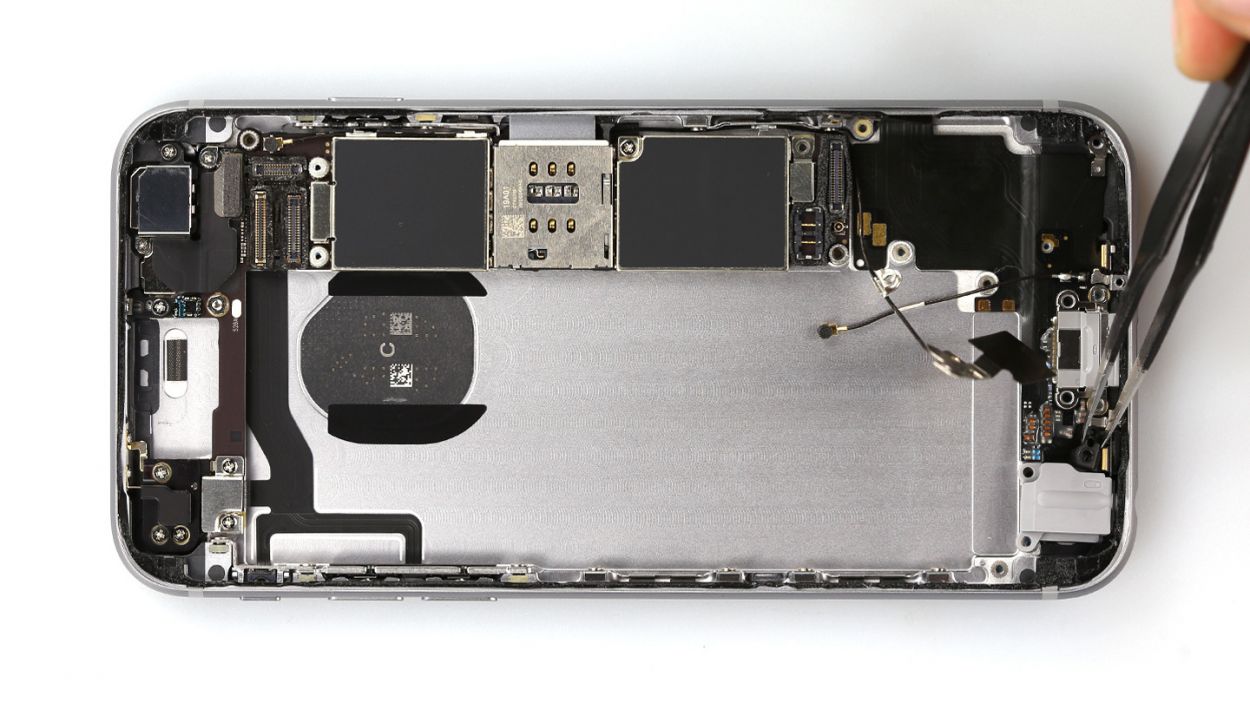
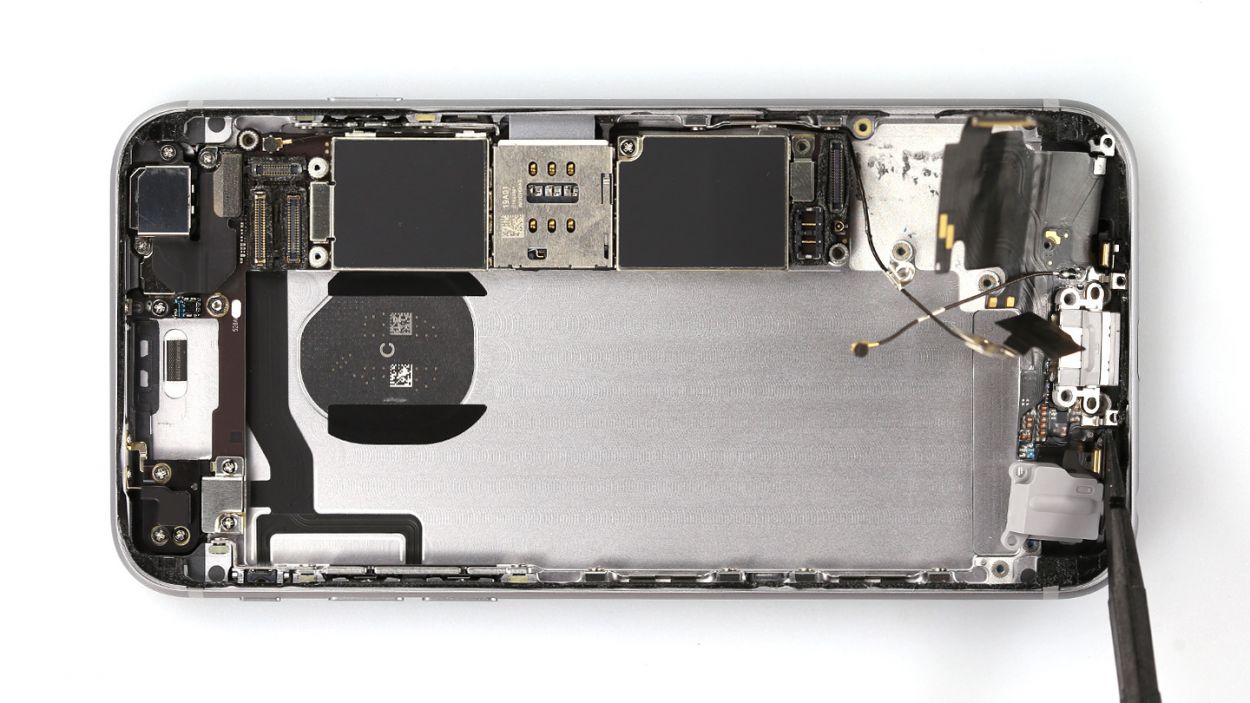
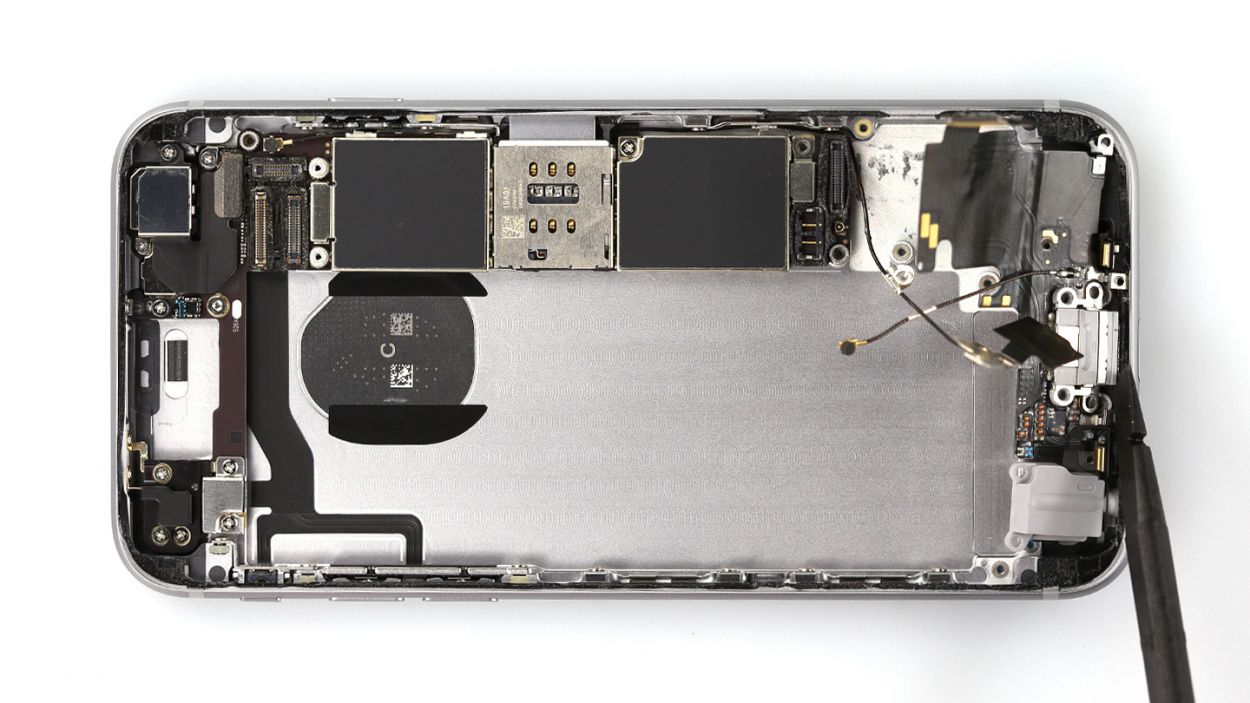
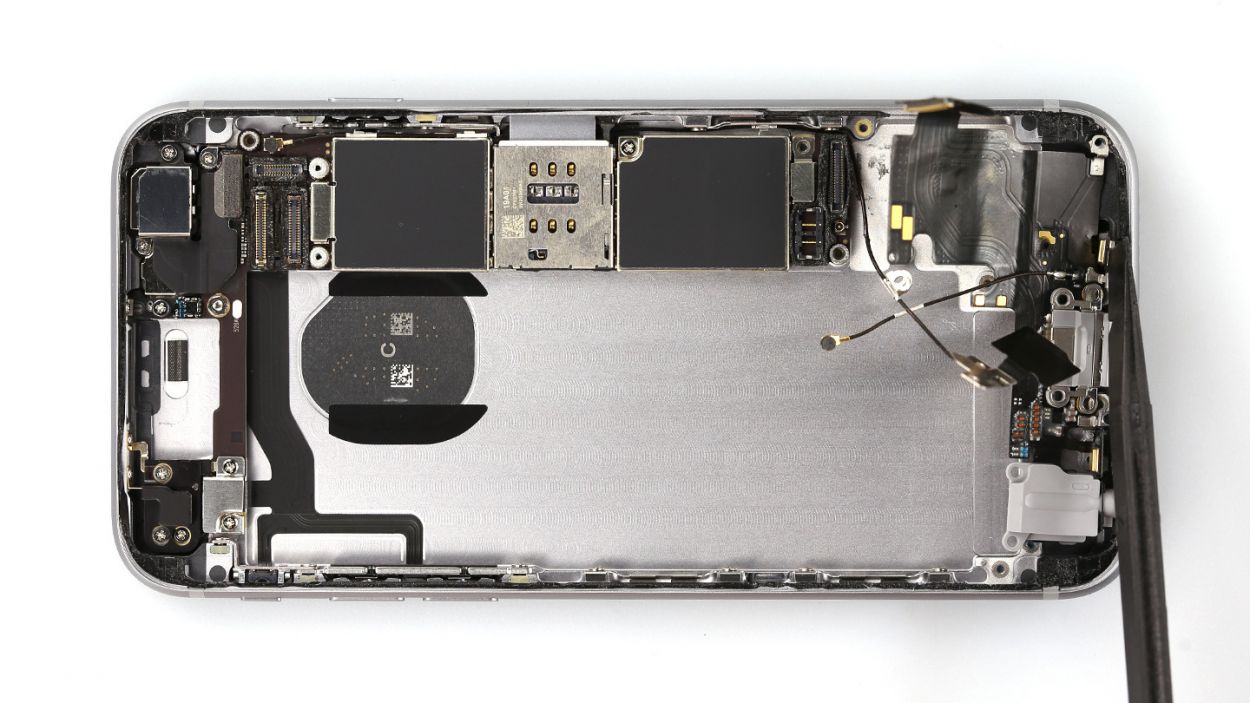
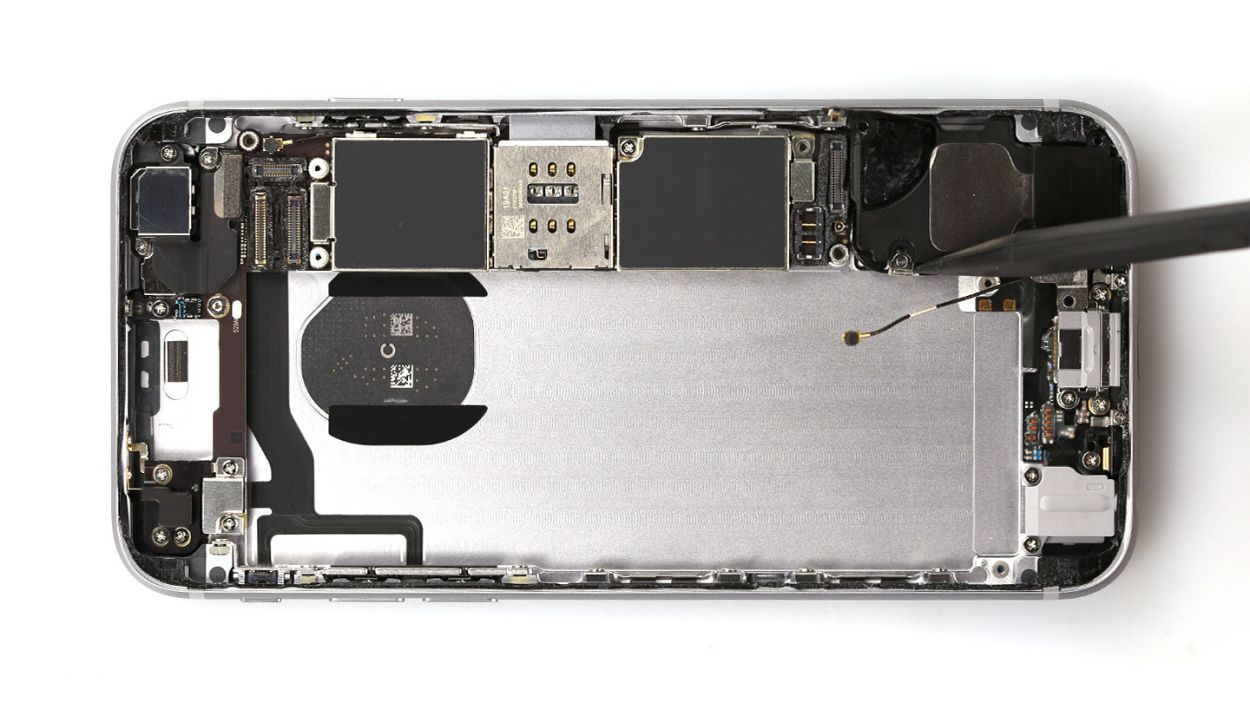
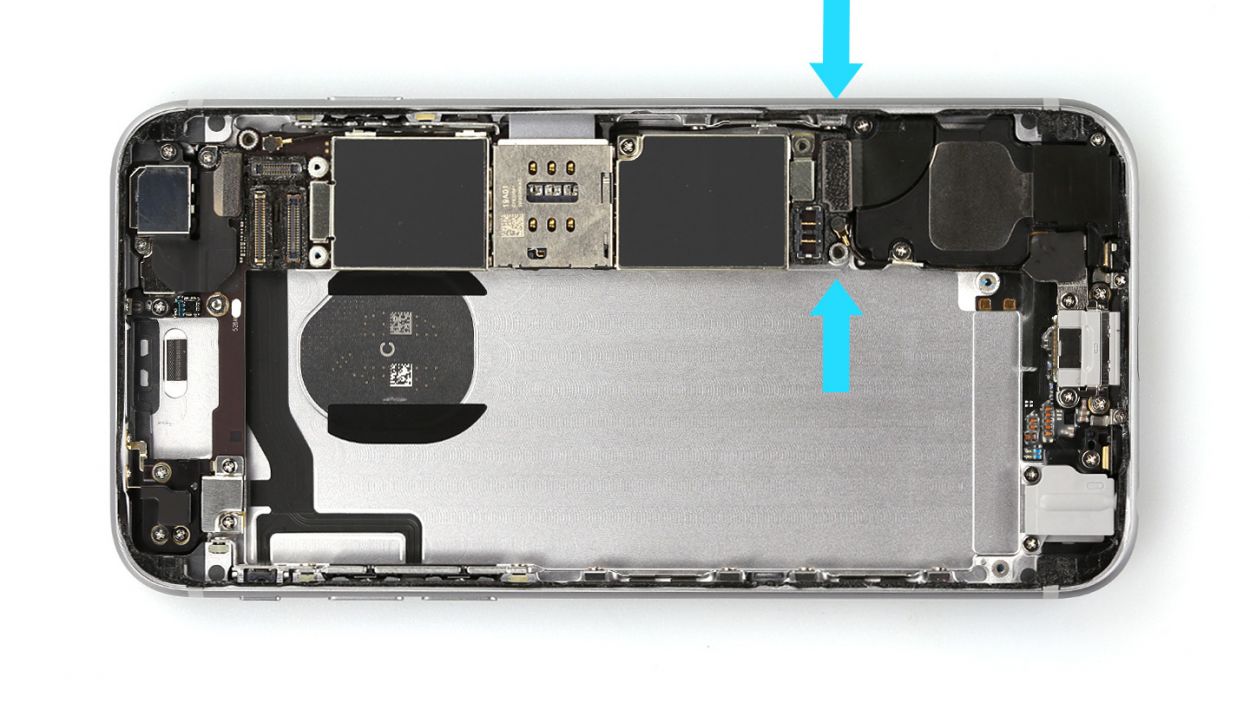
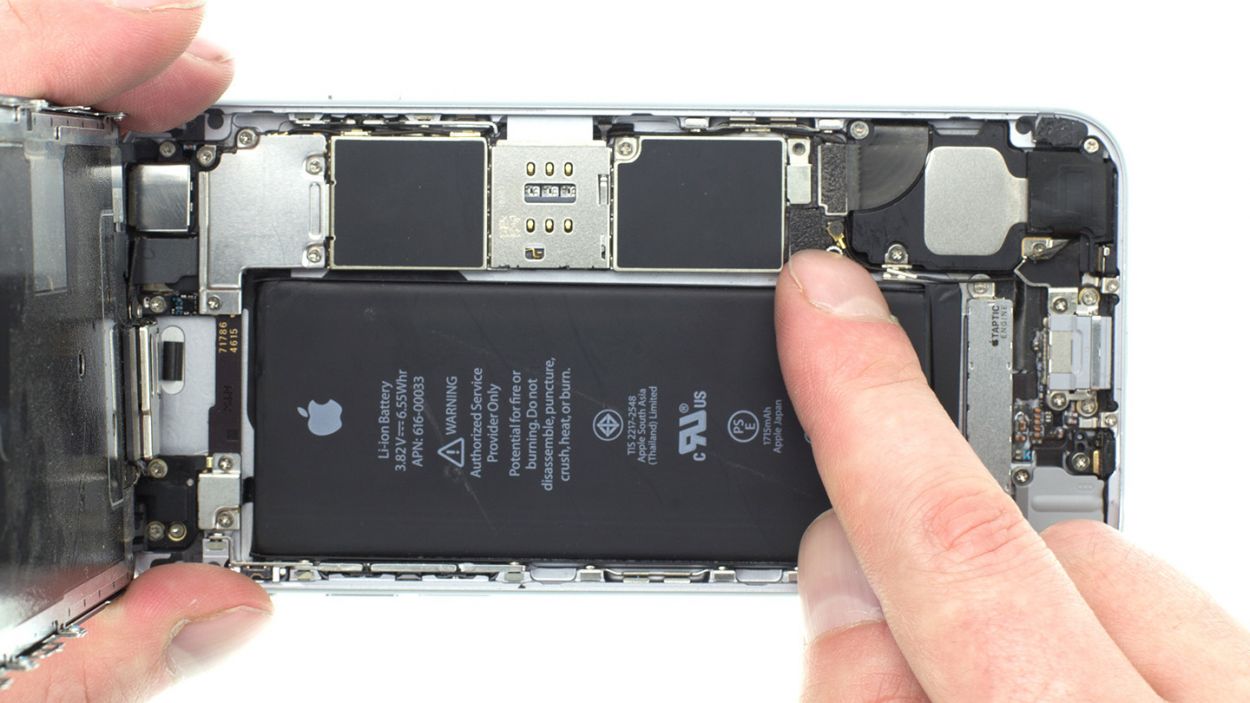
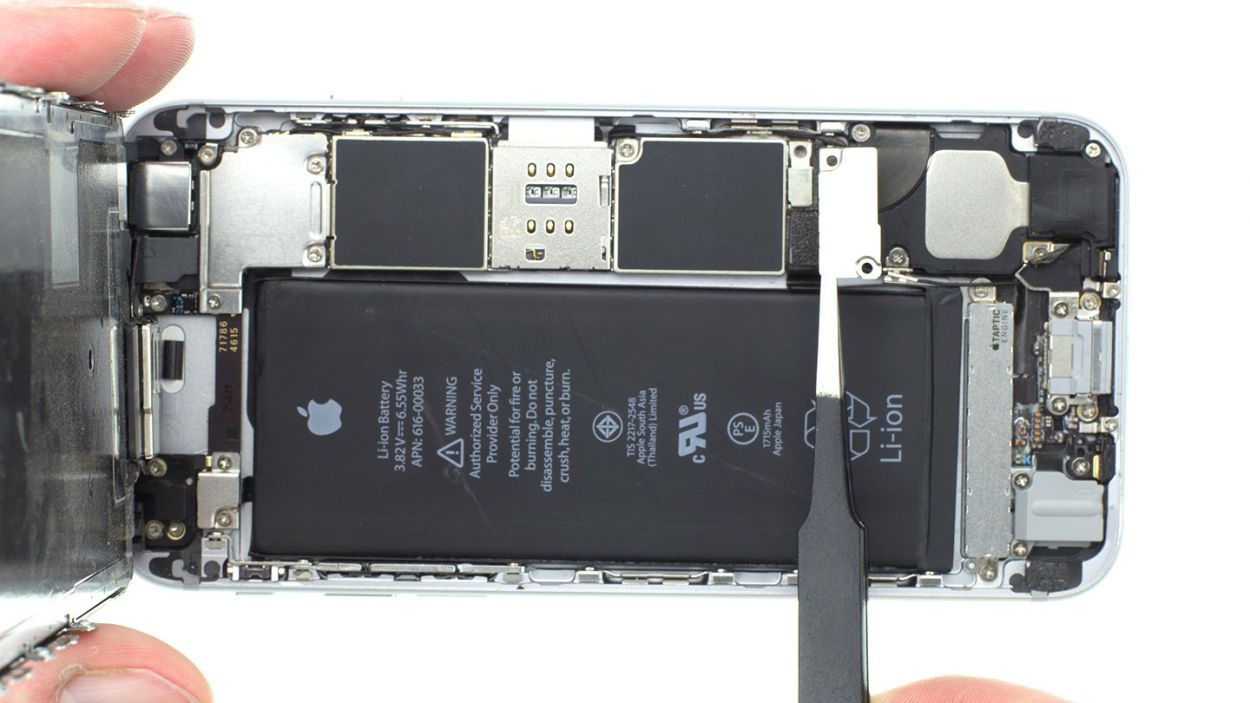
– Grab your trusty spudger and gently use its pointed tip to unhook the antenna cable and the flex cable from the main board. You’re doing great!
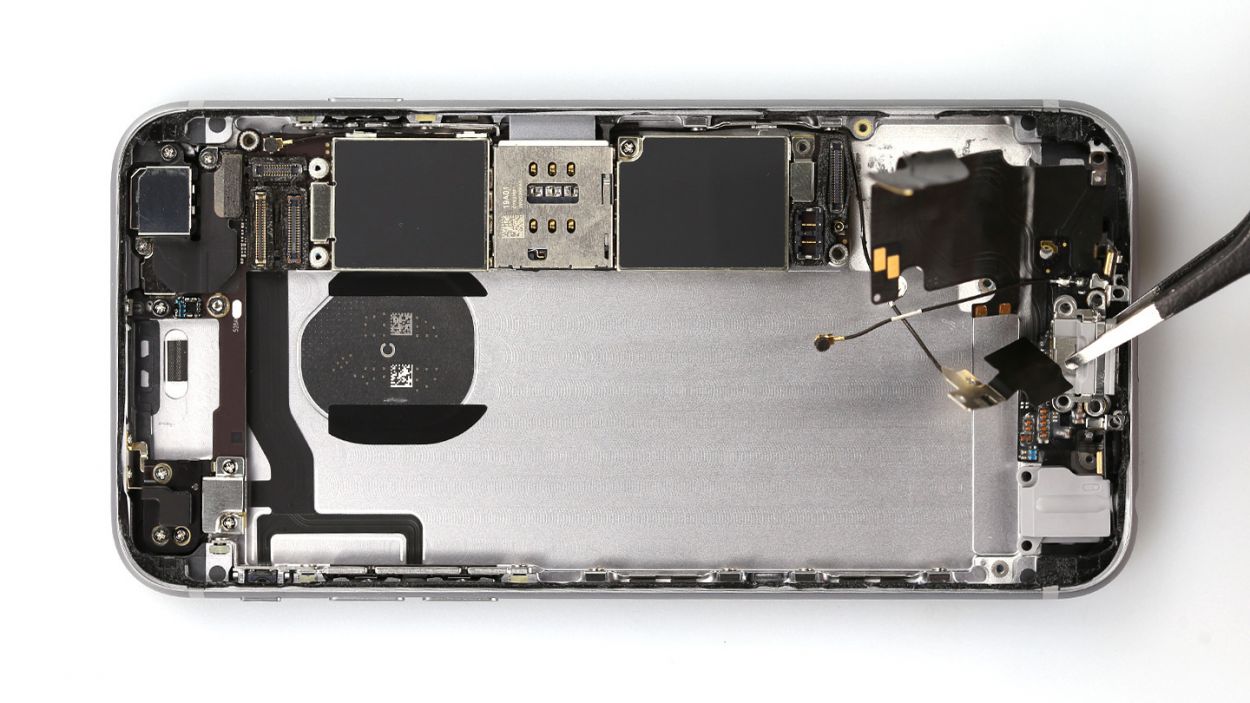
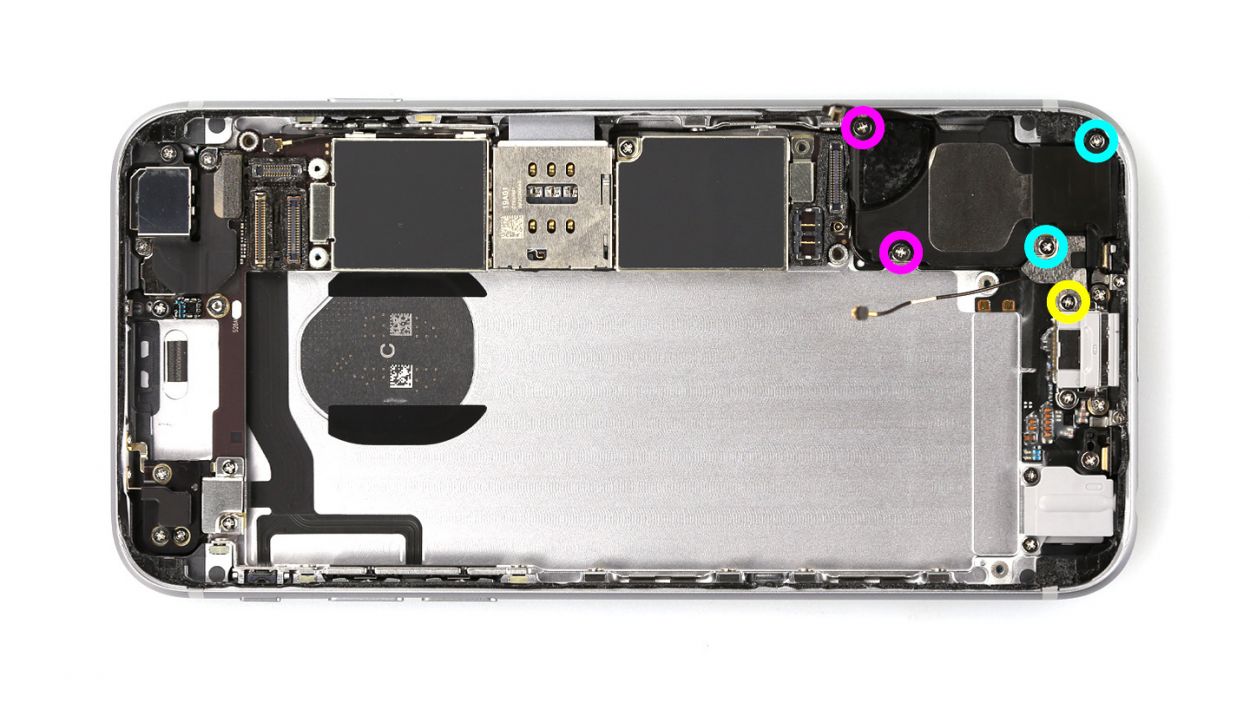
Step 7

– Time to get our hands dirty! Let’s tackle those two pesky Phillips screws that are holding the taptic engine in place. They’re 2 x 1.5 mm Phillips screws, so have your screwdriver at the ready!
– Now that those screws are history, it’s your moment to shine—gently lift out the taptic engine and say goodbye to that little rascal!
Step 8


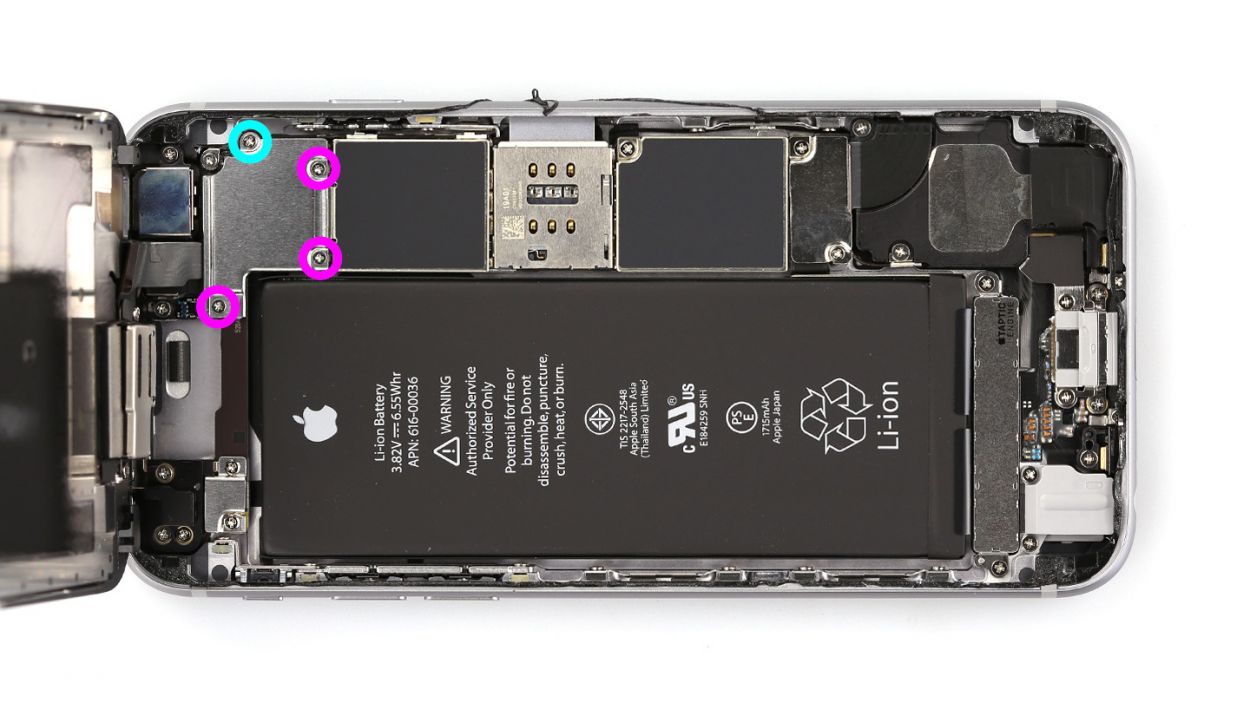
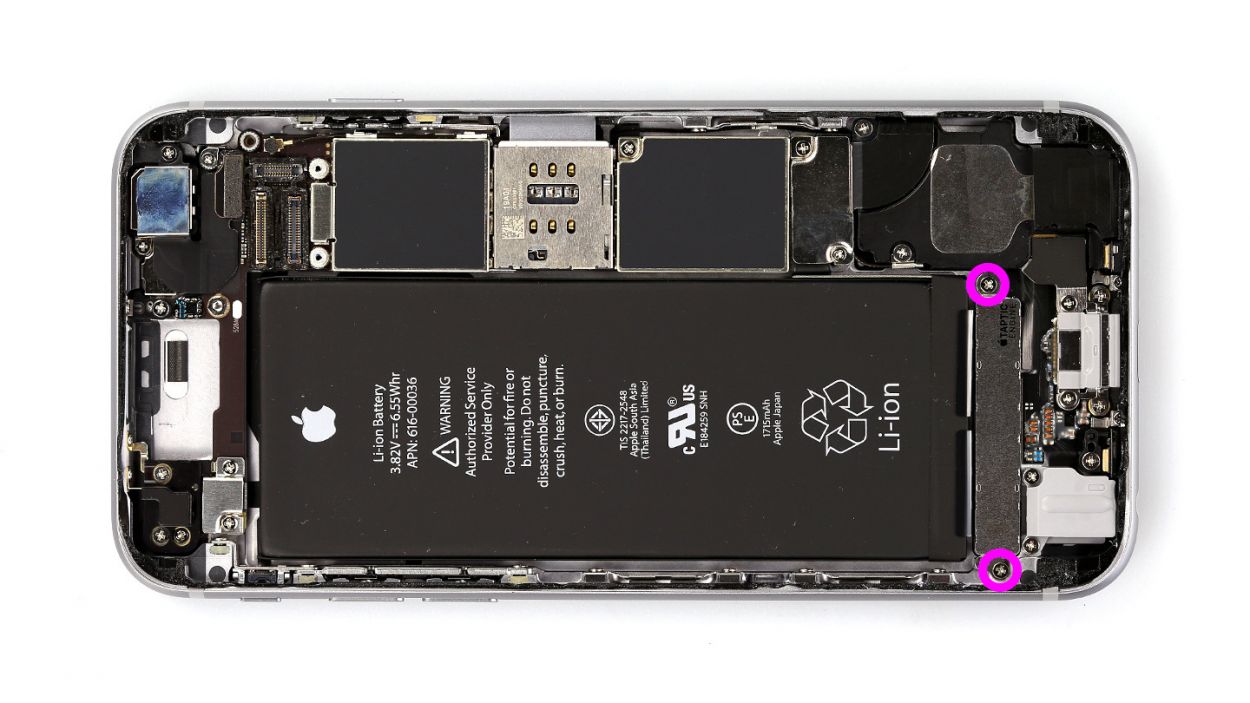
– Detach the black adhesive strip next to the lightning connector. You can find another Phillips screw under it.
– Now loosen the following five Phillips screws that hold the speaker in place. Drop the screws in different sections on the magnetic pad to easily identify them later.2 x 2.6 mm Phillips screw2 x 2.3 mm Phillips screw1 x 3.0 mm Phillips screw
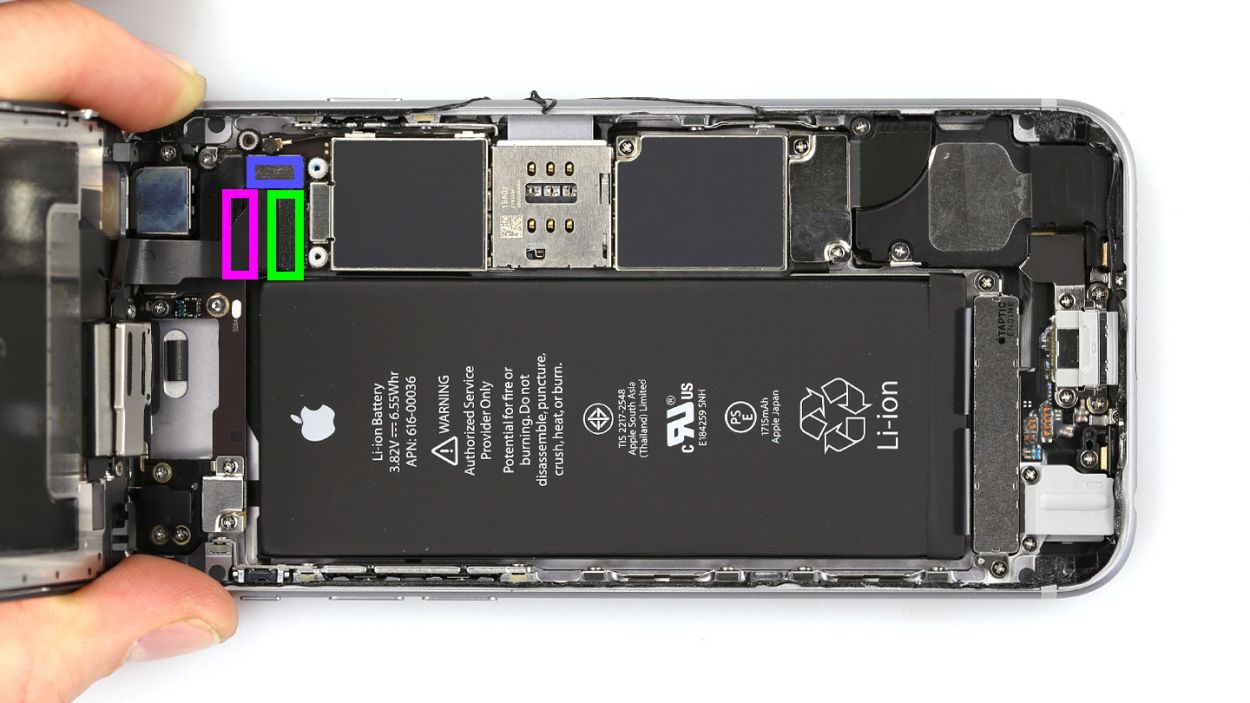
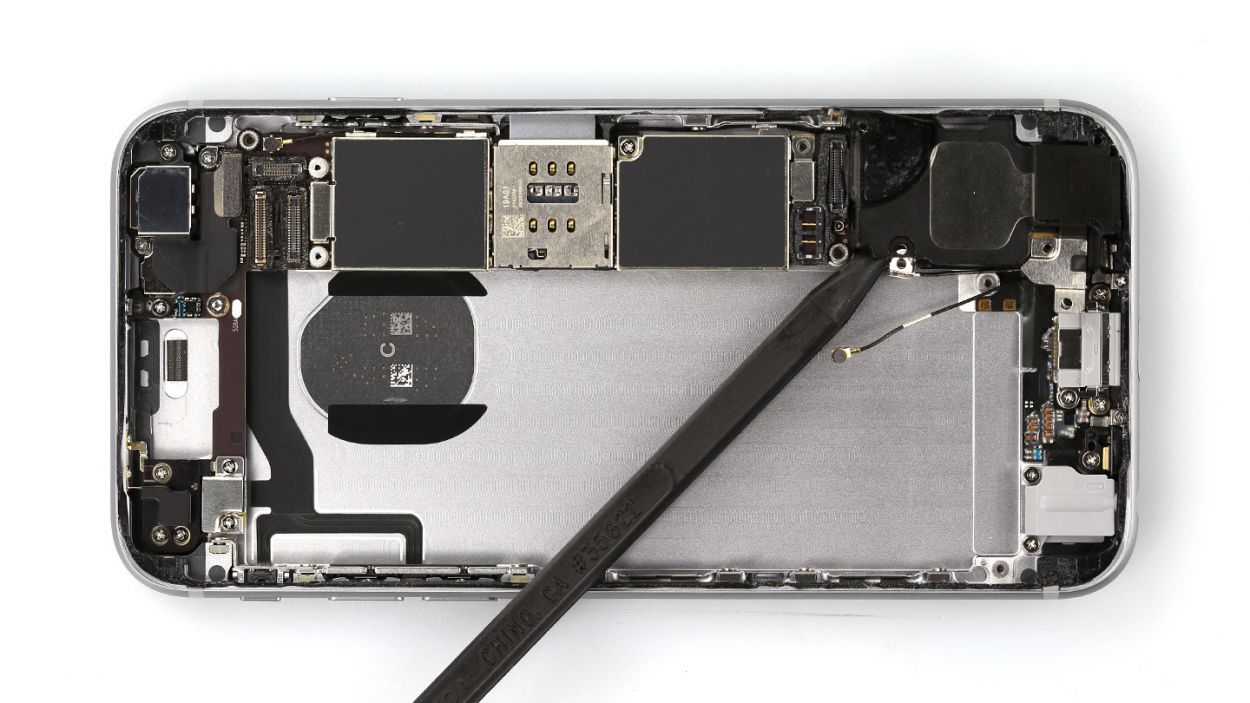
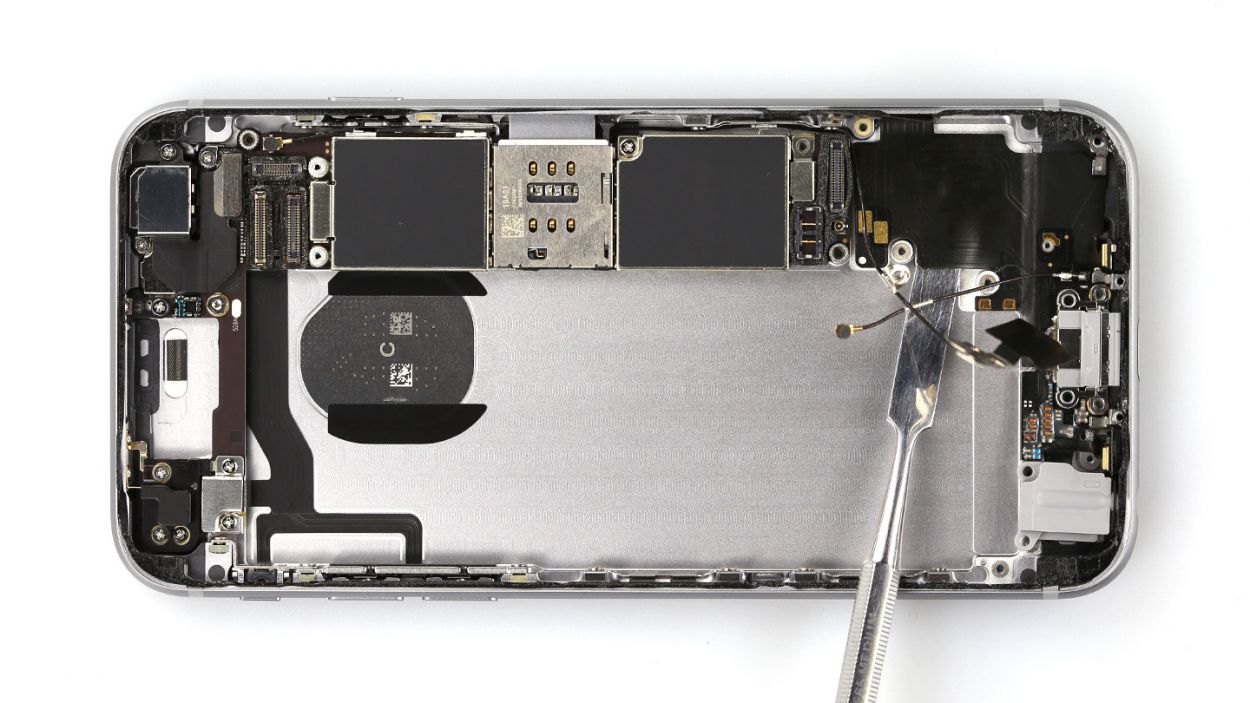
– Carefully pull the antenna cable to the side.
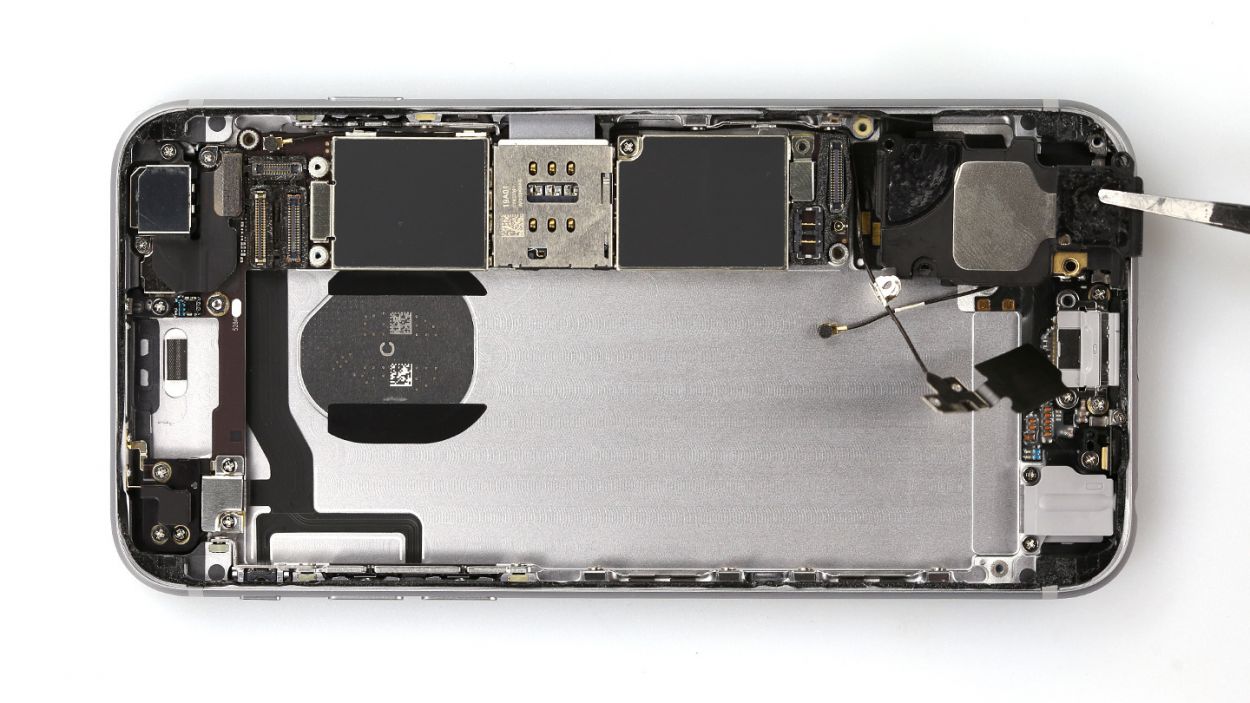
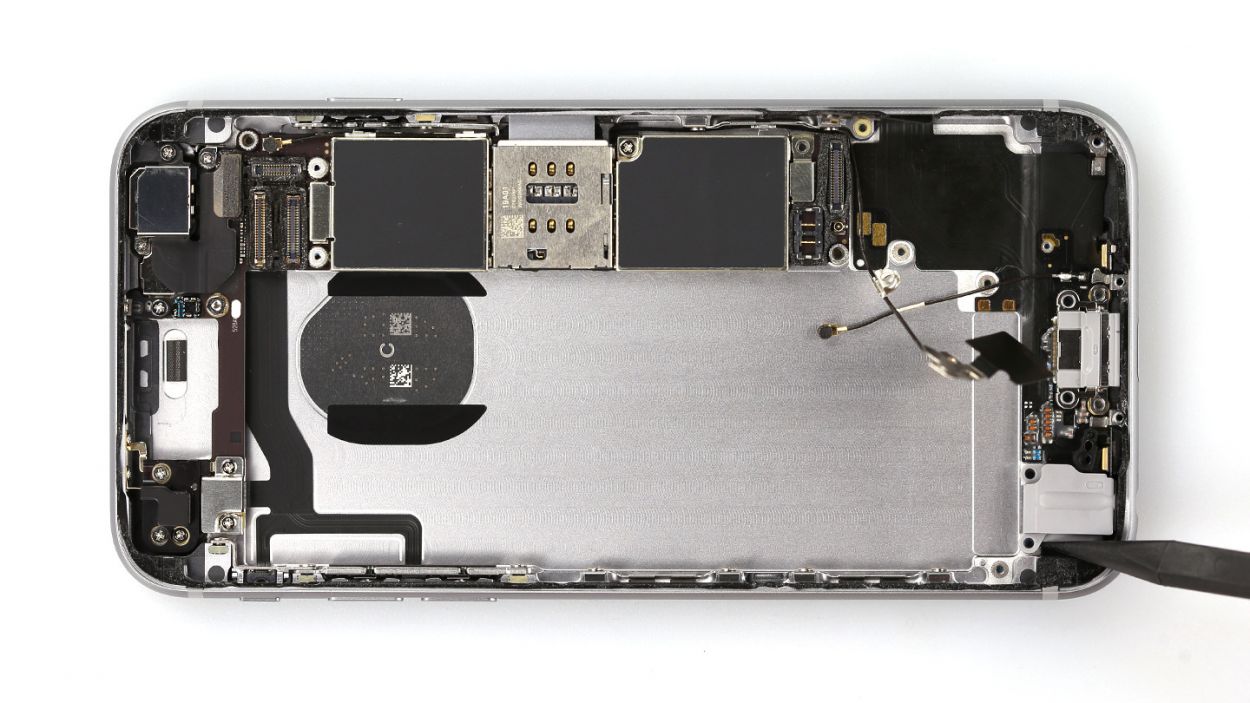
– Now you can remove the speaker.
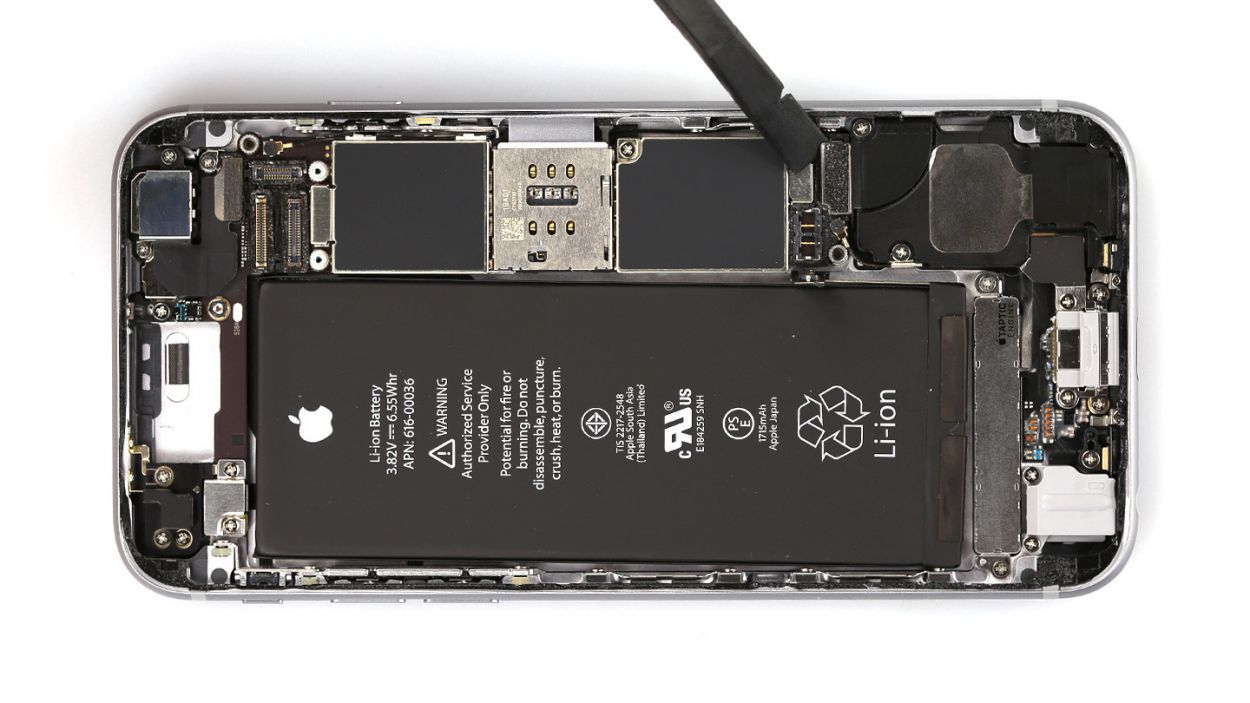
Step 9
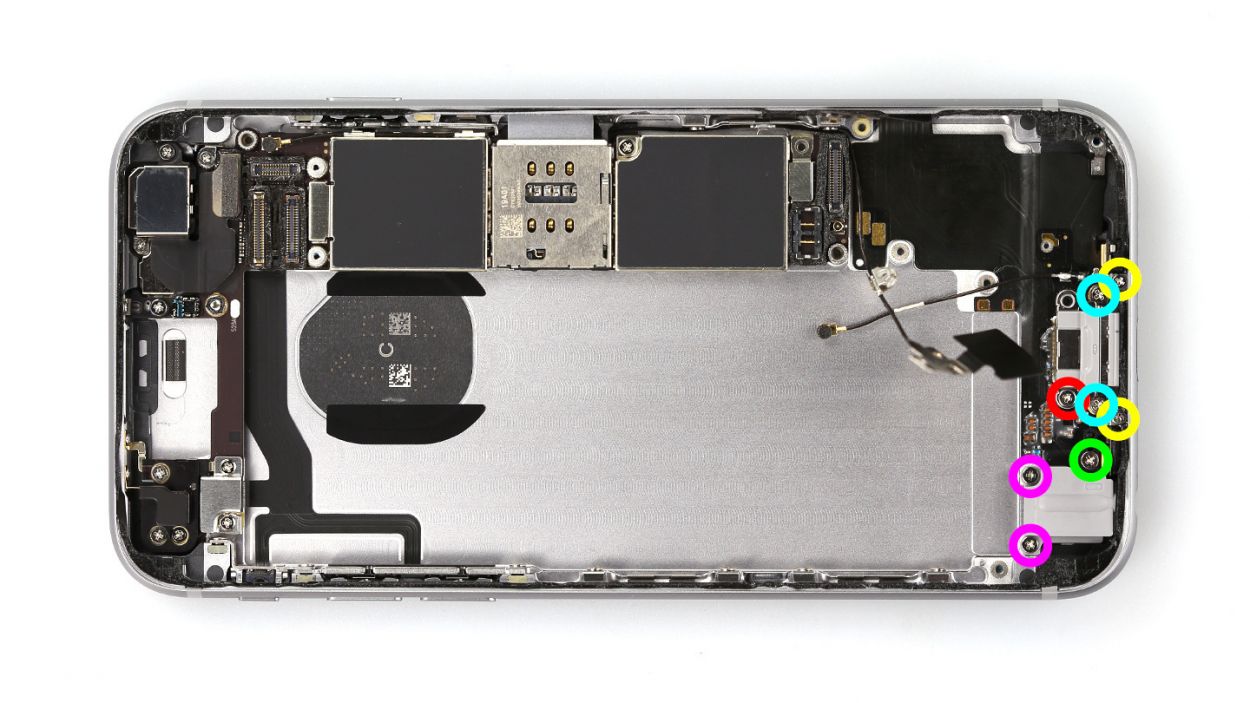
– Okay, super sleuth! Let’s tackle these eight Phillips screws. Think of your magnetic mat as a VIP parking lot for your tiny screw buddies. Arrange them neatly—it’ll make putting them back a breeze! We’ve got: 2 x 3.0 mm, 1 x 3.6 mm, 2 x 1.4 mm, 2 x 1.8 mm, and 1 x 3.0 mm Phillips screws. You got this!
Step 10
– First, let’s get that little black plastic piece next to the headphone port out of the way.
– Now, grab a lab spatula and gently slide it under the ribbon cable to detach it. It’s only stuck where the speaker used to be, so a little hot air will help you pull it off with ease.
– Use your spatula or spudger to loosen up the headphone port, the lightning connector, and those two shiny gold microphones.
– Finally, with a gentle touch, pull off the ribbon cable using your fingers or tweezers. You’ve got this!
Step 11

– Let’s pop that little black plastic piece right over the microphone—it’s like a cozy hat for your device!
– Now, tighten up all those eight screws securing the lightning connector like a true champion! Your checklist is: 2 x 3.0 mm Phillips screws, 1 x 3.6 mm Phillips screw, 2 x 1.4 mm Phillips screws, 2 x 1.8 mm Phillips screws, and 1 x 3.0 mm Phillips screw. You’ve got this!
Step 12


– Place the new speaker back in its cozy spot where the old one used to hang out.
– Double-check that the antenna cable, complete with its little metal ring, is snugly fitted on the speaker, and make sure the silver contact point is back in its rightful place.
– Now, let’s tighten those Phillips screws like a pro!
– Finally, don’t forget to stick that black adhesive tape back on the antenna cable to keep everything nice and tidy.
Step 13
– Alright, let’s get those connections back in action! Reattach the antenna and lightning connector like a pro. You’ve got this!
Step 14

– Alright, let’s get that taptic engine back where it belongs! Just slide it into its cozy little spot.
– Now, secure it with those screws—2 x 1.5 mm Phillips screws will do the trick!
Step 15
– Put on the silver connector cover and screw it tight.
– 1 x 2.9 mm Phillips screw1 x 2.2 mm Phillips screw
Step 16


If those display connectors are feeling a bit shy and aren’t snugly connected, you might see some funky stripes or find that parts of your touchscreen are on a break! Let’s make sure everything’s plugged in right!
– Alright! Time to plug in those display connectors. It might take a few tries, so keep your cool and be gentle—no bending allowed! We’re talking the Front camera/sensor/earpiece/ambient microphone, the Touch ID cable, and the Display.
– Once everything is snug and secure, give your iPhone a warm welcome back by powering it on. Make sure to check that the LCD, touchscreen, proximity sensor, front camera, and earpiece are all back in action. If those connectors aren’t connected right, you might see some funky stripes or find parts of the touchscreen playing hide and seek!
– Finally, it’s time to cover it all up! Place the connector cover back on and screw it tight—using 3 x 1.3 mm Phillips screws and 1 x 2.9 mm Phillips screw. You’re doing amazing!

Step 18
– Alright, time to get that display back in action! Gently fold it down, making sure that the upper edge with the connected cables clicks into place just right. Now, with a little care, push the display down towards the home button along the edge until it fits snugly in the frame. You’ve got this!
Step 19
– Alright, superstar! Time to tighten those two pentalobe screws at the bottom of the enclosure. Grab your 2 x 3.8 mm pentalobe screws and give them a good twist! You’re almost there!
Step 20

When you pop that battery out, your iPhone might just decide to throw a little time party and reset itself to 1:00 a.m. on 1/1/1970! If you don’t set the time, you might find yourself having a tough time connecting to the cellular network. So, let’s get that clock back on track!
– Get your iPhone in sync with iTunes or find a WLAN network and hang tight while it updates the time.
– Pop out the SIM tray with the SIM card and then slide it back in place.
– Toggle flight mode on your device—turn it on and then off again. You got this!