DIY Guide to Replace iPhone 5 Screen
Duration: 30 min.
Steps: 16 Steps
Welcome to your go-to guide for swapping out that stubborn iPhone 5 display! If you’re dealing with a cracked glass, a touchscreen that’s playing hard to get, or an LCD that’s gone dark or flickers like a disco light, then it’s time for a change. Let’s get your device looking sharp again!
Step 1

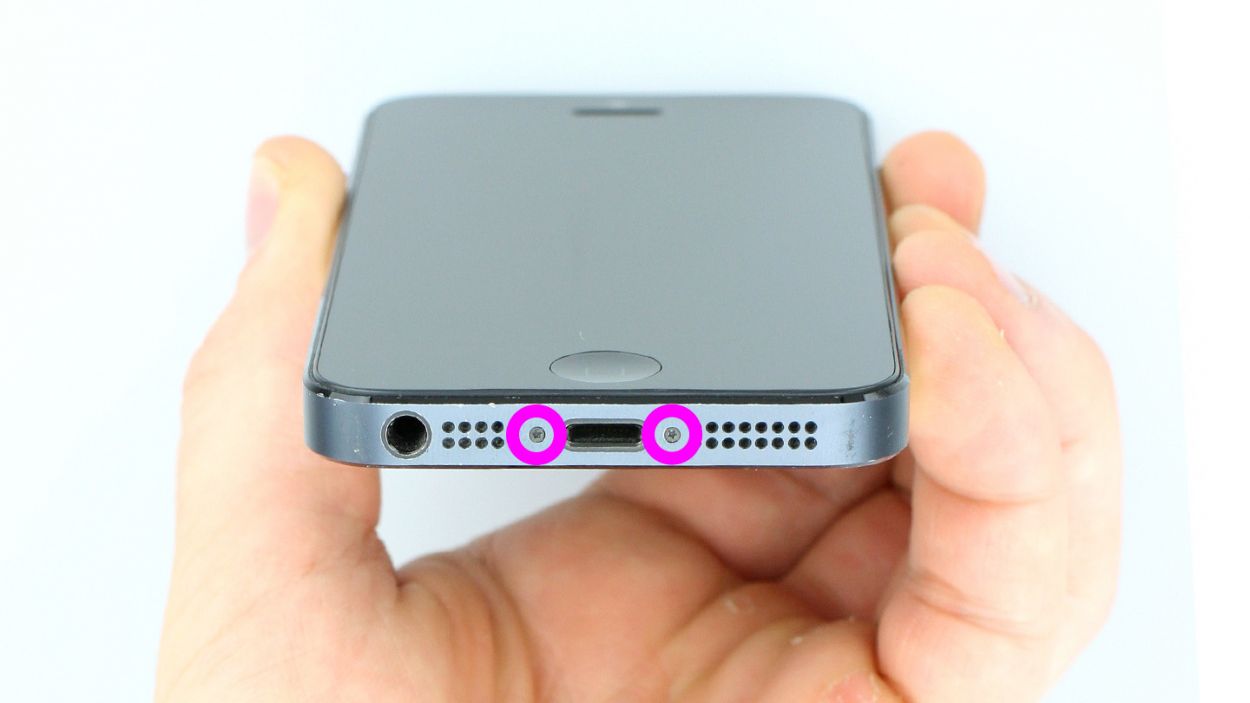
– Grab your trusty pentalobe screwdriver to get this iPhone 5 open and ready for action!
– Carefully unscrew the two pentalobe screws at the bottom of the enclosure, located right next to the Lightning connector. Don’t forget to throw those screws into the same compartment of your organizer tray—let’s keep things tidy! You’ll need 2 x 3.6 mm pentalobe screws for this part.
Step 2

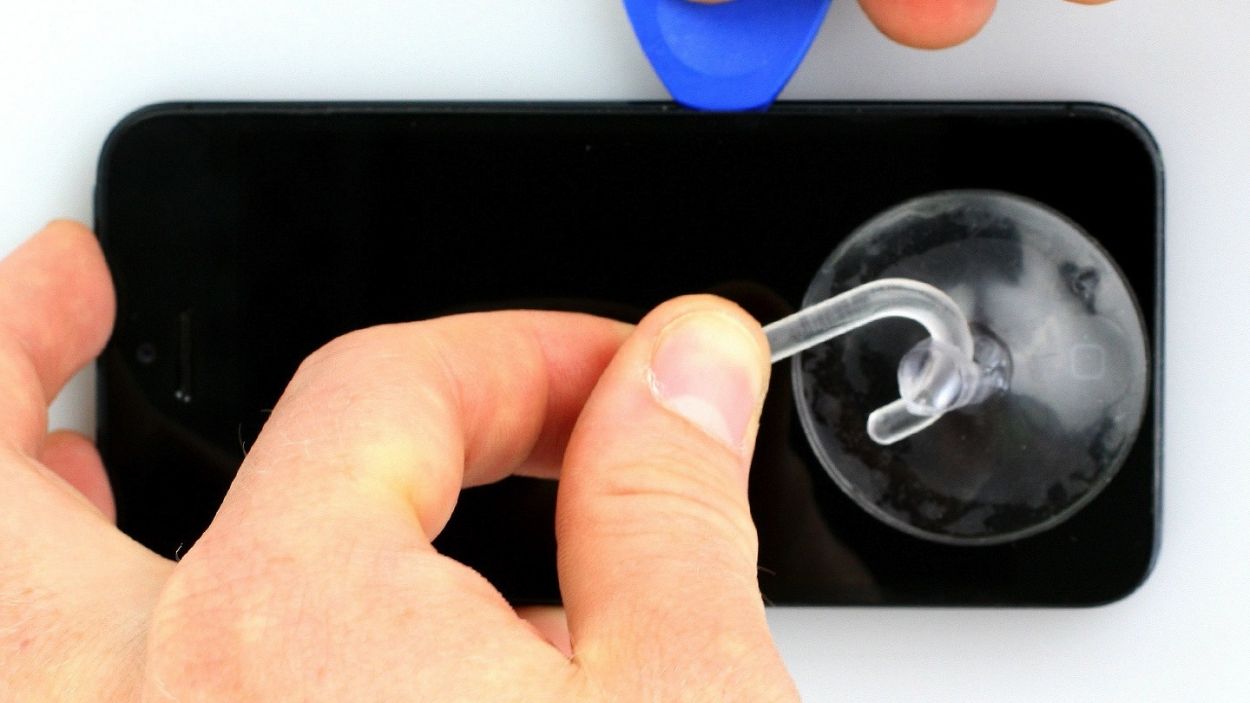
– Put your iPhone 5 on a soft, clean surface to avoid scratching the back.
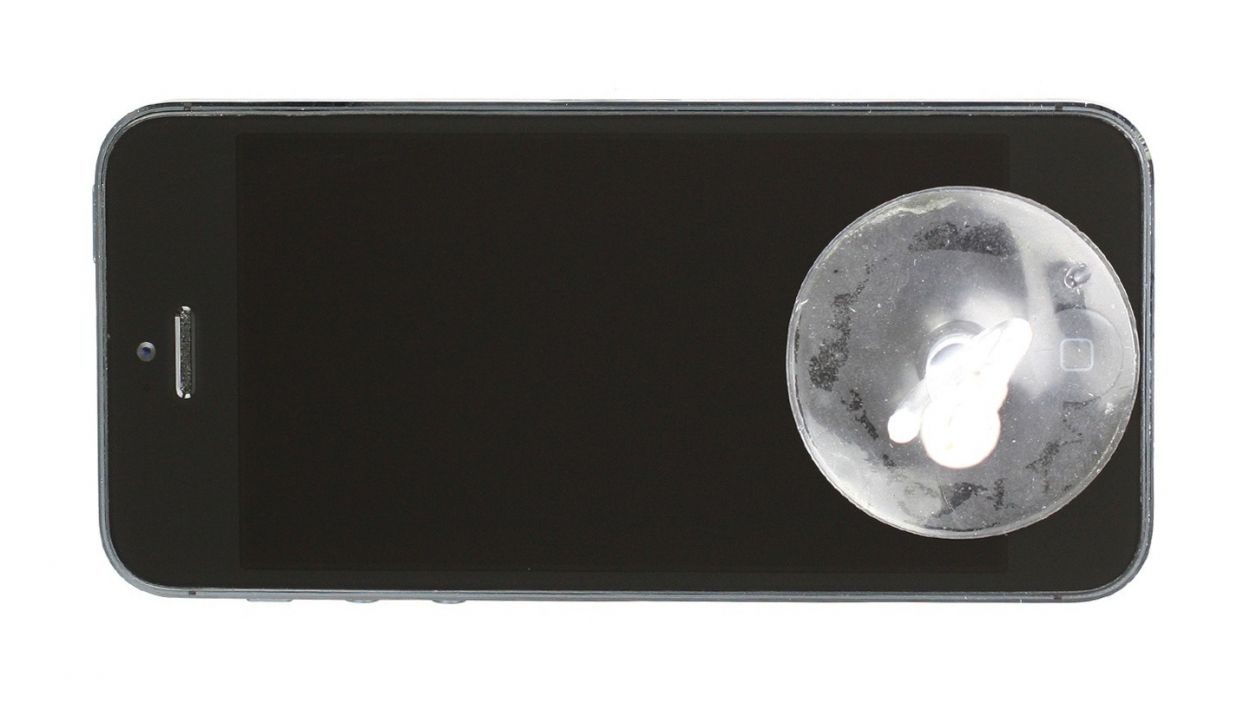
– To lift the front panel, you need a suction cup and the hard plastic pick. If the screen is severely cracked, cover all of it with packing tape.
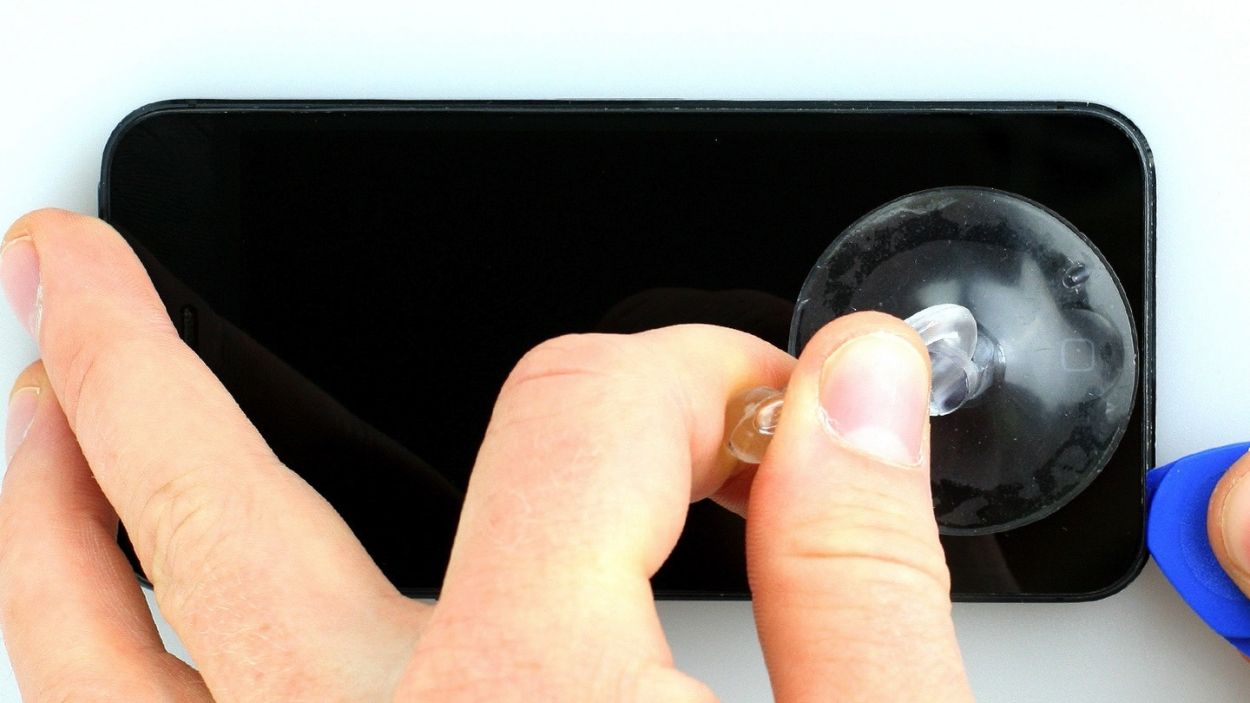
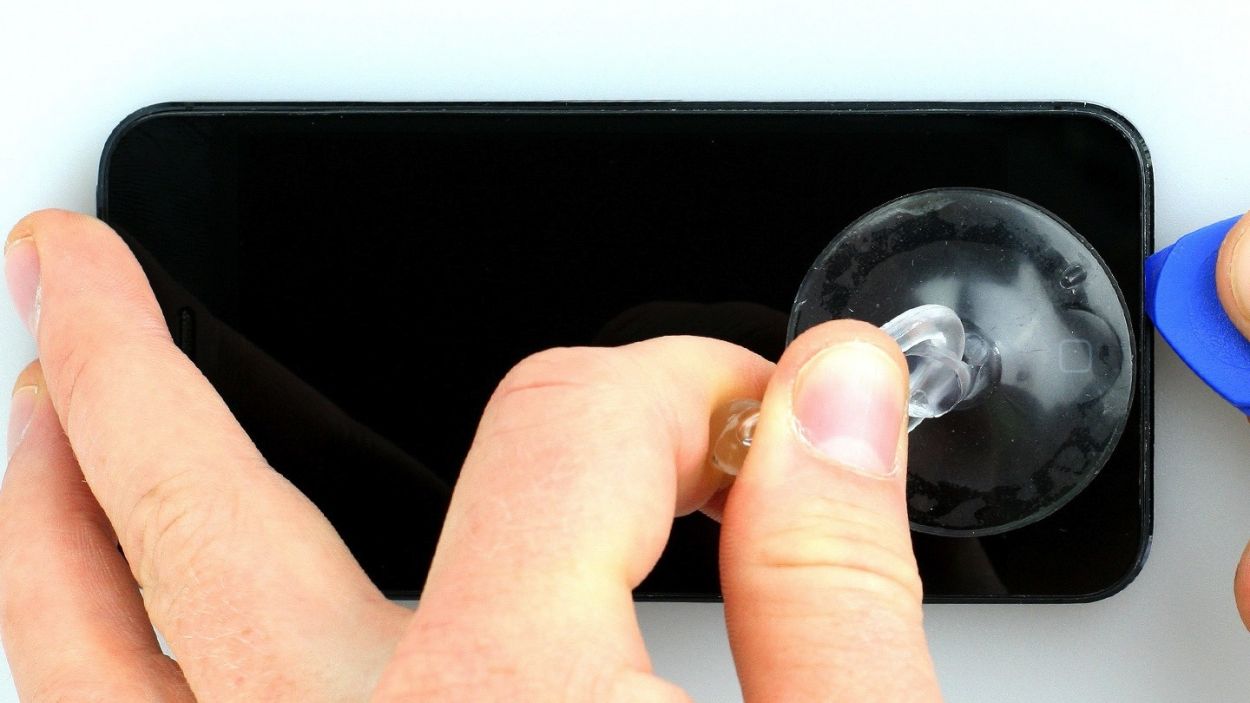
– Place the suction cup over the Home button (if possible) or next to it (see figure 1). While lifting the screen with the suction cup, insert the hard plastic pick between the aluminum frame and the display frame and press down the aluminum frame. Also use the hard plastic pick to raise the screen (see figures 2 and 3). This usually takes several attempts.
– As soon as you can lift the screen a little bit (see figure 4), you have to carefully work your way around the outside until it’s loosened on both sides (see figure 5).
– Once the display is fully detached, you can flip it up at the Home button. Note that the display cables are still connected to the logic board (see next step).
Step 3
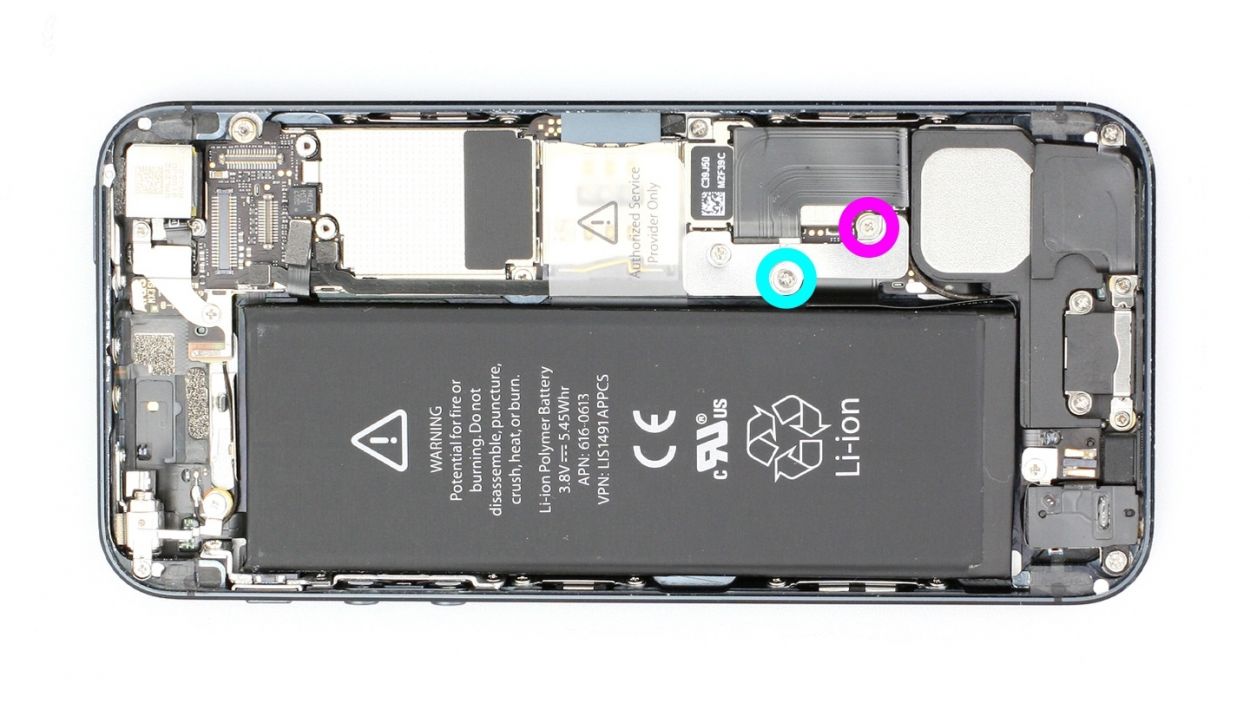
– Grab your Phillips screwdriver and get ready to tackle those Phillips screws on the battery connector (check out figure 1 for a visual!). Once you’ve got those out, gently lift the cover using your trusty spudger (figure 2 is your friend here). Remember to keep all those little parts organized in the same compartment of your tray—let’s keep it neat! You’ll need 1 x 1.8 mm Phillips screw (funnel head) and 1 x 1.7 mm Phillips screw for this step.
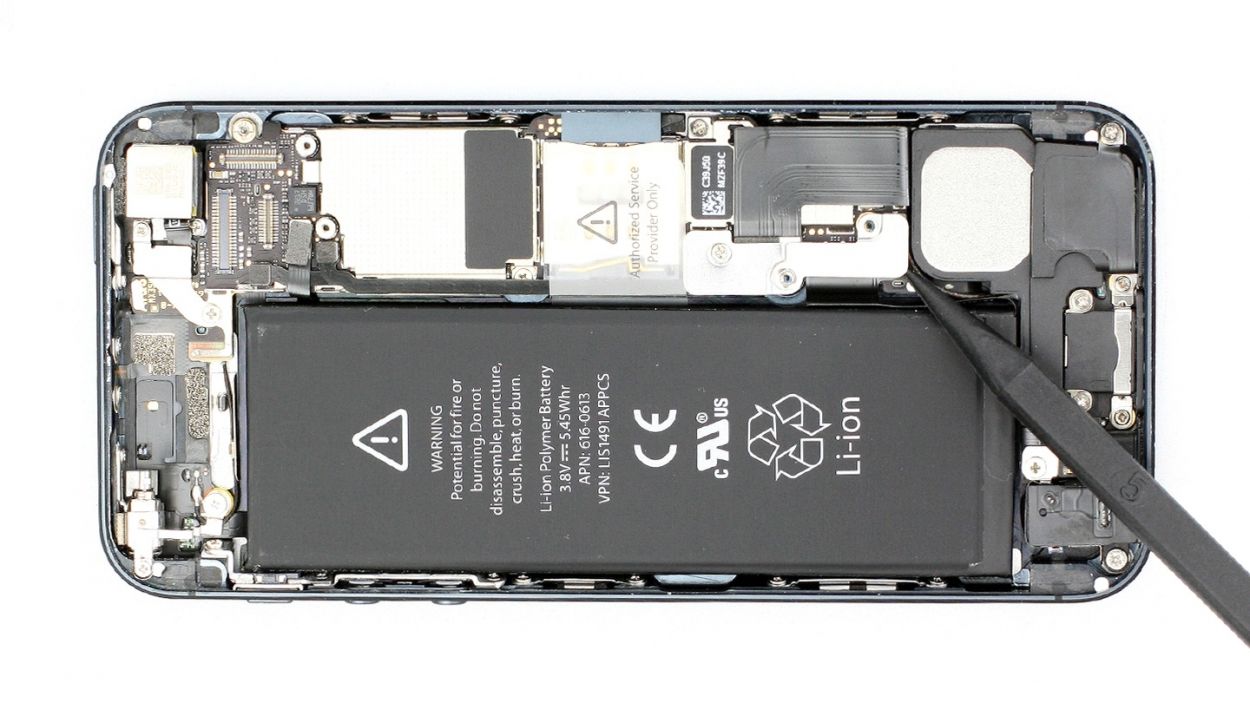
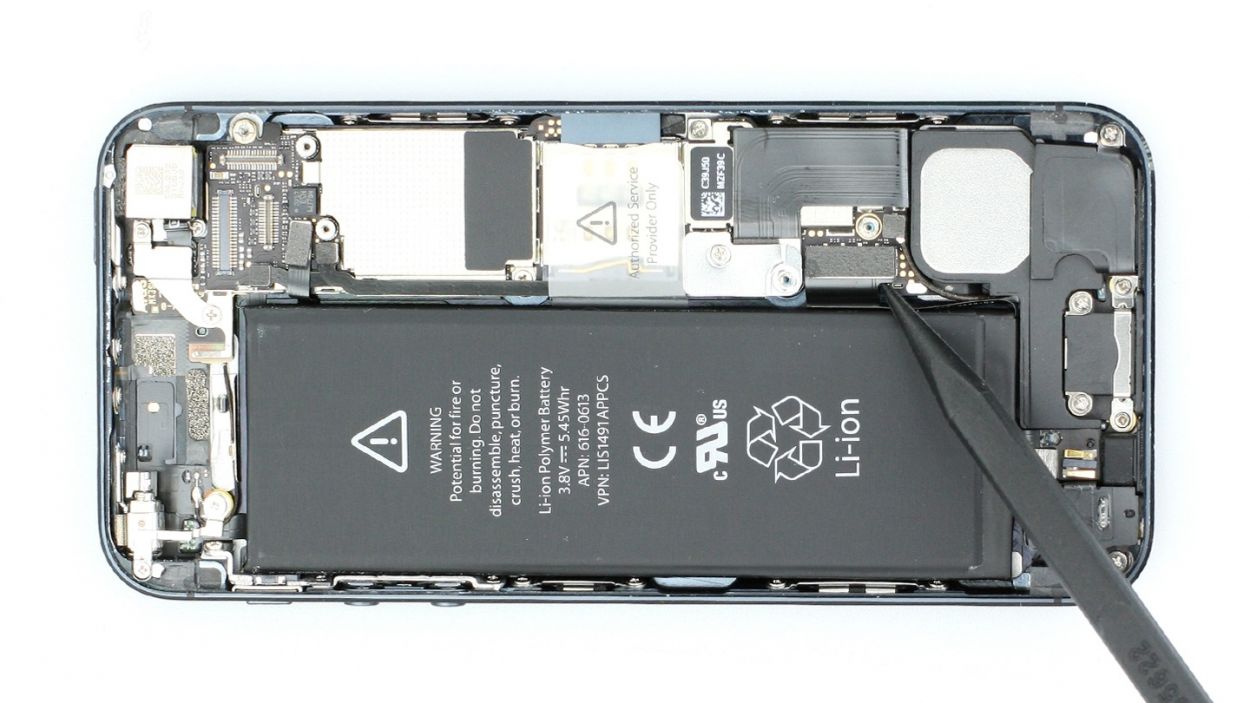
– Now, with a steady hand, carefully lift off the battery connector by sliding the pointed tip of the ESD spudger just below the connector (figure 3 will guide you). If you don’t have a spudger handy, your fingernail can do the trick too!
Step 4

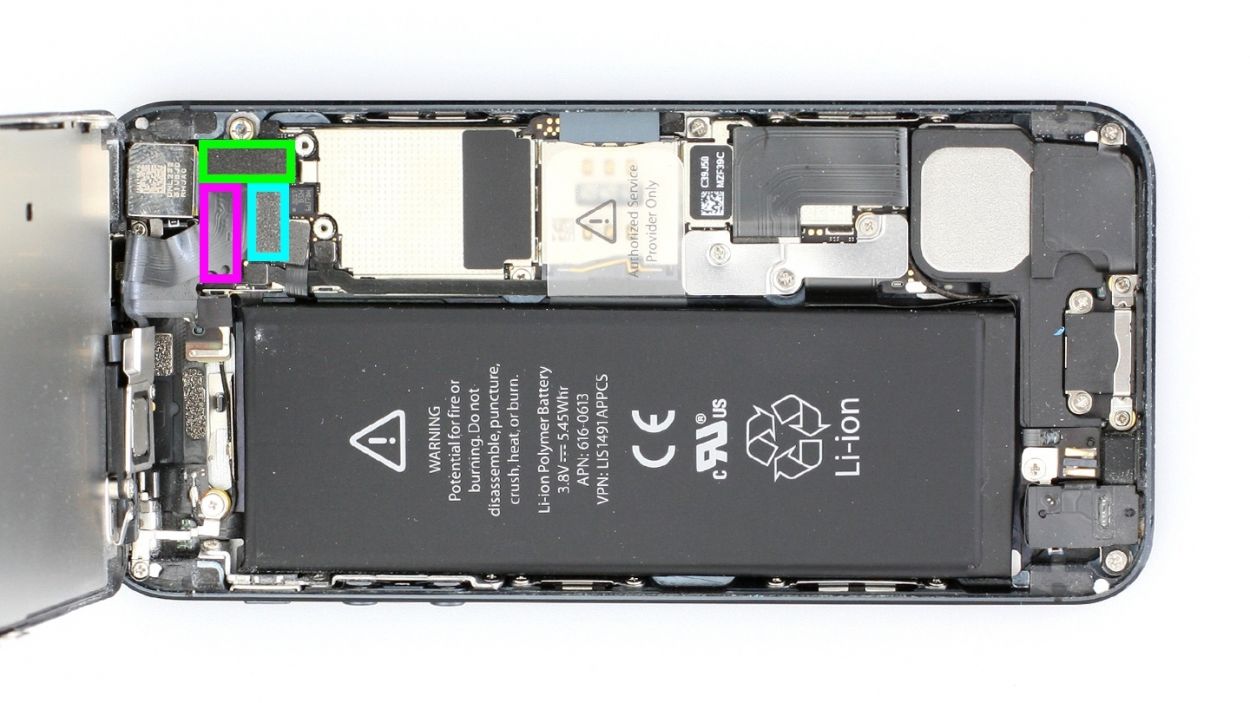
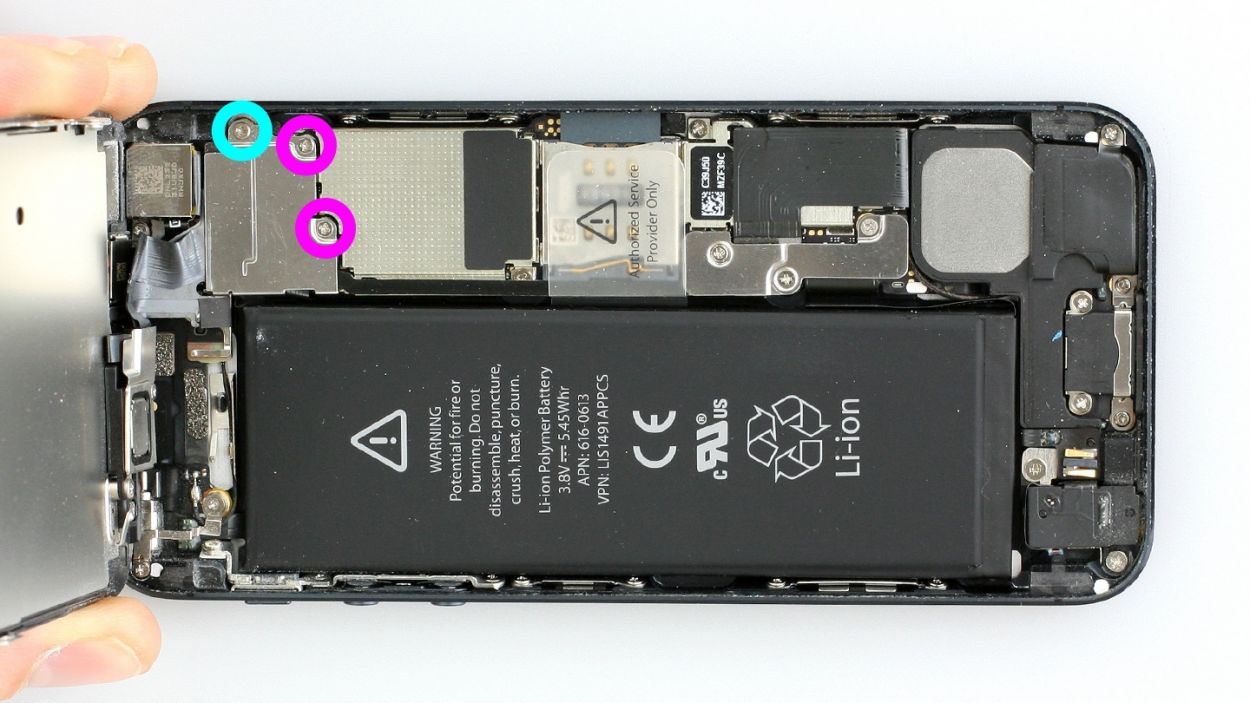
– First remove the three Phillips screws from the silver cover (see figure 1). Put the screws in the same compartment of your organizer tray.2 x 1.2 mm Phillips screws1 x 1.7 mm Phillips screw (not magnetic)
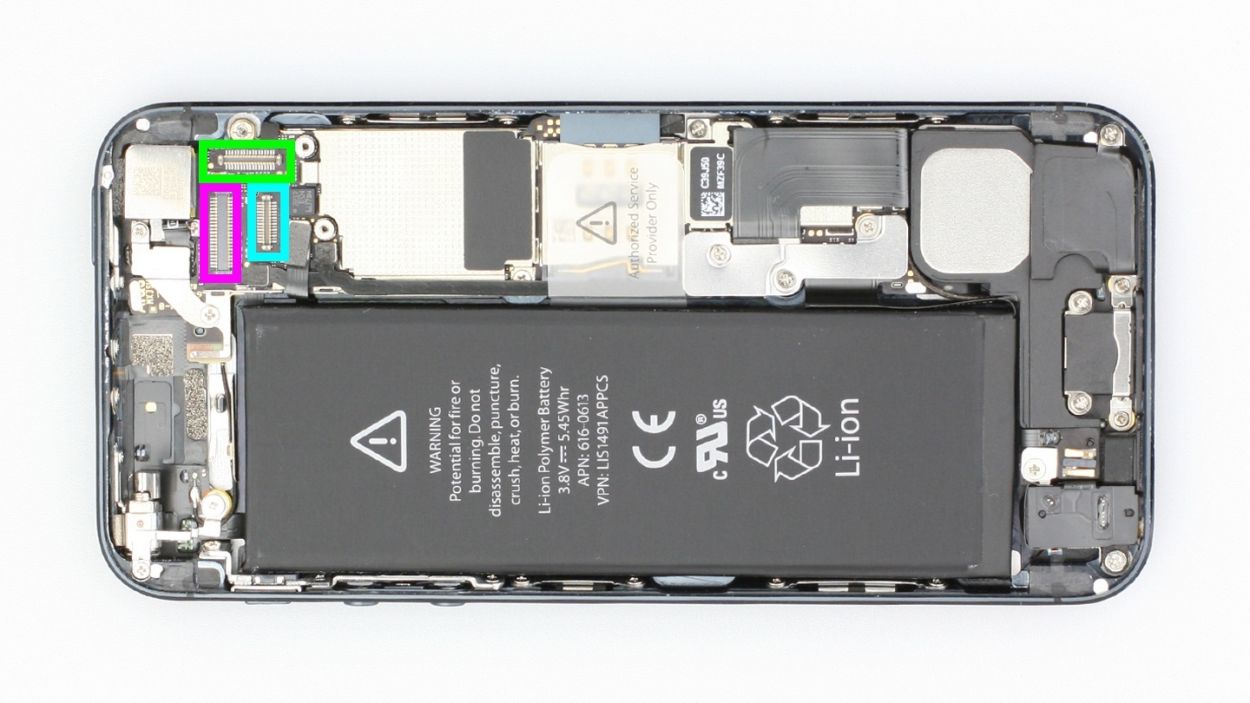
– Now you can disconnect the following three connectors (see figure 2). Be very careful.
– Place the pointed tip of the spudger very slightly below the contact and lift it up. Make sure you don’t break off the resistors that are soldered onto the logic board. In later batches of phones, the resistors are protected by a black plastic film.LCDTouchscreenFront camera/sensor/earpiece
– Testing the new displayTemporarily connect the new display assembly.Start the iPhone and check whether the LCD and touchscreen work properly. Make sure the connectors are securely plugged in to the connections. If not, the display will remain black or stripes will appear on it.If the display you want to install already has a proximity sensor, earpiece and front camera, skip to step 13.If the display is slightly yellow, see the last step in this manual.
– Temporarily connect the new display assembly.
– Start the iPhone and check whether the LCD and touchscreen work properly. Make sure the connectors are securely plugged in to the connections. If not, the display will remain black or stripes will appear on it.
– If the display you want to install already has a proximity sensor, earpiece and front camera, skip to step 13.
– If the display is slightly yellow, see the last step in this manual.
Step 5

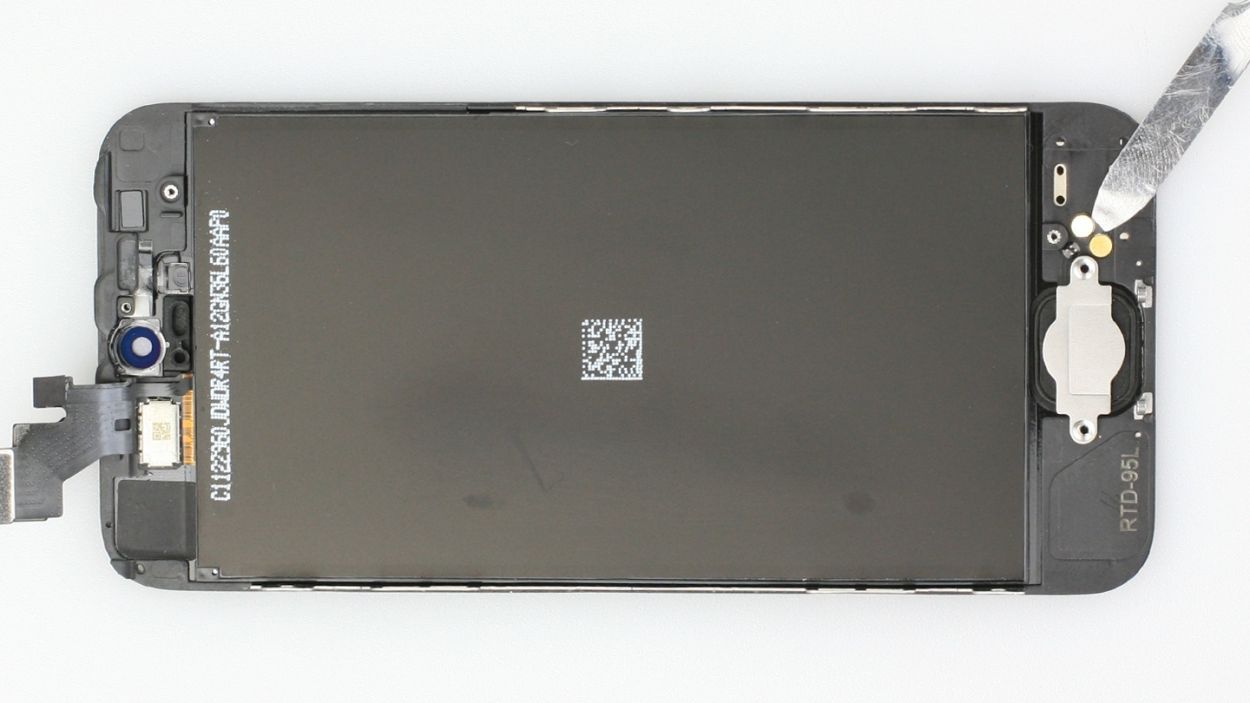
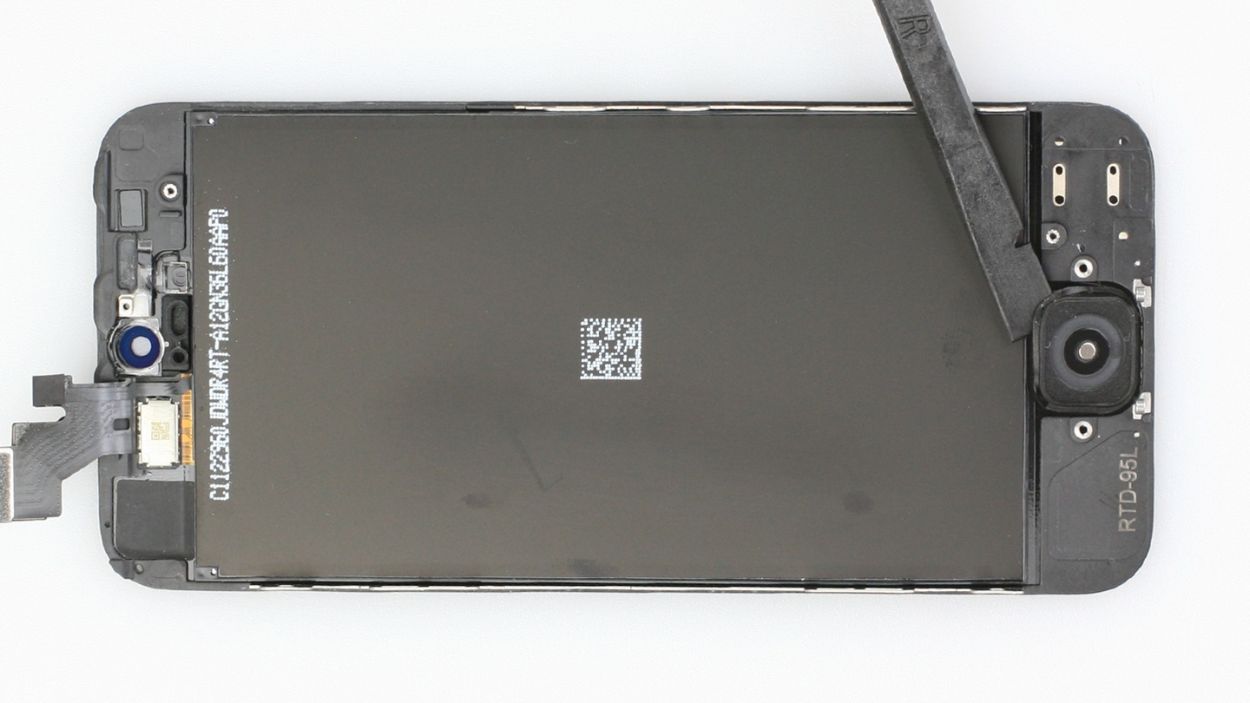
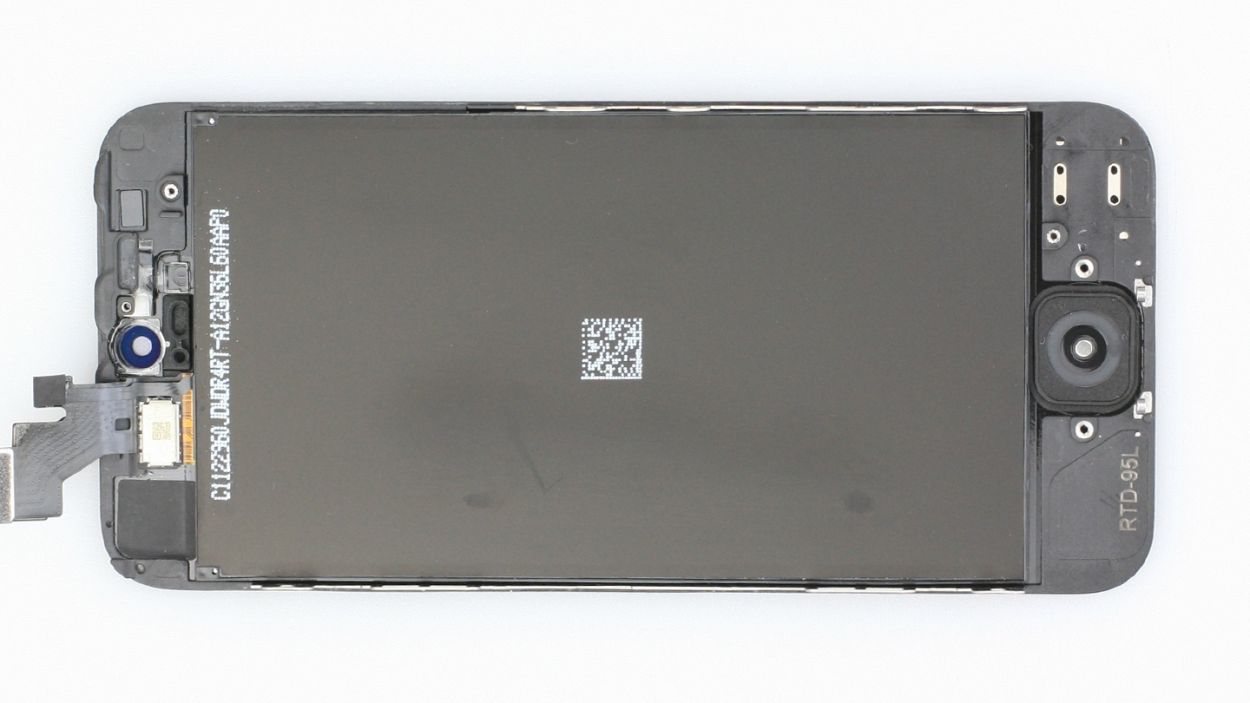
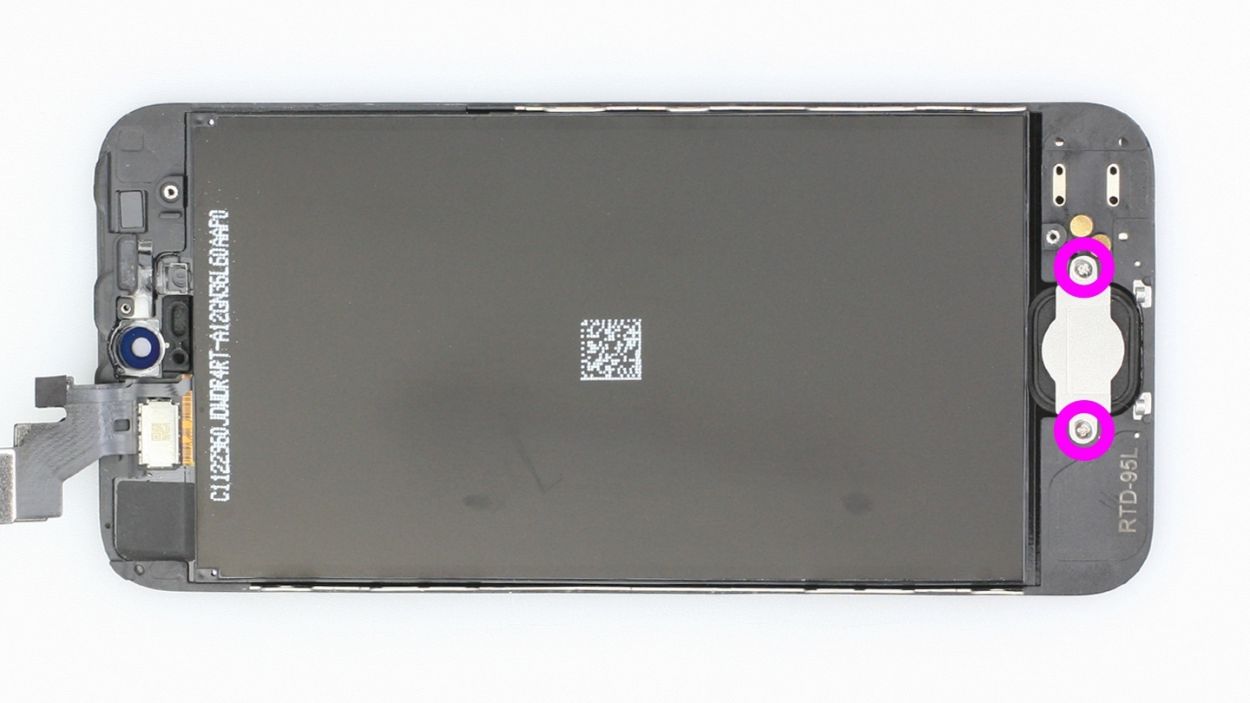
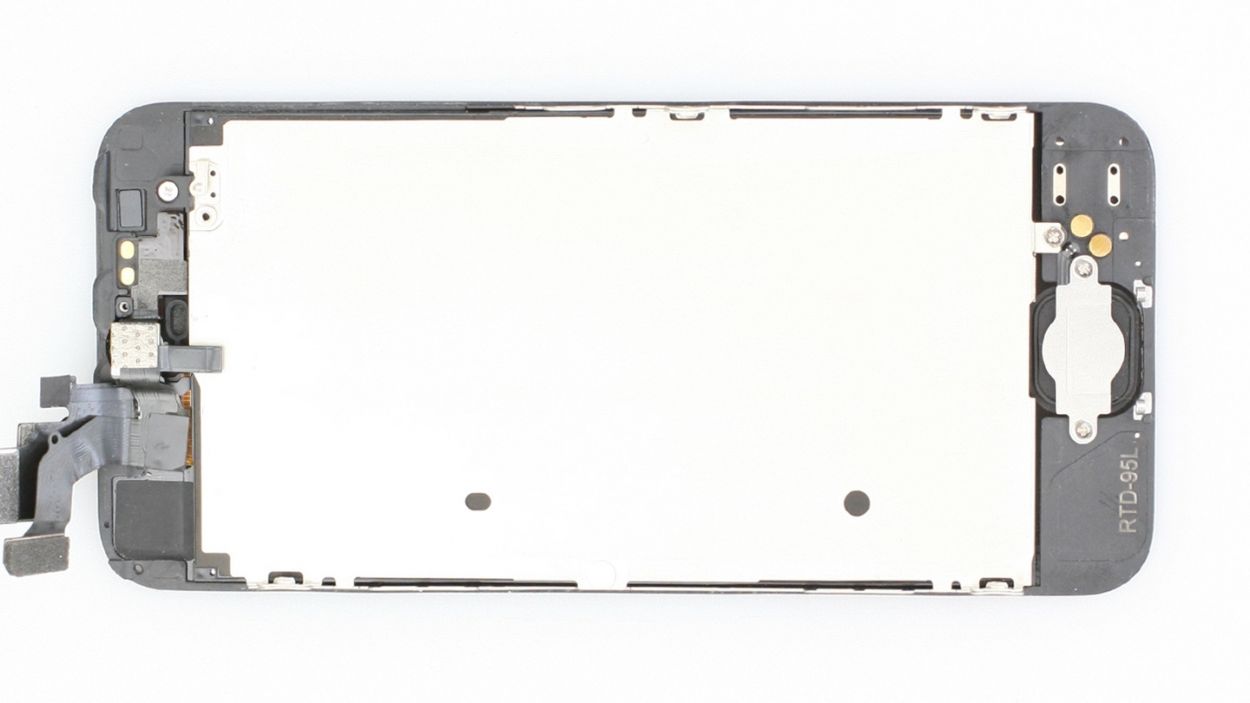
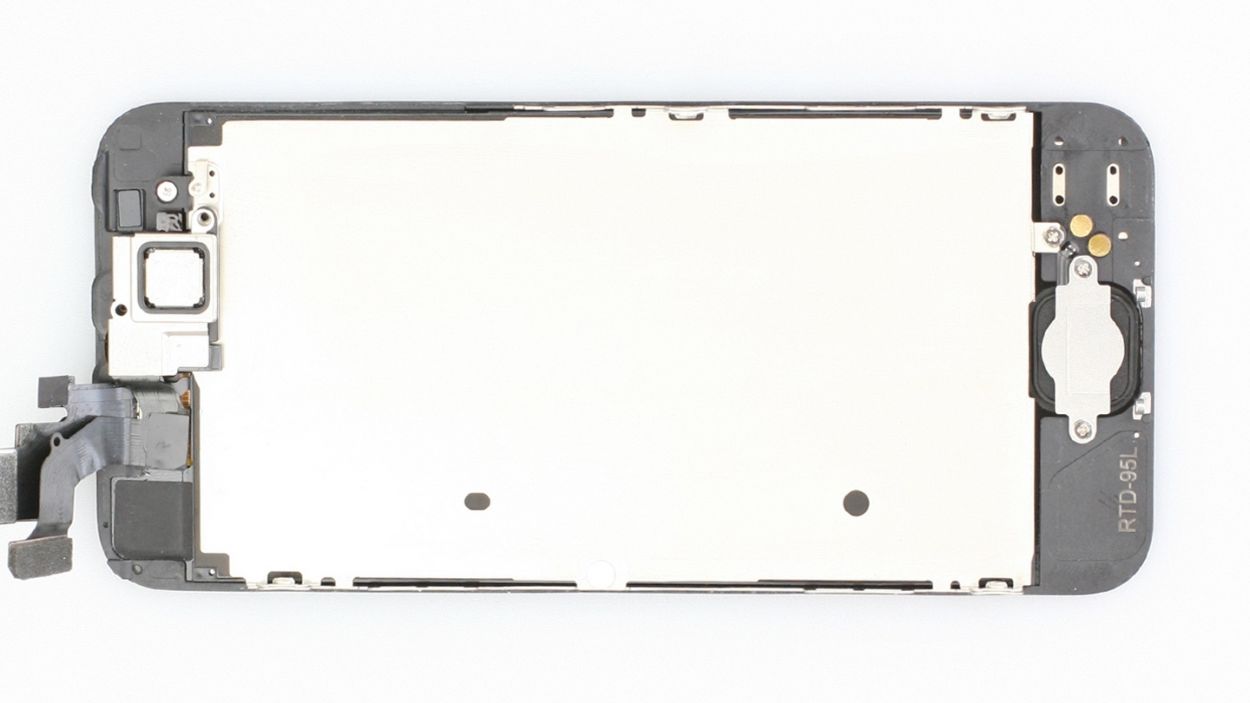
– The earpiece is hanging out on the back of the display panel! First, let’s remove the two Phillips screws that are keeping the cover in place (check out figure 1 for a visual). Don’t forget to toss those screws into the same compartment of your organizer tray—staying organized is key! You’ll need a 4.1 mm Phillips screw and a 2.2 mm Phillips screw for this part.
– Next, gently take off the cover and place it with the screws you just removed (see figure 2).
– Now, uncover that little earpiece (see figure 3) so you can wiggle it out with your fingers. Easy peasy!
Step 6

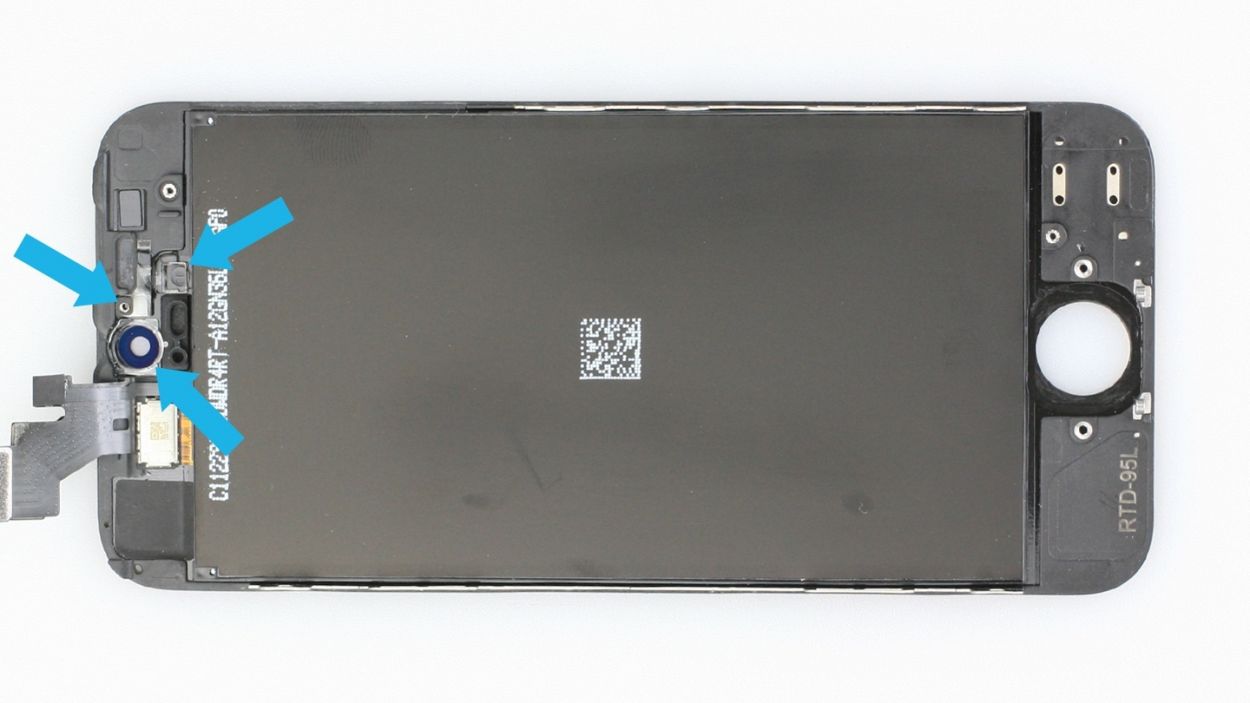
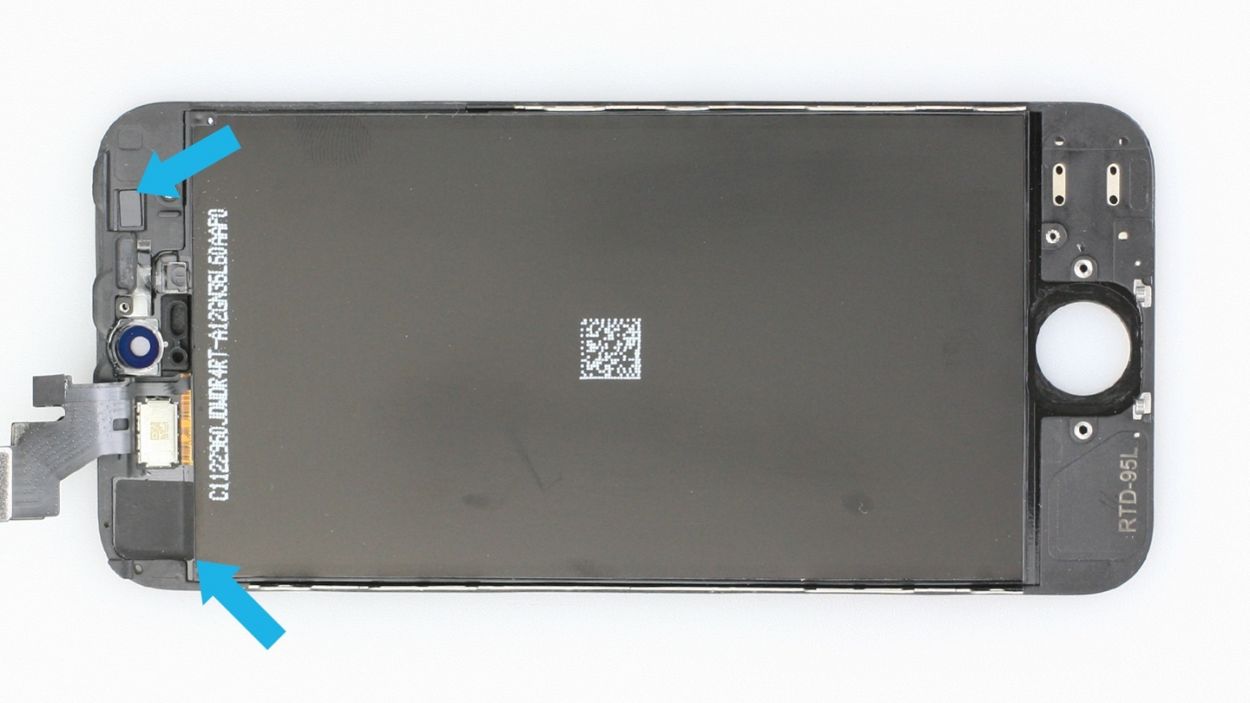
– Start by gently peeling away the cable set. It’s got a bit of gentle glue holding it to the sensors, so grab your trusty laboratory spatula and nudge it off carefully (just like in figure 1).
– Once you’ve got it loose, you can finish the job with your fingers (check out figure 2). Just a heads-up: the ambient microphone is still kind of hanging on, but don’t worry, it’s not going anywhere just yet!
Step 7

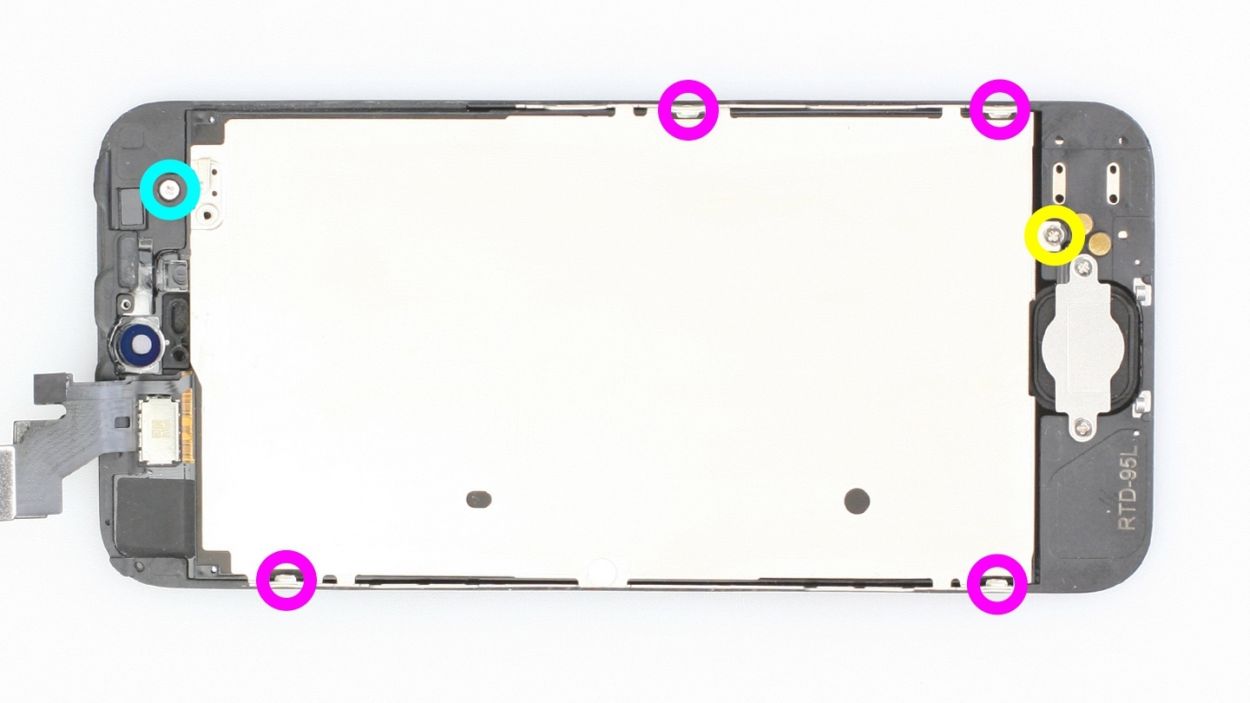
– Alright, let’s get that metal cover off! Start by unscrewing the six Phillips screws that are holding it in place. Remember to toss those screws into the same compartment of your organizer tray—keeping it organized is the name of the game! You’ll need: 1 x 2.7 mm Phillips screw, 4 x 1.2 mm Phillips screws, and 1 x 1.6 mm Phillips screw.
Step 8

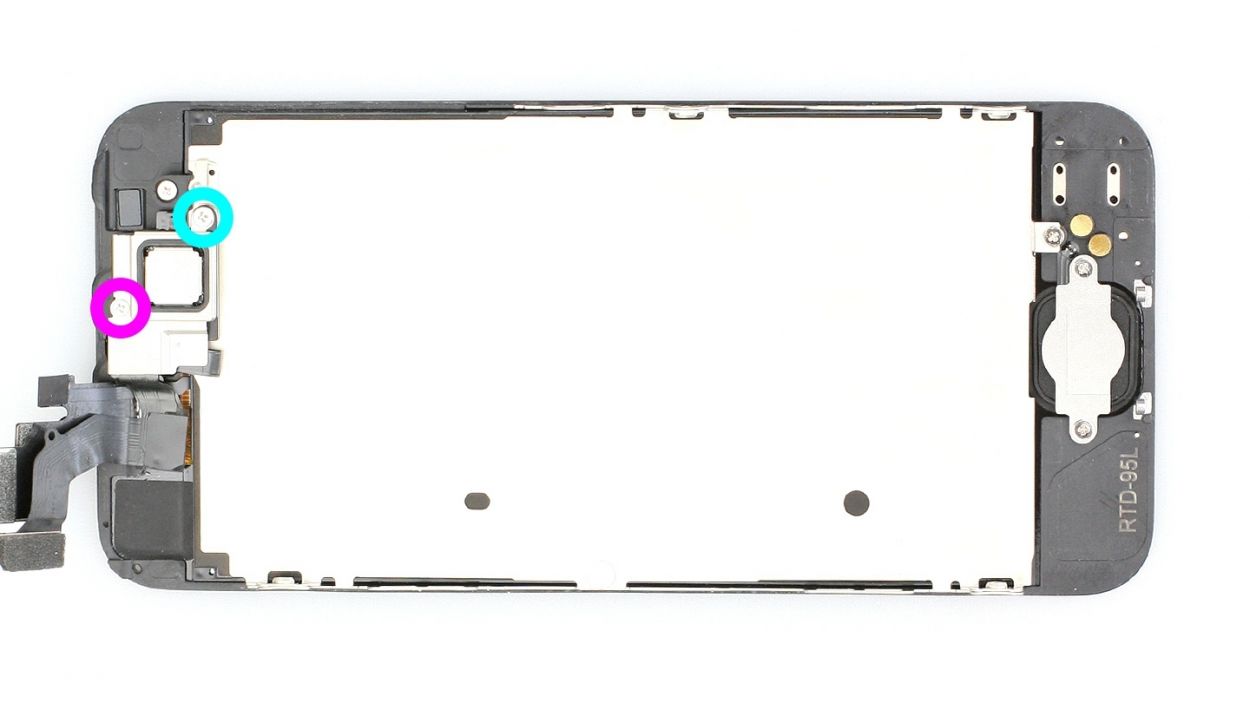
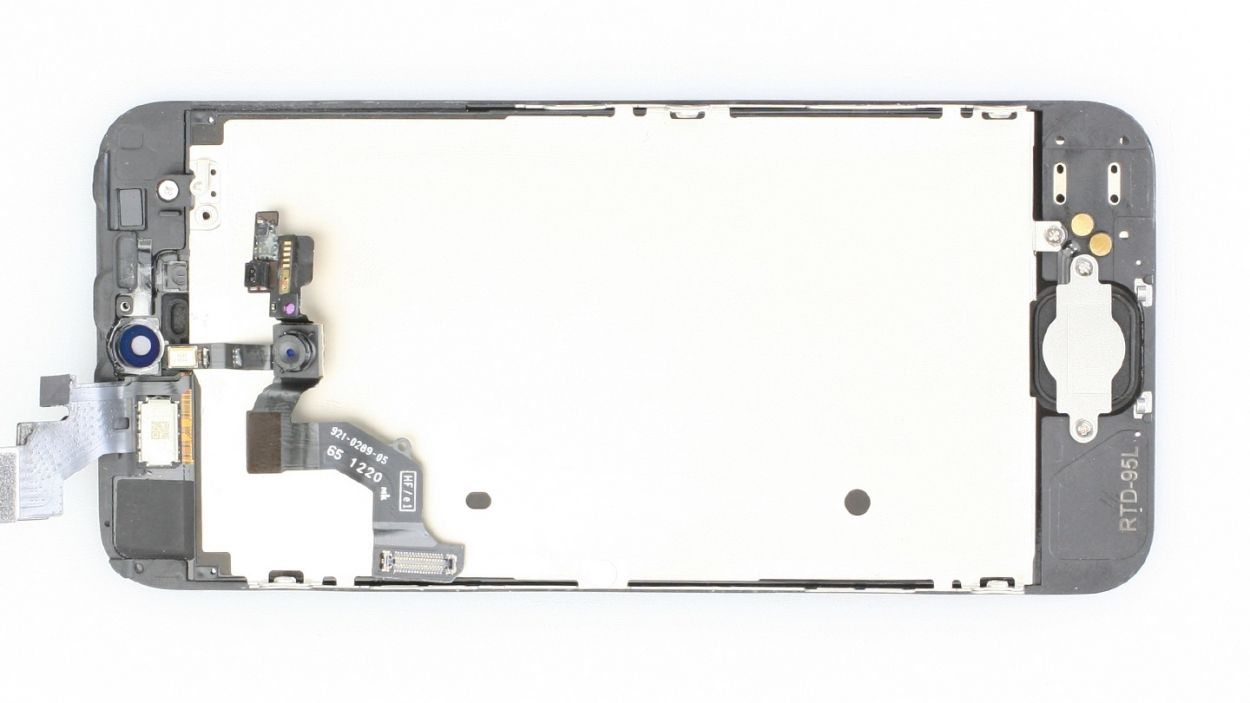
– First off, let’s tackle those two Phillips screws! Unscrew them and pop them into the same compartment of your organizer tray—keeping tidy is half the fun! (Check out figure 1). You’re dealing with 2 x 1.4 mm Phillips screws here.
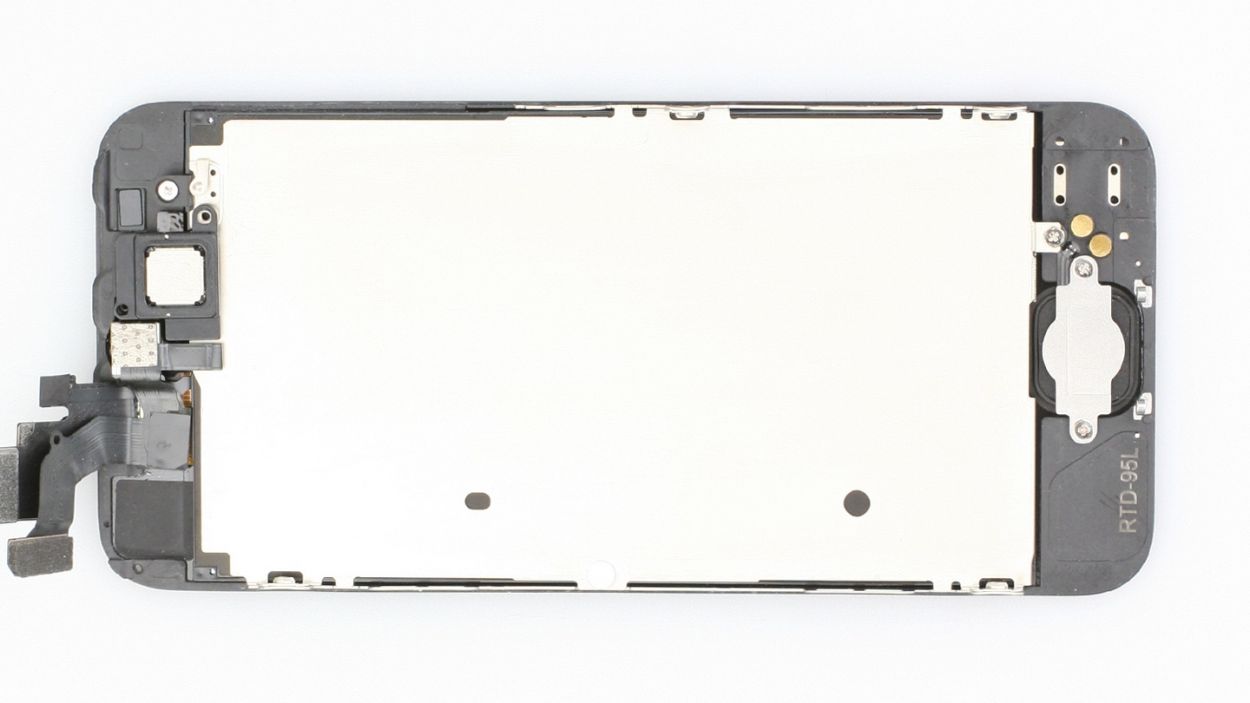
– Next up, grab your trusty laboratory spatula and gently slide it beneath the cable set. It’s usually glued in place, but no worries—you’re in control! (See figure 2).
– Once you’ve got it loose, go ahead and pull off the cable set with ease!
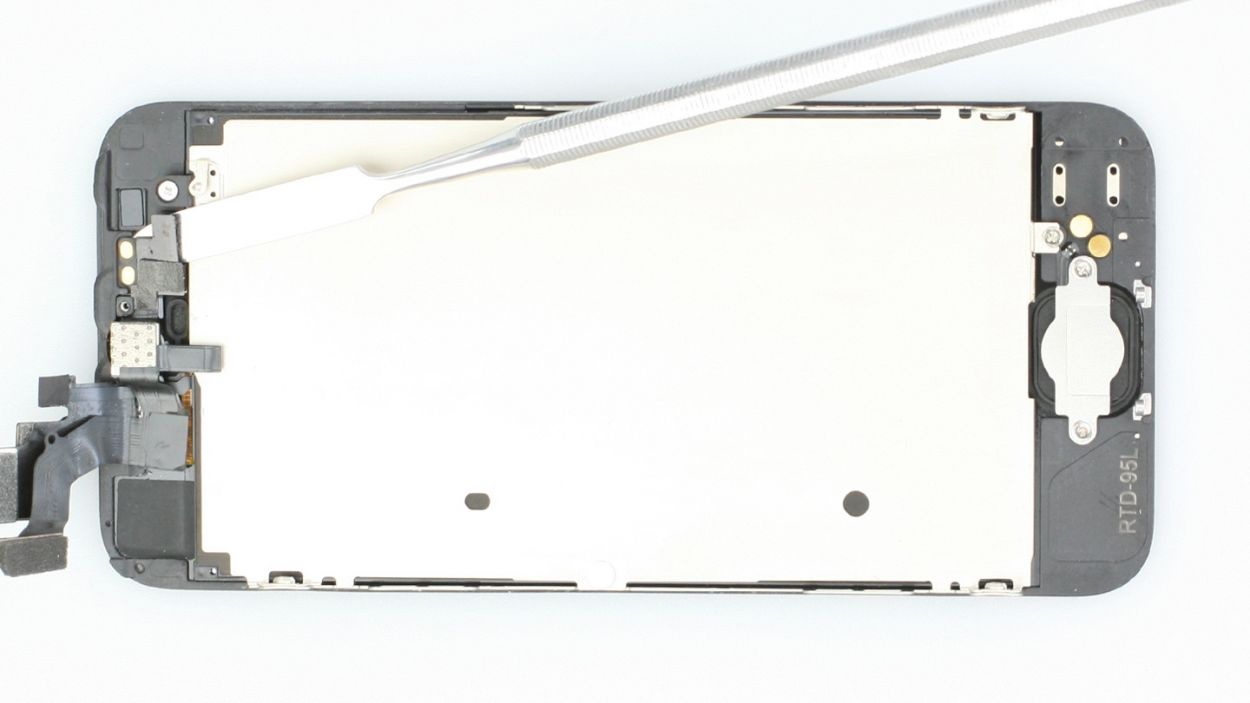
– The Home button is a little stuck, being glued to the screen from the inside. Use your spudger to carefully peel off the rubber coating (see figure 3). If you prefer, you can also press in the Home button from the front side.
Step 9
– Not every display out there is created equal! If you find yourself in need, you might have to snag a few parts from your old display before you pop in the new screen (check out figure 1 for a visual guide):
– Front camera bracket (it’s just a little glued in place)
– Sensor bracket (also lightly glued, no biggie)
– Black plastic cover (because we all need a little cover-up)
– And hey, don’t forget, you can reuse those two stickers too (see figure 2)!
Step 10
– It’s time to reinstall the Home button! Make sure it’s sitting pretty and evenly on the other side (check out figure 1 for guidance).
– Now, let’s put that cover back on and secure it in place (see figure 2). You’ll need 2 x 1.4 mm Phillips screws for this step.
Step 11
– Alright, let’s get that shiny silver rear panel snugly fitted onto the back of your new display! Grab your trusty screwdriver and secure it in place with the following screws: 1 x 2.7 mm Phillips screw, 4 x 1.2 mm Phillips screws, and 1 x 1.6 mm Phillips screw. You’re almost there!
Step 12
– First, let’s slide that ambient microphone right into its cozy little black groove (check out figure 1 for a visual aid).
– Next up, hook up the front camera and the sensor to their respective brackets—easy peasy! Just take a glance at figure 2 for guidance.
Step 13


– Time to get that earpiece back where it belongs! Gently place it in its original spot (check out figure 1 for a visual). Next, pop the cover back on (see figure 2).
– Now, let’s secure everything with those Phillips screws (see figure 3). Just a quick reminder: make sure the front camera is nicely centered on the display. If it needs a little nudge, go ahead and adjust it!
Step 14
– Now reconnect the connectors (see figure 1). The LCD connector sometimes comes undone when you connect the touchscreen connector.LCDTouchscreenFront camera/sensor/earpiece
– Reattach the battery connector and fix the coverplate again.
– Start your iPhone as soon as the connectors are securely attached. Check the function of the LCD, touchscreen, proximity sensor, front camera and earpiece.
– Now attach the cover and screw it in place (see figure 2).2 x 1.2 mm Phillips screws1 x 1.7 mm Phillips screw (not magnetic)
– Then carefully fold down the screen. Make sure that the edge of the screen where the cables are clicks into place properly. Now carefully press the screen on toward the Home button until it’s properly installed in the frame. (See figure 3).
Step 15
– Alright! Time to wrap things up at the bottom of the enclosure. Grab those two pentalobe screws and snug them in place—2 x 3.6 mm pentalobe screws are what you need for this final touch! Let’s keep everything secure and ready to roll!
Step 16
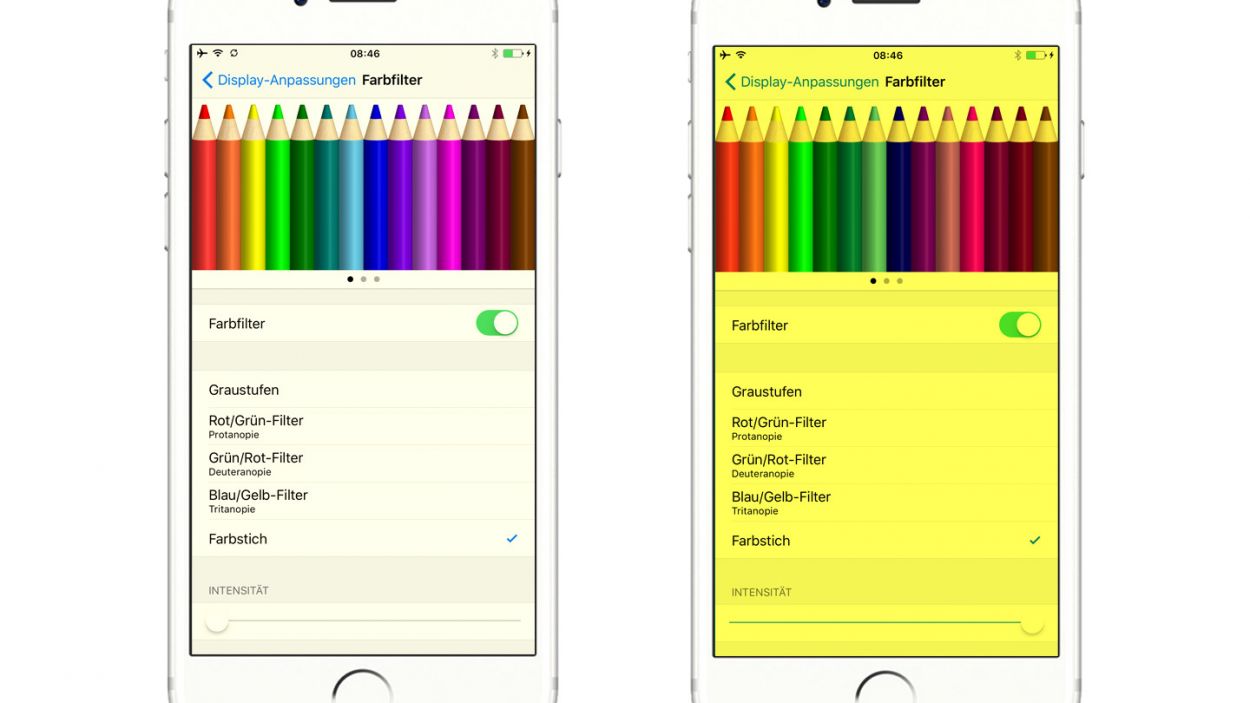
– Ever since iOS 10, you’ve had the power to tweak your display’s color temperature to match your vibe!
– Start by opening those ‘Settings’—you know the drill! Head over to ‘General’, then ‘Accessibility’, and finally ‘Display Accommodations’.
– Next, look for ‘Colour Filters’ and give it a click.
– Turn on those ‘Colour Filters’ to let the fun begin!
– Choose the ‘Colour Tint’ filter to get your colors just right.
– You can adjust how intense you want the colors by playing with the slider. Have fun experimenting!