iPhone 5c DIY Guide to Replacing Vibration Motor
Duration: 30 min.
Steps: 11 Steps
In this guide, we’ll walk you through the process of swapping out your iPhone 5c’s faulty vibration motor. If your phone is feeling a bit too quiet or just gives a weak buzz, this repair is just what you need!
Step 1

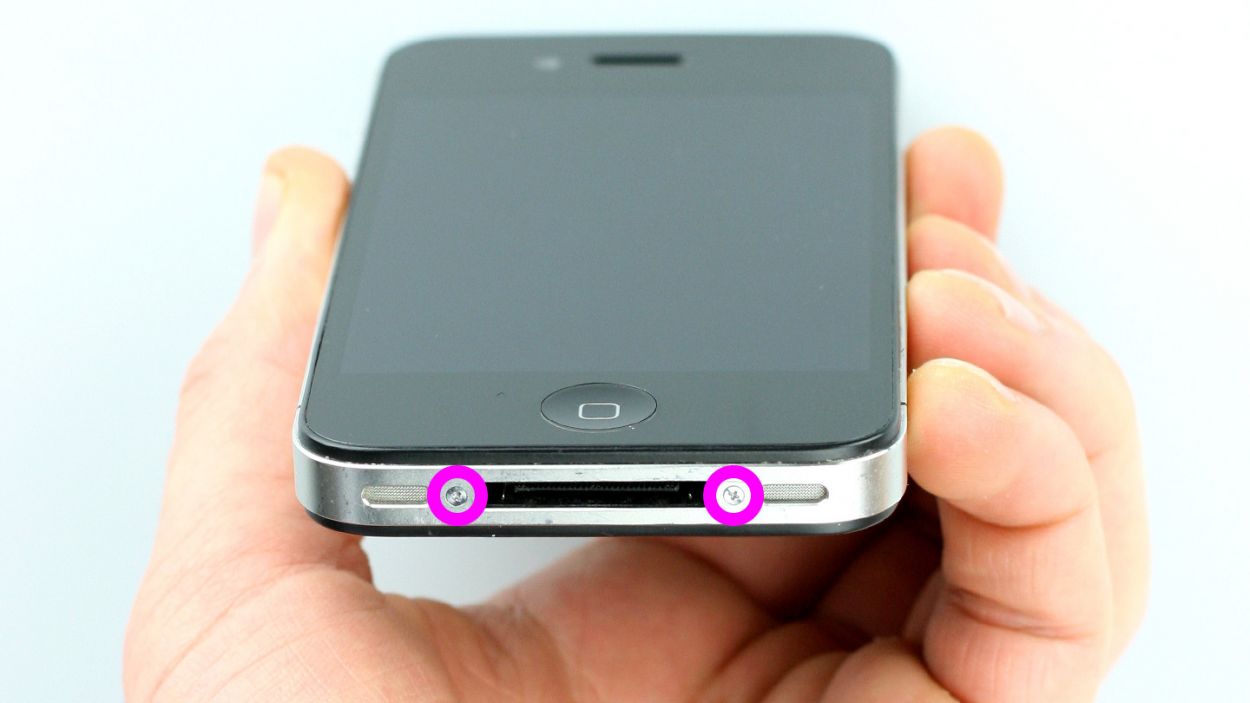
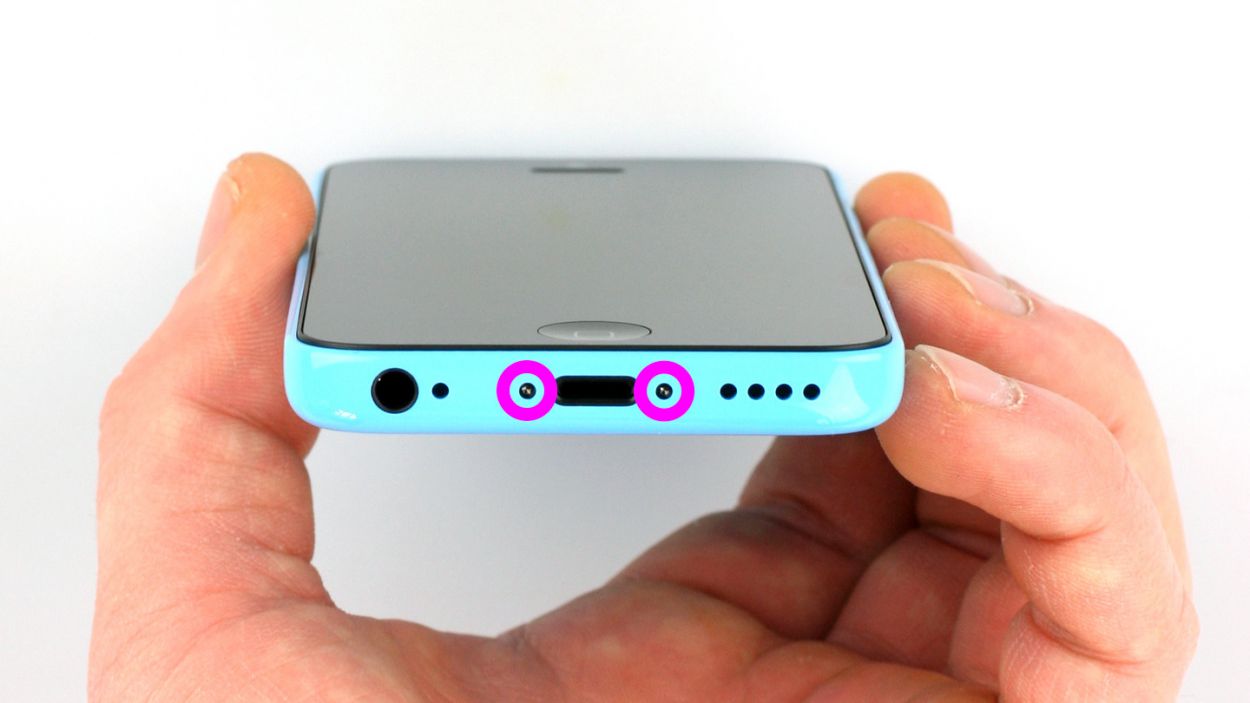
– Grab your trusty pentalobe screwdriver—it’s your golden ticket to unlocking the magical world of the iPhone 5c!
– Now, let’s get those screws out! Remove the two pentalobe screws nestled at the bottom of the enclosure, flanking the Lightning connector like loyal bodyguards. Make sure to stash those little guys in the same compartment of your organizer tray—trust us, future you will thank you! 2 x 3.8 mm pentalobe screws
Step 2


– Place your iPhone 5c on a soft, clean surface—let’s keep that back looking spiffy!
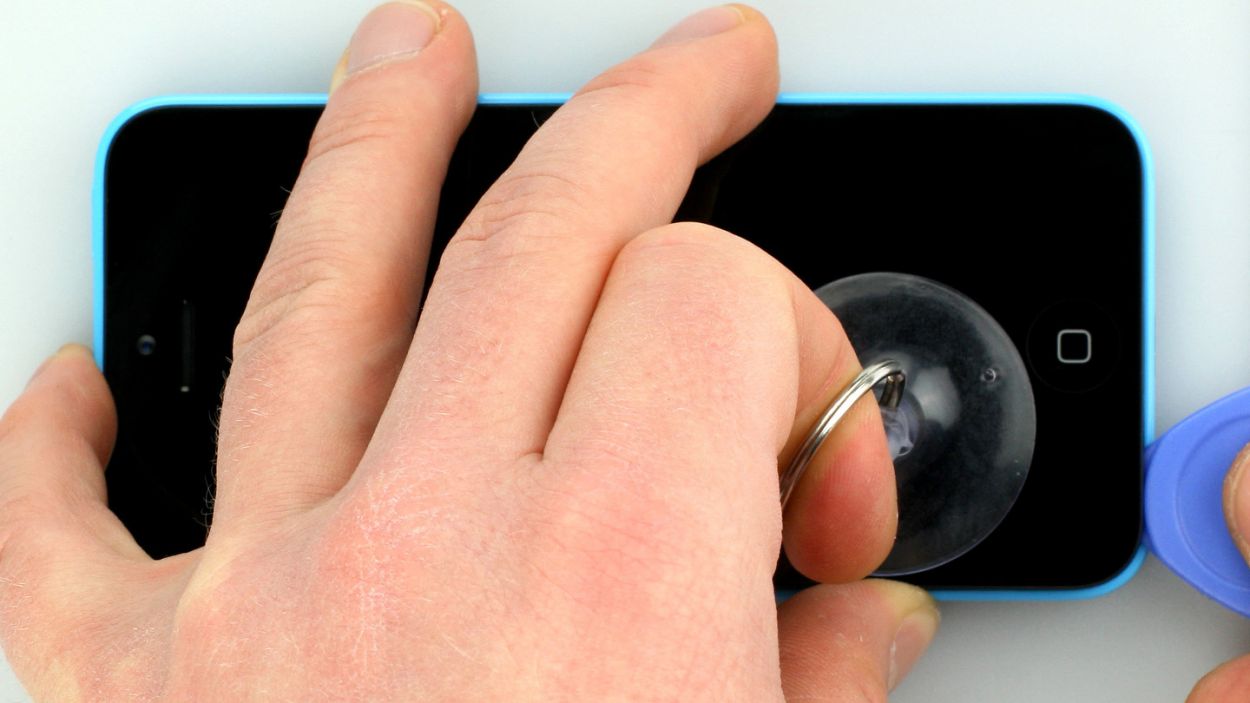
– Ready to lift that front panel? You’ll need a suction cup and a hard plastic pick! And hey, if your screen’s looking like it’s been through a war zone, some packing tape can help hold it together.
– Position the suction cup over the Home button (if you can) or right next to it (check out figure 1). While you’re giving the screen a little lift with the suction cup, slide the hard plastic pick between the plastic frame and the display frame, pressing down on the plastic frame. Keep using the pick to gently raise the screen (see figure 2). Don’t worry if it takes a few tries; just keep at it!
– Once you’ve got the screen lifted a few millimeters (see figure 3), it’s time to work your magic around the edges to loosen it up on both sides (see figure 4).
Step 3
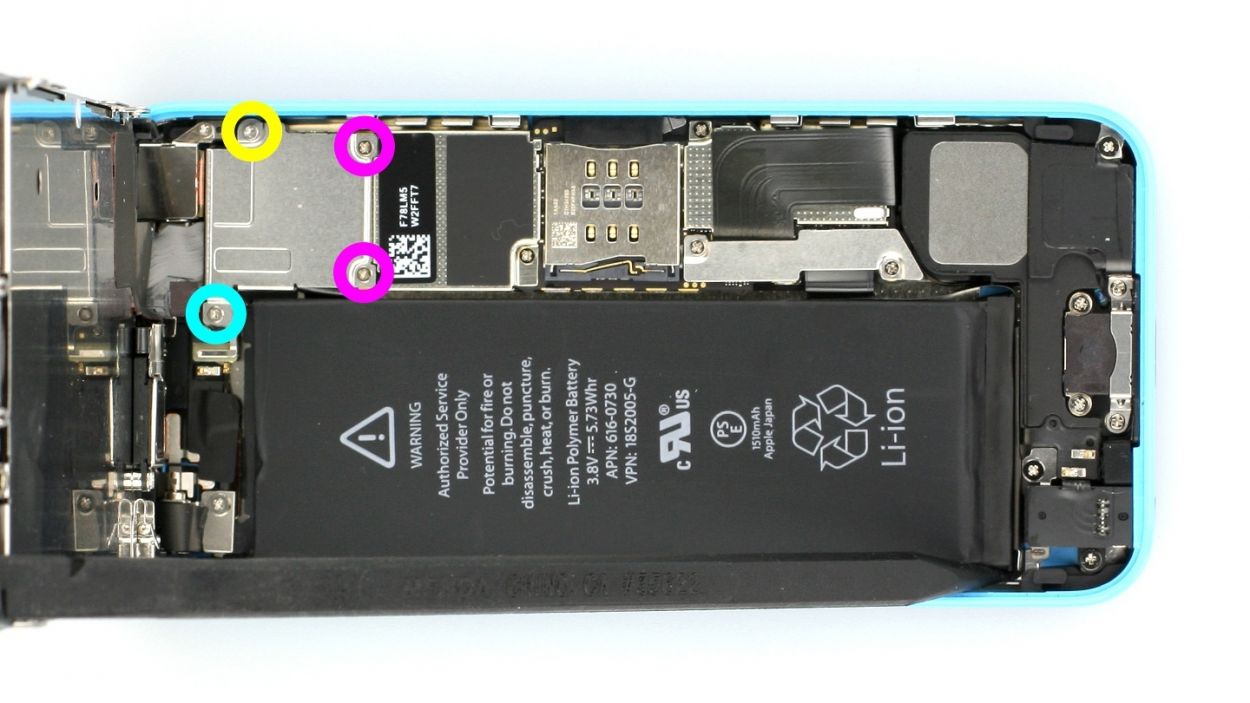
– First up, grab that trusty Phillips screwdriver and help yourself to the four screws holding on the silver cover (check out figure 1 for guidance!). Make sure to toss those screws into the same spot in your organizer tray—organization is key! Now, gently lift off the cover and voilà, you’re making progress! You’ll find 1 x 3.2 mm Phillips screw (not magnetic), 2 x 1.2 mm Phillips screws, and 1 x 1.7 mm Phillips screw.
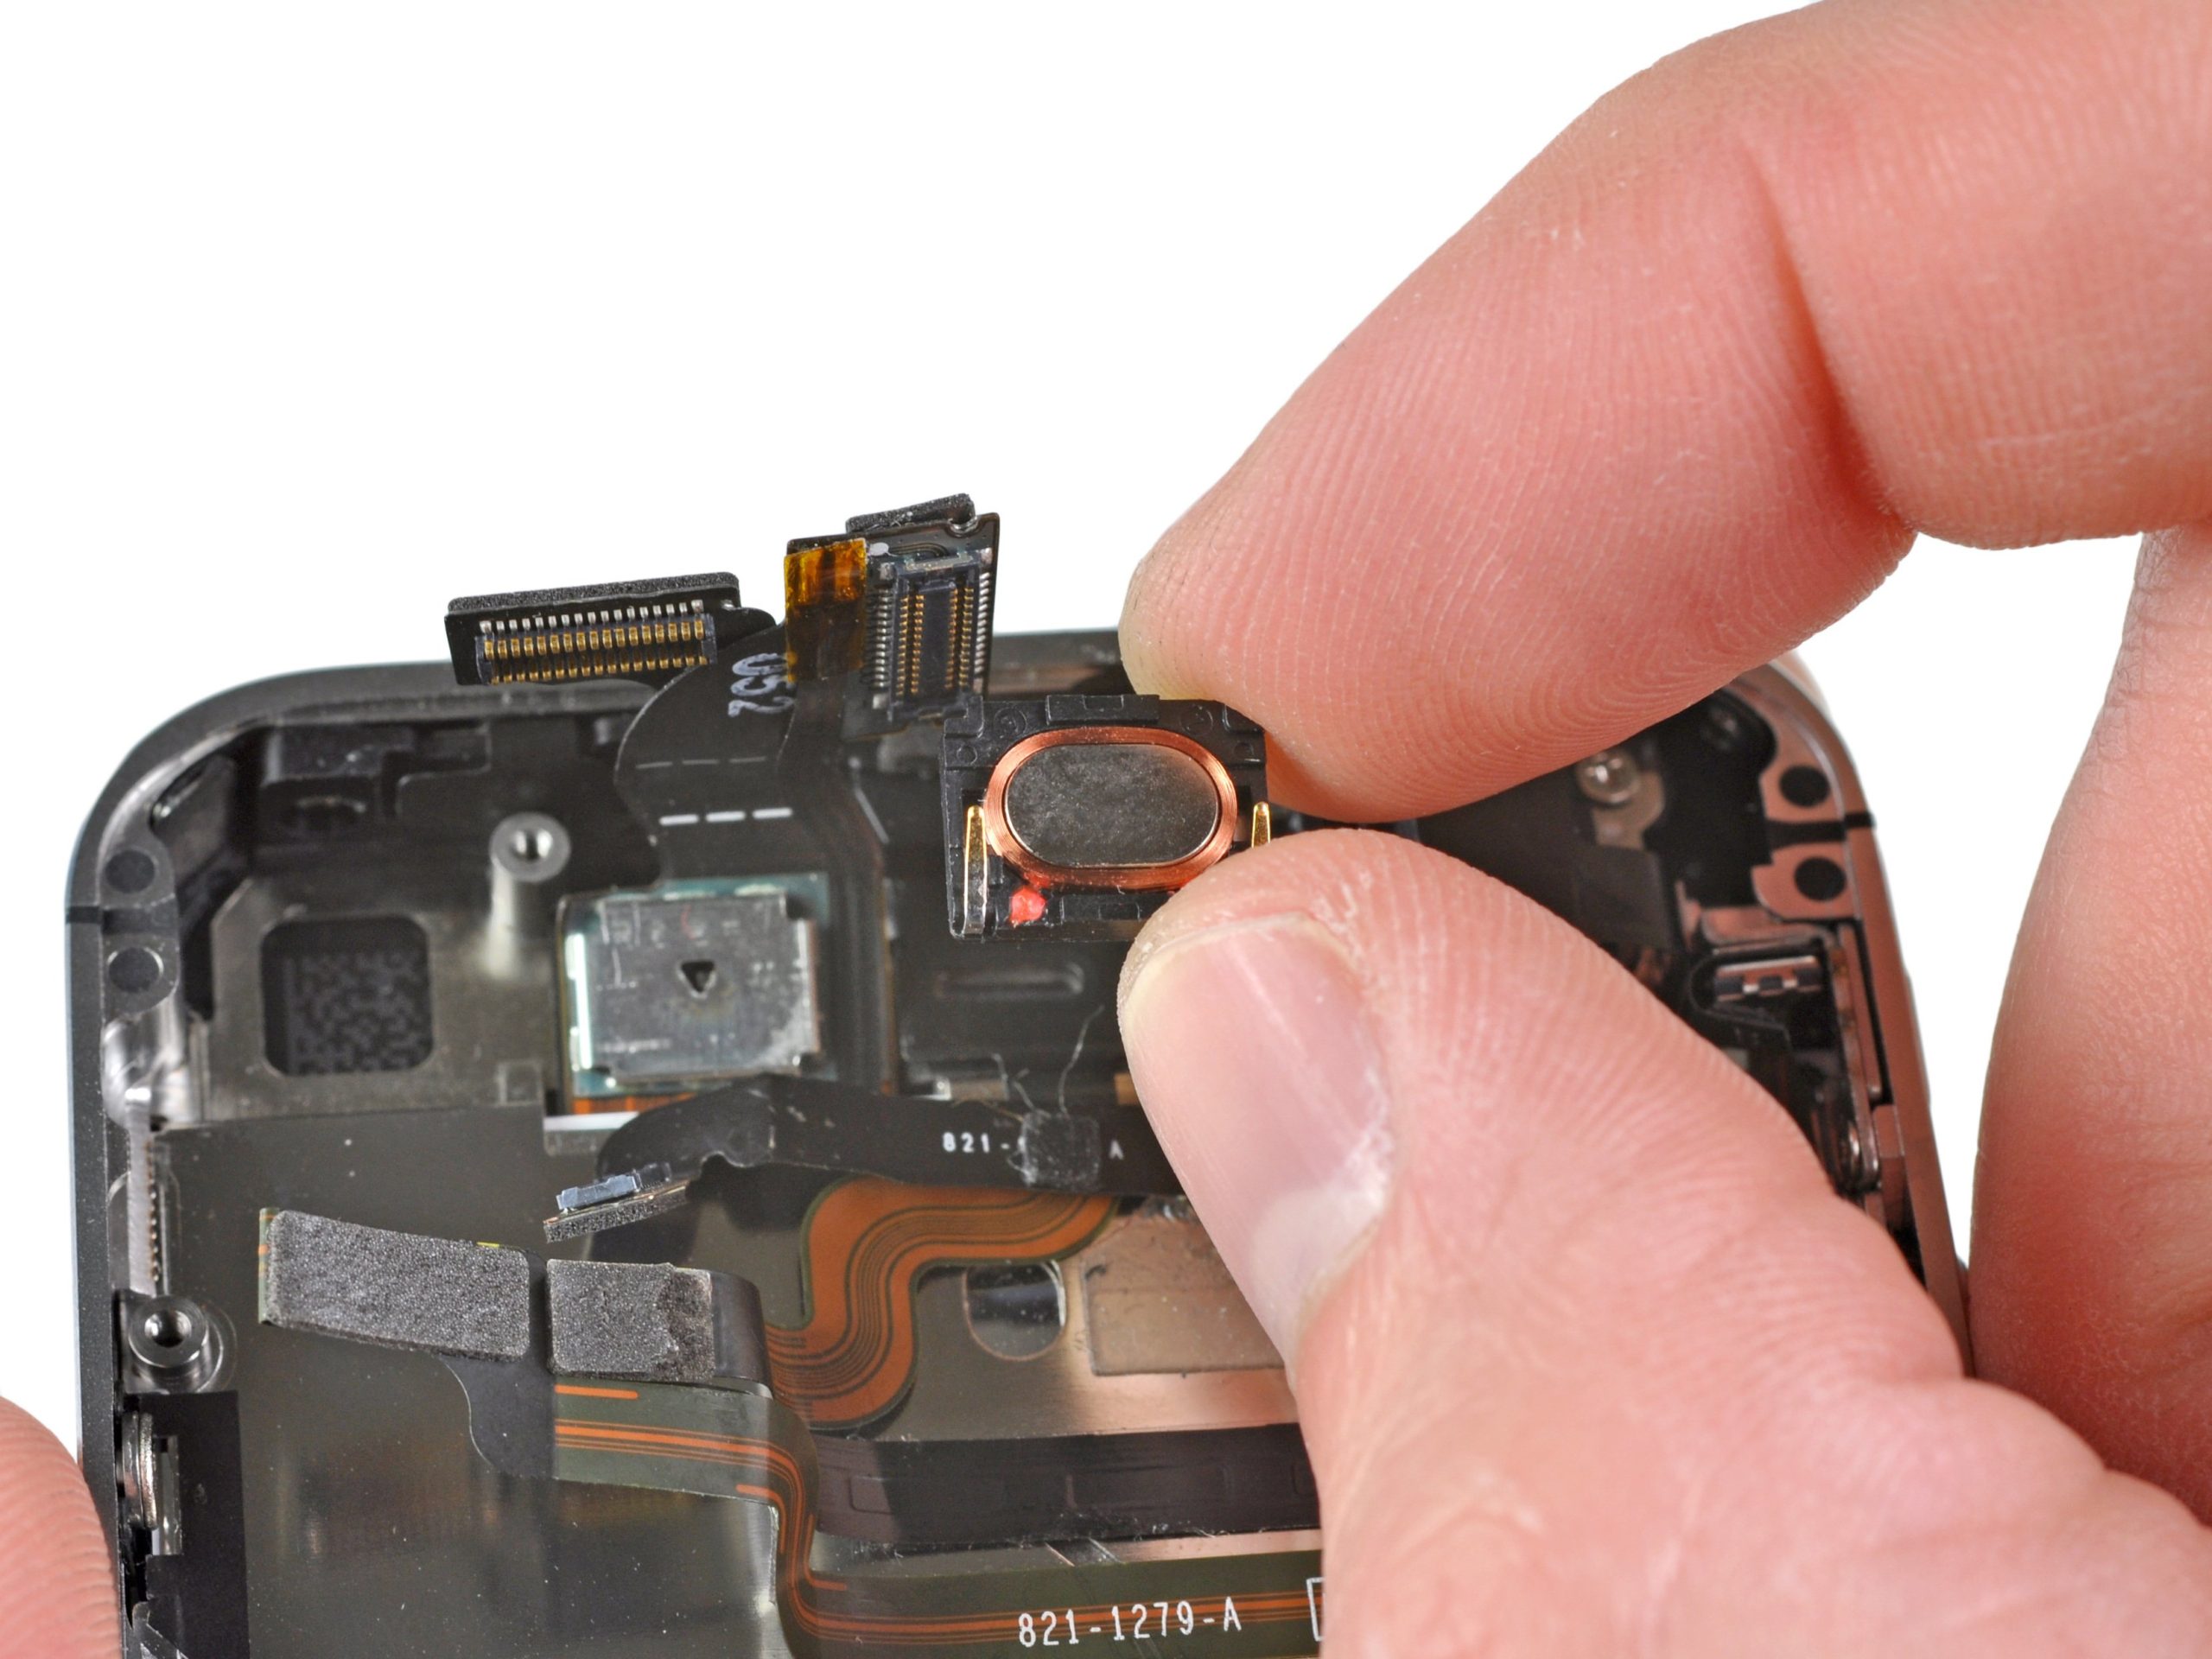
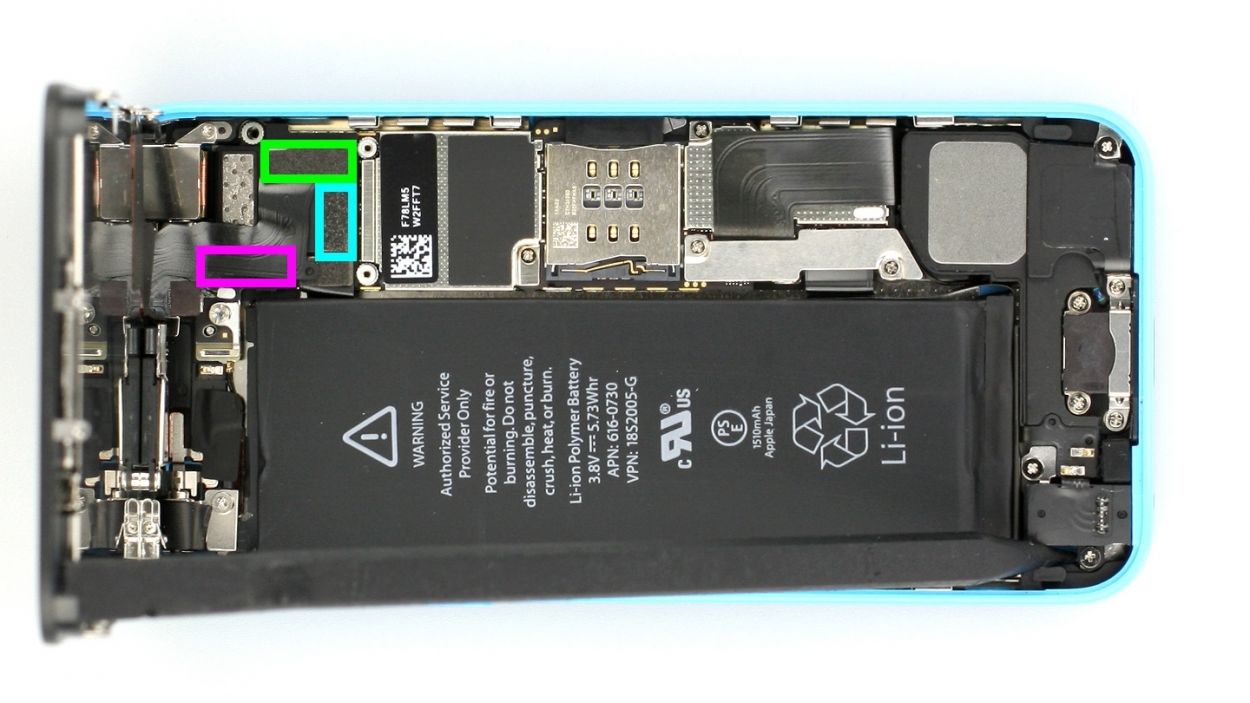
– Next, it’s time for some delicate disconnecting—carefully release the three connectors shown in figure 2. Use the pointed tip of your spudger just below the contact and lift gently. We’re talking about the touchscreen, LCD, and the whole front camera/sensor/earpiece/ambient microphone gang here!
– Ready to give that brand-new display a test run? Go ahead and temporarily connect the display assembly. Fire up the iPhone and see if both the LCD and touchscreen are behaving as they should. Remember, check those connectors to make sure they’re snugly plugged in; if they’re not, you might be greeted by a black screen or some funky stripes. Oh, and if it looks a bit yellow, don’t fret—just flip to the last step in this guide.
– Let’s connect that new display assembly temporarily.
– Once that’s done, boot up your iPhone and do a quick check on the LCD and touchscreen functionality. Make sure those connectors are properly fastened. Remember, if they aren’t, you could end up with a black display or those pesky stripes.
– If, during your testing, you notice a yellow hue, just refer to the last step in this manual for a little help.
Step 4
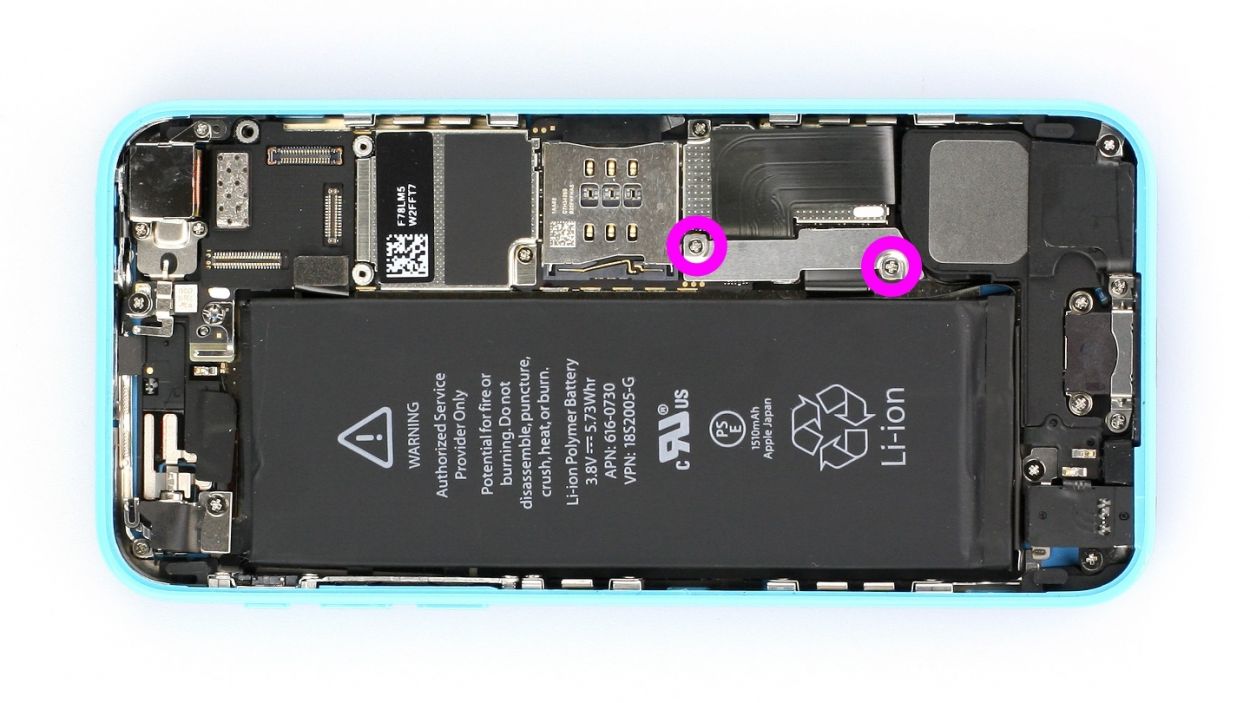

– Grab your Phillips screwdriver and get ready to tackle those screws on the battery connector (check out figure 1 for a visual!). Once you’ve got them out, gently lift the cover using your trusty spudger (figure 2 is your friend here). And hey, don’t forget to keep all those little parts cozy in the same compartment of your organizer tray—2 x 1.6 mm Phillips screws are waiting for you!
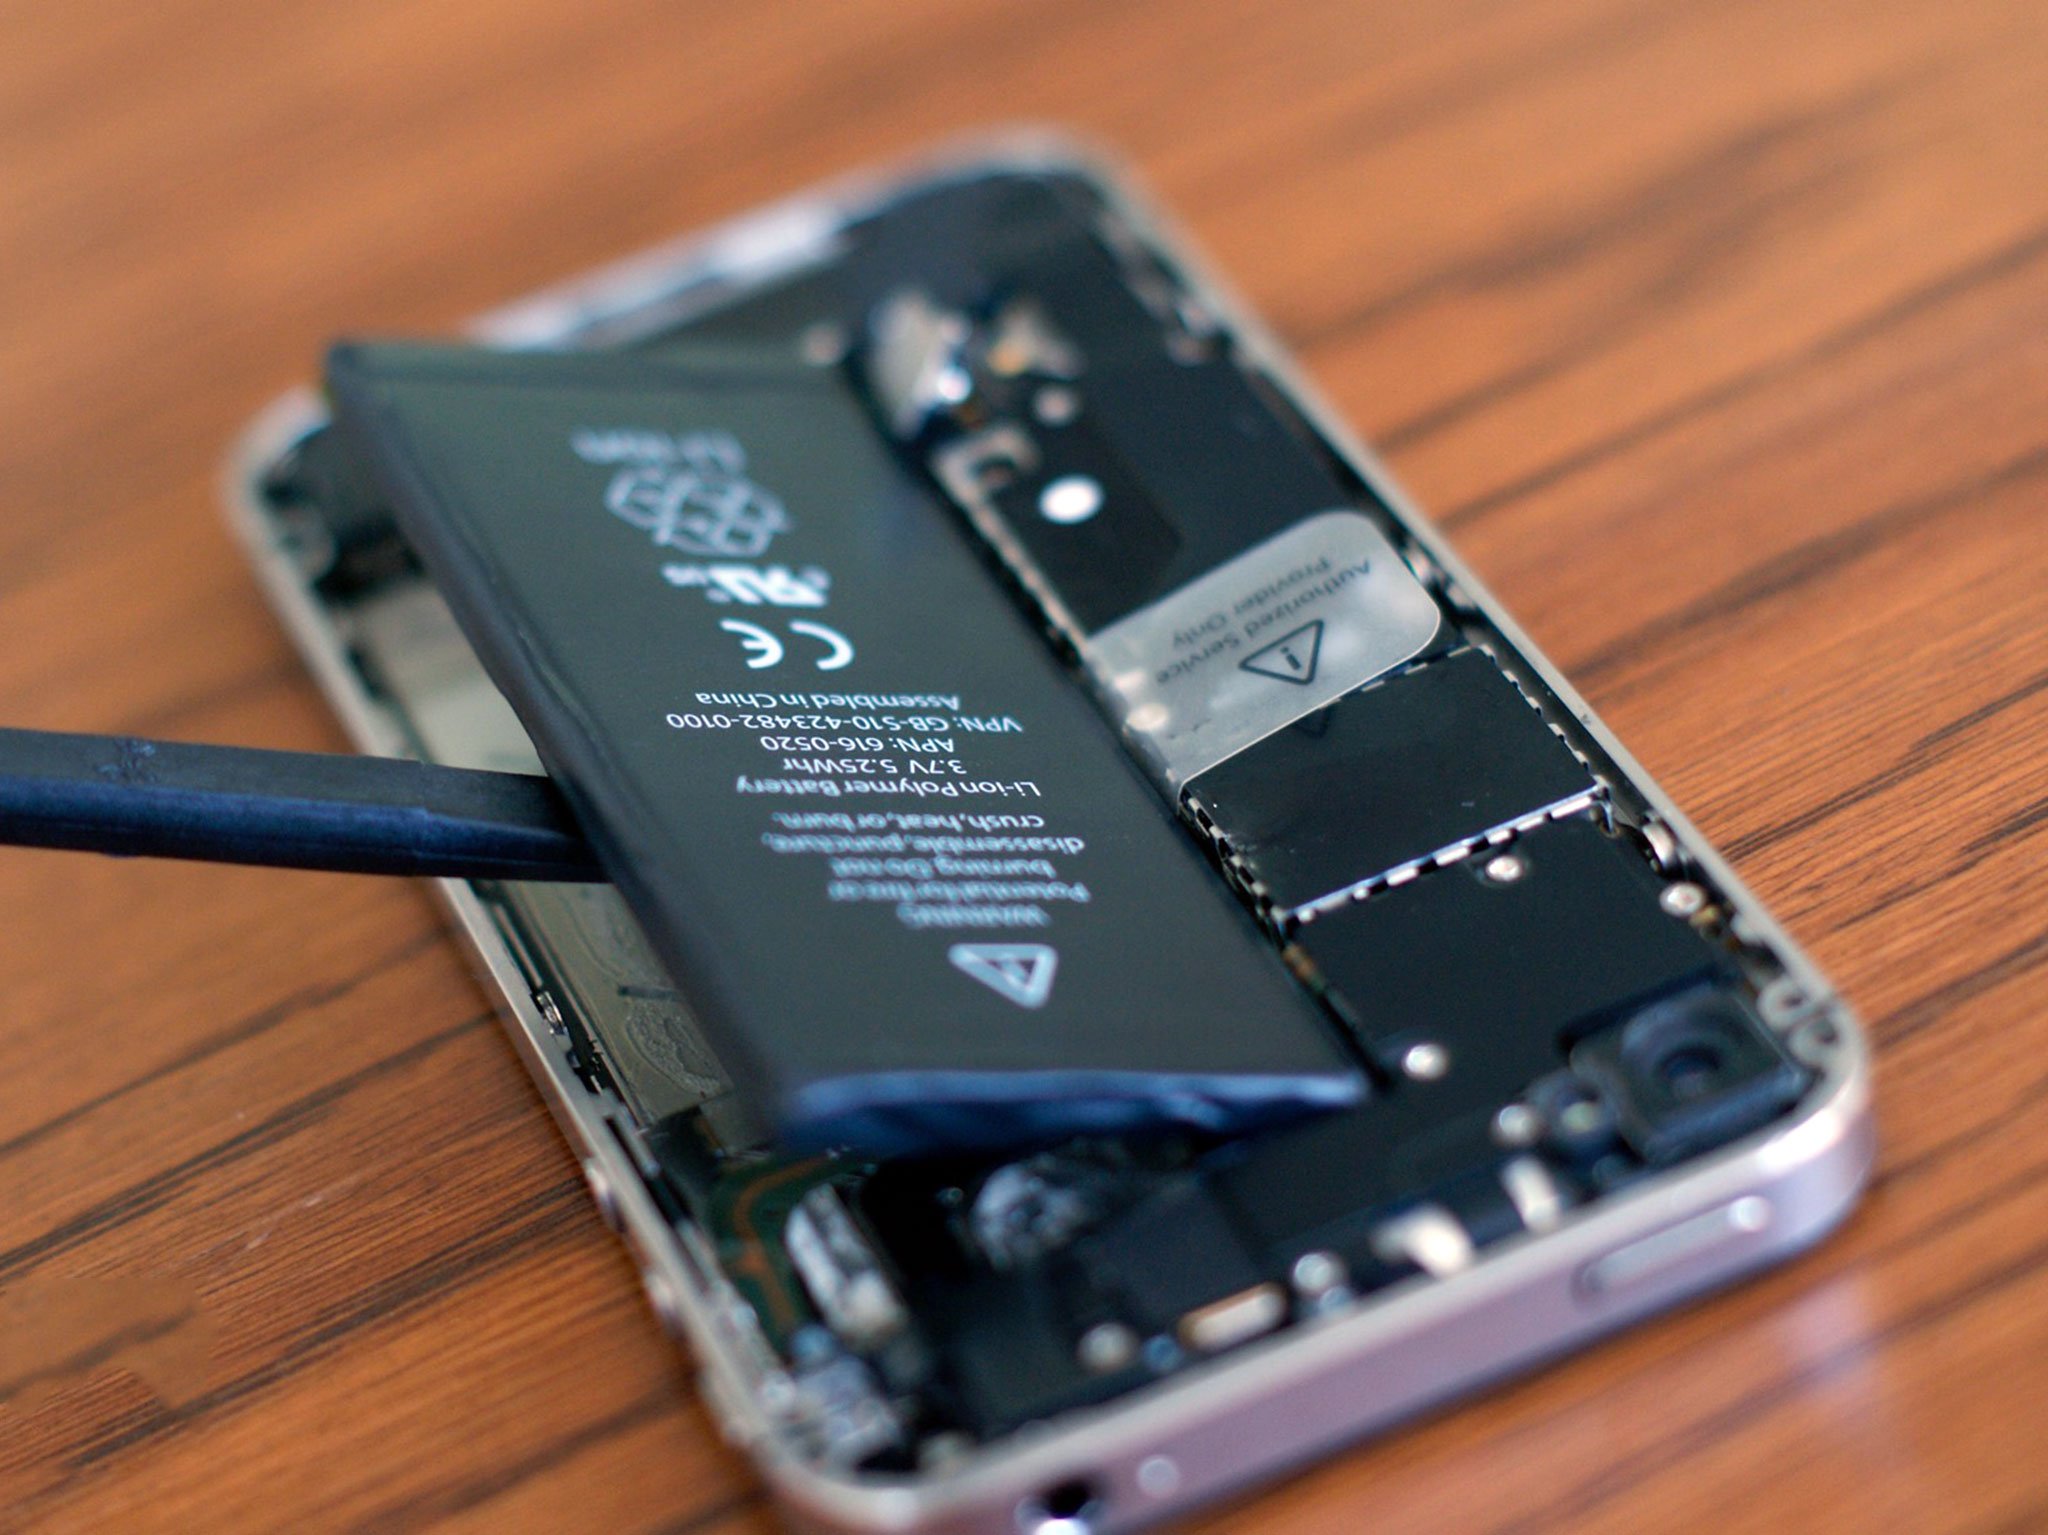
– Now, let’s carefully lift that battery connector! Just slide the pointed tip of your ESD spudger right below the connector (figure 3 will guide you). If you’re in a pinch and don’t have a spudger, your fingernail can do the trick too!
Step 5


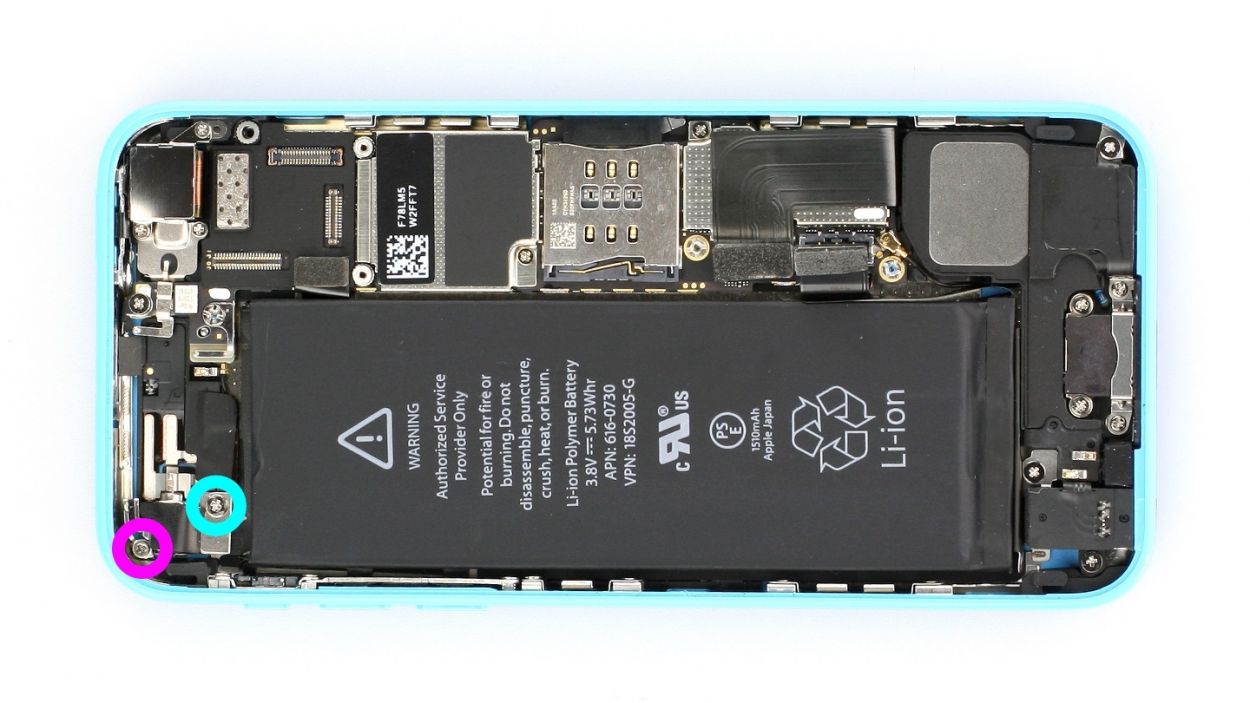
– First, let’s tackle those two screws holding the vibration motor and its trusty support frame in place (check out figure 1 for a visual!). You’ll need 1 x 2.2 mm Phillips screw and 1 x 1.1 mm Phillips screw for this job.
– Once those screws are out of the way, gently lift out the vibration motor (see figure 2).
Step 6

– First up, let’s plop that shiny new vibration motor right back where it belongs (check out figure 1 for a visual cue!).
– Now, it’s time to secure the cover and the vibration motor with those trusty little screws (see figure 2). You’ll need 1 x 2.2 mm Phillips screw and 1 x 1.1 mm Phillips screw for this step!
Step 7


– Get that battery connector back in place (check out figure 1).
– Now, slap on the cover and screw it tight (see figure 2). Use those 2 x 1.6 mm Phillips screws!
Step 8


Hey there! If you don’t connect those connectors properly, you might see some funky stripes on your display or find parts of the touchscreen taking a little snooze.
– Reconnect those connectors (check out figure 1 for a visual!). Just a heads up, the touchscreen connector can sometimes get a little shy and disconnect when you’re plugging in the LCD connector. We’re talking about the touchscreen, LCD, front camera/sensor, earpiece, and ambient microphone here!
– Once everything is snug and secure, power up your iPhone! Give the LCD, touchscreen, proximity sensor, front camera, and earpiece a quick test. If those connectors aren’t playing nice, you might see some stripes on the display or find parts of the touchscreen taking a little nap.
– Now, let’s put the cover back on and screw it in tight (see figure 2). You’ll need 1 x 3.2 mm Phillips screw (not magnetic), 2 x 1.2 mm Phillips screws, and 1 x 1.7 mm Phillips screw for this step!

Step 10
– Now, let’s grab those two pentalobe screws at the bottom of the enclosure and secure them in place. You’re using 2 x 3.8 mm pentalobe screws, so make sure they’re snug as a bug!
Step 11

Heads up! When you take the battery out of your iPhone, it forgets what time it is and defaults to 1:00 a.m. on 1/1/1970. If you don’t set the time right, you might run into some hiccups connecting to the cellular network.
– Let’s get your iPhone grooving by syncing up with iTunes or hopping onto a WLAN network. Hang tight until the time syncs up perfectly!
– Time for a little SIM card boogie! Pop out that SIM tray, give the SIM card a little love tap, and slide it back in like a pro.
– It’s airplane mode time! Flip that switch on, let it have its moment, and then gracefully switch it off.