Acer Aspire 3 A315-21-92FX Battery Replacement
Duration: 45 minutes
Steps: 13 Steps
Ready to breathe new life into your Acer Aspire 3 A315-21-92FX? This guide is here to walk you through replacing that pesky, tired battery that just won’t start when you hit the power button. Before diving in, it’s a good idea to check out our troubleshooting page to confirm that your battery is indeed the culprit. Let’s get started!
Step 1

– Turn the Acer Aspire 3 A315-21-92FX upside down, making sure the back is facing up, ready for action.
Step 2


– Pop out that lone 2.5mm Phillips #0 screw like a pro!
Step 3

– Grab your trusty iFixit opening tool and gently pry off that little cover. You’re doing great!
Tools Used

Step 4


– Gently nudge the tabs on both sides of the RAM outward, and watch as the memory module gracefully pops up at an angle!
Step 5


– Gently slide the RAM out of your Acer Aspire 3 A315-21-92FX, taking your time to avoid any rush. A little patience goes a long way here!
Step 6

Before you start, make sure the battery is completely drained and there’s no way for it to accidentally turn on – we want to avoid any unexpected sparks or power surges!
– Flip that Acer Aspire 3 A315-21-92FX over and let it chill with its backside facing up. Let’s get this repair party started!
Step 7


– Pop out that lone 2.5mm Phillips #0 screw like a pro!
Step 8

– Grab your trusty iFixit opening tool and gently pry off the hard disk cover. It’s easier than you think!
Tools Used
Step 9


Looks like this laptop’s hard drive has gone MIA. No worries, we’ll help you get things back on track!
– Gently and carefully slide the hard disk out of the Acer Aspire 3 A315-21-92FX like it’s emerging to enjoy some fresh air—slow and steady wins the repair race!
Step 10

Before you dive into removing the back cover, check under the hard drive cover for two sneaky screws that might be hiding out. You’ll want to take those out first for a smooth operation!
– Unscrew fourteen 2.5mm Phillips #0 screws from the back of your laptop. You’ve got this!
Step 11


– Let’s get this repair started! Use a trusty opening tool to carefully remove the back cover, and we’ll take it from there.
Tools Used
Step 12

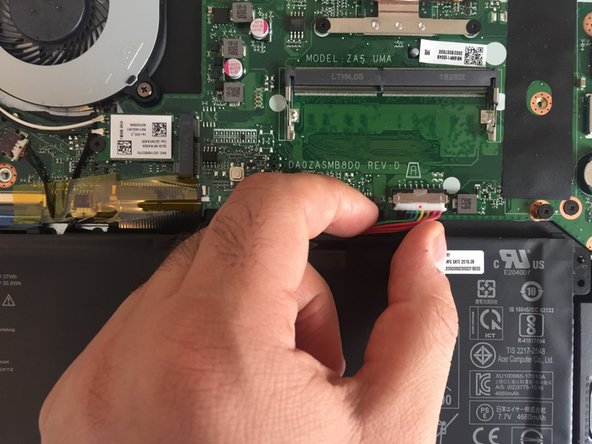
– Gently unplug the battery connector from the motherboard. Keep it steady and don’t pull too hard—you’re doing great!
Step 13


– Gently pop the battery out of its cozy little slot.
Success!