Acer Aspire 3003WLCi Internal Fan Replacement
Duration: 45 minutes
Steps: 9 Steps
Get ready to breathe new life into your laptop by replacing the internal fan. This crucial component keeps your device cool and prevents overheating, which can cause damage. Don’t worry, this replacement is moderately easy and can be done in just 15 minutes with minimal tools. We’ve broken it down into 6 simple steps to guide you through the process. If you need help, you can always schedule a repair
Step 1

– Flip your Acer Aspire 3003WLCi laptop over and get ready to work – make sure the bottom is facing up and the battery is on your left side, easy peasy!
Step 2


– On the back of your laptop, you’ll find two switches: one near the top of the battery and the other near the bottom.
– Gently push the bottom switch upwards to unlock the battery. It’s easy, just give it a little nudge.
– To unlock the top switch, apply a little more force and push it up while holding it in place.
Step 3


Keep that upper switch held up the whole time—if you let go, the battery’s staying put!
If the battery is stuck, don’t worry – it’s more common than you think. Just gently rock it back and forth while pulling to the left, and it should come loose. If it still doesn’t budge, you might need to use a bit more force, but be careful not to push too hard.
– While keeping the upper switch pointed upwards, gently pull the battery out to the left to remove it. If you’re not sure, take a deep breath and give it a try – you got this!
Step 4

– The panel hiding the internal fan is tucked away at the bottom of the laptop. Carefully remove it to give your fan some fresh air and a breather. If you need help, you can always schedule a repair.
Step 5

Don’t worry if the screws seem stuck in the panel – it’s actually a design choice made by the manufacturer to keep everything secure. You’re making great progress so far!
– Let’s get started by removing the two 5mm captive screws from the panel using a trusty Phillips #0 screwdriver. Simply unscrew them and you’ll be on your way to a successful repair!
Step 6

If you’re struggling to remove the panel, grab a spudger and gently work your way around the edges to pop it open.
– Gently lift and pop off the panel to get things started. Keep it smooth and steady—no need to force it. If you hit a snag, remember you can always schedule a repair for extra help.
Tools Used

Step 7


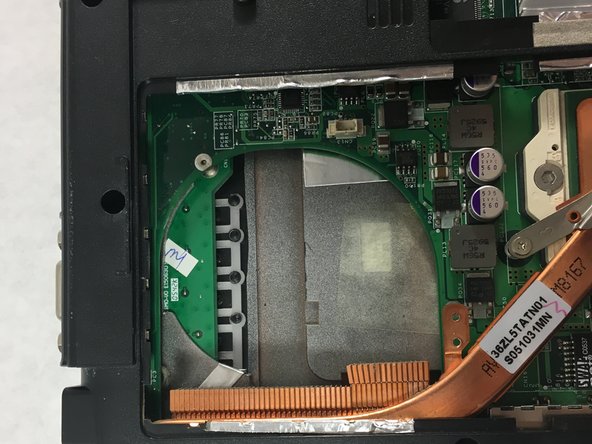
– The fan is tucked away in the upper right corner of the panel.
– Grab a Phillips #00 screwdriver and unscrew the four 2.5mm screws holding the fan in place. Take your time—those screws aren’t going anywhere.
Tools Used

Step 8


– Gently pull the fan power cable up and out of the connector to disconnect it from the motherboard. Easy does it, no need to rush!
Step 9

The fan hangs on with a sneaky piece of tape on the other side of the copper. Give it a gentle wiggle or two to help loosen things up.
– Ready to put everything back together? Just work your way through these steps in reverse. If things get tricky or you hit a snag, you can always schedule a repair and we’ll lend a hand!
–
Success!