Acer Aspire 5 A515-54 Hard Drive Replacement
Duration: 45 minutes
Steps: 9 Steps
This is where all the magic happens—your operating systems, software programs, and files get stored here. Keep it happy and clean!
Ready to swap out that old hard drive on your Acer Aspire 5 A515-54? Whether you’re replacing it or upgrading to something snappier, this guide will walk you through it. Your hard drive is where all your precious files, software, and even your operating system live, so don’t forget to back up anything important before diving in! And remember—before you get started, make sure to power off your laptop and unplug it from any power source. Better safe than sorry, right?
Step 1

– First, power off your Acer Aspire 5 A515-54 and unplug it from any power sources.
– Now, carefully flip it over so the back is facing up, ready for the next step.
Step 2


– Grab your Phillips #0 screwdriver and unscrew those eleven 9 mm screws holding the back cover in place—no sweat!
– Gently pry open the back cover with a plastic opening tool—think of it as giving your laptop a friendly nudge to say hello!
Tools Used

Step 3


Touch some metal or pop on an antistatic wrist strap to keep those sneaky static shocks away and your motherboard happy.
– Carefully unplug the battery connector—just a gentle wiggle and pull does the trick.
Step 4


– First, locate the mounting tray that comes with a cable for the extra HDD. Use a Phillips #0 screwdriver to remove the four 3 mm screws holding it in place.
– Now, carefully take out the mounting tray and its connector to get everything ready for the hard drive installation in the next step.
Tools Used
Step 5


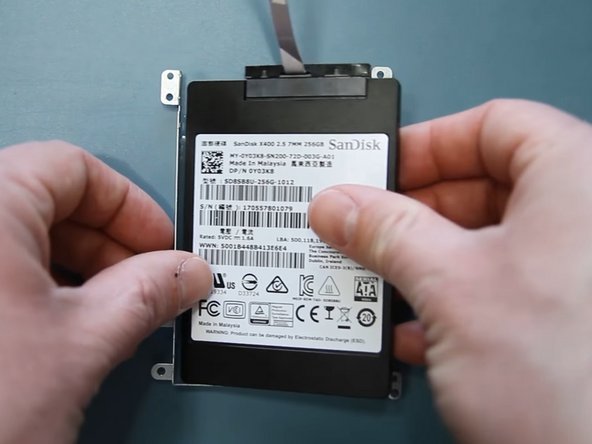
– Grab that connector from the last step and hook it up to your shiny new hard drive.
– Slide the drive smoothly into the mounting tray, making sure it fits snug as a bug.
Step 6


Your laptop box comes with a couple of 2 mm screws. Handy, right?
– Grab your Phillips #0 screwdriver and fasten those 2 mm screws to the mounting tray—this is what keeps your HDD steady and secure.
Tools Used
Step 7


– Slide the mounting bracket with the hard drive into its spot, making sure the cable is chilling out toward the battery.
– Grab your Phillips #0 screwdriver and pop those 3 mm screws back in to keep the bracket nice and secure.
Tools Used
Step 8


– Grab your trusty Phillips #0 screwdriver and remove the solo screw holding the wireless card to the motherboard.
– Carefully slide the wireless card out of its socket and set it aside—this will give you the space you need to hook up the hard drive to the motherboard.
Tools Used
Step 9


– To wrap up your device repair, simply follow these steps in reverse – easy peasy!
– After installing the new hard drive, just format it and you’re all set – your laptop’s hard drive upgrade is complete!
– You’ve made it to the end of this step-by-step repair guide. If you need help or have any other devices to fix, you can always schedule a repair.
Tools Used
Success!