Acer Aspire 5 A515-56-347N PCIe SSD Replacement
Duration: 45 minutes
Steps: 6 Steps
Feeling cramped for space on your Acer Aspire 5 A515-56-347N? This guide walks you through swapping out the original PCIe SSD for something bigger and better. Just a heads up: static electricity and laptop guts aren’t friends. Skip the wool sweaters and stay off the carpet while you work. If you’re feeling extra cautious, an ESD bracelet or mat will help keep static at bay. For a deeper dive into safety, check your device’s manual or visit the manufacturer’s support page. Ready to give your storage a boost? Let’s get started!
Step 1


– First, power down your laptop and unplug it from any power source. Safety first!
– Now, gently flip your laptop over, so the bottom is facing up.
– Time to get a little hands-on—remove the eleven 6.6 mm Phillips #0 screws from the bottom cover. Keep track of them; they’re tiny but mighty!
Step 2


– Slide a plastic opening tool into the crack where the case meets the bottom cover. Gently pry it open—think of it as giving your laptop a little nudge to wake up.
– Work your way around the edge with blue plastic picks, popping them in the gap as you go. You’re basically unzipping your laptop’s jacket.
– Once the bottom cover feels wobbly and loose, lift it up and off. Set it aside somewhere safe—your laptop’s about to get a breath of fresh air!
Step 3

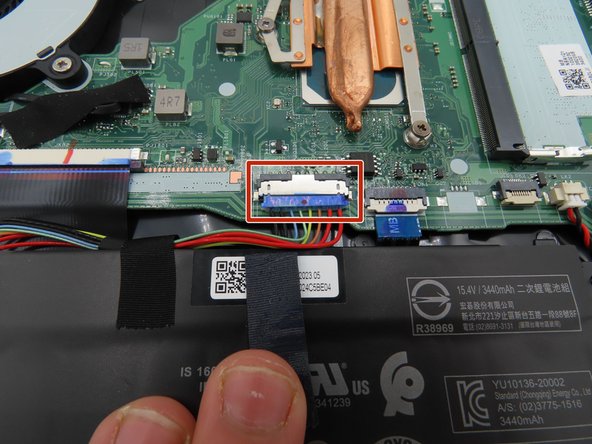
Keep the battery unplugged for the upcoming steps. Let’s stay safe and make sure everything’s disconnected before you dive in!
– Use a plastic spudger to carefully loosen the black tape wrapped around the large battery connector on the motherboard. It’s stuck on there pretty tight, so be patient!
– Now that it’s loose, gently pull the tape back to release it from the connector. Easy does it!
– Time to disconnect the battery! Use a plastic spudger to carefully pry the battery connector away from the motherboard. Take your time and work it loose slowly.
Tools Used

Step 4

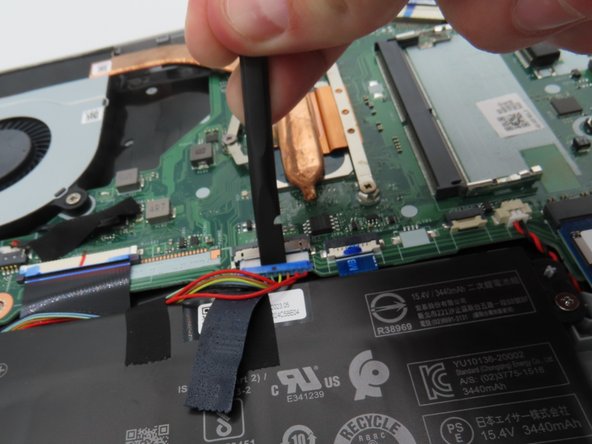
Keep those exposed components away from your fingers and anything that could mess with them, like anything conductive. You got this!
– Press and hold the power button for about five seconds to safely drain any leftover power from the system – it’s like hitting the reset button!
– Now, carefully unplug the battery connector and set it aside, out of the way, while you work on your laptop. This will help prevent any accidental power-ons or shorts.
Step 5
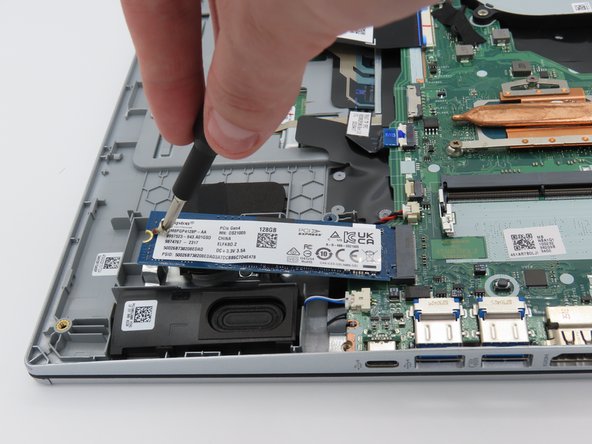

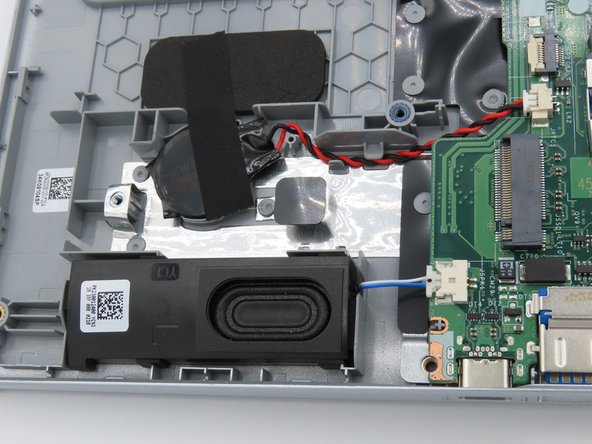
– Grab your Phillips #0 screwdriver and take out the tiny 4.5 mm screw holding the SSD in place. No need to flex, but you got this.
– Now the SSD is free—just lift it out, nice and easy.
Tools Used

Step 6

– Carefully wiggle the SSD out of its slot using your fingers—no need to rush, just a gentle pull will do!
– To install your new SSD, slide it in until you hear that satisfying click. That’s the sound of a job well done.
– Once your new SSD is in place, screw it down. Nice and snug, but don’t overdo it!
Success!