Acer Aspire 5253 RAM Replacement
Duration: 45 minutes
Steps: 13 Steps
First things first, take out the battery. It’s always best to play it safe and avoid any potential surprises down the line. Safety first, repair second!
Step 1

– Flip the laptop upside down like a pro.
Step 2

– Flip that battery switch to unlock it! Just slide it over until you see a cheerful unlocked lock on a lovely red background. You’re doing great!
Step 3

– Alright, here’s your next move: while the unlocked symbol is still glowing bright, slide that other switch into action! Watch as the battery pops up like it’s been energized, leaving the bottom of your laptop totally clear. You’re rocking this!
Step 4

– Gently lift the battery out of the laptop starting from the side nearest to the switches. Take your time and be careful as you do it—this part is a piece of cake.
Step 5

– Nice work! The battery is out and you’re rocking this repair like a pro. Keep going—you’ve got this!
Step 6

– Next, find the two screws that keep the back cover panel attached to your laptop. Let’s get that cover off!
Step 7

The screws measure 3/8″ long and sport a 1/4″ head. Perfect for getting your device back in action!
– Use your trusty Philips #00 head to unscrew those two screws holding the back panel snugly in place—it’s like giving your device a little wardrobe change.
Step 8


– Once you’ve removed both screws, grab a trusty plastic opening tool and gently pop that panel off. Start at the little notch, then work your way left and right like a pro.
Step 9

– Once you’ve given that panel a little wiggle with your trusty plastic opening tool, slide your finger into the gap and gently lift the panel off your laptop like a pro!
Step 10

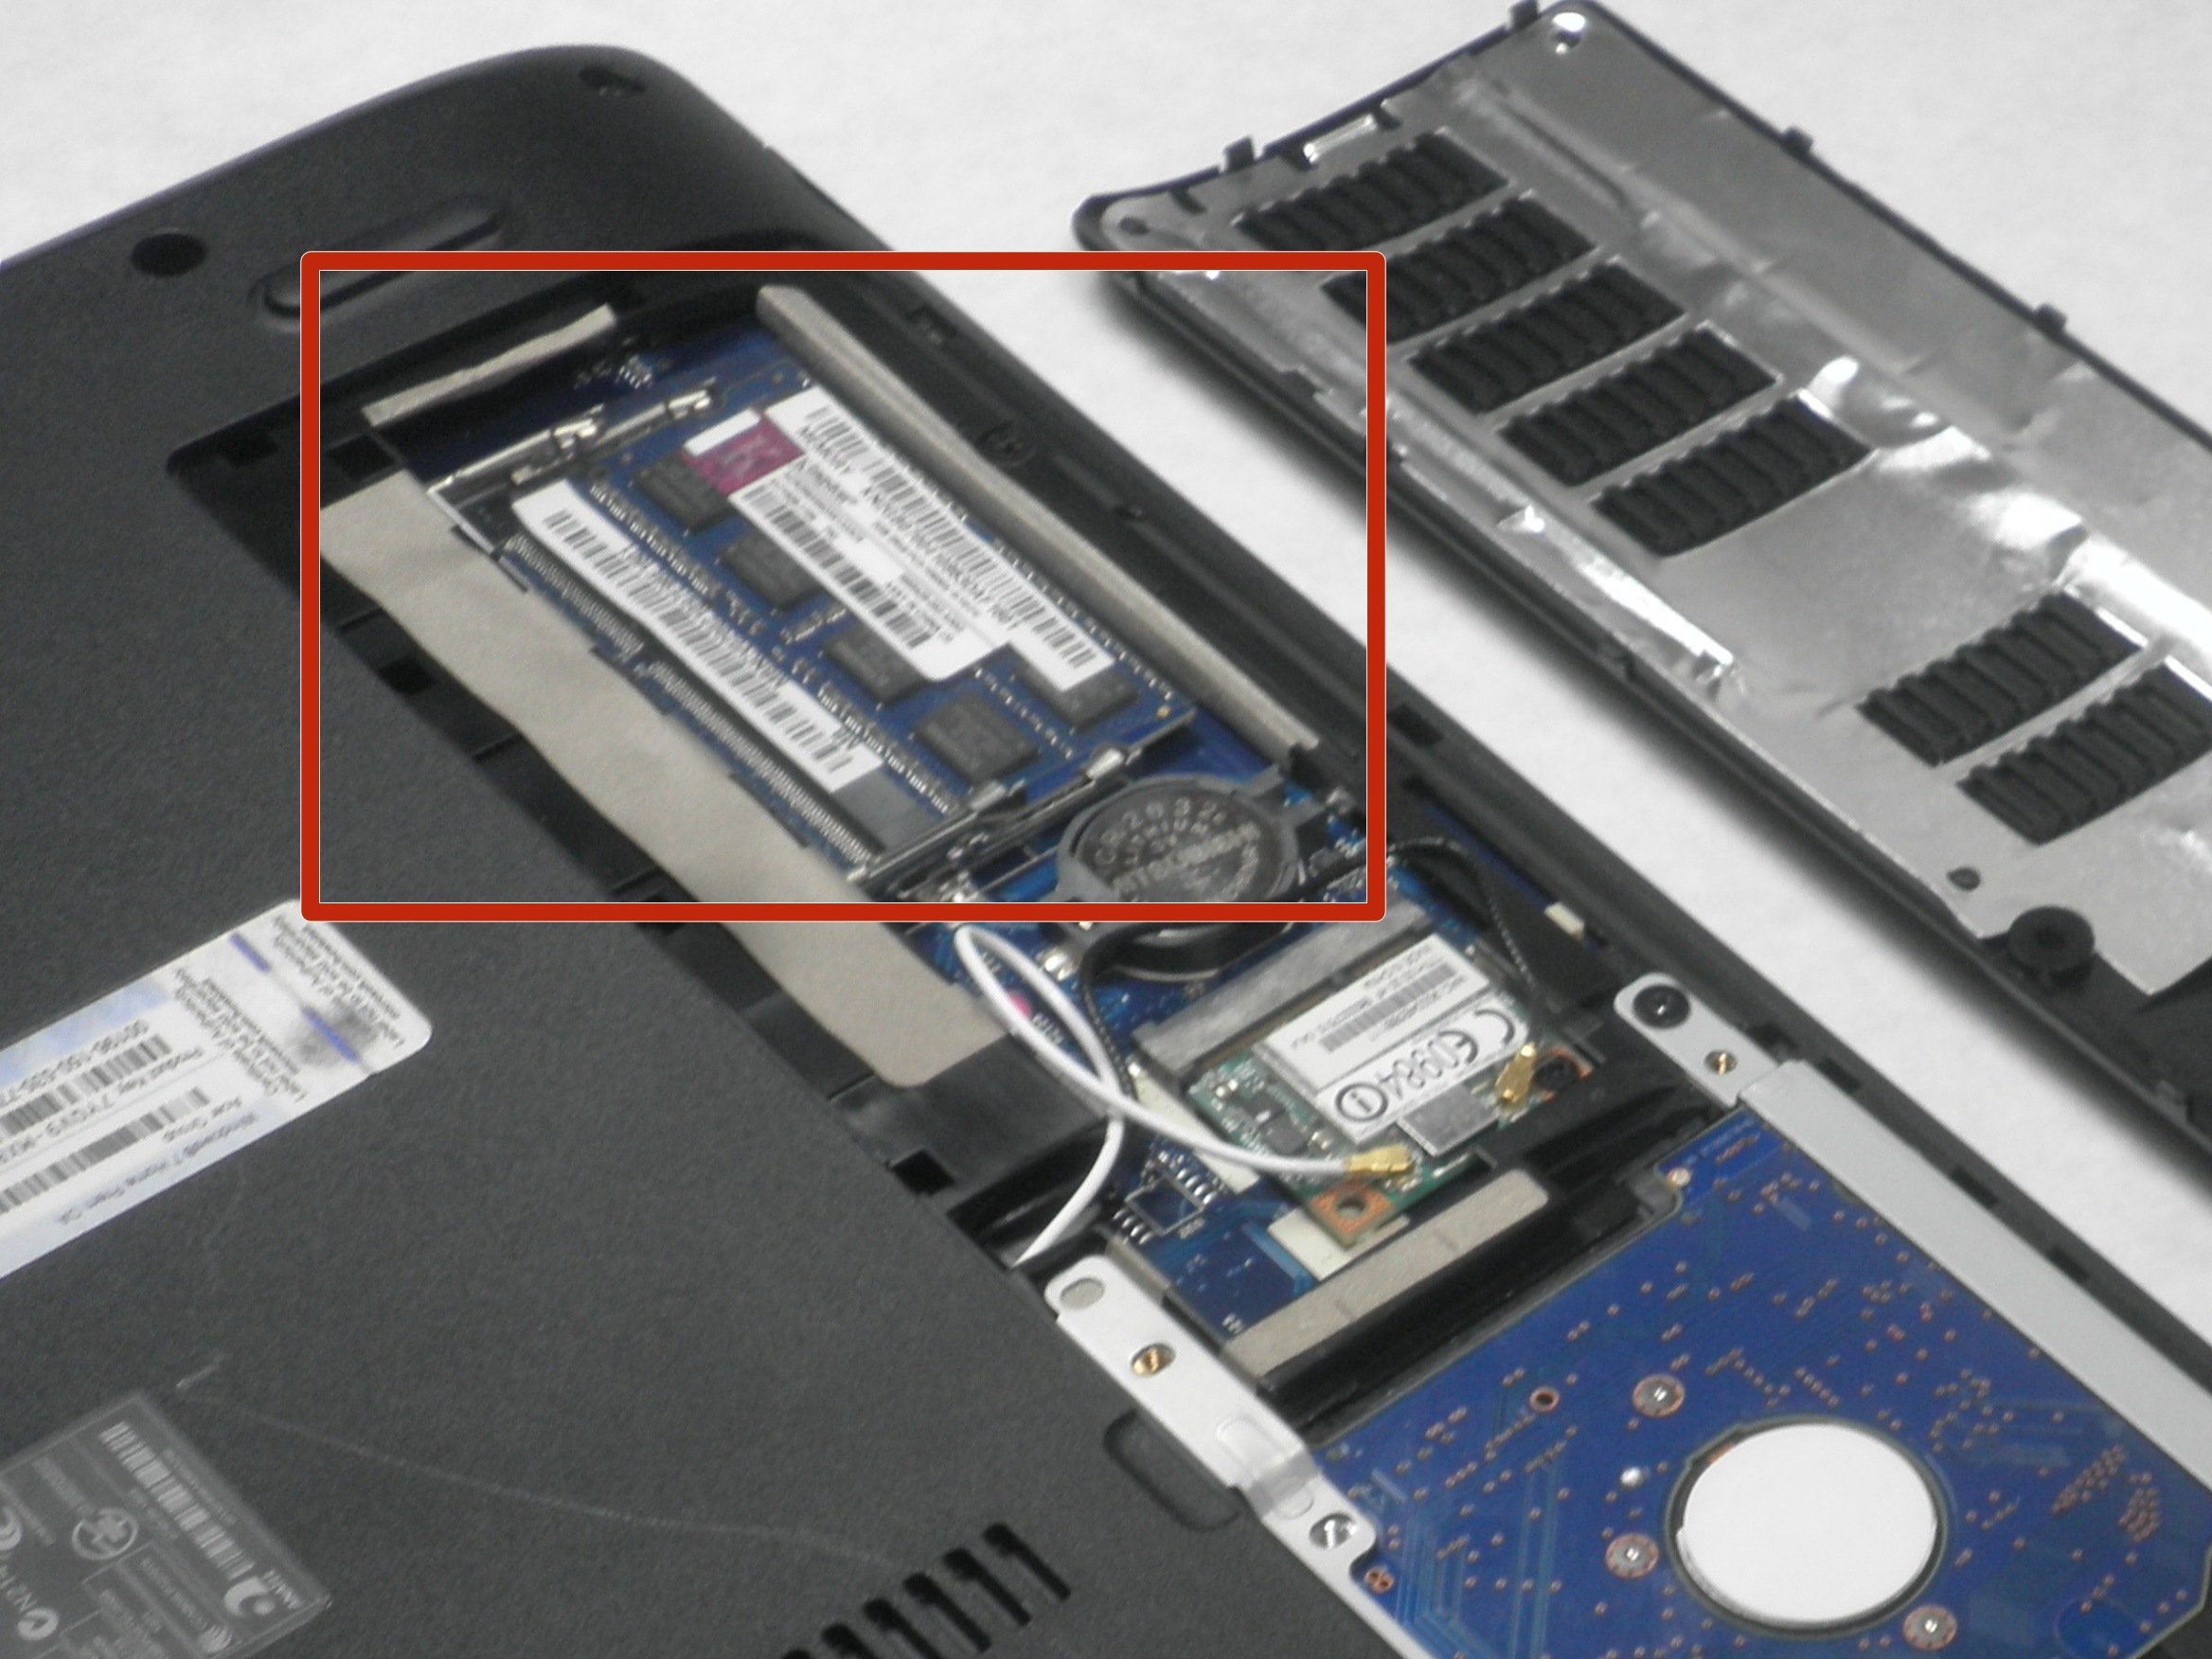
– Alright, let’s spot that RAM! It’s hiding in there somewhere, so get ready to pounce!
Step 11

– Spot the two metal clips snugly hugging both sides of the RAM—those little champs are keeping it secure!
Step 12

Once you gently pry them open, the RAM will pop up like it’s ready for action.
– Gently spread the tabs apart and pop out the RAM like a pro—quick and simple.
Step 13


– To put everything back together, just work your way through these steps in reverse – easy peasy!
– You did it! If you need help with another repair or have any questions, you can always schedule a repair
Success!