Acer Icona W510 vibration motor Motor Disconnection Prerequisite Only
Duration: 45 minutes
Steps: 15 Steps
This guide is all about gently disconnecting that pesky vibration motor. Let’s make sure your device is quiet and steady with a smooth, straightforward approach!
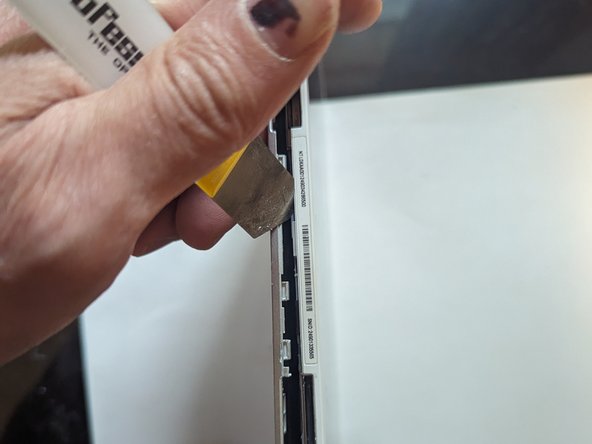
Step 1


– Gently slide your metal pry tool in between the back cover and the frame at a fun little angle like you’re trying to sneak a peek.
– Give that tool a little twist to the left to start unhooking those clips like a pro.
– Keep on working your way to the corner, prying and twisting to pop those clips out as you groove along.
Step 2


– Slide in an opening pick to keep those pesky clips from snapping back shut while you tackle the corner and venture over to the right side of the tablet.
– Keep going just like before—pry and twist to liberate the catches!
Step 3


When you get to the corner, take it easy and avoid sliding the tool into the spot right under the power symbol. There’s a fragile little clip hiding there that can easily break if you’re too aggressive with your prying. (Trust me, I’ve learned this the hard way. Don’t be like me.)
– Keep cruising along the top edge just like you did before!
Step 4


– Pop off the left side of the tablet like you’re unwrapping a gift!
Step 5

– Now, back to the bottom side. This part can be a bit tricky to unclasp on its own, but just follow the same method you used earlier for the first one and you’ll be golden.
– And here we are, the final stretch! Between the keyboard/power connector and the right-hand guide pin, just retrace your steps back to where you started.
Step 6

– Pop off the rear cover like a pro!
Step 7

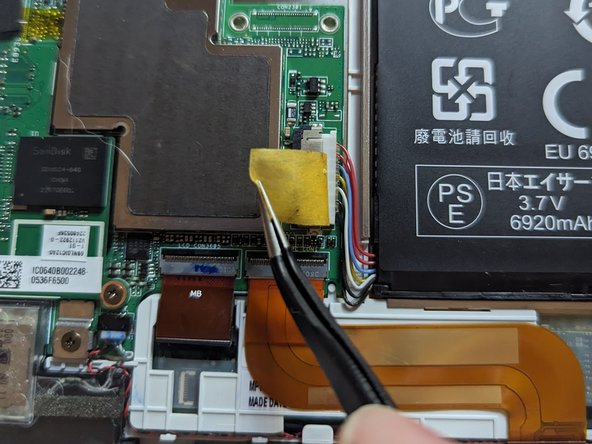
– Gently lift the tape holding down the battery connector—it’s like unwrapping a gift, but way cooler!
Step 8

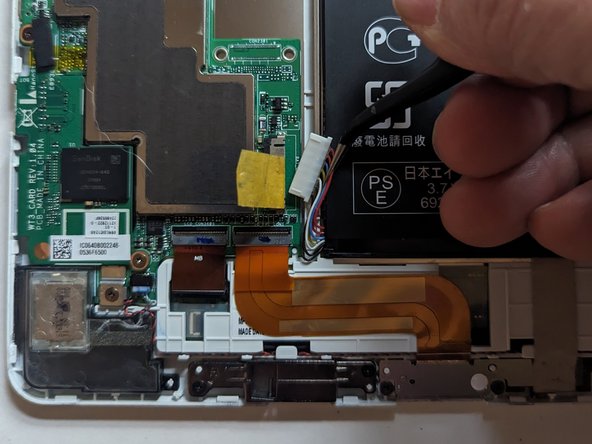
– Grab the plug by the tabs on either side and gently pull it straight out from the connector. It’s like removing a key from a lock – simple and straightforward!
Step 9
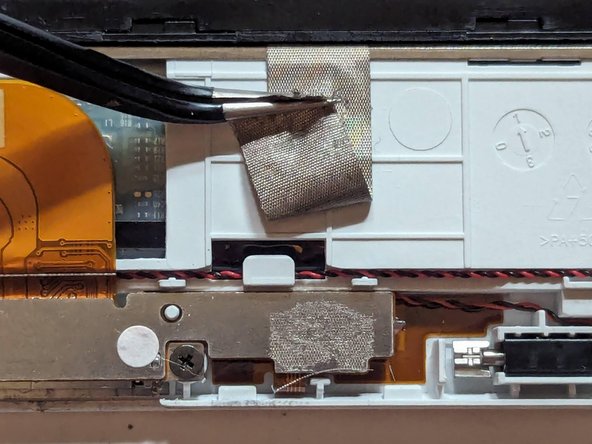
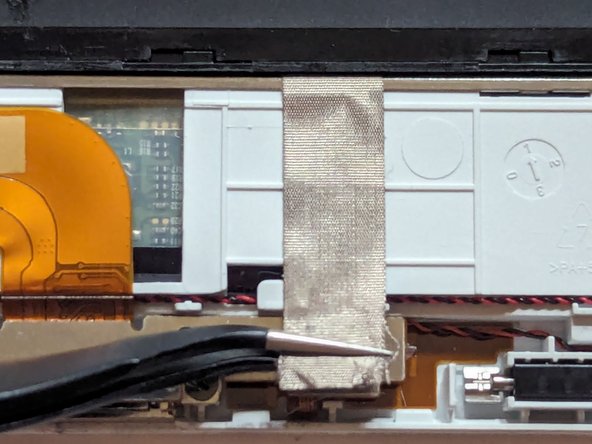

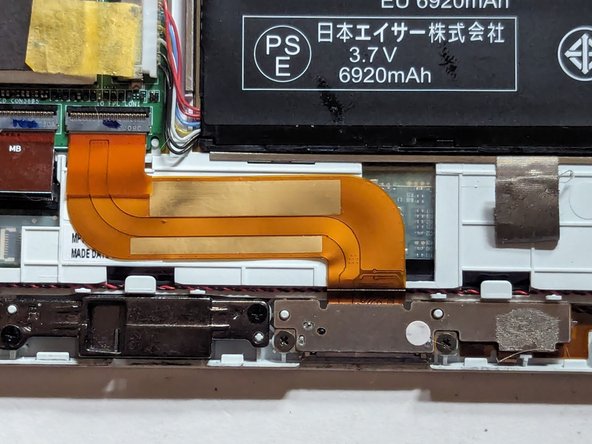
– Let’s get that grounding tape unstuck from the charging connector. Gently pry it loose to get things started.
Step 10
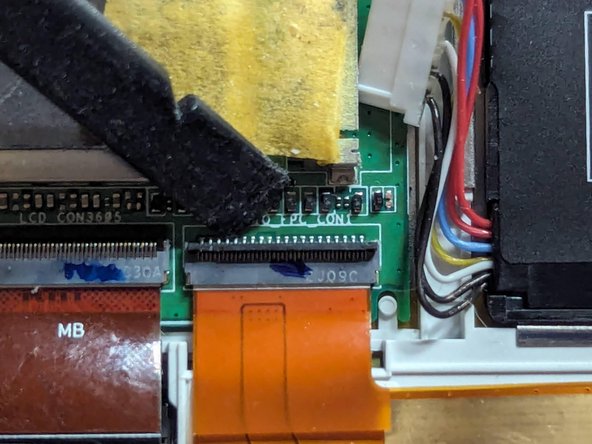

– Grab your spudger and gently lift the latch holding down the charge port flex cable. You’ll want to flip it up carefully so it can come free without any hassle.
Step 11

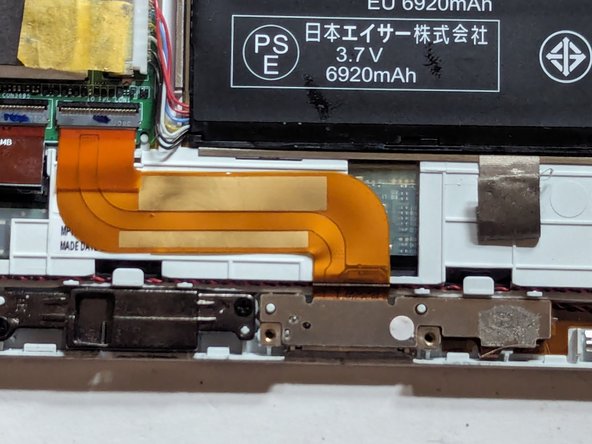
– Grab that pull tab on the flex cable and give it a gentle tug to slide the cable right out of the connector. You’ve got this!
Step 12

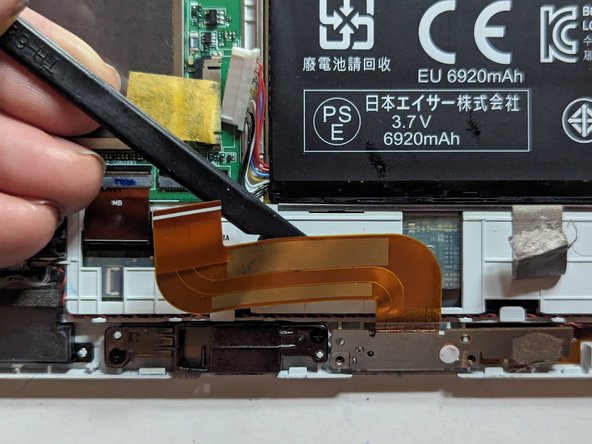
– The flex cable is gently stuck to the display frame, so grab a spudger and carefully separate them.
Step 13

– Take out the two 2.1mm Phillips screws—you’re almost there!
Step 14

– Carefully flip the cable assembly over, making sure not to damage the thin strip of flex cable that’s still stuck to the frame. Let’s keep that strip intact.
Step 15

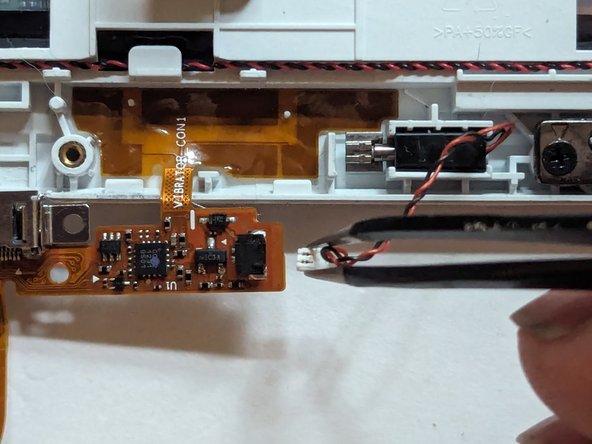
– Gently disconnect the vibration motor from the charging port circuit board.
Success!