Acer Iconia A1-830 Rear Facing Camera Replacement
Duration: 45 minutes
Steps: 7 Steps
This tiny digital camera is hooked up to the motherboard with a ribbon cable that’s hiding under some sneaky tape. Grab your metal tweezers and channel your inner surgeon to gently peel away the tape and lift out the camera. Steady hands make all the difference!
Step 1


– Let’s get your workspace ready. Find a flat, clean surface with plenty of light to make sure you’re all set for the job ahead.
– Time to power down your Acer Iconia A1-830. Give it a rest before we dive in.
– Disconnect any cables or remove any outer covers from your tablet to clear the way.
– Now, place your tablet on the workspace with the screen facing up, ready for action.
Step 2


– Gently slide your plastic opening tool into the small gap between the white plastic front bezel and the sleek aluminum back panel.
– Avoid prying the top edge near the front-facing camera; it’s a tricky area that deserves a little respect.
Step 3


– Start by carefully prying off the small clear plastic cover on top of the battery cable using a nylon or metal spudger. This is a delicate step, but don’t worry, you got this!
Tools Used

Step 4

– Let’s get started! Carefully pry the battery cable loose by gently lifting it up with the pointy end of your trusty black nylon spudger.
Tools Used
Step 5


Take it slow and steady—don’t let that battery take a hit while you’re freeing it!
– Gently pry the battery away from the metal plate using the black nylon spudger.
Tools Used
Step 6

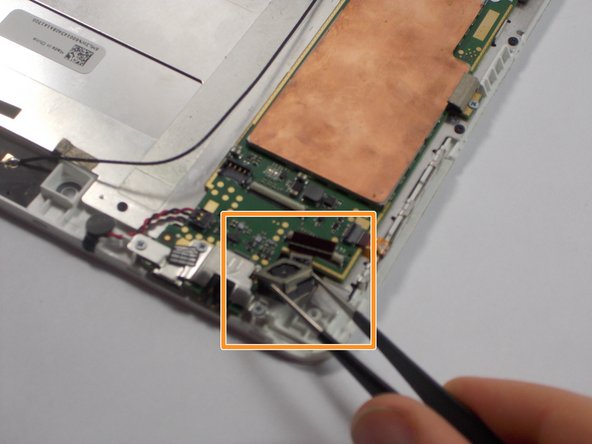
– Peel off that piece of black tape hiding the rear-facing camera ribbon cable connector. You’re just one step closer, keep it up!
Step 7

– Now that the hard work’s done, just rewind these steps to put your device back together—it’ll feel like you’re hitting the rewind button on your favorite mixtape.
– If you need help, you can always schedule a repair.
Tools Used

Success!