Acer Iconia A110 On/Off Switch Replacement
Duration: 45 minutes
Steps: 9 Steps
Step 1


Before diving into your tablet, make sure it’s powered off. We don’t want any surprises while you’re working your magic!
While you’re getting into the groove of this process, just a heads up that the volume button and/or power button might decide to go on a little adventure and fall out. No worries, it’s all part of the fun!
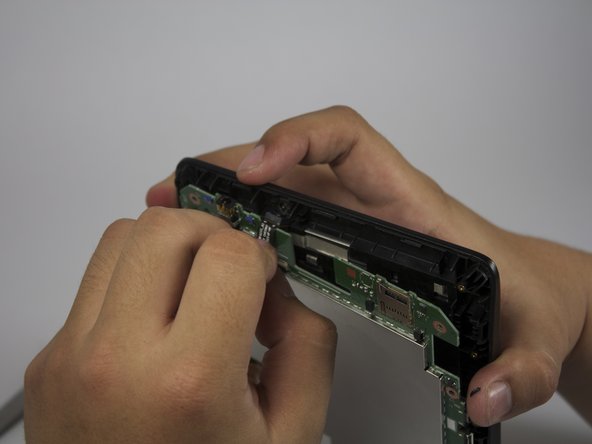
– Gently pry open the right side of the case using your trusty plastic opening tool. If things get tricky, just keep a tool stuck in there to hold the case open while you work your magic!
Step 2


– Take your plastic opening tool and gently persuade the left side of the case to pop open. With a little finesse, the backside of your tablet will part ways with the front, giving you access to the inner realm!
Step 3


You’ll probably hear that satisfying sound of adhesive letting go as you work on this.
– Time to get this repair started! Use your trusty plastic opening tool and spudger to carefully pry the battery away from the case. Take your time, it’s easier than it looks!
– Great job on freeing the battery! Now, gently detach the dongle that connects it to the motherboard. You’re one step closer to getting your device up and running again!
Tools Used

Step 4
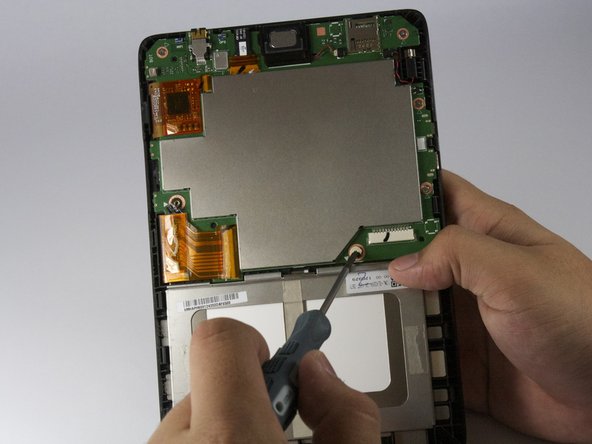

– Grab your trusty Phillips #00 screwdriver and let’s get those screws out! You’re looking to remove the following screws holding the motherboard in place:
– Two 2.0 mm screws, the ones with the bigger heads
– Four 2.5 mm screws, these have the smaller heads
Tools Used

Step 5


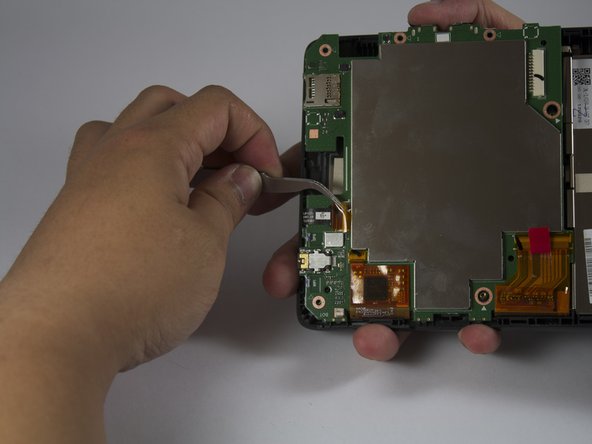
The vibration motor’s still tethered to the motherboard by a tiny wire—so take it slow and steady to avoid yanking that wire out.
– Alright, let’s locate the vibration motor, which is hanging out on the top right side of the motherboard. Grab your trusty tweezers and gently coax the vibration motor out from under the motherboard—be gentle, it’s a delicate little thing!
– Next up, use your fingers to carefully disconnect the cable that’s keeping the vibration motor tethered to the motherboard. Once it’s free, set it aside and give yourself a pat on the back!
Tools Used

Step 6


– The speaker nestled at the top of the motherboard should slide out with ease. Just a heads up, there’s a wire still attached, so handle it with a gentle touch.
– Using your fingers, carefully pull out the wire that connects the speaker to the motherboard. You’ve got this!
Step 7

Be cool and pull that ribbon cable straight out—not up, not down—to keep it intact and tear-free.
– Next up, let’s gently disconnect the ribbon cables from the motherboard.
– Each ribbon cable is tucked under a protective sticker—carefully peel it off using your trusty tweezers.
– Now, use those tweezers to gently pull out the ribbon cable. Easy does it!
Tools Used
Step 8
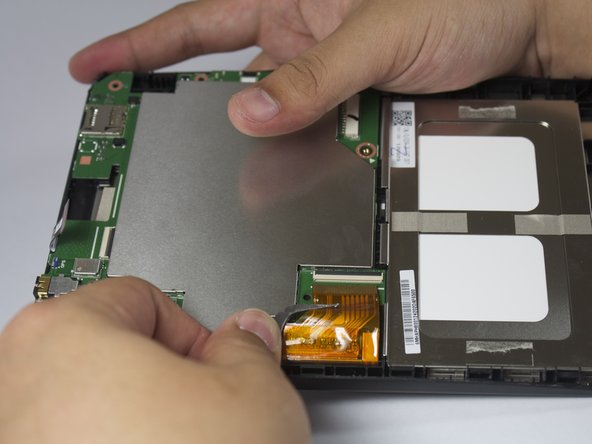
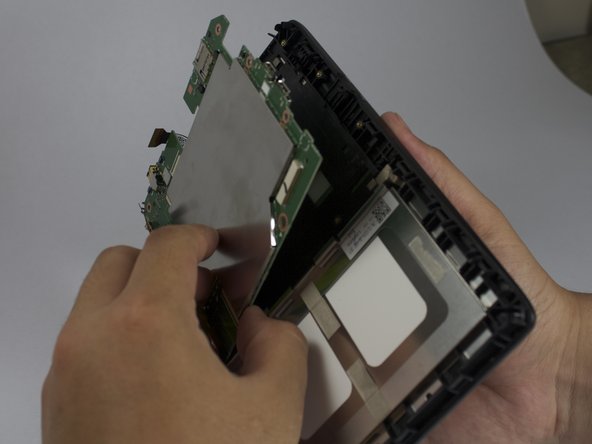

– Now that you’ve disconnected all the ribbon cables, gently move them aside and the motherboard should come out smoothly. You’re making great progress!
Step 9


If you’re not feeling confident with soldering, it’s time to pause! Check out this link for some handy soldering tips that might help you out.
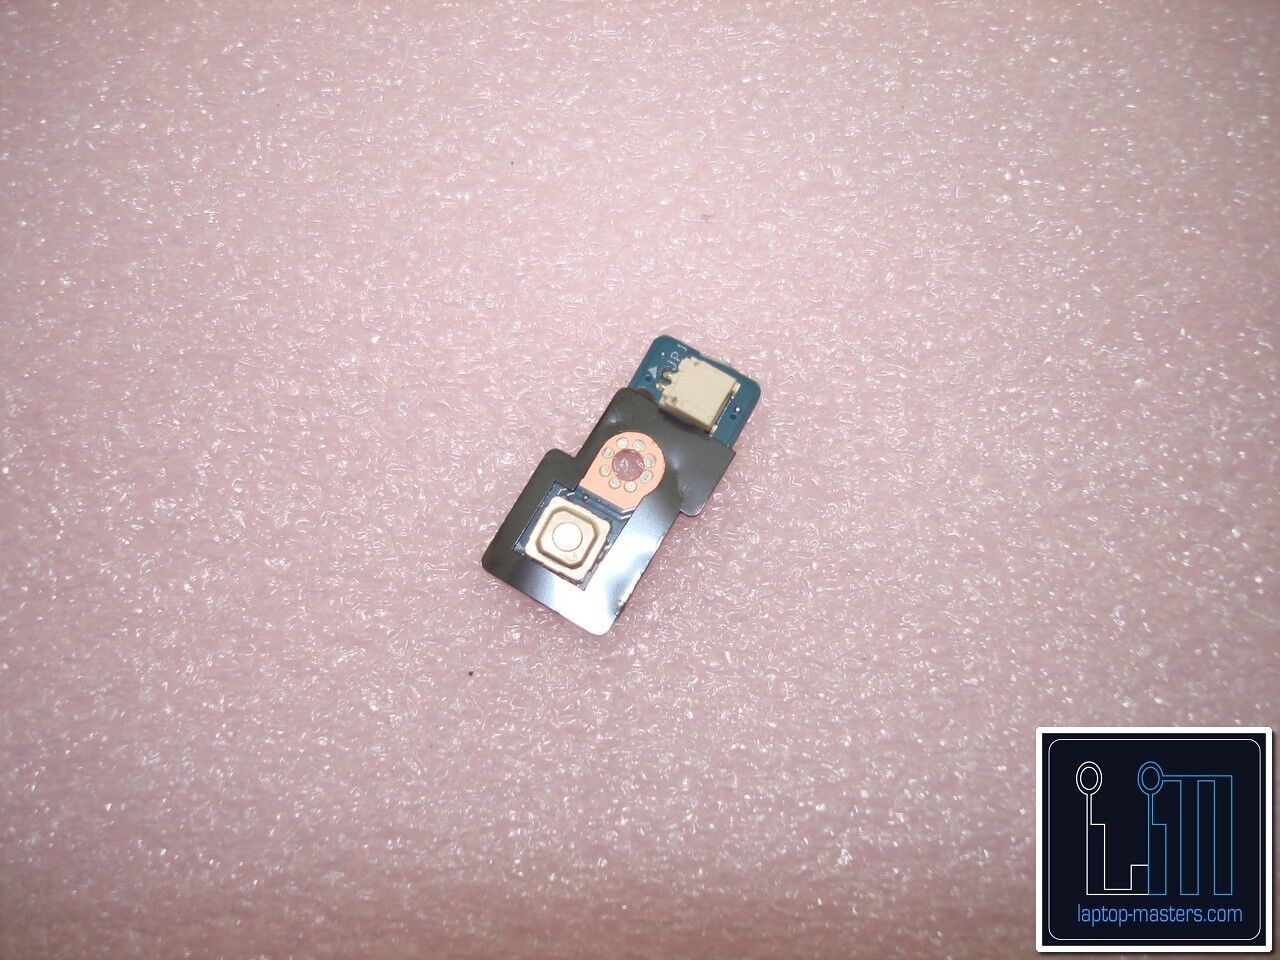
– Once the motherboard is out of the way, you’ll spot the buttons on the side – nice and easy to find.
– Now, grab your soldering iron and a wick to gently desolder the button. It might take a little extra patience because of the lead-free solder they used in the manufacturing process, but don’t worry, you’ve got this!
Success!