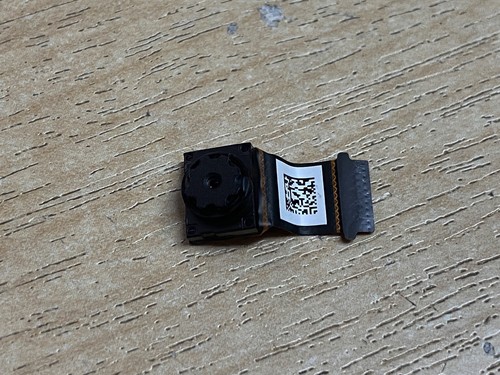
Acer Iconia W3-810 Screen Replacement
Duration: 45 minutes
Steps: 22 Steps
Ready to tackle a cracked or burnout screen on your Acer Iconia W3-810? This guide lays out each step in an easy-to-follow way to replace your screen and get your device shining like new again. No matter whether it’s shattered from a slip or tired from too much use, we’ve got you covered.
Step 1

– Lay your tablet flat on a stable surface, screen facing down, with the charging port facing towards you.
Step 2

Watch out for that plastic opening tool! Keep it away from the charging dock and any media ports to avoid any mishaps.
– Grab a plastic opening tool and carefully work your way around the edges to pop that back panel off. Take it slow—no need to wrestle with it!
Step 3

– Grab the ribbon cord and gently nudge the clamp on the port toward you using the plastic opening tool. Easy does it, you’ve got this!
Step 4

Be gentle with that ribbon cord, we don’t want any accidental tears!
– Gently slide the ribbon cord to disconnect the colorful rainbow cord from the battery. You’ve got this!
Step 5

– Grab your plastic opening tool and gently work the power cord out of its slot. Push from both sides to ease it out, then pull the cord free from its port with your hands. Nice and easy, no rush.
Step 6

Hey there! Just a friendly reminder: be gentle with that ribbon cord—don’t yank it too hard or tug near the other end. It likes a light touch, just like we all do!
– Gently tug on that ribbon cord to break the seal with the battery. Keep going until it’s fully free and ready to roll!
Step 7

– Grab your trusty plastic opening tool and give it a gentle nudge to wiggle out the battery pack from your device. It’s like a little dance – lift it up carefully and you’ll be golden!
Step 8


– Let’s get this repair started! Use a plastic opening tool to gently break the adhesive bond between the inner tape and the battery. You’ll find this tape in the middle and on either side of the battery, so take your time and work carefully to release it.
Step 9

– Pop that battery pack out of its cozy little home!
Step 10

– Gently wiggle your plastic opening tool to detach the speaker cord from the motherboard. Just a little pry and it should come right out!
Step 11

– Gently ease the retaining flap open with a trusty plastic opening tool, then carefully wiggle the ribbon cord free from its snug little slot. You’ve got this!
Step 12

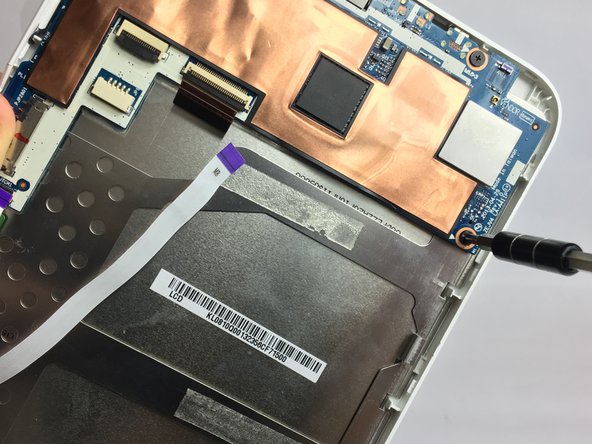
– Take a deep breath, grab your HH0 screwdriver, and remove those 3mm Phillips head screws hugging the motherboard—like a pro.
Step 13


– Gently lift the retaining flap of the ribbon cord that’s linking the screen circuit board to the motherboard—your trusty plastic opening tool is your sidekick for this part.
– Next, give that ribbon cord a little nudge to pop it out of its slot. A plastic opening tool is perfect for helping with that!
Step 14

– Now it’s time to get a little screwy! Use that trusty HHO screwdriver to remove the 3mm Phillips head screws from under the screen circuit board. Yep, same screwdriver, same ease – you’re a pro at this already!
Step 15

– Grab your trusty HHO screwdriver and let’s get to it! Remove those 3mm Phillips head screws that are holding the speaker and home button circuit board snugly in place on the main frame. You’ve got this!
Step 16

– Gently pull the ribbon cord from the special slots on the screen circuit board, giving it a friendly tug like you’re helping a buddy out of a tight spot.
Step 17

– Loosen up that left speaker by scooting the ribbon cord aside—it’s blocking your access to those 3mm Phillips screws. Time to unscrew them from the frame like a pro!
Step 18

– Gently free the speaker cord from the back frame by carefully breaking the tape seal with a spudger. You’re doing great, keep it up!
Step 19

– Let’s get started by carefully loosening the main back metal frame from the front casing using a trusty plastic opening tool.
Step 20

– Peel away the metal tape from the front panel with some finesse using a trusty spudger—like you’re delicately unwrapping a present!
Step 21

– Gently pry off the metal tape from the back of the screen using a spudger. Take your time and be careful; the last thing we want is a sticky situation!
Step 22

– To wrap things up, just reverse the steps and you’ll be good as new!
– You’ve made it through the repair guide – nice job! If you need help with anything else, you can always schedule a repair.
Success!