Acer Iconia W3-810 Speaker Replacement
Duration: 45 minutes
Steps: 12 Steps
Ready to tackle some speaker troubles? This guide is here to help you swap out those pesky speakers that may have given in to water damage or just a bit too much love. Let’s get those sounds back in action!
Step 1

– Lay your tablet flat on a stable surface, screen down, with the charging port facing you.
Step 2

Watch out for that plastic opening tool around the charging dock and media ports – they can be a bit sensitive!
– Let’s get started by using a plastic opening tool to carefully pry the back panel off your device.
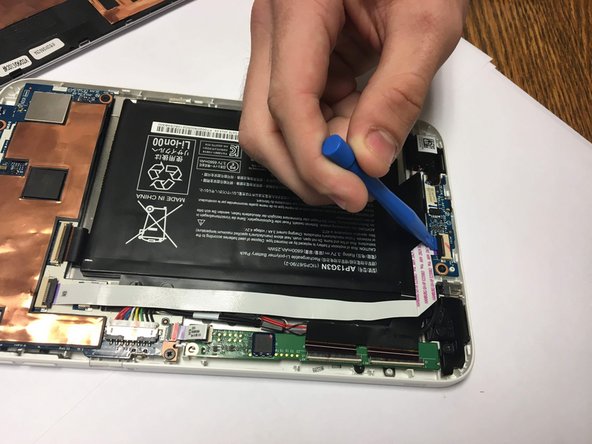
Step 3

– Gently lift those little retaining flaps holding the screen ribbon cord to the circuit board using a plastic opening tool. You’ve got this!
Step 4

– Gently wiggle the ribbon cord and coax it out of its cozy slot.
Step 5
– Gently lift the retaining flap that’s keeping that ribbon cord in place!
Step 6

– Gently pull out the ribbon cord from its cozy little slot.
Step 7

– Time to get techy! Grab that Phillips head screwdriver and unscrew those HH0 3mm screws that are keeping the right speaker in place. You’ve got this!
Step 8

– Take a moment to grab your trusty screwdriver and tackle those HHO 3mm screws that are holding the left speaker in place. You’ve got this!
Step 9

– Gently lift the speakers out from the front panel—like you’re freeing them from a tiny, electronic embrace.
Step 10

– Gently tug on the speakers just below the headphone cord to release them.
Step 11

– Grab your trusty plastic opening tool and gently pry out the speaker cord from its cozy slot. You’ve got this!
Step 12

– Get ready to give your device a little makeover! Start by carefully taking out the speakers from the device.
Success!