
Apple Watch 42mm Glass Digitizer Only Replacement
Duration: 45 minutes
Steps: 9 Steps
Ready to separate the LCD from the glass/digi on your Apple Watch? This hands-on guide breaks it down for experienced techs who have the right tools and know-how. The process involves some high-end equipment and a steady hand, so unless you’re confident with advanced repairs, you might want to schedule a repair with the pros at Salvation Repair.
Step 1


- Give your screen a little warmth to make it cozy! Start by powering down your device—just hold that crown and slide to turn it off. Now, grab a sharp blade and gently start at the bottom right corner. Lift the glass just enough to create a gap. Once you've got a nice little opening, switch to a plastic tool to carefully break the adhesive seal around the edges.
Step 2


- When working your way around the edges with a knife and plastic tools, be gentle and don't insert more than 1mm into the AMOLED. Remember, the force touch gasket is right underneath the glass and can be easily damaged if you apply too much pressure with a metal object. The FPC clip can be a bit finicky, but it's a breeze to remove using sharp point tweezers on the battery edge. Take your time and you'll be golden!
Tools Used

Step 3


- Grab your trusty soldering iron with a tip that's a bit bigger than those little solder pads. Crank that temperature up to 350°C – that's the sweet spot! Now, hold off on adding any solder; let's keep it simple and just use the heat along with some tweezers to gently lift those tabs. Once you've unsoldered everything, carefully move the flex cable out of your way. Now, with your tweezers in hand, take your time peeling back that proximity sensor from the AMOLED – and remember, gentle does it!
Tools Used

Step 4

- Once you've desoldered, grab a trusty plastic spudger and gently work it into the area shown in the picture to release the adhesive that's keeping the digi flex in place. A little warmth goes a long way, so applying a small amount of heat—around 150F—will help ease that adhesive grip. Now, fold that digi cable back just like you see in the second picture!
Tools Used

Step 5


- Start by warming up the entire screen evenly—think of it as giving it a cozy blanket of warm air for about 10 minutes. I keep my heat gun set between 300°F and 350°F, holding it about 3 to 6 inches away to keep the temperature just right. Gently slip a business card under the screen on the dig flex side. Use some alcohol to loosen up the OCA tape bond, then slowly and carefully slide the card in—patience is key here.
Tools Used

Step 6


- Gently slide the card in, adding a bit of alcohol as you go for a smooth ride. Keep that hot air aimed at the screen for an even heat. While holding the edges of the glass, rock the card back and forth until the AMOLED finally lets go.
Step 7


- The AMOLED screen is super thin—think potato chip, not glass slipper—but tougher than it looks. Be gentle and keep some heat handy while you work your way around. For old OCA adhesive, use your finger to roll it off like you’re peeling tape from your favorite mixtape. A bit of pure isopropyl alcohol makes things even easier and won’t hurt the screen, even if it sneaks into the edges.
Step 8

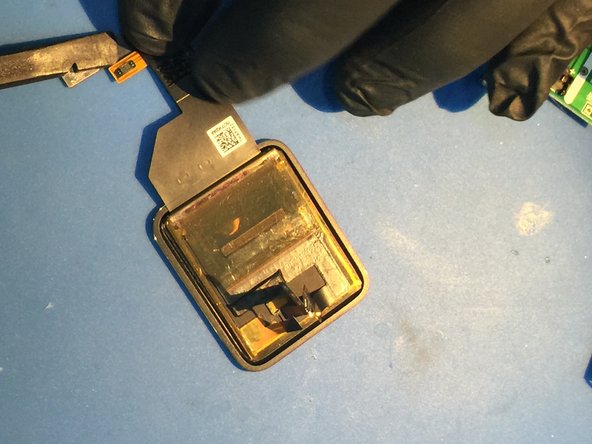
- Watch out for that sneaky force touch flex cable hanging out on the bottom left of the display when you're taking off the display assembly from the frame. The force touch gasket is like a thin silicone hug that wraps around the entire edge of the watch. Before you dive into the next steps, give your AMOLED a little test after you've separated it. You're doing great!
Step 9
- Hang tight while I wrap up this guide! I'm just waiting for the arrival of the new digitizer/glass assembly, which is on its way from China. It might take a few days, but good things come to those who wait!


