Apple Watch Force Touch Sensor Replacement
Duration: 45 minutes
Steps: 39 Steps
Heads up! Popping open your Apple Watch can mess with the Force Touch sensor, which also acts as the waterproof seal. This sensor is basically two layers glued together, and they might split apart when you open the watch, making it less sealed when you put everything back. If that happens, you’ll need to fix or swap the sensor before reassembly.
Step 1
If your touchscreen is acting up and you can't turn off your watch, don't sweat it! Try this nifty alternative to power it down.
- First things first, let’s get that watch off the charger and power it down before we dive into the repair adventure!
Step 2

If parts of the screen start cooling off, just give your iOpener another quick heat-up or shift it around to keep things warm enough to pry the screen off easily.
- Warm up an iOpener, or grab a hair dryer or heat gun, and give the watch face a good heat session until it’s just a bit too hot for comfort.
- Let the iOpener hang out on the watch for at least a minute to make sure the screen gets nice and toasty—this will loosen up the adhesive and make life easier.
Tools Used

Step 3


Keep your fingers clear of the blade—think of it as giving your digits a little personal space. When in doubt, protect your hand with a sturdy glove, like a leather or gardening glove, to keep things safe and sound. Be gentle with pressure—no need to turn it into a wrestling match, or the blade might slip or cause damage. And don’t forget your safety glasses; if the glass or blade shatters, you want your eyes to stay unscathed. If you need help, you can always schedule a repair.
Since there's only a tiny gap between the screen and watch body, you'll need a sharp blade to gently pry them apart. Be sure to read the following warnings closely before diving in—safety first!
Step 4


Handle the knife with care—once the gap opens, pressing too hard might cause it to slip and cut the battery. Stay steady and controlled to keep things safe and smooth.
Grab that curved blade! It's your best buddy in avoiding scratches on the case and cracking the glass. Remember, only use the curved part for prying; the tip and flat section are just for show!
This nifty move should help pry the gap open a bit, making the glass pop up from the case like a champ.
- Slip the curved part of your blade into the small gap between the glass and the case at the bottom edge of the watch, and press straight down with confidence.
- Once the glass pops up a bit, gently twist the blade downward—lifting the glass and widening the gap. Slow and steady wins this race!
Step 5


Be gentle with that opening pick! Just slide it in about 1/8" (around 3 mm)—any deeper and you might accidentally mess with some cables. Keep it light and easy!
- Once you've made a nice little gap, slide the point of an opening pick under the glass like a pro.
- Glide the pick along the bottom edge to loosen up the sticky adhesive that’s holding the screen onto the case.
Step 6


Don't push the pick in too aggressively—it's easier to keep it gentle by rolling the tool rather than dragging the tip along. Take your time, stay patient, and you'll avoid unnecessary damage.
- Grab your trusty opening pick and slide it up along the button side of the watch. Gently nudge it in to break that adhesive seal and create a little more space as you go along.
Step 7


- Gently slide the pick around the top right corner and smoothly glide it along the top edge of the screen. You're doing great!
Step 8


Keep that pick snugly in place to prevent the adhesive from sealing the screen back up. You're doing great!
- Keep that pick moving around the outside of the screen, gliding down the left side to slice through the last bits of adhesive. You're doing great!
Step 9


- Now that you've got the first pick in place, grab a second one and make sure all the adhesive is separated around the entire screen perimeter. Take your time, you got this!
Step 10


Heads up! There are two cables hanging out near the top left corner, connecting the screen to the inside of the watch. Pry gently—those cables don't like surprises!
- Gently lift the right side of the screen to break free from any stubborn adhesive holding it down.
- Now, give a little lift on the left side too! Just a heads up, don’t try to yank the screen off just yet—it's still connected by two sneaky cables.
Step 11


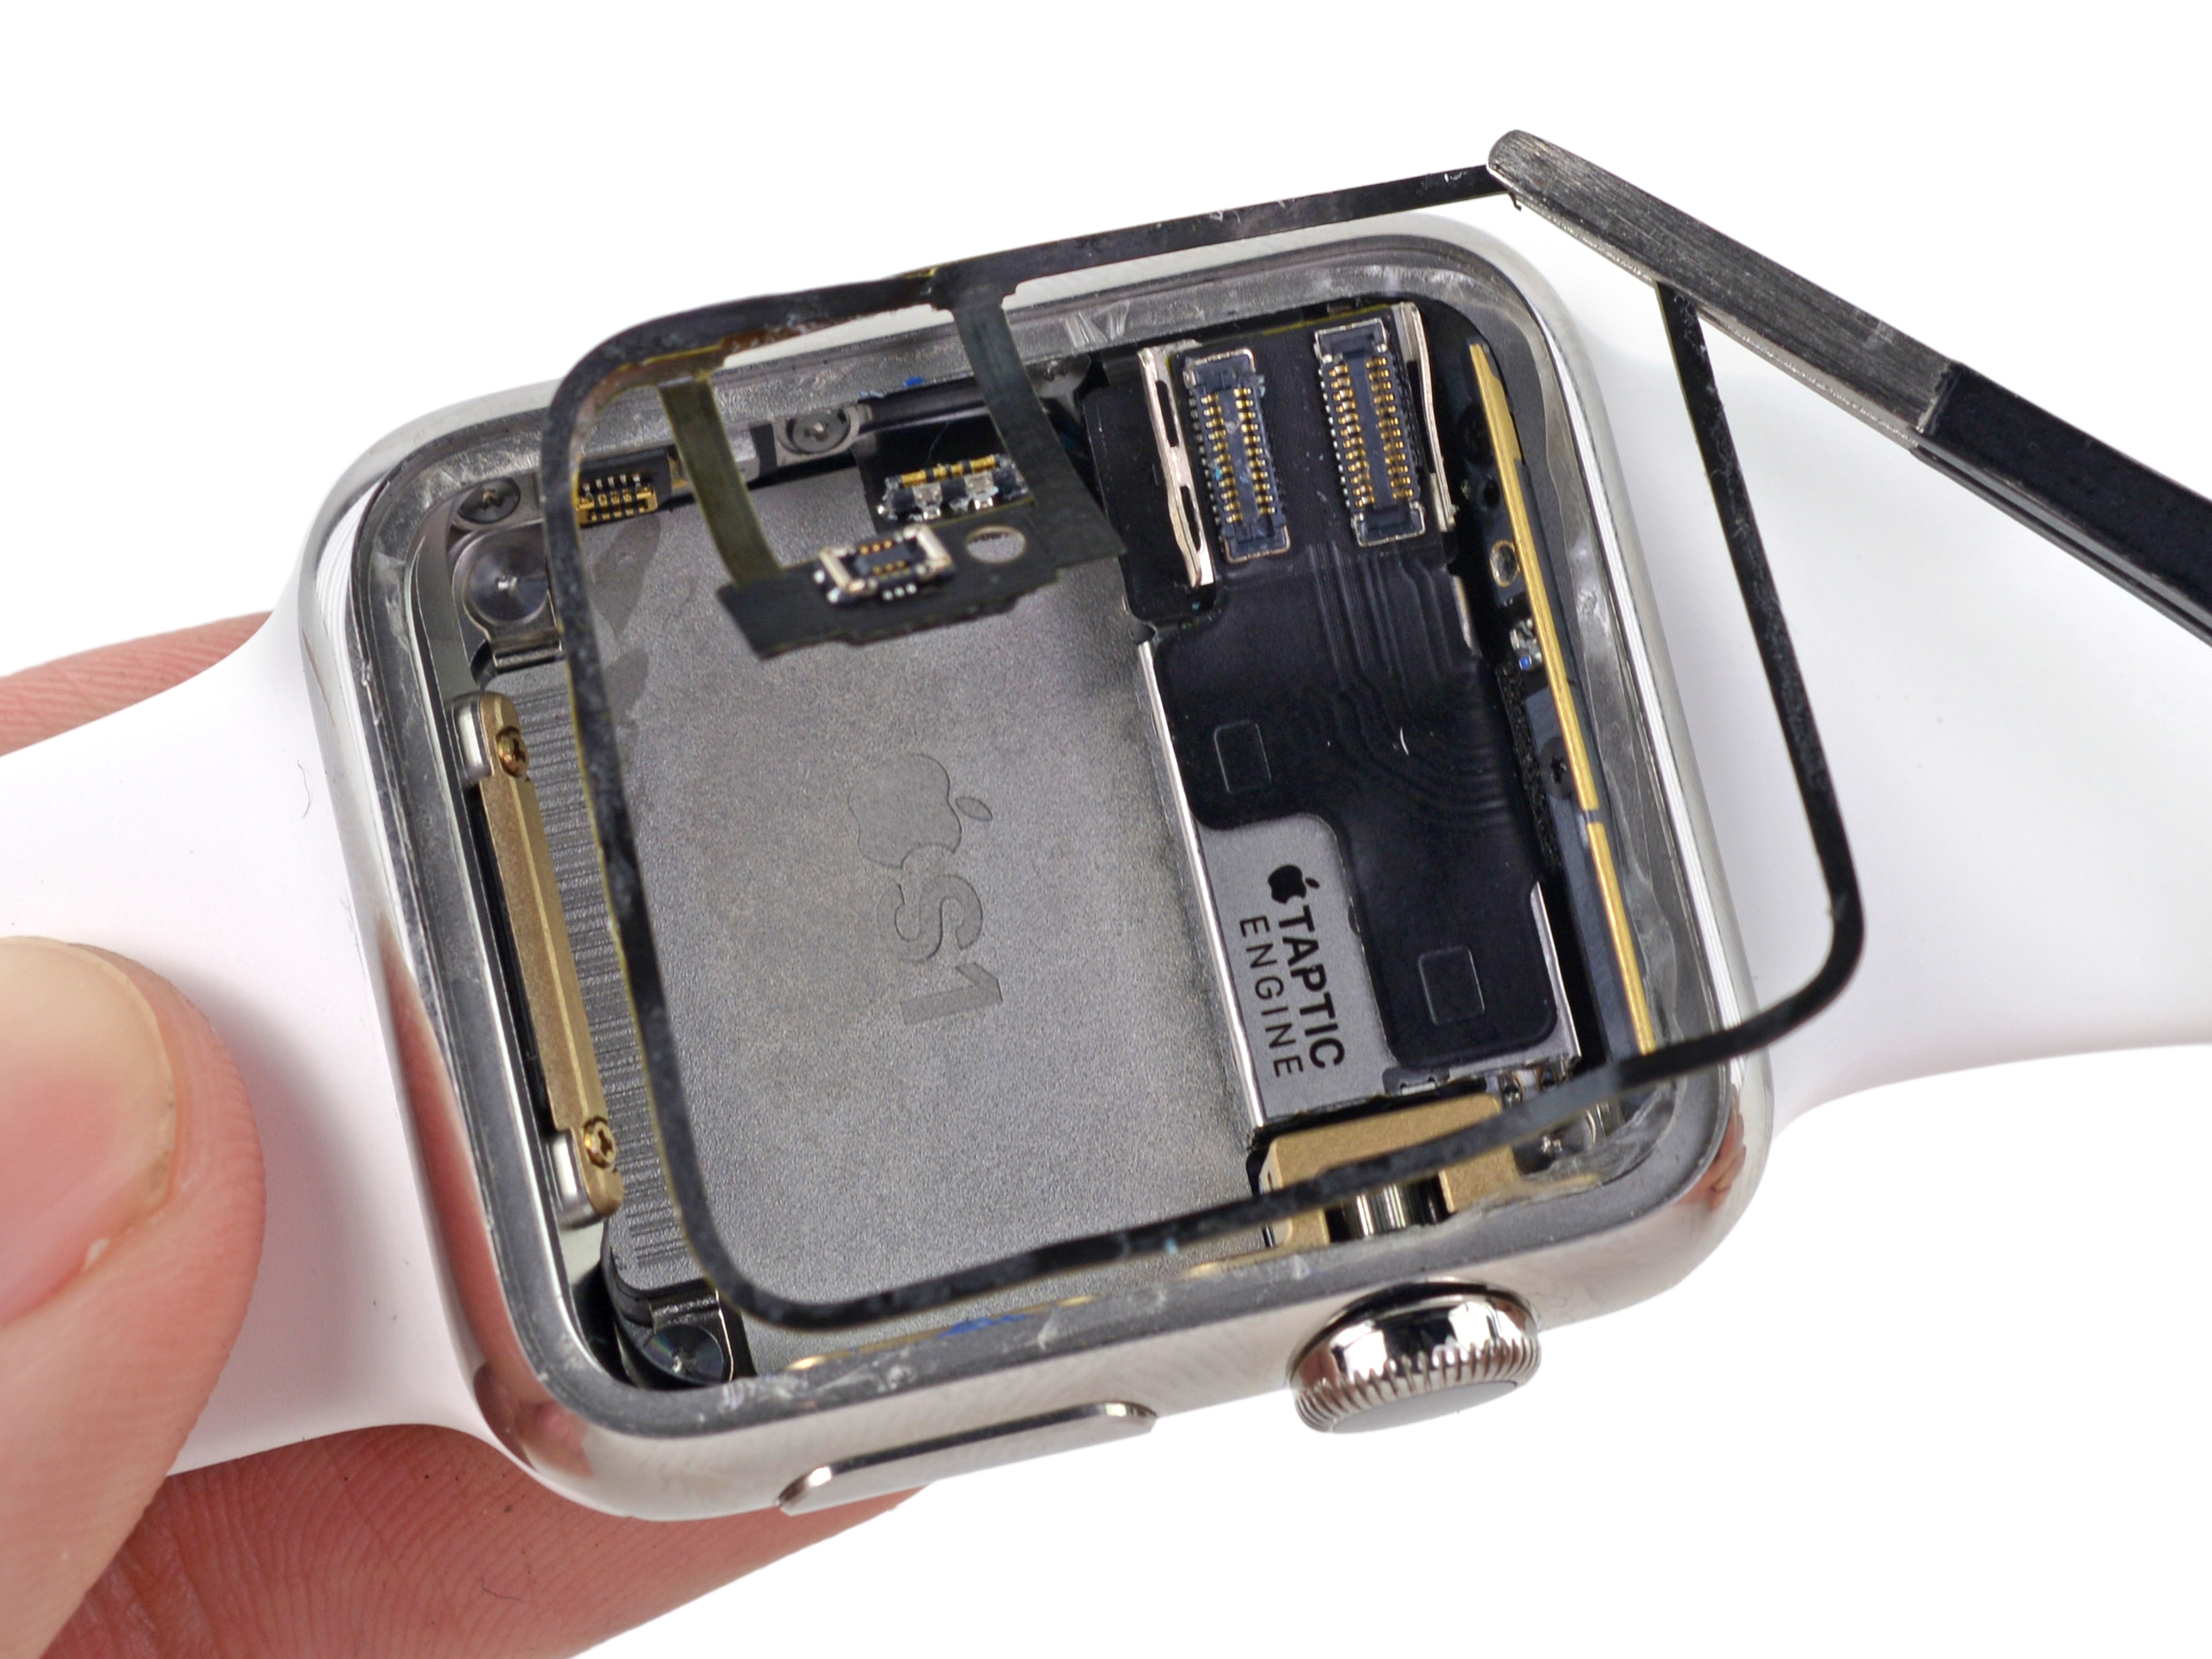
- The top layer of the sensor might be a little clingy with the back of the screen—if that happens, gently press it down and ease it apart.
If you spot the top layer of your Force Touch sensor peekin' out through the display adhesive, it means those two layers have decided to part ways—time for a replacement or repair. Luckily, if you're using a Salvation Repair kit, it comes with a fresh Force Touch sensor included, so no sweat. Need a hand? You can always schedule a repair to get it sorted.
Step 12


- Lift the screen gently and slide it to the left, being careful to avoid snagging the display data and digitizer cables along the way.
Step 13

Watch out for any sudden tugs on the screen or cables—gentle hands win the day!
- Grab something sturdy—think a small box or the edge of a book—and set your watch on top so it’s raised about half an inch (1 cm) off the table. This way, the screen can dangle down, giving you way more room to work on the battery.
Step 14


Hey there! Just a friendly reminder: don't try to take out the battery just yet—it's still plugged in and ready to go!
And remember, be super gentle with that battery! We don't want any bumps or bruises on it, so handle with care!
- Grab some scissors and snip one of your opening picks down to about the width of the battery. Just make sure to keep those corners nice and smooth!
- Slide that modified pick in between the right side of the battery and the case. Nice and easy does it!
- With a steady hand, apply constant pressure to gently pry the battery up, breaking free from the adhesive that’s been keeping it cozy with the system board.
- For those larger (42 mm) models, be careful not to accidentally poke around at the system board hiding beneath the battery. Just insert the pick enough to get under the battery, but not too deep!
- If you're finding it tough, a dab of high concentration isopropyl alcohol (90% or greater) around and under the battery can help loosen that adhesive grip.
Tools Used

Step 15


- Twist that battery to the left like you're opening a jar of pickles to reveal its connector!
Step 16


Spot a battery that's looking a little lumpy or bent out of shape? Time for a swap! For best results, always start fresh with a new battery whenever you remove the old one.
- Gently lift the battery up and away so you can get a clear view of the battery cable connector.
- Grab a plastic opening tool and carefully pry against the bottom of the case to pop the battery cable connector off the watch’s battery cable.
- Once the connector is free, go ahead and remove the battery from the watch.
Step 17


- Flip the screen up and to the right, so you can get a good look at the cables hanging out underneath.
Step 18


Be careful not to pry too aggressively towards the watch band, or you might end up damaging those delicate cables.
The small metal bracket holding the display and digitizer cable connectors is glued onto the speaker. Carefully lift or unstick this bracket to access the connectors underneath.
- Grab a trusty plastic opening tool and gently nudge the bracket toward the display, lifting it up from the speaker like you're peeling a ripe banana!
Step 19


Popping off the cover can be a bit stubborn, so don’t worry if it takes a few tries. Take it slow, and steer clear of yanking on the bracket or messing with the cables—they’re not fans of rough treatment!
Pop those two slotted tabs loose to let the cover break free from the bracket. The cover should come right off!
- Hold the bracket steady on the left side with your fingers or tweezers—get a good grip!
- At the same time, slide a tiny (1 mm) flathead screwdriver under the little tab on the right.
- Lastly, place a finger behind that tab and give the bracket a firm pinch between your finger and the screwdriver to pop the cover off.
Tools Used

Step 20


- Use your tweezers to grab the cover, then slide it up toward the top of the watch to pop out the last slotted tab and lift the cover away.
Tools Used
Step 21


Avoid poking the exposed pins—your fingerprint smudges can mess with the connection.
- Gently lift to disconnect those display data and digitizer cables like a pro.
- Now, go ahead and remove the display with confidence!
Step 22


This screw is tiny and tends to strip out easily. Keep your driver at the right angle and apply steady pressure as you turn to avoid mishaps. If you need help, you can always schedule a repair.
- Grab a Y000 driver and gently unscrew the single tri-point screw holding down the Force Touch sensor connector cable. You're on your way to a smooth repair—keep at it! If you need a hand, you can always schedule a repair.
Step 23


- Grab your plastic opening tool and gently flip the Force Touch sensor cable connector straight down to disconnect it.
Step 24

- Give your iOpener a quick 30-second spin in the microwave, then stick it to the front of your watch case. This will help loosen up that stubborn adhesive holding the Force Touch sensor in place. You've got this!
Tools Used
Step 25


- Grab a plastic opening pick and a pair of tweezers — it’s time to gently lift the Force Touch sensor out of the case. Work carefully to keep everything intact. If you need help, you can always schedule a repair.
Tools Used
Step 26


Take your time with this step—don't rush it! Even a tiny bit of leftover gunk can stop your display from sticking properly to the case, which might make it pop loose later on. If you need help, you can always schedule a repair.
- Grab your trusty tweezers and lift away any leftover adhesive hanging out on the lower case.
- Give the case a good clean—make sure every last bit of sticky stuff (and any stray glass pieces) is gone before sealing up your watch. Use the tip of an opening tool or spudger, wrap it in a lint-free cloth or coffee filter, and dab on a little isopropyl alcohol (90% or higher). Scrub until it’s squeaky clean!
Tools Used
Step 27


- If you're sticking with your current screen, now's your chance to lose any old adhesive that's still hanging on. (Swapping in a fresh screen? You can skip this part.)
- Grab a plastic opening tool and gently scrape away the leftover adhesive from the edge of the screen. If you spot any bigger bits, tweezers make quick work of those.
- Give the area under the adhesive a solid wipe-down with isopropyl alcohol for a nice clean finish.
Tools Used
Step 28

- Place your new Force Touch sensor face-down, with the connector pins pointing away from you—like it's chilling on a beach towel.
- Peel off the first protective liner and toss it (the liner, not the sensor), revealing the sticky adhesive underneath.
Step 29


- Now it's time to get the Force Touch sensor into its new home! With the sticky side facing down, carefully line it up and gently place it into the watch case.
- Make sure everything is oriented just right, with the connector hanging out in the lower left corner and facing upwards - you got this!
Step 30


- Give the Force Touch sensor a gentle but confident press all around the edge of your watch case, making sure it’s snug in every spot.
Step 31


- Grab your tweezers and gently flip the Force Touch sensor cable connector back onto its socket—think of it as tucking it in for a nap.
- Next, use a plastic opening tool to press the connector into place. Give it a gentle but firm push to make sure it’s all snug and happy.
Tools Used
Step 32

- Pop that Y000 tri-point screw back into place to secure the Force Touch sensor connector cable. Keep it snug, but don’t go Hulk on it!
Step 33


Watch out for those exposed pins! Give them a little space and keep your fingers clear, as the oils from your skin might throw a wrench in their connectivity party.
- Grab your trusty plastic opening tool and snap those display data and digitizer cables back into place. Make sure they’re seated snugly for a smooth reassembly!
Step 34


- Place the display connector bracket cover in position and give it a gentle slide to lock in that big slotted tab at one end.
- Press down on the cover to snap those two smaller tabs into place at the other end.
Step 35


- Line up the battery connector with its counterpart inside the watch—like you're setting up a tiny high-five.
- Grab those tweezers and press the connectors together, giving them a gentle but confident squeeze.
Tools Used
Step 36


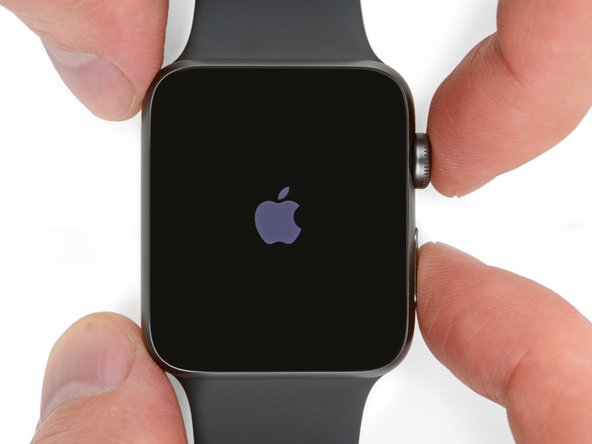
Alright, it's time to power up your watch and give that force touch function a whirl! If it’s playing hard to get and refuses to turn on, take a moment to check those three connectors—make sure they’re snug and connected. Give it another shot!
- If your new battery has adhesive already on it, go ahead and peel off that protective strip to get it ready.
- Flip the battery down into place, lining it up with its cozy little spot.
- Press the battery firmly onto the system board so it sticks.
- Reusing the old adhesive is totally fine, or grab a bit of double-sided tape like Tesa 61395, or a tiny dot of liquid glue like E6000 to keep it snug.


Step 38


- Swing the screen back to the right, making sure the display and digitizer cables are tucked in all nice and tidy.
- Line up the screen with the case, then press down firmly so it sticks to the adhesive.
Step 39

- Ready to give your e-waste a new home? Take it to an R2 or e-Stewards certified recycler!
- Things not going as smoothly as you'd hoped? Don't worry! Try some basic troubleshooting or check out our Answers forum for some extra tips.
- And hey, if you find yourself stuck, remember, you can always schedule a repair for some expert help!


