
Apple Watch Screen Replacement
Duration: 45 minutes
Steps: 21 Steps
Oops! Did your Apple Watch glass just crack? No worries, we’ve got you covered! Dive into this guide to swap out that screen, including the sleek OLED display and the fused glass digitizer (touchscreen) you love. To keep your device safe while you work your magic, we’ll kick things off by disconnecting the battery—it's as easy as removing it! If you need help, you can always schedule a repair.
Step 1
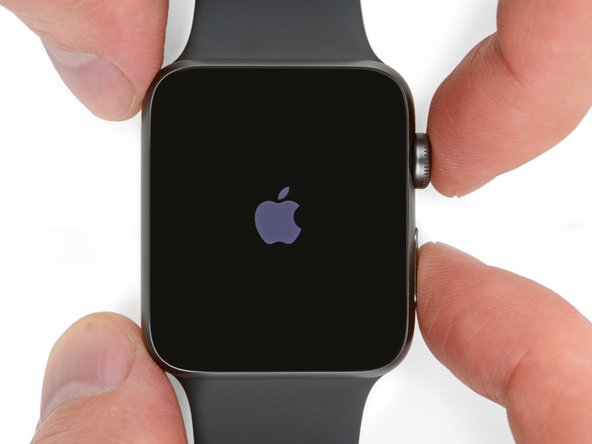
If your touchscreen's acting up and won’t let you turn off your watch normally, don’t worry—there’s an easy workaround. Use this alternative method to power it down and get things back on track.
- Before diving into the repair, make sure to remove your watch from the charger and turn off your device. This keeps everything safe and ready for a smooth fix. If you hit a snag or need a pro touch, you can always schedule a repair with Salvation Repair.
Step 2

You might need to rewarm the iOpener or shift it around on the screen as different sections cool down, helping to heat the screen enough so you can gently pry it off.
- Warm up your iOpener (or grab a hair dryer or heat gun) and get the face of the watch nice and toasty—just past the point where it’s comfy to touch.
- Keep the iOpener chilling on the watch for at least a minute to make sure the screen heats evenly and the adhesive underneath loosens up.
Tools Used

Step 3


Keep those fingers out of the knife’s way—no one wants an accidental slice! If you’re unsure, slip on a sturdy glove (think leather or gardening style) for extra protection.
Go easy on the pressure—too much force could send the knife slipping, which is bad news for both you and your watch.
Pop on some eye protection before you dive in. Sometimes knives or glass can snap, and you don’t want to dodge flying bits.
The space between the screen and the watch body is super tight, so you'll need a sharp blade to carefully separate them. Make sure to check out the following warnings before diving in!
Step 4


Handle that knife like it's a delicate dance partner—keep your grip steady! If you press too hard and the gap opens up, it might just slip in and give the battery a little surprise cut.
Using a curved blade helps keep things scratch-free and avoids cracking the glass. Focus on prying with the curved part of the blade—avoid the tip or flat edge—to gently wedge the gap open. This should lift the glass slightly away from the case, making it easier to work with.
- Slide the curved part of your blade into the gap between the glass and the lower edge of the watch case, and press straight down with confidence.
- Once the glass pops up a bit, gently pivot the knife downward to widen the opening, easing the glass upward as you go.
Step 5


Be mindful not to push the opening pick too deep. Just about 1/8" (around 3 mm) is plenty – going any further might lead to some unwanted cable drama!
- Once you've created enough of a gap, carefully slide the tip of an opening pick under the glass to get started.
- Gently move the pick along the bottom edge to loosen the adhesive holding the screen in place. Keep at it until the screen starts to lift away.
Step 6


Just a friendly reminder: don't shove that pick in too deep—it's way easier to roll it instead of dragging a tip along. Keep it light and breezy!
- Start by inserting a pick underneath the edge of the watch's side button area. Gently pry it open, working your way around to loosen the adhesive and widen the gap. Keep it steady and patient—you're just creating enough space to proceed with the next step. If you need help, you can always schedule a repair.
Step 7


- Glide your pick around the top right corner, then smoothly slide it along the top edge of the screen.
Step 8


Keep that pick snug in place to prevent the adhesive from sealing the screen back up. You've got this!
- Keep that pick moving smoothly around the screen's edge, gliding down the left side to slice through the last bit of sticky adhesive. You're almost there!
Step 9


- While keeping the first pick steady, grab a second one to ensure that all the adhesive has been released all around the edges of the screen.
Step 10


There are two cables connecting the screen to the inside of the watch, near the top left corner. Be careful when prying or you may damage these cables.
- Gently lift the right side of the screen to loosen it from any lingering adhesive. Then, carefully pry up on the left side as well—but hold your horses, don’t try to peel the screen all the way off just yet, since it’s still connected by two cables. Take your time and work gently to avoid any damage. If you need help along the way, you can always schedule a repair.
Step 11


Spotting the top layer of your Force Touch sensor peeking out from the display adhesive? That's a sign that the two sensor layers have decided to part ways. Time for a replacement or a little TLC!
Don't worry if you have a screen and battery repair kit handy—it includes a shiny new Force Touch sensor! You've got this!
- Sometimes the top layer of the sensor likes to stick to the back of the screen. If that happens, gently press it back down and carefully separate them.
Step 12


- Carefully lift the screen up and slide it to the left, being mindful of the display data and digitizer cables to avoid any damage.
Step 13

Keep an eye on the screen and those delicate cables—no sudden moves or cable yoga while you're working!
- Set your watch on something a little taller—like a small box or the edge of a book—so the screen can dangle down. This gives you way better access to the battery and keeps things nice and easy.
Step 14


Warning: don't even think about trying to remove the battery yet, it's still hooked up!
Handle with care: avoid bending or poking holes in the battery, okay?
- Grab some scissors and snip one of your opening picks down to about the width of the battery. Be sure to round off those sharp corners for safety!
- Slide that modified pick right between the battery's right side and the case. It’s like a gentle nudge!
- Apply steady, consistent pressure to slowly lift the battery up, breaking free from the adhesive that’s holding it to the system board. Take your time!
- For the larger (42 mm) models, be careful not to accidentally pry up the system board lurking beneath the battery. Just insert the pick far enough to shimmy under the battery, not the system board.
- If things get sticky, feel free to dab a bit of high concentration isopropyl alcohol (90% or greater) around and under the battery to help loosen that adhesive grip.
Tools Used

Step 15


- Twist the battery gently to the left until its connector is revealed.
Step 16


If the battery looks a little banged up or misshapen, it’s time to swap it out. For the best performance, it’s always a good idea to replace it with a fresh battery whenever you’re taking it out.
- Gently lift the battery to reveal the battery cable connector underneath.
- Grab a trusty plastic opening tool and pry between the bottom of the case and the battery cable connector—pop that connector loose from the watch’s battery cable.
- Carefully take the battery out of the watch.
Step 17


- Gently lift the screen up and tilt it to the right, revealing those hidden cables waiting for some attention.
Step 18


Hey there! Just a quick heads up: if you pry too close to the watch band, you might accidentally mess with the cables. Let's keep everything in one piece, okay?
The display and digitizer cables are tucked under a small metal bracket that's stuck to the speaker like a secret handshake.
- Grab your plastic opening tool and gently flip the bracket up and away from the speaker, like you’re opening a tiny treasure chest.
Step 19


Popping off the cover can be a bit tricky and might take a few tries. Stay cool, take your time, and steer clear of tugging on the bracket or snagging any cables.
Releasing these two slotted tabs from the bracket is the key to freeing the cover - you're making great progress!
- Hold the bracket steady from the left side using your fingers or some handy tweezers.
- While you're at it, gently slide a small (1 mm) flathead screwdriver under that tiny tab on the right.
- Finally, sneak a finger behind the tab, and give the bracket a good pinch between your finger and the screwdriver to pop that cover off.
Tools Used

Step 20


- Use your tweezers to grab the cover and gently slide it upward along the watch. This will release the final slotted tab and allow you to lift off the cover. Need a hand? You can always schedule a repair if things get tricky.
Tools Used
Step 21


Be sure not to touch those exposed pins with your fingers — your oils might throw off the connection, and we want to keep everything running smoothly.
- Gently pop up the display data and digitizer cables—think of it as unplugging a tiny, high-tech seatbelt.
- Lift off the display and set it aside like a VIP.


