Apple Watch SE Screen Replacement
Duration: 45 minutes
Steps: 19 Steps
Ready to give your Apple Watch SE a fresh new look? This guide will help you swap out that broken, cracked, or just plain tired display. Just a heads up, replacing the display can sometimes throw a wrench into your Apple Pay routine. To keep everything smooth sailing, it's a good idea to remove all your Apple Pay info before you start, and then add it back in once your shiny new display is in place. Oh, and don’t forget—replacement adhesive is your best friend for sticking everything back together when you're done!
Step 1


- Before diving into the repair, make sure to take your watch off the charger and power it down. If your touchscreen's on the fritz and you can't turn it off normally, no worries—just use this alternative method to power it down and keep things under control. If you need a hand at any point, you can always schedule a repair for extra help.
Step 2


Keep those fingers safe and sound by staying clear of the knife! If you’re feeling a bit unsure, don a sturdy glove—like a leather shop glove or a gardening glove—to keep your hand protected.
Remember, a gentle touch is key! Applying too much pressure could make the knife slip, which could hurt you or cause damage to the watch.
Don’t forget your eye protection! The knife or glass might shatter, sending bits flying. Safety first, my friend!
Take off or snap on the watch band if it helps you get a better grip while working your repair magic.
- Since the gap between the screen and the watch body is super slim, you'll need a sharp blade to gently pry them apart. Make sure to read the following warnings carefully before you get started.
Step 3

Don't worry if the display adhesive doesn't soften right away - you might need to reheat the iOpener and try again a few times until it's ready to come off.
- Grab an iOpener, or if you prefer, a hair dryer or heat gun, and gently warm up the face of the watch to help loosen that stubborn display adhesive.
- Keep the iOpener on the watch for at least two minutes, giving the screen enough time to heat up and the adhesive to soften up. Patience makes perfect!
Tools Used

Step 4
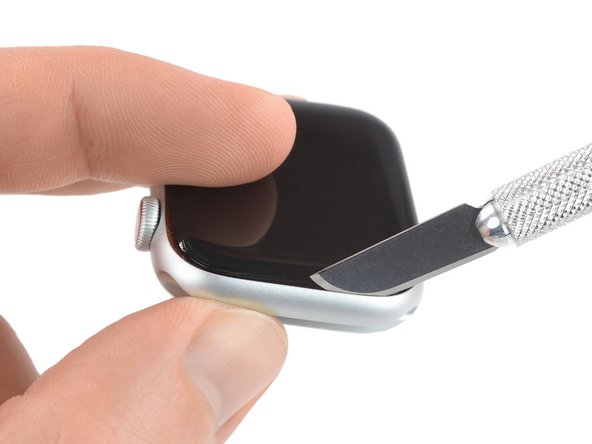
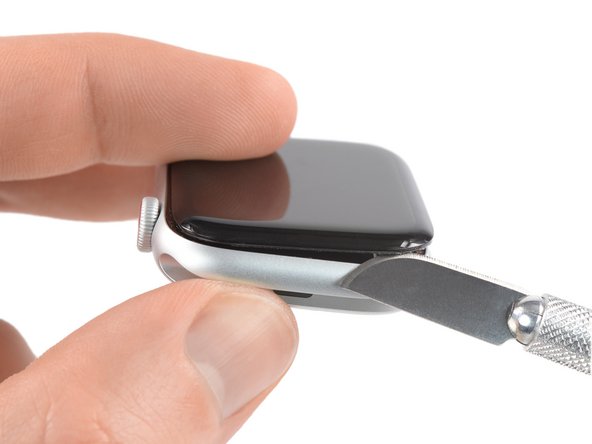
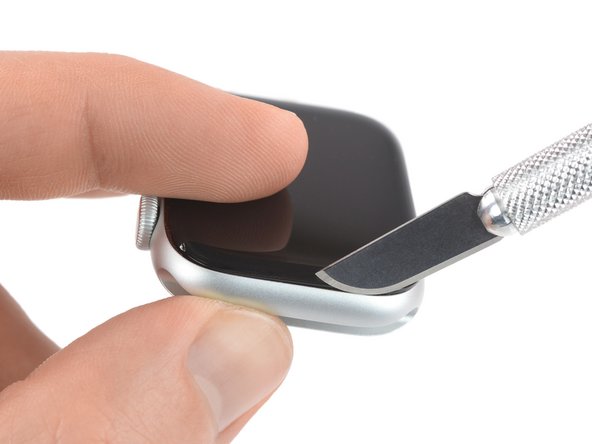
- Slide the edge of a curved blade into the slim gap between the display and the outer casing. Start on the shorter side, right by the digital crown.
- Give the blade a confident push, straight down into the gap.
- Once you’re in, gently rock the blade to nudge the display open a bit.
Step 5


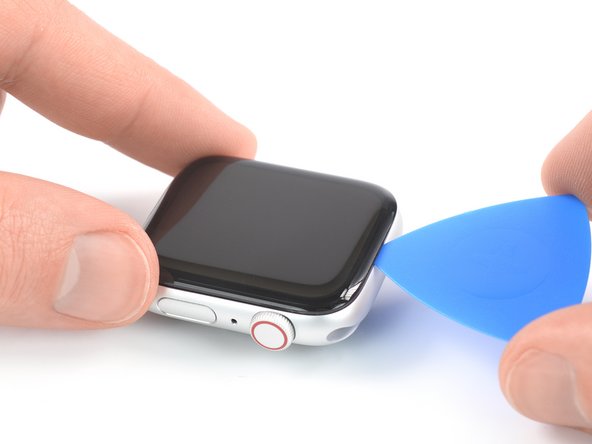
- Slide an opening pick into the gap you've made.
- Gently glide the opening pick along the short edge of the watch to slice through the adhesive.
Step 6


When you're working near the crown, keep your opening pick shallow—no deeper than 1/16 inch (about 2 mm).
- Gently glide the opening pick around the corner and along the lengthy edge where the crown hangs out, slicing through that pesky display adhesive like a pro!
Step 7


- Gently slide the opening pick around the corner to slice through the last bit of adhesive on the short edge that’s farthest from the crown. You've got this!
Step 8


When you're slicing near the crown, keep the opening pick no deeper than 1/16th of an inch (~2 mm). You got this, just take it slow and steady!
- Set your watch down on a flat surface, and grab an opening pick to carefully cut through any stubborn adhesive that's still hanging on.
- Next, sneak an opening pick under the display edge opposite the watch crown. You've got this!
Step 9

Heads up! The display is still connected to the watch assembly, so don't attempt to remove it just yet.
- Slide the opening pick back in along the short edge near the watch crown.
- Give the pick a gentle twist to help separate the display from the watch case.
Step 10


Keep those display cables happy and unstrained while you gently fold the display to the side!
- Gently lift the display and pull it towards the edge that’s furthest from the crown.
- Now, swing that display open like a pro, bringing it to an upward position.
Step 11
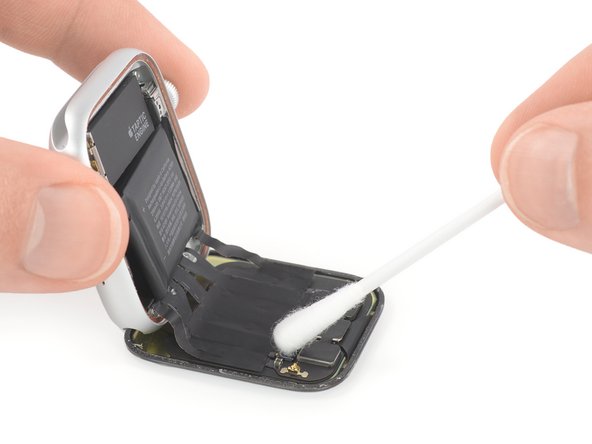

Hey there! The black foil covering the display connectors is pretty delicate, so handle it with care to avoid tears. When you're peeling it off, grab some high isopropyl alcohol or your trusty iOpener to keep that tape in one piece.
Don't be surprised if you need to give the iOpener a little extra heat and repeat the process a few times to get that adhesive nice and soft!
- Grab your trusty iOpener, or if that's not handy, a hair dryer or heat gun will do just fine! Warm up the front of the watch to help loosen up that pesky adhesive tape.
- If you're feeling adventurous, dip a Q-tip in some high-concentration isopropyl alcohol (greater than 90%) and gently apply it to the black adhesive foil on the display connectors. Give it a couple of minutes to work its magic and let the alcohol soak into the adhesive.
Tools Used
Step 12


- Grab your tweezers and gently lift the tape that's hiding the right display cable connector.
Tools Used

Step 13

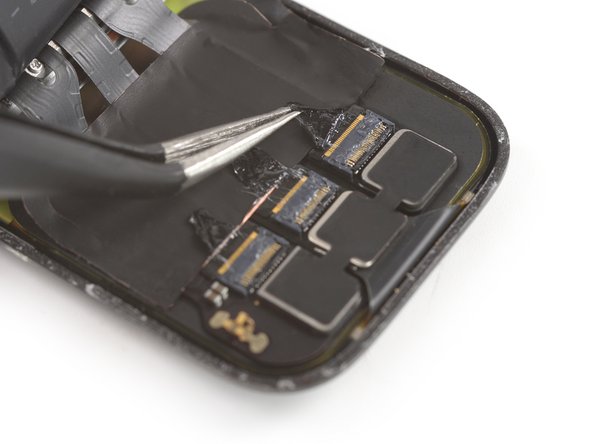
- Grab your tweezers and gently lift away the tape that’s covering the middle and left display cable connectors. Easy does it!
Tools Used
Step 14
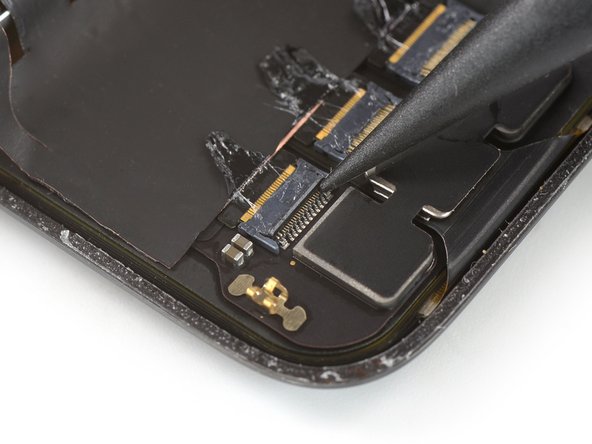

- Grab that trusty spudger and use its pointed end to gently lift the right ZIF connector on the back of the display. Just flip that flap up so it stands tall and proud!
Tools Used

Step 15
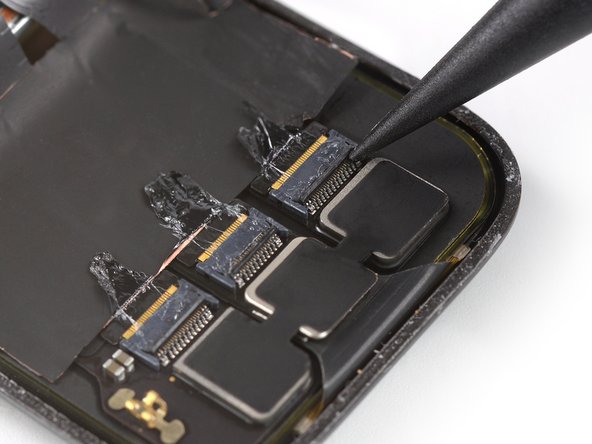

- Grab the pointed end of your spudger and gently pop the flaps on the middle and left ZIF connectors straight up. Flaps up, connectors ready!
Tools Used
Step 16


Hey there! Just a friendly reminder: don't go peeling off that sticker completely! You'll want to keep it around for when you put your watch back together. Make sure to only peel back the part that holds the cable to the back of the display. You've got this!
- Grab a trusty pair of tweezers and gently lift the left edge of that display cable sticker from the back of the display. You've got this!
Tools Used
Step 17
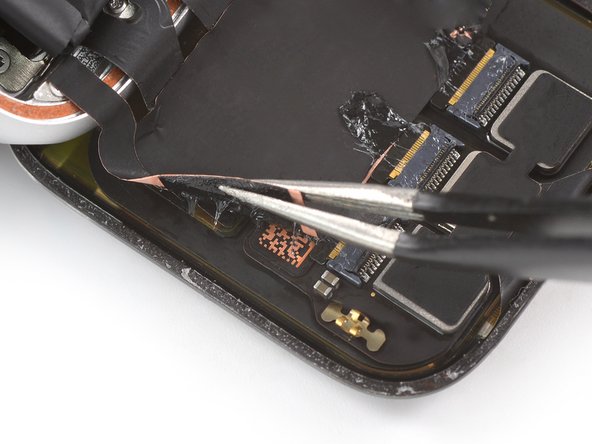

- Grab your tweezers and gently peel up the right edge of the display cable sticker from the back of the display.
Tools Used
Step 18


Gently pull close to the ZIF connector—avoid yanking on the watch body, or you might tear that delicate display cable. Treat it like a delicate dance, and your display will thank you. If you need help, you can always schedule a repair.
- Gently wiggle the display flex cables free from their ZIF connectors, being careful not to damage them.
Step 19

- Put your Apple Watch SE back together by reversing these steps to reconnect the screen and battery.
- Before adding new adhesive, use a bit of high-strength isopropyl alcohol (over 90%) on a Q-tip or a cleaning pad to clean off any sticky leftovers from the case and screen edges.
- Recycle your old parts responsibly—look for an R2 or e-Stewards certified recycler.
- If things got tricky or your watch isn’t quite right yet, swing by our Answers community for troubleshooting tips. And if you’d rather let a pro handle it, you can always schedule a repair.