Apple Watch Series 1 Force Touch Sensor Replacement
Duration: 45 minutes
Steps: 39 Steps
Heads up! Cracking open your Apple Watch can put the Force Touch Sensor at risk—this little guy acts as both a seal and a sensor, made of two layers stuck together. If these layers split while you’re working, the seal could be toast, and you’ll need to fix or swap out the sensor before you put everything back together. If your Force Touch gasket is still kicking but you just need fresh adhesive, check out our Apple Watch Adhesive Replacement guide.
Step 1
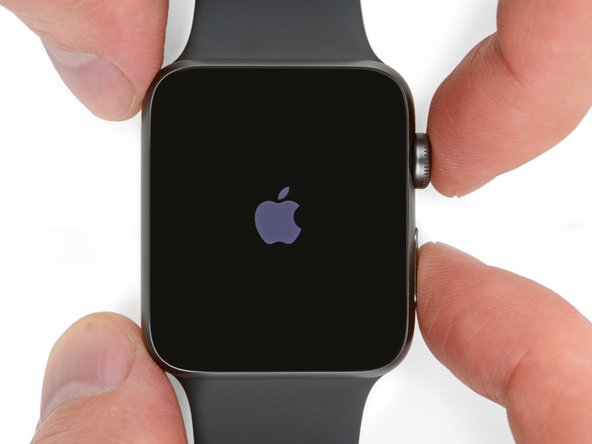
Touchscreen not cooperating? No worries—here’s a handy backup trick to power down your watch even if the screen’s out of commission.
- Before you start fixing, make sure to unplug your watch from the charger and shut it down completely.
Step 2

Feel free to reheat the iOpener and give it a little dance around the screen as some areas cool down—this will help warm up the screen enough for you to gently pry it off.
- Warm up an iOpener, or grab a hair dryer or heat gun, and give your watch face a spa day—heat it until it’s just a bit too hot for comfort.
- Let the iOpener chill on the watch for at least a minute to let the heat work its magic and loosen up that stubborn screen adhesive.
Tools Used

Step 3


Keep your fingers safely away from the knife. If you're feeling unsure, grab a thick glove, like a leather work glove or a sturdy gardening glove, to protect your free hand.
Take it easy on the pressure! Too much force could make the knife slip, leading to a cut or even damage to your device.
Protect your eyes – pieces of glass or knife shards could fly unexpectedly. Safety first!
Since the gap between the screen and the watch body is super slim, you'll need a sharp blade to carefully pry them apart. Take a moment to read the warnings below before diving in—precision is key, and safety first.
Step 4


Keep a steady hand on that knife—once the gap opens up, pressing too hard could send it slipping right into the battery. We definitely don’t want that!
Grab that curved blade! It's your best buddy for keeping the case scratch-free and avoiding any glass mishaps. Remember, only use the curved part for prying—leave the tip and flat section out of the action!
Now, gently work that blade into the gap. This will help open it just enough for the glass to pop up a bit from the case!
- Grab the curved part of the blade and slide it into the gap between the glass and the case along the bottom edge of the watch face. Press down firmly and straight into that space.
- Once the glass begins to lift, gently tilt the knife downward, widening the gap by nudging the glass upward. Keep it slow and steady.
Step 5


Take it easy when using the opening pick! Just slide it in about 1/8" (around 3 mm) – that's all you need. Go any deeper and you might just end up tangling with some cables!
- Once you've created enough of a gap, gently insert the tip of an opening pick beneath the glass surface.
- Glide the pick along the bottom edge to break the adhesive that’s holding the screen onto the case.
Step 6


Go easy with the pick—roll it gently instead of dragging the tip, so you don't poke it in too deep.
- Gently slide the opening pick along the side of the button on the watch, giving it a little nudge to break the adhesive seal and create a wider gap as you go. Keep it steady and take your time—you're doing great!
Step 7


- Glide your pick around the top right corner, then cruise it smoothly along the top edge of the screen.
Step 8


Keep that pick right where it is! It’s your trusty sidekick, preventing the adhesive from sticking the screen back down. You've got this!
- Keep working your way around the edge of the screen, gently rolling down along the left side to loosen and cut through the last bit of adhesive. Stay steady and patient—you're almost there! If you need a hand, you can always schedule a repair.
Step 9


- Keep that first pick steady, then grab a second pick to double-check that you’ve sliced through all the adhesive around the screen. No sticky surprises left behind!
Step 10


Watch out! There are two sneaky cables connecting your screen to the watch's inner workings, hanging out near the top left corner. When you're prying it open, be gentle—these cables can be a bit fragile and might get damaged if you're not careful.
- Gently lift the right side of the screen a bit to loosen it from any remaining adhesive. Then, carefully pry up on the left side as well—just remember, the screen isn't ready to come off yet since two cables are still holding it in place. Take your time and work slowly. If you need extra help, you can always schedule a repair.
Step 11


Spotting the top layer of your Force Touch sensor peeking through the display adhesive? That’s a sign that the layers have come apart! Time for a replacement or repair.
No worries if you’ve got a screen and battery repair kit ready to go—these usually include a replacement Force Touch sensor. If you need help, you can always schedule a repair.
- Sometimes the top layer of the sensor sticks to the back of the screen. If that happens, gently press it back down and separate it with care.
Step 12


- Gently lift the screen and slide it to the left—just watch out for those display and digitizer cables hanging out underneath.
Step 13

Watch out for that screen and those cables! We want to keep everything safe and sound while you work your magic.
- Set your watch on something with a little height—think at least half an inch or about a centimeter, like a small box or even the edge of a book. This lets the screen dangle down and gives you prime access to the battery.
Step 14


Hey there! Just a heads up, leave the battery alone for now, it's still hooked up.
Watch out! We don't want any battery gymnastics—no bending or poking, please!
- Snip off one of your opening picks to about the width of the battery—no sharp edges, please! Gently slide it between the battery's right side and the case. Keep a steady hand and apply consistent pressure as you carefully pry the battery away from its adhesive embrace, working slowly to avoid any surprises. On the bigger (42 mm) models, watch out for the system board underneath—only insert the pick enough to get under the battery, not into the system board itself. If the adhesive is stubborn, a little high-concentration isopropyl alcohol (90% or higher) applied around and beneath the battery can help loosen things up. Need a hand? You can always schedule a repair.
Tools Used

Step 15


- Twist that battery to the left like you're opening a jar of pickles to reveal its connector!
Step 16


If your battery looks dented or out of shape, swap it out for a fresh one. Whenever you remove an old battery, it's a good move to pop in a new one.
- Lift the battery gently to reveal that sneaky battery cable connector hiding underneath.
- Grab your trusty plastic opening tool and give a little nudge at the bottom of the case to disconnect the battery cable from the watch's power source.
- Carefully take the battery out of the watch, and you're one step closer!
Step 17


- Gently lift the screen and swing it over to the right side, revealing those sneaky cables hiding underneath.
Step 18


Be careful when prying near the watch band; you might accidentally snag those delicate cables!
The connectors for the display and digitizer cables are snugly tucked away under a tiny metal bracket that’s stuck to the speaker. Keep this in mind as you dive into your repair adventure!
- Grab a plastic opening tool and gently nudge the bracket away from the display and lift it up from the speaker. Take it slow—no rush, just a little gentle persuasion.
Step 19


Getting that cover off might feel like a puzzle, and it could take a couple of tries. Stay cool, and remember to handle the bracket gently; we don’t want any cables getting pulled or torn!
Once you give those two slotted tabs a little nudge, the cover will be ready to break free from the bracket. Easy peasy!
- Hold the bracket steady from the left with your fingers or tweezers. Simultaneously, gently slide a tiny (1 mm) flathead screwdriver beneath the small tab on the right side. Then, use one finger behind the tab, and give the bracket a firm pinch between your finger and the screwdriver to lift the cover free. If you need a hand, you can always schedule a repair.
Tools Used

Step 20


- Take your tweezers and gently grasp the cover, then slide it toward the top of the watch. This will free up the last slotted tab, allowing you to lift off the cover with ease.
Tools Used
Step 21


Try not to touch any of the exposed pins—fingerprints can mess with the connection, and no one wants that!
- Gently lift and disconnect the display data and digitizer cables—no need to wrestle them, just a smooth pop off.
- Take off the display and set it aside like the precious tech treasure it is.
Step 22


This screw is tiny and can easily get stripped, so handle it with care! Make sure to keep your driver at the perfect angle and apply a little pressure while turning. You've got this!
- Grab your Y000 driver and remove the lone tri-point screw holding down the Force Touch sensor connector cable.
Step 23


- Grab your trusty plastic opening tool and give the Force Touch sensor cable connector a gentle flip straight down. This will disconnect it like magic!
Step 24

- Give your iOpener another 30-second round in the microwave, then place it on the front of your watch to warm up the adhesive holding the Force Touch sensor in place.
Tools Used
Step 25


- Grab your plastic pick and tweezers, then gently persuade the Force Touch sensor to leave its comfy little home in the case.
Tools Used
Step 26


Take your time here—any leftover gunk could keep your screen from sticking properly, and nobody wants a display that pops off later!
- Grab your trusty tweezers and gently lift away any stubborn adhesive still clinging to the lower case. It's like peeling off a stubborn sticker!
- Next up, let's make that case sparkle! Wipe away all remnants of adhesive (and any pesky broken glass) before sealing your watch back up. Use the tip of an opening tool or a spudger wrapped in a lint-free cloth or coffee filter, and add a splash of isopropyl alcohol (90% or higher) for a thorough clean. Your watch will thank you!
Tools Used
Step 27


- If you're reusing your old screen, now's the perfect moment to bid farewell to that stubborn old adhesive. (If you're putting in a shiny new screen, just skip this part.)
- Grab a plastic opening tool and gently scrape away the old adhesive clinging to the edges of the screen. For those bigger pieces, tweezers are your best friends!
- Give the area beneath the adhesive a good scrub with some isopropyl alcohol to ensure it's squeaky clean.
Tools Used
Step 28

- Flip your shiny new Force Touch sensor so it's face-down, making sure those connector pins are pointing away from you.
- Carefully peel off the first protective liner and toss it aside to reveal the sticky goodness underneath.
Step 29


- With the sticky side facing down, let's gently line up the Force Touch sensor and set it snugly into the watch case.
- Make sure to get it right, with the connector situated in the lower left corner, facing upwards.
Step 30


- With a gentle yet confident touch, press the Force Touch sensor evenly around the edge of the watch case. Make sure it's snug as a bug in a rug!
Step 31


- Grab your tweezers and gently fold the Force Touch sensor cable connector back onto its socket.
- Now, take a plastic opening tool and give the connector a gentle press so it clicks securely into place.
Tools Used
Step 32

- Let's get started by replacing the Y000 tri-point screw that's holding the Force Touch sensor connector cable in place. This is a crucial step, so take your time and make sure you've got it just right.
Step 33


Watch out for those exposed pins! Touching them with your fingers can leave behind oils that might cause connectivity hiccups. Keep your fingers clean and happy for a smooth repair experience!
- Grab a plastic opening tool and gently reconnect the display data and digitizer cable connectors. Easy does it—firm but friendly pressure is all you need. If you want a pro to handle it, just schedule a repair.
Step 34


- Place the display connector bracket cover where it belongs, sliding it along until the big tab at one end locks in.
- Give the cover a gentle press to snap the two smaller tabs at the other end into place—nice and secure!
Step 35


- Align the battery connector with its matching socket on the cable inside the watch case.
- Gently press the two connectors together using tweezers to secure the connection.
Tools Used
Step 36


Now's the perfect moment to give your watch a little power-up and see if that force touch feature is ready to shine! If it’s playing hard to get and refuses to turn on, take a moment to check those three connectors again and give it another shot.
- If your replacement battery comes with pre-installed adhesive, peel off the protective tab to reveal the sticky stuff. Then, carefully slide the battery into its slot and give it a gentle press to seat it properly. Press down firmly against the system board to help the adhesive bond again. If the original glue isn’t cooperating, try reusing it, or add a small piece of double-sided tape like Tesa 61395, or dab a little liquid adhesive such as E6000 for a secure fit. Need some extra hands? You can always schedule a repair for help.


Step 38


- Gently slide the screen back to the right, making sure to tuck those display data and digitizer cables away neatly.
- Position the screen right over the case and give it a good press down onto the adhesive, ensuring it's snug and secure.
Step 39

- Pop off the watch band, then give your Apple Watch a hug with a couple of rubber bands around the case. This helps everything stick together nicely.