Apple Watch Series 1 Screen Replacement
Duration: 45 minutes
Steps: 25 Steps
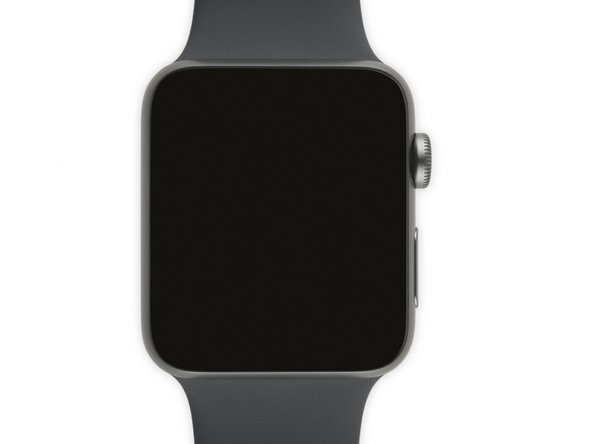
Swap out that cracked or glitchy Apple Watch display for a fresh one. To keep your watch safe while you work, this guide kicks off by disconnecting the battery—yep, that means taking it out first.
Step 1
For carousel microwaves: Ensure the turntable spins smoothly. If your iOpener gets stuck, it might overheat and cause a burn. Keep things moving for safe, efficient heating.
Before diving into the fun, give your microwave a little TLC! A quick clean will ensure any stubborn gunk doesn't hitch a ride on the iOpener.
- Pop that iOpener right in the middle of the microwave and let it warm up!
Tools Used
Step 2
Keep your iOpener cool—literally. Don’t let it get hotter than 100˚C (212˚F), or it might go out with a pop.
If your iOpener looks puffed up, hands off!
If the middle is still too hot to handle, let it chill a bit before reheating. A nicely warmed iOpener should stay cozy for about 10 minutes.
Microwaves can be a little unpredictable—your iOpener is ready to roll when it’s just a bit too hot to comfortably handle. If it’s not there yet, give it a little more time.
- Give that iOpener a quick zap in the microwave for thirty seconds.
- As you work through the repair, keep an eye on the iOpener. If it starts to cool down, just pop it back in the microwave for another thirty seconds to keep the warmth coming!
Tools Used
Step 3
Careful—this iOpener gets seriously hot! You might want to grab an oven mitt before handling it.
- Take the iOpener out of the microwave, holding it by one of the flat ends to keep the hot center away from your fingers. Easy does it—grab it firmly but gently, and you're all set to move on.
Tools Used
Step 4
- Grab a pot or pan and fill it with enough water to give your iOpener a nice swim.
- Bring that water to a rolling boil, then turn off the heat—safety first!
- Carefully drop your iOpener into the hot water and let it soak for 2-3 minutes. Ensure it’s fully submerged for the best results.
- Using tongs, fish out your warm iOpener from the water—be careful, it’s hot stuff!
- Give your iOpener a good towel dry to make sure it’s nice and ready to go.
- Boom! Your iOpener is all set! If it needs a little reheating later, just repeat the hot water bath for another 2-3 minutes. If you need help, you can always schedule a repair.
Heads up—this iOpener gets seriously hot! Grab it by the end tabs and let it work its magic, but keep those fingers cool.
No microwave? No problem! Just dip your iOpener into boiling water to get it nice and warm. Easy does it—just keep an eye on it to avoid any splashes or surprises. Need a hand? Remember, you can always schedule a repair with Salvation Repair.
Tools Used
Step 5
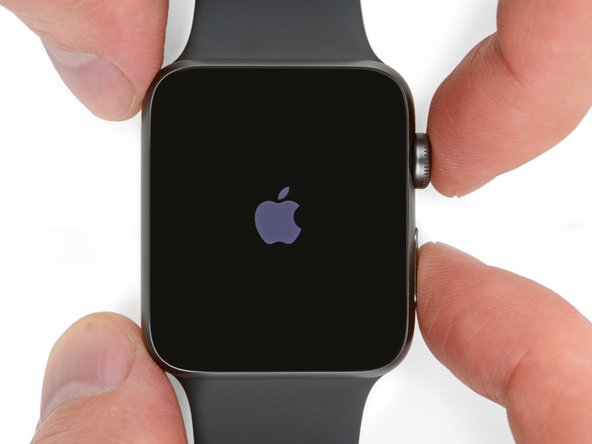
Screen acting up and you can't power off your watch? No worries—here’s a slick way to turn it off without using the touchscreen.
- Before diving into the repair, make sure to take your watch off the charger and power it down. This keeps things safe and smooth sailing. If you need help along the way, you can always schedule a repair.
Step 6
To get the screen to pry off, you might need to give your iOpener a quick reheat or move it around to make sure all sections are heated evenly. Don't worry, it's an easy process! If you're having trouble, just remember to be patient and take your time.
- Warm up your iOpener (or grab a hair dryer or heat gun) and heat the watch face until it’s just a bit too warm to touch—think cozy, not scorching.
- Let the iOpener chill on top of the watch for at least a minute, giving the screen and adhesive plenty of time to loosen up.
Tools Used
Step 7
Keep your fingers clear of the knife—think of them as the VIPs you don't want to cut! If you're feeling a little unsure, slide on a heavy glove, like a leather or gardening one, to keep those fingers safe. Don't go all Hulk on the pressure—gentle is the way to go, or you might slip and cause a cut or damage your watch. And hey, safety first: wear eye protection so flying glass or knife fragments don’t surprise you. If you need help with this step, you can always schedule a repair.
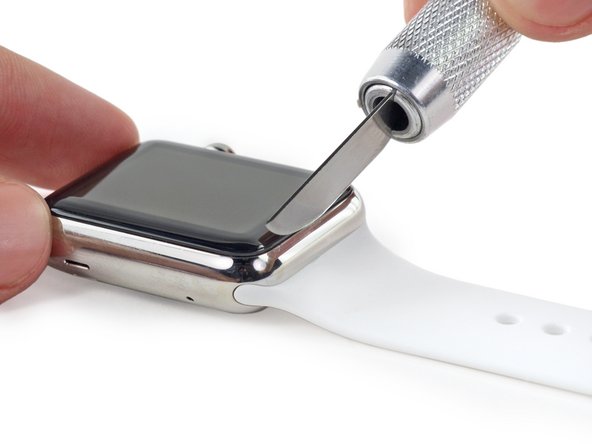
Since the space between the screen and the watch body is super tight, you'll need a sharp blade to carefully pry them apart. Make sure to read the following warnings closely before diving in!
Step 8
Be super cautious and keep a steady grip on that knife! Once you create a gap, applying too much pressure could make the knife slip and unintentionally poke the battery. Let's avoid that mishap!
To avoid scratching the casing or cracking the screen, use the curved part of the blade to pry the glass away from the case. Be careful not to use the tip or flat sections, as theyWould be too harsh.
As you pry, you should start to see a gap open up, and the glass will begin to lift away from the case. This is a good sign - you're on the right track!
- Slide the curved part of your blade into the gap along the bottom edge of the watch face, pressing straight down into the space.
- Once the glass pops up a bit, gently twist the blade downward, using it to carefully lift the glass a little higher.
Step 9
Be gentle when inserting the opening pick—just about 1/8" (around 3 mm) is enough. Push in too far, and you might risk damaging some cables. Take it slow and steady—your device will thank you. If you need a hand, you can always schedule a repair.
- Once you've created a nice little gap, slide the tip of your trusty opening pick under the glass.
- Gently glide the pick along the bottom edge to break free the adhesive that's keeping the screen snugly attached to the case.
Step 10
Be gentle with the pick—don't push it in too deep. Rolling the pick along the surface rather than dragging a tip makes it easier to avoid going too far. Just take it slow and steady, and you'll have this peeled back in no time.
- Gently slide the opening pick along the button side of the watch, carefully working it in to break the adhesive seal and gradually create a bigger gap as you go.
Step 11
- Glide your pick around the top right corner, then cruise it smoothly along the top edge of the screen.
Step 12
Keep the pick in place so the adhesive doesn’t fight back and reseal the screen on you. It’s like giving your tools a little vacation—less hassle, more progress.
- Keep gliding that pick around the edges of the screen, smoothly sailing down the left side to slice through the last bits of adhesive. You've got this!
Step 13
- While you're holding that first pick steady, grab a second one to make sure all the adhesive has let go around the whole edge of the screen. You've got this!
Step 14
There are two cables connecting the screen to the watch's inner workings, tucked away near the top left corner. Handle with care when prying, or you might accidentally give those cables a rough time!
- Gently pry up on the right side of the screen to loosen any stubborn adhesive holding it down. Next, do the same on the left side—just be careful not to yank, as the screen is still connected by two cables. Keep your movements steady and patient. If you need a hand, you can always schedule a repair to get professional help.
Step 15
Spotting the top layer of your Force Touch sensor peeking through the display adhesive? That’s a telltale sign that the two sensor layers have parted ways. Looks like it’s time for a replacement or a fix!
No worries if you’ve got an iFixit screen and battery repair kit handy – it comes with a shiny new Force Touch sensor. So, if you’re feeling a bit lost, just keep calm and remember, help is a click away. If you need assistance, you can always schedule a repair.
- Sometimes, the top layer of the sensor is just glued to the back of the screen. If that’s the case, gently push it back down and carefully peel it away. Take your time—patience pays off. Need a hand? You can always schedule a repair with Salvation Repair.
Step 16
- Gently lift the screen and slide it to the left, being careful of those delicate display data and digitizer cables!
Step 17
Watch out for that screen and those cables! They can be a bit sensitive, so let's keep things gentle and steady while we work our magic.
- Elevate your watch on a surface that's at least 1/2" or 1 cm high—think small box or the edge of a book; they're perfect for this. This position lets the screen dangle down, making it super easy to access the battery. Keep on rocking the repair!
Step 18
Hold up! The battery is still plugged in, so don’t try to yank it out just yet.
Handle the battery gently—no bending or poking, please!
- Grab some scissors and give one of your opening picks a little trim, so it's about the same width as your battery. Just make sure to keep those corners nice and smooth!
- Slide that modified pick gently between the right side of the battery and the case. Easy does it!
- Now, apply steady and gentle pressure to pry the battery upwards, breaking free from the adhesive that's holding it tight to the system board. You've got this!
- For those larger (42 mm) models, be cautious! You might accidentally pry at the system board beneath the battery. Only insert the pick just enough to get under the battery—avoid that system board!
- If you find things a bit stubborn, a little dab of high-concentration isopropyl alcohol (90% or higher) around and under the battery can help weaken that adhesive. Just a touch should do the trick!
Tools Used
Step 19
- Give that battery a little twist to the left, and bam! You've got its connector ready for action.
Step 20
If you spot a battery that's all dented or looking deformed, it's time for a swap. For the best performance, go ahead and replace it with a fresh one whenever you take it out. If you need help, you can always schedule a repair.
- Lift the battery gently to clear the way, revealing the battery cable connector. Grab a plastic opening tool and carefully wedge it under the bottom edge of the case to pry the battery cable connector away from the watch's battery cable. Finally, lift out the battery from the watch. If you need a hand with this, you can always schedule a repair.
Step 21
- Gently lift the screen and swing it over to the right side, revealing the cables hiding underneath. Don't worry, you've got this!
Step 22
Be careful when prying near the watch band—going too hard might risk damaging the cables.
The tiny metal bracket clutching the display and digitizer cable connectors is stuck onto the speaker with some adhesive. Gently lift or slide it out of the way to free those connectors up for your repair.
- Grab your plastic opening tool and gently flip the bracket up and away from the speaker—like you’re opening a tiny treasure chest.
Step 23
Removing the cover can be a bit of a challenge, so don't get discouraged if it takes a few tries. Just be gentle and careful not to damage the bracket or cables, and you'll get there!
Popping these two slotted tabs will set the cover free from the bracket.
- Hold the bracket steady on the left side with your fingers or a pair of tweezers.
- Next, gently slide a small (1 mm) flathead screwdriver under the tiny tab on the right.
- Finally, place a finger behind the tab and give it a little pinch with the screwdriver to pop the cover off.
Tools Used
Step 24
- Use your tweezers to grab the cover, then slide it up toward the top of the watch to pop out the last tab and lift the cover off.
Tools Used
Step 25
Avoid touching the exposed pins with your fingers—those tiny oil smudges can mess with the connection.
- Gently lift to disconnect the display data and digitizer cables—think of it as giving them a friendly handshake to release their grip.
- Once free, lift out the display carefully and set it aside.


