Apple Watch Series 2 Teardown
Duration: 45 minutes
Steps: 16 Steps
Did you catch our first peek at the "most cutting-edge iPhone ever"? Check out our iPhone 7 Plus teardown and see if you can keep up with all the cool details!
Our iPhone 7 Plus is still waiting for its turn, but we can’t resist cracking open the Apple Watch Series 2. On the outside, it’s nearly a twin of the newly dubbed “Series 1”—but what about under the hood? With upgrades like built-in GPS, water resistance, and fresh bands and cases, this new wearable is just begging to be explored. We’re here to reveal if this so-called “ultimate device for a healthy life” is as repair-friendly as it claims. Curious about our first peek at the latest iPhone? Check out the iPhone 7 Plus teardown and see how it stacks up! Ready to jump in? Follow Salvation Repair on Facebook, Instagram, or Twitter for more repair adventures.
Step 1


Just like the original Apple Watch, the Series 2 keeps things simple with two size options: 38 mm (272 × 340 pixels, 290 ppi) and 42 mm (312 × 390 pixels, 302 ppi). Pick your flavor—either way, you’re working with a sharp little screen.
- Our watches are getting smarter every day! Let’s dive into what the latest generation of Apple wrist gadgets has in store for us:
- A dazzling second-generation OLED Retina display complete with Force Touch.
- A custom-designed Apple S2 SiP (System in Package) for that extra zing.
- Sporting built-in GPS, NFC, Wi-Fi 802.11b/g/n at 2.4 GHz, and Bluetooth 4.0 to keep you connected.
- Equipped with an accelerometer, gyroscope, heart rate sensor, microphone, speaker, and ambient light sensor for all your tracking needs.
- Water resistance rated for depths of up to 50 meters, so you can splash around without a worry.
- Running on WatchOS 3 to keep everything smooth and snappy.
Step 2


Both series use the same swappable bands for quick and easy style changes. If only swapping out every part was this simple!
- With the debut of the Apple Watch Series 2, the original Apple Watch has stepped aside, making way for the new 'Series 1'—a fresh model powered by a speedy dual-core chip. On the back, you'll see a familiar quartet of optical polymer lenses guarding a cluster of LEDs and photodiodes. This guide will walk you through the steps to handle these parts with confidence. If you need help along the way, you can always schedule a repair for expert assistance.
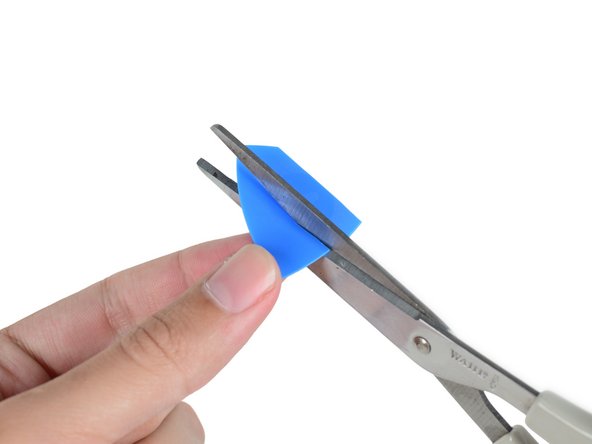
Step 3


Whoa, this adhesive is seriously hanging on—much stickier than the 2015 version! Looks like the extra grip is all about boosting water resistance.
- With some solid know-how from the original Apple Watch and an iOpener in hand, we're ready to take on that stubborn adhesive and open up the screen.
- A little teamwork between a knife, a pick, and a healthy dose of determination, and we’re in!
Tools Used

Step 4


This update is fantastic for all you repair enthusiasts out there! With connectors that are easy to access and secure, you're on the fast track to a successful repair. If you ever find yourself in a bind, remember, you can always schedule a repair!
- At first glance, the Series 2 looks a lot like the previous model. But pop it open, and you'll spot some slick ZIF connectors replacing those clunky old press connectors.
- Flip the display over and you'll uncover a bunch of control hardware doing its thing:
- Apple 343S00092
- 20211CP TD1628A
- NXP 67V04 NFC Controller (yep, the same one from the iPhone 7 Plus)
Step 5


Is it just us, or is this disassembly getting off to a super smooth start?
- Gently slide the remaining band away from the watch body and begin carefully prying for the battery. Just like the battery bracket in its cellular-capable sibling, this part is secured with a tricky tri-point screw. Luckily, your 64-bit driver kit has got it covered! With a smooth flick of your spudger, this watch is now powerless and ready for the next step. If you need a hand, you can always schedule a repair.
Tools Used


Step 6

Don't worry about the generous amount of adhesive on this tiny battery – it's a swim-proof watch that's meant to be worn on your wrist, not carried in your pocket, so we'll cut it some slack.
- Turns out, if something looks extra easy, there's probably a catch waiting for you.
- Under the Series 2 battery, Apple went all out with the adhesive—let's just say it's enough to keep an iPad screen glued down.
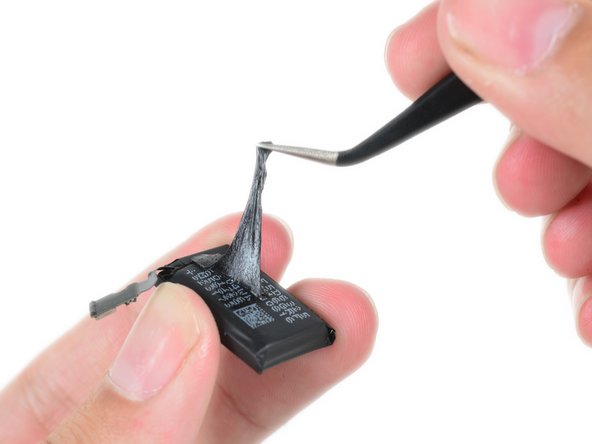
- But hey, a little stickiness never stopped us! With some careful picking, peeling, and gentle pulling, the battery finally gives up the glue and comes out clean.
Step 7


Get ready for a power boost! This battery offers a whopping 32% increase in power compared to the previous generation, likely to keep up with the added GPS capability.
Let's face it, batteries don't last forever. When it's time to replace this one, you'll be trading power for a different kind of protection - water resistance. So, be careful not to crack the seal, or it might be tough to get it watertight again.
We're working with the 38 mm model here, but if you've got the 42 mm, you can expect a larger power pack.
- Now that the battery is free from its sticky situation, we can admire its stats up close. This little powerhouse runs at 3.77 V and packs 273 mAh, giving you a solid 1.03 Whr of juice.
- Apple claims the Series 2 keeps the same 18-hour battery life as the original Apple Watch, which means that built-in GPS is definitely pulling its weight.
Step 8


Just like its 2015 sibling, the Series 2 has embraced Force Touch, allowing it to feel the pressure you apply to the screen. Apple first introduced this nifty tech in the MacBook Pro 13" Retina Display, and it's here to make your life easier!
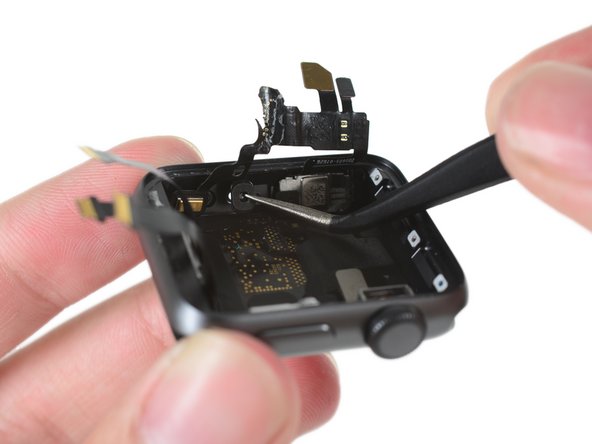
- Grab your trusty plastic opening tool and gently slide it around the edge of the watch. You'll uncover the Force Touch sensor and gasket, which look quite similar to the one from the original model!
- Now, here's a fun twist: unlike last year's version, there's a sneaky little IC tucked away on the Force Touch gasket!
- It's the Analog Devices AD7149 Capacitance Sensor Controller, waiting to be discovered!
Step 9


Linear resonant actuators (LRAs) aren't just a fancy trick exclusive to Apple. Those pancake-shaped LRAs have been buzzing around in electronic gadgets for ages! But by opting for a rectangular z-axis LRA, Apple gets to flex its design muscles and craft a more personalized vibration experience for users. How cool is that?
- Next up in our disassembly adventure is the impressively sizable Taptic Engine.
- The Taptic Engine is Apple's clever version of the linear resonant actuator. It moves in a straight line (unlike the circular dance of an electric motor), giving you that delightful haptic feedback.
Step 10

What does it mean when we say this watch has GPS capability? Well, it’s like this watch is just a hop, skip, and a jump away from becoming a fully-fledged Pokemon Go buddy—just waiting for that real data connection to kick in and let it shine!
We think the intricate design of this little assembly is thanks to the addition of a GPS antenna. It may be a tiny part, but trust us, the difference is pretty noticeable when you stack it up against the original Apple Watch.
- Now that the Taptic Engine is out, let's take a peek at the antenna module hiding up at the top of the watch.
- Alright, enough sightseeing—grab those tweezers, there's still more to uncover in this tiny tech wonder.
Step 11


And right between the two, we uncover the secret of the second microphone port. That flexible rubber plug isn’t just hanging out—it’s actually a barometric vent, letting the internal barometer sense outside pressure while still keeping things waterproof.
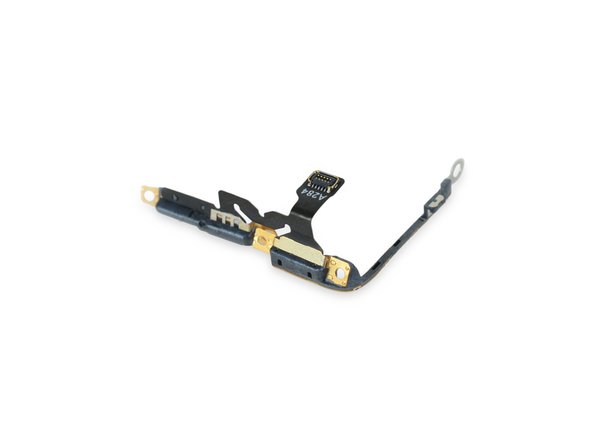
- Nestled on the outer edge, we uncover a tricky cable assembly—your go-to spot for the microphone and speaker.
- The Apple Watch Series 2 is all about making waves while staying dry. It’s got a whole army of gaskets and o-rings to help out.
- So, how effective are these gaskets and o-rings at keeping the water at bay? The Apple Watch Series 2 bravely resists water intrusion down to 50 meters, following the ISO standard 22810:2010. This means it’s perfect for a swim in the pool, but it might not be the best buddy for certain activities.
Step 12


When you swim with your Apple Watch, it shuts off the display and uses a clever pumping action to keep water from messing with the important stuff inside.
- Ready for a little water show? This speaker doesn’t just fear water—it welcomes it. Designed with ingress protection, it's all about letting water in just so it can kick it right back out.
- Instead of just letting water take over like the original Apple Watch speaker, this version fills up, then uses vibrations to clear out any extra water. A little shake, a little rattle, and your speaker’s back in business.
Step 13


- One last ribbon cable—guardian of the Home Button and Digital Crown encoder—stands between us and the heart of this tiny wrist computer.
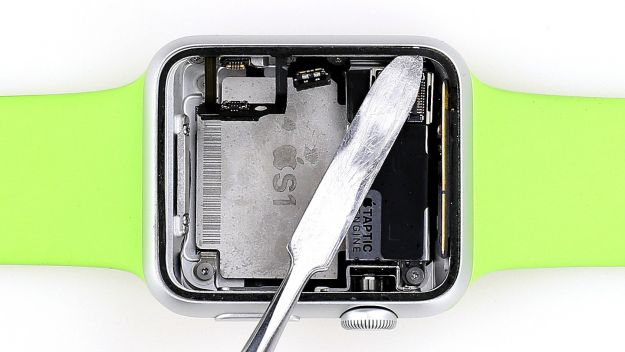
- No biggie. We slide past this cable crew like it’s the velvet rope at our favorite café and get to the real star of the show: the core system-in-package.
- With our trusty Apple Watch Opening Pick (fresh from the toolbox), we gently pop the package out of its rear hideout—easy does it.
Step 14


- And here we are at the highly anticipated Apple S2 SiP—complete with that pesky resin enclosure.
- As we take a closer look at the top of the SiP, nestled in the upper left corner, we discover a little duo of components:
- Bosch Sensortec BMP280 Barometric Pressure Sensor
- Probably a newer version of the STMicroelectronics C451 gyroscope + accelerometer that made an appearance in the original Apple Watch.
At first glance, it might look like the back of the device with all the cables and connectors—classic design. But surprise! Apple decided to flip the SiP, so all those connectors are now on the same side as the components they connect to. Wondering how that works? It's a clever change that makes the internal layout more streamlined. If you need a hand during your repair, you can always schedule a repair.
Step 15

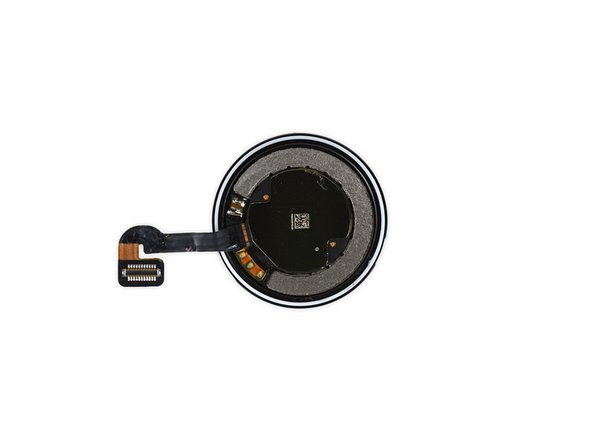
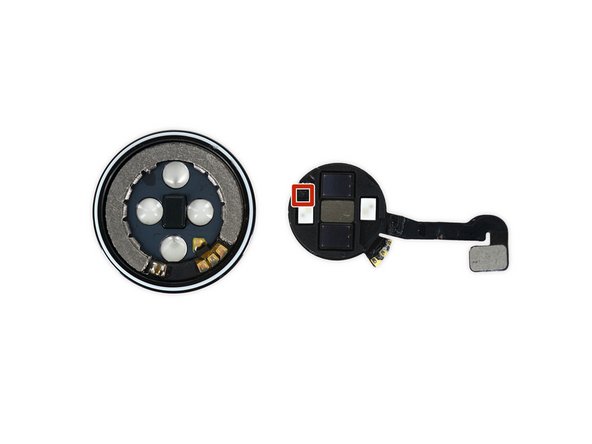
Now that we've popped off the back cover, we can take a peek at one final IC!
- We're almost there! The last piece of the puzzle is the sensor array nestled in the back cover of your watch.
- This awesome four-sensor setup features infrared sensors, visible-light LEDs, and photosensors that keep tabs on your heart rate all day long.
- Once we pop out the sensor assembly, we'll catch a glimpse of what we think is the inductive charging coil still hanging out in the cover.
- Looks like we've got an NXP Semiconductor Analog Front End Controller in the mix (or so we believe).
Step 16


A huge shoutout to our pals at Nikkei for graciously letting us crash in their Tokyo office!
- That's a wrap, folks! With our Apple Watch laid out in pieces on the teardown table, let's take a moment to gather everything and cross our fingers that it stays waterproof when we put it back together!


