
Apple Watch Series 3 Force Touch Gasket Replacement
Duration: 45 minutes
Steps: 20 Steps
Rocking the Cellular version? Stick to the instructions and keep a sharp eye out for the notes about the differences between models.
Ready to tackle replacing the Force Touch gasket on your Apple Watch Series 3? You've come to the right place! This guide walks you through the process while keeping your display connected. If you're swapping out the display too, check out this guide to replace the gasket after removing the display; it makes positioning the gasket a breeze! If your Force Touch is working and you just need some fresh adhesive to re-seal the display, then the adhesive replacement guide is your best bet. The watch featured in the photos is the GPS-only model, so keep in mind that the GPS and Cellular versions have a few minor differences. If you're working with the Cellular version, just follow the instructions closely and pay special attention to the warnings about the differences between the two models. If you need help, you can always schedule a repair.
Step 1


Screen totally unresponsive? No worries—here's a clever workaround to turn off your watch without using the touchscreen.
- Before diving into the repair, make sure to take your watch off the charger and power it down. This keeps things safe and smooth sailing. If you need a hand at any point, you can always schedule a repair with Salvation Repair.
Step 2

If the screen isn't loosening up, don't worry! Just reheat the iOpener or give it a little shuffle around the screen to make sure everything gets nice and toasty. This should help you pry it off with ease.
- Warm up that screen like it’s a fresh cookie—grab your iOpener, hair dryer, or heat gun and toast the watch face until it’s just shy of “yikes, hot!”
- Let the warmth chill on the watch for a good minute so the adhesive loosens up and the screen says “okay, I’m ready to pop.”
Tools Used

Step 3


Keep those fingers out of the knife’s way—if you’re not sure where to put your free hand, throw on a sturdy glove (leather or gardening gloves work great).
Go easy on the pressure! Too much muscle can make the knife slip, which could mean a nasty cut or a scratched-up watch.
Pop on some eye protection—sometimes knives or glass like to surprise you with flying bits.
Since the space between the screen and watch body is super tight, grab a sharp blade to gently separate them. Make sure to read all the warnings closely before diving into this step!
Feel free to pop on or remove the watch band as needed for better control while you work. You've got this!
Step 4


Keep that knife at bay—no deeper than 1/16th of an inch (~2 mm), please!
- Slip the curved blade into the slim gap between the screen and the outer shell, starting on the short side by the digital crown.
- Press straight down with purpose until the blade slides in.
- Now, give the blade a gentle tilt to nudge the display open just a bit.
Step 5


Hold off on trying to fully open or detach the display just yet—stay patient and keep it cool. We’ve got this step under control.
- Once you’ve made a little opening with the curved blade, swap it out for the slim side of your opening tool and slide it into the gap.
- Use your thumb as a handy pivot and nudge the tool inside to gently pop the display up a bit more.
Step 6


To keep that Force Touch gasket safe and sound, carefully pry under the edge of the display. If it splits or the layers separate, don't worry - you'll just need to replace the gasket too.
Remember, don't insert the opening pick more than 1/16th of an inch (~2 mm) to avoid any damage.
Don't worry if your Force Touch gasket is a little worse for wear! Our screen and battery repair kits come with a shiny replacement just for you. Keep calm and repair on! If you need help, you can always schedule a repair.
- Gently slide an opening pick under the display—think of it as a guitar solo, but for your device—and start easing the Force Touch gasket away from the screen.
- Work the pick all the way around the display, separating the sticky adhesive holding the Force Touch gasket to the screen. Take your time, and let the pick do the heavy lifting!
Step 7


Hold up! Don't swing the display all the way open just yet—those display cables need a little slack.
- Gently open the display to about a 45° angle, and with the help of tweezers, carefully peel away the adhesive that’s holding the display to the Force Touch gasket. You're doing great!
- Now, thread that adhesive around and behind the display cables to fully detach it. Keep it up, you're almost there!
Tools Used

Step 8


- Grab your Y000 driver and unscrew that tri-point screw holding down the metal cover plate.
- Pick up your trusty tweezers and lift off the cover plate.
- Swing the plate open all the way to pop both flaps out of their spots.
- Fold it back halfway, then lift it right out—easy does it!
Tools Used
Step 9


For those rocking the GPS-only version, you're in luck! You can disconnect the battery right away. However, if you're working with the cellular/LTE version, there's a little detour first. You'll want to carefully detach the Force Touch gasket and tuck it aside before you can get to that battery. Easy peasy!
- Gently lift the battery connector straight up to disconnect it. You've got this!
- Give that connector a little bend upwards to ensure it doesn’t accidentally touch anything. Safety first!
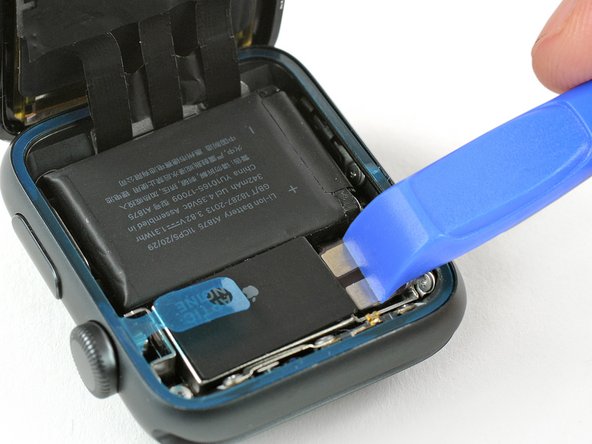
Step 10


- Get your trusty pry tool and gently lift the Force Touch gasket connection straight up—easy peasy!
Step 11

Handle those display cables with care, like they're the last piece of pizza at a party!
- Heat up your iOpener for another 30 seconds and lay it on top of the Force Touch gasket to loosen the sticky stuff underneath. (Or grab a hair dryer or heat gun for the same effect.)
Tools Used
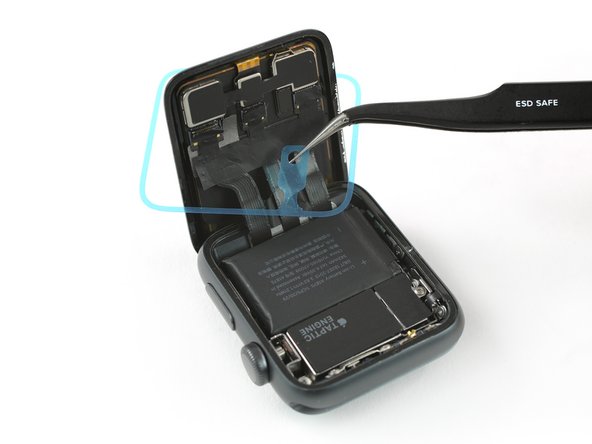
Step 12


- Grab your trusty tweezers and gently peel off that Force Touch gasket like a pro!
- Now, give the display a slight tilt forward and hold that gasket at a cool diagonal angle as you gracefully thread it over the display to remove it.
Tools Used
Step 13


Take your time with this step. Even the tiniest bit of leftover gunk can stop your display from sticking properly to the case. That could cause it to come loose down the road, and we definitely don’t want that!
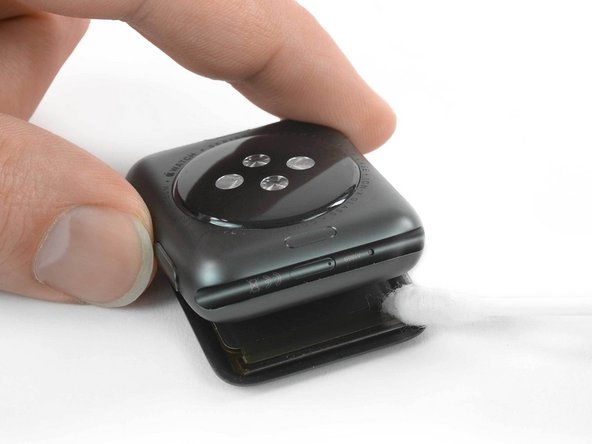
Let's tackle that adhesive around the display cables! Gently fold the display back onto the watch and carefully tilt it away from the frame. This will create some space for you to work your magic!
- Give your watch a good wipe-down to remove all traces of glue and any broken glass lurking around the edges. Next, gently scrub the case using a cleaning pad, or get creative with the tip of an opening tool or spudger wrapped in a lint-free cloth or coffee filter—dipped in a bit of 90% or higher isopropyl alcohol. If you're in a pinch, a Q-tip can do the trick. For tough spots, don’t hesitate to schedule a repair with Salvation Repair if you need a pro touch.
Step 14

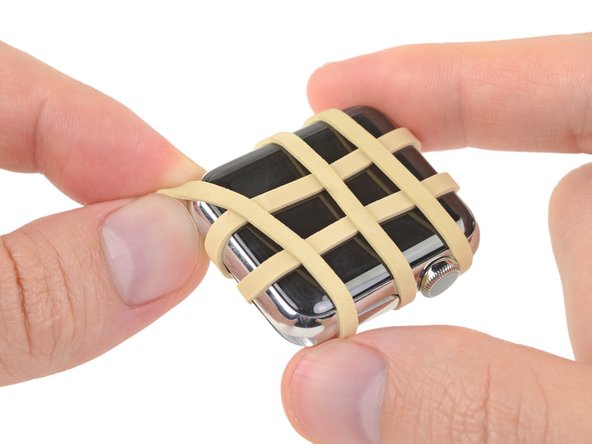
Flipping the watch upside-down so the display rests flat makes things a lot easier. Just make sure the rest of the watch is supported, and go easy on those cables—no need to give them a workout.
- Wipe the old sticky stuff off the back of your display like you're clearing your phone of bad vibes—keep it chill so the surface’s ready for a fresh bond.
Step 15


- Grab some tweezers and gently peel off the blue protective layer from the bottom of the replacement Force Touch gasket, revealing the sticky side underneath. Just make sure the connector pins are facing you, or you'll end up peeling from the wrong side. If you need a hand, you can always schedule a repair.
Tools Used
Step 16


Grab the end of your trusty pry tool and gently press the new Force Touch gasket into place all around the watch's edge. It's like giving your watch a snug little hug! If you need help, you can always schedule a repair.
- Make sure the sticky side is facing down and gently place the Force Touch gasket over the display (if it's still connected), then snug it into its spot in the case.
- Tilt the display just a bit forward to help you line up the Force Touch gasket perfectly with the frame.
- Ensure the connector is lined up just right with its socket.
Step 17

Double-check that your display is plugged in before reconnecting the battery—keeps everything in sync and avoids surprises.
- Click those connectors back into action! Gently press down the Force Touch gasket and battery flex cable until you hear that satisfying snap. You've got this!
Step 18


- Grab some tweezers and gently place that shiny metal plate back over the battery connector, making sure it’s sitting just right where it belongs.
- Next up, screw in the Y000 tri-point screw to keep everything snug and secure.
- Before sealing everything up, turn on your device and give all its functions a quick test drive—better to catch any issues early than after it’s all closed up!
Tools Used
Step 19


- Grab a trusty pair of tweezers and carefully peel away that blue protective liner resting on the Force Touch gasket. You're about to uncover the last bit of adhesive—let's keep it smooth and steady!
Tools Used
Step 20

- Got some e-waste? Make sure to drop it off at an R2 or e-Stewards certified recycler. Let's keep our planet happy!
- Things didn't go quite as smoothly as you hoped? No worries! Give some basic troubleshooting a shot, or swing by our Answers forum for a helping hand. And remember, if you need help, you can always schedule a repair!


